WooCommerce featured products allow online store owners to showcase specific items on their website. It’s a great way to draw attention to the best-selling products, products that are currently on sale, or products you’d like to promote.
With WooCommerce, you can showcase featured products in different parts of your online store – on sidebars, above the fold on your sales page, and even in blog posts. Highlighting product information and pictures is important to consumers, so this functionality - as well as the ease at which you can toggle featured products on and off - makes WooCommerce ideal for featuring your desired products.
With this in mind, in this article, we’ll explain how you can easily set and add featured products in WooCommerce, as well as display them in a neat, front-end table layout. Before we begin, let’s quickly take a look at some different scenarios where you might want to add featured products to your online store.
When (and why) you might want to add featured products to your online store
Setting WooCommerce featured products lets you easily boost product visibility on your website. As a result, you’re able to effectively run all sorts of marketing campaigns and ultimately increase sales.
Aside from this, here are some more reasons why you might want to add featured products to your online store:
Special offers To promote items that you’re offering at a discount. This is also great for running marketing campaigns, selling bundled products, or just about any other kind of limited time offer.
Getting rid of old stock Online store owners that need to get rid of old stock buried in their online store can use the WooCommerce featured products option to showcase them on their store’s front page, or using sidebars.
High-conversion products WooCommerce featured products also make it easy for online store owners to put their best-selling products front and center. This is a great way to get products in front of customers and skyrocket sales.
Certain types of products are in demand at different times of the year If you sell seasonal products – such as shorts and jackets, recreation items, or back to school products – then you might consider using WooCommerce featured products to showcase items that are seasonally high in demand.
As you can see, there are countless scenarios where you might need to set and add featured products to your online store. Before we jump into the tutorial, let’s quickly step through some examples of businesses that might need to feature products on their online store.
Featuring key products in your WooCommerce store is crucial for driving conversions. Highlighting bestsellers or high-margin items helps guide customers’ attention, streamline decision-making, and increase sales.
The good news is that setting and adding featured products in WooCommerce is incredibly easy. In addition to this, you can easily toggle between featured products, in case you need to change things up week after week.
Assuming you already have a WooCommerce store set up with some products added to it, here’s what you need to do to set and add featured products in WooCommerce to your online store.
Method #1: Add and set featured products directly within the WooCommerce dashboard
With WooCommerce, there are two main ways to set featured products – through the product page and from the All Products screen.
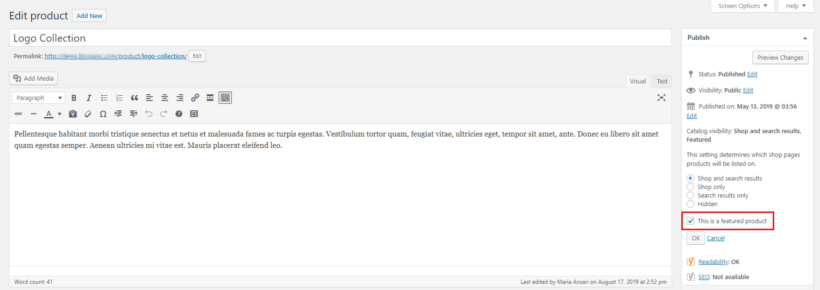
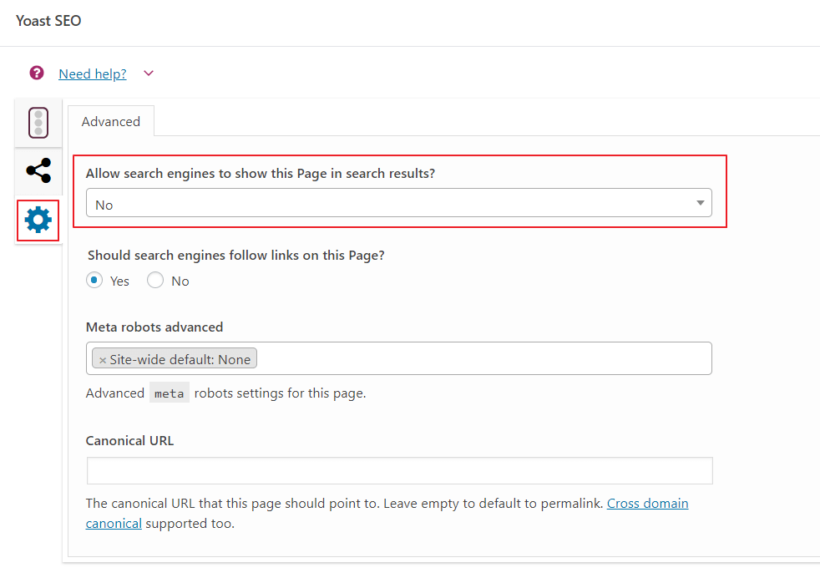
When you’re adding new products to your online store, you can use the Featured option under Publish settings to mark products as featured products in WooCommerce.
Another way to set featured products in WooCommerce is by marking them in the product listings.
All you have to do is navigate to Products →All Products from the admin panel and click on the star icon for each product you’d like to feature.
Switch featured products around
If you sell seasonal products or need to get rid of inventory quickly, you might need to switch featured products around frequently. The easiest way to do this is from the products listings screen (i.e. Products →All Products).
When you hover over the star icon, it will tell you if the product is featured or not. Simply clicking on the star icon lets you toggle it on and off.
Increase (or decrease) featured product visibility (less flexible option)
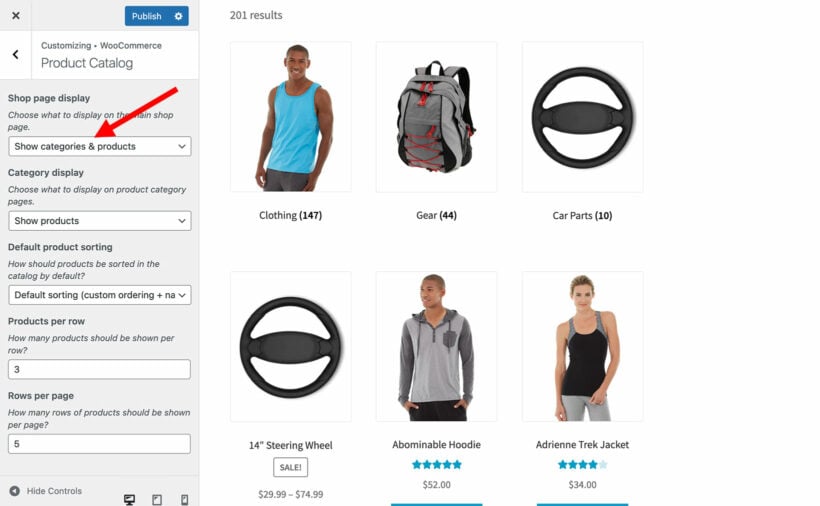
There are a few different ways to display WooCommerce featured products on your online store. The option you decide to go with depends on your specific needs, the types of products you sell, and how many of them you’d like to feature on each page. For example, by using WooCommerce shortcodes, you have the flexibility to insert featured products basically anywhere on your store.
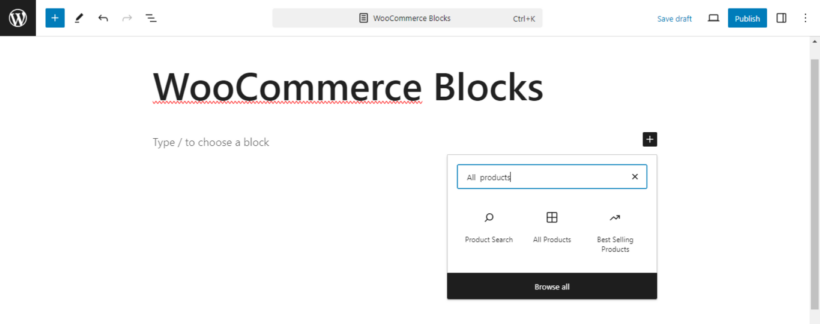
You can add this shortcode to any WordPress page or post you’d like to add WooCommerce featured products to:
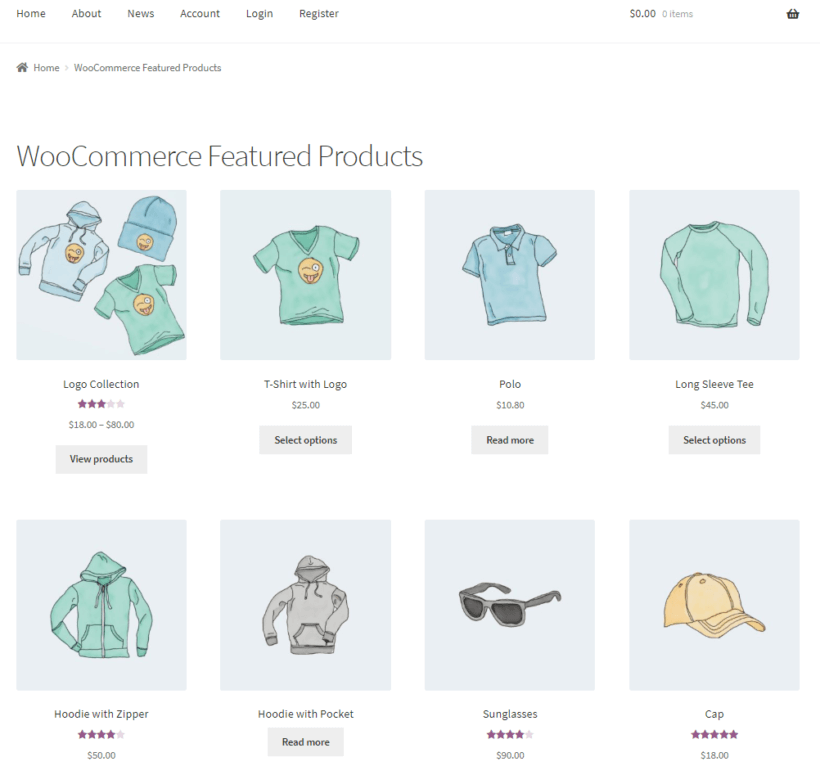
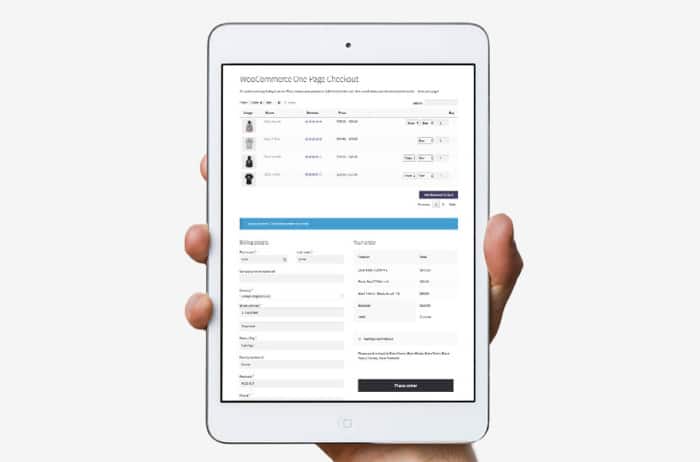
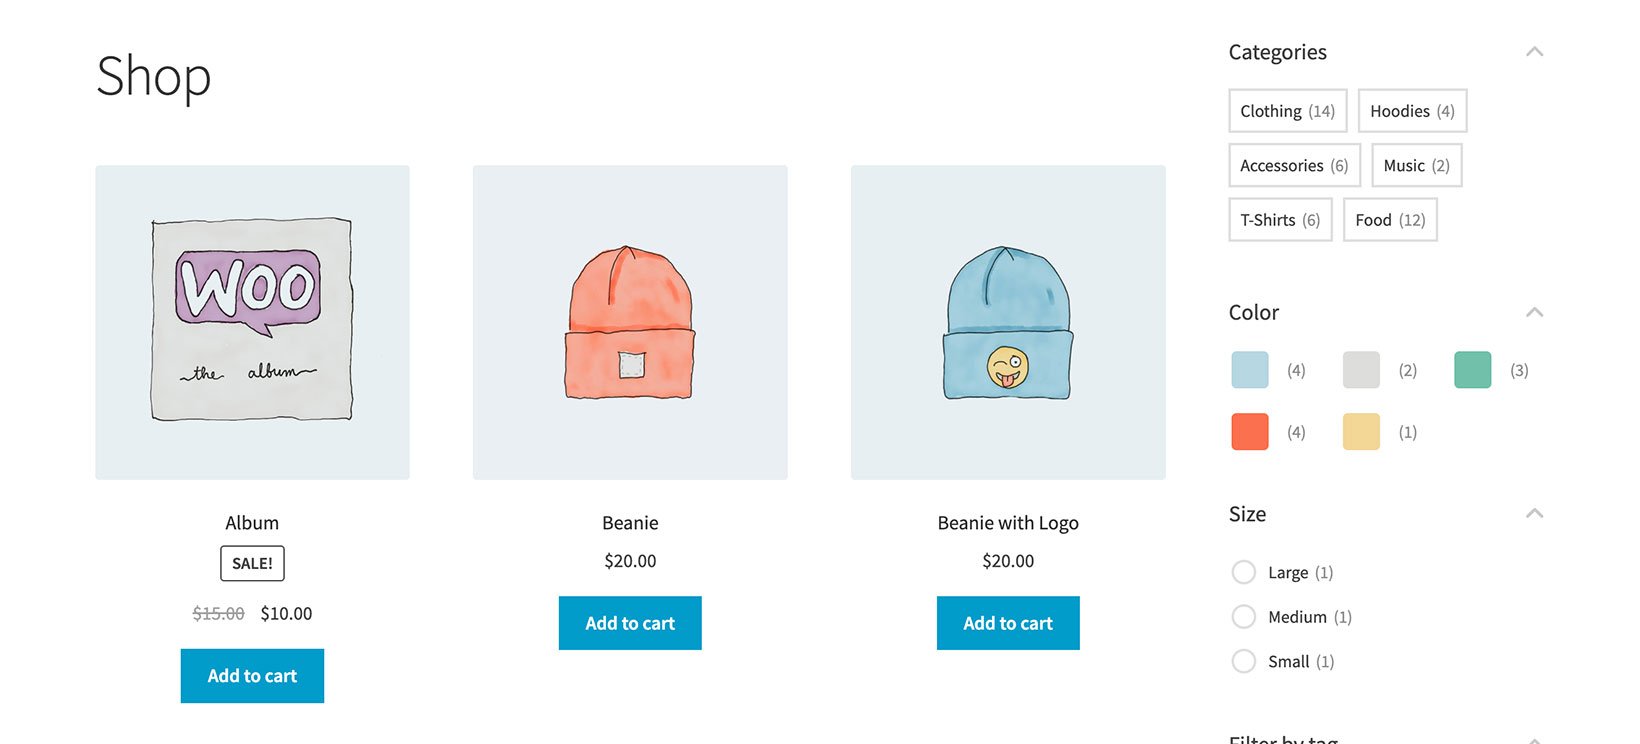
This shortcode would display all 12 of your featured products in a grid layout (4 columns and 3 rows). It would look something like this:
The problem with this approach is that some of your featured products might not be immediately visible to customers. If you need to showcase lots of WooCommerce featured products on your online store, you might instead consider using the WooCommerce Product Table plugin.
Method #2: List WooCommerce featured products in a table layout
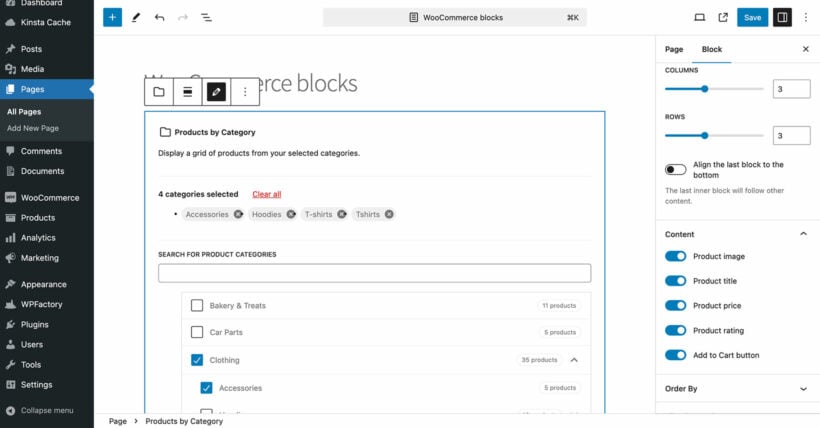
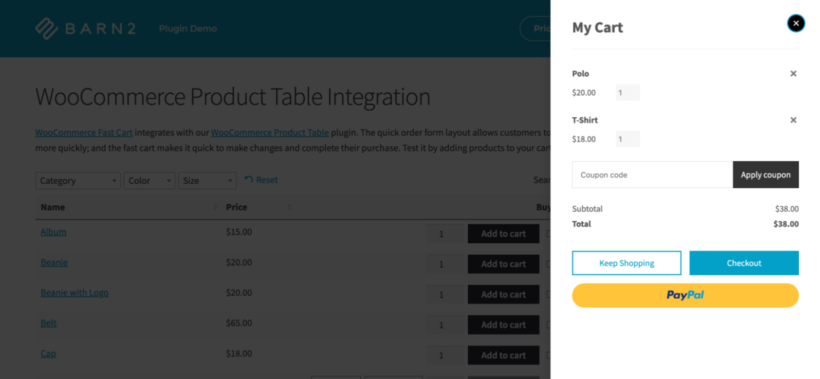
It's an excellent idea to display list WooCommerce featured products in a standalone table on your WordPress site. For example, you could showcase featured products in a special section on your store's homepage to give them extra prominence. You can easily do this with the WooCommerce Product Table plugin as follows:
Install and activate the plugin.
Create a product table via Products → Product Tables → Add New.
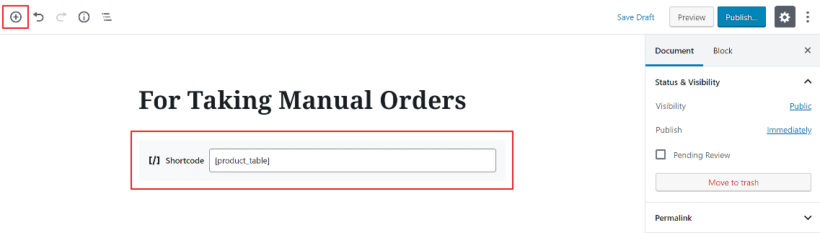
Copy the shortcode from the final page of the table builder. This will look something like [product_table id="1"]
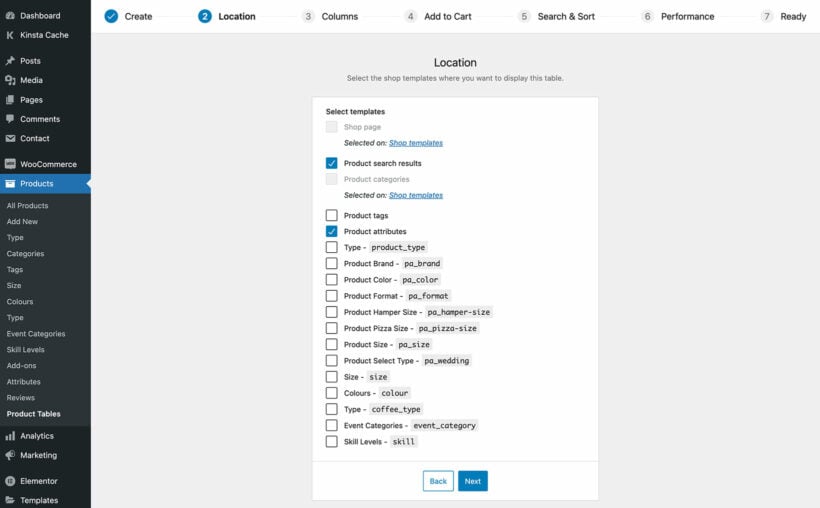
Now add the shortcode to the page where you want to list the WooCommerce featured products. Add term="product_visibility:featured" so it looks something like this:
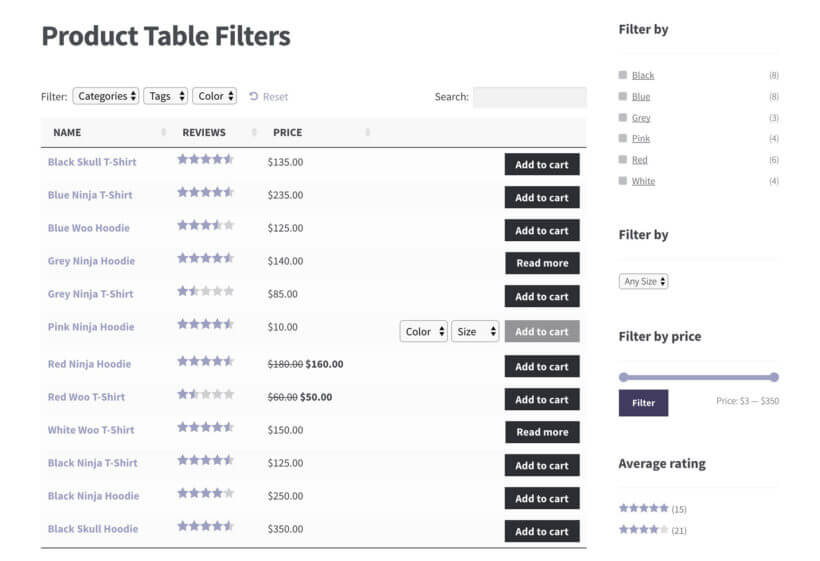
This will list featured products in a special table - perfect!
Using featured products to drive more conversions
Featured products are a powerful tool to boost conversions when used as part of your broader marketing strategy. Highlighting specific products in prominent areas of your store helps draw attention to your bestsellers, new arrivals, or seasonal offerings. By hand-picking this selection, you guide customers toward products you want to promote, increasing the chances of a sale.
During seasonal promotions or sales events, showcasing featured products helps create urgency and excitement. For example, displaying holiday-themed items or limited-time discounts in a dedicated section of your homepage or Shop page ensures they are front and center for customers. Pair this with clear calls-to-action, like "Shop Now" or "Limited Stock Available," to encourage quick decisions.
Featured products can also shine in email campaigns. Add them to your promotional emails with compelling visuals and links directly to their product pages. For instance, sending a “Top Picks for the Season” email featuring your highlighted items not only grabs attention but also increases traffic to your store.
Don’t forget to extend this strategy to social media. Showcase featured products in your posts, stories, or ads with engaging captions and calls-to-action. Pairing social media marketing with your featured products helps amplify their visibility, especially when targeting specific audiences. Integrating featured products across multiple channels ensures consistent messaging and maximizes their impact.
Conclusion
Setting and adding featured products in WooCommerce is a great way to draw attention to specific items, increase visibility, and boost sales. By listing featured products in a table layout, you can easily showcase multiple featured products in a neat front-end table layout with search, sort, and filter options.
What different types of products are you thinking of listing as featured products? Let us know by commenting below!
Shipping is an essential part of most e-commerce businesses. The right shipping options can affect whether customers complete their purchase, or abandon their cart and shop elsewhere.
If you’re running a WooCommerce online store, then there are many shipping options available - right out of the box. You can configure WooCommerce shipping zones, shipping methods, shipping options, and shipping classes.
With this in mind, in this article, we’ll explain how you can configure WooCommerce shipping settings for your own online store. We’ll also introduce you to some advanced options that further improve the customer’s shopping experience.
WooCommerce is a powerful e-commerce plugin for WordPress that comes with several shipping options and settings out of the box. Before we jump into explaining how you can configure these settings and offer shipping through your online store, let's take a step back and see what each option means.
Shipping zones are the geographical areas that carriers ship products to. Generally speaking, these range from Zone 1 to Zone 8 (for shipments in the United States) and can also be defined by a region (for example Northern Ireland). This allows carriers to measure distance in groupings of zip codes (rather than miles) from where the package will be shipped from.
You need to assign shipping methods to each shipping zone you create. This lets customers know how you'll ship their order to them. Out of the box, WooCommerce lets you choose from one of three shipping methods i.e. flat rate, free shipping, local pickup.
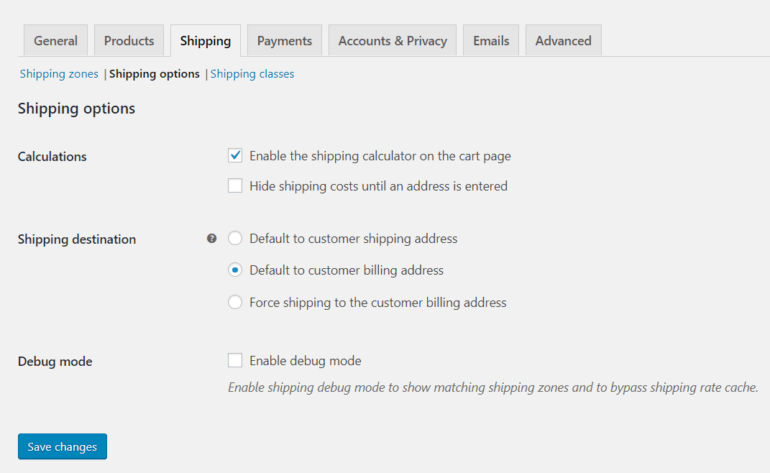
The shipping options settings page in WooCommerce lets you configure general shipping settings related to calculations and shipping destinations. From here, you can choose to show (or hide) the built-in shipping calculator or decide to hide shipping costs until customers enter their address.
Online stores that sell products of various sizes (e.g. furniture stores that sell sofas, table lamps, ottomans, and carpets) might need to group similar-sized products together. This way, they can charge a higher shipping rate for larger products and a lower rate (or free shipping) for smaller products. WooCommerce's shipping classes options lets store owners create shipping classes and charge different rates for different shipping classes.
In addition to this, there's so much more you can do with WooCommerce to make it easier for customers to understand how you handle and charge for shipping. For example, you can use the WooCommerce Lead Time plugin to display an estimated shipping time for each product – more on this later.
Log into your WordPress website and navigate to WooCommerce → Settings → Shipping to get started.
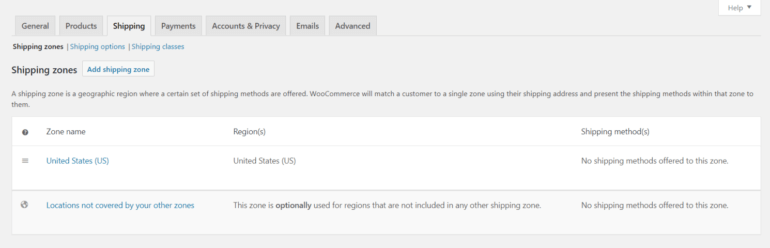
The first screen you’ll see shows a quick overview of the WooCommerce shipping zones your online store ships to. The first thing you need to do is add a shipping zone. For those unfamiliar, a shipping zone is a geographical region where you ship. This could mean a continent (such as South America) or a specific country (for example, Brazil).
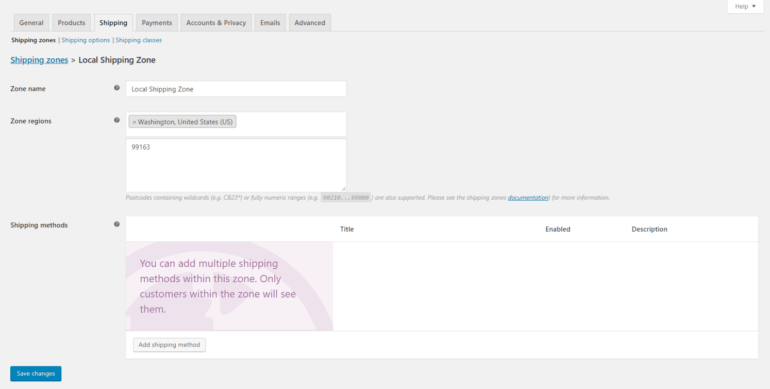
Click the Add shipping zone button to get started. Give the new zone a name and choose the regions that fall under this shipping zone. You’ll also be able to restrict the region to specific postal codes by clicking the Limit to specific ZIP/postcodes link, which is useful if you’re looking to offer local pickup or local delivery.
When you’re done, click the Save changes button to proceed.
WooCommerce shipping methods
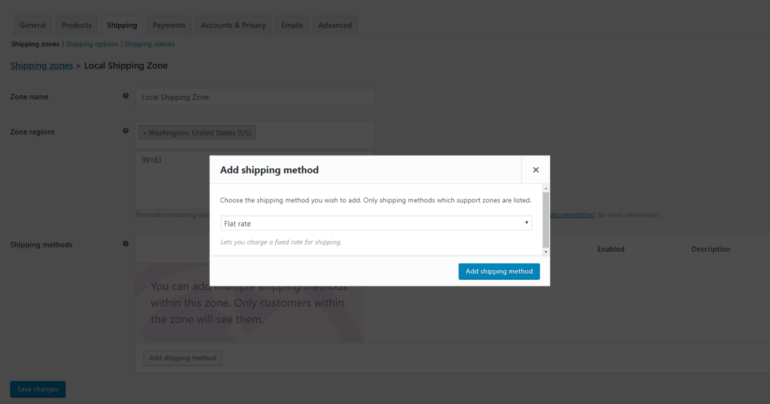
Now that you’ve created a shipping zone, the next step is to add and configure the shipping methods. From the same screen (i.e. WooCommerce → Settings → Shipping → Shipping zones) click the Add shipping method button under the Shipping methods option to get started. You'll see a pop-up window with shipping methods to select from.
WooCommerce comes with three shipping methods out of the box. These are:
Flat rateThis is a useful option for e-commerce sites that need to ship products to different shipping zones. For example, if you sell wholesale products through WooCommerce, you might need to charge customers in higher shipping zones more for getting their orders to them versus customers that are closer to your warehouse or fulfillment center.
Free shippingIf you sell subscription boxes or mix and match products locally, you might want to offer free shipping. This shipping method is also suitable for online store owners that bake the cost of shipping into their products to entice customers with Free shipping! messages.
Local pickupIf you're building a WooCommerce restaurant online ordering system, you might want to offer a local pickup option for people wishing to collect their meals from the restaurant.
Note: In some cases, you might need to offer a combination of shipping methods. For example, following our restaurant example, you might also set shipping zones to charge different delivery costs based on the customer's distance from the restaurant.
Once you've selected a shipping method, click the blue Add shipping method button to proceed.
You can add each shipping method more than once, which enables you to offer customers more options. The only problem is that your customers will be able to view all the shipping methods you create from their shopping cart. The cart contents will only affect the shipping prices that customers see. One way to refine this is by sorting through available shipping methods. You can do this by dragging and dropping the shipping methods into place. This way, you can decide the order in which customers see them.
Flat rate
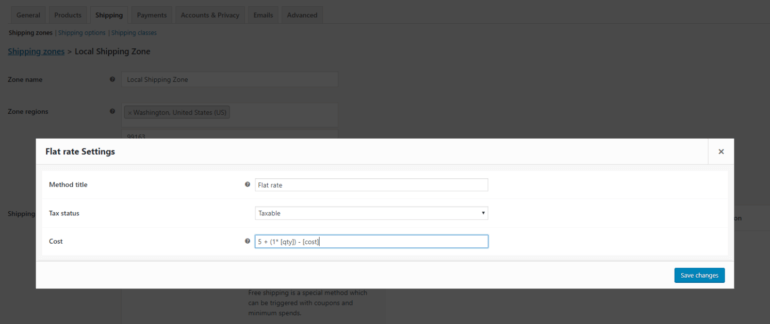
The flat rate shipping method lets you charge a fixed shipping rate. Here are the available options to you for configuring its settings:
Method title. Choose which payment method customers will see.
Tax status. Choose if the shipping method is taxable or non-taxable.
Cost. Fill in the cost of shipping the entire order. You can also use [qty] and [fee] parameters to charge custom shipping rates.
For example, you could add 5 + (1* [qty]) - [cost] which is $5 plus $1 for each product in the shopping cart. Or 10 + [fee percent = “5” min_fee = “2” max_fee = “5”] - [cost] which is $10 plus 5% of the total order, but no less than $2 and not greater than $5.
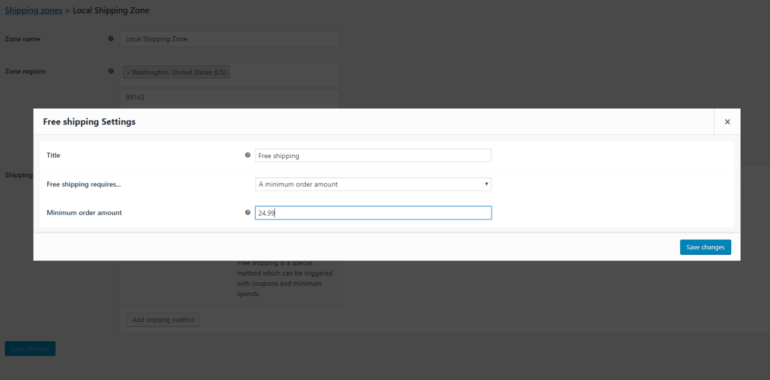
Free shipping
This is a special shipping method that can be triggered with coupons and minimum spend thresholds. By going into its settings, you can add in a custom title and set the free shipping condition. You can choose to set Free shipping requires... to:
N/A. Use this if you’re looking to offer free shipping to all of your customers.
A valid free shipping coupon. Create a coupon that enables customers to get free shipping. You can create coupons by navigating to WooCommerce → Coupons from the dashboard.
A minimum order amount. Enter the number of money customers would have to spend to receive free shipping.
A minimum order amount OR a coupon
A minimum order amount AND a coupon
Bear in mind that customers can use coupons even if the minimum order for free shipping has been set.
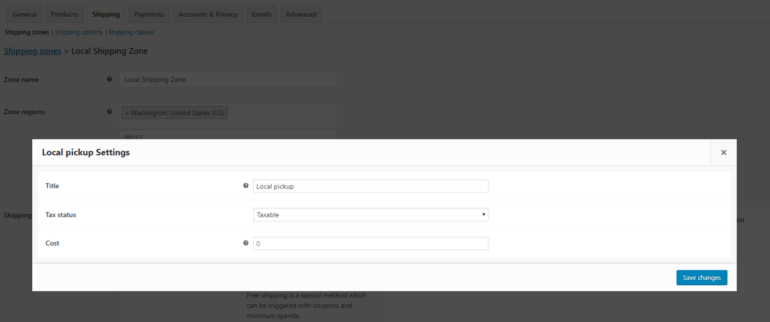
Local pickup
You can use this shipping method to let customers pick up orders themselves. You can add a custom title, set the tax status, and add in an optional additional cost for local pickup.
WooCommerce shipping options
From here you’ll be able to configure the general options related to shipping.
The main options you need to configure are:
Enable the shipping calculator on the cart page Make sure this checkbox is ticked if you want to enable customers to calculate shipping costs based on shipping zones. (However, remember that customers actually need to see shipping costs before adding products to the cart. We'll talk about this in the next section.)
Hide shipping costs until an address is entered Tick this option if you want customers to view the shipping cost only after the order summary is generated.
Shipping destination Choose which address for the default shipping address. You can choose the customer's shipping address or the billing address as default. Alternatively, you can force all orders to ship to the customer's billing address.
Display shipping options on the product page
In the previous section, you learned how to enable a shipping calculator on the cart and/or checkout page. That's what you can do with WooCommerce as it comes. However, it doesn't actually reflect the needs of your customers, who need to know the shipping options before deciding whether to add products to their cart.
This useful plugin adds a shipping calculator to the location of your choice on the product page.
Having a shipping calculator on the WooCommerce product page is much better for user experience than hiding this information until customers get to the checkout. It completely eliminates the problem of customers abandoning their cart due to unexpected shipping costs. Customers can see the options where they need them and make an informed decision.
A product page shipping calculator also helps to avoid disappointment for customers in locations you don't ship to. That's because they can see that you don't ship to them before committing to buying the product.
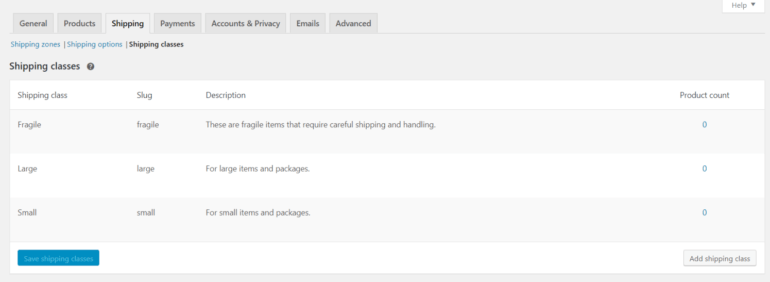
WooCommerce shipping classes
Shipping classes are especially useful for online store owners who sell products of various sizes. Shipping classes can be used to group similar types of products. In addition to this, you can also configure some shipping methods (such as flat rate shipping) to provide different rates to different shipping classes.
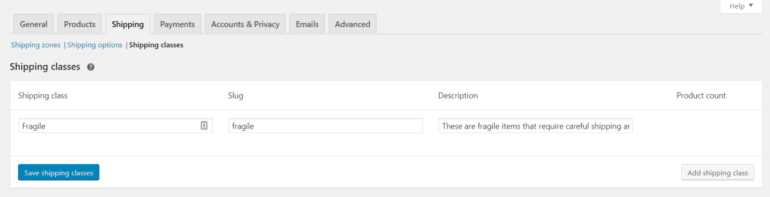
Click on the Add shipping class button to get started. Next, enter the Shipping class name, Slug, and Description.
Now that you’ve created the shipping classes, the next step is to assign shipping classes to products.
Assigning shipping classes to products
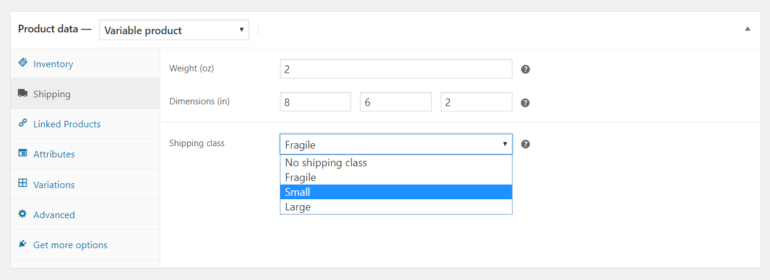
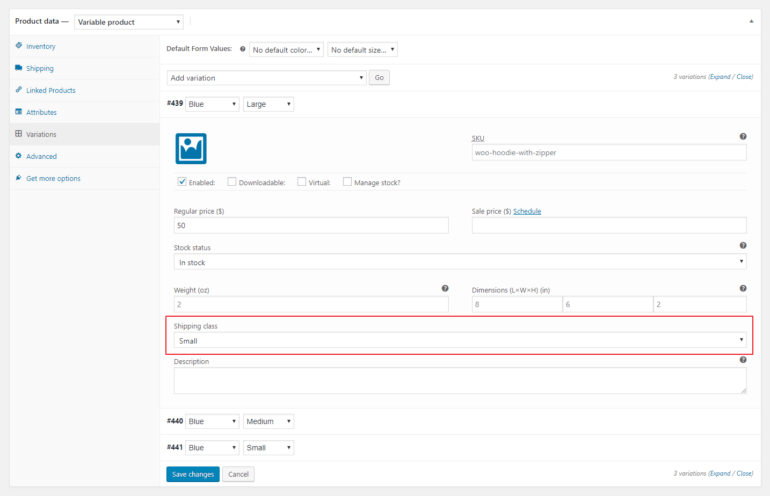
To assign shipping classes that you’ve created to products, navigate to Products → All Products and open the product you'd like to assign a shipping class to in the edit product screen. Next, scroll down to the Product data section and click on the Shipping tab.
From here, you can set the Shipping class option to one of the shipping classes you created. Click the Update button to proceed.
Note: If you sell variations of the same product, you'll be able to assign separate shipping classes to each variation. You can do this by heading over to Variations from the Product data section.
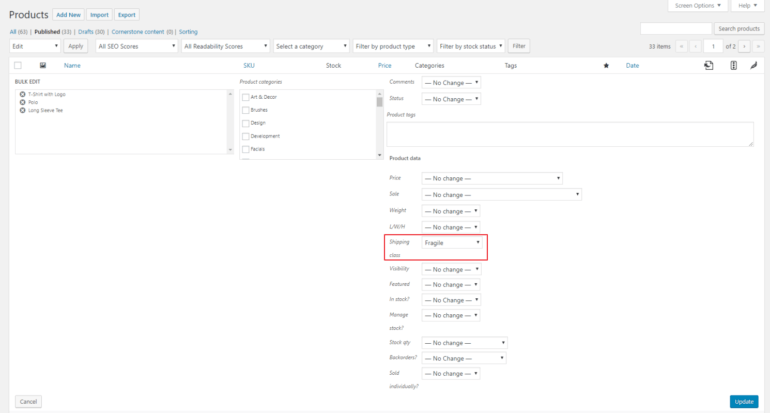
Assigning shipping classes to products in bulk
You can also set the shipping class for multiple products all at once.
Navigate to Products → All Products and select all of the products you'd like to assign to the same shipping class. From the Bulk Actions dropdown, choose Edit and click on the Apply button.
Set the Shipping class value (under Product data) to whichever shipping class you'd like to assign. Finally, click the Update button to proceed.
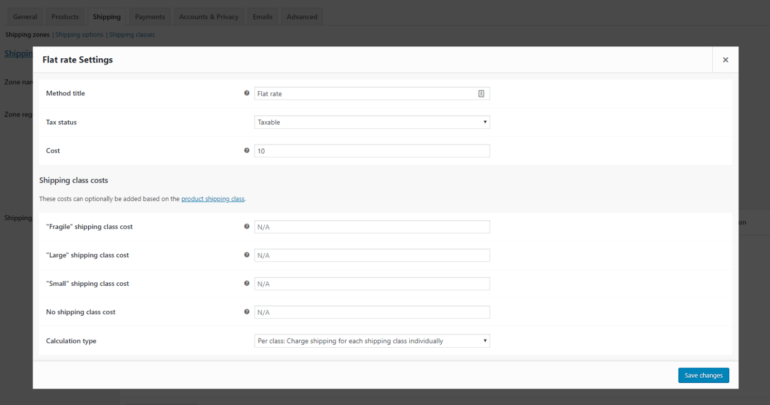
Setting shipping class costs for flat rate shipping
Once you've added some shipping classes, you'll see a Shipping class costs section under Flat rate settings. It should look something like this:
From here, you can configure:
Shipping class costsThere is a separate field reserved to add in a shipping cost for each shipping class. You can enter an additional cost here for specific shipping classes.
No shipping class costOnly use this in case you’re using Per class calculation (we’ll talk about that next).
Calculation type When you’re calculating the shipping cost for shipping classes, you can go with one of two options:
Per class. The cost of shipping will be the total costs for each shipping class added up.
Per order. Of all the products in the shopping cart, the most expensive shipping class will be applied.
3 plugins for advanced WooCommerce shipping
There are several plugins and extensions out there that let you control your shipping options. Here, we'll dig deeper into three of the most popular (and most useful!) offerings.
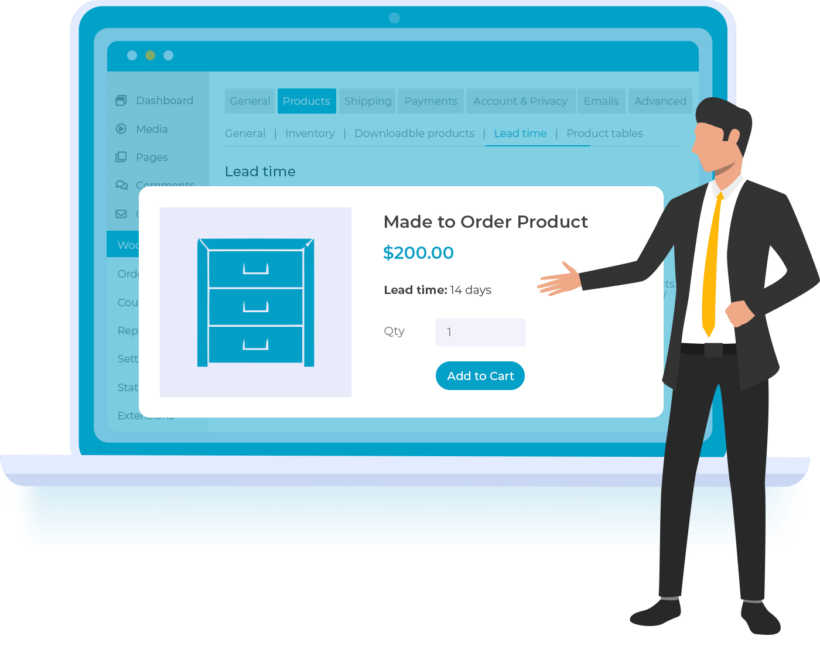
WooCommerce Lead Time
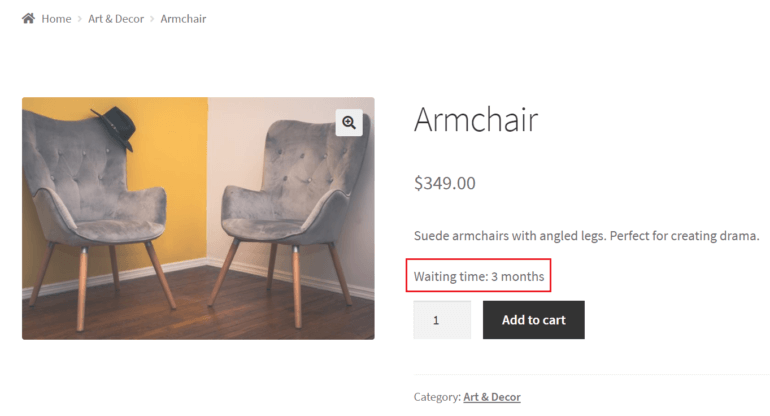
Out of the box, WooCommerce doesn't let you add an estimated shipping time for individual products. This is important as it lets customers know when they can expect to receive their order or when it will be available for purchasing.
Thankfully, with WooCommerce Lead Time, you can display the estimated number of days it will take to restock a product in your inventory. This allows customers to make an informed buying decision and can make a big difference to conversion rates.
This is especially useful for online stores that:
Sell made-to-order products or handmade goods
Sell products that have long lead times or waiting times (like furniture)
Don't always have all items in stock or for products that are out of stock
WooCommerce Shipping
WooCommerce Shipping is a free extension that lets you add discounted shipping rates and print shipping labels directly from the WordPress dashboard. You can use this extension to print discounted USPS shipping labels. If you need a way to access additional carriers (including DHL, UPS, FedEx, and USPS), consider using Shippo instead. This is the easiest (and most cost-effective) way to print labels.
Table rate shipping plugins
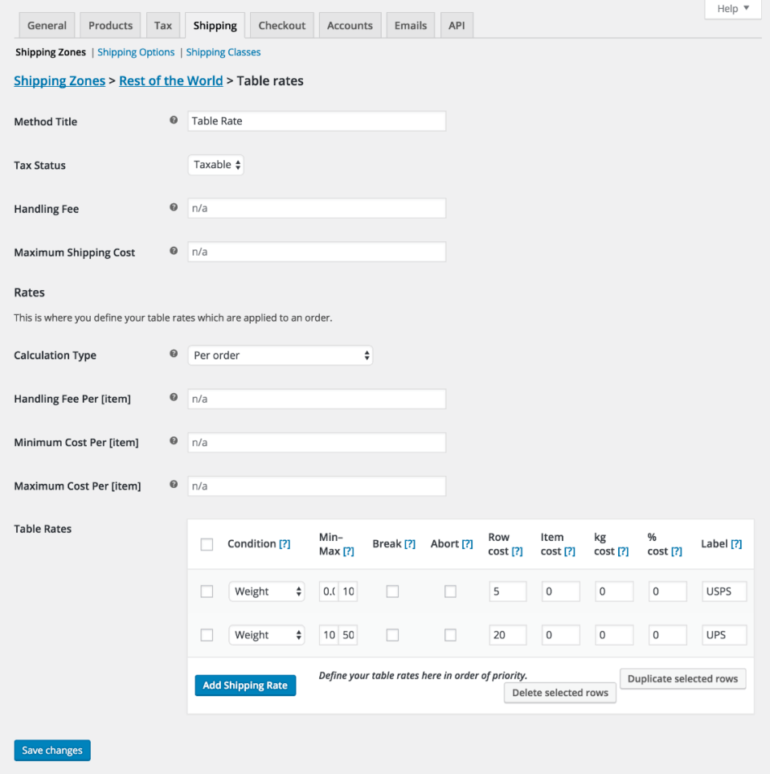
Many online stores sell products of variable sizes and weights. For this reason, flat rate shipping isn’t always the best possible solution for them. They need a different (more advanced) way to calculate shipping costs. This is where a Table Rate Product Shipping plugin comes in. This WordPress plugin by YITH offers a convenient way for store owners to create and set rules for calculating advanced shipping costs.
Rules can be set based on:
Weight
Number of items
Number of items by class
Price
This gives store owners the flexibility to create rules like:
If the weight of all the products adds up to be anywhere between 1 lbs and 5 lbs, $15 will be added to the shipping cost.
If the order contains more than 5 products, add $10 to the total shipping cost.
Get the most out of WooCommerce shipping
Setting up WooCommerce shipping for your e-commerce website is a great way to enhance your offering while remaining profitable. All you have to do is configure options for shipping zones, set shipping methods and classes, and assign products to the right classes.
Once you've set up the default WooCommerce shipping options, you can install the best plugins to supercharge shipping in your store:
The WooCommerce Lead Time plugin clearly displays product waiting times on product pages.
Product Shipping gives you more control over adding advanced shipping costs.
Do you have any questions on how to set up WooCommerce shipping for your online store? We're happy to help, so let us know in the comments section below!
Have you ever built a WooCommerce store? If yes, then pat yourself on the back! With a 22% market share among the top 1 million e-commerce websites, WooCommerce is the clear frontrunner. Nearly 3 million sites use the WooCommerce Plugin and its add-ons. So if you own a WooCommerce store, you’ve definitely made a wise choice.
Now, what would you do if your WooCommerce site was down for 3 hours? Just think about the time, dedication, and hard work that went into creating and maintaining it. Not to mention the loss of potential customers and revenue!
And what if data was permanently lost? You would lose order information, transactional details, and so much more!
It is therefore absolutely imperative to have security measures in place. Moreover, the threat of vulnerabilities like hacks, malware, and human error will always be at large. It is always best to employ a concrete backup process - one that specifically suits a WooCommerce store.
How important are backups to a WooCommerce site?
Having a regular WooCommerce backup process ensures that you have access to the latest data from your site in the event of a website crash or data breach. Ensuring robust data privacy is another crucial aspect, as backups often contain sensitive customer information and transaction details, making it vital to choose a secure and reliable backup solution for your WooCommerce store. If such an issue occurs, the backed up data can be quickly restored, making sure that your downtime is short and does not impact your business adversely.
Normally, a daily backup is sufficient for regular websites. But that is not adequate for a WooCommerce website. If your store crashes and your last backup was taken 12 hours ago, then you stand to lose any new orders, sign up information, posts, comments, etc. that occurred during that time.
WooCommerce websites need real-time backups that trigger a backup every time a change occurs on your site. This way, no matter what happens to your store, no matter when your store goes down, you have all your data stored safely and therefore lose nothing.
Now that you are aware of the importance of taking real-time backups for WooCommerce stores, let’s take a look at the best way to do just that. Primarily you can:
Use the backup service of your web host
Take manual backups
Automated backups using WordPress backup plugins
Let’s evaluate each of these backup methods in detail and decide which is the best.
Web host backups
Every web host provider offers a backup solution for the websites that they are hosting.
You can check with your web host provider if this is a free or chargeable service. For cheaper hosts, you need to upgrade to a higher plan to access backups of your site. Managed WordPress hosts such as Kinsta offer access to backups and one-click restores as standard.
You can configure your site's backup settings from your web host account. Depending on the hosting provider, this may be a complex or a user-friendly process.
Remember to check whether the hosting provides real-time backups. As we discussed earlier, regular backups are not ideal for WooCommerce stores.
Manual backups
If you don’t want to depend on your web host provider and would rather take the backups yourself, these are the typical steps to follow:
Connect to your WordPress web server using an FTP tool and download all your WordPress website files.
Create a backup of all your downloaded website files on a destination folder.
Create a backup of all your database files either from the database management panel of your WordPress account or by using the phpMyAdmin tool.
To perform manual backups, you need to either have the necessary technical knowledge yourself or seek professional assistance from a WordPress backup expert (which really defeats the purpose of taking manual backups).
Besides, taking manual backups is a very long and time-consuming process. On top of that, if you are managing multiple WooCommerce websites with large volumes of data, manual backups may not be a practical solution. After all, it can take quite some time to create just one backup. As a result, taking real-time backups manually is out of the question.
The best WordPress and WooCommerce backup plugins will help you take real-time backups without you having to lift a finger.
The best WordPress and WooCommerce backup plugins
WordPress backup plugins offer an easy and efficient way of taking a backup of your WooCommerce store. Available at very reasonable subscription prices, backup plugins are easy to install (just like any other WordPress plugins) and do not require any extensive technical know-how to execute the backup process. Choosing the right WooCommerce backup plugin, however, can be a challenge.
To save you the effort, we've compared 3 of the best WordPress backup plugins for your WooCommerce store.
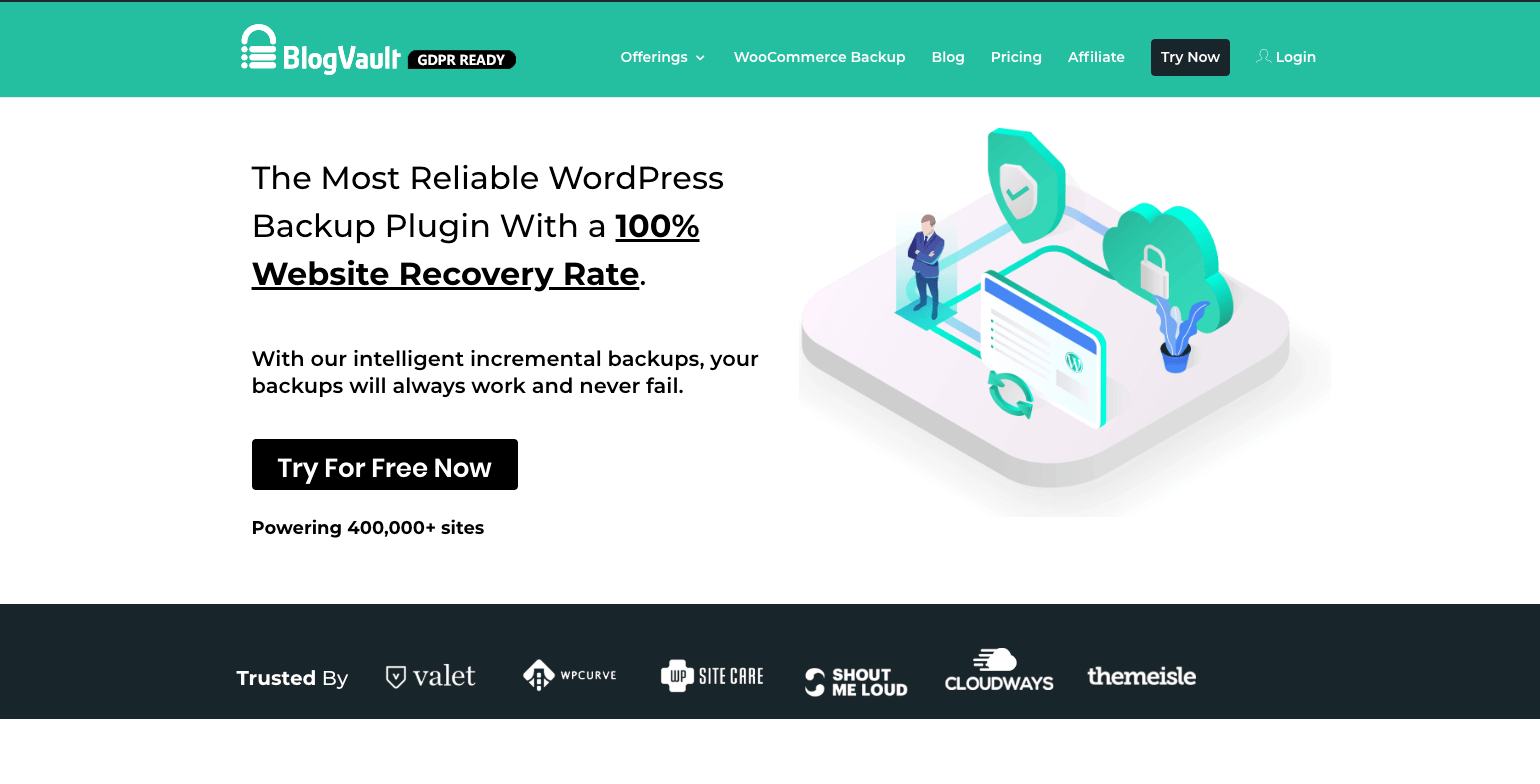
1. BlogVault
Powering over 400,000 WordPress websites around the globe, BlogVault is a reliable WordPress backup plugin. With a success rate of over 99.8% for automatic website recovery, BlogVault is trusted by thousands of single-site owners, developers, and agencies. The backup plugin offers the convenience of scheduled and on-demand backups along with the real-time backup feature.
Listed below are the WooCommerce-specific features of the BlogVault tool:
Takes a comprehensive backup of WordPress database and files including web pages, installed plugins/themes, user comments, published posts, website settings, and user details.
Uses an incremental backup method that is used to sync only the new changes on your website with the existing backup data.
Takes real-time backups where BlogVault stores even the minutest changes made on your WooCommerce store any time of the day.
Puts zero load on your website as BlogVault stores backups on its own dedicated servers, ensuring your site’s performance is not hampered.
Comes with an independent dashboard so that if you can’t access your WordPress admin, you can restore the site from BlogVault dashboard.
Pricing: Basic paid plan starting from $7.40 per month
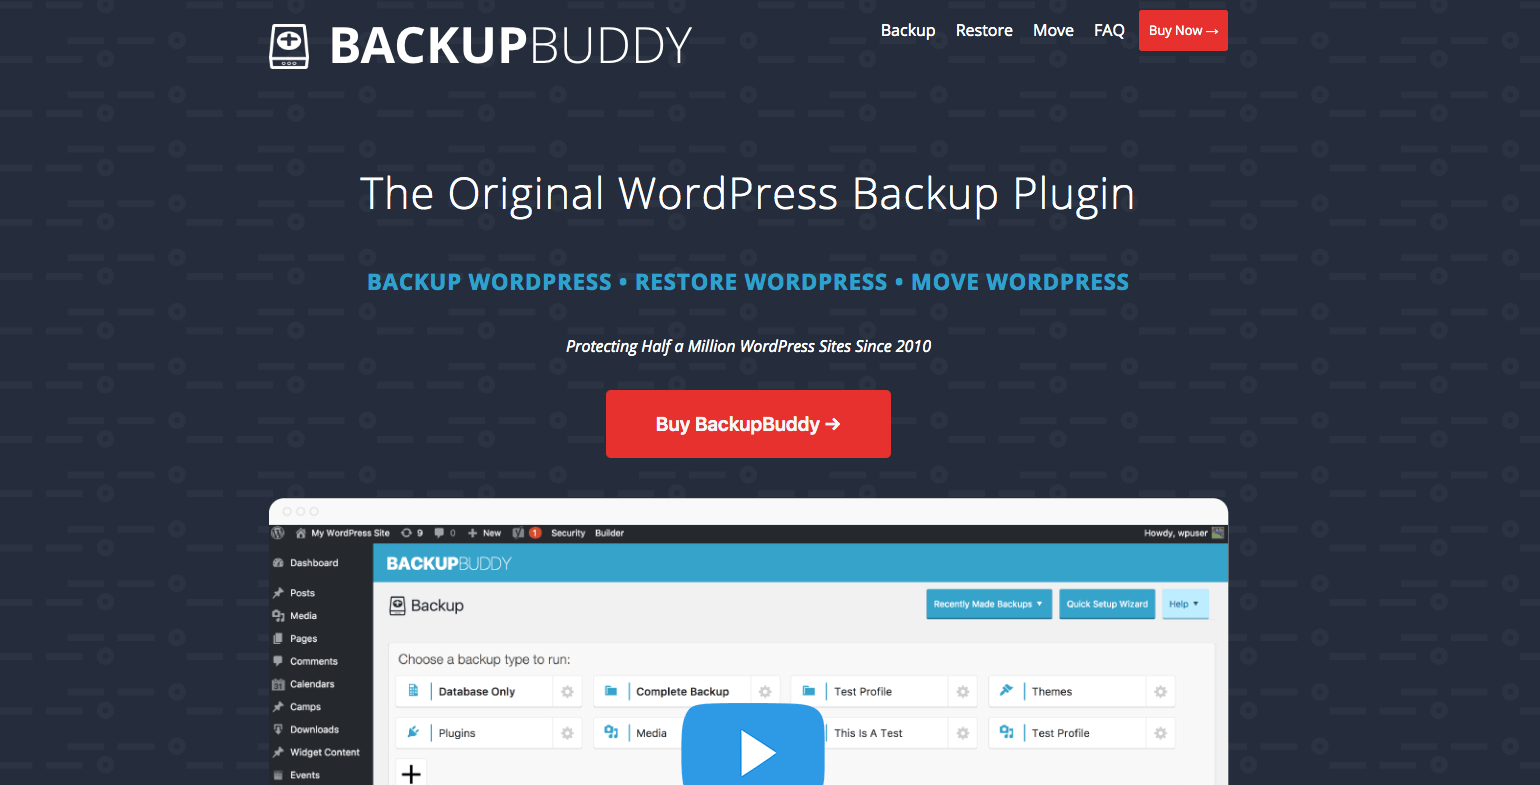
2. BackupBuddy
Available since 2010, BackupBuddy from iThemes is popular for being the first backup plugin for WordPress websites. Used by over half a million WordPress websites across the globe, BackupBuddy has simplified the entire website backup process with its centralized BackupBuddy dashboard.
Listed below are the WooCommerce-specific features of the BackupBuddy backup tool:
Offers both scheduled and real-time website backups.
Complete backup of all WooCommerce website files, including web pages, posts, user comments, dashboard widgets, images, plugins/themes, and much more.
Stash Live feature that periodically takes a snapshot of your website.
Availability of a safe and secure off-site backup storage facility.
Suitable for backups of multiple WordPress websites.
Pricing: One-year subscription plans priced at $52 (for one site) and $129 (for unlimited websites)
3. VaultPress
VaultPress is a WordPress backup and malware scanning tool that has been designed and built by Automattic. This backup tool is bundled as part of the popular JetPack plugin, so you will need to install JetPack first to use VaultPress. In addition to website backups, VaultPress has a security scanner tool that can be used to detect any malware or malicious activities on your website.
Listed below are the WooCommerce-specific features of VaultPress:
A centralized and independent VaultPress dashboard that lets you perform backups and malware scanning efficiently.
A calendar view on the VaultPress dashboard that lets you see real-time activities on your WordPress website.
Offers real-time syncing of your website data.
Complete website protection from a variety of security threats, including hackers, web host failure, online viruses, and user error.
Complete backup of all website data, including the posts, user comments, media files, and dashboard settings.
Pricing: Premium plans priced at $3.50 per month.
In conclusion
As a WooCommerce store owner, you can choose to perform your website backups manually or through the use of backup plugins.
Manual backups require a lot of technical expertise and can be very time-consuming. On the other hand, WordPress backup plugins are easy to use and offer result much faster.
Irrespective of the backup process you use, taking real-time backups of your e-commerce website is crucial to ensure zero loss of data and, of course, and your complete peace of mind.
As a business owner, you might offer bookable events or appointments which customers need to book ahead of time. While WooCommerce doesn't support bookings straight out of the box, you can easily achieve this with the right plugin. Keep reading to discover the best WooCommerce booking and WooCommerce appointment plugins, and how to use them.
As online booking and appointment scheduling becomes increasingly popular, WooCommerce has emerged as a go-to platform for selling bookable products. A wide range of WooCommerce booking plugins are available, so how can you choose the right one?
In this article, we'll provide an overview of the top WooCommerce bookings and appointments plugins and a step-by-step tutorial on how to set up and use the best ones. Whether you're a small business owner, a freelancer, or a large enterprise, this guide will help you find the perfect WooCommerce bookings or appointments plugin. You'll discover plugins for:
But first, let’s quickly take a look at some of the different types of businesses that can benefit from a WooCommerce booking plugin.
What is a WooCommerce bookings plugin?
Before we start, it's important to think about what a WooCommerce bookings plugin actually is. This may seem obvious, but it's really not. That's because there are so many different types of events which you might want to take bookings for.
Put simply, a WooCommerce bookings plugin is any plugin which lets your customers book some sort of event online. This can be broken down further into two main categories:
WooCommerce appointment booking plugins.
Event booking plugins.
While both WordPress appointments booking plugins and events booking plugins are designed to enable users to schedule and book activities, there are some key differences.
WooCommerce appointment bookings
A WooCommerce appointments booking plugin is typically designed for businesses or individuals who offer services that require pre-booking. This might include consultations, meetings, or sessions with clients.
A WooCommerce bookings and appointments plugin allows customers to select a specific date and time for the appointment. This might be based on live availability, or the service provider can then confirm or reject the booking manually.
The bookable WooCommerce appointments plugin may also include features like calendar integration, email notifications, and payment processing.
Event bookings
On the other hand, an events booking plugin is designed for businesses or individuals who host events for multiple people. Common examples include training courses, conferences, workshops, or concerts.
The WooCommerce event tickets plugin allows customers to register for the event, select a ticket type, and make payment. The plugin may also include features like event calendars, customizable registration forms, and ticket management tools. It can help manage complex ticketing structures, track ticket sales, and ensure the smooth operation of events by managing capacity and seating arrangements.
Should I use an appointments or an events plugin?
As you can see, the decision of whether to use a WooCommerce appointment bookings plugin or an events plugin depends on the type of activity you're offering. The above definitions might help you to choose the best type of WooCommerce bookings plugin for your WordPress site. However, it's often difficult to apply general definitions to your exact situation.
To help you even more, here are some guidelines to help you choose which type of plugin is best suited for your needs:
Use a WooCommerce bookings and appointments plugin for:
Services that require one-on-one interaction: If you offer services that require a one-on-one consultation, such as legal or medical consultations, coaching, or personal training, a WooCommerce appointments plugin would be more suitable.
Activities that require a specific time and date: If you offer activities that require booking at a specific time and date, such as hair appointments or massages, an appointments plugin would be a good fit. This also applies to hotel booking websites and sites like Airbnb that rent out a particular space.
Businesses with limited capacity: If you have a limited number of staff or time available to offer your services, a WooCommerce appointments plugin can help you manage your schedule more efficiently.
Use an events booking plugin for:
Events with multiple attendees: If you're hosting an event that requires ticket sales for multiple attendees, such as a conference or a music festival, an events plugin would be the better option.
Activities with multiple sessions: If you're hosting an activity that has multiple sessions, such as a course or a workshop, an events plugin would be more appropriate.
Activities with different ticket types: If you're offering different ticket types for your activity, such as VIP tickets or group discounts, an events plugin would be a better choice.
In summary, a WooCommerce bookings and appointments plugin is best for one-on-one services or activities that require a specific time and date. In contrast, an events booking plugin is better suited for events with multiple attendees, sessions, or ticket types.
The rest of this article will cover both types of "WooCommerce bookings plugin". Each time, I will make it clear whether the plugin is suitable for taking bookings for appointments or events. That way, you can choose the right plugin for your needs.
What type of events can I use a WooCommerce bookings plugin for?
In the previous section, we established that there are different types of WooCommerce bookings plugins for appointments and larger events. To help to explain this, let's look at some popular use cases for each type of plugin.
Any business that requires bookings, appointments, or reservations of any sort can use a WooCommerce bookings plugin. Here’s a look at some of them, divided into the two categories.
Popular use cases for WooCommerce appointment bookings plugins
I recommend a WooCommerce bookings and appointments plugin to sell the following examples of WooCommerce bookable product. These all focus on selling individual bookable products and time slots, rather than events for larger numbers of people.
Selling rental products
If you run a business that rents out products such as cars, boats, Christmas trees, or rooms and apartments then you’ll need a WordPress booking plugin. This will help you to better manage booking products, customer bookings, and reservations.
This way, you won’t have to maintain a manual, paper-based booking system or collect payments in person. Instead, customers will be able to use an automated reservation platform to learn about your products and the available time slots. They can use your website to book their desired product, and pay online.
Selling appointments and booking slots
A WooCommerce bookings plugin can help doctors better manage their patients’ appointments, and track any cancellations in time to squeeze in more patients. In addition, customers will no longer have to respond to emails or phone calls to book appointments in WooCommerce.
Similarly, personal service professionals such as wedding photographers, gardeners, and birthday decorators will also be able to fulfil client needs and requirements more efficiently.
Various types of product that may require a date picker
Online teaching businesses can also benefit from using an online booking system to complement their online learning website. You’ll be able to hire teachers who could each set up their available hours to teach students.
A WooCommerce bookings plugin lets you create all sorts of bookable products including university courses displayed in WordPress, cooking classes, guitar lessons, or even dance instructions. Either set a price and charge your clients a flat rate or by the hour.
You can also use a WooCommerce bookings plugin to let customers choose a date and time for any other purpose. For example, if you sell gifts direct to the recipient then it makes sense to let customers choose the desired delivery date.
Popular use cases for WooCommerce event bookings plugins
A WooCommerce event tickets plugin is a useful tool for businesses and organizations that sell tickets to events. This includes concerts, sports games, theater productions, and other live events. Here are three examples of popular use cases for a WooCommerce event tickets plugin.
Music festivals and conferences
Music festivals and conferences often have a complex ticketing structure that includes different ticket types for general admission, VIP access, and other premium services. A WooCommerce event tickets plugin can help manage these complex ticketing options and make it easy for customers to purchase and receive tickets. The plugin can also help manage the capacity of the venue, preventing overselling or underselling of tickets.
Sporting events
Sporting events can have a similar ticketing structure to music festivals and conferences, with various ticket types available for different seating areas and access levels. With a WooCommerce event tickets plugin, customers can easily purchase and receive their tickets online. At the same time, venue managers can track ticket sales and manage the availability of seats.
Theater productions
For theater productions, a WooCommerce event tickets plugin can help manage the sale of tickets for multiple showings or performances. The plugin can also help manage the capacity of the venue, prevent overbooking or double-booking. It also makes it easy for customers to select their preferred seating arrangement.
Online events
And of course, not all events take place face-to-face these days! You can also use a WooCommerce events plugin to take bookings for online events such as webinars. Or perhaps online appointments such as Zoom consultations.
What are the top WooCommerce booking plugins for appointments?
Ok, so now we've looked at the different types of WooCommerce bookings plugins. We've divided them into two categories based on whether you're selling places for appointments or events.
Now it's time to find the best plugins for each type of booking! Here, we’ll step through the most popular WooCommerce bookings plugins and highlight their key features. I'll also provide a full step-by-step setup tutorial for the best plugins on the list. That way, you'll have everything you need to get started with WooCommerce bookings and appointments.
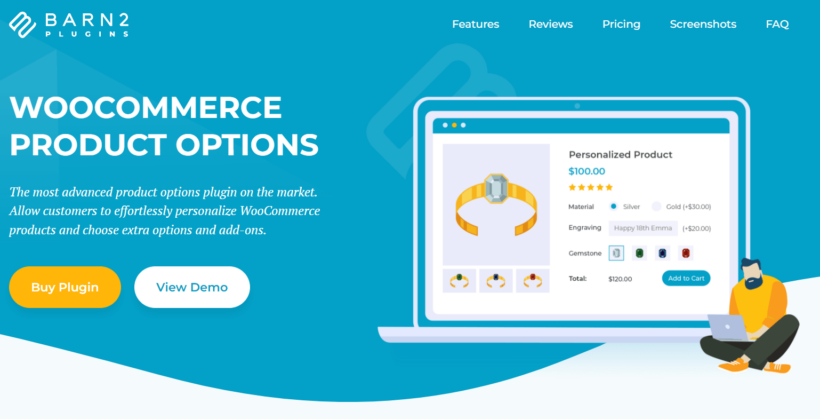
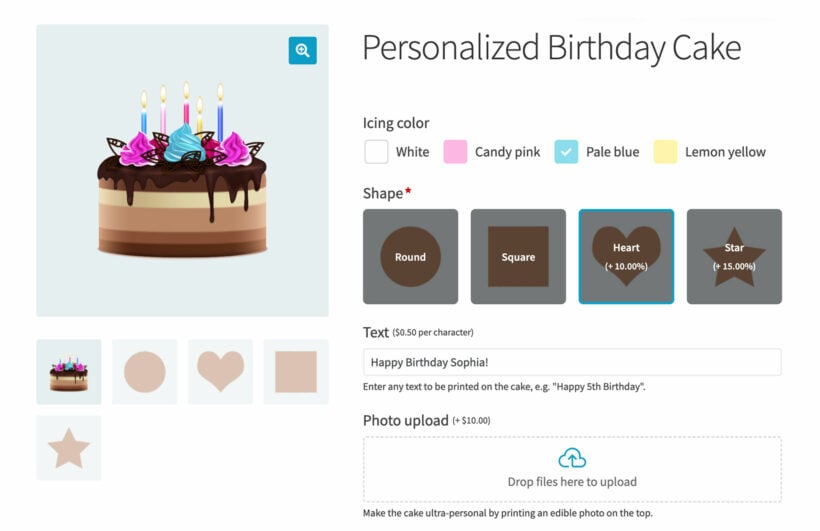
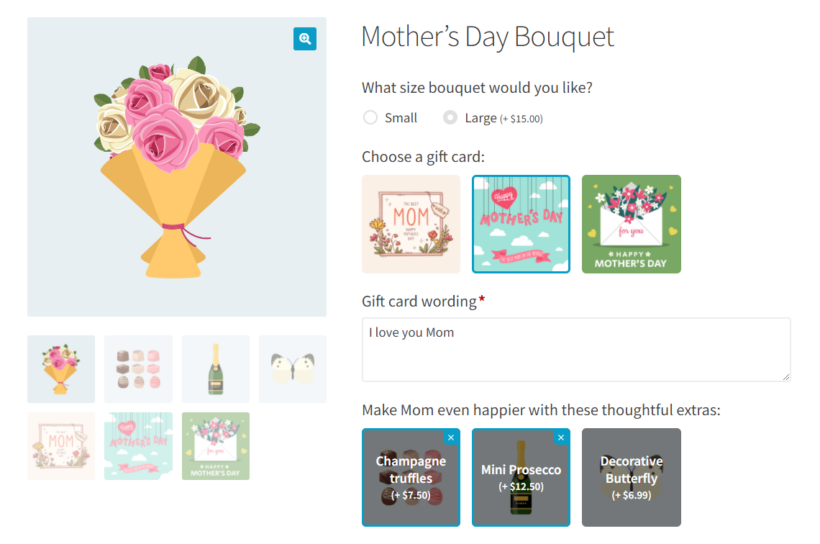
1. WooCommerce Product Options
Before we get into the fully featured WooCommerce bookings plugins, I'm going to give you a simpler option. That's because in WordPress (and life in general!), it's generally best to go for the most user-friendly solution that meets your needs. This keeps your website lightweight and makes your life easier 😌
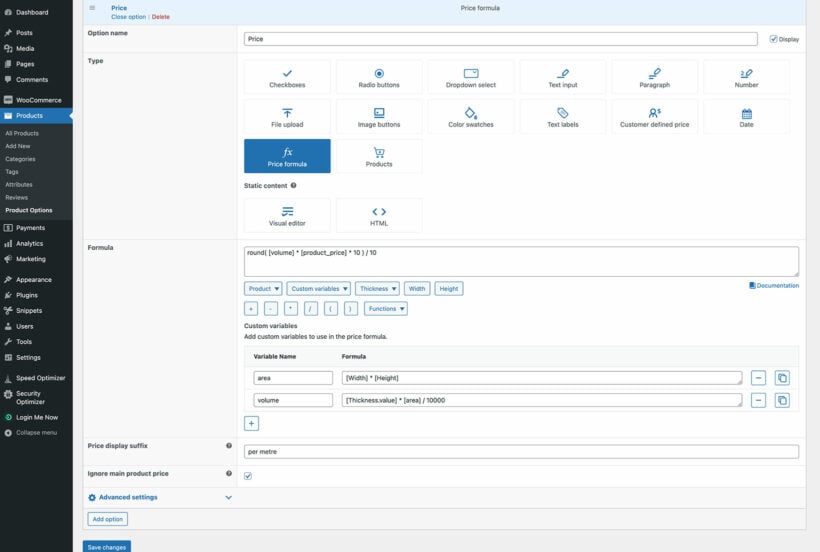
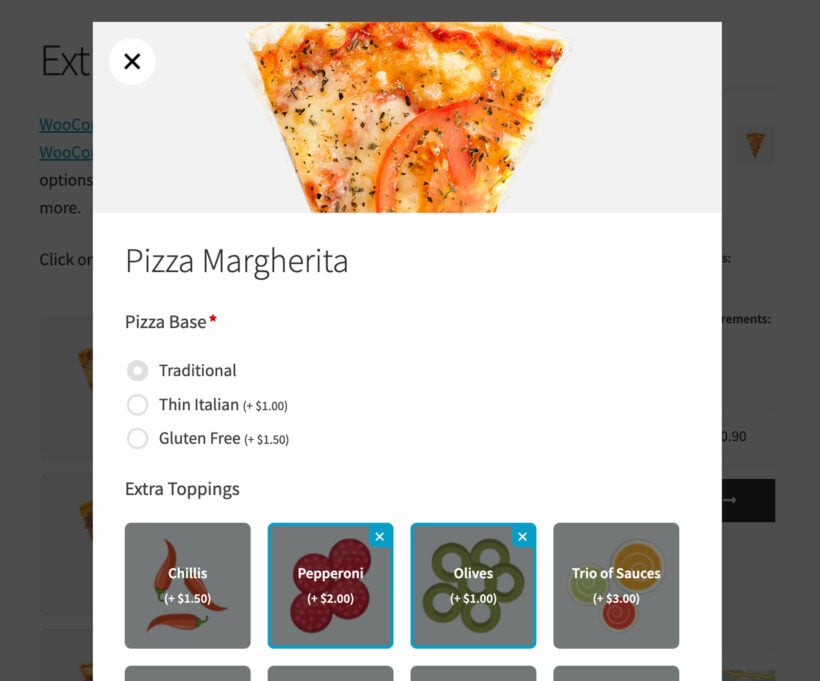
The simplest way to add WooCommerce bookings and appointments to your site is to use the WooCommerce Product Options plugin. This easy-to-use plugin lets you quickly convert any WooCommerce product into a bookable product. You simply need to add a date field to the product. This can be either a calendar with date picker, or a date and time picker.
Key features:
Here are some features of the date field in the WooCommerce Product Options plugin. Together, these can enhance your online store for bookings and appointments:
Add a calendar field to any WooCommerce product or variation, so customers can select a date and time for their booking.
Disable past dates or future dates in the calendar to only allow bookings for available dates.
Prevent same-day bookings by marking the current day as unavailable.
Disable specific weekdays, such as weekends, if you don't offer bookings on those days.
Set the field as required to ensure customers select a date before adding the product to their cart.
Change the date format to match your preferences or your customers' needs.
Enter minimum and maximum date limits, manually or dynamically, to control the earliest or latest available dates for bookings.
Mark specific dates as unavailable, such as when you have other bookings or are on holiday.
Use conditional logic to dynamically show or hide the date field based on other options the customer selects.
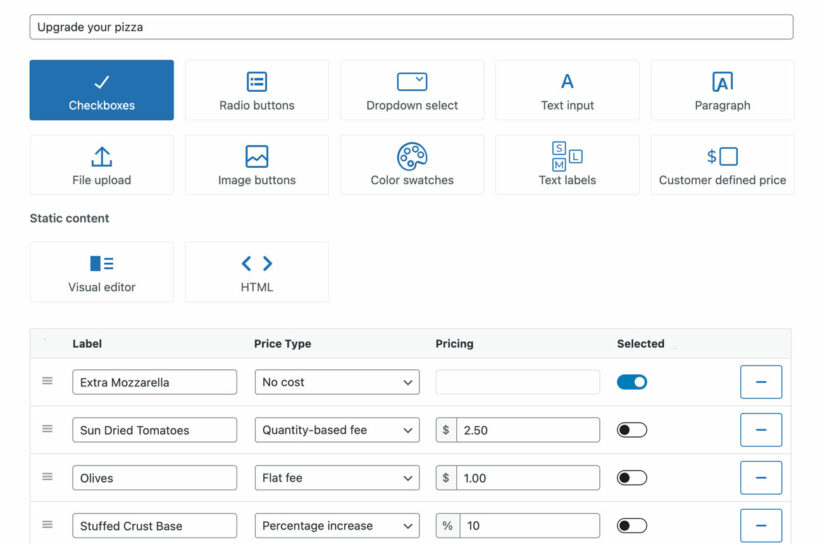
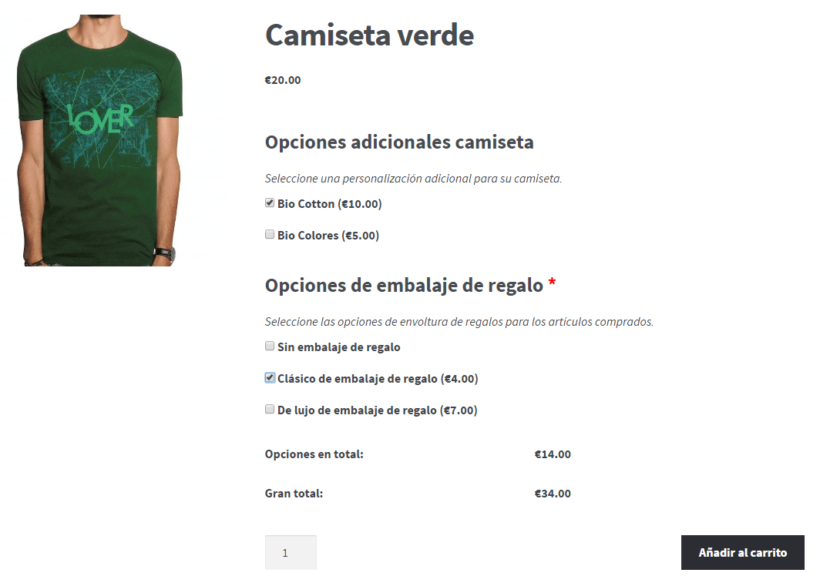
Add an extra fee to the product when the customer selects a date, with multiple date picker fields available to charge different fees depending on the date.
By using the WooCommerce Product Options plugin's date field, you can create a more streamlined and customizable booking experience for your customers. And even better, you can do this without the need for a full WooCommerce bookings plugin.
WooCommerce Product Options comes with a full money-back guarantee. This lets you try it risk-free before committing to a more complex WordPress appointment plugin.
Limitations:
I started this section by saying that WooCommerce Product Options offers a simple way of selling bookings and appointments. If you simply need a way to add a date calendar to a product, then that's all you need. Why over-complicate things?
However, while the WooCommerce Product Options plugin provides a lot of flexibility and customization for adding booking options to your online store, there are some features that might require a full bookings plugin to achieve. It's worth considering whether you need these extra features. For example:
One such feature is the ability to set different pricing options based on the date or time of the booking. While the WooCommerce Product Options plugin allows you to add an extra fee for a selected date, it doesn't provide the ability to create complex pricing structures based on a combination of dates, times, and other criteria. You can achieve this by adding multiple date fields to a problem (e.g. one for weekdays and one for weekends), each with different pricing. However, that may not meet your needs.
You may need centralized booking features such as a central page in the WordPress Dashboard listing all bookings. You don't get this with WooCommerce Product Options, which just adds the booking information to the usual 'Orders' page in WooCommerce.
Lastly, a full bookings plugin may be necessary if you need to manage your bookings and availability across multiple channels. Similarly, you may need a plugin that integrates with third-party booking platforms like Outlook Calendar.
While the WooCommerce Product Options plugin provides a great solution for adding booking options to your WooCommerce store, it may not be enough if you have more complex booking needs. If that applies to you, then skip to plugin #2 on our list.
How to add a simple booking calendar to any product
Next, I'll explain how to use WooCommerce Product Options to add a date field to any simple or variable product.
First, get the plugin and install it on your WordPress site.
The setup wizard will open, prompting you to activate your license key.
At the end of the setup wizard, click the button to start creating product options.
In Products → Product Options, either create a new options group or edit the default one. Click 'Add Option'.
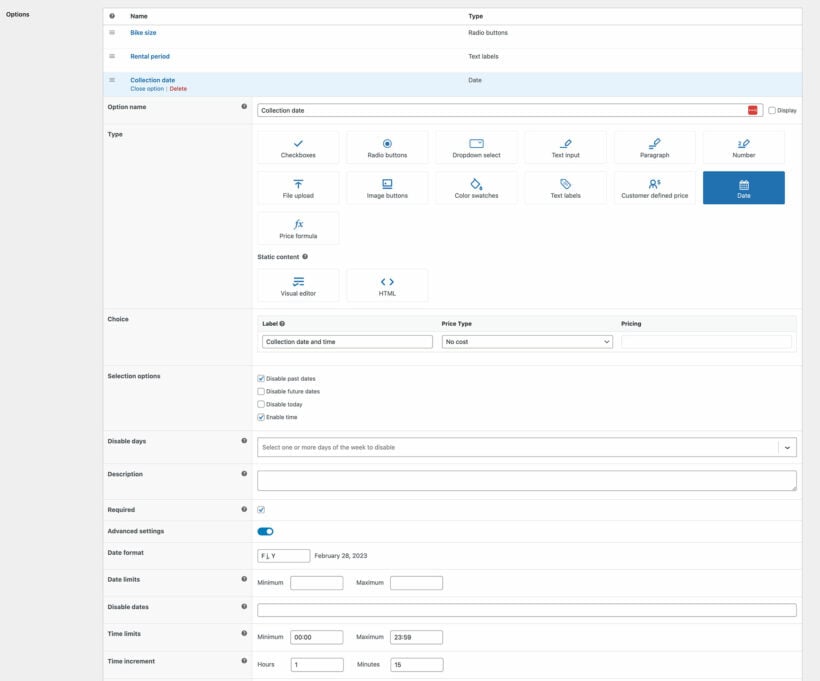
Select the 'Date' option type and fill in the information about it.
2. WooCommerce Bookings
The official WooCommerce Bookings extension enables your visitors to book appointments and reservations online – without making any phone calls. This way, you don’t have to mark dates on your calendar or maintain a paper-based booking system. Instead, your website will manage your bookings and online payments automatically.
Key features:
You can define set options like fixed time slots for a guided tour or an appointment or let your customers choose a time that suits them best.
It lets you set the minimum and the maximum number of participants allowed in a session. So, for example, you can choose to hold one-one-one appointments or allow multiple visitors to reserve a class.
You’ll be able to control how appointments are confirmed and cancelled on your WordPress website.
It allows you to send reminder emails to your customers when they make a reservation when it is confirmed, and the day before the booking date.
You can use a calendar to keep track of all your bookings and automatically sync all your booking dates with Google Calendar to view them on the go. This will work in your timezone.
WooCommerce Bookings also integrates with WooCommerce Product Table - ideal for listing bookable products in a searchable, filterable table view. More on this later.
Use WooCommerce to add payment gateways such as PayPal, Stripe, credit card, and so on.
Integrates with multilingual plugins like WPML for multi-language sites.
Tutorial: How to get started with the WooCommerce Bookings plugin
Want to know "How do I set up appointments in WooCommerce?" In this section, we'll walk through step-by-step instructions to help you get started with WooCommerce Bookings.
Installing WooCommerce Bookings
The WooCommerce Bookings plugin works seamlessly alongside WooCommerce allowing you to create bookable products. Assuming you already have WooCommerce installed on your WordPress website, here are the steps you need to follow to install WooCommerce Bookings:
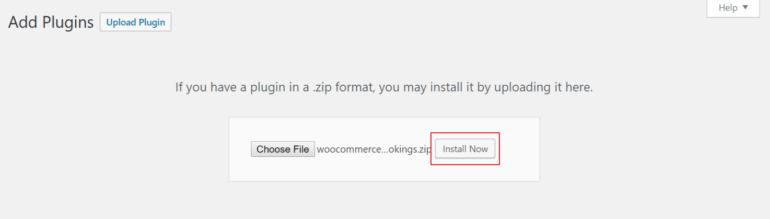
Get the YITH WooCommerce Bookings plugin's zip file. Next, log in to your WordPress website and head over to Plugins → Add New and click the Upload Plugin button.
Upload the plugin's zipped file and click Install Now to proceed. Activate the plugin to your website.
You'll notice that a new menu item in the side menu bar, Bookings. This is where you'll be able to create new bookable products and configure different settings related to accepting bookings. Next, we'll show you how you can begin creating a bookable product using WooCommerce Bookings.
Creating a bookable product
One of the reasons why WooCommerce Bookings is an incredibly popular booking solution in the WordPress space is because it's incredibly intuitive. The plugin lets you create bookable products in the same way you'd add new products in WooCommerce. The only difference is in the product's configuration settings. Here's what you need to do to get started:
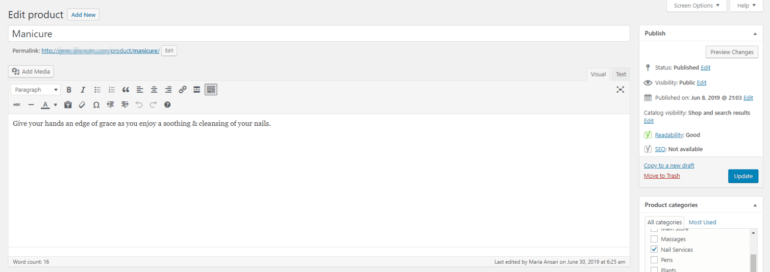
Head over to Products -> Add New from the WordPress admin panel. Add in product details (such as the product name, description, and featured image) and set categories and tags as you normally would.
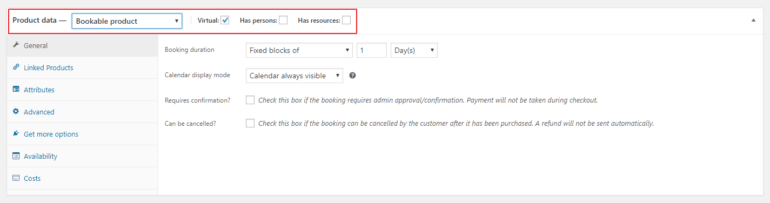
Next, scroll down to the Product data section. From here, use the dropdown menu next to where it says Product data to set the product as a Bookable product. If you're selling a virtual bookable product (such as an online course, training program, classes, or services), click the checkboxes next to the Virtual and Downloadable boxes, as necessary.
At this stage, you'll notice that the Product data section has been updated to reflect configuration settings for bookable products. Next, let's quickly step through these settings.
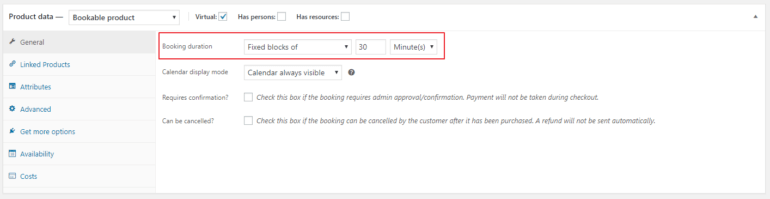
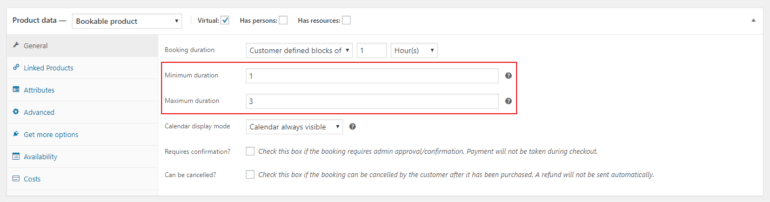
Booking duration
The Booking duration option lets you decide between a fixed block of or customer-defined blocks of:
Fixed block of. With this option, you'll be able to restrict customers and clients from booking outside of fixed slots. For instance, if you're setting up a website for a salon, you might need to set a fixed duration of 30 minutes to 2 hours, depending on the services you offer. You can set fixed blocks of minutes, hours, days, and months.
Customer defined blocks of. If you need to let customers set their own blocks, select this option. This way, you'll be able to set the duration and let customers select the number of blocks they'd like to book with you. With this option, you'll also be able to specify the minimum and maximum duration (in terms of days and hours) for bookings.
Note: If you set the Booking duration in Day(s) for Customer defined blocks of, you'll also be able to enable calendar date range picker to make it easy for customers to select a start date and end date on the calendar.
Calendar display mode
You can use this option to set the calendar to always be visible or to be displayed when customers click.
Required confirmation
If you check this option, the booking request will be sent but the payment will not be processed until the admin confirms the appointment. Once the admin reviews and approves it, the booking request will be confirmed and the payment will be processed.
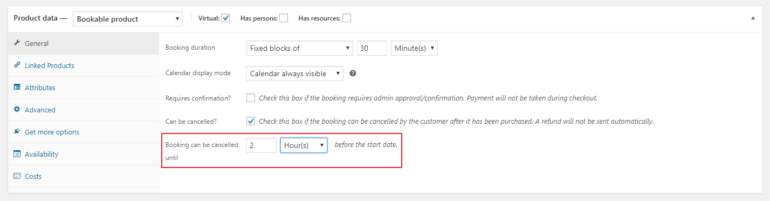
Can be cancelled
This option enables you to choose whether you’d want to enable customers to cancel their bookings after they are confirmed. Disabling this option will no longer let them cancel bookings after confirmation. If you select the option to allow booking cancellation, you can determine the period before it can be cancelled. For example, if you want to let customers cancel bookings up to two hours before their appointment, you'd configure the Booking can be cancelled until option as follows:
Setting up the costs
With WooCommerce Bookings, you can also set up pricing for each block you create by heading over to the Costs tab under the Product data section. You can choose to display prices on the sales page of your website or in a front-end table layout -- more on this later. Here's a look at the different options available to you for setting up costs for bookable products:
Base cost
This is a one-off cost for the booking as a whole. You can set this as the booking fee or the signup charges. This cost will be charged on every booking made regardless of the block cost. It's important to keep in mind that the base cost doesn’t depend on the block cost. In other words, even if a customer books more than one block, the base cost will remain the same for that booking.
Block cost
Here you’ll be able to set the price of a single block. The price per block multiplied by the number of blocks booked is the total cost of the booking.
Display cost
This is the price that’ll be shown to the users on the front-end regardless of the block cost and the base cost. This is great for when you'd like to display costs as, say, Starting from $9.95! Leave this option blank to have the cost automatically calculated for you.
Range
These fields will enable you to add more customizations to your booking costs. This is especially useful for when you are looking to offer customers a special discount for a limited time. For instance, if you offer a discount from August 5th to August 7th, you might configure the range as follows:
This will set the block cost for services at $9.95 from August 5th to August 7th.
Configuring available booking slots
WooCommerce Bookings also lets you set up availability rules for each block you create by heading over to the Availability tab under the Product data section. Let's step through the different setting options available to you. I'll focus on the most important, and you can also do other things like add a buffer time between each booking time slot.
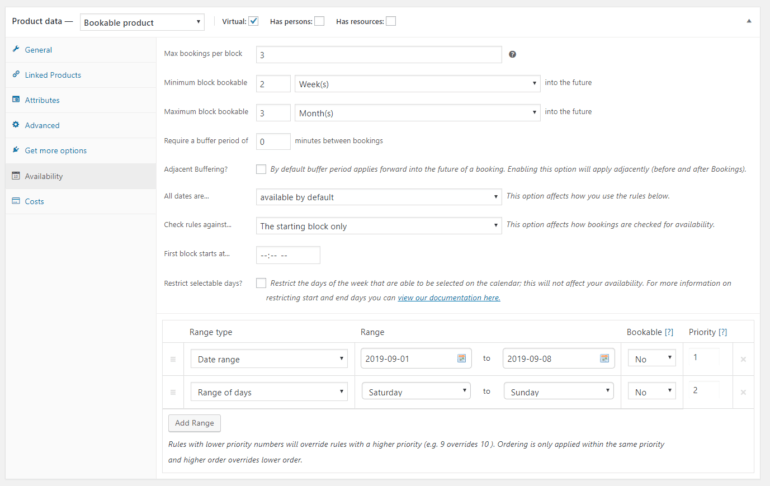
Max bookings per block
Max booking per block denotes the maximum number of bookings that are available for the same block. Let’s look at an example to better understand this. Let’s say you employee three nail experts who can offer manicure services at the same time i.e. in a bookable block. For this, you'd enter 3 as the Max bookings per block value.
Minimum block bookable
In this field, you can enter the minimum amount of time in the future for which the appointment can be booked. For example, if you set this to 2 weeks, customers will be able to book appointments with you up to 2 weeks before the day of the appointment.
Maximum block bookable
This option lets you specify the maximum period in the future for which customers will be allowed to make bookings. This is especially useful because you don’t want to let them book a few months or a few years in advance!
All dates are
This option lets you specify all the dates that are available by default. You can choose to set all the dates as not-available by default, as well.
Check rules against
You’ll be able to set the bookings system to check the rules for all the blocks that are booked or only the first block of the range of blocks being booked.
If you choose All the blocks being booked, the rule will be checked against every single block that the customer books. If a customer books 3 blocks simultaneously, all the blocks will be checked for availability individually and booking will be confirmed only if all three are available. However, if you specify the starting block only, the rule will check only for the availability of the first block.
Range
You can use this option to specify the range for availability according to your requirements. Just click Add Range and set custom availability. For instance, if your salon will remain closed over the first week of September, then you can create a range for the unavailability of those days. This is also useful if you want to make weekends un-bookable.
Of course, there are many other settings you can configure with WooCommerce Bookings such as sending custom email notifications or SMS notifications. You can even use the Follow-Ups plugin to send custom emails for each bookable product. This is handy if you want to send directions or 'what to bring' instructions to people before their appointment.
WooCommerce Bookings And Appointment turns any WooCommerce product into a flexible bookable product, making it perfect for scheduling time slots, accommodations, services, or events.
Key Features
Sell bookings by the minute, hour, day, or month.
Control availability by setting how many bookings are allowed per time slot.
Define minimum and maximum booking durations.
Allow customers to edit or cancel bookings within a set time frame before the appointment.
Choose between auto-confirmed bookings or require admin approval.
Send automated email notifications and reminders.
Build advanced booking forms with custom fields for collecting additional customer information.
Sync bookings with Google Calendar for seamless schedule management.
Manage staff members and assign bookings accordingly.
Apply advanced pricing rules and flexible options.
Automatically generate Zoom meeting links for virtual appointments, classes, or consultations.
4. Bookify
Bookify is a diversified and feature-rich appointment booking plugin. It offers the entire WordPress scheduling process for service-based businesses, featuring premium features such as Google and Outlook Calendar sync, Google Meet integration, time zone-aware bookings, and unlimited staff management. All these business-facilitating features make it a powerful solution right out of the box.
The standout advantage of Bookify is its rich customization options. The premium version includes powerful booking tools, built-in analytics, and multiple payment processor support, many of which help you customize the system to your unique needs.
Bookify offers both a free and a premium version. To integrate advanced features into your WordPress system, like Google/Outlook/Meet integrations, time zone-aware scheduling, and unlimited staff bookings, upgrading to Bookify Pro is highly recommended.
Key features
Admin appointment dashboard with integrated calendar
Unlimited staff, services, locations with multi-slot and timezone support
Secure PayPal and Stripe integrations (PCI-compliant)
Customizable email notifications, reminders, and branding
Embedded [bookify_bookings] and [bookify_appointments] shortcodes
Integrations: Google Calendar/Meet and Outlook sync (Pro version)
Manual appointment creation and CSV export
24/7 premium support and detailed documentation
5. Amelia
Amelia is a robust WordPress booking plugin designed to create a flexible booking environment tailored to your specific business needs. With its intuitive and user-friendly interface, Amelia integrates seamlessly with WordPress-powered business websites, as well as ecommerce websites built on Woo (WooCommerce). It enhances efficiency, customization, and overall booking experience, as it helps track and manage various types of appointments and events.
What sets Amelia apart is its extensive feature set, including appointment reminders, two-way calendar sync, online payment processing, packages of services, the cart feature for booking multiple services, and support for recurring appointments.
Key features
Centralized appointment management directly from your WordPress website, from the admin area for you, and from the employee/user front-end cabinets for others (so they don't ever have to log in to your WP Admin).
Seamless integration with Woo (WooCommerce).
User-friendly booking form for clients.
Flexible appointment scheduling, available 24/7.
Online payment processing in case you decide to use it without WooCommerce.
Appointment reminders to reduce no-shows.
Two-way calendar sync with the calendar of your choice for accurate scheduling.
Support for packages of services to offer bundled options.
"Shopping cart" option that allows your clients to book multiple services before checking out.
Ability to schedule recurring appointments.
Customization options to match your brand identity.
Extensive integrations include Google Calendar, Google Meet, Zoom, Elementor, Divi, WooCommerce, and more.
Dashboard for business owners and managers to track key performance indicators (KPIs).
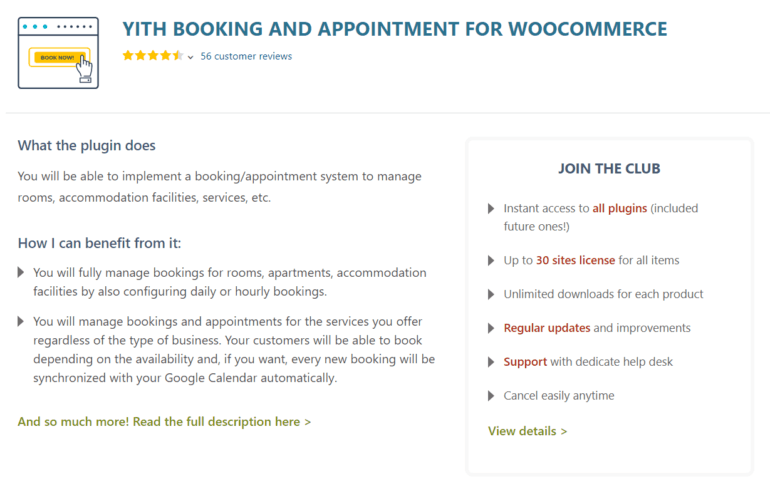
6. YITH Booking and Appointment for WooCommerce
YITH WooCommerce Bookings and Appointments helps you create a simple and easy-to-use booking system for your WordPress business website. This WooCommerce booking plugin supports all sorts of e-commerce sites built on WooCommerce and lets you create various types of bookable products with different pricing options.
Key features
It enables you to easily manage bookings for apartments, rooms, and other living facilities by setting their daily or hourly booking rates.
You’ll be able to set the minimum and the maximum number of days available for booking by individual visitors.
You can set to approve reservations as soon as the customer confirms it or require approval from the admins.
You can set the maximum period until when customers will be allowed to cancel their bookings.
It enables you to manage appointments and bookings for services such as nail salon, physiotherapy sessions, or beauty parlors and sync your booking dates with Google Calendar.
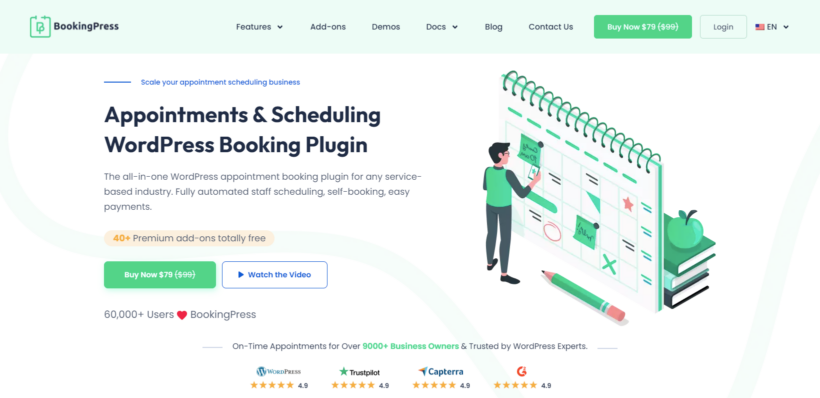
7. BookingPress
BookingPress is a useful appointment booking plugin for Woocommerce. It simplifies the whole process for service-based businesses. With BookingPress, you can create booking forms, set up availability and prices, and handle payments on your website.
BookingPress has a major benefit - its flexible and customizable booking system. You can access premium add-ons at no cost, and it works with over 17 payment gateways, such as PayPal, Stripe, Square, Mollie, WooCommerce, Razorpay, and more.
While a free version of BookingPress is accessible on the WordPress.org platform, it is advisable to opt for the premium version of BookingPress. This unlocks its full capabilities and comprehensive feature set.
Key features
Award-winning responsive design.
40+ premium add-ons which are free to use.
Fully customizable to meet the needs of individual businesses.
The Advanced staff dashboard is available for staff members to manage their schedules and appointments.
Custom booking fields with conditional hide/show options.
Advanced reports and analysis for better business management.
WhatsApp, Email & SMS notifications.
Invoice feature with PDF support.
Fully customizable booking forms and customer panels.
Cart facility for multi-booking.
24/7 customer support.
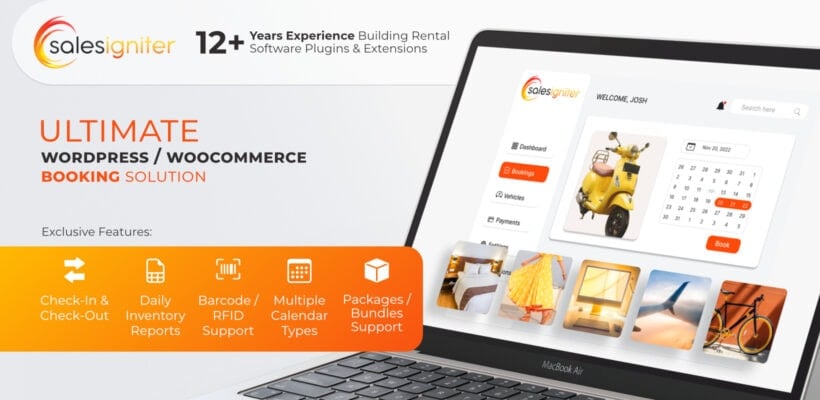
8. Sales Igniter WooCommerce Bookings
Most WooCommerce Bookings plugins merely add a calendar to your product page, and then a backend page where you can see a table of your bookings. But what about all the other needs of your rental business store? For example, you need a way to edit your orders and rental dates, a way to see day by day visually for a month what your inventory is, a way to track what has been checked out and checked in.
Sales Igniter WooCommerce Bookings & Tours designed to solve these problems and more. It comes with many exclusive features not found anywhere else.
Admin POS Calendar integration
Multiple calendar types
Check-out and check-in inventory tracking with RFID / barcode scanning
Bookly is a useful WooCommerce booking plugin that offers seamless integration with WooCommerce. It lets your customers book appointments for all types of businesses including spas and massage, law consultancy, car repair, beauty, and private clinics.
Key features
It helps you save time by eliminating your manual scheduling system. It automates the entire booking process. This enables your customers to quickly book their appointments even on weekends.
Bookly is easy to set up and lets you start receiving booking requests almost instantly.
You’ll be able to include several employees in the booking schedule, enabling them to charge different rates and show their available time slots.
You’ll be able to add an unlimited number of business services to your booking page and categorize them for easier management.
It offers integration with Google Calendar which lets you organize multiple calendars of all of your employees or staff members.
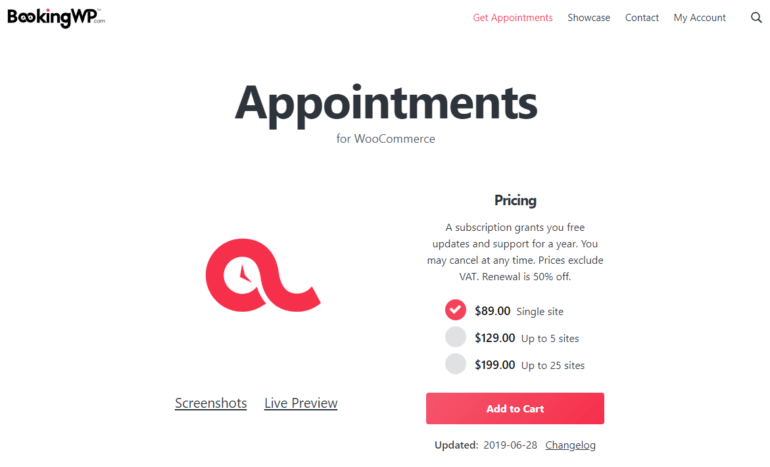
WooCommerce Appointments is a popular WooCommerce booking plugin that enables you to easily schedule and reserve bookings on your WordPress business site. It’s an ideal solution for companies that want to focus on their core business activities and leave the appointment scheduling tasks to the software.
Key Features
It is easy-to-use, fast to install, and doesn’t require any coding skills or staff training.
Its two-way Google Calendar sync feature lets you automatically synchronize bookings from your website with the Google Calendar and vice versa.
You’ll be able to assign multiple employees to appointments, manage their calendars individually, and enable them to log in and display their available times.
You can schedule appointments for multiple days for your customers or offer extended durations using add-on fields. Similarly, you’ll be able to extend duration by minutes or hours.
This WooCommerce bookings and appointments plugin lets you determine the number of times visitors can schedule an appointment in advance. This way they won’t be able to book an appointment a few months (or a year!) in advance.
WooCommerce Bookings by WooNinjas transforms your WooCommerce store into a powerful booking platform, ideal for salons, clinics, rental services, and event organizers. It simplifies appointment scheduling, resource management, and booking processes with real-time availability and flexible configurations. Seamlessly integrated with your WooCommerce setup, it makes managing and accepting bookings effortless for both store owners and customers.
Key Features
Updates availability in real time to avoid double-bookings and provide a smooth scheduling process.
Supports different booking types including hotel stays, appointments, and virtual consultations, with custom fields for each.
Allows staff, resources, and services to be assigned directly from product settings.
Provides advanced scheduling controls such as days, times, blackout dates, and buffer periods.
Supports both in-person and online bookings, with options for Zoom or custom meeting platforms.
Enables flexible pricing structures including base rates, service charges, and per-person pricing.
Syncs seamlessly with Google Calendar and auto-creates Google Meet links for each booking.
Integrates with Zoom to automatically generate links for virtual appointments.
Displays all bookings for logged-in customers through a simple dashboard shortcode.
Shows complete booking details on the cart, checkout, and customer dashboard for clarity and convenience.
12. Booking and Appointment for WooCommerce by Extendons
The booking for WooCommerce by Extendons is the ideal scheduling solution made for stores that manage rentals, appointments, or accommodation-based services. The entire booking process is managed directly inside WooCommerce, so you can manage availability, pricing, and reservations easily.
What sets it apart is the level of control it provides store owners, redefining how bookings are managed. Adjusting booking durations, setting prices based on scenarios, handling staff availability, and having steady communication with your customers are just a few ways the plugin adapts to a wide range of business needs.
Key features
You can set bookings for appointments, rentals, and accommodations with ease.
Predefined as well as custom time slots can be assigned for flexible scheduling.
You can provide a quicker and simpler booking option.
Prices can be set for persons of different age groups, categories, and room types.
You can apply clear pricing to optional as well as paid add-on services.
Multiple rooms can be booked within a single transaction.
Gain more control over scheduling by adding breaks between appointments.
Manage your available staff for appointments.
Choose off-days by disabling bookings on specific dates.
Booking and confirmation email notifications are automated for your convenience
You can manage and track all reservations with an interactive calendar.
Make navigation simple by displaying your business location with Google Maps.
Compatible with WPML for multilingual bookings.
Best WooCommerce bookings plugin for events
The six plugins featured above are perfect for taking bookings for individual appointments and time slots. However, they're less useful for selling tickets to larger events. For example, they don't have the features that you need to sell event tickets, such as a central calendar for viewing multiple event dates at once. They're also quite limited in terms of selling different ticket types and options.
We have just one top pick for using WooCommerce to sell tickets to multi-person events - The Events Calendar. This is easily the best WordPress events plugin. I'll tell you all about it next.
Introducing the Events Calendar
The Events Calendar is really a whole suite of popular WooCommerce bookings plugins for taking bookings for events. It offers a range of tools for managing and promoting events on a website. The suite includes several plugins, such as the core Events Calendar plugin, the Events Calendar Pro add-on, and other useful extensions. The Events Calendar is an ideal choice for businesses and organizations that host events and need a reliable and customizable platform to manage and promote them.
One of the key features of the Events Calendar suite is its ability to take bookings for events. You need the Event Tickets add-on for this. Whether you're hosting a small workshop or a large-scale conference, the Events Calendar makes it easy for customers to book and purchase tickets for your event. They can choose the number of people and place group bookings.
Backend management
Events Calendar plugin integrates with WooCommerce, which means that it can handle complex payment processing and booking scenarios. This includes recurring events and multi-day events.
In addition to its booking capabilities, the Events Calendar also offers a range of other features, including a customizable calendar view, event listings, location management, and support for various event types. It has a sidebar widget for listing events and displaying the calendar throughout your site. The plugin is also fully responsive and optimized for mobile devices, ensuring that customers can access and book events on the go. It has several built-in design templates to choose from.
The Events Calendar plugin suite is an excellent choice for businesses and organizations that need a comprehensive tool for managing and promoting events on their website. Its booking capabilities, combined with its other useful features, make it an ideal solution for a wide range of event types and sizes.
Is the Events Calendar a free plugin?
There is a free version of the Events Calendar on wordpress.org. This lets you display events on your WordPress site. However, the free version doesn't come with booking functionality.
To take bookings online, you need paid add-ons such as Event Tickets. This adds full booking management features to your site, plus WooCommerce integration for selling tickets.
Showcase bookings in a table layout
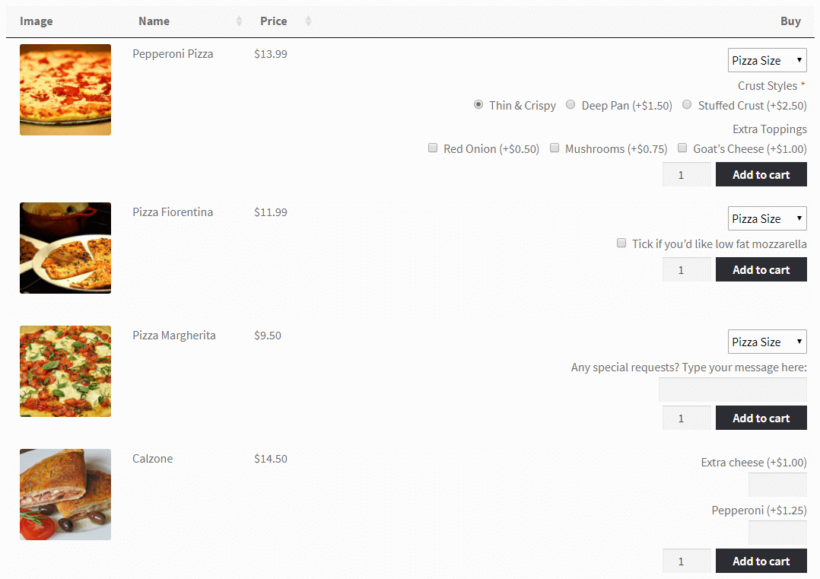
With the default WooCommerce shop page layout, customers will have to click through to single product pages to be able to book products or appointments. This doesn't make for an intuitive shopping experience.
Instead, you can display all bookable products (along with real-time booking availability, pricing, and other product information) in a quick one-page order form. The front-end table will also display a booking calendar against each product in a column. You can do this by combining two plugins as follows:
In addition, use the WooCommerce Product Table plugin integration to display the bookable products in a quick order form, complete with a column containing the booking calendar.
Here's what you need to do to get started:
Step 1: Install and activate WooCommerce Product Table
Next, head over to Plugins → Add New from the WordPress dashboard and upload the plugin’s zipped file to your site. Click the Activate button.
This will auto-launch the table builder wizard. Use this to create a table of bookable products.
You can modify the bookings table to make it look the way you want it to appear on your site's front-end. At the bare minimum, you'll want to set Columns. For example, you can add columns for the bookable product image, name, description, plus a buy column which will contain the booking calendar and add to cart buttons.
Important! Make sure you do not enabkle the 'lazy load' option in the table wizard. WooCommerce Bookings only works with non-lazy loaded tables.
Step 2: Create your bookings and appointments page
By now, you've installed and activated the WooCommerce Product Table plugin on your WordPress website and created a table. Next, we'll create a bookings and appointments page for customers to book products and appointments.
Navigate to Pages → Add New from the WordPress admin panel and create a new page for accepting bookings and appointments. Your customers and clients will be able to use this page to select view bookable products, see pricing and special prices, book slots, and add bookable products to the cart.
Once that's done, it's time to add the table of bookable products using one of these methods:
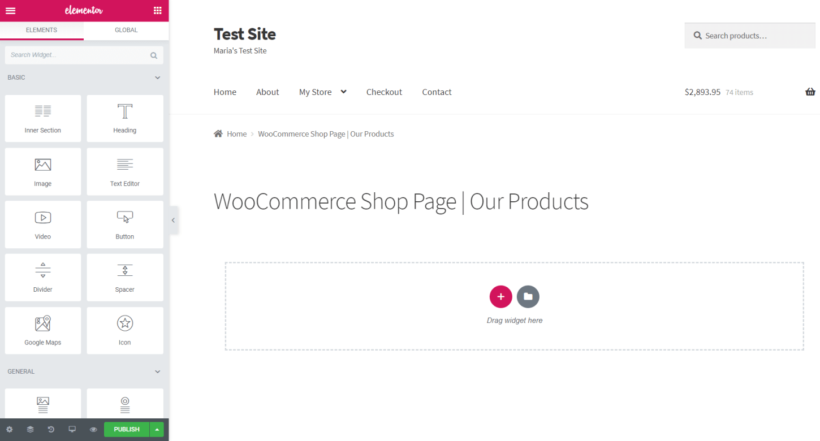
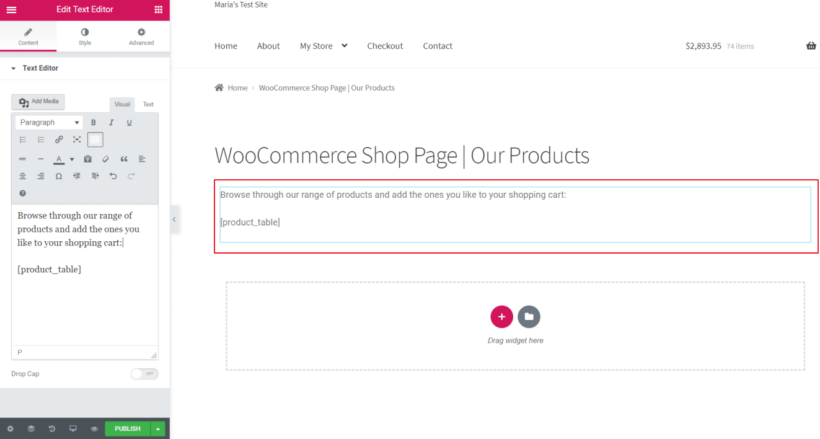
Gutenberg editor - Add a 'Product Table' block and select your table.
All other WordPress page builders and editors - Get the shortcode for your table from Products → Product Tables and insert it onto the page.
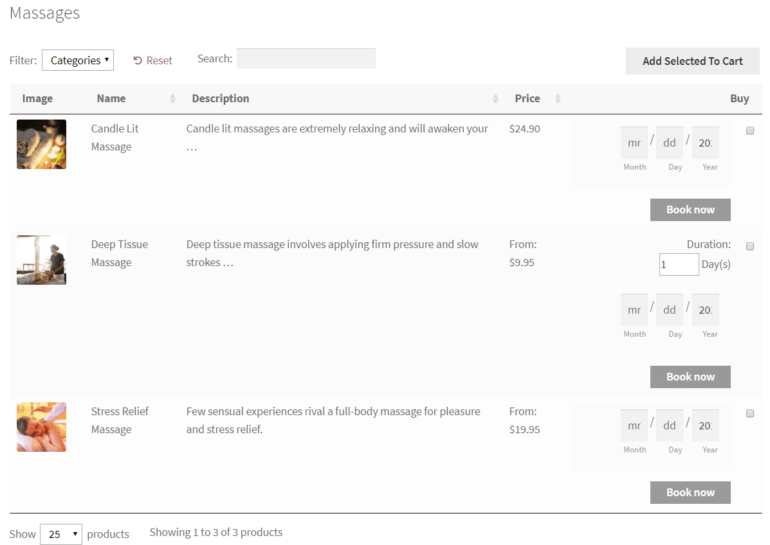
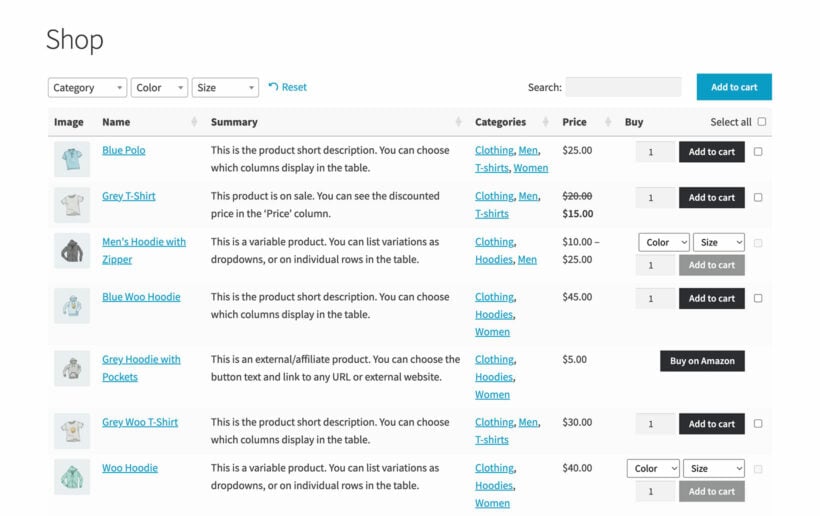
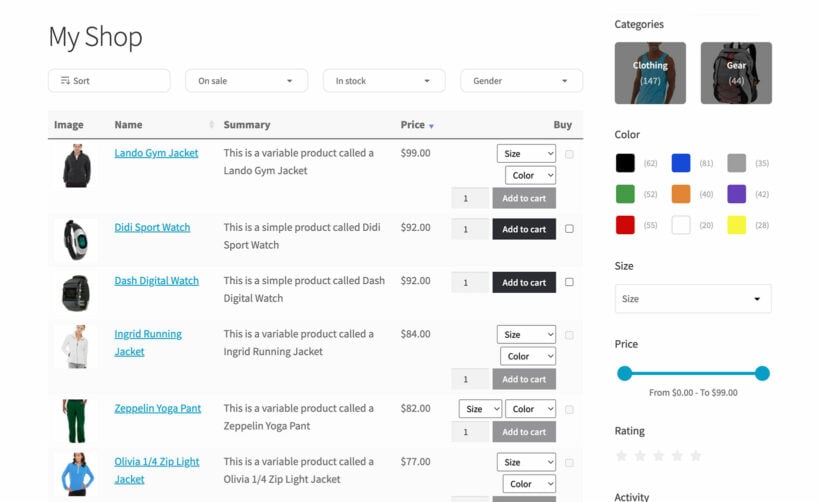
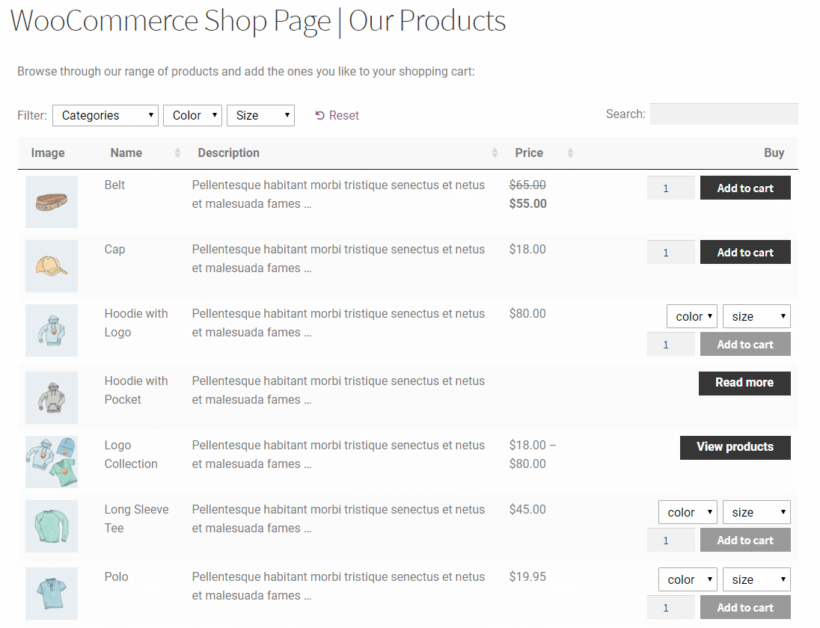
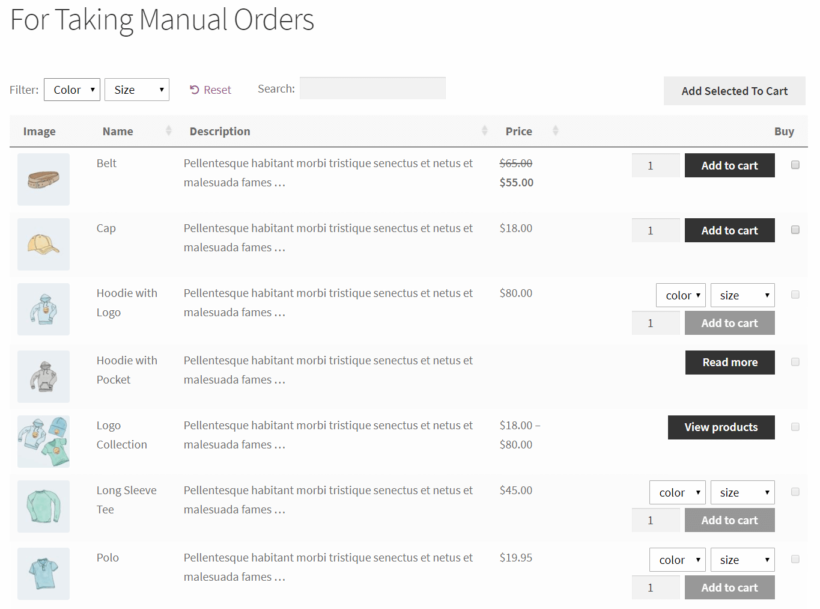
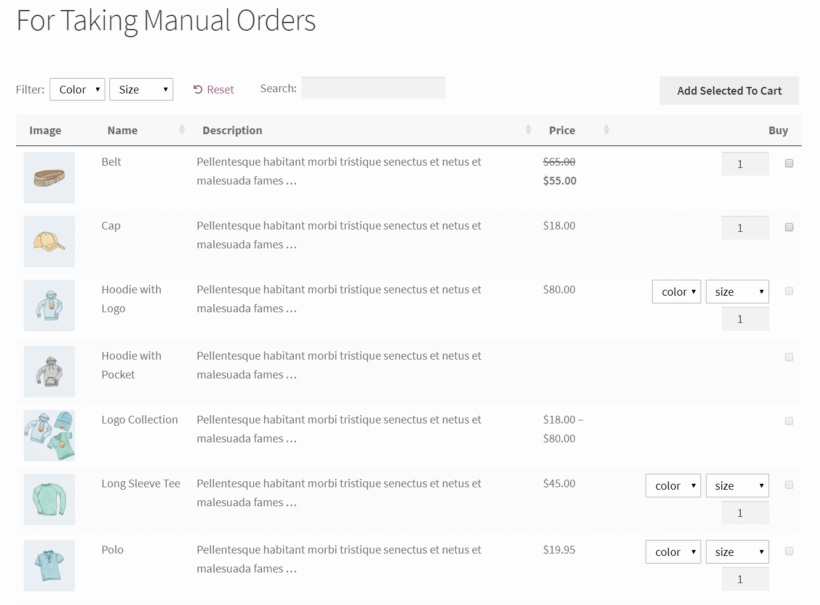
Click the Publish button and preview the page on your site's front-end. It might look something like this:
Is WooCommerce booking plugin free?
You may be wondering, "What is the best free booking app for WordPress?" While WooCommerce is a free plugin, none of the booking extensions featured in these articles are. Instead, they are paid add-ons that you need to buy separately to add booking functionality to your WooCommerce store. Unfortunately, we're not aware of any free plugins with the features and quality that you need to take bookings on your website in a robust, reliable way.
As with most things in life, you get what you pay for. Investing in a premium booking plugin like WooCommerce Bookings or WooCommerce Product Options is a smart move. They're the best way to take bookings on your website in a way that is both reliable and easy to use.
Bonus tip: Sell extras with your bookable products
A WooCommerce bookings and appointments plugin makes it easy to sell appointments or other bookable time slots in WordPress. You can increase your average income per booking by selling extras at the same time.
For example:
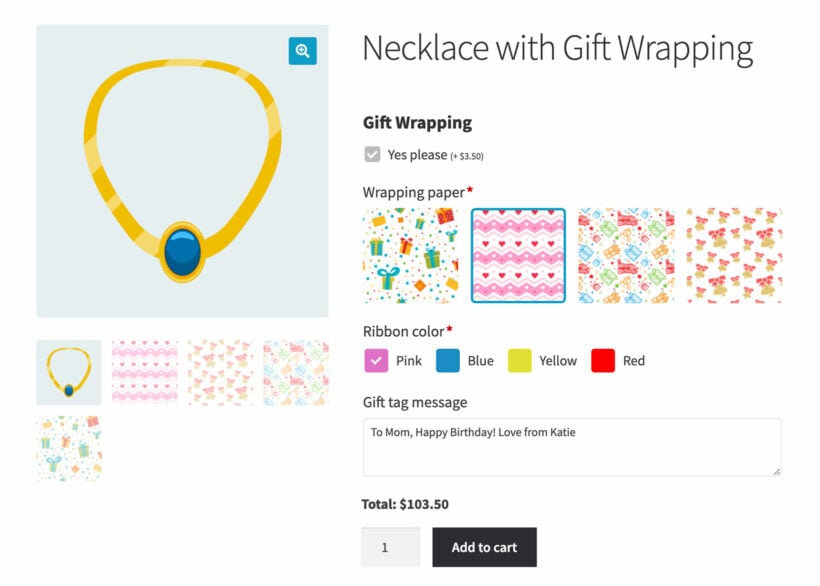
If you're selling massage appointments then you may want to offer optional extras, such as skincare products or massage oils.
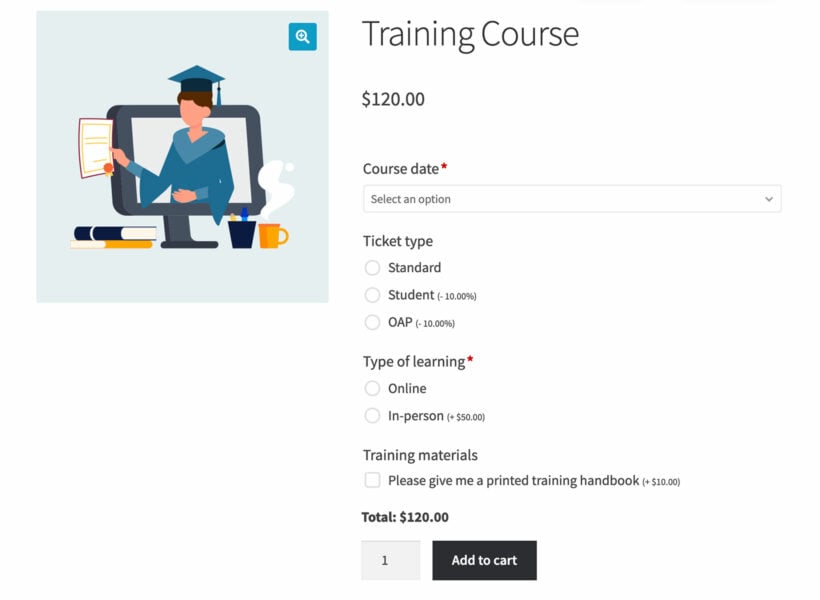
Similarly, if you're selling training courses then you could sell a training handbook and lunch.
Even if you don't want to sell extras, you may wish to collect extra information from customers such as any special health needs or dietary requirements.
You can do all this by adding the WooCommerce Product Options plugin. As we saw earlier, WooCommerce Product Options comes with a date field which you can use to convert any product into a bookable product. However, you can use it to add extras to your bookable products even if you're using a different bookings plugin such as WooCommerce Bookings.
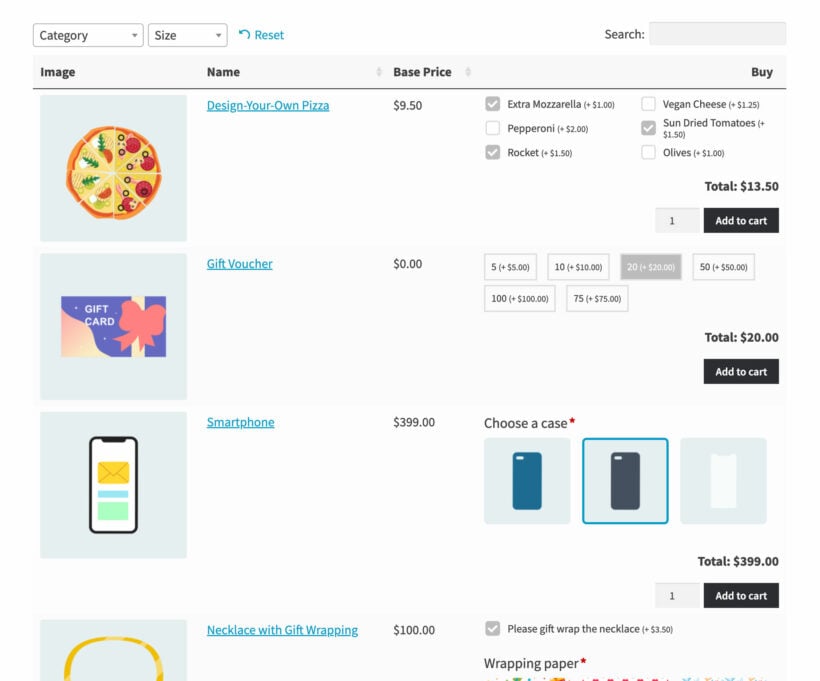
WooCommerce Product Options also has compatibility with with WooCommerce Product Table, so the extras for each bookable product will appear in the Buy column of your product tables. That way, customers can select a date from the booking calendar, choose extras and enter extra information directly from the list of products.
Having a robust WooCommerce bookings plugin allows you to easily accept, manage, and track customer and client bookings directly through your WordPress website. You can create bookable products the same way as you would in WooCommerce. Once you've created bookable products, you can set costs and availability and start accepting bookings right away!
These are our top recommendations for WooCommerce bookings and appointments plugins:
WooCommerce Product Options - Use this if you want a very simple way to add a date picker to any product, without the added complexity of a full bookings plugin.
WooCommerce Bookings - Use this if you want a fully featured bookings plugin complete with online availability and more.
Events Calendar - Alternatively, use this if you want to sell events rather than bookings.
And remember, whichever bookings plugin you choose, you can use WooCommerce Product Options to add extra options to your bookable products. That way, you can collect extra information from clients as well as earn more money by selling upgrades and extras.
What are some of the features you look for in a WooCommerce booking plugin? We'd love to hear from you so let us know in the comments section below!
Are you looking for ways to increase your conversion rate? Many e-commerce businesses fail because they don't have an effective WooCommerce checkout page editor. Do you want to get the most out of your customers? Then you need to customize your WooCommerce checkout page, it's as simple as that.
An efficient checkout page is essential for any e-commerce business. The default WooCommerce checkout is basic and limiting when it comes to customization options. This article will reveal the best plugin to help you learn how to customize WooCommerce checkout pages.
Creating an attractive and user-friendly WooCommerce checkout page is necessary for customer retention and increases conversions significantly. This article will walk you through the basics of customizing the WooCommerce checkout page. This will help improve customer experience, reduce cart abandonment rates, and boost sales simultaneously!
Why is customizing the checkout page important?
Setting up your online store can be challenging on its own. You need to figure out the most effective way to showcase your products. Between this and running marketing campaigns, store owners sometimes overlook learning how to customize the WooCommerce checkout page.
Customizing your WooCommerce checkout page is essential for the success of your e-commerce store. A well-designed checkout page makes it easier for customers to complete their purchases. This will help you eliminate any friction that could lead them to abandon their cart.
Further, a customized WooCommerce checkout page helps build trust. Customers can see you are serious about protecting their data and providing a secure shopping experience.
Improved user experience is just one benefit of customizing WooCommerce checkout. You will also:
Make it easier (and faster) for your customers to make a purchase,
Increase their trust in your e-commerce store, and
Encourage customers to buy more from you.
With this in mind, we’ll review some of the different ways you can customize the WooCommerce checkout page. We’ll show you how to add extra checkout fields. Also, you will learn how to create a one-page checkout with a searchable product table at the top.
Before we begin, let’s explain why you should customize the WooCommerce checkout page and how it can benefit your business.
The benefits of having a customized WooCommerce checkout page
The UX design of any WooCommerce checkout page is important for customer satisfaction and e-commerce success. Creating a tailored custom checkout page can make all the difference in how they experience your store.
Using a WooCommerce checkout page editor allows for adding additional features to enhance the user experience. These features include social media log-in, address auto-complete, and more.
You can also help increase customer trust by ensuring your customers know their data is secure. Do this by adding an SSL certificate to your website and displaying a secure checkout logo on the page.
As an online store owner, your goal is to deliver a seamless shopping experience to your customers. One way to achieve this is by creating a frictionless checkout process.
Here are some of the key benefits of learning how to customize the WooCommerce checkout page:
Make it easier for customers to make purchases (Increase conversion rate)
Customers who navigate a lengthy purchase process are more likely to abandon their shopping cart. A single-page checkout will help increase conversions by reducing customers' steps to complete their purchases.
Encourage customers to buy more
Customizing your WooCommerce checkout page allows your customers easily add multiple products to their shopping cart. It also makes it easier for them to choose product variants without clicking through to the single product page.
Make sure added products are set for a default checkout. There the user can review and confirm their products, use a coupon code if applicable, and choose payment options of their preference.
This way, they'll be more likely to buy more of your products, enabling you to increase your average order value.
Ensure a safe transaction process
Ensure your customers feel safe when shopping online - implement a secure, trusted payment gateway to guarantee their contact and billing details are secure! Customizing the WooCommerce checkout page also helps improve customer loyalty.
You can add features such as account registration, guest checkouts, and order tracking to make it easier for customers to shop with you again.
Collect actionable data
Customizing the checkout page can also help you to capture more useful customer data. This data can be used to segment customers, target them with personalized emails, and improve customer retention.
You can add custom fields to WooCommerce that ask for specific information, such as the customer's birthday or preferences regarding products and services. Customer segmentation data helps to create a more personalized experience for each customer and ensure they are only presented with relevant products or services.
These features provide a better shopping experience and help build trust. Build brand loyalty by allowing customers to easily view past purchases, update their information, and track orders.
Now that we know the benefits of learning how to customize the WooCommerce checkout page, we will provide instructions on customizing the WooCommerce checkout.
Personalize the WooCommerce checkout page by adding custom fields
The WooCommerce Checkout Field Editor checkout manager plugin lets you easily customize the form fields. No custom CSS code is necessary for additional options (such as placeholders) on your WooCommerce checkout page. You can both add additional fields and remove fields to set up your own custom checkout fields.
Investing in the checkout field editor plugin allows you to customize the checkout page to meet your exact needs. This can further enhance your brand presence and speak volumes to the customers about the quality your WooCommerse shop offers.
Once you install and activate the plugin, you can add, move, edit, or remove any field from your WooCommerce checkout form. It lets you modify the WooCommerce checkout required fields, including their type, position, label, placeholder, and more.
To do this, head over to WooCommerce → Checkout Fields to add new fields or start editing.
From here, you'll be able to edit three different sets of WooCommerce checkout fields:
The payment fields and billing fields sections of the checkout form.
You can edit the shipping fields, such as the delivery address if shipping is enabled.
Order notes or other order details allow the customer to provide specific instructions on the delivery, etc.
In addition to this, you can add different types of custom fields to your checkout form, including:
Text field, password field, and text area input fields
Keep in mind that this process is not a one-time project. With time you will gain more insight into what your customers are interested in, and you can take this to your advantage while adjusting the customization elements and field types.
In the next step, let's look at ways to implement it in your own WooCommerce-based WordPress site.
Streamlining the WooCommerce checkout to enhance the user experience
You can improve your conversion rate and increase sales by making it easier for customers to add information, place orders, and complete transactions. Consider removing any unnecessary fields from your WordPress theme that can complicate the customer checkout process.
You can also simplify the checkout process by adding a single-page checkout feature, allowing customers to review and confirm their order on a single page without switching between different pages.
Add custom fields to the checkout
With WooCommerce, out of the box, it's not possible to add or remove form fields from the checkout form. There's no option to do this using a drag-and-drop form editor or point-and-click options. It can be a huge limitation for some online store owners.
For example, if you're selling digital goods (like e-books, PSDs, or other downloadable resources), you don't need to collect some customer details, like shipping information. If you leave the field in, customers might be confused about why you're asking for their billing address for a digital product! That's why it's important to optimize the WooCommerce checkout for digital products.
Conversely, you might need to customize the WooCommerce checkout page to add an extra field or two. For example, if you're selling customized jewelry and watches, you'd need an add-on custom field to let customers enter the words or phrases they'd like to have engraved. If you're taking restaurant food orders, then you might want a checkout field for the customer to enter special dietary information. Most importantly, adding a discount or coupon code field to the checkout is one of the most important elements potential customers are interested in, as it can increase their purchase value.
Divide the checkout form into multiple steps
Depending on the types of products you sell, consider dividing your checkout form into multiple steps. Multi-step checkout forms make it easier for customers to complete the checkout form for two main reasons:
They group similar fields together, making the form look shorter.
Customers are less likely to miss a field or make errors which minimizes potential frustration.
This is a great way to simplify checkout and deliver a frictionless shopping experience.
Create a one-page checkout with a searchable product table
One of the easiest (and most effective) ways to simplify checkout is by allowing customers to select products and variations, add them to the cart, and checkout from the same page. Essentially, it optimizes the order process and speeds up the buyer’s journey.
Of course, the number of clicks is a significant factor here. If customers have to click through several pages to add products to their cart and place their order, their likeliness of completing the transaction drops significantly.
You can speed up the customer journey by listing your products on the same page as the WooCommerce checkout. This will improve the customer's shopping experience, increase your sales, and improve conversions.
Add payment options to WooCommerce checkout
One of the most important elements of a successful checkout process is offering customers various payment options. By doing this, you can make it easier for customers to complete their purchases without leaving your site.
You can add multiple payment options using the WooCommerce payment gateways extension and include various popular payment options such as PayPal, Stripe, and Amazon Pay.
Make the checkout page mobile friendly
Optimizing the WooCommerce checkout page for mobile devices is important, as they account for over half of web traffic. Create a mobile-specific checkout page that is easy to navigate and has an appropriately sized display is recommended.
Design elements to keep in mind
Like any good customer experience element, design plays an important role in checkout. The checkout page should be easy to use and aesthetically pleasing. Remember to keep the same branding elements on the checkout page to keep a consistent look.
The background color of your website should be solid so it does not interfere with images and product descriptions. Font consistency is equally important.
Also, try to keep the design simple and organized. Too many elements on the page can make it hard to read and understand. Minimize distractions by removing unnecessary text or images that could interfere with the customer’s focus.
You can also add a progress bar to show customers how far along they are in their orders. This can help customers better understand what action needs to be taken next and how far along they are in the payment gateway.
Theoretically, these elements are easily understandable, but putting them into practice is another thing. In the following sections, you will learn how to update the purchase process making it user-friendly.
How to create a one-Page checkout with a customizable product table
The customized table largely depends on product selection. With WooCommerce, you have two main options when it comes to creating a one-page checkout:
Option 1: For listing a handful of products
With the official WooCommerce One Page Checkout plugin, you can create a single-page checkout for your online store without requiring code tweaks. This can save time when you need to edit the WooCommerce checkout page.
In addition, it lets you position the checkout form directly under your product tables on the cart page. If you're looking for a way to let customers modify product quantities from the checkout form, we'd recommend using this great plugin to create a one-page checkout experience.
This extension has several product layout options allowing you to list products above the checkout form. However, these options are limited. For example, it doesn't allow you to showcase dozens of products, add filters, or even a search box to the product listing section.
The benefit of such a checkout page template is that it will not allow unnecessary fields in the checkout flow. This is a great option for listing a few products, but you will probably need a different single checkout solution if more products need to be showcased.
Option 2: For listing dozens of products
The official One Page Checkout plugin is only really suitable for listing a few products on the checkout page. If you want to list dozens of WooCommerce products on the checkout page, we recommend using the WooCommerce One Page Checkout plugin with WooCommerce Product Table.
The WooCommerce Product Table allows you to list your products much more sophisticatedly. More specifically, you'll be able to:
Add search, sort, and filter options to make it easy for customers to find exactly what they're looking for.
Display product variation dropdown menus directly in the product table.
Choose which columns you want to show and hide.
Make it easy for customers to add multiple products to the cart in one go.
All of these options will be integrated directly into the one-page checkout form.
You'll need a WordPress website with the WooCommerce plugin installed, and a few products added. Once you have everything in place, here are the steps you need to follow to add a one-page checkout page to your WooCommerce site:
Step 1: Install and activate WooCommerce product table
Get the WooCommerce Product Table plugin and install it on your website. Once that's done, head over to Products → Product Tables and create your first table.
Pay particular attention to these settings on the Add to Cart page of the table builder:
Make sure that the Quantities option is ticked. This allows customers to purchase more than one product (or variation) at a time.
Set the Add to cart button option to Checkbox only or Button and checkbox to allow customers to add multiple products to cart at once. This adds a clear multi-select option, enabling customers to add many products to their cart simultaneously.
Set the Variations option to either Dropdown lists in the add to cart column or Separate rows in the table (one per variation) if you want to showcase variable products in the product table. This allows customers to choose product variations from within the order form instead of clicking through to the single product page.
Additionally, you can prevent customers from leaving the one-page order form by clicking through to the single product page. You can do this in the advanced settings for each column.
Once you've done that, go to Products → Product Tables → Settings and disable the 'AJAX cart' option. This way, whenever customers add products to the shopping cart, the page will reload, showing the one-page checkout below with the correct products.
Step 2: Create the checkout page
Now that we've configured the WooCommerce Product Table plugin, all that is left is to create the page you'd like to add the WooCommerce product list and one-page checkout to.
To begin, head over to Pages → Add New and create a new page.
Here's what you need to do:
Add a few instructions on the top of the page for customers. For instance, this could be a friendly line that tells them to pick their products, add them to the shopping cart, and scroll down the page to checkout.
Next, add the product table that you created in Step 1 to the page. Do so using one of these methods:
Gutenberg editor - Add a Product Table Gutenberg block and select the name of your table.
Other page builders and editors - Add the shortcode from the final page of the table builder. You can also get this from Products → Product Tables.
Finally, add a shortcode below the product table block/shortcode to display the checkout form. You can do this by adding a new shortcode block and adding [woocommerce_one_page_checkout] to it.
When you’re done, your WooCommerce order form page will look something like the image below on your site’s front end. Customers can choose items at the top. Then, they'll get an order review and checkout form below, where they can enter their customer details and choose payment methods.
Here's a screenshot of how it might look:
Alternative method: Set up a popup one-page cart and checkout process
Another way to customize the checkout page is by using a popup checkout plugin to set a single-page cart and checkout page for faster order processing.
As mentioned above, the checkout process for any ecommerce store needs to be seamless, and having a one-page checkout mechanism makes it perfect for this. You can either do this by listing the checkout form underneath your products, as described earlier, or by adding a popup checkout.
WooCommerce Fast Cart makes the checkout process for any store as swift as possible. Customers can easily review their cart, enter their mailing details, and complete the payment from a single page.
The plugin is super easy to get started with as well. Here's a simple tutorial on how you can set it up.
Install and activate WooCommerce Fast Cart on your website. If you don't have the plugin, you can get it here. Once the plugin is activated, you'll be redirected to a setup wizard. Enter the plugin license keys and follow the wizard to set up the plugin.
Once you are done, and the settings are saved, WooCommerce Fast Cart will get triggered when a customer adds a product to their cart or initiates the checkout process.
You can always return to the plugin settings page and change how the fast cart functions and behaves.
If increasing conversions and reducing cart abandonment is one of the primary goals, we highly recommend giving WooCommerce Fast Cart a try. You can also see it in action on the plugin demo page.
In the event that you are experiencing difficulties with our written step-by-step guides, make sure to check out our YouTube channel, where you can find video tutorials for your plugins.
Using a plugin vs code customizing the checkout page
Custom checkout templates will easily personalize all aspects of your online store, from the content tab, conditional fields, and checkout stage elements to the branded cart button. There are virtually no elements that can't be customized.
Knowing how to customize the checkout page in WooCommerce can give your online store a meticulous advantage against competitors. It can greatly increase conversions and ensure customers have a smooth order experience.
Doing the customization on your own is often a meticulous and time-consuming task. On the other hand, using plugins provides you with safe and tested ways to customize and optimize the WooCommerce checkout page. These plugins provide a range of features to help you create the checkout page that best suits your store's needs.
It is important to remember that the UX experience should flow easily, where the customers can navigate the website and understand what further actions should be taken to complete a purchase. Using simple language reduces the chance of the customer abandoning their purchase.
Changing text on the WooCommerce checkout page
Changing the text on the WooCommerce checkout page is important because it gives businesses greater control over the customer experience. For example, you can customize the call-to-action (CTA) to encourage customers to complete a purchase or solicit feedback on the product they are buying.
Using language specific to the business and its products allows ecommerce sites to personalize their checkout page and communicate core messages. Changing text also enables you to highlight company-specific features, such as discounts or brand values, which may be beneficial and influential for customers making purchase decisions.
There are a few ways to change the text on your WooCommerce checkout page in a few different ways. First, you can edit the default text fields directly within the WooCommerce settings. This is the most straightforward approach, allowing businesses to update existing text or add additional fields quickly. For more advanced customization, you can use a plugin that enables altering specific elements on the page.
Avoid using jargon
Focusing on microscopy when it comes to the words used on the checkout page is important for any ecommerce business. Using language that customers can quickly understand will help prevent confusion, reducing the chances of cart abandonment and incomplete purchases.
Avoid using industry terms such as Card # or CSC when it comes to jargon. Instead, opt for simpler words like “Card Number” and “Security Code” instead. This often confuses users when entering data for validation. So make sure to use simple action verbs that are easy to understand, such as “Submit” or “Continue.”
How to manually customize the WooCommerce checkout page with code
You can manually override and edit your checkout template if you're a developer familiar with PHP files and JavaScript. Do this by using custom code and editing the WooCommerce checkout page. However, it's important to note that this cannot be done without a developer's help.
To insert additional content into your checkout template, you can edit the functions.php file for your store's child theme and use WooCommerce's built-in checkout hooks.
By default, WooCommerce offers 9 action hooks on your checkout page:
woocommerce_before_checkout_form
woocommerce_checkout_before_customer_details
woocommerce_checkout_billing
woocommerce_checkout_shipping
woocommerce_checkout_after_customer_details
woocommerce_checkout_before_order_review
woocommerce_checkout_order_review
woocommerce_checkout_after_order_review
woocommerce_after_checkout_form
You can use these hooks to insert your own content or fields.
For example, to insert content or display fields before the customer details fields, you could use this code snippet:
add_action( 'woocommerce_checkout_before_customer_details', function() {

echo '<p>Content you want to display before customer details fields</p>';

});
To simplify managing these code snippets, you can use a free version plugin like Code Snippets rather than adding them directly to your functions.php file. In practice, these steps can be handy when adding another shipping address or payment method to the WooCommerce checkout page.
Things to keep in mind
WooCommerce doesn't offer the best shopping experience out of the box. Depending on the types of products you're selling, you might consider learning how to customize the WooCommerce checkout page to:
Make it easy for customers to choose the products they want to purchase easily.
Quickly find the products they're looking for and add multiple products to cart in one go.
Select products and variations, add products to cart, and checkout from a single page.
Display extra fields or hide irrelevant fields to improve conversions.
A WooCommerce checkout page editor plugin can be used to customize your checkout page without any coding knowledge. Regardless of the method you choose, it's important to ensure that customers understand the checkout process. This way, they can complete their purchases quickly and easily.
What strategies do you use to deliver a better online shopping experience to customers? Do you have any other questions on how to customize the WooCommerce checkout page? We’d love to hear from you, so let us know by commenting below!
WooCommerce product add-ons plugins transform standard products into customizable experiences. They let you offer personalized options beyond basic variations. Here's how to choose and implement the best product add-ons solution for your store.
In the world of ecommerce, offering customers a variety of options is a critical component of success. One of the best ways to do this is by using product add-ons. In this blog post, we will explore the best WooCommerce product add-ons plugins available and how they can enhance your ecommerce store.
In this article, we will:
Dive into why product options are essential for your business. Customers appreciate the ability to customize their purchases to meet their individual needs, and product add-ons allow you to offer them precisely that.
Guide you through the process of adding add-ons to your products. You'll learn how to set up product options and add-ons, choose the type of product option and add new options.
Look at how to add pricing and rules and configure add-on settings. We'll do this using Product Options - our recommended WooCommerce product add-ons plugin.
Finally, we will share some other add-ons plugins worth considering.
By the end of this post, you'll be equipped with the knowledge and tools needed to use the power of WooCommerce plugins to enhance your ecommerce store, increase customer satisfaction, and drive sales.
Let's get started!
What are WooCommerce add-ons?
Create a wide range of add-ons with with the WooCommerce Product Options plugin
WooCommerce add-ons are additional features or options that can be added to a product on an ecommerce website powered by WooCommerce. These add-ons can be anything from gift-wrapping options, extended warranties, personalized messages, or additional accessories for a product. They provide customers with more choices, allowing them to customize their purchases to meet their specific needs and preferences.
With WooCommerce product add-ons, merchants can easily add product options and allow customers to select the specific variations they want, such as color, size, or material. This feature not only improves the overall customer experience but also increases the chances of making a sale as customers are more likely to purchase a product that meets their individual needs and preferences.
Product add-ons provide merchants with a simple and effective way to offer more choices and customization options to their customers, resulting in increased customer satisfaction, and loyalty.
Why do you need WooCommerce add-ons?
As ecommerce continues to grow, it has been increasingly important for merchants to provide customers with an exceptional shopping experience. One way to do this is by offering customizable product options through WooCommerce add-ons. For example, the WooCommerce Product Options extension allows you to add custom options to your products, giving customers more flexibility and control over their purchases.
So, why do you need WooCommerce product add-ons? First and foremost, they open the door to selling types of products that simply can't be sold using WooCommerce alone. Shoppers can customize their purchases in more flexible ways. Moreover, you can increase your revenue by selling extras and add-ons, inspiring customers to spend more money on your website.
WooCommerce Product Options offers a wide range of add-ons that can help you tailor your products to your customers' needs. You can add custom text fields, dropdown menus, checkboxes, radio buttons, date bookings, color pickers, date pickers, and more. This means you can offer a variety of options, from color and size to custom engraving and personalized messages.
Creative ways to use WooCommerce product add-ons
Here are a few creative examples of how you can use WooCommerce product add-ons to enhance your online store and improve customer experience:
Add a special note to a pizza delivery box: Custom text fields capture delivery notes and special requests. With WooCommerce product add-ons, you can allow customers to add a personalized note to their pizza delivery box. For example, they may want to write "Happy Birthday, John!" or "Congratulations on your new home!" This small addition can go a long way in making the customer feel valued and appreciated.
Custom engraved watches or jewelry: Engraving services use text fields for personalized messages on products. If you sell watches or jewelry, WooCommerce product add-ons can be used to offer custom engraving services. Customers can choose to have their name or initials engraved on the back of the watch or jewelry item, using a font of their choice.
Additional notes for placing orders at a restaurant: If you run a restaurant or cafe, you can use WooCommerce product add-ons to allow customers to add additional notes to their order details: For example, they may want to specify "No peanuts" or "Extra olives" on their pizza.
Add-on services for products: Another way to use WooCommerce product add-ons is to offer extra services for your products: For instance, if you sell the camera, you can offer an add-on service that includes a free version one-hour photography tutorial for beginners. This adds value to your product and can entice customers to make a purchase.
Gift wrapping options:Gift wrapping adds checkbox options with additional fees. It can be an excellent way to attract holiday shoppers. With WooCommerce product add-ons, customers can choose to have their items gift-wrapped and add a personalized message. This can differentiate your store from competitors and provide a memorable shopping experience.
An example of product add-ons created using the WooCommerce Product Options plugin (our recommendation)
Live previews: Lastly, some product add-ons plugins let your customers preview what the finished product will look like with their chosen options.
The WooCommerce Product Options plugin with the Live Preview add-on
Key benefits of using WooCommerce product add-ons
WooCommerce product add-ons offer a wide range of benefits for you to enhance your store's functionality. By taking advantage of the benefits they bring, you can differentiate your store from competitors, drive more sales, and ultimately, grow your business. There are loads of reasons to add WooCommerce extra product options as add-ons instead of variations:
Easy to add and manageProduct add-ons are much easier to work with than variable products. Instead of creating a variation for every possible combination, you add each add-on individually. The best product add-ons plugins do all the work for you.
Flexible display optionsVariable products only display the options as dropdown lists - how boring! The best add-ons plugins for WooCommerce come with loads of built-in style options. These include checkboxes, radio buttons, text fields, file uploads, clickable product images, and more.
Custom products You'll be able to offer customized product options to your customers such as monogrammed jewelry, customized goods (like t-shirts or mugs), and personalized gift hampers or chocolate boxes.
What features should I look for in the best WooCommerce product add-ons plugin?
When it comes to WooCommerce product add-ons, there are numerous plugins available on the market, each with its own set of unique features and benefits. It's essential to find the right plugin that suits your business needs and goals. However, with so many options to choose from, selecting the right one can be a daunting task.
While some plugins offer basic custom field types, others are more advanced, providing a plethora of features and functionality. However, a plugin that is overly complex may pose a steep learning curve and be challenging to use. The best WooCommerce product add-ons plugin should strike a balance between functionality and usability, offering a broad range of features while being simple to set up and use.
Different businesses have different requirements when it comes to WooCommerce product add-ons. A smaller online store may not require an advanced plugin, while a more prominent retailer may need a more robust solution to handle a high volume of traffic and orders. Therefore, it's vital to consider your business needs and select a plugin that offers the right balance of functionality, ease of use, and cost-effectiveness.
Here's a rundown of the essential features to look out for:
Types of custom fields available
Text fields capture names and personalized messages.
File uploads accept logos and custom designs.
Checkboxes offer multiple option selections.
Radio buttons provide single-choice options.
Date pickers schedule delivery dates and appointments.
Color swatches display product variations visually.
Image buttons display add-on options as clickable images.
Dropdowns allow customers to select one or more items from a list.
The best product addon plugins include multiple field types for complete customization. This makes a huge difference to how professional and user-friendly your store appears to customers.
Global vs per-product options
Product add-ons can be applied globally to categories or applied individually to specific products. Global options save time when managing multiple products, whereas category or product-level add-ons are more fine-grained for greater control.
Beyond where you apply them, consider what types of customizations you need. The flexibility to use add-ons both globally and per-product means you can maintain consistency across similar items while still offering unique options where needed.
Plenty of product customization options
Consider which field types and customization options you require from a WooCommerce product add-ons plugin. Most of them offer basic field types like checkboxes, but the best add-ons plugins offer additional styles such as text input fields
Let's take text input fields and file upload fields as an example. These allow you to sell fully personalized products, such as:
Custom bowling balls with a unique print.
Adding a sports logo to the t-shirt (ideally with a live preview).
Hand-written greeting cards.
Printed materials, where the customer uploads a print ready graphic design file e.g. a PSD.
And if you run a jewelry monogram business, your customers might ask you to monogram their initials on a bracelet.
As you can see, there are loads of different ways to use product add-ons. That's why the best WooCommerce add-ons plugin needs a wide range of styles to choose from.
Support for product variations
Nearly all WooCommerce product add-ons plugins force you to set up the add-ons in their own interface, separately from variations. This makes sense for certain field types such as file upload and text fields. However, sometimes you want to display normal product variations as if they were product add-ons.
The reason to do this would be to take advantage of the features that you get with product variations (e.g. stock control), while displaying the variations in more interesting ways (e.g. as checkboxes, clickable images or color swatches).
The WooCommerce Product Options plugin gives you the best of both worlds. You can create product add-ons directly in its interface, or you can display product variations as add-ons.
Adjust prices
Depending on the type of business you're running, you might need to charge customers additional fees on each transaction. For example, you might charge a premium for shipping and handling, or a percentage-based fee for providing services over time.
For example, the WooCommerce Product Options plugin lets you choose from a range of useful product price options:
WooCommerce Product Options comes with a choice of add-on styles and price types
As well as adding a flat fee to each item, you can change the add-on price based on quantity or increase/decrease it by a certain percentage.
You can charge a flat fee regardless of how many products a customer orders. This could be incredibly useful for service-based businesses. For example, if you're selling washing machines or air conditioners, you might consider charging a flat fee on every purchase which covers installation charges.
Alternatively, you can charge a quantity-based fee. This is generally more useful than a flat fee because you can multiply the price based on the quantity selected.
Similarly, you can charge based on a percentage of the total order value. For example, you might need to charge a percentage fee for shipping and handling. The further away the product needs to be shipped, the more it'll cost you for transporting it. For this reason, you might consider charging customers a higher percentage of the customer's total shopping cart value based on their shipping address.
Price formulas and calculators
As well as all the simple price options, WooCommerce Product Options lets you create your own custom price formulas. These are perfect for creating a measurement price calculator, selling by weight, and so on.
You can create straightforward formulas or advanced formulas. WooCommerce Product Options is easily the most advanced price calculator plugin on the market and supports all types of product data, mathematical and logical functions, custom variables, and more.
Customer-defined prices
Providing customers with the option to name their own prices can be a powerful tool for your online store. This feature allows customers to set their own price for a product or service, offering greater flexibility and transparency in the buying process.
One ideal use case for custom pricing is collecting tips at a restaurant or accepting donations for a charity. Giving customers the option to add an extra amount to their purchase as a gratuity or donation can increase customer engagement and loyalty, while also benefiting a worthy cause.
If you're someone who regularly organizes fundraisers or works closely with local charities, implementing a custom pricing add-on option in your ecommerce site can be an effective way to support the cause while boosting sales. This approach not only shows your commitment to the community but also allows customers to support a cause they believe in.
Moreover, the custom pricing add-on option is also suitable for businesses that offer personalized products or services. By allowing customers to set their own prices, merchants can offer a more personalized experience, building trust and long-term relationships with their customers.
Use the WooCommerce Product Options to let customers name their price
For example, you can do this using the 'Customer Defined Price' add-on in WooCommerce Product Options.
Conditional logic
Conditional logic is a powerful feature that helps you create a more customized and personalized experience for your customers when using a WooCommerce product add-ons plugin. With conditional logic, you can set up dependencies which display relevant product add-ons based on which other options, attributes and variations the customer has selected.
For instance, if you offer installation services as an add-on option, you might want to display additional fields for customers to select, such as their city and a request to dispose of the packaging. However, you wouldn't want to clutter up the page with these options for customers who don't require installation.
The solution is to use a WooCommerce product add-ons plugin that supports conditional logic, like WooCommerce Product Options. By using conditional logic, you can make the 'Your city' and 'Please dispose of the packaging' fields conditionally dependent on the installation box being ticked. This way, only customers who require these options will see them, making the checkout process smoother and more efficient.
Using conditional logic can help you create a more streamlined and personalized shopping experience for your customers. With a plugin like WooCommerce Product Options, you can easily set up and customize conditional logic rules to suit your needs. By doing so, you can increase customer satisfaction and boost sales in your online store.
Tick the Installation & Assembly box and related product options magically appear below!
File upload add-on fields
WooCommerce product add-ons plugins offer a wide range of options that can enhance your ecommerce store. One of these useful features is the file upload fields. It allows customers to upload files directly to your website, which is then sent to the admin via an order confirmation email.
This feature is particularly helpful for businesses that require customers to submit files for review or editing. For example, a graphic design company can use this feature to allow customers to upload images or design files that they want to be edited. Similarly, an editing and proofreading company can use file upload fields to accept document files that need to be proofread and corrected.
By offering file upload fields as a product add-on option, you provide a convenient and secure way for customers to submit their files. Additionally, it streamlines your business process, allowing you to work on the submitted files promptly and accurately. It's a win-win for both you and your customers!
Using the WooCommerce Product Options plugin to sell business card printing, including a file upload field
Translation options
In today's global economy, it's more important than ever to have an ecommerce site that is easily translatable into multiple languages. This is especially true if you want to reach customers in countries where English is not the primary language. Fortunately, many WooCommerce product add-ons plugins offer easy translation options.
One such plugin is WooCommerce Product Options, which is compatible with popular translation plugins like Weglot and WPML. This means that any product add-ons you create can be easily translated into any language supported by these translation plugins.
For instance, if you have a product add-on that allows customers to select a specific color, you can easily translate the color options into the language of your choice. This not only helps to improve the user experience for non-English speaking customers but also makes it easier for you to market your products to a global audience.
To illustrate the importance of translation, let's consider an example of a product page with add-ons that have been translated into Spanish. A customer who speaks Spanish can easily understand the product options and make a purchase, which ultimately leads to increased sales and customer satisfaction.
Minimum and maximum quantities
Controlling the quantity of each add-on is an important aspect of a robust WooCommerce product add-ons plugin. Setting a minimum and maximum quantity for add-ons ensures that customers don't buy too much or too little of an item. This feature is especially crucial if you're selling products that are limited in quantity or if you want to prevent customers from adding an excessive amount of an add-on.
The best WooCommerce product add-ons plugin provides different options for managing the minimum and maximum quantity of each add-on. For example, the WooCommerce Product Options plugin offers two ways to set the quantity:
Min/max quantity - This applies to fields like checkboxes and clickable images. Set a minimum and maximum quantity to control how many the customer should select before adding the product to the cart.
Min/max character count - This applies to text input and paragraph field add-ons. If customers are providing text with their order, then it makes sense to make sure they don't write too much or too little.
By having this feature, you can have better control over the number of items sold and prevent any inventory or production issues.
If you're offering gift wrapping, use a maximum character count to ensure the gift tag message is the right length
Popular WooCommerce product add-on plugins
Before diving into detailed plugin reviews, here's a quick overview of the most popular WooCommerce product add-on plugins. We'll explore our top recommendation in detail, followed by other notable options.
WooCommerce Product Options by Barn2 provides 16 field types with conditional logic and live previews. The official WooCommerce Product Add-Ons offers basic customization from WooCommerce.com. Advanced Product Fields delivers lightweight performance with custom formulas and lookup tables, whereas YITH Product Add-Ons includes freemium options with conditional logic.
WooCommerce Product Options - the best add-ons plugin
WooCommerce Product Options costs $149 for one site. The plugin includes 16 field types with conditional logic. The optional live preview shows uploaded images and customer-input on products.
As you've probably already gathered, the WooCommerce Product Options plugin is easily the best add-ons plugin on the market. That's because:
It's ridiculously easy to use. There's a visual drag-and-drop interface to create product add-ons. You don't even need to read the documentation! (Although it's there if you need it.)
Lots of add-on styles. It comes with all the add-on styles and designs that you expect. This includes more advanced ones like file uploads, text fields, and clickable image and text labels.
Advanced features. You also get more advanced options that not all product add-ons plugins include. For example, you can display product variations as add-ons or create custom add-on options. It comes with conditional logic and minimum/maximum quantities. You can also pre-select add-ons and choose which add-ons are required fields.
Plugin compatibility. While WooCommerce Product Options displays add-ons on the single product page, you're not limited to that. Since it's a Barn2 plugin, you can use it with other Barn2 plugins to display add-ons in other parts of your store. We cover this in the section on displaying product add-ons, later.
Optional live preview add-on. You can get the plugin on its own or with the Live Preview extension. This allows customers to preview their uploaded images and see what they'll look like on the finished product.
How to add product add-ons to your store
Here's how to add product add-ons to WooCommerce:
Install WooCommerce Product Options plugin.
Navigate to Products → Product Options.
Click Create New Group.
Add fields using drag-and-drop builder.
Set pricing for each option.
Apply to products or categories.
Save and test on frontend.
Next, I'll provide a detailed step-by-step tutorial on how to create add-ons for your products. We'll use WooCommerce Product Options as our chosen plugin. Either watch the video or follow the written instructions below.
In WordPress, head over to Plugins → Add New → Upload and install the plugin.
After completing the plugin setup wizard, click the button to start creating product options.
Edit or create a product options group.
Start by choosing whether to display it globally or on specific products or categories.
Next, click 'Add Option' and add as many add-ons as you like. It's all very straightforward.
Finally, preview one of the products that you have enabled add-ons. Depending on how you configured both the plugins, it might look something like this:
In the above example, you can see:
Pepperoni Pizza has both the radio buttons option and the checkboxes option.
Pizza Fiorentina has the checkbox option.
Pizza Margherita has the text input option.
Calzone has two quantity selector options.
How to display product add-ons in your store
Used alone, WooCommerce product add-ons plugins just display the extra options on the single product page. That's fine for some products, but not others.
If you sell the sort of products that customers will want to add to cart from your main shop pages, then you can quickly achieve this. The trick is to use WooCommerce Product Options with a compatible plugin that displays product add-ons elsewhere in your store.
Using the best WooCommerce product add-on plugins alongside other display plugins is a unique approach that your competitors probably aren't doing. This gives your store the edge!
Display add-on options in a product table
The WooCommerce Product Table plugin officially supports WooCommerce Product Options. It replaces your usual store layout with a searchable order form builder view, complete with a 'Buy' column. The Buy column contains everything that customers need to add products to the cart without leaving the page. And you guessed it - this includes the product add-ons!
By using product tables with a WooCommerce product add-ons plugin, you'll be able to display all sorts of WooCommerce products (with variable products and add-on options) in a dynamic, one-page table layout. This way, your store's buying user flow will go something like this:
Customers land on the one-page table layout and use the search, sort, and filter options to find exactly what they're looking for.
Next, they choose the product variation(s) they'd like to purchase.
They select from the available product add-on options.
Finally, they add the product to the cart and continue browsing products from the same screen.
The key benefit here is that customers don't have to click through to single product pages to choose the right product variation and select available product add-ons. It's the best WooCommerce product add-ons solution for online stores!
The benefits
Here's a look at some of the key benefits you get by using WooCommerce Product Table with WooCommerce Product Options:
It can help increase conversion rates and boost sales.
You're able to deliver a better shopping experience to your customers.
It improves the usability of your online store.
It simplifies the buying user flow.
Here's a preview of what the best WooCommerce product add-ons solution – integrating WooCommerce Product Table with WooCommerce Product Options – looks like on the front end:
Customers can select pizza sizes using a dropdown list (product variations) in addition to various add-on options including Crust Styles using radio buttons and Extra Toppings using checkboxes. Additionally, customers can also use the text area under Any special requests. Type your message here: for special requests.
Show product add-ons in a quick-view lightbox
If you sell products that typically have lots of personalization options - like clothes, jewelry, food, or gift items - then it's worth displaying product add-on options in a quick-view lightbox. That's because the add-on options take up a lot of space in a product table view, or on the single product page. A quick view plugin solves this issue.
WooCommerce Product Options integrates seamlessly with the WooCommerce Quick View Pro plugin, allowing you to display product details in addition to extra options. It works by adding 'Quick View' buttons to your shop pages. Instead of accessing the single product page, customers view the product in a quick-view lightbox. They can learn more, select add-ons, and add to the cart - all from the handy lightbox.
For example, if you sell t-shirts and hoodies, you could include add-on options for Choose Your Extras (using checkboxes) or Add a Custom Message (using text input fields).
Other product add-ons plugins - Free vs pro
Finally, let's look at some other free plugins vs. premium versions of WooCommerce product add-ons plugins.
Extra Product Options (Free)
Extra Product Options for WooCommerce is a free plugin with dynamic pricing features. This plugin by ThemeParrot offers an extensive range of customization options, including checkboxes, dropdown menus, and text fields.
The dynamic pricing feature empowers you to set individual prices for specific options, enabling flexible and personalized pricing strategies. You can provide competitive prices while optimizing your store's profitability with this tool. Creating an intuitive and seamless layout for your product options is now simpler than ever.
The plugin offers easy section positioning, ensuring that customers can navigate quickly and make informed choices.
With regular updates and dedicated support from ThemeParrot, the Extra Product Options plugin remains compatible with the latest WooCommerce versions.
YITH WooCommerce Product Add-Ons (Free)
YITH WooCommerce Product Add-Ons is a freemium plugin with conditional logic. The YITH WooCommerce Product Add-Ons enable you to increase your customers' shopping cart order value and let you save time by managing additional options simultaneously.
You'll be able to create groups of options and use them for all the items, as well as for specific categories in your online shop. You can also select dependency between options so that a dropdown option is shown only to customers that select the one that depends on it.
The YITH Product Add-ons let you add a text field where your customers can enter a custom phrase or select a predetermined phrase using a checkbox or radio button on the single product page. Predetermined phrases are great around the holiday time when people might want holiday greetings carved into chocolate such as Merry Christmas or Happy Easter.
WowAddons - Product Addons for WooCommerce (FREE)
WowAddons is a powerful product addons plugin for WooCommerce, built to help store owners offer personalized shopping experiences. It's a go-to solution for product customization that offers 25+ custom fields, including text inputs, color swatches, image uploads, range sliders, date pickers, and formula fields.
WowAddons covers virtually every customization need. Whether you're selling custom jewelry, pizza, clothing, or electronics, the plugin adapts to your niche.
What truly sets WowAddons apart are its robust features without the premium price tag. The add-ons' price is dynamically calculated based on the customer’s selections. Smart conditional logic shows or hides fields based on user input. Product recommendation fields help boost average order value through upselling.
You can also see your addons’ performance using the plugin’s live dashboard analytics. Easily check sales amount, clicks, order count, etc. for the addons in a nice interface.
Setup is effortless – thanks to its simple drag-and-drop builder. The product addons can be assigned to specific products, categories, or all products globally, giving store owners full control without any coding required.
WooCommerce Product Add-Ons (Paid)
WooCommerce Product Add-Ons is the official paid extension from WooCommerce.com. With the official Product Add-Ons plugin from woocommerce.com, customers can customize products as they shop through your ecommerce store.
You can offer several options using dropdown menus, checkboxes, sample images, and text fields. Additionally, you'll also be able to use multiple pricing methods such as flat fees, percentage fees, and quantity-based pricing to sell your products. This helps boost sales and increases conversion rates.
This plugin is very popular, but it lacks the advanced features of the best WooCommerce product add-ons plugins like WooCommerce Product Options. For example, you can't set minimum or maximum quantities for your product addons for WooCommerce. You also can't add conditional logic to show and hide add-ons based on user selection. That's why it may not be the best option, even though it's the official extension on woocommerce.com.
Advanced Product Fields for WooCommerce
Advanced Product Fields for WooCommerce offers lightweight performance with custom formulas. The Advanced Product Fields for WooCommerce is an adaptable product add-ons plugin. You can easily add a plethora of additional product options that go beyond the basic fields offered by WooCommerce, from various text boxes, dropdowns, checkboxes, radio buttons, images, and color swatches, to number fields.
Using the Advanced Product Fields plugin, your customers can easily select their preferred options and add them to their shopping cart. In addition, it is highly intuitive and easy to use. You can quickly set up WooCommerce custom product addons options, specify pricing rules for different product variations, and create product bundles and add-ons.
This product add-ons WooCommerce plugin also offers advanced conditional logic features that allow you to show or hide specific fields based on certain criteria, which can help you create a more streamlined and intuitive user experience for your customers.
WooCommerce Product Add-Ons Ultimate (Paid)
WooCommerce Product Add-Ons Ultimate provides 16 field types with child product support. It allows customers to personalize your products. You can add over 16 different field types to product pages. This includes checkboxes, radio buttons, text inputs, and select fields. The Pro version allows you to add advanced fields, like child products, so you can even use other products in your store as add-on fields.
Add-Ons Ultimate allows you to display your add-on fields using conditional logic if you wish and you can create fields per product or globally. You can assign prices to fields and even create calculations based on user inputs. The plugin is easy to use for non-technical people and developers.
AovUp WooCommerce Product Options
AovUp WooCommerce Product Options includes automatic embedding capabilities. You can offer several options using dropdown menus, checkboxes, sample images, and text fields. Additionally, you'll be able to set various custom prices using methods such as flat fees, percentage fees, and quantity-based pricing.
Moreover, the plugin allows users to upload files directly to their product orders and add a dedicated file upload field. You can implement conditional logic to show or hide fields based on user selections, enhancing the purchasing process. The versatility of custom fields ensures you gather all necessary information from customers.
Another standout feature is the automatic embedding capability. You can embed product options onto different pages, creating a unique and streamlined user flow, significantly enhancing the user experience.
PH WooCommerce Product Add-ons Plugin (Paid)
PluginHive's WooCommerce Product Add-ons offers reusable add-ons with dynamic pricing. It has a range of add-on options ranging from custom text fields and image uploads to dropdowns, checkboxes, and date pickers. With dynamic pricing options, businesses can charge based on quantity, percentage, or fixed fees, ensuring flexible pricing strategies. Its user-friendly setup works across various product types, including apparel, accessories, and personalized gifts.
Designed for maximum efficiency, this plugin supports reusable add-ons, allowing merchants to assign custom fields to multiple products in a single click. Customers can see a detailed price breakdown on the product, cart, and checkout pages, ensuring transparency. The plugin also includes conditional logic, built-in validations, and compatibility with WooCommerce Bookings, making it a must-have for stores that offer personalized products.
How to choose the right WooCommerce product add-ons plugin
Finding the perfect WooCommerce product add-ons plugin can be a daunting task. Especially with so many options available on the market. However, by following these simple steps, you can narrow down your search and find the plugin that meets your needs.
Identify your needs
It's important to take the time to identify your goals and requirements in choosing the right WooCommerce product add-ons plugin. This will help you filter your options and focus on plugins that offer the specific features that you need.
To get started, take some time to consider what you want to achieve with your product add-ons. Do you want to offer your customers the ability to customize their orders with additional options? Do you need a plugin that supports different languages to cater to a multilingual customer base? Or perhaps you're looking for a plugin that can provide upsell opportunities to help boost your sales?
By understanding your goals and requirements upfront, you can streamline your research. As well as save time by focusing on plugins that align with your needs. This will help ensure that you find a product add-ons plugin that meets your requirements. And also delivers the best results for your ecommerce store.
Research and Compare
It's important to do your research and carefully consider your options. You need to ensure that the plugin you choose aligns with your goals and provides the functionality you require.
Once you have a clear idea of your needs, it's time to start researching different WooCommerce product add-ons plugins. Keep in mind several factors, such as compatibility with your theme and other plugins, ease of use, and pricing.
To make an informed decision, make a list of the top contenders and compare them side-by-side. Visit their websites, read their documentation, and look for demos or videos that showcase the plugin's capabilities. You can also check out customer reviews to see how other users are finding the plugin's functionality and support.
Read Reviews
Customer reviews can be an invaluable resource for making an informed decision. Reviews offer a glimpse into real-life experiences with the plugin, including its strengths, weaknesses, and overall performance.
It is essential to take the time to read through both positive and negative reviews. Look for detailed reviews that explain why the reviewer liked or disliked the plugin. As well as how it performed in different scenarios.
You can find reviews on the plugin's website, WordPress plugin repository, or independent review sites. In addition to reading reviews, you can also look for user ratings to get a sense of user satisfaction.
However, it's important to note that not all reviews may be genuine, and some may be biased or even fake. Therefore, it's crucial to consider the source of the review and use your judgment to assess its credibility.
Consider the price
Price is an essential factor to consider when selecting a WooCommerce product add-ons plugin. Some plugins offer free versions with limited features, while others charge a one-time fee or recurring WooCommerce subscription.
Consider your budget and how much you are willing to spend on the plugin. Keep in mind that the cheapest option may not always be the best choice. It may lack essential features or have limited support.
By considering all these factors, you can make an informed decision. As well as choose the right WooCommerce product add-ons plugin that meets your specific needs and budget.
Enhance your ecommerce store with WooCommerce product add-ons
WooCommerce product add-ons are a valuable tool for online stores looking to enhance customers' shopping experience. By using add-ons such as WooCommerce Product Options, WooCommerce Product Table, and WooCommerce Quick View Pro, merchants can create more customized and personalized product pages that cater to their customers' specific needs
Throughout this article, we have explored the key benefits of using product add-ons. As well as the ability to offer custom pricing, personalized products, and more. We have also discussed how to choose the right WooCommerce product add-ons plugin. This includes identifying your needs, researching and comparing options, reading reviews, and considering the price.
We encourage you to try out the recommended WooCommerce product add-ons plugins. As well as experiment with different customization options to find the best fit for your business. With the right add-ons, you can create a more seamless and intuitive shopping experience for your customers. This can lead to increased customer satisfaction, loyalty, and sales.
In today's highly competitive ecommerce market, customization and personalization are essential to stand out from the crowd. By leveraging the power of the WooCommerce product add-ons plugin, you can take your online store to the next level.
What sort of add-on fields do you use to offer personalized products to your customers? Let us know by commenting below.
Out of the box, the default shop page in WooCommerce showcases products in a grid layout. Keep reading to discover some simple but effective ways to edit and customize WooCommerce shop pages.
The WooCommerce shop page is an integral part of your online store – after all, it’s the page your customers will interact with most. That's why you need more control over its design in order to create an intuitive, user-friendly layout that's suited to your specific business and delivers value to customers.
In this post, we'll walk you through a quick, step-by-step tutorial about how to customize the WooCommerce shop page by transforming it into a conversion-optimized order form. We'll do it using the WooCommerce Product Table plugin.
But before we jump into the tutorial, let’s quickly explore the WooCommerce shop page.
What is the WooCommerce shop page?
The WooCommerce shop page serves as a placeholder for a post type archive to display products. A post type archive displays a list of all posts under a particular post type, tag, or category. In this case, it would be the Products post type to display WooCommerce products.
Behind the scenes, the shop page may be rendered differently than other pages on your WordPress site. The exact layout and appearance of the default WooCommerce shop page depends on your theme. In most themes, it looks something like this:
The products are listed in a grid layout with some basic information about each one. This typically includes a large image, the product name, price, and maybe star ratings from reviews. It doesn't include product options such as variations, or the ability to choose a quantity and add to the cart.
The default shop page may be full-width, or it may have a sidebar where you can add filter widgets etc.
As you can see, the basic WooCommerce shop page can look great without any customization. However, while it's well suited to some types of products, it's completely inappropriate for others. If it's not the best way to showcase the types of products that you sell, then you will need to edit or customize the WooCommerce shop page. I'll tell you how to do that next. But don't stop there as it's also possible to edit the default product page layout.
Methods to edit the WooCommerce shop page
When it comes to customizing the default WooCommerce shop page, there are several different ways to achieve a completely unique look and feel. There's no limit to what you can do! For example, you can edit the default layout, add custom fields, include product filters, show exclusive offers, and much more 🪄
Your priority should be to customize the WooCommerce shop page in a way that suits the types of products you're selling. Ideally, your custom shop page should:
Encourage prospective customers to browse through more products.
Make it easy for customers to find exactly what they're looking for.
Display enough information about each product for customers to decide to make a purchase.
Allow customers to select all the options they need to add the product to their cart.
I'm going to tell you several different ways to use WooCommerce to edit the shop page. First we'll look at the built-in WooCommerce edit shop page options, and then we'll look at how you can use plugins to get even more flexibility.
1. Using the WooCommerce Customizer
Your first stop to customize the WooCommerce shop page is the Customizer. You'll find this at Appearance → Customize → WooCommerce.
This contains a range of options to edit the shop page. These let you customize the details of the shop page in WooCommerce. They don't change the overall look and feel or the information which is displayed about each product.
Store Notice - Optionally show a banner at the bottom of every page in the shop.
Product Catalog:
Shop page display - Choose whether to show products, categories or both.
Category display - Similarly, choose whether to show products, subcategories or both on category archive pages.
Default product sorting - Change how products are sorted when the WooCommerce shop page custom loads.
Products per row - Customize the number of shop page product per row.
Rows per page - Edit the number of rows of products on the shop page grid before pagination buttons appear underneath.
Decide whether to include products, categories or both on the WooCommerce shop page
2. Customizing with the WordPress block editor
You can use the built-in WordPress block editor to create a custom WooCommerce shop page. Also known as 'Gutenberg', this comes with a range of WooCommerce blocks for displaying products in different ways.
For example, you could create a customized shop page which has some static content first, then a list of your top selling products, then another heading followed by your entire product catalog.
The best way to find the WooCommerce shop page blocks is to click the + icon to add a new blog. You can then search for 'products' and the relevant blocks will appear. You can list all products, products by category, best selling products, and so on.
For shop page WooCommerce blocks that let you select which products to include, you'll then see a range of options like this:
Use the options in the main block to select which products to display on the customized WooCommerce shop page. Also use the options in the 'Block' tab on the right to customize details like the number of columns and rows in the product grid, and whether to hide any of the product data.
The WooCommerce blocks provide a neat way to edit the shop page structure. However, as with the Customizer, they don't actually change the layout of how the products are listed. Moveover, they don't let you show additional data about each product, or allow customers to select quantities or variations from the shop page.
3. Manual customization (using code and hooks)
It's also possible to write custom code to customize the WooCommerce shop page.
This is a developer-level task so I won't go into this option in much detail. It's a good option if you just need to make some minor tweaks. However, if you want to make significant changes then it's better to use a plugin. If you're a developer and want to edit the shop page using code then Sellbrite have provided a useful guide on the available hooks and filters.
4. Using WooCommerce extensions and plugins
Finally, you can use plugins to create a completely custom shop page. This is by far the most flexible option because you can choose from a wide range of plugins to edit different parts of the shop page.
In the next section, I'll show you how to customize the WooCommerce shop page using 2 high quality plugins:
WooCommerce Product Table, which replaces the default product grid with a conversion-optimized order form view.
WooCommerce Product Filters, which adds professional-grade product filters to the shop page to aid product discovery.
Step-by-step guide: Customizing the shop page with product tables
One way to create a high-converting custom WooCommerce shop page is by showcasing your products in a searchable, sortable table. You can do this using the fully customizable WooCommerce Product Table plugin.
For many types of products, the table layout can significantly boost conversions because:
The instant search box and filter dropdowns let customers find products quickly and easily.
It lists products in a much more structured format, making it easy for customers to compare and choose products.
You can display far more product data than the default WooCommerce shop page layout. For example, you can show product descriptions, dimensions, stock, and so on. If you want to display even more information, then you can use WooCommerce Product Table with the Quick View Pro plugin. This adds 'Quick view' buttons the product table so that customers can view more information without leaving the shop page.
Customers can select product quantities and variations directly on the customized WooCommerce shop page. Again, this allows them to purchase without leaving the page.
The order form layout also encourages customers to spend more. It does this by adding multi add to cart checkboxes to the shop page. Customers can select multiple products and then add all their selections to the cart at once.
Choose from pre-built templates for the design of your shop page. You can then further customize each template to match your exact brand design.
Using product tables to design the WooCommerce shop page is an ideal solution for online store owners who sell:
When you first activate the plugin, this will launch the product table builder. You can also launch it by going to Products → Product Tables. Set up your shop page product table by going through each page of the builder:
On the first page, choose the option to "Display on a shop page (e.g. main storefront, category page, etc.)".
On the next page, select which WooCommerce shop page templates you will enable the table view on. As a minimum, you should choose the shop page. You can also display the table on categories, attribute archive pages, etc.
Once you've finished, your customized WooCommerce shop page, category pages, and any other pages will now display product tables on the front end:
Bonus plugin: Adding advanced product filters to the shop page
As you can see in the screenshots above, WooCommerce Product Table comes with some basic filter dropdowns. These appear at the top of the custom WooCommerce shop page. You can also add the default filter widgets to your shop page sidebar.
Alternatively, you can use the WooCommerce Product Filters plugin to add even more advanced filters to the shop page. This works on its own, or with WooCommerce Product Table.
WooCommerce Product Filters gives you even more filtering options which can appear above the products on the shop page, or as widgets in the shop sidebar. Here's an example of what your supercharged shop page filters might look like:
Bonus plugin: Allow customers to check out directly on the shop page
Above, we learned how the WooCommerce Product Table lets you create a custom shop page layout which is better for conversions. It achieves this by making it quicker and easier for customers to find products and add them to their cart.
However, that's only half of the story.
The other half is the final part of the purchase process. That is, reviewing and completing an order. And that's where the WooCommerce Fast Cart plugin comes in.
WooCommerce Fast Cart adds either a popup cart or a floating cart icon to your custom WooCommerce shop page. Customers use this to review their order, enter their details, pay and check out - without ever leaving the shop page. It's a much faster way to complete an order, and therefore can help to reduce abandoned carts.
A website using both WooCommerce Product Table and Fast Cart on the shop page
Next steps: Customize the WooCommerce shop page today
The default WooCommerce shop page offers a number of useful features. However, it's not the best solution for all types of online stores. By editing your shop page’s layout, you can enhance your online store's visual appeal, improve usability, increase sales, and boost conversions.
We recommend using the WooCommerce Product Table plugin to upgrade the default shop page layout with an intuitive, user-friendly table layout. This will allow customers to:
Search, sort, and filter products to find what they're looking for, quickly.
Add multiple products to cart in one go.
Select product variations without having to click through to the single product page.
View more products per page in a neat and organized way (with complete product information).
Do you agree that customizing the WooCommerce shop page's layout and design will help you simplify the purchasing process? Share your thoughts in the comments below!
FAQ
How to use WooCommerce Product Table with Elementor (or other page builders)
Instead of customizing the default WooCommerce shop page, you can also create an entirely new shop page using a page builder like Elementor. We'll show you how to use WooCommerce Product Table with Elementor - with the Storefront theme - to create a unique shop page for your online store. The process is similar for other page builders, too.
1. Create a new page and edit it using Elementor
Create a new page or post and edit it using the Elementor editor. You can do this by clicking on the Edit with Elementor button.
2. Add the WooCommerce Product Table shortcode to a text editor or shortcode widget
When you create a product table at Products → Product Tables, you're given a shortcode for adding it to a page. Add this to an Elementor widget, such as a text editor or shortcodewidget.
Here’s what it might look like on the front end:
Categories are essential to helping customers to find the products they're interested in. Discover 2 easy ways to add a WooCommerce category dropdown or categories widget to your store.
If you have more than a few products, then you probably need to structure them into categories. Categories provide a quick and easy route for customers to navigate your shop and quickly find products they're interested in.
But despite this, there's no built-in WooCommerce product categories widget or filter. Instead, you need to install a plugin.
In this article, I'll tell you about two easy ways to add WooCommerce category filters to your store:
WooCommerce Product Filters adds category filter dropdowns either to the top of your shop pages, or as a filter categories widget. Or to make your filters more interactive, consider replacing the dropdown with something more visual like clickable category images!
WooCommerce Product Table transforms your store layout as well as adding a category dropdown filter above the quick product order form.
Problems with the default WooCommerce categories widget
Before we start looking at plugins, I should mention that WooCommerce itself does have a product categories widget. It looks like this:
This categories widget is just a list of product categories and subcategories. There are a few reasons why it's not ideal for your store:
It's not a category filter - The list of categories simply links to the different category pages. It's not actually a way to filter by category.
Looks unprofessional - As you can see in the screenshot above, it doesn't look great and includes the "Uncategorized" category. This doesn't look great.
Lists all categories, including irrelevant ones - The WooCommerce categories widget lists all categories, not just the ones relating to products on the current page.
The list can get very long - If you have lots of categories then they'll all be listed in the widget, which again looks unprofessional. It's better to list them in a WooCommerce category dropdown which take up less space.
Of course, WooCommerce also comes with some filter widgets. However, they only let you filter by attribute, price, or average rating - but not category. WooCommerce doesn't have a category dropdown widget.
But that's fine, as there are plenty of easy ways to add one. Next, I'll tell you about 2 plugins which provide much better ways to add a category dropdown or widget to WooCommerce.
Solution 1: Create filter widgets with WooCommerce product category dropdowns
Our first solution is far more than just a WooCommerce category dropdown plugin - it's a fully featured filtering plugin.
WooCommerce Product Filters lets you add a wide range of flexible and user-friendly filters to your store. And you guessed it - this includes a WooCommerce product categories widget. Also a category dropdown. And category checkbox filters. And category image fields. You get the picture 😅
You can use the WooCommerce Product Filters plugin to:
Add WooCommerce category dropdown widgets to the left or right sidebar.
Display all of these options above your shop instead of in the sidebar.
Allow customers to filter by category, tag, attribute, and even custom taxonomies - all at once.
Choose whether to list categories as drop downs, checkboxes, radio buttons, clickable images, and more.
Here's a screenshot of the different types of category dropdown and widget that you get with this plugin:
Category dropdown widget
Category dropdown above the shop
Checkbox category widget
Category radio buttons widget
Category names widget
Clickable category images widget
Creating dependent category/subcategory dropdowns
You can also use the plugin to create WooCommerce step filter dropdowns. With these, the customer selects a parent category and then an additional category dropdown appears listing the child categories. When they select these, the grandchild categories appear. And so it continues, for as deep as your category structure goes:
As you can see, WooCommerce Product Filters is an incredibly versatile way to add category dropdowns and widgets to your store. Next, I'll tell you how to set it up.
Instructions: How to add category dropdowns and filters to WooCommerce
This opens the 'Add filter group' screen. Use this to add as many filters as you like.
Enter all the information for the filter. Remember to select 'Categories' and a style of filter, e.g. dropdown.
Once you have saved the filter group, it's time to add it to the page. This depends on where you want it to appear in your shop:
Display a categories dropdown above the shop - Go to Products → Product Filters → Settings and select your filter group in the 'Shop filters' setting.
Add a WooCommerce categories widget to the sidebar - Go to Appearance → Widgets and add a 'Product Filters' widget.
Solution 2: Create product tables with WooCommerce category dropdown filters
The first solution involves using the WooCommerce Product Filters WordPress plugin to add category dropdowns or widgets to your store. However, it doesn't actually change your shop layout, and products are still listed in the default grid layout. That's where the WooCommerce Product Table plugin comes in.
WooCommerce Product Table adds category dropdowns while also transforming your store's layout. It does this by creating a list view of your products.
Listing products in a table instantly makes your store easier to navigate. The table comes complete with instant AJAX search box and various filtering options including - you guessed it! - category dropdown lists. It's the perfect way to display WooCommerce categories and products in a dropdown list.
Customers can view all products in the table and quickly select a category or sub-category from the dropdown. This instantly filters the list of products by category.
Here are all the different types of product category filter that come with WooCommerce Product Table:
Category filter dropdown above the table
This is the most obviously way to add a drop down category option in WooCommerce. The list of categories is hierarchical, perfectly reflecting the structure of your store. The sub-categories (and sub-sub-categories, etc.) are automatically nested/indented to show the category relationships.
Shoppers simply open the categories dropdown and select a category. The list of products updates instantly to display products from that category.
To clear the category selection, the shopper simply clicks the reset link to view all products.
Filter by clicking on a category in the table
You can choose which columns of data to include in your product tables. If you choose to include a 'categories' column, then this will list each product's categories within the table. Customers can click on these to instantly filter by a specific category. Or if you prefer, you can disable 'search on click' so that clicking on a category will load the category archive page.
Add to any page or to your main shop page
You can create as many tables as you like using the table builder, and then insert it using a block or shortcode. These tables can either list all your products, or specific products only. Alternatively, you can select specific shop templates (e.g. the main shop page or category pages) which will display the product table, replacing your default store layout.
Either way, the tables will be complete with a product category dropdown.
This opens the table builder. Use this to set up the table.
On the first page, choose the option to show the product table on your main shop pages.
On the 'Search & Sort' page, add filters including a categories dropdown.
Now when you visit your shop pages, you'll see a WooCommerce category dropdown above the list of products.
However, it doesn't come with a WooCommerce product categories widget
While WooCommerce Product Table provides several types of category dropdowns and filters, it doesn't include a categories widget. It does work with the built-in WooCommerce widgets - but like I said before, there's no category dropdown widget.
If you want this for the sidebar, then you should use WooCommerce Product Table with the WooCommerce Product Filters plugin that I described above.
Use WooCommerce Product Filters and Product Table together for best results
Get your category dropdown filters set up today
It's a shame that the basic product categories widget that comes with WooCommerce isn't a filter - it's just a list of links. However, you can easily fix this by installing either or both of these high quality plugins:
WooCommerce Product Filters adds category filter dropdowns either to the top of your shop pages, or as a filter categories widget. Or to make your filters more interactive, consider replacing the dropdown with something more visual like clickable category images!
WooCommerce Product Table transforms your store layout as well as adding a category dropdown filter above the quick product order form.
Whichever plugin(s) you use, this is a fantastic way to let customers find products by category.
Many online shop owners need to be able to take and place WooCommerce manual orders for customers. This could either be phone orders, email, or chat. Typically, this involves creating an account for the customers, filling out their orders, and taking payment in person or over the phone.
Did you know that over a third of consumers prefer to speak directly with a salesperson when considering high-ticket items?. The only problem is that WooCommerce manual orders aren’t supported out of the box. Shop owners need an easy way to be able to place customer orders efficiently.
In this article, we’ll introduce you to a WooCommerce manual orders plugin that you can use and configure to quickly place customers' orders. We’ll also walk you through a step-by-step tutorial to help you integrate this functionality into your own WooCommerce store. We'll do this by creating a simple, one-page order form that's searchable, sortable, and filterable, and will allow your customers to make step-by-step orders on your store.
The method described below will show you how to set up a manual ordering system directly within your WooCommerce store. If you want to know how to simply add a standalone manual order in the WooCommerce backend, click here!
Why you might need to take WooCommerce manual orders
Many online businesses cater to customers that would prefer to place orders in person, over the phone, by email, or live chat. In other words, they provide their order details and payment information like billing address, shipping method, and shipping address to a salesperson.
Since the ecommerce plugin doesn’t support WooCommerce manual orders out of the box, shop owners resort to other measures:
Accessing their online store from a private (or incognito) window or from the online store's backend to place the customer’s order.
Logging in and out of their admin user account to place orders for customers.
Placing the customers’ order only to find that they’re a new customers and, therefore, need a user account first.
Aside from the fact that this isn’t a user-friendly approach to placing orders, it’s also incredibly inefficient. Instead, shop owners need a way to be able to:
Create a WooCommerce order form that’s hidden from regular customers so they’re able to place new orders without logging out of their admin user accounts.
Make it easy for multiple salespeople to place customer orders through the hidden order form and choose from all of the available payment methods. It's a good idea to make all payment gateways available.
Place WooCommerce phone orders on behalf of their customers – whether they’re existing customers or new customers.
With the right WooCommerce manual orders plugin and implementation, you’ll be able to do all of this and much more.
Taking manual orders in WooCommerce: 2 methods to consider
While ecommerce is the preferred method of shopping for many customers today, some may still prefer to place orders by phone or email or may face technical difficulties when trying to order online.
To accommodate these customers, it's important to have a system in place for taking manual orders. If you're using WooCommerce as your ecommerce platform, you have several options for taking manual orders, including using a dedicated WooCommerce manual order plugin or adding orders manually in the back end.
In this section, we'll explore these two methods in more detail, and discuss some best practices for taking manual orders in WooCommerce.
****The method described below will show you how to set up a manual ordering system directly within your WooCommerce store. If you want to know how to simply add a standalone manual order in the WooCommerce backend, click here!****
Method #1: Introducing the WooCommerce manual orders plugin
Taking WooCommerce orders from customers manually – either over the phone, email, or live chat – is incredibly important for some online businesses. One of the easiest ways to implement this sort of functionality into your own online store is by using a WooCommerce manual orders plugin such as WooCommerce Product Table Pro.
WooCommerce Product Table lets shop owners create a dynamic, front-end WooCommerce order form that’s hidden from public view. Salespeople will then be able to access the order notes (without having to log out of their own account) and place the customer’s existing order.
With WooCommerce Product Table, you’ll be able to create a searchable, sortable order form with filters that makes it easy to quickly find the product(s) customers would like to purchase. At the minimum, the WooCommerce manual order plugin lets you:
Add products to the cart without navigating to single product pages.
Select product variations directly from the order form or from a quick view lightbox.
Additionally, salespeople will also be able to place orders for customers with existing user accounts and new customers. You’ll also have the option to automatically create an account for new customers or offer a guest checkout option.
How to take WooCommerce phone orders manually using WooCommerce Product Table Pro
With WooCommerce Product Table, you’ll be able to create a hidden page where admins and salespeople can take WooCommerce phone orders or add orders from paper order forms, emails, or live chat.
Assuming you already have a WooCommerce store setup with some products added to it, here’s what you need to do to take WooCommerce phone orders from customers.
Step #1: Install and activate the WooCommerce Product Table plugin
To get started, get the WooCommerce Product Table plugin and install it to your WordPress website. Once that’s done, head over to Products → Product Tables to activate the license key and your first table. This should list all the products which will be available in the manual order process.
Step #2: Create a WooCommerce order page
Create a new page (via Pages → Add New) where you’ll add the WooCommerce manual orders form. Use the product visibility section to make it private so that public customers can't see it.
To list products on the manual ordering page, either:
Insert the 'Product Table' Gutenberg block and select the table you created in Step 1, or;
Copy the table's shortcode from Products → Product Tables and insert it into your page.
Once you’re done, preview the page on the front end. It should look something like this:
The key benefit of using WooCommerce Product Table to create an order form is that it allows employees and salespeople to quick-find products, select variations, and place the customer’s order.
Pro tip for selecting products more quickly
If you sell a lot of inexpensive products or find that customers typically purchase multiple products from you at a time, you might consider replacing Add to Cart buttons in the table layout with add to cart checkboxes. You can easily do this on the 'Add to cart' step of the table builder. Just set the Add to cart button option to either Checkbox only or Button and checkbox.
For example, if you go with Checkbox only, it should look something like this:
Step #3: Hide the WooCommerce order form from public view
Since we don’t want the WooCommerce manual orders form to be accessible to regular customers, we’ll use an SEO plugin (such as Yoast SEO) to noindex the order form page.
Simply open up the page you created in Step #2, and scroll down till you reach the Yoast SEO widget.
Click the cog icon to access the Advanced settings.
Set the Allow search engines to show this Page in search results? option to No.
Click the Publish button to proceed.
This way, the WooCommerce manual orders page won’t appear in search results. You can share a link to this page with salespeople and employees. However, you shouldn’t add a link to it to your online store’s navigation menu so that it remains hidden from public view.
Step #4: Take manual payments in WooCommerce
Next, you need a way to take WooCommerce manual payment from customers. It needs to work whether you're doing face-to-face sales, WooCommerce phone orders, or something else.
There are a few options here:
Enter their payment details manuallyThis is best for WooCommerce phone orders. Just choose a normal payment gateway such as Stripe, and enter the customer's credit card details on the checkout page. This is just as if the customer was ordering directly on the website, but you're doing it on their behalf.
Use WooCommerce In Person PaymentsWooCommerce has launched a service for the US and Canada where you order a card reader which takes credit card payments from customers.
Use a PayPal card readerIn the last few years, PayPal has introduced card readers which provide an affordable way to take face-to-face credit card payments. These are called "PayPal Here" card readers. Use the free WooCommerce PayPal Here plugin to take website payments using a PayPal card reader.
Step #5: Taking orders from customers
Now that you’ve set up the online order form using WooCommerce Product Table, there are two main ways you can place orders on behalf of the customer.
For customers with an existing account:
Install the WooCommerce Login and Shop as Customer plugin to your WordPress website. You can use it to switch to the customer’s user account before placing their order.
For new customers:
When taking orders for new customers, you can either offer them a guest checkout option or place an order as a new customer. For the latter, you’ll need to ensure you’re logged out. You’ll be able to create an account for the customer automatically since entering their email address is part of the order placement process.
Method #2: Adding new manual orders in the back end
We'll show you how to add manual orders in the back end of your WooCommerce store and provide some tips for establishing a clear manual ordering process. By following these steps and guidelines, you can ensure that your customers can place manual orders easily and that your staff can process them efficiently and accurately.
Steps in creating manual orders
Here are the steps to add new manual orders in the back end of your WooCommerce store:
Log in to your WordPress dashboard and navigate to the "Orders" section.
Click the "Add Order" button. This will take you to the "Add New Order" page.
Enter the customer's details in the appropriate custom fields, such as their name, email address, and phone number. You can also select whether the order is for a registered customer or a guest.
Add the items the customer wishes to order by clicking the "Add item(s)" button. You can search for products by name or SKU and select the quantity and any relevant variations.
Set the pricing details, including the product price, tax, and shipping costs. You can also add any discounts or coupons if applicable.
Select the payment method the customer will use to pay for their order. If they are paying by credit card, you can enter their details manually or use a payment gateway integration.
Set the shipping details, such as the shipping method, address, and any notes or instructions for the delivery.
Review the order details and click "Save Order" to complete the process.
While adding manual orders in the back end of your WooCommerce store can be a useful option, it's worth noting that it may be more time-consuming than using a dedicated plugin, particularly if you have a high volume of manual orders.
If you're using a plugin such as WooCommerce Wholesale Pro, you can take advantage of features such as the automatic calculation of wholesale prices based on the customer's role. Regardless of whether you use a plugin or not, it's essential to establish clear processes for manually creating orders to ensure that they are processed efficiently and accurately.
Tips for streamlining manual orders in your online store
Here are some tips for establishing a solid manual ordering process:
Set up a dedicated phone line or email address for manual orders to ensure that they are tracked separately from online orders.
Train your staff on how to WooCommerce create order for customers manually and provide them with clear guidelines and procedures to follow.
Use a centralized system to manage and track manual orders alongside your regular online orders. This could include using a spreadsheet or order management software.
Ensure that you have a clear process for handling WooCommerce manual payment and shipping details, such as verifying credit card information and selecting the appropriate shipping method.
Bonus: For orders with lots of variations
If you’re selling products with lots of variations, they’ll likely take up a significant amount of space on the one-page order form. Instead, you can use the WooCommerce Product Table plugin with WooCommerce Quick View Pro to add quick view lightboxes.
By doing so, salespeople will be able to choose product variations. As well as add them to cart directly from the quick view lightbox.
The WooCommerce manual orders process
Once that’s all done, your WooCommerce phone orders process will look something like this:
Whenever a salesperson receives a phone call (or paper order form), they’ll log in as the relevant customer, add a new user account on their behalf or select the guest checkout option.
Next, they’ll place the customer’s order using the order form, select products and variations, and add them to the cart.
Finally, they can head over to the main WooCommerce checkout to complete the order. From there they can choose from the available pending payment gateways to complete the transaction (or use a card reader for in-person payments).
Customers will receive the usual email order confirmation email letting them know that their order has been placed along with other important details (such as the order status link).
Conclusion
Enabling customers to place WooCommerce phone orders can be a beneficial strategy for online store owners who wish to increase their sales. By using the WooCommerce create order for customer feature, store owners can improve the overall customer experience.
With a WooCommerce manual orders plugin – like WooCommerce Product Table – you can make it easy for customers to place orders over the phone while making the order placement process seamless for salespeople.
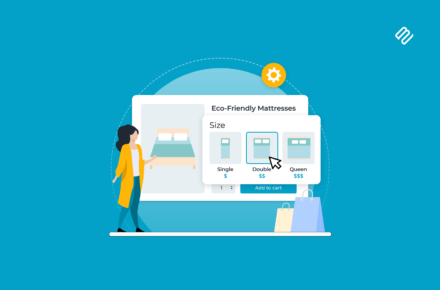
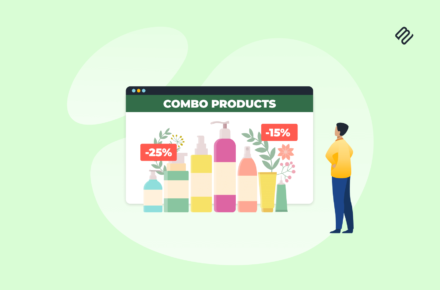

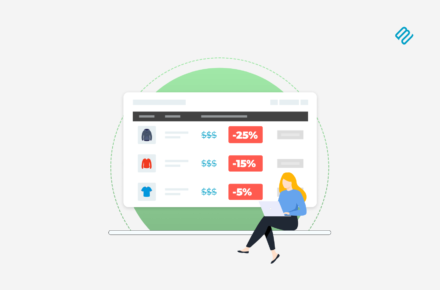
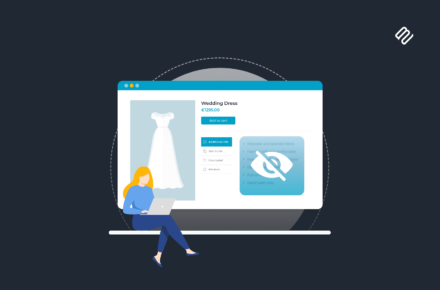
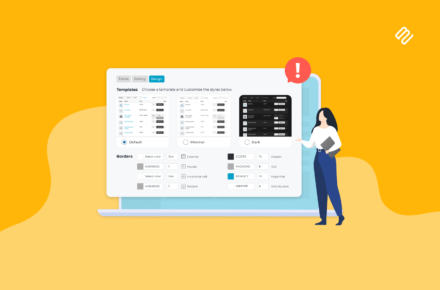
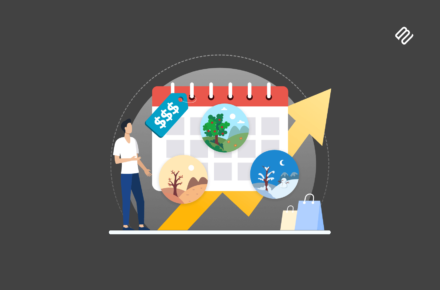
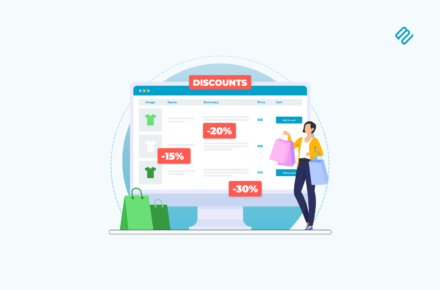
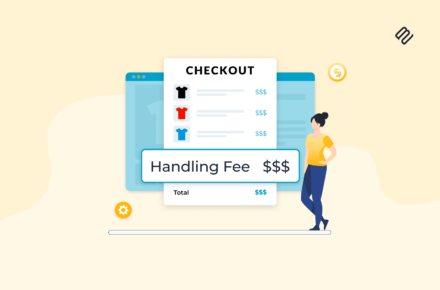
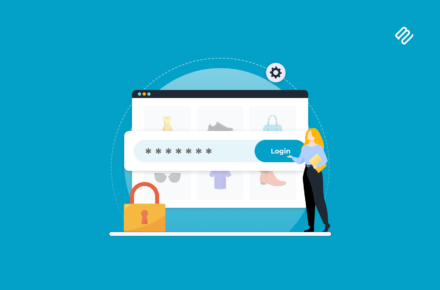
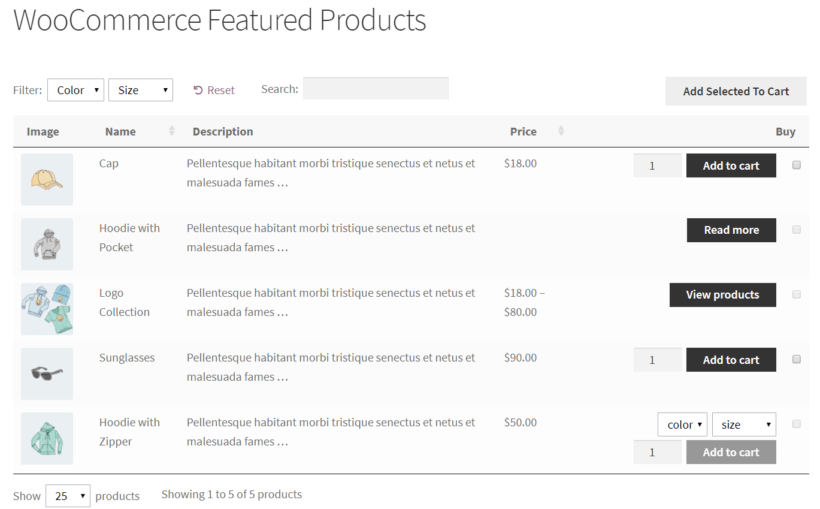
Katie KeithFounder & CEO