WooCommerce tickets: How to sell event tickets on your store (2026)


Selling tickets through a regular WooCommerce product works for a single one-off event, but it falls apart once you need capacity limits, check-in or recurring dates.
If you run a WooCommerce store and want to start selling tickets to an event, workshop or training course, there are two general ways to do it.
The first is to use WooCommerce's own product options. You add a product, then bolt on extra fields for date, ticket type and attendee details. It works for a single one-off event, but it can get complicated once you want to manage event timings, attendee data and more.
The second is to use a plugin that's specifically designed for events and integrates with WooCommerce, so you're not running two separate systems.
This guide covers option two: Using the EventKoi event tickets plugin.
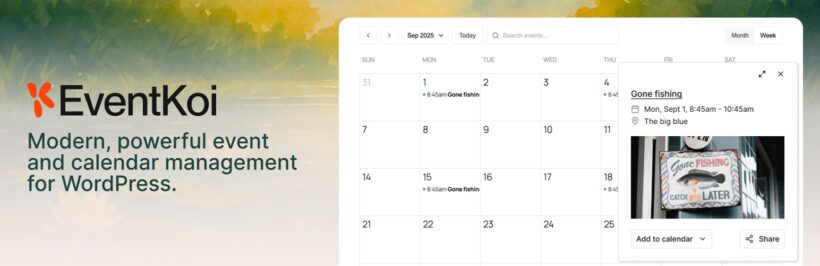
Why sell tickets through WooCommerce instead of a separate platform?
There are many ticketing platforms out there, like Eventbrite and Luma. However, if you're already running a WooCommerce store, there are several clear benefits to keeping your events on WooCommerce too:
- One checkoutTicket purchases go through the same cart and payment gateways you've already set up, instead of redirecting to a different platform.
- One order historyTicket orders show up in your normal WooCommerce order list, so support and fulfillment stay in one place.
- No marketplace feesYou're not handing a percentage of every ticket to a third-party platform.
- Full control over the pageThe event lives on your own site, styled the way you want, using your existing branding and design.
Why not just sell tickets as a regular WooCommerce product?
It's possible to create a WooCommerce product, call it a ticket and sell it that way. But you quickly run into trouble once you need event-specific features. For example, a regular product has no idea it's tied to a date, has no concept of a shared capacity across ticket types, and won't check anyone in at the door.
A dedicated events plugin gives you the event features WooCommerce products don't include:
- Capacity that spans ticket typesCap total attendance for the event, not just stock for one product, even when you're selling "Early bird" and "General admission" as separate tickets.
- One attendee list per eventInstead of digging through order line items, you get a single view of who's coming, whether they've checked in, and which ticket they bought.
- Built-in check-inEvery ticket has a QR code and check-in code by email, with no separate check-in app or spreadsheet needed.
- Per-ticket sales windows"Early bird" can close on its own schedule while "General admission" stays open, without touching WooCommerce's stock settings.
- An events list or calendarA WooCommerce product page is just a page. It won't create a calendar view or an upcoming-events list elsewhere on your site. A dedicated events plugin can manage both.
- Recurring eventsA weekly class or monthly meetup needs to repeat on a schedule. A regular product can't do that on its own; you'd be duplicating a product for every occurrence manually.
- Multi-day events with different timesA conference running three days with a different schedule each day doesn't map to a single product with one price and one stock count. An event with real date structure can hold that.
Why EventKoi?
EventKoi hooks directly into WooCommerce's own cart and checkout, rather than building a separate ordering system. This means you get all the features of a plugin that's built for events and ticketing without having to set up and manage a brand new payments system.
EventKoi comes with over 40 meta keys, shortcodes and dynamic tags. You can use them to customize your event data and design your event pages however you want. It has a small team that is proactively improving and maintaining the plugin.
With EventKoi, you can even connect to WooCommerce using their EventKoi Lite version, which is available for free on the WordPress.org repository. The Lite version does not have recurring events, multiple calendars or custom fields. So if you're looking for a more complex setup, you'll have to upgrade to EventKoi Pro.
Setting up EventKoi for ticket sales
EventKoi lets you sell paid or free tickets directly from your event pages. You can create multiple ticket types per event, cap capacity, control when sales open and close, and manage every order from your WordPress dashboard.
Step 1: Pick Lite or Pro, based on checkout
EventKoi Lite is free and sells tickets through WooCommerce checkout, using whichever payment gateways you've already set up there (Stripe, PayPal, bank transfer and so on). If your store already runs on WooCommerce and that's the checkout you want tickets to go through, Lite covers it at no cost.
EventKoi Pro adds a second checkout option: A built-in Stripe integration that lets buyers pay by card, Apple Pay or Google Pay directly on your site, without touching WooCommerce checkout at all. Choose Pro specifically when you want advanced features or if you want to use EventKoi's checkout instead of WooCommerce.
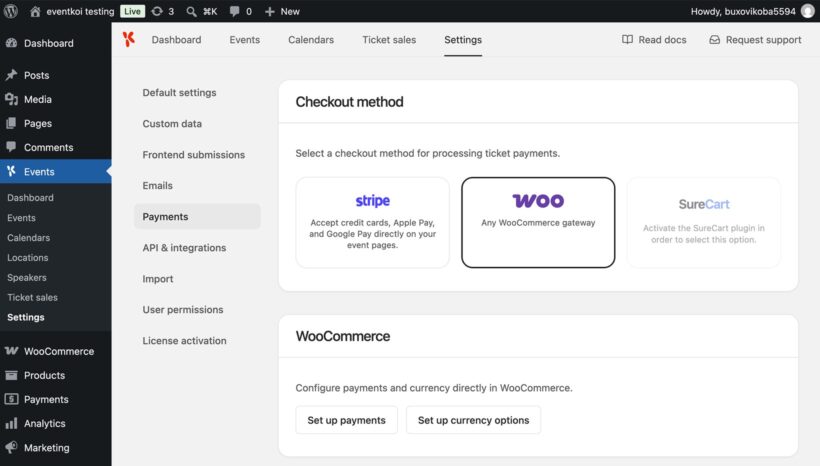
To set the checkout method, go to Events → Settings → Payments.
On Pro, choose 'Stripe' or 'WooCommerce'; on Lite, WooCommerce is the only option. You can switch methods later without affecting existing orders.
Step 2: Create your event and add ticket types
Go to Events → Add event and fill in the event details (name, date and time, and so on). Scroll to 'Attendance' and select 'Tickets'. A new Tickets tab will appear where you can create one or more ticket types, for example "Early bird" and "General admission."
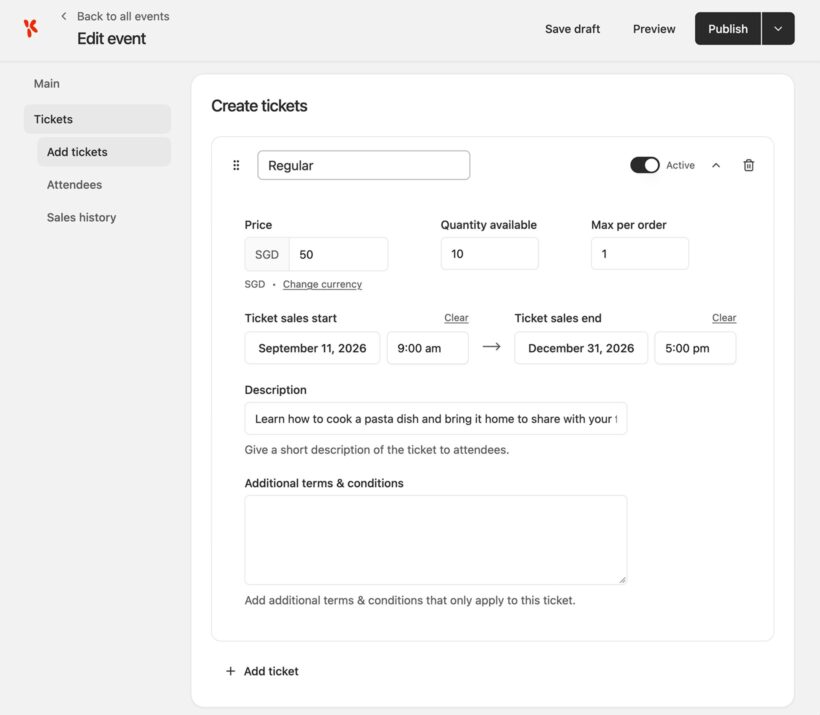
For each ticket you can set:
- Name, price and quantity
- Maximum tickets per order
- Sales start and end dates (if left blank, sales open when the event starts and close when it ends)
- A description and terms & conditions, either per ticket or for all tickets on the event
- Whether to show remaining ticket count on the event page
Free tickets work the same way. The order processes at $0 and the buyer still receives a confirmation email with a check-in code. The buyer does not enter payment details.
Step 3: What attendees see
On the event page, attendees see a ticket price range and a 'Get tickets' button. Clicking it opens the available ticket types, where they choose quantity and go to checkout.
After entering billing details, they're taken to Stripe or WooCommerce to pay, depending on which method you've configured. Once payment goes through, they land back on the event page with a confirmation, and their tickets arrive by email with a QR code for check-in.

Step 4: Manage orders and check people in
Every event has an 'Attendees' tab showing who's registered, their check-in status, order ID and ticket quantity. A 'Sales history' tab gives you the full order list for that event, and Events → Ticket sales shows sales across every event at once.
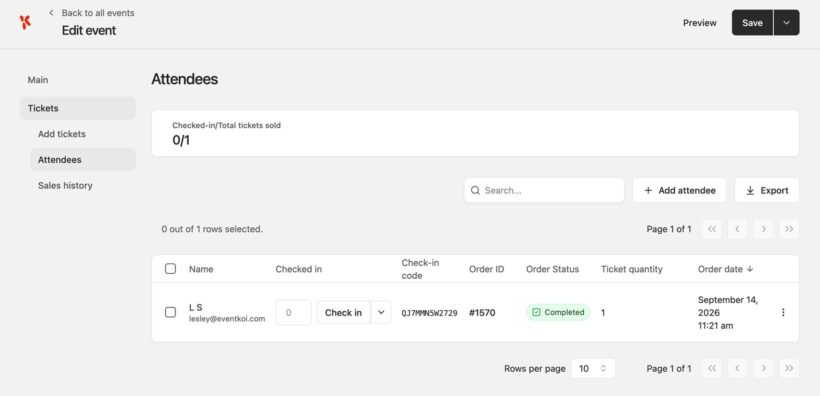
On the day, attendees check in by showing their QR code or sharing their check-in code, and you can check in part of an order if not everyone in a group has arrived yet.
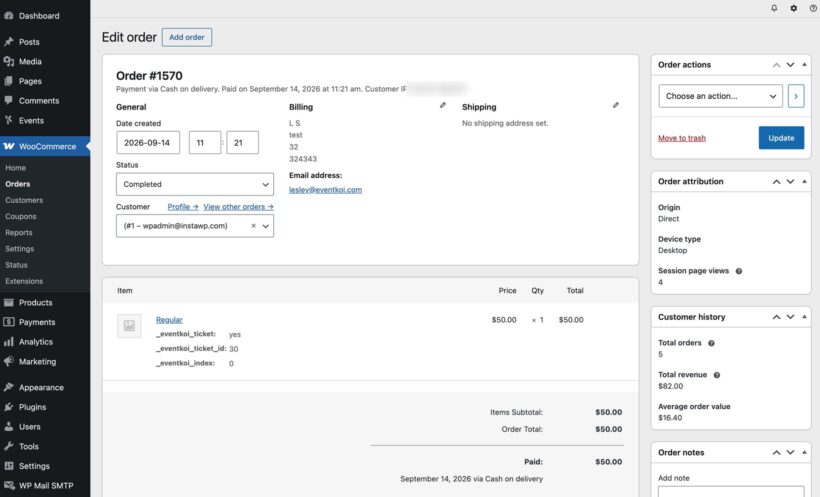
If you're using WooCommerce as the checkout method, clicking through to an order takes you straight to that order inside WooCommerce, the same order screen you already use for every other sale. Refunds, order notes and status changes all happen there, so there's no separate refund flow to learn. (With Stripe checkout, order management stays inside EventKoi instead.)
Summary
If you're selling tickets through WooCommerce, EventKoi covers the features you need. You get capacity that spans ticket types, a real attendee list and built-in QR check-in.
You can show an events list or a calendar that visitors can browse. EventKoi also supports recurring and multi-day events. You still keep the checkout, payment gateways and order history WooCommerce already gives you.
Try the ticket features yourself in the live sandboxed demo, no account required. If your events run on a repeating schedule, this guide to selling tickets for recurring events on WordPress covers that setup in more detail.