Ecommerce is big business. It's also incredibly competitive, which means you need to take advantage of proven techniques to give yourself the best chance for success and make money by selling online. Rarely is this more true than when you’re trying to sell clothes online, given the saturation of the online fashion market.

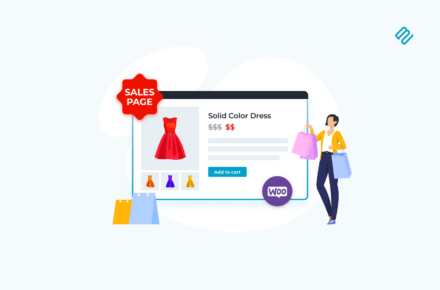
To encourage customers to choose you over the competition, you’ll want to make buying clothes on your website a convenient and streamlined experience. This means finding a way to display your clothing products and options effectively, such as by using a customized product table.

WooCommerce Product Table Demo

Or perhaps you need a quick and easy way for customers to choose clothes sizes, colors and other options?

WooCommerce Bulk Variations single product page

Best plugins for selling clothes online

In this guide, we’ll introduce you to the best plugins for selling clothes online with WooCommerce. This includes:

  • WooCommerce Product Table - List clothing products in a quick order form layout which is perfect for one-page shopping. (Learn more.)
  • WooCommerce Product Filters - Add advanced filters so that customers can quickly find closed based on size, color, price, and more. (Learn more.)
  • Bulk Variations - Display all of the options for an item of clothing in a quick buying grid, so that customers can purchase multiple sizes and colors with ease. (Learn more.)
  • Quick View Pro - Let customers preview products and add to the cart without leaving the shop page. (Learn more.)
  • WooCommerce Fast Cart - And finally, provide the fastest possible way for customers to review and complete their order. (Learn more.)
  • Product Options - Add extra options in order to sell customizable products. For example, add file upload fields for a logo, or text message fields for a custom message. (Learn more.)

All of these amazing plugins make it easier for customers to browse and buy clothing such as t-shirts, shoes or accessories. They are all either developed by the same company or guaranteed to be compatible. As a result, you can mix and match them to create a robust clothing store that meets your exact business needs. You can either buy them individually or save money with an All Access Pass.

Let’s get started!

Plugin 1: Why your clothing store can benefit from a customized product table

Visual product table

Some online consignment shops (like Etsy, thredUP or Poshmark) sell products that require a lot of detailed information. For instance, an online electronics shop will usually merit dedicated pages to explain the ins and outs of each item.

However, a clothing store is a little different as is the case with thredUP, Tradesy, and Poshmark. If you're running this kind of ecommerce site, chances are your products are pretty simple to grasp. Most customers won’t need a lot of information in order to know whether they want to buy a particular shirt, for example. They’ll just want to know what it looks like, and see the options when it comes to colors and sizes.

Therefore, making visitors navigate to a bunch of individual product pages – as in a traditional ecommerce store layout – can be counterproductive when you’re trying to sell clothes online. Some customers might like this extra information, but most want a quick buying process. Instead, you can show off everything you have to offer in a concise product table.

Keep in mind that you don't need to compete with high-end brands that sell luxury items like Louis Vuitton, Chanel, Gucci, or Prada right off the bat.

This lets customers view all the clothing options in one place. They can compare products easily, and add everything they want to their carts from a single page. Once they're done, they can proceed to checkout and make the payment through the payment options you offer (such as PayPal). It's just like buying in a physical clothing store! What’s more, it's simple to set up if you have the right plugin.

Introducing WooCommerce Product Table

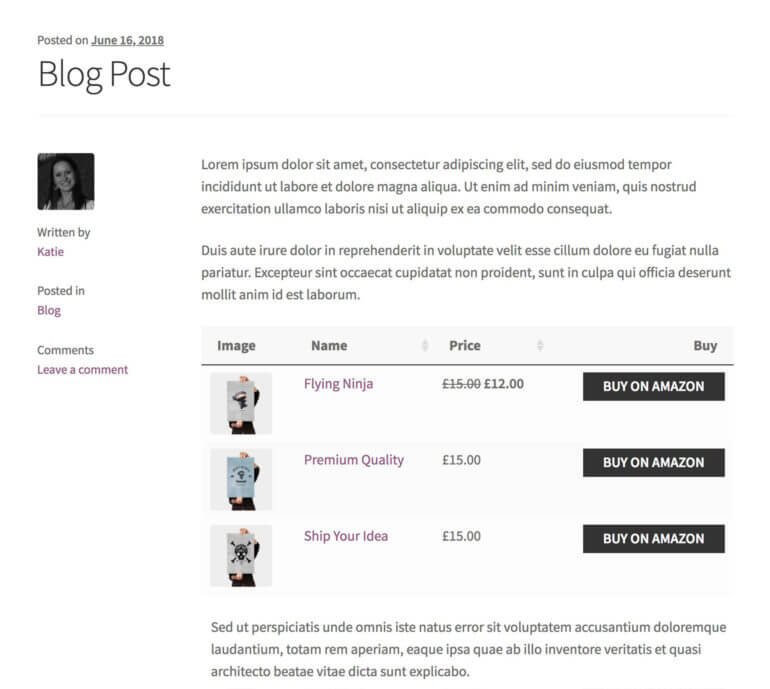
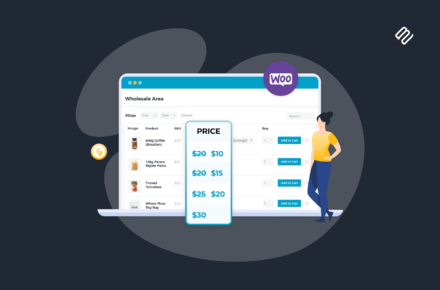
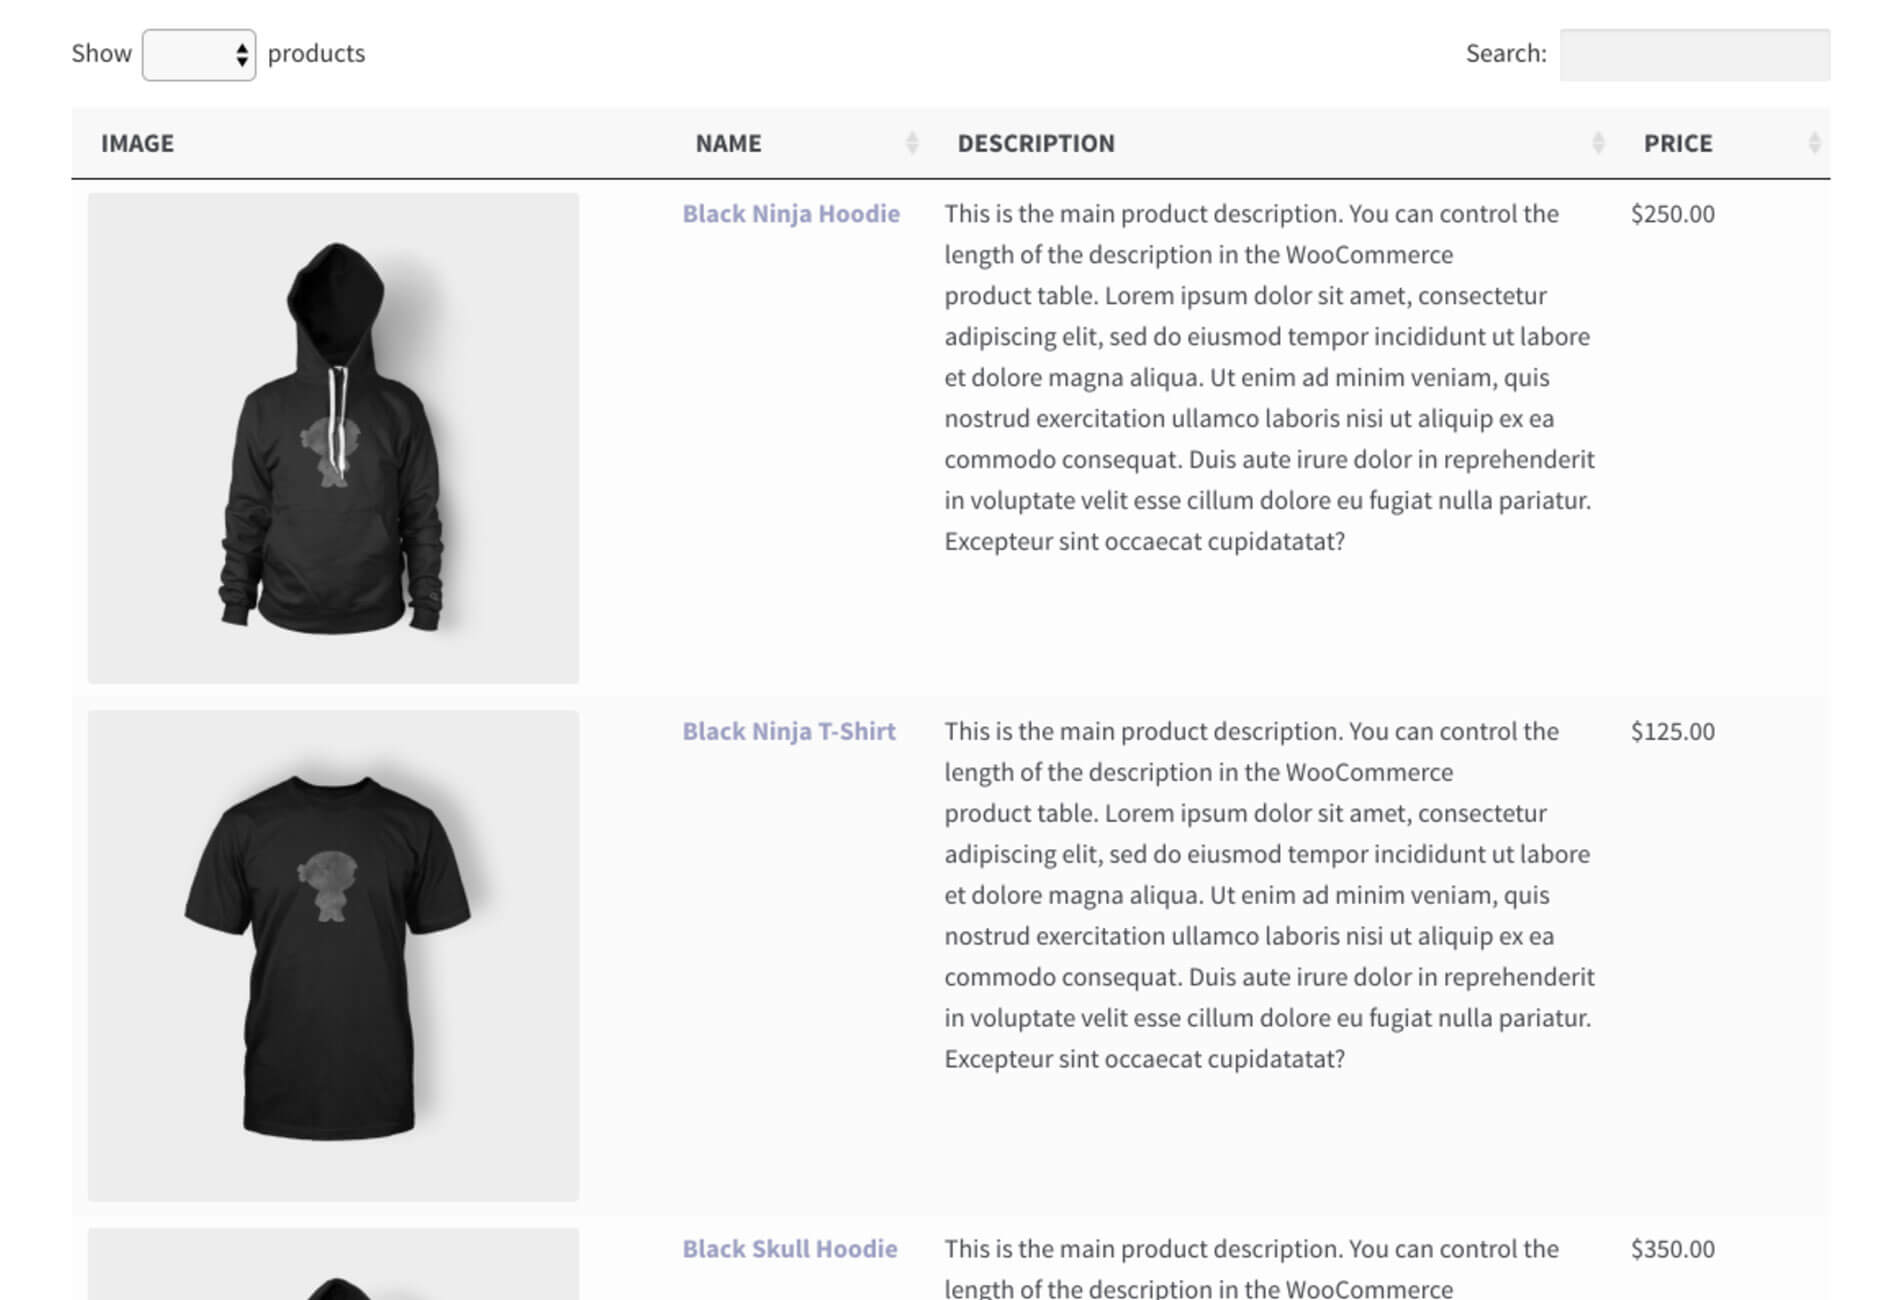
While WordPress and WooCommerce are the perfect foundation to sell clothing online, they're missing some essential features. For example, they don't provide a way to show off all your items on a single organized page, similar to eBay. Luckily, you can easily listing clothing products with the WooCommerce Product Table plugin:

This plugin helps you create a customized product table to display any or all of your clothing products. Among its many features, this plugin:

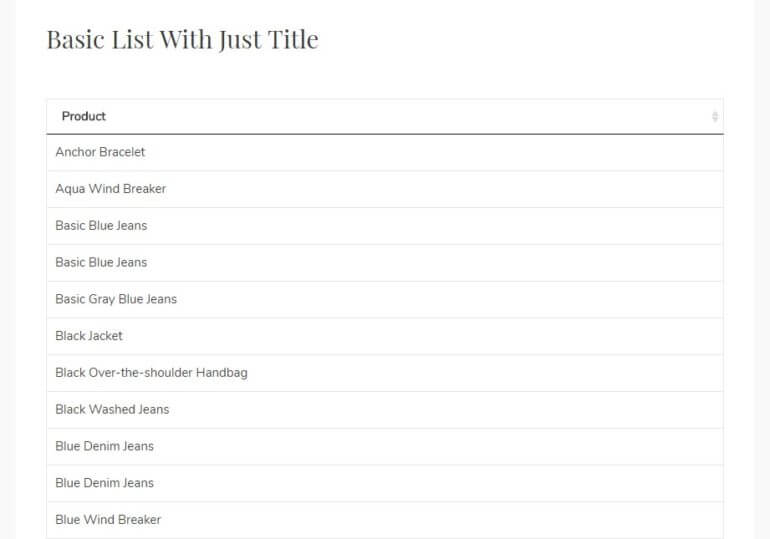
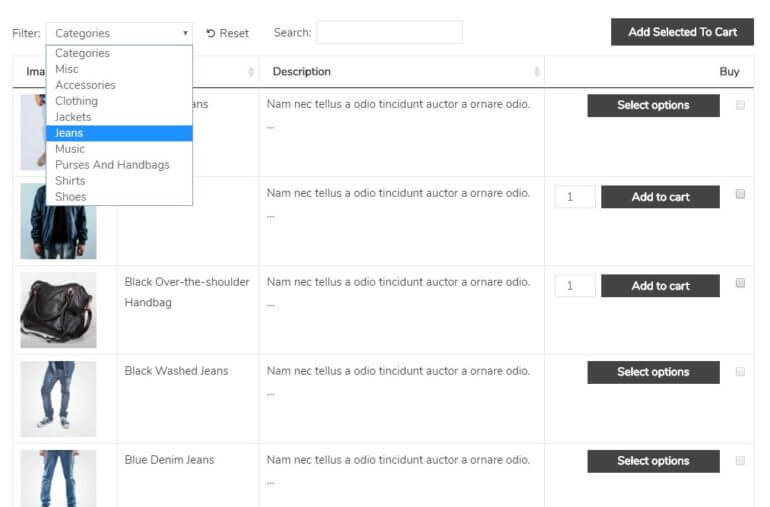
  • Lets you organize all your clothing, accessories, and more into one table similar to eBay.
  • Makes it easy for customers to compare items.
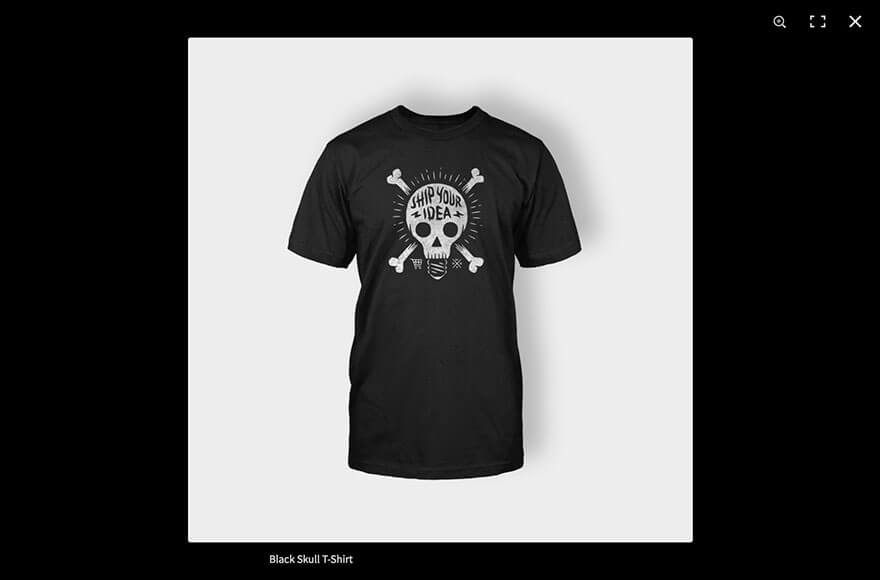
  • Customers can click on a clothing image to view a zoomed in version in a lightbox.
  • Includes sorting and filtering capabilities, making your product table dynamic.
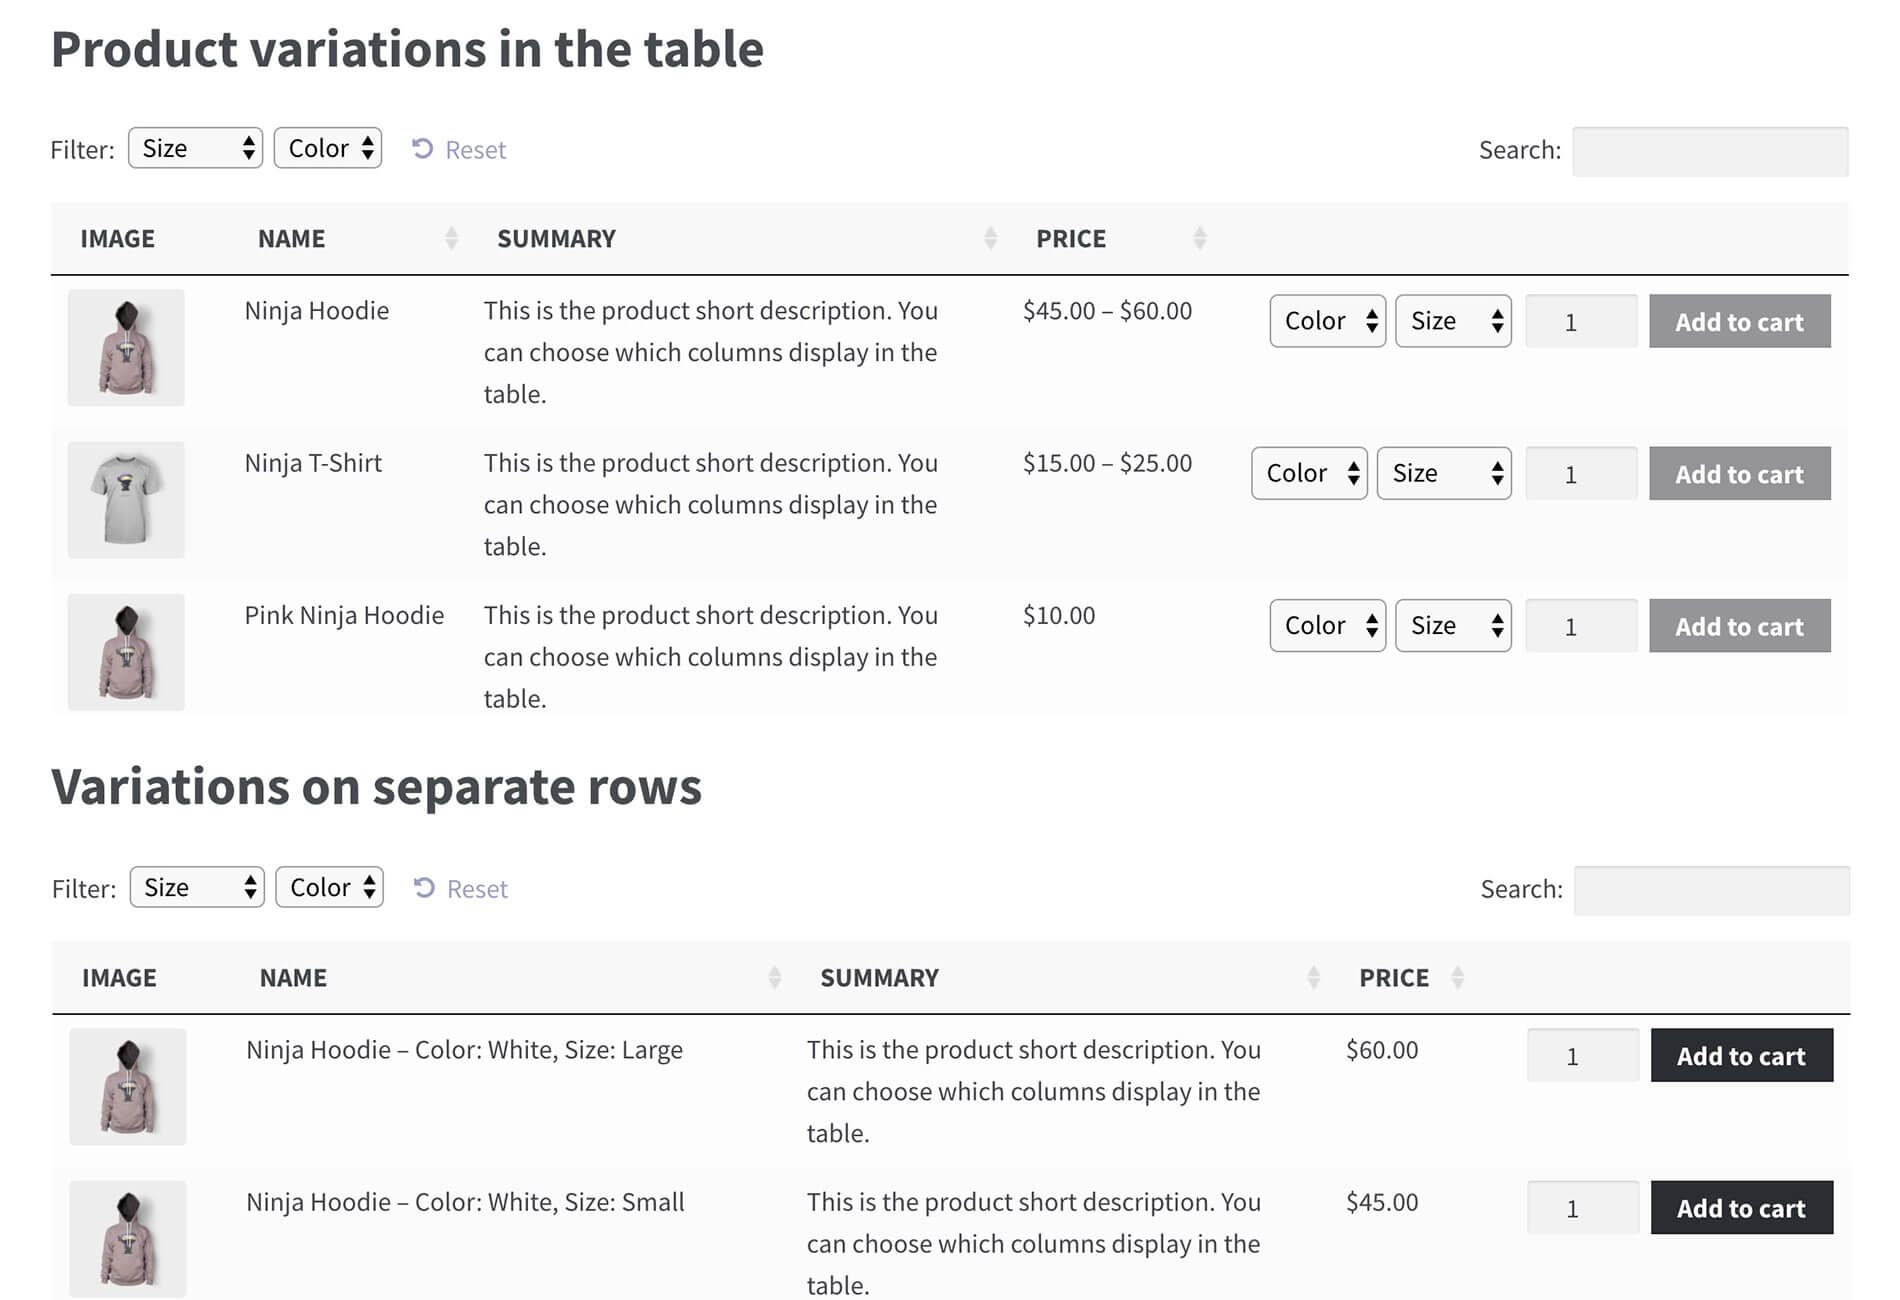
  • Enables you to display product variations (such as colors and sizes) alongside each item.

Best of all, WooCommerce Product Table is simple to use and only takes a few minutes to set up.

Try out the WooCommerce Product Table clothing store demo for yourself!

How to sell clothes online with WooCommerce Product Table

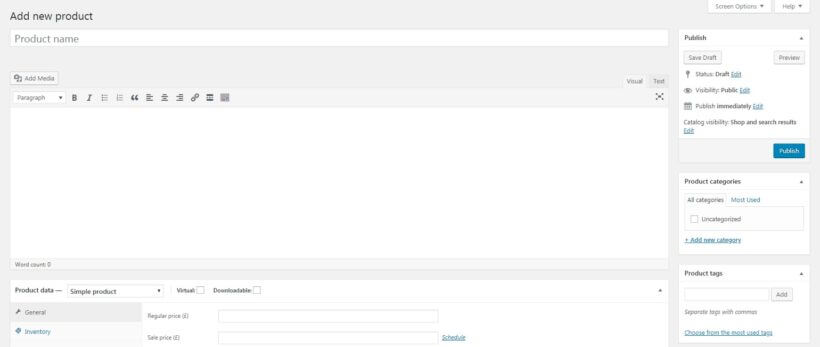
In the following tutorial, we’re going to assume that you already have a WooCommerce store set up to sell clothes online. If you’re creating a brand-new ecommerce site, therefore, you'll want to do three things before proceeding:

  1. Set up a basic WordPress website.
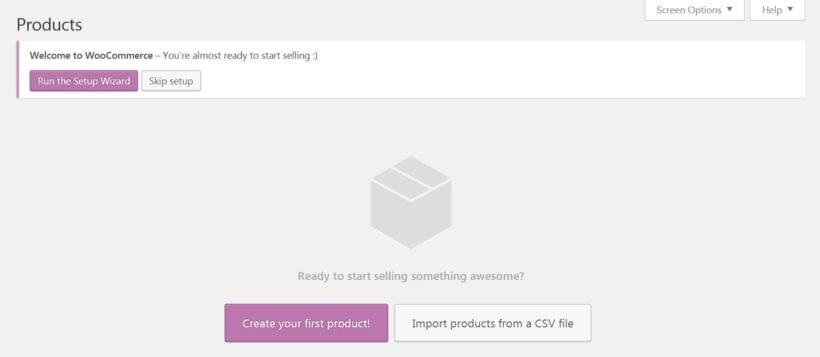
  2. Install WooCommerce, and go through its setup wizard to configure your store.
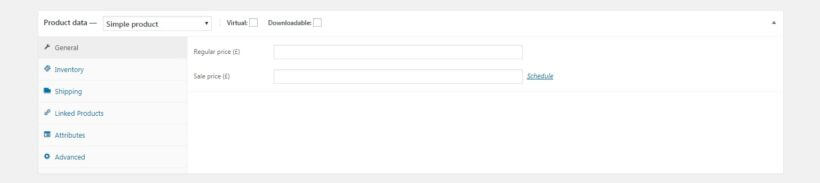
  3. Add all your clothing and other items as individual WooCommerce products.

Once those tasks are out of the way, you’re ready to get started.

Install and activate WooCommerce Product Table

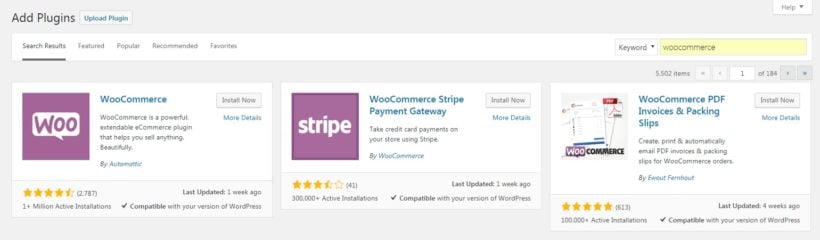
First up, you’ll want to get the WooCommerce Product Table plugin running on your clothing website. To do that, you’ll need to purchase the plugin.

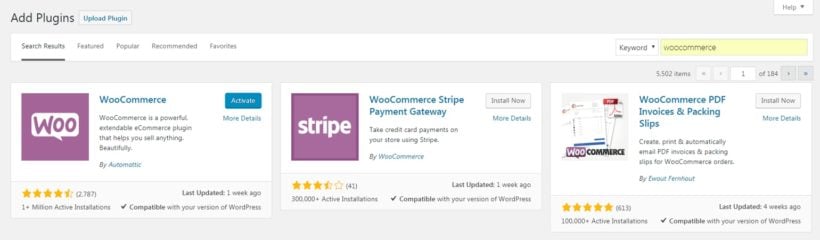
After the plugin is installed, activate it. Next, the table wizard will open. It also walks you through the main settings for creating your table listing some or all of clothes products. This will get WooCommerce Product Table fully up and running, ready to start selling clothes online.

Popular settings for selling clothes online

Here are some tips on which settings to choose in the setup wizard:

Display - Where to display product tables
Create page of table builder

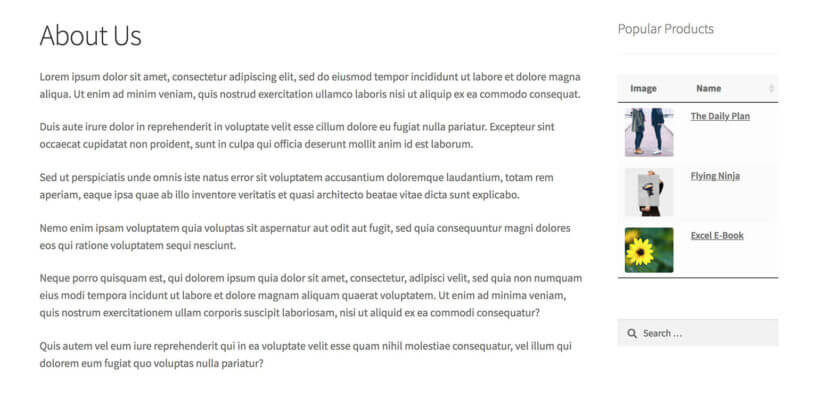
Enable the table on your shop page templates if you want your whole clothing store to use the table layout. Alternatively, you can add the table listing clothes products to specific pages only. If you do this, then you can then choose exactly which products/categories/etc. to display.

Table content
WPT table builder columns

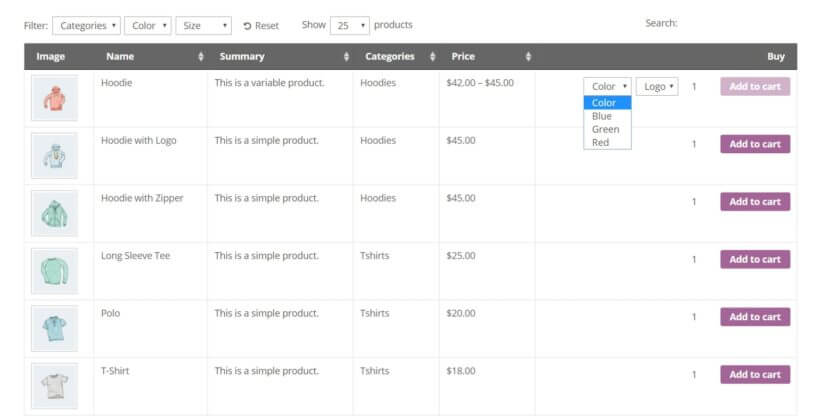
Next, use the Columns page of the table builder to specify what information will appear in the product tables.

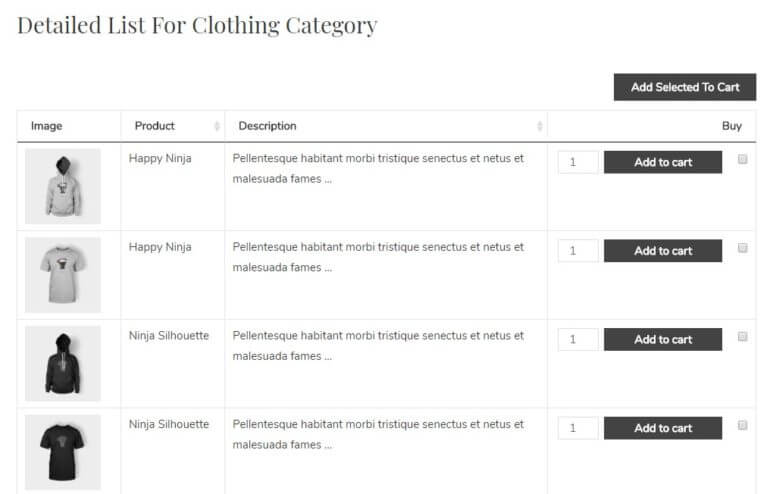
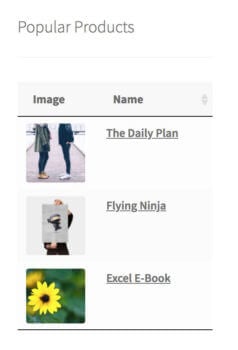
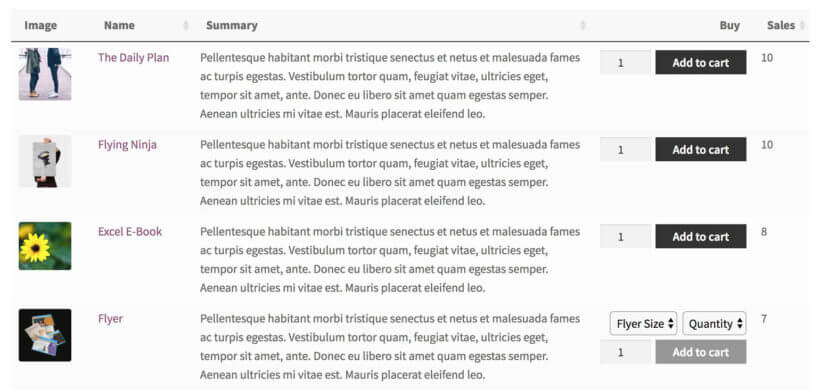
You’ll probably want to include images, as well as a few details about each item such as its category, description, and sale price. And don't forget to include the product name and a 'Buy' column!

Adding to the cart
Add to cart page of WooCommerce product table builder

The add to cart method controls what appears in the 'Buy' column of the table. If your customers are likely to choose one clothing item at a time then use the 'Button' method. Alternatively, select 'Checkbox' (or 'Both') to allow customers to use multi-select to add multiple clothing products at once.

Right below that, you probably want to check the 'Quantities' box. This will enable customers to purchase more than one of each item directly from the product table page. That's a useful feature for a clothing store to have, as it's quicker than visiting a separate page for each product.

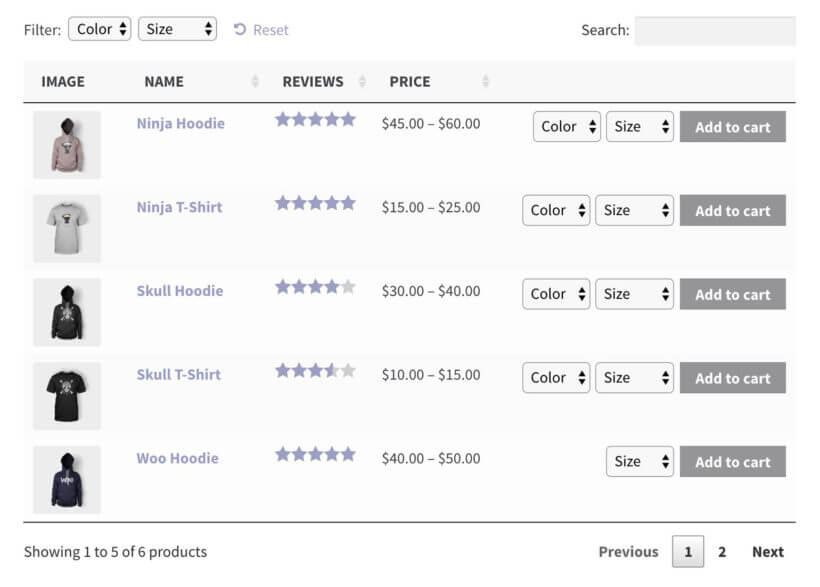
Most importantly, you’ll want to choose how to display product variations. This setting displays your items’ variations right within the table. In other words, customers will be able to see and select all clothing options, such as colors and sizes. You can either display these variations as dropdown menus, or on their own rows.

Product filters
WooCommerce Product Table builder filter dropdowns

Nearly all stores that use WooCommerce to sell clothes online need some sort of filtering. This allows customers to select details about what they're looking for (e.g. their size or preferred colors) and quickly narrow down their selections.

WooCommerce Product Table comes with some basic filter dropdowns which you can enable above the table. You can enable them on the next page of the setup wizard. Alternatively, leave this option empty if you want to add more advanced features. We'll look at how to do that a bit later.

Preview your WooCommerce clothing store

If you enabled the product table on your shop templates, then you can view these straight away. Alternatively, add a 'Product Table' block to another page, or copy the shortcode from the final page of the table builder and add it that way.

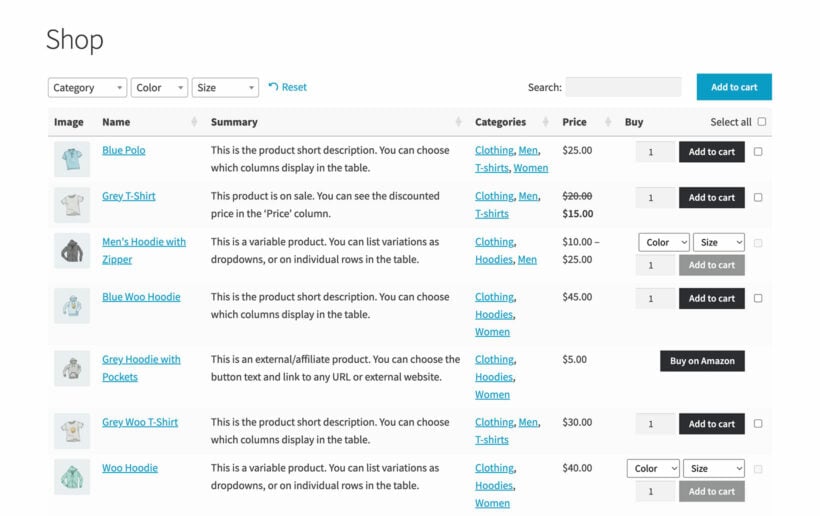
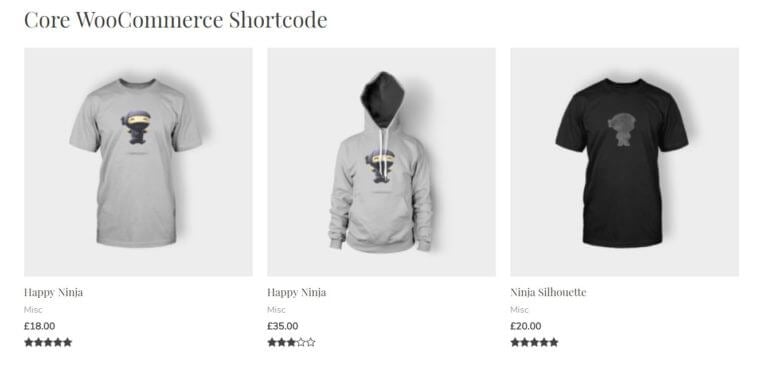
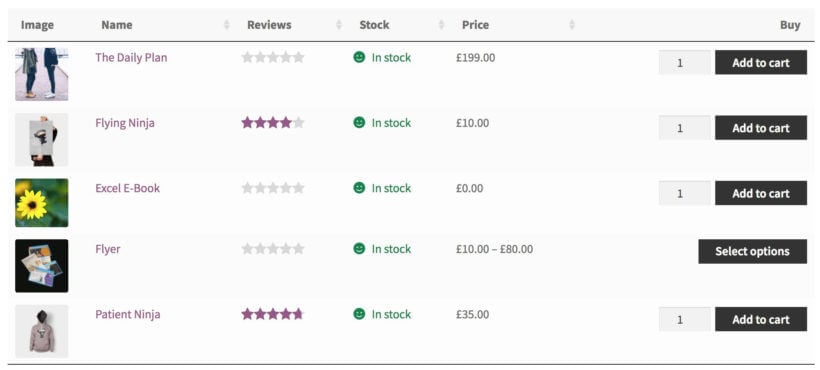
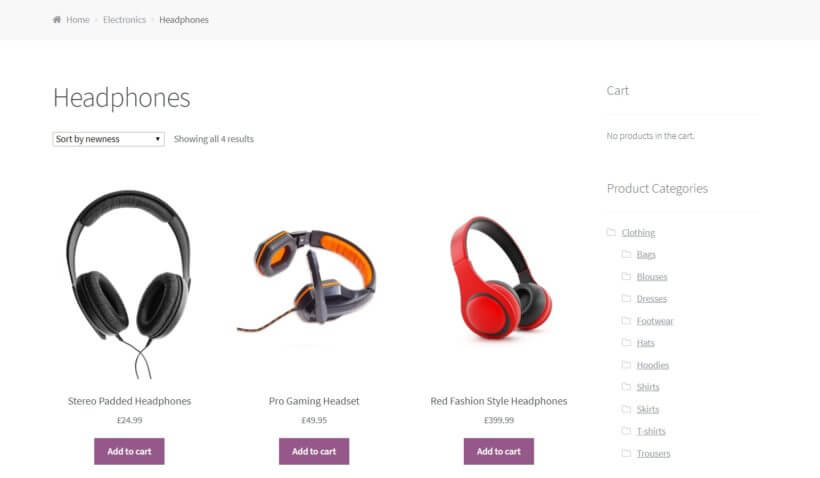
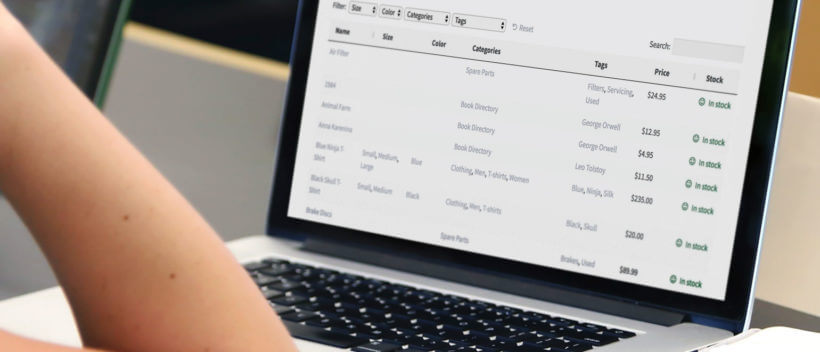
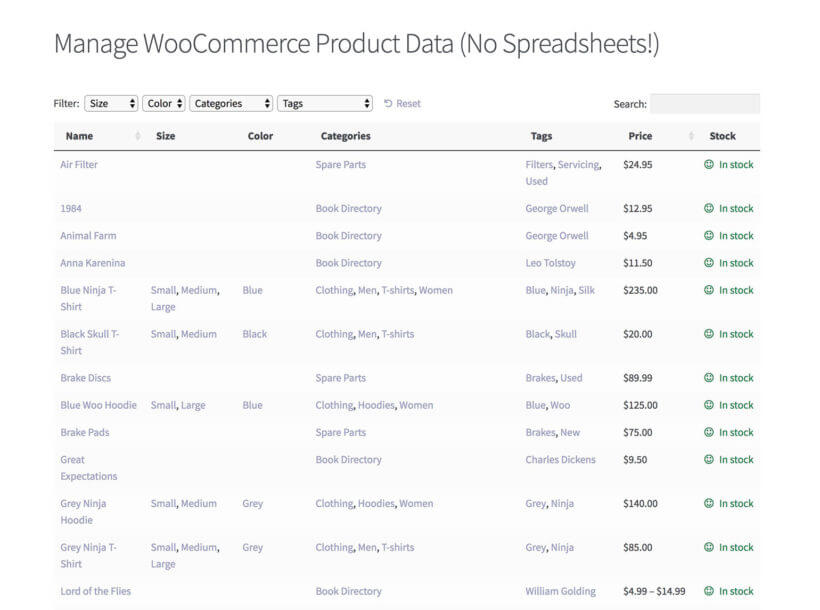
Now, the basics are in place to sell clothes online in WooCommerce. You can see what it looks like so far by viewing the front end. Depending on your settings, it might look something like this: 

An example of a customized product table to sell clothes online.

You can continue to make changes – anything you alter in the settings will be instantly applied to your product tables. When you’re happy with the way your table looks and functions, you're done!

Your ecommerce store is now ready to publish. However, you might want to add some extra features to truly supercharge your WooCommerce clothes website. We'll look at these next.

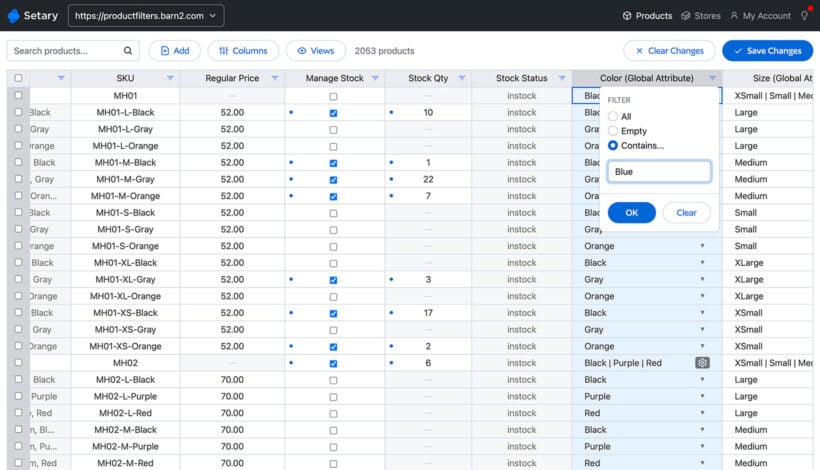
Plugin 2: Use advanced product filters to help customers find specific clothes more easily

WooCommerce Product Filters Table Integration

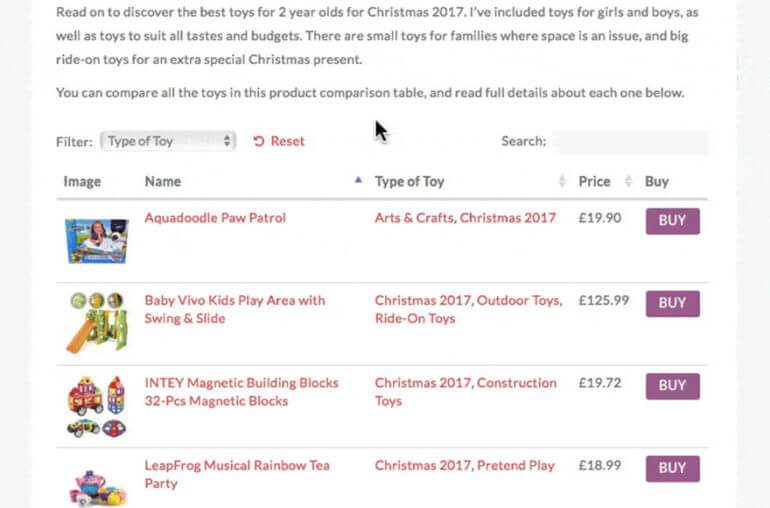
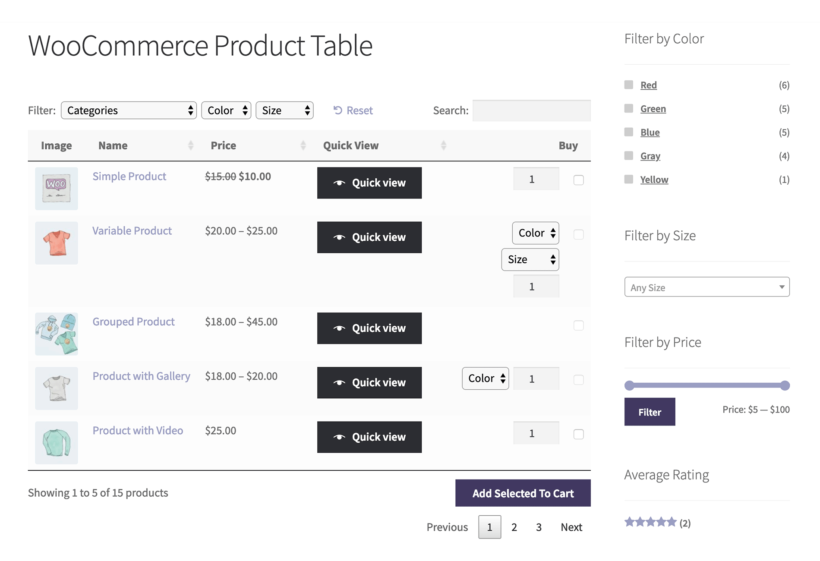
In step 1, we learned how to use the basic filter dropdowns that come with WooCommerce Product Table. For more advanced filtering, you can use the WooCommerce Product Filters plugin instead.

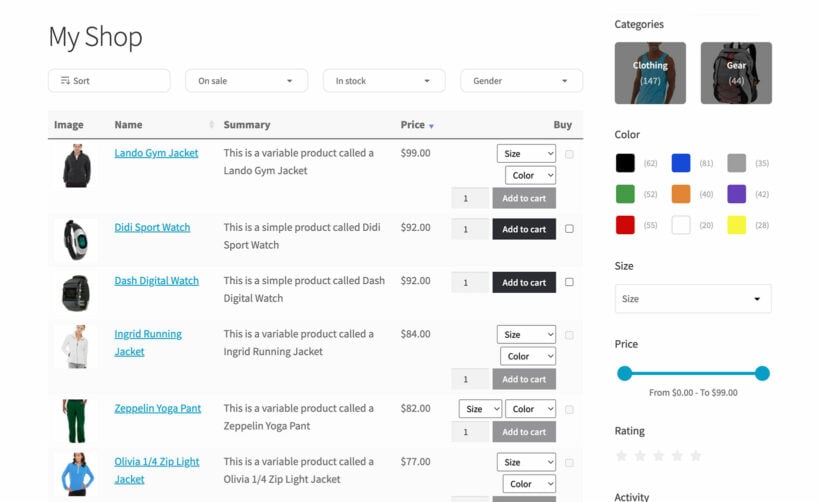
As you can see in the screenshot above, this is perfect for helping customers to find exactly what clothes they like. They can filter by category, color, size, price, rating, and any other data you have added for your clothing products. They look great and you can choose from various filter styles, such as images, color swatches, checkboxes, sliders, and more.

If you have a lot of clothing products then advanced WooCommerce filtering is a must for selling clothes online.

How to add filters to your WooCommerce clothes store

  1. Install the WooCommerce Product Filters plugin.
  2. Activate your license key in the setup wizard, and choose how you want your filters to behave. One of the options in the wizard allows you to display the default filter group at the top of all your shop pages. Select this if you want to show filters above the list of clothes in your store. Or if you want the filters to appear in the sidebar on the left or right of the list of clothes, then ignore this.
  3. Next, go to Products → Filters and add all the ways that you want your customers to be able to filter products.
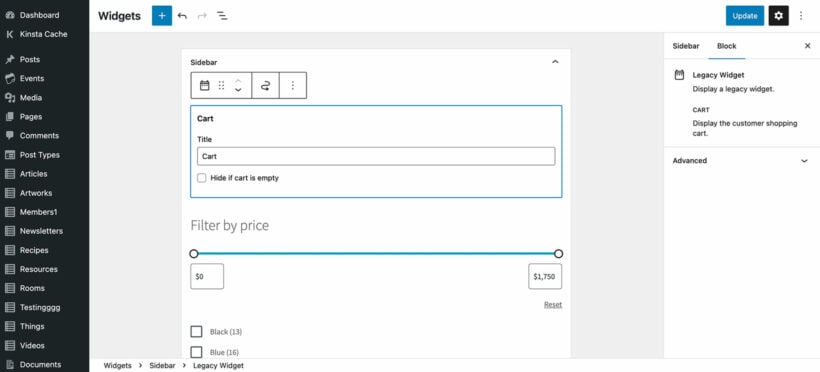
  4. If you selected to display the default filter group at the top of your clothes shop in Step 2, then ignore this step. Alternatively, go to Appearance → Widgets and use the Product Filters widget to display the filters in your store sidebar.

Plugin 3: Create a grid of color and size options

WooCommerce Bulk Variations plugin


Have you used product variations to sell different size and color options of the clothes in your store (or any other type of option)? If so, then WooCommerce will normally display each option as a dropdown for customers to choose from. Once they select a size and color (for example), the price appears and they can add it to the cart. They then repeat the process for each combination of options they want to order.

That's not ideal for selling clothes in WooCommerce because customers tend to order multiple sizes and colors to try. It's much better if customers can see all the options and prices at once.

You can do this by installing the WooCommerce Bulk Variations plugin. To help you decide if you need it, then see whether you answer 'Yes' to any of these questions:

  • Would you like a faster way to add and edit variations in bulk. For example, do you want to be able to instantly add an image of a blue t-shirt to all the blue variations on your t-shirt product? Or do you want to be able to quickly set the price of all the 'Large' size t-shirts at once?
  • Do you want people to be able to select clothing sizes and other options in bulk on the single product page?

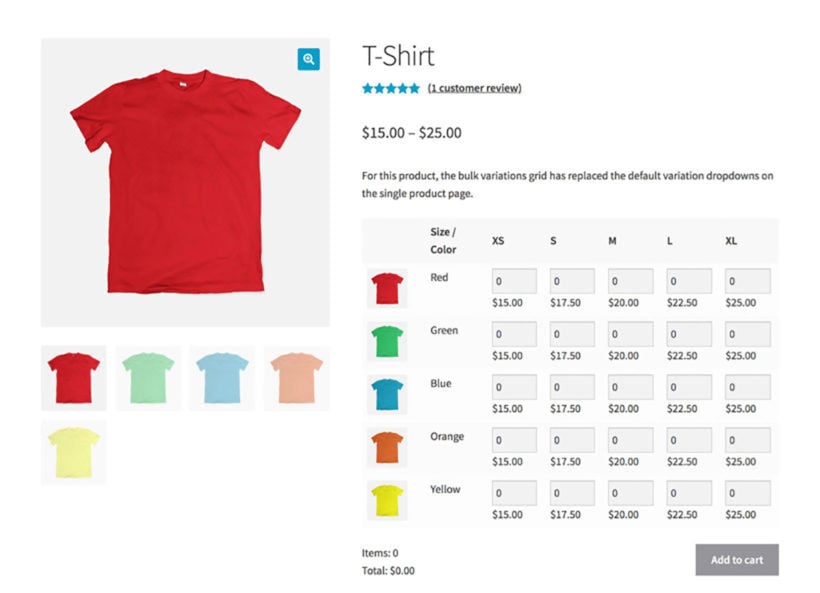
Instead of having to select their clothes size from a dropdown, WooCommerce Bulk Variations displays all the options in an eye-catching grid or matrix.

A WooCommerce bulk variations form is ideal for selling clothes in larger quantities. For example, you'll need this if you're selling clothes for parties or corporate events, branded workwear, or wholesale.

The variations are displayed in two dimensions within the matrix-style order form. The customer can enter the quantity that they require for each option, and quickly add them all to the cart.

Case study: Elite Teamsport

Elite Teamsport uses WooCommerce Bulk Variations to sell teamwear kits and training wear on their online store.

Elite Teamsport sell teamwear

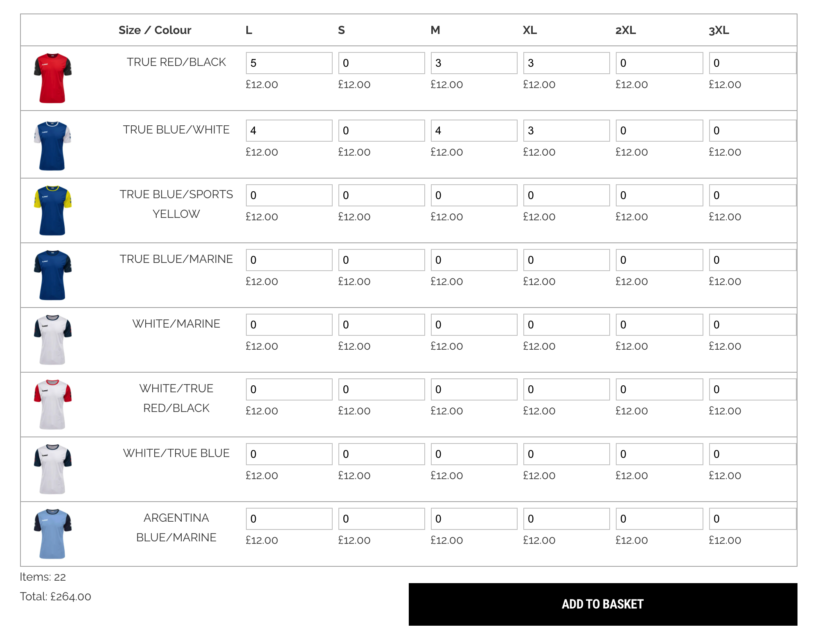
From the single product page, customers can choose to either buy one variation at a time or select multiple options and add them all to their cart at once. The WooCommerce Bulk Variations plugin displays all of the available variations in a grid layout with size and color attributes. This makes it easy to buy multiple variations of a product and reduces friction in the buying process.

Customers can use the quantity selectors to specify how many units of each product. They can then click the Add to Basket button to add them to their shopping cart in one go.

How to set up WooCommerce Bulk Variations

  1. Install WooCommerce Bulk Variations on your site.
  2. The setup wizard will open. Use this to set up the plugin, including enabling it on your variable products.
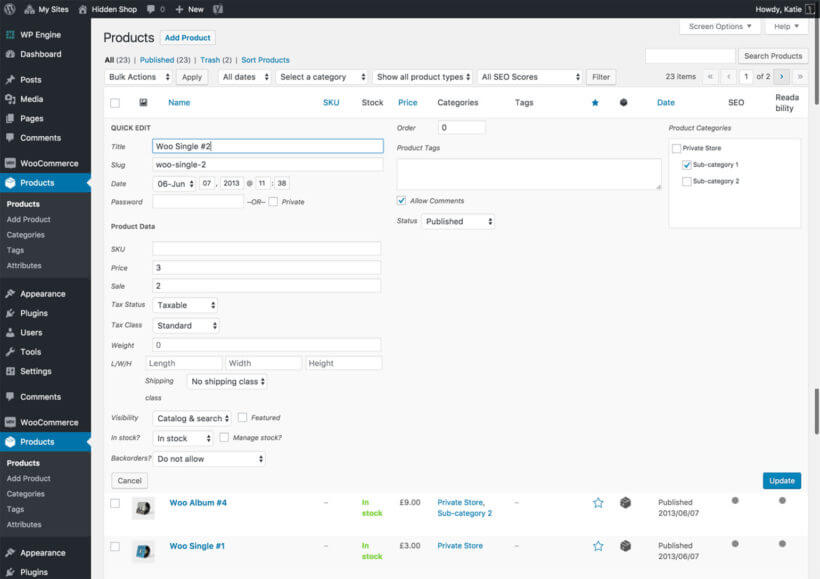
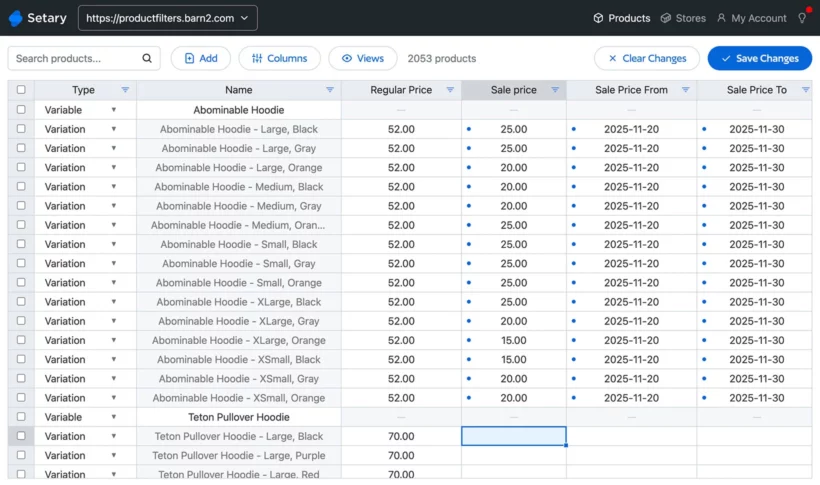
  3. To edit variations in bulk, go to the 'Variations' tab on the 'Edit Product' screen. Use the 'Filters' bar to select which variations you want to edit. Next, use the bulk actions dropdown above to apply changes in bulk.

Tip - WooCommerce Bulk Variations lets you edit and display variations. If you want one of these features but not both, that's fine - just activate the ones you need. 

Plugin 4: Add quick view to your clothes store

WooCommerce Quick View Demo

You can take your store to the next level by combining the table layout with product quick view.

Think about when you've bought high-quality clothing or handbags online from leading fashion websites like Etsy, thredUP, Tradesy, and Poshmark. You've probably noticed that nearly all of them offer some sort of quick view function. This is where you can see extra pictures and buy without having to visit a separate page for each garment. There's a reason for this - it's because quick view is a much more user-friendly way to sell clothes online.

That's why you need the WooCommerce Quick View Plugin. This handy tool adds - you guessed it - quick view links or buttons to your WooCommerce clothing store. Customers can use these to view more photos of each clothing item, zoom in on images, view the selling price, and buy directly from a quick view popup. You can also show the short description in the quick view, which is a useful place to add size charts, washing instructions and other useful information.

If you're selling customized clothing, then quick view is ideal for this too. Use it with the Product Options plugin to add text input boxes. This is where customers can upload a logo or enter a personalised message to be added to their custom clothing product.

You can use quick view with product tables. Alternatively, it also works as a standalone product that adds quick view buttons to the default WooCommerce store layouts.

If you're using the WooCommerce Bulk Variations plugin, then the variations matrix can appear in the quick view lightbox. That way, people can select variations and buy in bulk without having to access a separate page for each garment.

How to add quick view to your WooCommerce clothes store

As we saw earlier, the WooCommerce Quick View Pro plugin is a must if you're selling clothes with WooCommerce and WordPress. This how to set it up:

  1. Install and activate WooCommerce Quick View Pro.
  2. Go to the plugin settings page at WooCommerce → Settings  → Products → Quick view.
  3. Enter your license key and choose what you want to appear in the quick view lightbox. For selling clothes, you'll probably want the full product image gallery, image zoom, and possibly the short description and add to cart options.
  4. If you're using WooCommerce quick view with product tables, then you should also go back to WooCommerce → Settings  → Products → Product tables. Add quick_view to the list of product table columns, or tick the option further down the page to replace links to the single product page with quick view.

Plugin 5: Speed up ordering with an on-page cart and checkout

WooCommerce side cart plugin

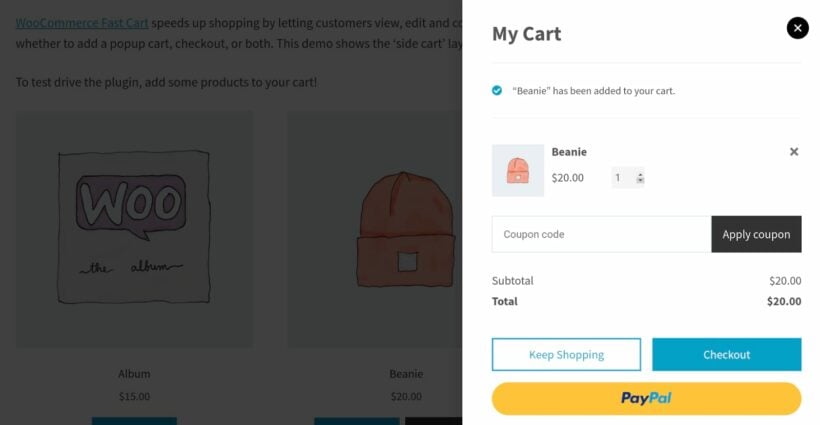
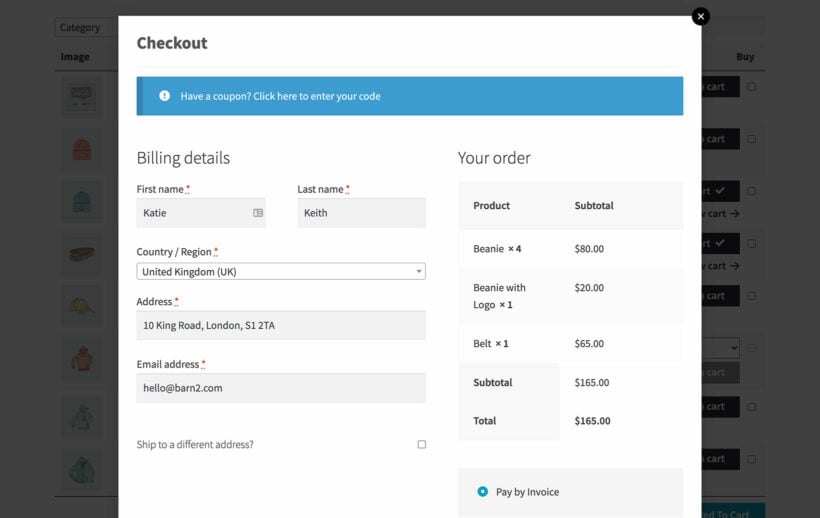
Plugins like Product Table, Product Filters and Quick View Pro make it quicker and easier for customers to find and add products. In contrast, the WooCommerce Fast Cart plugin speeds up the final stages of the ordering process.

Normally, WooCommerce makes customers visit separate cart and checkout pages to complete their order. That's quite time-consuming, and your WooCommerce clothes store will convert better if they can complete their order on the same page.

WooCommerce Fast Cart adds a popup cart and/or checkout to your store. As soon as customers add clothes to their cart, the popup cart either launches automatically or a floating cart icon appears. They can use this to review their selections, make changes, add related products, and even pay and check out - without ever leaving the page.

WooCommerce one page checkout popup

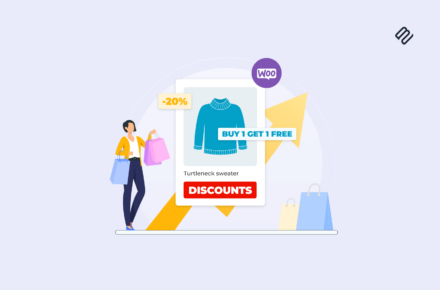
Plugin 6: Sell customizable clothes with product add-on options

Custom T Shirt Message WooCommerce
Customizable T-Shirts website created with WooCommerce Product Table and Product Options

The above three steps are sufficient for creating a fully-featured and compelling product table. However, there’s one more tool you may want to consider adding to your site: Product Options.

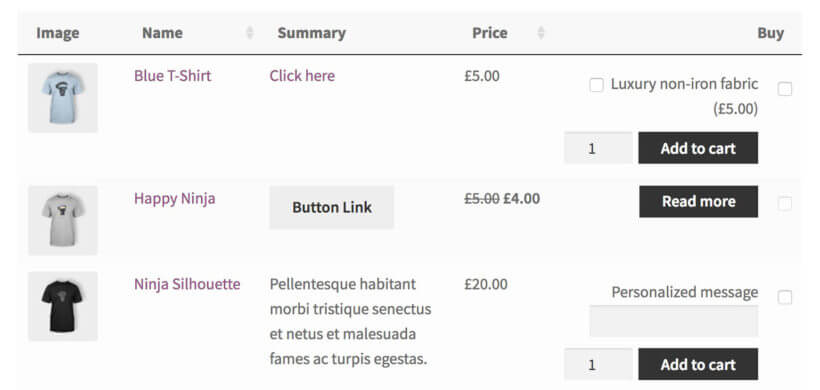
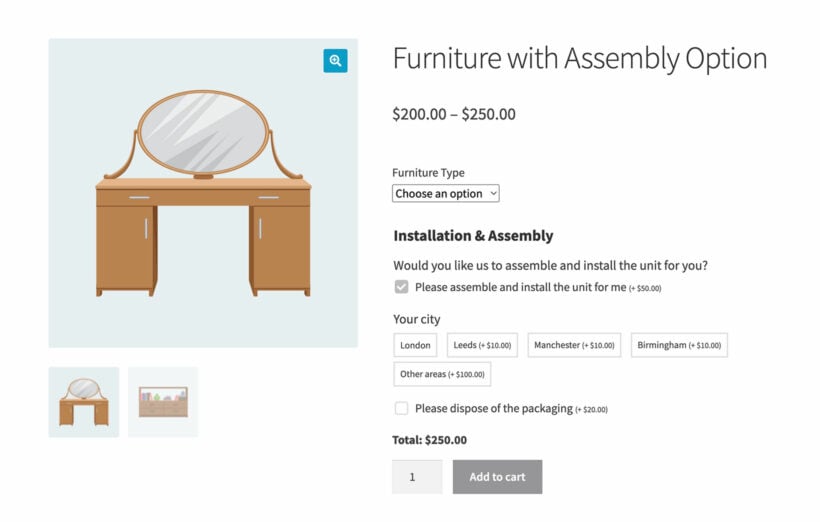
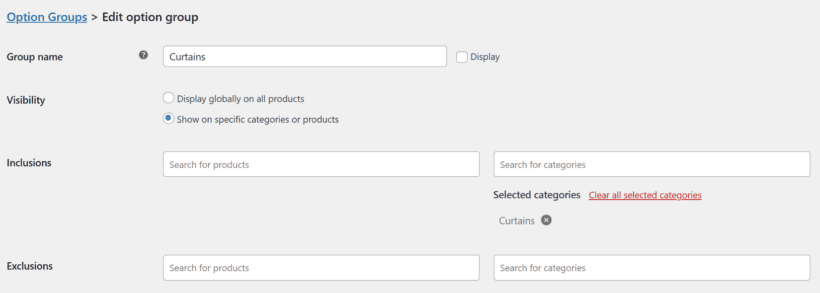
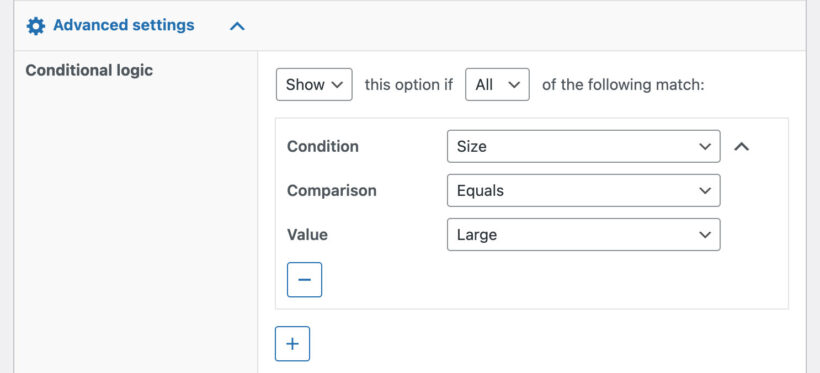
This add-on lets customers further personalize their purchases. You can enable them to add on items to their orders, via input boxes, drop-down menus, and checkboxes. If you offer personalized clothing and accessories, this extension will also make it easy for customers to request custom messaging.

For example, if you want to sell personalized custom t-shirts online then Product Add-Ons is a must. You can use it to add check boxes for optional extras, and a text entry box to add a personalized message. It's even possible to include a File Upload field (e.g. to upload a custom logo or design), although customers will need to click through to the single product page to use this.

WooCommerce custom product designer t-shirt plugin
Selling a customizable t-shirt with the WooCommerce Product Options plugin

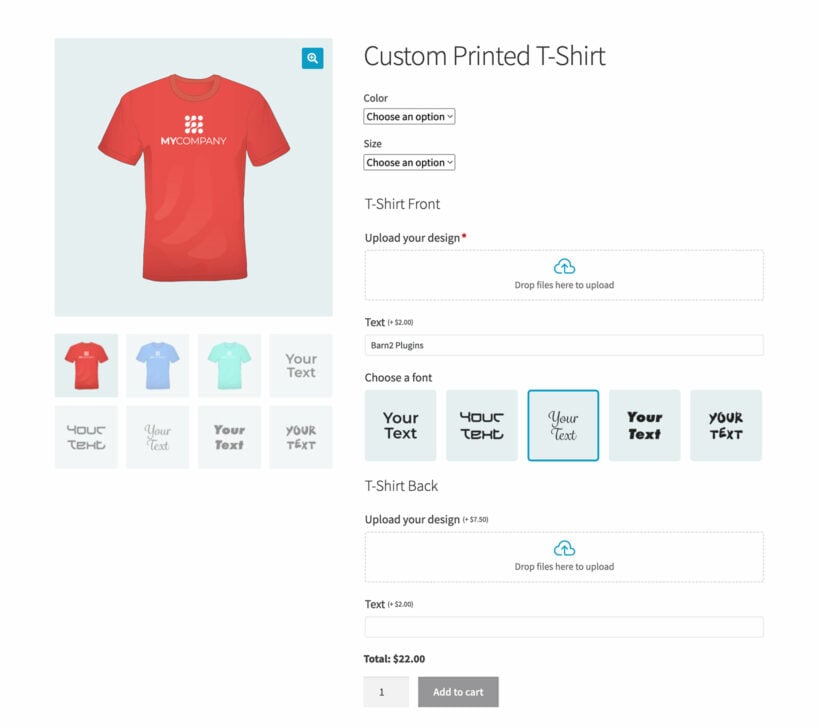
As you can see, Product Add-Ons is a valuable addition that helps you sell clothes online more effectively. The extra product options appear on the single product page and also in the 'Buy' column of the product table.

Where to get the plugins

If you’re looking to sell clothes online, you’ll need to use the most effective strategies in order to stand out. This includes finding a way to show customers everything you have to offer – and all the relevant variations – in one convenient place.

Fortunately, this is a simple matter with the plugins featured in this article:

  • Product Table - perfect for listing clothes in a flexible order form layout.
  • Product Filters - ideal for helping customers to find products more quickly.
  • Bulk Variations - perfect for letting customers choose sizes and other options in bulk on the product page, and for bulk editing variations.
  • Quick View Pro - perfect for speeding up shopping.
  • Fast Cart - ideal for speeding up the final stages of the customer journey.
  • Product Options - essential for selling customizable clothing products.

Use the plugins alone or together to create a professional clothing store that will be a pleasure to use. You can save money with an All Access Pass. They all come with full support, documentation and a full 30-day money back guarantee.

Do you have any questions about how to sell clothes online with WooCommerce? Let us know in the comments section below!

WooCommerce sell modular furniture

For many online stores, a traditional setup works pretty well. However, a specialty e-commerce website may require a unique approach. If you’re looking to sell furniture online that’s modular, like Chairish, Etsy, or Ikea, you’ll need to think carefully about how you design your website.

Modular furniture requires the potential buyer to pick out all the options they want and combine them into a single order.

For example, potential buyers may select materials and colors, or pick from a range of cabinet doors to make a ‘bespoke’ kitchen.

To make that easy, you can set up a dedicated ‘build-your-own-product’ page. This lets visitors see everything that’s available even in New York, on social media, or Offerup, and make their choices quickly and confidently.

A GIF of a table to sell furniture online.

In this post, we’re going to discuss what a build-your-own-product page might look like. Then we’ll show you how to create one using WooCommerce Product Table, in order to sell furniture online more effectively, even from New York, on Offerup, or on social media. Let’s get to work!

Why your furniture store needs a build-your-own-product page

Most e-commerce websites have a very similar and familiar design, like Chairish, Etsy, or Ikea. Each product is given its own dedicated page, where visitors can find information and add it to their carts. In most cases, customers can also look for the handmade items they want using a search feature, like on eBay, Letgo, or Apartment Therapy.

While there’s nothing wrong with this approach, it isn’t always effective. For example, what if you’re selling new furniture or you want to sell used furniture online? Listing each option on its own page doesn’t make much sense. With that setup, customers would go elsewhere, like Facebook marketplace, Shopify, 1stDibs, or Amazon.

Instead, you can create a build-your-own-product page. This page is dedicated to a single item and all its various options. While the above image is of a gift basket, this principle applies just as well to helping you sell furniture online.

Customers can view all the options in one place, enabling them to make easier decisions. They can also quickly see how each choice will affect the final price and add everything they want to their cart at once, like on eBay, Letgo, or Apartment Therapy.

Check out this build-your-own-product page demo!

In other words, this method of selling used furniture provides a much smoother user experience – which makes it easier to share on social media and in large metropolitans like New York City or New Jersey where there isn’t space for garage sales or a storefront.

Case study: First Kitchens

So far, everything we’ve been talking about has been a little abstract. So let’s see what it actually looks like to sell furniture online this way.

First Kitchens is a WooCommerce furniture store that uses this technique on its ecommerce website:

The First Kitchens website.

This site sells kitchen doors and accessories, and makes purchasing its products simple. The page for each type of door contains a build-your-own-product table, which lets customers select related parts and accessories:

A product table on the First Kitchens website.

As you can see, the table is clear and well-organized, and makes it simple for the customer to order a piece of furniture or secondhand furniture in WooCommerce. If this looks like a feature that would be useful on your own used furniture site, the good news is that it’s easy to replicate.

How to sell modular furniture online with WooCommerce (in 3 steps)

To create this kind of page to sell used furniture or vintage furniture as a consignment shop, you’ll need a few things. First, it’s crucial to create your website using WordPress. This platform provides the flexibility you’ll need to design a build-your-own-product page, even for handmade furniture pieces.

After that, you’ll want to set up WooCommerce on your WordPress website. This plugin enables you to turn your site into a fully-functioning, high-end, online marketplace quickly, just like eBay, Letgo, or Apartment Therapy. Then, it’s time to start selling furniture online! 

Step 1: Add all your furniture and options as WooCommerce products

The first thing you’ll need to do is make sure all your online store offerings are listed in WooCommerce. Even though you won’t be using the plugin’s normal functionality, you’ll need to have everything set up as WooCommerce products and show your retail prices and sales prices.

In your WordPress dashboard, go to Products → Add New:

Adding a new WooCommerce product.

If you’ve spent any time with WordPress, this screen should look familiar. It’s the platform's standard editor, augmented with a few new hassle-free options:

The WooCommerce product data section.

Start out by giving your product a name. Then, you can enter as much or as little information about it as you’d like,  like if a piece is a vintage furniture. We’d recommend including:

  • A brief description of the item,  including similar items, in the Product short description box.
  • An image, uploaded to the Featured Image section in the right-hand sidebar.
  • The price, under Product data → General.

You’ll want to create products that encompass all your used furniture and variations, like Facebook marketplace, Shopify, or Amazon do. There are two main ways to accomplish this.

Add each furniture option as a WooCommerce product

First, you can list every option as its own separate product. Then, you'll need to add each item to a category based on its role in the building process, such as “Materials” or “Finishes”. If any of these options include further choices, such as colors, you can add them as variations that will be displayed as dropdowns in your table.

In Step 2, you’ll be able to list all your products in a single product table or furniture order form. You can also create multiple product tables, each listing used furniture from a specific category, similar to eBay, Letgo, or Apartment Therapy.

Add each furniture option as a product variation

Alternatively, you can create a dedicated product for each type of used furniture item, such as coffee tables or doors, like on Craigslist or AptDeco. Then, you can add each option as a variation through the WooCommerce settings. This is useful if you want to create a separate product table for each modular product. You can list each variation on its own row in the table.

Either way, when you’ve done including all the necessary details, hit Publish to make the item public. Continue this process until you’ve added all the options a customer can use to create their modular furniture, each as its own product.

Step 2: Install and configure the WooCommerce Product Table plugin

Neither WordPress nor WooCommerce gives you an easy way to set up a product page to sell furniture online. You’ll need one more tool to make this work – the WooCommerce Product Table plugin:

This plugin integrates seamlessly with WooCommerce, adding a number of useful features. It enables you to create customizable, sortable product tables for displaying your items similar to Craigslist or AptDeco. This includes setting up a simple system for buying modular furniture.

You’ll want to start by purchasing and installing this plugin. When you do that, the table builder will open automatically. You can also launch it later at Products → Product Tables. It lets you customize exactly what your product tables will look like and contain, just like tat Facebook marketplace, Shopify, 1stDibs, or Amazon.

Follow the steps in the table builder to create an online furniture order form.

Pay particular attention to the following options:

Inserting the table

First, the table builder prompts you to decide how you will add the furniture order form to your WooCommerce store. There are 2 choices:

  • Add it manually to a normal page, or;
  • Enable the table layout on your main shop pages. Do this if you want your entire WooCommerce store to use the table layout.
Create page of table builder

Order form columns

Use the 'Columns' page to determine what information will appear about each furniture item.

For now, you’ll want to keep things simple. I suggest including a product image, name, short description, and price. Plus, you’ll want Add to Cart buttons (the "Buy" column) as well.

WPT table builder columns

Add to cart

Speaking of which, you can customize the way your Add to Cart buttons work on the 'Add to Cart' page.

Here, you should select the Checkbox only option. This enables customers to choose all the options they want and add everything to their cart simultaneously, which is key for a build-your-own-product page.

Then, scroll down and find the Product variations setting. Here, you’ll want to choose Show as dropdown list. If old furniture has multiple options – such as colors or sizes – this will display them in a drop-down menu within the table, like on Craigslist or AptDeco. Customers will then be able to select whichever version they want without having to consult Google.

Add to cart page of WooCommerce product table builder

There are a lot more settings in the table builder, of course. You can tweak whichever ones you like. However, the above options are the most crucial in order to sell furniture online using a modular system.

Step 3: Set up the build-your-own-furniture product page

With your WooCommerce Product Table settings configured (and saved!), you’re ready for the last step. If you selected the option to enable the table on your main shop pages, then you can skip this step. Otherwise, do this to add the list of furniture products to a page: 

  1. Open up a new page, via Pages → Add New.
  2. Either insert the 'Product Table' block if you're using the block editor, or get the shortcode from Products → Product Tables and add it to the page.

This tells WordPress to display the furniture product table that you customized in the previous step. If you preview your page on the front end, you’ll see a list of your furniture products and variations, like in a yard sale:

An unorganized table to sell furniture online.

This will work as a new furniture order form, and you could stop here. However, I recommend one more step. Instead of a single table, you can create multiple tables – one for each furniture category, like you see on Craigslist or AptDeco.

This is a much better way of organizing your page and making it clear what options are available. For instance, you could have one product table for coffee tables, one for high-end chairs, and so on. Or alternatively, you could let customers choose the type of furniture they want in the first table, then select a material in the second table, and finally pick a finish in the third table, like many online marketplaces.

To do this, you’ll need to create multiple tables. You can easily do this at Products → Product Tables by cloning your existing table and changing this furniture products are included. You can then place multiple blocks or shortcodes on the page, one for each table you want to include. You’ll probably also want to add a different heading above each one, such as the name of the furniture category.

Once you’ve done this, you’ll have a build-your-own-product page that looks something like this:

An organized table to sell furniture online.

Of course, you can continue to make changes and tweaks, until everything looks and functions just right, like on Craigslist or AptDeco. After that, publish the page, and you can start using it to sell used furniture online!

Bonus tip: Add extra options to your furniture products

Finally, it’s worth noting that there are ways to give your customers even more options. For instance, you can purchase the WooCommerce Product Options add-on.

WooCommerce Product Options furniture assembly fields

For example, this screenshot shows a product on the WooCommerce Product Options plugin demo site. When you tick the 'Installation & assembly' box, the conditional logic in the plugin makes the other options dynamically appear underneath. This is a great way to add extra products and offer additional choices to your visitors, like they’re used to from Chairish, Etsy, or Ikea. Extra product options can be hugely beneficial when you’re looking to sell furniture online.

Bonus tip: Add quick view to your furniture shop

WooCommerce Quick View Plugin with Grouped Products

So far, we’ve talked about how to sell modular furniture using a one-page order form layout. You can build on this by using the WooCommerce Product Table with its sister plugin, WooCommerce Quick View Pro.

This lets you add ‘quick view’ buttons to the list of furniture products. Customers can click on these buttons to open up more information and purchase from a quick view lightbox, like on Chairish, Etsy, or Ikea.

Quick view is a great option if:

  • You have too many variations or add-on options to show directly in the product table. The customer can buy them from the quick view window instead!
  • You want to sell more complex groupings of products - for example, by using grouped products or the Bundled Products or Composite Products extensions. These types of products are too complicated to sell directly from the table. Instead, you can list them as usual in the product table and customers can build their modular furniture bundles and purchase from the quick view lightbox.

Where to get the plugin

It’s not always easy to sell furniture online. This is doubly true when what you’re offering is modular in nature. You’ll need a way to let customers see everything that’s available in one place, and select all their desired options quickly, similar to sites like Chairish, Etsy, or Ikea.

As we've shown, this is a simple matter using the WooCommerce Product Table plugin. You'll just need to:

  1. Add all your consignment furniture and options as WooCommerce products.
  2. Install and configure the WooCommerce Product Table plugin.
  3. Set up the build-your-own-product page.

Do you have any questions about how to sell furniture online effectively? Ask away in the comments section below!

Looking for a way to display WooCommerce products in a more compact and user-friendly way? If so, then a list view might be just what you need. A WooCommerce product list view allows customers to quickly scan through your products and find what they're looking for without the clutter of a traditional grid layout.

In this tutorial, we'll go over how to create a WooCommerce product list, step by step. You'll learn how to list products in a user-friendly table layout, complete with extra features like additional product information, searching and filtering.

We'll be creating a list view of your products using a plugin called WooCommerce Product Table. This WordPress plugin comes with everything you need to create a WooCommerce list view. It has dozens of customization options which you can use to create a flexible product list based on your exact requirements.

Customers can view more products per page, see product data, choose options and add to their cart - all directly within the list view. The end result will be a fully customizable product list that looks something like this:

Let's get started!

Product Table - the best WooCommerce list view plugin

WooCommerce Product Table is the best list view plugin because it's 100% flexible. With dozens of easy-to-use options, it has everything you need in a WooCommerce product list plugin. You can:

  • Display products anywhere. As well as enabling the WooCommerce product list plugin view on your default store pages (e.g. the shop or category pages), you can display WooCommerce products on custom pages anywhere on your site.
  • Choose what product data to display. You choose which product information is displayed in the list view. This includes the product name, image, price, attributes, stock information, and even custom fields that you've added to your products.
  • List all WooCommerce products or products from specific categories (or even specific tags, WooCommerce custom fields, custom taxonomy terms, IDs, etc.).
  • List products and/or variations. You can choose whether to list variations as dropdowns for each product, or with each variation listed on its own row.
  • Create simple lists with the product name only, or more advanced lists with multiple columns of product data.
  • Make it easy to find products with column sorting, keyword search, and product filters.
  • Choose how many products per page are listed before pagination links appear at the bottom.
  • If you want to list 100's or 1,000's products, there's a lazy load option to boost performance.
WooCommerce Product Table on shop page

What types of store need a WooCommerce product list view?

A product list view comes in especially handy for:

  • Technical or non-visual productsIf your products don't need big product images (or maybe they don't need images at all!), then why waste space? Instead, use a WooCommerce list products plugin to show more products per page. You can also display extra product data to allow easy comparisons between products.
  • WooCommerce wholesale storesWholesale buyers are already familiar with your products and want a quick one-page order form layout. They don't want to waste time visiting a separate page for each product they wish to order.
  • 'Build your own' productsIf you're selling custom gift boxes, hampers, or other 'build-your-own' products then customers need to bulk-select multiple items and add them to the cart together.
  • Simple WooCommerce catalogsSome stores want to keep things simple and list products in a one-page format that mimics a traditional printed catalog or order form.

Think carefully about the type of products in your store, and whether they'll sell better in a WooCommerce product list view.

Further reading: 2 ways to list WooCommerce orders in the front end.

Tutorial: How to create a WooCommerce list view

Next, I'll explain how to create different types of product list view in WooCommerce, step-by-step.

To create a WooCommerce product list view:

  1. Install the WooCommerce Product Table plugin.
  2. The table builder will open when you activate the plugin. Use it to choose the main options for your product list views.
  3. During the table builder, you can choose whether to enable the list view on all your shop pages, or insert tables to list products manually. If you chose the manual option then the final page of the table builder will provide a shortcode which you can use to list products. Alternatively, insert a 'Product Table' Gutenberg block and select the product list you just created.

Depending on your settings, this will list WooCommerce products in a table like this. The exact styling is inherited from your theme/template so that everything matches the rest of your website:

WooCommerce Product Table's default table layout

WooCommerce product list view examples

WooCommerce Product Table lets you list products in many different ways. Just choose the settings that will work best for the types of products you sell.

To provide some inspiration, here are some example screenshots of different ways that you might set up your WooCommerce list view.

We'll start with a basic WooCommerce list view that just displays each product's title. Then, we'll build on that simple list with more columns, AJAX filter options, as well as only pulling specific products into the list.

1. A basic WooCommerce list view

Just because a WooCommerce list view plugin lets you add extra columns of information doesn't mean you have to! While you can include images, add to cart buttons and tons of data, these aren't essential. If you prefer, then you can list products in a much simpler format.

As a minimum, you can create a very simple list of WC products, containing the product name but no other information:

simple woocommerce list view

This WooCommerce product list is super-simple and minimalist. It lists products by name, with no other data or features. This is as simple as it comes!

Set it up by choosing these options when you create a product table:

  • Columns - add Name but not other columns. This will list the product name but no other data.
  • Sort by - select 'Name' and 'Ascending' order to list products alphabetically.

Also choose the following options on the plugin settings page at Products → Product Tables → Settings

  • Search box - hide this.
  • Reset button - hide this.
  • Page length - hide this.
  • Product totals - hide this.

Personally, I like this type of simple product list for specific purposes only - for example, in a sidebar widget where there's limited space. On page layouts with more space, I prefer adding extra columns - and depending on the number of products, extra features like a search box and product filters.

2. Listing products with extra data

Now, let's say you want to do more than just display a product's title. Fortunately, you can display literally any type of product data in the list view. In addition, you can include a 'Buy' column complete with add to cart buttons, quantity pickers and variation dropdowns. This makes it much quicker for customers to buy their desired products.

To add more columns, you need to add additional columns to the table. This example has columns for image, name, description and buy.

full woocommerce list products functionality
A WooCommerce list view with multiple columns of product data

Or to get even fancier, this WooCommerce list view has columns for image, name, reviews, price, and buy:

WooCommerce product list plugin

3. Adding filters and search options

For stores with more than about 10 products, you can help customers find them by providing a search box and filters.

Here's an example of a full list of products with the search box and filters turned on:

search/filter

And for even more advanced filtering for your product list view, use Product Table with its sister plugin - WooCommerce Product Filters. This adds a wide range of professional filter options, such as color swatches, image filters, and more:

WooCommerce Product Filters Table Integration

4. Listing products in multiple columns

As we saw earlier, the WooCommerce Product Table plugin lists products with 1 item per row. However, you can create more complex page layouts with multiple columns, each listing different products:

Multiple column WooCommerce product list view

​You can do this by creating a page with a 3-column layout and adding a different product table to each column. You would create the multi-column page layout using the WordPress dashboard block editor (Gutenberg) or a page builder plugin like Elementor or Divi.

​Once you've added the columns, put a product table shortcode in each one. Each shortcode should list items from different product categories.

Case study - A WooCommerce product list view plugin for Dunbar Sales

WooCommerce Product List View

Jupiter Multimedia was developing a WP website for Dunbar Sales, a leading supplier of MIL-spec adhesives, paints, coatings, lubricants, and corrosion preventatives. The website would be selling highly technical, non-visual products that did not require large images. As a result, the default WooCommerce grid/list layout was inappropriate for their client's industry.

The developer said:

"I needed a TRUE list view and nothing else I tried could produce the results I required, short of trying to rebuild the entire archive page by hand. I wasn't into the idea of doing that due to the time involved and ability to upgrade as woo changes."

They were delighted to discover WooCommerce Product Table, which offered the list view and Woo custom fields they needed. This allowed them to deliver the website on time and on budget.

Jupiter Multimedia added extra functionality to its product list view by using WooCommerce Product Table with some third-party plugins. They used an Add to Quote plugin to allow customers to request a quote, and an extra product options plugin to add an extra text field to the list.

WooCommerce Product Table saved me time and money
The WooCommerce Product Table is well thought out and provides a great responsive experience. The switch between desktop and mobile is elegant and clean. The plugin saved me hours or creating a *true* list view myself and then having to design a way for my own list view to be responsive. This saved me time and money. Very pleased with the results.

List WooCommerce products with quick view buttons

A WooCommerce list view plugin is a brilliant way to speed up the buying process. It works by keeping customers away from the single product page. They find products in the product list and add them to the cart without clicking away from the list. This encourages them to buy more and more, and there's no risk that they'll get lost!

You can improve this even further by adding a quick view to your product listings. This adds optional quick-view buttons to the WoCommerce list view, and/or replaces the links to the single product page with quick-view links.

WooCommerce Quick View Plugin with Product Table

It's a great way to show extra information that you can't really fit into the product list. If you have lots of variations or add-ons for your product listings, then there may be too many to fit nicely into your neat WooCommerce list view. Instead, customers can view the basic product information in the product list; choose options, and add to the cart from a quick view lightbox.

To add quick view, you need to use Product Table with its sister plugin, WooCommerce Quick View Pro. Once both plugins are installed, you can add a column called quick-view in your list of product table columns. This will add a Quick View button for each product so that customers can easily launch the lightbox.

Want to set up a WooCommerce list view in just 15 minutes?

Creating a custom WooCommerce list products view for your products is a great way to enhance the shopping experience for your customers. With the flexibility and customization options available through WooCommerce Product Table, the possibilities are endless.

WooCommerce Product Table is a plug-and-play solution that 1000's of online store owners have already used to grow their sales. No technical knowledge is required - just follow the steps in this tutorial and you'll be up and running in minutes.

  • Instant plug-and-play setup
  • FREE knowledge base and tutorials
  • Technical support is available if you need any help
  • 30-day money-back guarantee. Love it or get a full refund, zero risk.

Whether you're looking to create a wholesale store, a simple catalog, an event-based system, or something entirely unique, a custom list view can help you achieve your goals. And with the ability to add multiple WooCommerce list products views to your site, you can provide a tailored experience for every type of customer.

Get the plugin and start getting more orders TODAY →

Do you have any other questions about using the WooCommerce list products shortcode? Leave a comment and we'd love to help!

FAQ

Benefits of a list view for your products

A list view for your WooCommerce products offers several benefits that can enhance user experience and ultimately lead to more sales. Here are a few key benefits:

  • Improved user experience: A WooCommerce list products view allows customers to conveniently scan through your product catalog and find the products without navigating through multiple pages.
  • Increased sales and revenue: By displaying more products on a single page, customers are more likely to find products they're interested in. This will lead to increased sales and revenue for your store. This effect is increased by adding order form functionality to the list view so that customers can choose options and add to their cart without leaving the page.
  • Improved navigation: A product list view allows customers to quickly scan through your products in a linear fashion. This makes it easier to find what they're looking for without having to scroll through a grid of products. The built-in searching and filtering above the product list makes it even easier to find products.
  • More information per row: With a WooCommerce list products view, you can display more product information per row than with a traditional grid layout. This can be especially helpful for products that require more details information or have multiple variations. The extra information can also boost your SEO.
  • Reduced bounce rates and cart abandonment: Customers are less likely to become frustrated and abandon their shopping carts. Because of this, you will have a lower bounce rate and increased conversions.
  • Better mobile optimization: A WooCommerce list products view is often better optimized for mobile devices than a grid view, as it allows for easier scrolling and navigation on smaller screens.

Differences between a product grid and list view

There are two main ways of displaying products on an ecommerce website: grid view and list view. The main difference between the two is the layout and structure of the display products:

  • Product grid view is a popular way of showcasing products on WordPress websites. It displays product images in a grid formation, usually with 3 or 4 products per row. The per-page product count is usually 9-12 products. The grid layout view is perfect for visual products with big images such as clothing, shoes, and accessories.
  • On the other hand, a WooCommerce list view displays products in a vertical list layout format, with each product taking up a separate row. This layout is better suited for WooCommerce stores that offer more detailed product information, as customers can easily see each product's features and specifications. List view is perfect for stores that sell technical or complex products such as electronics, software, or machinery. You can have an unlimited number of products per page, either in a single list or broken up using pagination or previous/next links to load more. Either include images in whatever size you like, or list WooCommerce products without images.

Nearly all WordPress themes list WooCommerce products in a basic layout. Compare how the products are presented in these two pictures:

As you can see, the default layout is very limited and not suitable for many types of product.

Isn't there already a WooCommerce list products shortcode?

Before we start looking at list view WooCommerce plugins, it's always a good idea to consider whether you can do it without a plugin. The answer is, sort of. Yes, there is a WooCommerce list products shortcode built into WooCommerce - [products]. There are also Gutenberg blocks that you can use to list products anywhere on your WordPress site.

However, the shortcodes and blocks use the basic grid layout and not a proper list view:

core woocommerce products shortcode

That's why you need a WooCommerce product list plugin to create a true list of your products, with 1 per row.

WooCommerce hidden store plugin

Lots of people ask us how to create a WooCommerce hidden store. This tutorial covers 2 methods to build a private store using 2 plugins: WooCommerce Private Store and WooCommerce Protected Categories. It will also help you choose which WooCommerce hidden store plugin is best for your website.

WooCommerce hidden store plugin WordPress
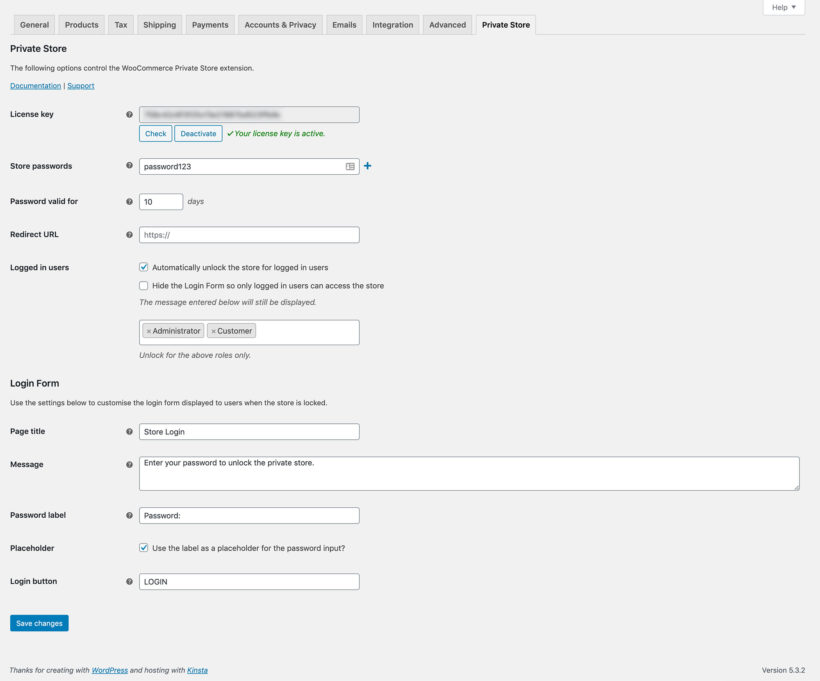
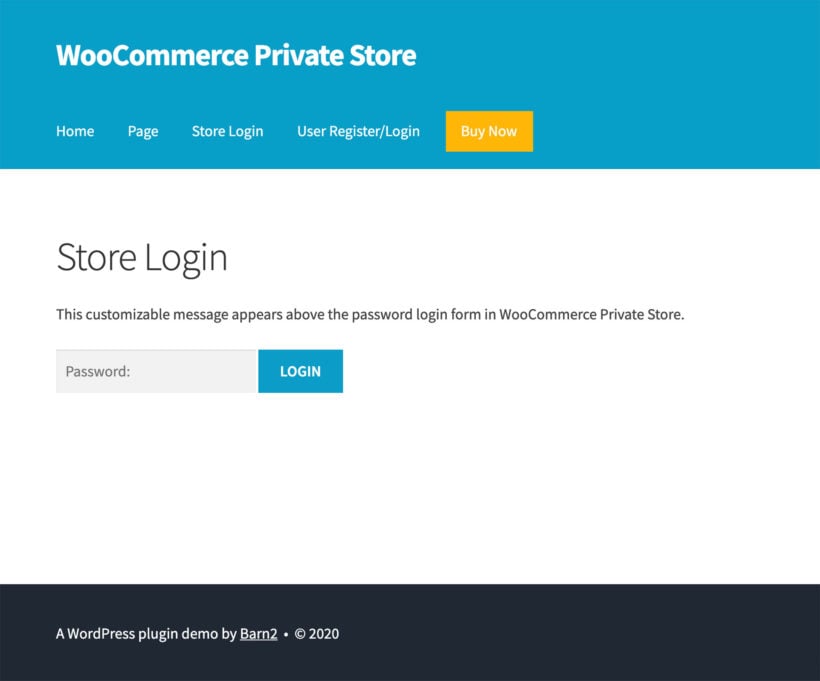
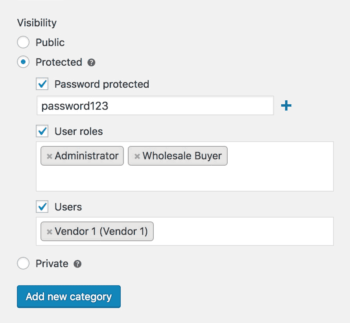
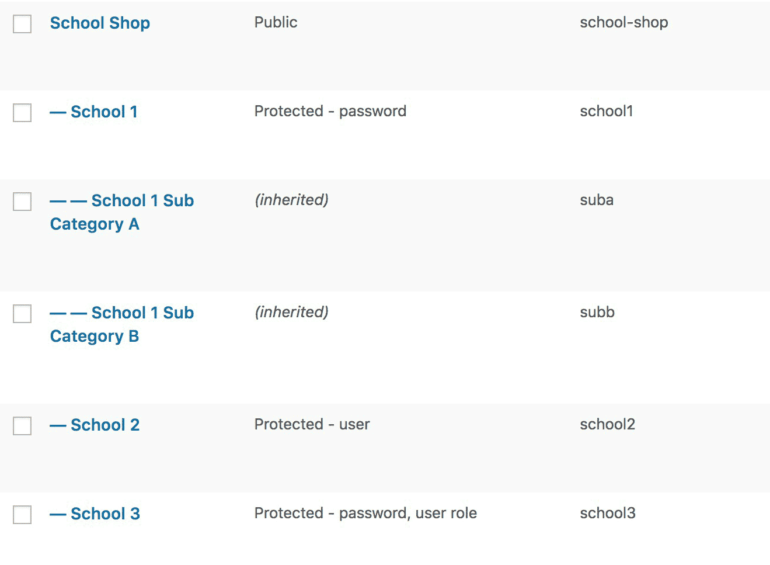
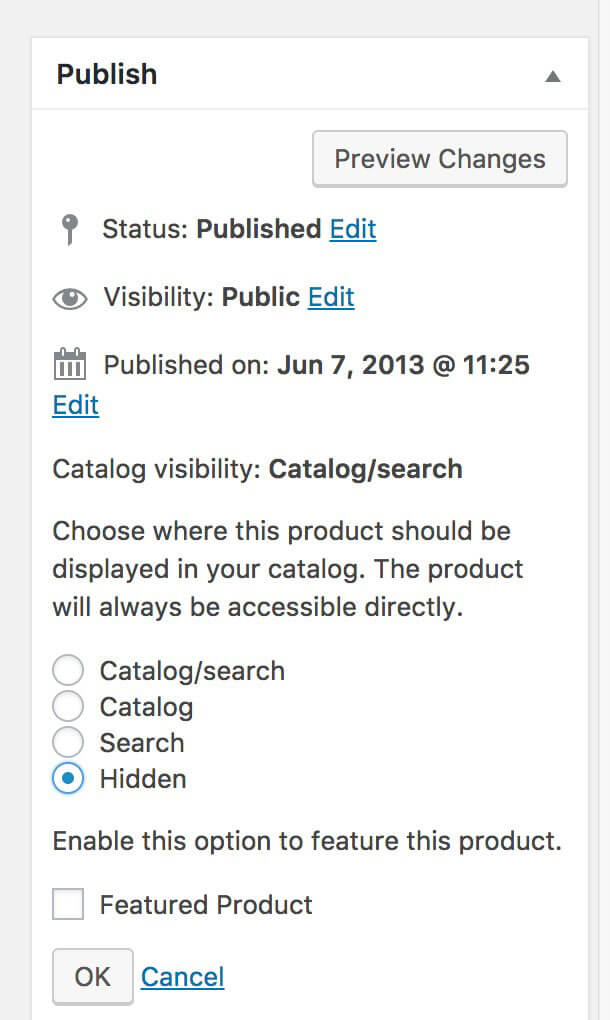
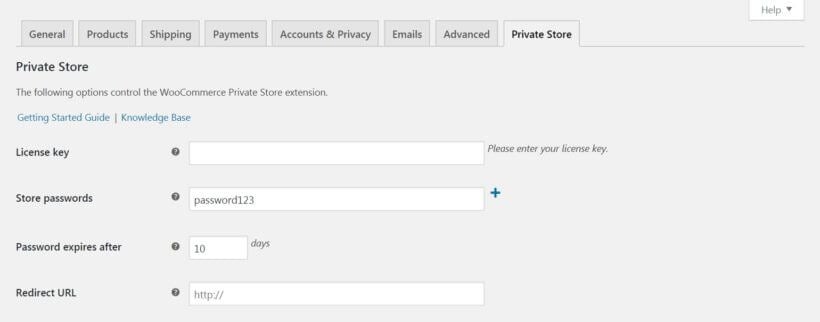
You might want a public-facing website that anyone can access, with a hidden e-commerce area that only people with the right credentials can see. Or you might want to hide your entire WooCommerce store.

At the end of this tutorial, you'll know how to create a WooCommerce hidden store or temporarily hide a store.

Your categories, products and other WooCommerce content will not appear anywhere on your public website. They won't appear in the navigation menu, sidebar widgets or on your homepage. Read on to learn how, or watch the video:

1. Before you start

To build a WooCommerce hidden store, you need a WordPress website with the WooCommerce plugin installed. You also need a WooCommerce-compatible theme - I used Storefront on my test site.

Once you have done this, you should add your WooCommerce products to their respective product pages in the usual way. You can also create the public pages of your website (if you're having one) such as Home, About and Contact.

Once you've done that, you're ready to hide products and transform your website into a hidden WooCommerce store.

2. Decide which WooCommerce hidden store plugin to use

First, you need to decide which of the plugins described in this tutorial to use for your WooCommerce hidden store. Read the 2 lists below and then skip to the method that best applies to you. Or to make it easier, take our quick quiz!

Do you:

  • Want to hide your whole WooCommerce store?
  • Need your WooCommerce shop page and ALL your products, categories and tags to be completely hidden from search engines, sitemaps etc?
  • Want all customers to have access to all the products within your WooCommerce hidden store?

If so, you need WooCommerce Private Store. Create your hidden WooCommerce products using Method 1 of this tutorial.

Do you:

  • Want to hide some of your WooCommerce products, while also having a public online shop?
  • Need to give different customers access to different products within your hidden store?

If you've answered Yes to either of these questions then you need WooCommerce Protected Categories. Build your WooCommerce hidden store using Method 2 of this tutorial.


Method 1 - Hide Products with the WooCommerce Private Store plugin

The WooCommerce Private Store plugin is the easiest way to make WooCommerce private. It creates a 100% WooCommerce hidden store, locking down your entire shop behind a single password. Alternatively, you can automatically unlock your private store for logged in users or specific roles. No one will know your hidden store exists unless you want them to! So if you need to disable a store temporarily, this is a great option.

This video tutorial will tell you how to set up your WooCommerce hidden store. I've also provided written instructions below.

Still not sure if our WooCommerce Private Store plugin is for you? Have a look at this customer review or check out the Montana Medicinals case study below.

If you want a Private Store, Look no further!!
This plugin has been a GODSEND for us. Perfect for Wholesale usage. Hide your store with one or two checkboxes within the plugin settings and BOOM! We now have a private store. Only unlockable with a username and password. Thank you, guys :)

Case study #1 - Sprezzatura Imports

Sprezzatura Imports login page
Sprezzatura Imports distribute the Italian coffee brand, ICAF, across the US. As wholesalers, they need to keep their WooCommerce wholesale store hidden from the public. That's why they've password protected it with the WooCommerce Private Store plugin.

After registering, distributors can purchase products and gain access to the price list by logging in to the password protected area. Then, to make it even easier for distributors to login, the login page was added to the menu. As a result, the hidden WooCommerce store is just a matter of clicks away from the homepage.

Case study #2 - Montana Medicinals
WooCommerce Private Store Case Study Montana Medicinals

Montana Medicinals needed to password protect their shop to comply with laws in the state of Montana. That's because Montana Medicinals operate a medical marijuana dispensary and only pre-authorized customers are allowed to access the shop. That's why they used our WooCommerce Private Store plugin.

To limit access to those over 18, they also used a sitewide WordPress age verification plugin.

Within a matter of minutes of installing the WooCommerce Private Store plugin, the developers had created a password protected private store. Customers registered with Montana Medicinals are given a password to access the store.  Once a user has confirmed they're over 18, they can access the site. Anyone can read general information about getting prescriptions, but to view products and start shopping you need a password. Clicking on Shop or Products prompts the customer to enter their password. And without a password you can't access the private store.

Read on to find out how to hide WooCommerce stores or even temporarily disable online shops.

1. Install WooCommerce Private Store

WooCommerce Private Store Plugin Settings
  1. First, buy WooCommerce Private Store.
  2. Download the plugin files and copy your license key from the confirmation page or order confirmation email.
  3. In the WordPress admin, go to Plugins → Add New and upload the plugin files.
  4. Activate the plugin.
  5. Next go to WooCommerce → Settings → Private Store and paste your license key. Change the other settings as required.
  6. Create a store login page by adding the shortcode [store_login] anywhere on your site.

And that's it! That's all you need to do to hide products in WooCommerce and make your store private.

The next few steps will let you further configure your hidden WooCommerce store. However you've already done the most important bits and your store is secure and hidden.

2. Customise the WooCommerce login page (optional)

If you like, you can customise the text that appears above the password entry form for your WooCommerce hidden store. You can also change the text on the 'Submit' button. You can do all this on WooCommerce → Settings → Private Store.

Make any changes and then check the WooCommerce login page that you selected in step 1.6 (above) to ensure it looks ok.

You can also add text and other content above and below the password entry form, directly onto the WooCommerce login page.

WooCommerce hidden store

All WooCommerce hidden stores are different. You might want to include a link to your store login page on your public site. For example if you're creating a WooCommerce wholesale shop then you might want to add a 'Wholesale Login' page to the menu or header. Or you might want to keep your WooCommerce store hidden so that only people with the link can ever find it.

You can link to the store login page in the usual way for adding a link in WordPress.

4. Add additional store login forms (optional)

You can also add login forms anywhere else on your public site - for example on another page or sidebar widget. In this screenshot, I've added a login form to a text widget in the right hand column.

WooCommerce hidden store and hidden products

To do this, add the shortcode [store_login] to any page, post or text widget. (Or if you're a developer, you can add it elsewhere such as in the header or a popup login form.) This will insert a login form and the text that you added to the settings page in step 2.

Customers can use this to access your WooCommerce hidden store while everyone else remains locked out.

5. Add WooCommerce content to the menu

If you haven't already done this, you can edit your navigation menu to include links to the main WooCommerce store page or to specific products, categories or tags.

Go to Appearance > Menus and select the relevant page/products/categories/tags. Add them by ticking the correct box and clicking 'Add to Menu'. (If you add them as Custom Links then the WooCommerce hidden store plugin won't hide them.)

If you use this method then the shop page/products/categories/tags in your menu will be invisible until you enter the password to unlock the hidden store.

You can see this in action on the password protect WooCommerce plugin demo. When you first view the site there's no menu dropdown under the 'Hidden Shop' link. Once you enter the password, hover over 'Hidden Shop' and you'll see that links to various WooCommerce content have magically appeared!

6. Check your WooCommerce store is hidden

Now comes the fun part. Visit your public website and try to find your WooCommerce hidden store:

  • Try accessing any of your WooCommerce pages - e.g. your main Shop page, a product or specific category. You'll be taken to the store login page.
  • Do a Google search for one of your hidden WooCommerce products.
  • If you have a search box on your site, see if your hidden WooCommerce content appears in the results.
  • Check your XML sitemap.
  • Test the navigation menu.
  • Check that no WooCommerce widgets (e.g. Products, Product Categories or Product Filters) are showing.

We've developed the WooCommerce hidden store plugin to be completely private and hidden. If you find any loopholes (e.g. you might be using a WordPress SEO plugin that we haven't tested), let us know.

Once you're happy that your WC store is 100% hidden, go to your login form and enter the password. Now you can test what customers will see after they unlock the private store.

7. Give the password to your customers

When you're completely happy with your WooCommerce hidden store, you can start using it. Give the password to your customers. And if you haven't added a 'Store Login' link to your public site, give them the URL too.

Or if you've ticked the 'Logged In Users' box in the settings, they just need to log into their account and the store will automatically unlock. There's also an option to choose which logged in users roles can access the store.


Method 2 - Hide Products with WooCommerce Password Protected Categories

WooCommerce Protected Categories is most commonly used to hide one or more product categories within a public online shop. However the plugin can equally be used to create a WooCommerce hidden store. This video and the written instructions below will show you how to create a private shop and hide WooCommerce products.

1. Create a main protected category to hide products

The first step is to create a main product category for your WooCommerce hidden store and protect it, either with a password or user login. By having one protected category, you can then structure your entire store within this category:

  1. WooCommerce school category visibility
    In the WordPress admin for your website, go to Products → Categories. This is the standard WooCommerce category page, except that you will see a 'Visibility' section at the bottom left when you create or edit a category. This has been added by the WooCommerce Protected Categories plugin.
  2. Add a new category and call it anything you like. This will be the name of your WooCommerce hidden store.
  3. Click 'Protected' and either enter one or more passwords, or choose which users or roles will have access.
  4. Your new hidden category will appear in the list of product categories on the right. You can see that it's protected in the 'Visibility' column.
WooCommerce hidden shop schools category structure

Password protected categories is a good option for most WooCommerce hidden stores because you don't have to manage individual logins for each user. Everyone shares the password to your hidden shop, or you can give a different password to each person. Alternatively, choose the user or role protection options if you want each customer to have their own user account.

2. Add sub-categories to your WooCommerce hidden store

You can divide your WooCommerce hidden store into multiple categories if you like. (If not, skip ahead to step 3.)

Everything in your private WooCommerce store must be in a protected category or one of its sub-categories.

  1. Create each of your sub-categories using the 'Add new category' option on the left of Products → Categories.
  2. Select your main protected category as the 'Parent'.
  3. Leave the visibility as 'Public'. This is because the sub-category (and its products) will automatically be hidden using the same type of protection.

Once a customer enters the correct password or logs into their user account, it will unlock the entire WooCommerce store and all the hidden products. This saves them having to re-enter a password for each product as they navigate around the shop.

Note: If you want to create separate protected categories that are unrelated to each other, that's fine. You might want to do this if you want to create different private areas of your shop for different customers. For example, a photographer might create a separate hidden category to sell the photos for each client. You can then have a central login form which will direct each customer to their hidden category. 

3. Hide products by adding them to a protected category

Next, it's time to put your products within the protected categories you just created:

  1. Go to the Products section of the WP admin.
  2. Hover the name of each product and click the 'Quick Edit' link that appears.
  3. Select one or more categories and click 'Save'.
  4. Repeat for all your other products.

When you add new hidden products to WooCommerce in future, you will also need to assign them to your store's hidden categories.

Hidden WooCommerce store plugin

Even if you are hiding your Woo shop, you might still want to link to it. For example, you might want to add a link called 'Client login' or 'Trade area' to your homepage, header or footer. You might want to link to it from the navigation menu and either make it publicly visible so that anyone can access the login page, or set it to only appear after customers have entered the password.

Of course if you want to hide the fact that your website even has an e-commerce store, you don't have to link to it at all. Instead, you can give your customers the link directly (e.g. via email).

There are 2 ways to let people find your hidden WooCommerce store. You can either link to a central WooCommerce customer login page, or link to each hidden product category.

Add a central WooCommerce customer login page

If you're using password protected categories, then the shortcode [category_login] will add a WooCommerce customer login form. When customers visit this page, they can enter the password for any hidden WooCommerce product category. If the password is correct then they'll be redirected to the correct category page in your hidden WooCommerce store.

This option works well whether you have one or several protected categories in your WooCommerce hidden store. It's more flexible than linking directly to a protected category because you can add the WooCommerce login form to any page or widget. However I'll tell you how to do that next, just in case.

If you're using role or user protected categories, then you just need to link to a user login page instead. Use the free Peter's Login Redirect plugin to automatically redirect users to the correct hidden category after they log in. You can choose a different category for each user or role to be forwarded to - it's surprisingly flexible for a free plugin.

  1. Go back to Products → Categories. Hover over the name of your main hidden category. Right-click the 'View' link and copy the link. That will put the URL/address for your hidden category to your clipboard.
  2. Now go to wherever you want to add the link - e.g. your homepage, header or footer. Create a hyperlink in the usual way (either using HTML or the 'Insert/Edit Link' WordPress toolbar icon).

How to link to hidden product categories from the menu

  1. Go to Appearance > Menus.
  2. On the left, open up the 'Product Categories' section.
  3. Tick whichever protected categories you want to add to the menu OR the page where you have added the WooCommerce login form.
  4. Click 'Add to Menu'.
  5. The product categories will be added to the end of your menu on the right. Drag them to the correct position and click 'Save Menu'.

Now go back to your website and click 'Refresh'. If your private categories don't appear in the menu, that's because the plugin is set to only show them in the menu after you have unlocked the category. If you go to the main category for your WooCommerce hidden store and enter the password, the links will then appear in the menu.

To make the menu links visible to everyone, you can change this setting at WooCommerce → Settings → Products → Protected Categories.

5. Choose how your hidden WooCommerce product categories behave

The WooCommerce Protected Categories plugin lets you choose how the hidden part of your store appears publicly. You can change the plugin settings as follows:

  1.  Go to WooCommerce → Settings → Products and click the 'Protected Categories' link at the top.
  2. Tick and untick the boxes to choose whether to hide your WooCommerce hidden products and categories from menus etc.
  3. This page also lets you change the text that appears above the 'Enter password' box and the wording of the button. For example you might add instructions on what to do if a customer loses the password.

Depending on your WordPress theme, there might be publicly visible links to the cart which aren't hidden. If you want to hide a WooCommerce store, you probably don't want this to appear on your public website.

If you use a fully featured theme from ThemeForest or similar then the theme options might let you hide the cart icon. If your theme doesn't have this option then you can hide it using CSS. (We offer a customization service for small coding tasks like this). You can code the cart link to only appear when there are products in the cart. This will automatically hide it from your public-facing store because customers can only add products to the cart after unlocking the category!

7. Add the WooCommerce cart widget

If you've hidden the main links to your cart, you can use the WooCommerce cart widget to display the cart in the sidebar. This might be the right or left hand column on your WP site.

  1. Go to Appearance → Widgets.
  2. Find the sidebar area where you want the cart to display.
  3. Drag the 'WooCommerce Cart' widget from the left hand side to the correct sidebar area.
  4. Tick the 'Hide if cart is empty' box in the widget settings and click 'Save'.

By ticking 'Hide if cart is empty', the cart widget will only display when customers have products in their cart. Since your Woo store is hidden and people can only add products after they unlock the category, this stops it from appearing on your public website. Even if you have the same sidebar on the public and private areas of your website, the cart will only appear when there are products in the cart.

This means that it doesn't matter if you have hidden the shopping cart from the header, as it appears in the sidebar instead.

WooCommerce cart widget

8. SEO - Block your WooCommerce hidden store from search engines

Finally, a note about SEO.

I won't cover this in-depth as it depends on your WordPress SEO plugin. As a general principle, you will want to mark all of the following as noindex:

  • All the default Woo pages (Cart, Checkout, My Account and Shop).
  • The Products custom post type.
  • Product category pages.
  • Product tag pages.

If you have an XML sitemap then you need to tweak the settings to exclude.

Use the documentation for your WordPress SEO plugin to find out exactly how to do this.

This will hide the hidden areas of your WooCommerce store from search engines while allowing search engines to index your public pages.

If you're worried about this, you may be better off using Method 1 and WooCommerce Private Store which handles this automatically.

By default, the products in your hidden product categories will appear in the website search but if you click them then you will be prompted for the password. This also applies to other WooCommerce content such as your main shop page, categories and tags.

You can stop your hidden WooCommerce products from appearing in the WordPress search results at all. To do this, you need to set the "Catalog Visibility" option for each product to "Hidden". You can find this option in the 'Publish' section on the right hand side of the Edit Product screen:

WooCommerce hidden store plugin

This advice applies to the default search feature that is built into WordPress. If you're using a different search plugin, it's worth testing this to make sure it works for your plugin.

If you're worried about hidden WooCommerce products appearing in the search, you may be better off with Method 1 and our WooCommerce Private Store plugin. That plugin hides products from the search results automatically.

Further reading: How to Build a Private WooCommerce Members Only Shop

Wrapping up

In this tutorial, we have used 2 different plugins to create a WooCommerce hidden store. We've added links to it - either to the menu or to anywhere else on your website. We've dynamically added links and widgets so they only appear once people have unlocked a category.

Both plugins let you hide products and protect a WooCommerce store within your WordPress website. WooCommerce may be most popular for public online shops, but it's just as good for hidden WooCommerce shops. Whether you want to hide WooCommerce wholesale areas, customer-specific products, temporarily hide stores, or create a WooCommerce age restricted area, you can do it with these plugins.

I hope the tutorial has been useful for you. Use the plugin documentation for WooCommerce Protected Categories or WooCommerce Private Shop to learn even more about your chosen hidden store plugin. Or if you like the plugin, become a Barn2 affiliate and earn 30% commission for recommending our plugins!

Are you using one of these methods to hide products in WooCommerce? I'd love to hear how it's working for you - please add a comment below.

WooCommerce bestselling products widget
List popular products on pages, widgets - anywhere you like!

I love discovering new ways to use our bestselling WooCommerce Product Table plugin. Today I'm going to share a new method for how to list bestselling or popular products anywhere on your website.

There are lots of reasons why you might want to list bestselling products in order of popularity. Maybe you want to list the most popular products on your website homepage. This is a neat way to draw attention to your main products, and give the most valuable estate to bestselling products making the most sales.

There are many benefits to using this method to list popular products:

  1. List bestselling products anywhere on your site. This could be the homepage, sidebar text widget, within a blog post - absolutely anywhere!
  2. Choose how many products to include in the list.
  3. Add extra columns of data, such as the product image, description, and stock status.
  4. Include an add to cart column so that people can buy popular products directly from the list!
  5. Choose whether or not to show actual sales figures for each product.
  6. The dynamic list of bestselling products automatically updates in real-time based on actual sales figures. No need to manually update it - ever.

Keep reading to learn how to set it up.

How to list bestselling products in a WooCommerce table

The WooCommerce Product Table plugin provides 100's of different ways to list products. This is how to set it up to list bestselling or popular products in a table anywhere on your site.

First, set up the list popular products plugin

  1. Get WooCommerce Product Table and install it on your site.
  2. The product table builder will open automatically, or you can access it later at Products → Product Tables.
  3. Look through the settings and choose how you want your product tables to behave. On the search and sort page, sort by popularity in descending order.
  4. Now go to Products → Product Tables and edit the table you just created. The 'Edit' screen contains some more advanced options. Use these to set the product limit to however many popular products you want to list in the table.
  5. Next, go to the plugin settings page at Products → Product Tables → Settings. Hide any unnecessary elements such as the search box and total number of products. It's best to keep a list of WooCommerce most popular products clean and simple because you will probably only have a few products in the table.
  6. Next, edit the page where you want to list bestselling products. Either insert the shortcode from the final page of the table builder (you can also find this at Products → Product Tables) or add a 'Product Table' Gutenberg block and select the table you just created. This will all your products.

Your popular products WooCommerce list should look something like this:

WooCommerce list bestselling popular products

Can I list the number of sales for each product?

Yes. To display the number of sales of each WooCommerce product:

  1. Create a product table as described above.
  2. In your list of table columns, add a custom field column called total_sales.

It will look something like this:

WooCommerce display number of product sales

By now, you know how to list WooCommerce bestsellers on any page, based on the number of sales. You can also add the product table shortcode anywhere else on your site.

For example, there's no WooCommerce popular products widget built into the WooCommerce core. It's easy to create your own bestselling products widget by adding a WooCommerce Product Table shortcode directly to a text widget. This is a nice way to draw attention to popular products by listing them throughout your store.

If you're listing popular products in the sidebar then I recommend keeping table columns to a minimum. For example, you might just include columns for the product image and name. The name column will then link through to the individual product page.

You can find a shortcode for each of your product tables at Products → Product Tables. Copy this and paste it into a text widget.

WooCommerce popular products widget
List of popular products added to a text widget, with columns for image and product name

Where can I get the plugin?

As you can see, WooCommerce Product Table provides lots of fabulous opportunities for listing bestselling products based on popularity. Think about how it can increase sales in your own store.

Add WooCommerce to WordPress

Adding a WooCommerce storefront to your existing WordPress website can be a very profitable move. An e-commerce area lets you sell products or services directly to visitors, and when set up properly it can practically run itself. However, you’ll need to think carefully about exactly how you add WooCommerce to WordPress without affecting your live site.

For best results, you’ll want to develop your new store privately, and only make it available to customers once it’s completely ready to go.

Most people do this by creating a separate staging site, adding WooCommerce, and then overwriting the main site when it's ready to launch. This causes various problems, such as version control issues and potential loss of data when you need to make changes to the live site. Fortunately, there's an easier way.

In this quick tutorial, we’ll explain how to add WooCommerce to WordPress seamlessly. You'll use the WooCommerce Private Store plugin to create a hidden development area. It's like adding a 'coming soon' page to WooCommerce or putting your store in maintenance mode, while the rest of your website remains public.

When your site goes live, you'll deactivate the private store plugin and your WooCommerce store will instantly become available on your existing website. You won't have to worry about version control or staging sites, and it just takes a few minutes to set up.

Let’s get to work!

Why you should use a hidden development area to add WooCommerce to WordPress

Many people start up a blog or a small business site, only to later decide to add in a storefront. Selling products and services through your website does take a little work, but the benefits are more than worth it.

WordPress doesn’t offer a lot of e-commerce specific functionality, so you’ll need a dedicated tool for setting up your new shop. We highly recommend WooCommerce:

An example of a WooCommerce store.

The free WooCommerce plugin adds a fully-featured store to your website, without disrupting any of your existing pages or content. No matter how established your site is, setting up an integrated WooCommerce shop is quick and painless.

However, you will want to spend a little time working on your store before making it live – creating key pages, uploading products, and so on. You'll want to add menu links to your store pages, and icons linking to the cart and checkout. What’s more, you won’t want this work-in-progress to be publicly available. Instead, you’ll want visitors to continue seeing the original website until the new store is designed and ready.

The easy way to add WooCommerce to WordPress

There are a few ways you can handle this. For instance, you can set up a separate staging site that’s a carbon copy of your live website, add WooCommerce to WordPress, and then merge your changes. Unfortunately, this is a time-consuming, complex process that’s fraught with the potential for errors.

Clearly, you need a better solution. That’s where WooCommerce Private Store comes into the picture:

This plugin has a number of useful applications. Its primary use is enabling you to set up a private storefront, where users have to log in before they can view its contents. For example, some people use it to create a private members-only club. However, it also lets you temporarily hide your new WooCommerce store while it’s being developed. Then, you can easily make the shop publicly available when you’re done setting it up.

Check out the WooCommerce Private Store demo!

This is a much simpler and more temporary solution than creating a full staging site and then copying it over your live site. To illustrate, let’s take a look at how the process works from start to finish.

How to add WooCommerce to WordPress using a hidden development area (in 4 steps)

The following steps will show you how to set up a hidden WooCommerce store on your live site. You'll also learn how to make it visible only when you’re ready to do so. All you’ll need to get started is a WordPress site, and the WooCommerce Private Store plugin.

Step 1: Add WooCommerce to WordPress

The first thing you’ll need to do is add WooCommerce to WordPress. You won’t actually be setting up your store yet – after all, you’ll want to be sure it’s hidden first. However, WooCommerce will need to be installed before you configure your hidden development area.

Fortunately, WooCommerce is a free plugin that’s simple to set up. Log into your WordPress dashboard, and navigate to Plugins > Add New. Use the search bar to find 'WooCommerce', and click on the button labeled Install Now:

Installing the WooCommerce plugin.

After a few moments, another button will appear, this one labeled Activate:

Activating the WooCommerce plugin.

Select that one as well, and WooCommerce will be ready to go on your site. At this point, you’ll be able to start setting up your shop and adding products. Before you do that, however, it’s important to make sure your fledgling store is safely locked away.

Step 2: Set up your hidden development area

If you haven't done so yet, go ahead and purchase the WooCommerce Private Store plugin. You’ll be provided with a zipped file containing everything the plugin needs to work, which you’ll need to install on your site.

After that, navigate to WooCommerce > Settings in your dashboard. Select the Private Store tab:

Setting up the WooCommerce hidden development area plugin

Enter the license key you were given when you bought the plugin. Then, save your changes. This will fully activate WooCommerce Private Store, making it ready to use.

The best part is that this is all you need to do. Once the plugin has been activated using a valid license key, it will automatically hide WooCommerce from public view. This means that all pages, features, and products associated with WooCommerce won’t be available on the front end. If anyone does try to view those areas, all they’ll see is a login form:

A WooCommerce store login form.

You can customize the login form on the plugin settings page. However, it's not very important because it's unlikely that anyone will see it anyway. All the WooCommerce-related pages are hidden from public view, so the only way someone would ever see the login form is if they guessed the URL of one of these pages.

Show the WooCommerce hidden development area to logged in users or specific roles

Of course, you want logged in administrators to be able to access the hidden development area. That's how you'll develop and test your WooCommerce store, while keeping it hidden from other users.

There are two ways to do this. Use the first option if your website isn't set up to allow normal visitors to create accounts. That's how most non-WooCommerce websites work. However, if you let people create accounts for other purposes - such as blog commenting or membership plugins - then use option 2 instead.

  • Option 1 - Tick the 'Logged In Users' box on the plugin settings page, then select the 'administrator' from the user roles option that appears underneath. This will automatically unlock the store for all logged in administrators, while leaving it hidden from guests and other user roles.
  • Option 2 - Leave the 'Logged In Users' box unticked on the plugin settings page, and enter 1 password which will unlock the store.

Once administrators have unlocked the store using either of these methods, they will be able to see the full WooCommerce store. This includes viewing menu links to the store pages in the front end, and viewing those pages. They can also add products to the cart and test the checkout process. This lets you and your development team work on the new WooCommerce area while it remains hidden from everyone else.

Step 3: Create your WooCommerce store

Now that you’ve made WooCommerce inaccessible to visitors, it’s time to set up your store:

Setting up your WooCommerce store.

We won’t go through that entire process here, since there’s plenty of information elsewhere that can help you out. Still, let’s summarize the basic steps involved in getting your WooCommerce store ready to go:

  1. Go through the WooCommerce setup wizard. In just a few screens, you’ll be able to set up your store’s basic features and enter crucial information about pricing, shipping, and more.
  2. Configure your store’s settings. While the WooCommerce wizard covers the most crucial options, there are a lot of other settings you may want to customize to better suit your needs.
  3. Add each of your products or services to the store. This can be done in the Products tab, which offers lots of options to fully customize your offerings.

We recommend taking your time with this process. Check out each product and store page on the front end, and walk through the buying and checkout stages as though you were a customer. You’ll want to ensure that your store looks and acts exactly the way you want it to before you make it live.

Step 4: Make your WooCommerce store visible to the public

When you’re confident that your store is ready to launch, you’ll need to make it visible to the public. Fortunately, this is the easiest part of the entire process.

All you need to do is deactivate the WooCommerce Private Store plugin. To do that, go to the main 'Plugins' list in the WordPress admin, and click to Deactivate WooCommerce Private Store.

This will automatically unhide your hidden development area and make your store available for all to see. At this point, you can uninstall the plugin if you like. Alternately, you can keep it deactivated on your site, in case you need it in the future. (For example, you might want to temporarily hide your WooCommerce store while making changes or updates.)

Conclusion

If you want to build a positive reputation online, your website should always look professional and fully-functional. This means that if you need to make large-scale changes, you’ll want to keep your development work hidden from public view. That includes keeping your in-progress store private while you add WooCommerce to WordPress.

As we’ve demonstrated, the process of doing this is remarkably simple when you use WooCommerce Private Store. It's much quicker than installing WooCommerce on a separate site and merging with the live site, and avoids all the problems.

To recap, here are the four steps you’ll want to follow:

  1. Add WooCommerce to WordPress.
  2. Set up your hidden development area.
  3. Create your WooCommerce store.
  4. Make your WooCommerce store visible to the public.

Do you have any questions about how to add WooCommerce to WordPress? Ask us anything in the comments section below!

Image credit: pxhere.

WooCommerce Product Table Compatibility Program Logo
Calling all WordPress theme and plugin developers! We're pleased to announce that you can now apply for our new WordPress plugin compatibility scheme for WooCommerce Product Table.

Thousands of WordPress websites worldwide are now increasing their sales with our bestselling WooCommerce Product Table plugin. People constantly ask us whether WooCommerce Product Table works with a specific theme or plugin.

We've already published a list of compatible third party themes and plugins we have tested with. However, there are many themes and plugins that we haven't tested with.

We want to help our customers to use product tables to meet more and more diverse requirements. You can achieve amazing things by combining WooCommerce Product Table with other developers' plugins. As a result, we've decided to launch a formal scheme for theme and plugin developers to get certified and declare compatibility with WooCommerce Product Table.

Compatible themes and plugins get more sales

By getting your WordPress themes and plugins certified as compatible with WooCommerce Product Table, you open up your product to a much bigger market.

As well as getting sales from people who are searching for your plugin directly, you can reach people who are seeking extra features for their product tables.

Adding the compatibility badge to your plugin sales page can also boost conversions by reassuring customers that your plugin is well tested and compatible with other plugins they want to use. This makes them more likely to use your plugin rather than one that hasn't been tested.

You get more customers, we get more customers, and your customers can build more robust websites by using plugins that work well together. Everyone wins!

How does the WordPress plugin compatibility scheme work?

Once you apply to the compatibility scheme, we'll set up your theme/plugin on a test site where you can test it with WooCommerce Product Table. If the plugins are compatible, then we will accept your theme or plugin onto the scheme.

When this happens, then you will receive an official certification mark to use to promote the theme/plugin. We will also promote your theme and plugin on our own website.

What does it cost?

Absolutely nothing! This is a free WordPress plugin compatibility scheme designed to help both your customers and ours.

What are the benefits for my theme/plugin?

  1. If your WordPress theme or plugin is compatible, then we will permit you to use the official WooCommerce Product Table Compatibility logo on your website and sales materials. You can use it on WordPress.org (for free WordPress plugins), third party marketplaces such as ThemeForest or CodeCanyon, and your own website. This will encourage more people to buy your theme or plugin.
  2. We will list your theme or plugin as a certified product on our compatibility page, including a dofollow link to your site.
  3. We'll announce the compatibility to our customers on our social media channels.
  4. If you wish, then you can write a tutorial about how to use your theme/plugin with WooCommerce Product Table. We'll publish this on the Barn2 blog, including dofollow links back to your site. We will also email the tutorial to our mailing list.
  5. You can also join the Barn2 Media affiliate scheme and earn 30% commission for any sales we get as a result of people clicking the compatibility badge on your website. Just add your affiliate link to the WooCommerce Product Table Compatibility logo and anywhere else you mention the compatibility. This gives you double benefits: it encourages more people to buy your theme or plugin. You also earn affiliate commission when your customers buy WooCommerce Product Table!

WooCommerce spreadsheet plugin

WooCommerce is fantastic for selling products. But unless you're a database expert, it's not easy to manage a big product inventory once the products are uploaded to your site. Do you ever find yourself exporting products to CSV and using an Excel spreadsheet to view data and filter for information? If so, then this post is for you.

The WooCommerce Product Table plugin offers a different way to view a list of all your products with various filterable data. You can quickly find specific products, search and sort by any column, and filter based on information such as category, tag and custom taxonomy.

Bill Jacobson recently told us how much time he has saved by switching to WooCommerce Product Table instead of exporting to a spreadsheet. He was so pleased with the time-saving that he left the plugin a 5 star review:

Fast, Non-Complicated, Spreadsheet and Data Viewing Plugin
I needed a Wordpress plugin to easily display and filter a spreadsheet of 1,000 rows of product details. Frustrated after hours of testing multiple CSV upload tools, I found Barn2's "WooCommerce Product Table" plugin by doing a Google search. This product table works great, it's easy to install, has great help videos and documentation, and it simply works. I can now present and have spreadsheet data displayed and searched in Wordpress pages, and clients can easily search and find find products.

Keep reading to learn how you can stop using spreadsheets to manage product data from your own WordPress WooCommerce store!

How this WooCommerce spreadsheet plugin works

WooCommerce spreadsheet plugin bulk manage products

Instead of exporting to CSV and managing products in a spreadsheet, WooCommerce Product Table lists your inventory on a page on your website.

You can either make the product management page available to your customers, or you can mark it as Private and use it for internal purposes only. I'll tell you how to do this in a minute.

As well as the product name, you have full control over which columns of data appear in this WooCommerce spreadsheet view. For example, you can include columns for attributes, categories, tags, price, stock (including exact stock levels if needed), weight and dimensions.

There are lots of ways to find specific products in the spreadsheet view. WooCommerce Product Table comes with several search and filtering options built-in:

  • You can add filter dropdowns above the table, or sidebar widget filters if you prefer.
  • There's a search box above the table.
  • You can click on a category, tag or attribute to filter by that category/tax/attribute.
  • You can sort by any column (if you're not using the lazy load option) or by the name and price columns (if you're using lazy load).

Or for even more advanced filtering options, you can use the WooCommerce product spreadsheet layout with the purpose-built WooCommerce Product Filters plugin. This works perfectly with WooCommerce Product Table to add enterprise-level filtering to the spreadsheet view. Here's an example:

WooCommerce Product Filters Table Integration
A spreadsheet view created using the WooCommerce Product Table and WooCommerce Product Filters plugins

Why is this better than using spreadsheet software?

As you can see, viewing products in WooCommerce Product Table is very similar to viewing them in a traditional spreadsheet using Excel, Numbers or Google Sheets. The difference is that the spreadsheet layout is generated automatically from the WordPress database. You don't need to waste time exporting products to XML or CSV and then open them using spreadsheet software.

How to list products in a WooCommerce spreadsheet layout

  1. Install WooCommerce Product Table and activate your license key.
  2. The table builder will open when you first activate the plugin. Alternatively, access it later at Products → Product Tables.
  3. Use the options to choose how you want your WooCommerce spreadsheet layout to work. Here are some useful options for managing WooCommerce products in bulk:
    1. Columns - List the columns of data that you want to include in the spreadsheet layout. You probably want columns such as name, price, attributes, and stock. I expect you don't need customer-facing columns such as image and add to cart column.
    2. Product filters - Choose which filter dropdowns to show above the WooCommerce spreadsheet review. You can add filters for categories, tags, attributes/variations, and any custom taxonomy.
    3. Lazy load - Tick this box if you're listing more than about 50 products. This speeds up the table by loading 1 page worth of products at a time.
  4. Now create a new page for the WooCommerce spreadsheet layout. If you want to make it private, go to the 'Publish' section in the top right corner of the Add/Edit Page screen and choose the 'Private' visibility option. This hides the page from normal customers, so that only logged in Administrators and Store Managers can see it.
    WordPress private page visibility
  5. The next step depends on whether you're using the Gutenberg block editor or another page builder. If you're using Gutenberg then insert the 'Product Table' block and select your table. Alternatively, copy the table's shortcode from Products → Product Tables and paste it into your page builder.
  6. Finally, publish the page and view your spreadsheet of WooCommerce products. Now you can start managing products directly on your website, without having to bother exporting to CSV or XML first!

Can I use WooCommerce Product Table to edit products in a spreadsheet format?

While WooCommerce Product Table itself doesn't provide inline editing, you can easily add this with the Universal Frontend Editor plugin. This lets you add an 'Edit' link to your public-facing product tables. Logged in users with the correct role can use this to access an editable WooCommerce product spreadsheet, from which they can edit the products inline.

If you don't want to make the spreadsheet editable, then you can click on any product in the table and edit it from the single product page:

  1. Make sure you're logged into your WordPress website as an Administrator or Store Manager.
  2. View your WooCommerce spreadsheet page and click on the name of any product in the table. This will take you to the single product page.
  3. Next, click the 'Edit Product' link in the WordPress toolbar at the top of the screen.
  4. This will take you to the Edit Product screen, where you can make changes and save.
  5. Refresh the WooCommerce spreadsheet page, and the changes will instantly appear. (Tip: If you regularly edit products or need to see live stock information in the table, do not enable the caching option on the plugin settings page. This ensures that you always see the latest live data about each product.)

What else can the WooCommerce spreadsheet plugin do?

This article is about how to use the WooCommerce Product Table plugin to list products in a convenient spreadsheet layout for store owners. However, that's only a tiny part of what the plugin can do.

The plugin is particularly popular for creating a one-page WooCommerce order form layout for customers. Instead of just showing read-only data in the table, you can include add to cart buttons and variation selectors. Your customers can quickly find products, choose variations and add them to the cart - all on one page. This is a great way to increase conversions as it's much more user-friendly than standard store layouts.

You can use WooCommerce Product Table in different ways around your site. For example, you can add a read-only spreadsheet view to a private page for your internal management purposes. Separately, you can create a public WooCommerce order form page with more interactive features such as add to cart buttons.

Install this WooCommerce spreadsheet plugin on your site, and you'll be amazed at how many different ways you can use it!

Where to get the plugin

Many WooCommerce store owners waste time exporting products into spreadsheet software in order to view data and perform filters. If you just need to view products without editing them en masse, then there's an easier way!

Instead, you can use WooCommerce Product Table create a WooCommerce spreadsheet-like view directly on your website. This can be public or hidden from public view. The products are listed instantly, with no need for export plugins or manual data entry. Simply view your product list page, use the filters to find specific products, and think about how to spend the extra time!

WooCommerce comparison table affiliate blog
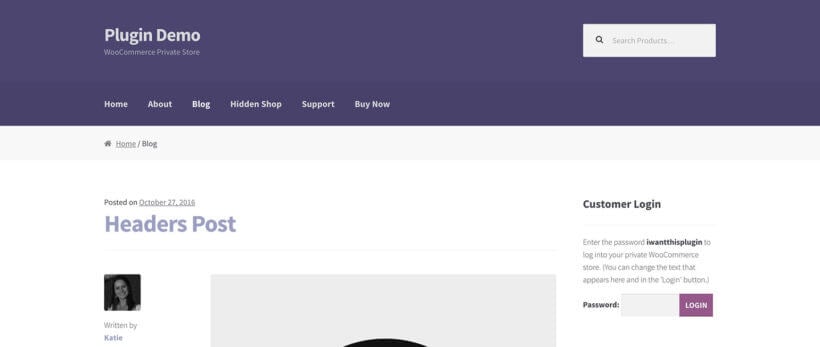
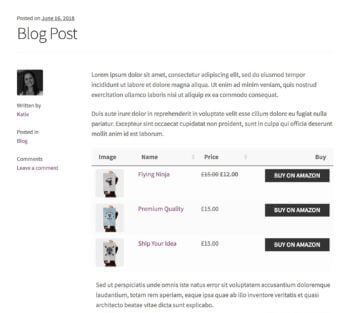
If you are monetizing your blog, you are likely doing a number of things – soliciting advertisers, acting as an affiliate for products or services, etc. And you may even be selling or promoting products directly from within blog posts.

But you may not know how you can use WooCommerce with a product comparison table plugin. This gives you all kinds of flexible ways to showcase and compare products for your audience.

What is WooCommerce?

At its most basic, WooCommerce is an open source e-commerce plugin for WordPress. It is used by online vendors/merchants to showcase and sell their products or services. For a free plugin, it offers lots of features, including managing inventory, shipping, a secure payment system, and even taxes. And of course, there’s support for mobile devices.

There are a number of extensions for WooCommerce. One of the best is the WooCommerce comparison table plugin we're talking about today.

What a WooCommerce comparison table can do for affiliate bloggers

WooCommerce comparison table affiliate blog

The idea behind this plugin is that bloggers can list products in a table directly inside their blog posts. This provides easy viewing by followers, whether you're selling your own products or performing as an affiliate seller of other companies' products (e.g. Amazon affiliates).

What makes this the best WooCommerce comparison table plugin is the availability of over 50 features. As an affiliate blogger, this gives you lots of flexibility in how to promote products within blog posts. Best of all, you can add comparison tables to any WordPress blog post with a simple shortcode.

Everything you need to sell more affiliate products from within blog posts

Here are just a few features that monetizing bloggers can use with this plugin:

  • The blogger adds a standard or external/affiliate product through WooCommerce. They then display it in a comparison table in a blog post. You can categorize products in a number of different ways. There are also ways to choose which products to include in each blog post.
  • There are a number of options for columns and filters to include in the table.
  • If products are being sold directly on your e-commerce site, then WooCommerce provides a shopping cart feature.
  • If products are sold through an affiliate link, there is an option to provide a referral link to the affiliate company. This will then appear as a button next to each product in the WooCommerce comparison table. Followers can easily compare products you've talked about in the blog post. They can then click through to buy them on the third party website.
  • The table has a search feature at the top, for bloggers who sell or promote numerous products or services. You can hide the search box if you only feature only a few products in each blog post.
  • The plugin is WPML certified for multi-lingual audiences.
  • Users can access full expert support from the UK WordPress agency Barn2 Media.

An interesting sideline - create an Amazon affiliates blog

WooCommerce Amazon Affiliate Reviews Website

Many bloggers have sites focused on specific topics of interest to them. They monetize those blogs with affiliate advertising and product offerings relating to that topic.

But one blog does not have to be the “end-all”. Many bloggers, in fact, have multiple blogs, on varied topics/themes.

One option for an additional blog would be to establish an Amazon products review blog, through Amazon’s affiliate program. This is a great source of passive income, although there will certainly be some work involved. For example, you need to write the best reviews that will draw followers to the blog and inspire them to order the products that you recommend. Even if a blogger is not an accomplished writer, you can use creative copywriters from services such as FlashEssay to write your reviews for a nominal price.

A WooCommerce comparison table plugin is perfect for displaying Amazon affiliate products. And the great thing about this plugin is that it is scalable, with the ability to add a limitless number of products, new categories, etc.

What are you waiting for?

If you have a monetized WordPress blog featuring WooCommerce products, it makes perfect sense to add product comparison tables to your blog posts. When consumers access websites and blogs, looking for products or services, they want an easy, visual method of viewing potential purchases, with all of the information they need in one place. Most do not want to read walls of text. A WooCommerce comparison table plugin is the solution.

Affiliate blogging has great potential as an income-producer, if it is done right. Getting companies to see value in advertising on a blog is a long-term process, after a blog has become popular enough with a large enough following to make it worth their while. The faster method is to develop a line of products to sell directly, or to become an affiliate marketer for other companies with products to sell. In either case, WooCommerce Product Table is the ideal plugin for adding product comparison tables to your blog posts.