List popular products on pages, widgets - anywhere you like!
I love discovering new ways to use our bestselling WooCommerce Product Table plugin. Today I'm going to share a new method for how to list bestselling or popular products anywhere on your website.
There are lots of reasons why you might want to list bestselling products in order of popularity. Maybe you want to list the most popular products on your website homepage. This is a neat way to draw attention to your main products, and give the most valuable estate to bestselling products making the most sales.
There are many benefits to using this method to list popular products:
List bestselling products anywhere on your site. This could be the homepage, sidebar text widget, within a blog post - absolutely anywhere!
Choose how many products to include in the list.
Add extra columns of data, such as the product image, description, and stock status.
Include an add to cart column so that people can buy popular products directly from the list!
Choose whether or not to show actual sales figures for each product.
The dynamic list of bestselling products automatically updates in real-time based on actual sales figures. No need to manually update it - ever.
Keep reading to learn how to set it up.
How to list bestselling products in a WooCommerce table
The WooCommerce Product Table plugin provides 100's of different ways to list products. This is how to set it up to list bestselling or popular products in a table anywhere on your site.
The product table builder will open automatically, or you can access it later at Products → Product Tables.
Look through the settings and choose how you want your product tables to behave. On the search and sort page, sort by popularity in descending order.
Now go to Products → Product Tables and edit the table you just created. The 'Edit' screen contains some more advanced options. Use these to set the product limit to however many popular products you want to list in the table.
Next, go to the plugin settings page at Products → Product Tables → Settings. Hide any unnecessary elements such as the search box and total number of products. It's best to keep a list of WooCommerce most popular products clean and simple because you will probably only have a few products in the table.
Next, edit the page where you want to list bestselling products. Either insert the shortcode from the final page of the table builder (you can also find this at Products → ProductTables) or add a 'Product Table' Gutenberg block and select the table you just created. This will all your products.
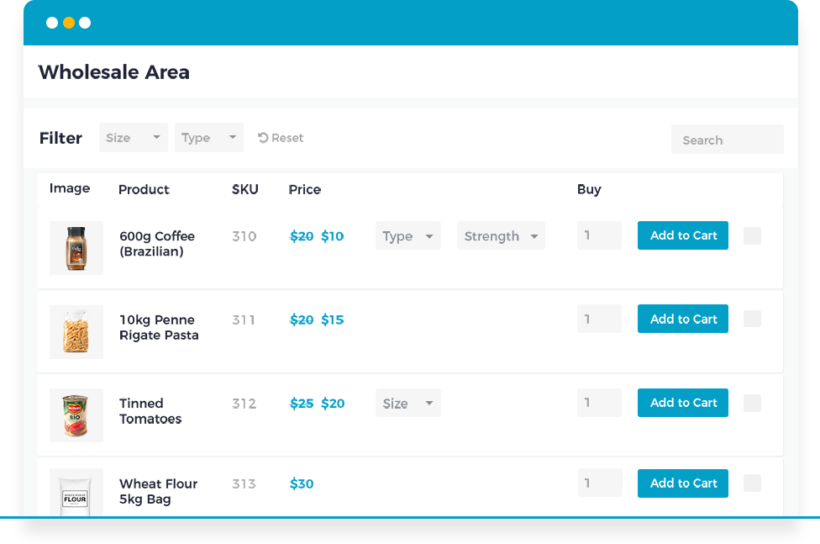
Your popular products WooCommerce list should look something like this:
Can I list the number of sales for each product?
Yes. To display the number of sales of each WooCommerce product:
Create a product table as described above.
In your list of table columns, add a custom field column called total_sales.
It will look something like this:
List popular products in the sidebar
By now, you know how to list WooCommerce bestsellers on any page, based on the number of sales. You can also add the product table shortcode anywhere else on your site.
For example, there's no WooCommerce popular products widget built into the WooCommerce core. It's easy to create your own bestselling products widget by adding a WooCommerce Product Table shortcode directly to a text widget. This is a nice way to draw attention to popular products by listing them throughout your store.
If you're listing popular products in the sidebar then I recommend keeping table columns to a minimum. For example, you might just include columns for the product image and name. The name column will then link through to the individual product page.
You can find a shortcode for each of your product tables at Products → Product Tables. Copy this and paste it into a text widget.
List of popular products added to a text widget, with columns for image and product name
Where can I get the plugin?
As you can see, WooCommerce Product Table provides lots of fabulous opportunities for listing bestselling products based on popularity. Think about how it can increase sales in your own store.
Adding a WooCommerce storefront to your existing WordPress website can be a very profitable move. An e-commerce area lets you sell products or services directly to visitors, and when set up properly it can practically run itself. However, you’ll need to think carefully about exactly how you add WooCommerce to WordPress without affecting your live site.
For best results, you’ll want to develop your new store privately, and only make it available to customers once it’s completely ready to go.
Most people do this by creating a separate staging site, adding WooCommerce, and then overwriting the main site when it's ready to launch. This causes various problems, such as version control issues and potential loss of data when you need to make changes to the live site. Fortunately, there's an easier way.
In this quick tutorial, we’ll explain how to add WooCommerce to WordPress seamlessly. You'll use the WooCommerce Private Store plugin to create a hidden development area. It's like adding a 'coming soon' page to WooCommerce or putting your store in maintenance mode, while the rest of your website remains public.
When your site goes live, you'll deactivate the private store plugin and your WooCommerce store will instantly become available on your existing website. You won't have to worry about version control or staging sites, and it just takes a few minutes to set up.
Let’s get to work!
Why you should use a hidden development area to add WooCommerce to WordPress
Many people start up a blog or a small business site, only to later decide to add in a storefront. Selling products and services through your website does take a little work, but the benefits are more than worth it.
WordPress doesn’t offer a lot of e-commerce specific functionality, so you’ll need a dedicated tool for setting up your new shop. We highly recommend WooCommerce:
The free WooCommerce plugin adds a fully-featured store to your website, without disrupting any of your existing pages or content. No matter how established your site is, setting up an integrated WooCommerce shop is quick and painless.
However, you will want to spend a little time working on your store before making it live – creating key pages, uploading products, and so on. You'll want to add menu links to your store pages, and icons linking to the cart and checkout. What’s more, you won’t want this work-in-progress to be publicly available. Instead, you’ll want visitors to continue seeing the original website until the new store is designed and ready.
The easy way to add WooCommerce to WordPress
There are a few ways you can handle this. For instance, you can set up a separate staging site that’s a carbon copy of your live website, add WooCommerce to WordPress, and then merge your changes. Unfortunately, this is a time-consuming, complex process that’s fraught with the potential for errors.
This plugin has a number of useful applications. Its primary use is enabling you to set up a private storefront, where users have to log in before they can view its contents. For example, some people use it to create a private members-only club. However, it also lets you temporarily hide your new WooCommerce store while it’s being developed. Then, you can easily make the shop publicly available when you’re done setting it up.
This is a much simpler and more temporary solution than creating a full staging site and then copying it over your live site. To illustrate, let’s take a look at how the process works from start to finish.
How to add WooCommerce to WordPress using a hidden development area (in 4 steps)
The following steps will show you how to set up a hidden WooCommerce store on your live site. You'll also learn how to make it visible only when you’re ready to do so. All you’ll need to get started is a WordPress site, and the WooCommerce Private Store plugin.
Step 1: Add WooCommerce to WordPress
The first thing you’ll need to do is add WooCommerce to WordPress. You won’t actually be setting up your store yet – after all, you’ll want to be sure it’s hidden first. However, WooCommerce will need to be installed before you configure your hidden development area.
Fortunately, WooCommerce is a free plugin that’s simple to set up. Log into your WordPress dashboard, and navigate to Plugins > Add New. Use the search bar to find 'WooCommerce', and click on the button labeled Install Now:
After a few moments, another button will appear, this one labeled Activate:
Select that one as well, and WooCommerce will be ready to go on your site. At this point, you’ll be able to start setting up your shop and adding products. Before you do that, however, it’s important to make sure your fledgling store is safely locked away.
After that, navigate to WooCommerce > Settings in your dashboard. Select the Private Store tab:
Enter the license key you were given when you bought the plugin. Then, save your changes. This will fully activate WooCommerce Private Store, making it ready to use.
The best part is that this is all you need to do. Once the plugin has been activated using a valid license key, it will automatically hide WooCommerce from public view. This means that all pages, features, and products associated with WooCommerce won’t be available on the front end. If anyone does try to view those areas, all they’ll see is a login form:
You can customize the login form on the plugin settings page. However, it's not very important because it's unlikely that anyone will see it anyway. All the WooCommerce-related pages are hidden from public view, so the only way someone would ever see the login form is if they guessed the URL of one of these pages.
Show the WooCommerce hidden development area to logged in users or specific roles
Of course, you want logged in administrators to be able to access the hidden development area. That's how you'll develop and test your WooCommerce store, while keeping it hidden from other users.
There are two ways to do this. Use the first option if your website isn't set up to allow normal visitors to create accounts. That's how most non-WooCommerce websites work. However, if you let people create accounts for other purposes - such as blog commenting or membership plugins - then use option 2 instead.
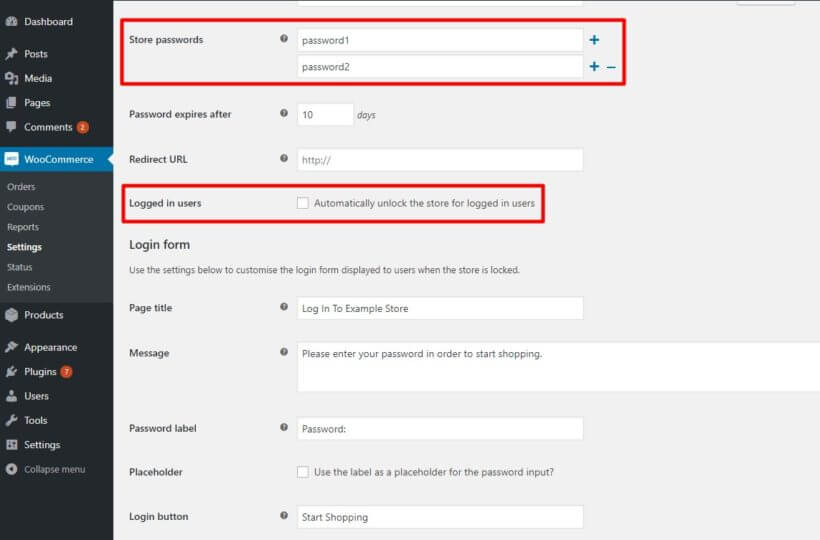
Option 1 - Tick the 'Logged In Users' box on the plugin settings page, then select the 'administrator' from the user roles option that appears underneath. This will automatically unlock the store for all logged in administrators, while leaving it hidden from guests and other user roles.
Option 2 - Leave the 'Logged In Users' box unticked on the plugin settings page, and enter 1 password which will unlock the store.
Once administrators have unlocked the store using either of these methods, they will be able to see the full WooCommerce store. This includes viewing menu links to the store pages in the front end, and viewing those pages. They can also add products to the cart and test the checkout process. This lets you and your development team work on the new WooCommerce area while it remains hidden from everyone else.
Step 3: Create your WooCommerce store
Now that you’ve made WooCommerce inaccessible to visitors, it’s time to set up your store:
We won’t go through that entire process here, since there’s plenty of information elsewhere that can help you out. Still, let’s summarize the basic steps involved in getting your WooCommerce store ready to go:
Go through the WooCommerce setup wizard. In just a few screens, you’ll be able to set up your store’s basic features and enter crucial information about pricing, shipping, and more.
Configure your store’s settings. While the WooCommerce wizard covers the most crucial options, there are a lot of other settings you may want to customize to better suit your needs.
Add each of your products or services to the store. This can be done in the Products tab, which offers lots of options to fully customize your offerings.
We recommend taking your time with this process. Check out each product and store page on the front end, and walk through the buying and checkout stages as though you were a customer. You’ll want to ensure that your store looks and acts exactly the way you want it to before you make it live.
Step 4: Make your WooCommerce store visible to the public
When you’re confident that your store is ready to launch, you’ll need to make it visible to the public. Fortunately, this is the easiest part of the entire process.
All you need to do is deactivate the WooCommerce Private Store plugin. To do that, go to the main 'Plugins' list in the WordPress admin, and click to Deactivate WooCommerce Private Store.
This will automatically unhide your hidden development area and make your store available for all to see. At this point, you can uninstall the plugin if you like. Alternately, you can keep it deactivated on your site, in case you need it in the future. (For example, you might want to temporarily hide your WooCommerce store while making changes or updates.)
Conclusion
If you want to build a positive reputation online, your website should always look professional and fully-functional. This means that if you need to make large-scale changes, you’ll want to keep your development work hidden from public view. That includes keeping your in-progress store private while you add WooCommerce to WordPress.
As we’ve demonstrated, the process of doing this is remarkably simple when you use WooCommerce Private Store. It's much quicker than installing WooCommerce on a separate site and merging with the live site, and avoids all the problems.
To recap, here are the four steps you’ll want to follow:
Add WooCommerce to WordPress.
Set up your hidden development area.
Create your WooCommerce store.
Make your WooCommerce store visible to the public.
Do you have any questions about how to add WooCommerce to WordPress? Ask us anything in the comments section below!
Calling all WordPress theme and plugin developers! We're pleased to announce that you can now apply for our new WordPress plugin compatibility scheme for WooCommerce Product Table.
Thousands of WordPress websites worldwide are now increasing their sales with our bestselling WooCommerce Product Table plugin. People constantly ask us whether WooCommerce Product Table works with a specific theme or plugin.
We've already published a list of compatible third party themes and plugins we have tested with. However, there are many themes and plugins that we haven't tested with.
We want to help our customers to use product tables to meet more and more diverse requirements. You can achieve amazing things by combining WooCommerce Product Table with other developers' plugins. As a result, we've decided to launch a formal scheme for theme and plugin developers to get certified and declare compatibility with WooCommerce Product Table.
Compatible themes and plugins get more sales
By getting your WordPress themes and plugins certified as compatible with WooCommerce Product Table, you open up your product to a much bigger market.
As well as getting sales from people who are searching for your plugin directly, you can reach people who are seeking extra features for their product tables.
Adding the compatibility badge to your plugin sales page can also boost conversions by reassuring customers that your plugin is well tested and compatible with other plugins they want to use. This makes them more likely to use your plugin rather than one that hasn't been tested.
You get more customers, we get more customers, and your customers can build more robust websites by using plugins that work well together. Everyone wins!
How does the WordPress plugin compatibility scheme work?
Once you apply to the compatibility scheme, we'll set up your theme/plugin on a test site where you can test it with WooCommerce Product Table. If the plugins are compatible, then we will accept your theme or plugin onto the scheme.
When this happens, then you will receive an official certification mark to use to promote the theme/plugin. We will also promote your theme and plugin on our own website.
What does it cost?
Absolutely nothing! This is a free WordPress plugin compatibility scheme designed to help both your customers and ours.
What are the benefits for my theme/plugin?
If your WordPress theme or plugin is compatible, then we will permit you to use the official WooCommerce Product Table Compatibility logo on your website and sales materials. You can use it on WordPress.org (for free WordPress plugins), third party marketplaces such as ThemeForest or CodeCanyon, and your own website. This will encourage more people to buy your theme or plugin.
We will list your theme or plugin as a certified product on our compatibility page, including a dofollow link to your site.
We'll announce the compatibility to our customers on our social media channels.
If you wish, then you can write a tutorial about how to use your theme/plugin with WooCommerce Product Table. We'll publish this on the Barn2 blog, including dofollow links back to your site. We will also email the tutorial to our mailing list.
You can also join the Barn2 Media affiliate scheme and earn 30% commission for any sales we get as a result of people clicking the compatibility badge on your website. Just add your affiliate link to the WooCommerce Product Table Compatibility logo and anywhere else you mention the compatibility. This gives you double benefits: it encourages more people to buy your theme or plugin. You also earn affiliate commission when your customers buy WooCommerce Product Table!
If you manage a WooCommerce store with lots of products, then you'll know how time-consuming updating them can be. But don't worry - there's a better way.
Do you spend hours updating WooCommerce products manually? Do you ever find yourself exporting products to CSV and using an Excel spreadsheet to view data and filter for information? If so, then this post is for you.
I'm going to show you two ways to create a WooCommerce product spreadsheet:
The Setary app brings spreadsheet editing to WooCommerce. You and your colleagues can access the secure spreadsheet and perform easy bulk edits to save hours of time.
In contrast, the WooCommerce Product Table plugin displays your products in a spreadsheet on the front end of your ecommerce store. This makes it much easier for customers to find what they're looking for. They can quickly find specific products, search and sort by any column, and filter based on information such as category, tag and custom taxonomy.
Bill Jacobson recently told us how much time he has saved by switching to WooCommerce Product Table instead of exporting to a spreadsheet. He was so pleased with the time-saving that he left the plugin a 5 star review:
Fast, Non-Complicated, Spreadsheet and Data Viewing Plugin
I needed a Wordpress plugin to easily display and filter a spreadsheet of 1,000 rows of product details. Frustrated after hours of testing multiple CSV upload tools, I found Barn2's "WooCommerce Product Table" plugin by doing a Google search.
This product table works great, it's easy to install, has great help videos and documentation, and it simply works. I can now present and have spreadsheet data displayed and searched in Wordpress pages, and clients can easily search and find find products.
Keep reading to learn how you can create either type of WooCommerce product spreadsheet.
Option 1: Spreadsheet bulk editing for WooCommerce products
Choose this option if you want to quickly bulk edit your products and inventory from a WooCommerce product spreadsheet.
Setary is a web app which connects to your WooCommerce store, displaying your products in a bulk editing spreadsheet. It can save you a huge amount of time compared to editing products manually or exporting and re-importing via CSV files.
This is how a Setary-powered product spreadsheet can supercharge your store management workflow:
You (or anyone with the right credentials) logs into Setary.
All your products and variations appear in a customizable spreadsheet. You can control which columns of product data to include in the WooCommerce spreadsheet.
You use the search box and filters to narrow down the list of products and find the ones you want to edit. For example, you might need to edit all products and variations that have a "Blue" attribute or which cost under $50.
To bulk edit the products, either make changes inline directly in the spreadsheet; or select multiple products and use the 'Bulk Actions' button.
This is significantly faster than manually updating products and variations one-by-one. It's also much faster and less error-prone than editing products via a CSV file.
How to set up the Setary spreadsheet editor
To use Setary's WooCommerce spreadsheet editor, you need to connect your store to Setary once. You and your colleagues can then access the spreadsheet whenever you want.
Follow the onscreen instructions to install the free Setary helper plugin on your WooCommerce store. This lightweight plugin simply connects Setary to your store, allowing it to securely retrieve your product data and display it in the spreadsheet.
You can then log into Setary to view your inventory in a spreadsheet and make bulk edits. All changes are automatically synchronized with your live WooCommerce database, ensuring fast and accurate product management.
If you have multiple WooCommerce stores, then you can connect them all to Setary. You can then either make the bulk edits to each store within its own individual spreadsheet; or copy changes between your stores.
Option 2: Display WooCommerce products in a filterable front-end spreadsheet
Choose this option if you want to display customers in a structure spreadsheet-style view on the front end of your WooCommerce store.
As we've seen, Setary offers a bulk editing spreadsheet for WooCommerce. Our other recommended plugin - WooCommerce Product Table - works very differently because it's for your customers rather than for back end product management.
It lists the products in a structured spreadsheet view on your online store, with whichever columns of product data you chose in the plugin settings. For example, you might include extra columns for attributes, categories, tags, price, stock (including exact stock levels if needed), weight, and dimensions.
As you can imagine, this is much more helpful than the usual store layout because customers can view extra product data, choose variations and quantities, and add to the cart directly in the WooCommerce spreadsheet. No need to visit a separate page for each product!
Finding products in the WooCommerce spreadsheet
There are lots of ways for customers to find specific products in the spreadsheet view. WooCommerce Product Table comes with several search and filtering options built-in:
You can click on a category, tag or attribute to filter by that category/tax/attribute.
You can sort by any column (if you're not using the lazy load option) or by the name and price columns (if you're using lazy load).
Or for even more advanced filtering options, you can use the WooCommerce product spreadsheet layout with the purpose-built WooCommerce Product Filters plugin. This works perfectly with WooCommerce Product Table to add enterprise-level filtering to the spreadsheet view. Here's an example:
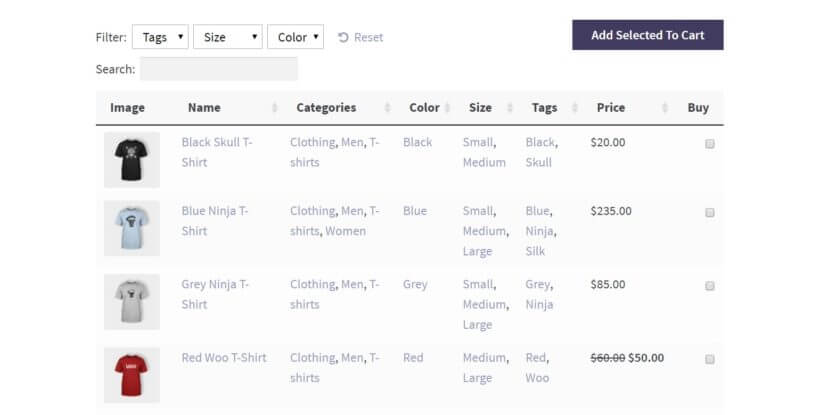
A spreadsheet view created using the WooCommerce Product Table and WooCommerce Product Filters plugins
How to list products in a WooCommerce spreadsheet layout
The table builder will open when you first activate the plugin. Alternatively, access it later at Products → Product Tables.
First, choose whether you want to add the spreadsheet to your main shop pages or manually add it to a specific page.
Use the options to choose how you want your WooCommerce spreadsheet layout to work. Here are some useful options for managing WooCommerce products in bulk:
Columns - List the columns of data that you want to include in the spreadsheet layout. You probably want columns such as name, price, attributes, and stock. I expect you don't need customer-facing columns such as image and add to cart column.
Product filters - Choose which filter dropdowns to show above the WooCommerce spreadsheet review. You can add filters for categories, tags, attributes/variations, and any custom taxonomy.
Lazy load - Tick this box if you're listing more than about 50 products. This speeds up the table by loading 1 page worth of products at a time.
The remaining steps are optional - skip them if you choose to add the spreadsheet to your main shop pages in step 3:
Create a new page for the WooCommerce spreadsheet layout. If you want to make it private, go to the 'Publish' section in the top right corner of the Add/Edit Page screen and choose the 'Private' visibility option. This hides the page from normal customers, so that only logged in Administrators and Store Managers can see it.
The next step depends on whether you're using the WordPress block editor or another page builder. If you're using the block editor then insert the 'Product Table' block and select your table. Alternatively, copy the table's shortcode from Products → Product Tables and paste it into your page builder.
Finally, publish the page and view your spreadsheet of WooCommerce products.
Now customers can visit your store and see the products displayed in a structured WooCommerce spreadsheet layout. This makes it much easier for them to find what they're looking for and add to the cart!
Can I use WooCommerce Product Table to edit products in a spreadsheet format?
No - WooCommerce Product Table is for displaying products in a non-editable spreadsheet view on the front end of your WordPress site. Think of it as a quick order form, structured like a spreadsheet.
If you want to update products from a spreadsheet then I recommend Option 1 - Setary - instead.
Why is this better than using spreadsheet software?
As you can see, viewing products in either Setary or WooCommerce Product Table is very similar to viewing them in a traditional spreadsheet using Excel, Numbers, or Google Sheets. The difference is that the spreadsheet layout is generated automatically from the WordPress database. You don't need to waste time exporting products to XML or CSV and then open them using spreadsheet software.
Next steps
Many WooCommerce store owners waste time exporting products into spreadsheet software in order to view data and perform filters. Luckily, there are two excellent tools to create a dynamic spreadsheet of WooCommerce products - without the headache of importing or exporting products from CSV:
Setary provides a secure spreadsheet of all your WooCommerce products and variations. You can quickly filter this to find the products you want to change, and then apply inline or bulk edits.
WooCommerce Product Table adds customer-facing WooCommerce spreadsheets to your ecommerce store. This can be public or hidden from public view.
Either way, the products are listed instantly, with no need for export plugins or manual data entry. Simply view your product list page, use the filters to find specific products, and think about how to spend the extra time!
If you are monetizing your blog, you are likely doing a number of things – soliciting advertisers, acting as an affiliate for products or services, etc. And you may even be selling or promoting products directly from within blog posts.
But you may not know how you can use WooCommerce with a product comparison table plugin. This gives you all kinds of flexible ways to showcase and compare products for your audience.
What is WooCommerce?
At its most basic, WooCommerce is an open source e-commerce plugin for WordPress. It is used by online vendors/merchants to showcase and sell their products or services. For a free plugin, it offers lots of features, including managing inventory, shipping, a secure payment system, and even taxes. And of course, there’s support for mobile devices.
There are a number of extensions for WooCommerce. One of the best is the WooCommerce comparison table plugin we're talking about today.
What a WooCommerce comparison table can do for affiliate bloggers
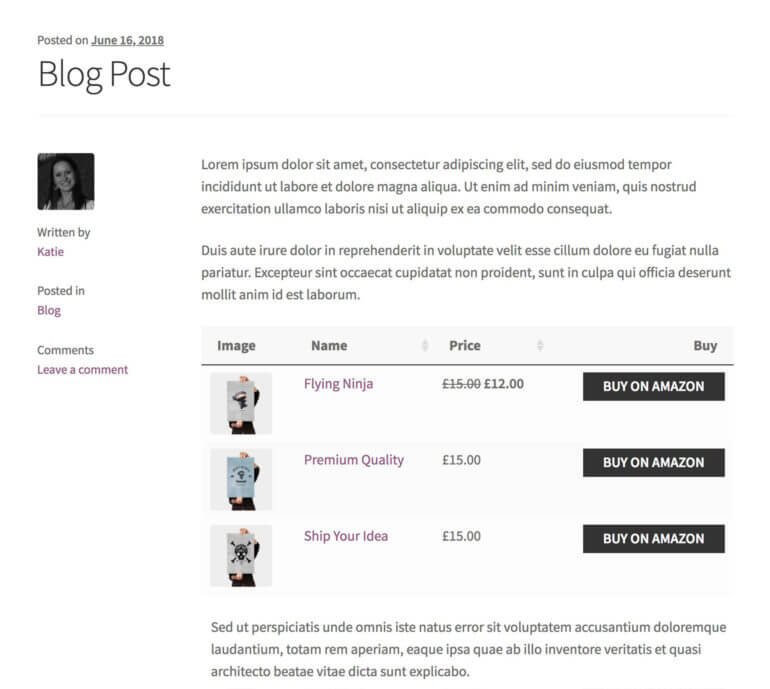
The idea behind this plugin is that bloggers can list products in a table directly inside their blog posts. This provides easy viewing by followers, whether you're selling your own products or performing as an affiliate seller of other companies' products (e.g. Amazon affiliates).
What makes this the best WooCommerce comparison table plugin is the availability of over 50 features. As an affiliate blogger, this gives you lots of flexibility in how to promote products within blog posts. Best of all, you can add comparison tables to any WordPress blog post with a simple shortcode.
Everything you need to sell more affiliate products from within blog posts
Here are just a few features that monetizing bloggers can use with this plugin:
The blogger adds a standard or external/affiliate product through WooCommerce. They then display it in a comparison table in a blog post. You can categorize products in a number of different ways. There are also ways to choose which products to include in each blog post.
There are a number of options for columns and filters to include in the table.
If products are being sold directly on your e-commerce site, then WooCommerce provides a shopping cart feature.
If products are sold through an affiliate link, there is an option to provide a referral link to the affiliate company. This will then appear as a button next to each product in the WooCommerce comparison table. Followers can easily compare products you've talked about in the blog post. They can then click through to buy them on the third party website.
The table has a search feature at the top, for bloggers who sell or promote numerous products or services. You can hide the search box if you only feature only a few products in each blog post.
The plugin is WPML certified for multi-lingual audiences.
Users can access full expert support from the UK WordPress agency Barn2 Media.
An interesting sideline - create an Amazon affiliates blog
Many bloggers have sites focused on specific topics of interest to them. They monetize those blogs with affiliate advertising and product offerings relating to that topic.
But one blog does not have to be the “end-all”. Many bloggers, in fact, have multiple blogs, on varied topics/themes.
One option for an additional blog would be to establish an Amazon products review blog, through Amazon’s affiliate program. This is a great source of passive income, although there will certainly be some work involved. For example, you need to write the best reviews that will draw followers to the blog and inspire them to order the products that you recommend. Even if a blogger is not an accomplished writer, you can use creative copywriters from services such as FlashEssay to write your reviews for a nominal price.
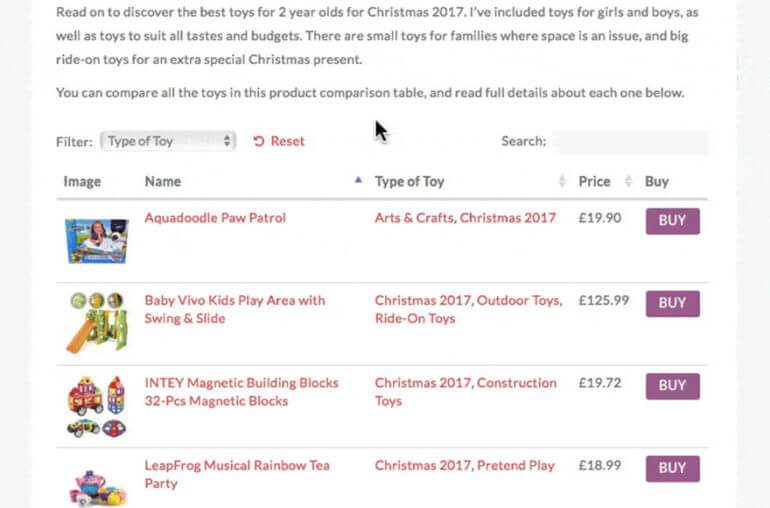
A WooCommerce comparison table plugin is perfect for displaying Amazon affiliate products. And the great thing about this plugin is that it is scalable, with the ability to add a limitless number of products, new categories, etc.
What are you waiting for?
If you have a monetized WordPress blog featuring WooCommerce products, it makes perfect sense to add product comparison tables to your blog posts. When consumers access websites and blogs, looking for products or services, they want an easy, visual method of viewing potential purchases, with all of the information they need in one place. Most do not want to read walls of text. A WooCommerce comparison table plugin is the solution.
Affiliate blogging has great potential as an income-producer, if it is done right. Getting companies to see value in advertising on a blog is a long-term process, after a blog has become popular enough with a large enough following to make it worth their while. The faster method is to develop a line of products to sell directly, or to become an affiliate marketer for other companies with products to sell. In either case, WooCommerce Product Table is the ideal plugin for adding product comparison tables to your blog posts.
Discover the easy way to embed, stream and sell videos on your WooCommerce store. We'll do it with the best WooCommerce video gallery plugins.
Are you looking for a way to showcase or sell videos on your WooCommerce store? There are several ways that you can use videos on your store:
Creating a WooCommerce video gallery - Display preview or promo videos on your main shop pages to grab visitors' attention. This is a great way to boost sales of any type of product, whether you're selling videos or something else such as clothing.
Selling videos with WooCommerce - You can also use WooCommerce to sell actual video products, which customers can then download or watch online.
An example of a WooCommerce video gallery
Keep reading to learn how to use WooCommerce video gallery plugin to display videos on your shop pages, as well as how to sell videos in WooCommerce. Customers will be able to watch a video preview for each product without leaving the page, and add the product to their cart right from the same gallery.
I'll also provide some tips on other ways to display video in WooCommerce, such as in a "Quick view" product lightbox, or in a dedicated "Video" tab on the product page.
How to create a WooCommerce video gallery
Why WooCommerce Product Table makes a great video gallery plugin
WooCommerce Product Table lets you display allor someof your WooCommerce products as a flexible grid/table. You can control exactly what information displays in your table including add to cart buttons and - you guessed it - product videos.
The advantage of a table view is that your customers can watch videos for multiple products on one page - there's no need for them to keep going to the individual product page. You can do this by adding embedded video players directly to the product table on the shop page. This is ideal for WooCommerce video streaming, as customers can view the video directly on. your website.
Similarly, your shoppers will also be able to select variations and add products to their carts right from the video gallery - again, no multiple tabs or page reloads required. Whether you're selling videos with WooCommerce or just want to use video to promote other types of product, it's a more convenient approach for visitors.
Below, we'll show you how to set up this WooCommerce videos plugin. After that, I'll show you some extra ways to display video in WooCommerce, and also how to sell video products.
Step 1: Add video to WooCommerce products
To get started, you need to add an embedded preview video to the individual products that you want to display with WooCommerce Product Table. This is how customers will stream the video online.
The process is the same whether you're selling videos with WooCommerce or just adding video to a regular product. You do have some choices for where and how you add the video, though.
First off - how. There are lots of ways to easily add video to WooCommerce products:
The easiest way is to just embed a video player from YouTube or Vimeo. Simply paste the video URL into the product and WordPress will embed it as a proper video player.
If you don't want YouTube branding, you can pay for one of Vimeo's unbranded plans, or a service like Swarmify. This can seamlessly import and serve YouTube video but with an unbranded player.
Now, the where.
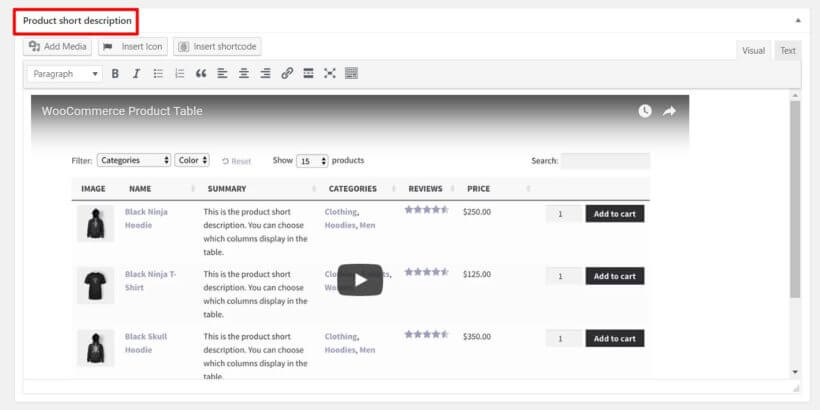
If you're not already using the Product short description field, that's the easiest spot to add your video. In fact, that's what we'll do for this example. All you need to do is embed your video in the text editor using normal WordPress oEmbed functionality. This is incredibly easy - simply paste the URL of your video from YouTube, Vimeo or similar.
But if you're already using the short description field for something else, you can also create a custom field to embed your videos using a free plugin such as Advanced Custom Fields.
Finally, add videos to all the products you want to display with the WooCommerce video gallery plugin.
Step 2: Create a product table for your WooCommerce video gallery
Install the plugin and then go to Products → Product Tables. While you should set up each step to see what interests you, if you want to create a WooCommerce video gallery, I recommend that you configure these settings as a minimum:
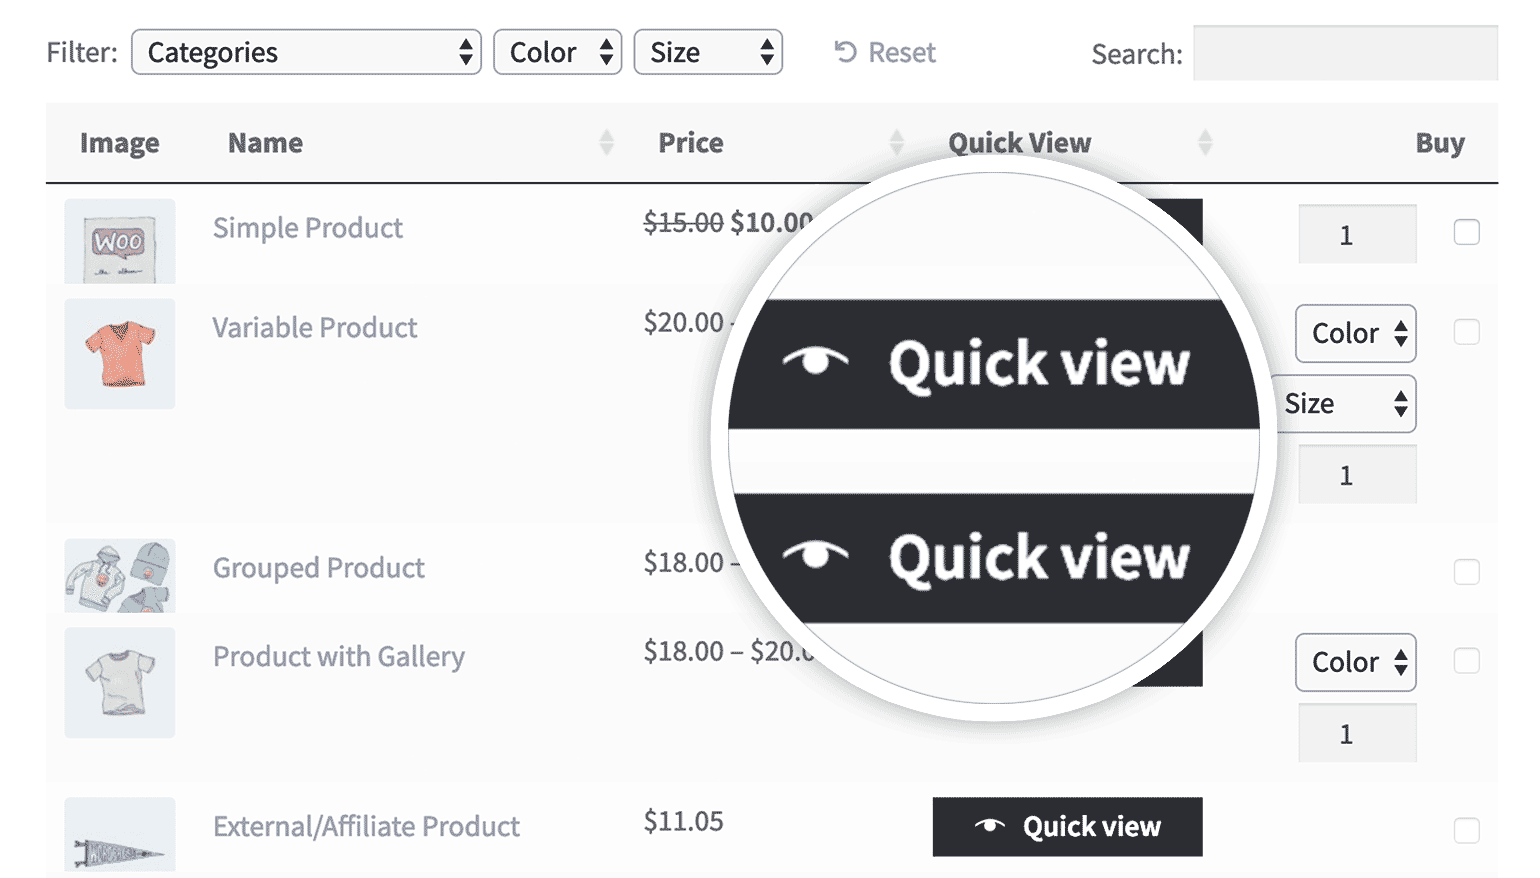
Columns - Make sure to include the short description or the custom field that you added to hold your video. And if you're planning to add quick view to your video gallery, then you should also add a 'Quick view' column.
Add to cart column - Configure how you want your add to cart button to function, including variations.
Lazy load - If you have lots of products with WooCommerce videos, you might want to enable lazy loading for performance reasons.
Once you've created the video table, go to Products → Product Tables → Settings and enable the 'Shortcodes' option. This ensures that your embedded WooCommerce video players load properly in the table.
Step 3: Add the video gallery to WooCommerce
Now, you just need to choose where in your store the WooCommerce video gallery will appear. There are two ways to approach this:
Tick the relevant boxes on the plugin settings page to show the product table layout on your main shop and category pages. You can do this via the first page of the table builder.
Use a 'Product Table' block or a shortcode to add WooCommerce video streaming galleries to other pages. You can find the shortcode for your table at Products → Product Tables.
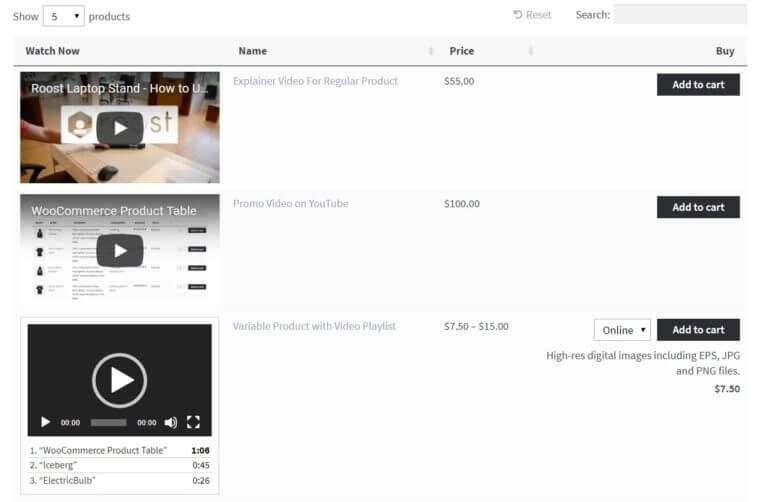
Once you have set up the video gallery in WooCommerce, it will look something like this:
Can I embed video playlists?
If you want to show more than one video per product, then you can embed entire video playlists into the WooCommerce video gallery. You can easily do this using the video playlist shortcode that comes with WordPress itself.
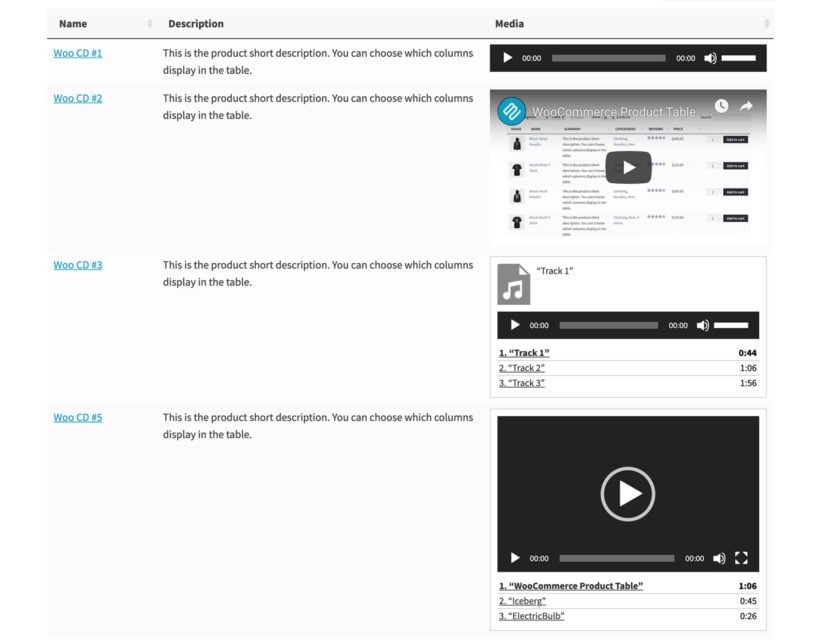
WooCommerce audio and video gallery containing an audio file, a single video, an audio playlist, and a video playlist
Use the following instructions to add a video playlist to any of the fields you're displaying in the product table:
Click the 'Add Media' button.
Choose the 'Create Video Playlist' button on the left.
Upload and select the videos you wish to include in the playlist.
Click the 'Create a new video playlist' button on the bottom right.
On the next screen, add any captions for each video and change the settings as required.
Creating video playlists in Gutenberg
At the time of writing, the above instructions only work if you're using the classic WordPress editor and not Gutenberg. Hopefully Gutenberg will add a video playlist button in future. In the meantime, you can create video playlists by adding the following shortcode to a Gutenberg 'Shortcode' block:
Replace the ID's with the actual ID of each video you wish to include in the playlist. You can find these by going to the 'Media' section of the WordPress admin, clicking on a video, and looking at the URL at the top of your browser tab. For example, if the URL ends /wp-admin/upload.php?item=12345 then you need to add the ID 12345 to the shortcode.
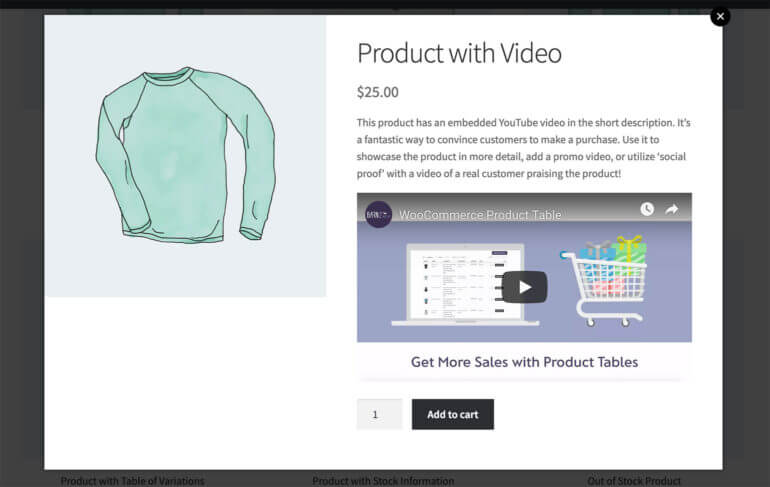
Add WooCommerce videos to a quick view lightbox
So far, you've learned how to create a WooCommerce video gallery with embedded video players in the main product list. You can use the widths option in WooCommerce Product Table to choose how much space the video player column takes up. However, videos inevitably require a fair amount of vertical space. If you want to list products in a more compact way, then it might be better to show the videos in a quick view lightbox for each product:
Using WooCommerce quick view is better than just adding video players to the single product page. That's because you don't want to take customers to a separate page for each product - that slows things down and takes them away from the main product list. By watching sample WooCommerce videos and adding to the cart from a quick view lightbox, the customer remains on the same page. This stops them from getting lost and encourages them to add multiple products to the cart.
Go to WooCommerce → Settings → Products → Quick view, enter your license key and choose your quick view settings. Make sure you enable the short description, as this is where you've added the video players. You can choose whether or not to show other sections such as the product images or add to cart buttons.
Add 'Quick view' quick_view to the list of columns in the Product Table (Products → Product Tables).
And that's it!
Add a video tab to the product page
And finally, let's think about where else you can display video on the WooCommerce product page. One way to do this is to add a dedicated 'Videos' tab, which allows you to display video without cluttering up the page layout. You can do this with the WooCommerce Product Tabs plugin, which lets you add extra tabs to the product page.
How to stream videos on WooCommerce
We have already touched on WooCommerce video streaming, but I want to make sure it's totally clear before we move on.
Steaming videos involves allowing people to actually watch the video on your website. They don't download it - they watch it in an embedded video player embedded on the website.
This means that you can use several of the methods that we already discussed to enable video streaming:
When you embed videos directly in a product table, then visitors can stream them from your main shop pages.
Whichever method(s) you choose, it's very straightforward to add video streaming to WooCommerce. Just host the videos on any streaming service such as Vimeo or YouTube, and paste the URL wherever you want them to appear on your WordPress site.
How to sell videos on WooCommerce
Above, you learned how to create a customizable WooCommerce video gallery. However, what if you're specifically looking to sell videos on WooCommerce?
In that case, the same basic steps apply for creating the video gallery, but you'll want to go about creating your WooCommerce products a little differently.
That is, in the example above you learned how to display videos in a gallery as a way to showcase a product. Now, you're going to learn how to make the video the product itself.
Can you sell videos on WooCommerce?
Most people think of WooCommerce in terms of selling physical products that are shipped to the user. However, it's equally well-suited for selling virtual or downloadable products.
This means that you can sell videos on WooCommerce whether you're selling physical videos to post, or virtual videos to stream online or download.
Types of video you can sell with WooCommerce
You can use WooCommerce to sell absolutely any type of video. This includes:
All video genres - fiction, nonfiction, films, movies, educational video.
Any type of video - animations, commentary, drone footage, behind-the-scenes event coverage, how-to video tutorials, interviews, presentations, promotional product videos, stock footage, motion graphics and presets, After Effects project files, Apple Motion or Cinema 4D templates, Flash elements files, video overlays and textured, Premiere Pro templates, social media video templates, video effects and transitions.
All video file types - MP4, WEBM, AVI, QuickTime, WAV, and many more.
Whatever sort of video you want to sell online, keep reading to discover the best way to do it.
Setup instructions
The basic steps to sell video in WooCommerce are as follows. I'll be focussing on selling videos for streaming online or downloading, but you can also sell physical videos to post to the customer:
Upload the video file somewhere accessible.
Mark products as Virtual and Downloadable.
Add video file to WooCommerce product.
Let's go through them in detail…
Step 1. Upload video file somewhere accessible
To get started, you'll need to upload the video file itself to a place where visitors will be able to download it.
For a small file, you can just upload it straight to your server via your WordPress Media Library.
However, if you have larger files, or if you're planning to have a ton of downloads, a better option is to use a dedicated storage service like Amazon S3 or DigitalOcean Spaces. These services are affordable, reliable, and lower the burden on your site's server.
Step 2: Create a virtual, downloadable product
Next, create a new WooCommerce video product:
Go to Products → Add New.
Add the product title - this will usually be the WooCommerce video name.
Type a main description of the video. This will help with the SEO of the video product page by being crawled by search engines.
Choose any categories or tags for the video. Customers will be able to filter by these to find specific videos.
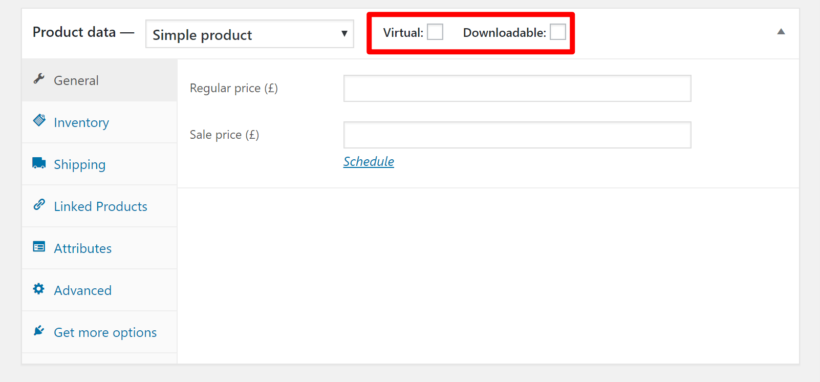
In the 'Product data' section, make sure to check the boxes for Virtual and Downloadable:
Step 3: Add download or streaming link
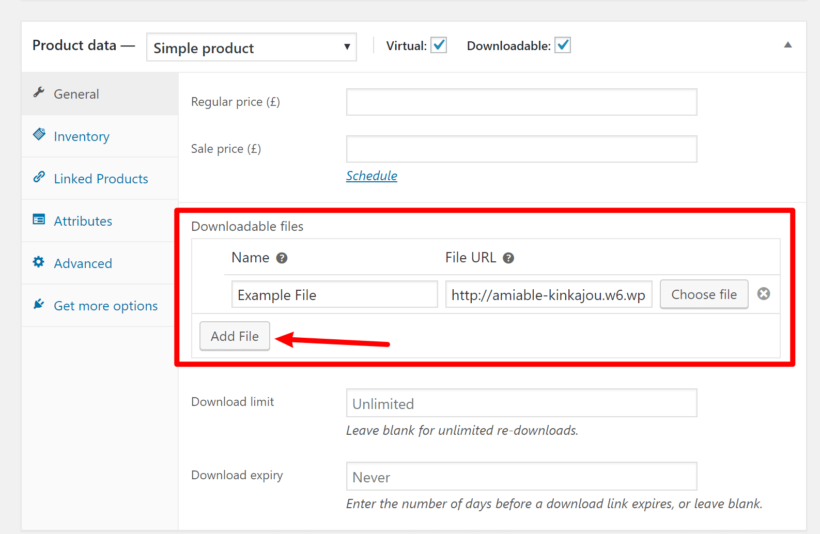
After you tick the 'Downloadable' box in Step 5 (above), you should see a new Downloadable files section appear in the General tab of your WooCommerce video product.
If you want customers to download the video they bought, then fill this in as follows:
Click the Add File button and insert the download link for where the video is saved. As we discussed in Step 1, this might be in the WordPress Media Library or it might be on a third party video host like Vimeo.
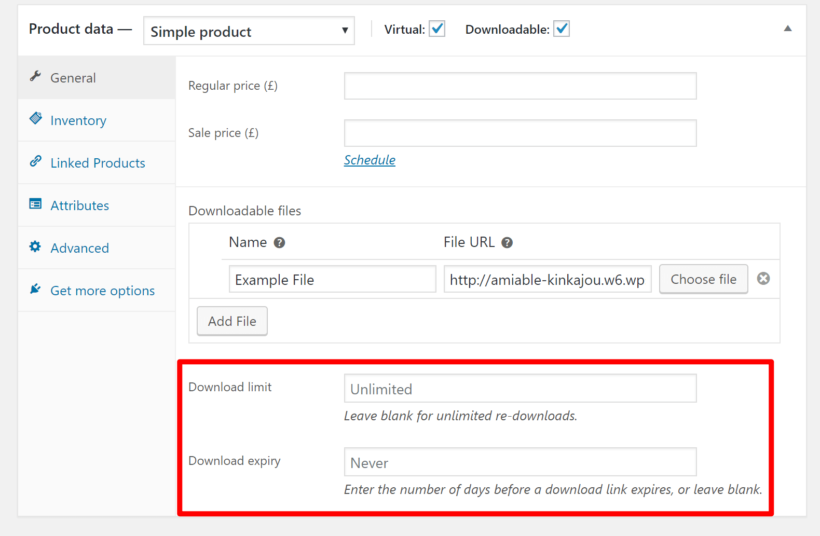
Add a download limit and expiry date if required.
Alternatively, you can allow people to stream the video online instead of downloading it. To do that, simply enter the URL of wherever they can stream the video. This might be a hidden page on your WooCommerce site containing the embedded video. It might also be a link to a third party video hosting site such as Vimeo.
Once you're finished, Publish the video product as you normally would.
Step 4: Add custom fields to WooCommerce video products (optional)
When you're selling video online, there might be extra fields of product data that you need to display about each video. For example, perhaps your WooCommerce video gallery needs fields for resolution, video length etc.
You can easily add custom fields using a free plugin like Advanced Custom Fields or Easy Post Types and Fields. Simply use your chosen plugin to add as many fields as you like to the 'Products' post type. You can then use WooCommerce Product Table to display them as extra columns in the video gallery.
What happens when customers purchase a video product?
When someone purchases the video from your WooCommerce store, they receive an email containing a unique link to download the video file.
For best results, combine this method for selling videos with the earlier section of this tutorial on how to create a WooCommerce video product gallery. That way, customers can watch the embedded video preview directly on your shop pages, and then purchase the full video.
What about piracy?
With the example above, even people who didn't purchase a video would still technically be able to download it if someone shared the link with them.
Now, digital piracy is something you're never going to stop, so a lot of store owners will just live with that and focus on finding more paying customers.
But if you are concerned and want to at least make it harder for people to share the download links, you can use the Download limit and Download expiry options to limit access:
Just be aware that these restrictions might frustrate some legitimate customers who want to download a file multiple times or in the future.
Go build your WooCommerce video gallery!
And that's it - you just added a user-friendly WooCommerce video gallery to your store. You also learned how to sell video online in WooCommerce, either for download or streaming.
Not only can visitors browse videos for multiple products without leaving the page they're on. They can also add products right to their carts for a smooth, friction-free checkout process.
The WooCommerce Product Table plugin makes it easy to add video to your shop pages. Get it today and start promoting your products with video:
Have any other questions about how to use a WooCommerce video gallery plugin? Leave us a comment!
If you're creating an order form for your e-commerce store, then you're likely to want a WooCommerce one-page checkout too. Keep reading to learn how to enable WooCommerce one-page shopping.
WooCommerce one-page checkout lets customers select products and complete their purchase on a single page. One-page shopping speeds up the buying process, which means customers are less likely to abandon their carts.
The perfect WooCommerce one page checkout plugin needs two things:
An easy way to view and find products, select options, and add them to their order without leaving the page. This involves listing WooCommerce products in a quick one-page order form.
A WooCommerce checkout form - either underneath the product order form or in a popup on the same page.
Unfortunately, setting up WooCommerce one-page shopping isn't as easy as it sounds. Most order form plugins meet the first requirement but come short with the second one. And the official WooCommerce.com extension for one-page checkout isn't great at displaying products.
This tutorial will tell you how to meet both requirements - no coding required! You'll learn how to list products in a quick order form, with a choice of two types of WooCommerce single page checkout.
But first, let's cover the basics – what is a one-page checkout?
What is WooCommerce one-page checkout?
WooCommerce one-page checkout is a checkout method that combines product selection and payment on the same page, eliminating the need to navigate between cart and checkout pages.
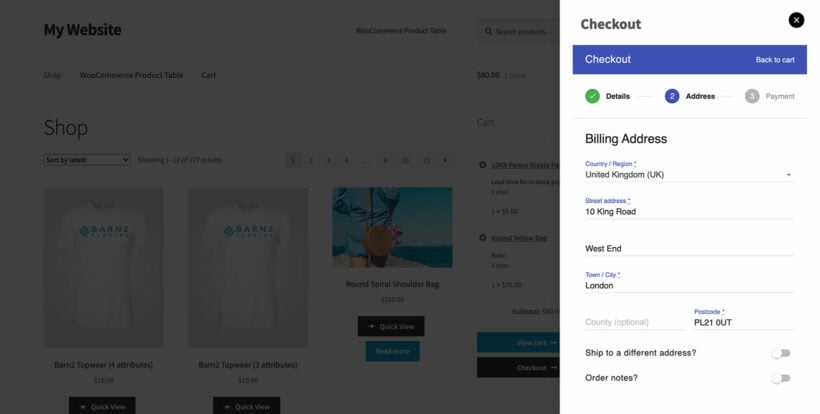
A WooCommerce one-page checkout can either appear on the page under the products, or as a popup on the same page
As I mentioned above, a WooCommerce single page checkout allows customers to select products and complete their purchases – all on one page.
Why do I need a WooCommerce one-page checkout plugin?
Typically in WooCommerce, customers must navigate through three separate pages: adding products to cart, reviewing the cart, and completing checkout. This creates multiple friction points.
In the simplest of terms, this is bad. Research shows that 22% of abandoned carts happen because the checkout flow is too long. The more pages the customer has to click through to make a purchase, the less likely they are to complete it.
A WooCommerce single page checkout combines all the steps onto one page, creating a faster checkout experience. You speed up purchases by listing products and letting customers complete everything on the same page.
This is why even WooCommerce has created its own one-page checkout plugin.
The 3 best WooCommerce one page checkout plugins
Next, let's explore the 3 best plugins for adding one-page checkout to WooCommerce. We'll start with the official extension from WooCommerce.com. That's a good starting point but has limitations. As a result, Plugin #2 will provide an alternative way to implement one-page checkout, and Plugin #3 works alongside the official extension to add the missing functionality.
Read about all three plugins to choose the combination that will work best for your customers.
It does this well, except that it lists products in a very basic way. That's fine for displaying one product or a small number of products with a checkout form underneath. However, this plugin becomes impractical if you have lots of products. It also fails to deliver if you want customers to search, sort, and filter products to find what they need.
Any ecommerce store with numerous products needs to seriously consider user experience and make things easier for the customer. This involves listing products in a user-friendly way:
The products have to be easy to find.
All the important product data needs to be visible at once, without having to visit multiple pages.
Customers need to be able to choose quantities and compare variations from one page.
Luckily, there are two easy ways to improve on this. We'll do this with Plugins 2 and 3 in this list.
Plugin 2: Display a popup checkout on your main shop pages
A popup checkout is a checkout form that appears in an overlay window on the same page as your products, allowing instant purchase without page navigation.
Rating: 5 out of 5 stars Setup time: 15 minutes
I think the most user-friendly way to enable one-page checkout in WooCommerce is to display the checkout in a popup window on the same page as your products. That way, you don't add clutter to your shop pages - and yet customers can quickly check out on the same page where they add products to their cart.
With this type of WooCommerce single-page checkout, the checkout form appears in a popup instead of below the list of products. Here's how it works:
The customer visits the product table page and uses the search, sort and filtering to find the products they want.
They select the products and add them to their cart.
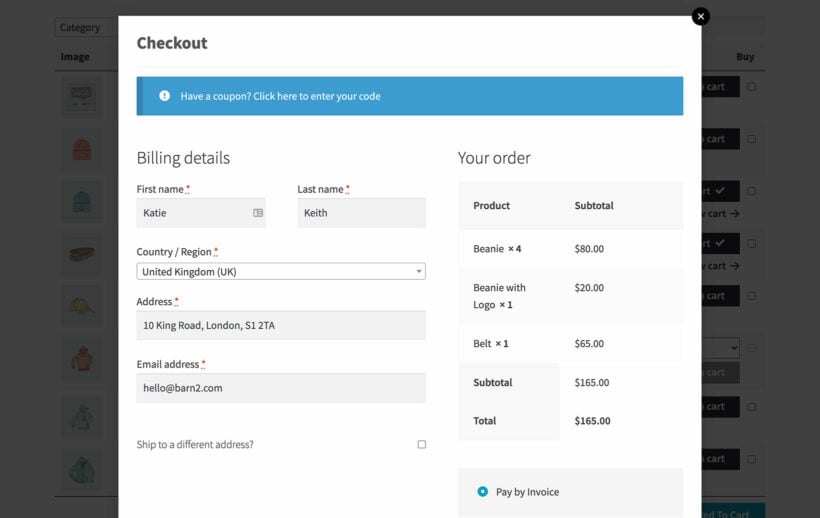
A popup immediately appears over the product table. The customer makes any changes to the selected products, enters their details and completes the purchase without having to leave the page.
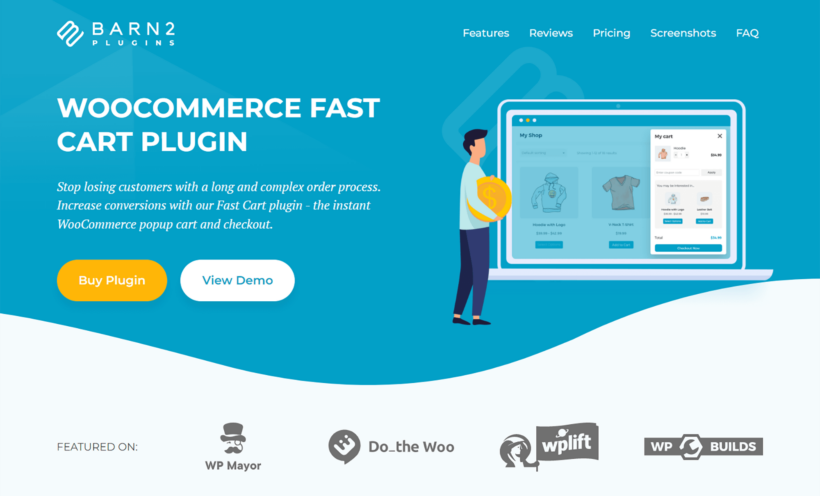
You can easily add this type of WooCommerce one-page checkout with the WooCommerce Fast Cart plugin. This lets you display a popup cart and/or complete checkout on the same page as your products. When a customer adds a product to the cart, you can either display the popup on-page checkout automatically, or let them click on a floating cart icon to launch it.
Use the WooCommerce Fast Cart plugin to add a popup checkout to your shop pages
Popup one-page checkout setup instructions
Quick setup: Install plugin → Configure settings → Enable Direct Checkout → Done in 15 minutes!
Install the plugin (2 minutes): Download and install WooCommerce Fast Cart on your WordPress site.
Access settings (1 minute): Go to the WooCommerce Fast Cart settings page at WooCommerce → Settings → Fast Cart.
Configure options (10 minutes): Choose how you want the fast cart to work. In particular, I recommend enabling the 'Direct Checkout' and 'Auto Open' options. Together, these make the checkout appear as soon as customers add products to the cart. It's the fastest way of using the plugin for a WooCommerce one-page shopping experience.
Plugin 3: List products in a searchable order form with one-page checkout underneath
An order form is a product listing page where customers can view, search, filter, and select multiple products before checking out on the same page.
When we discussed Plugin #1, I told you about the limitations of using the WooCommerce One-Page Checkout extension on its own. The main problem was that it lists products in such a basic way, with no way to search or filter them. That's where WooCommerce Product Table comes in.
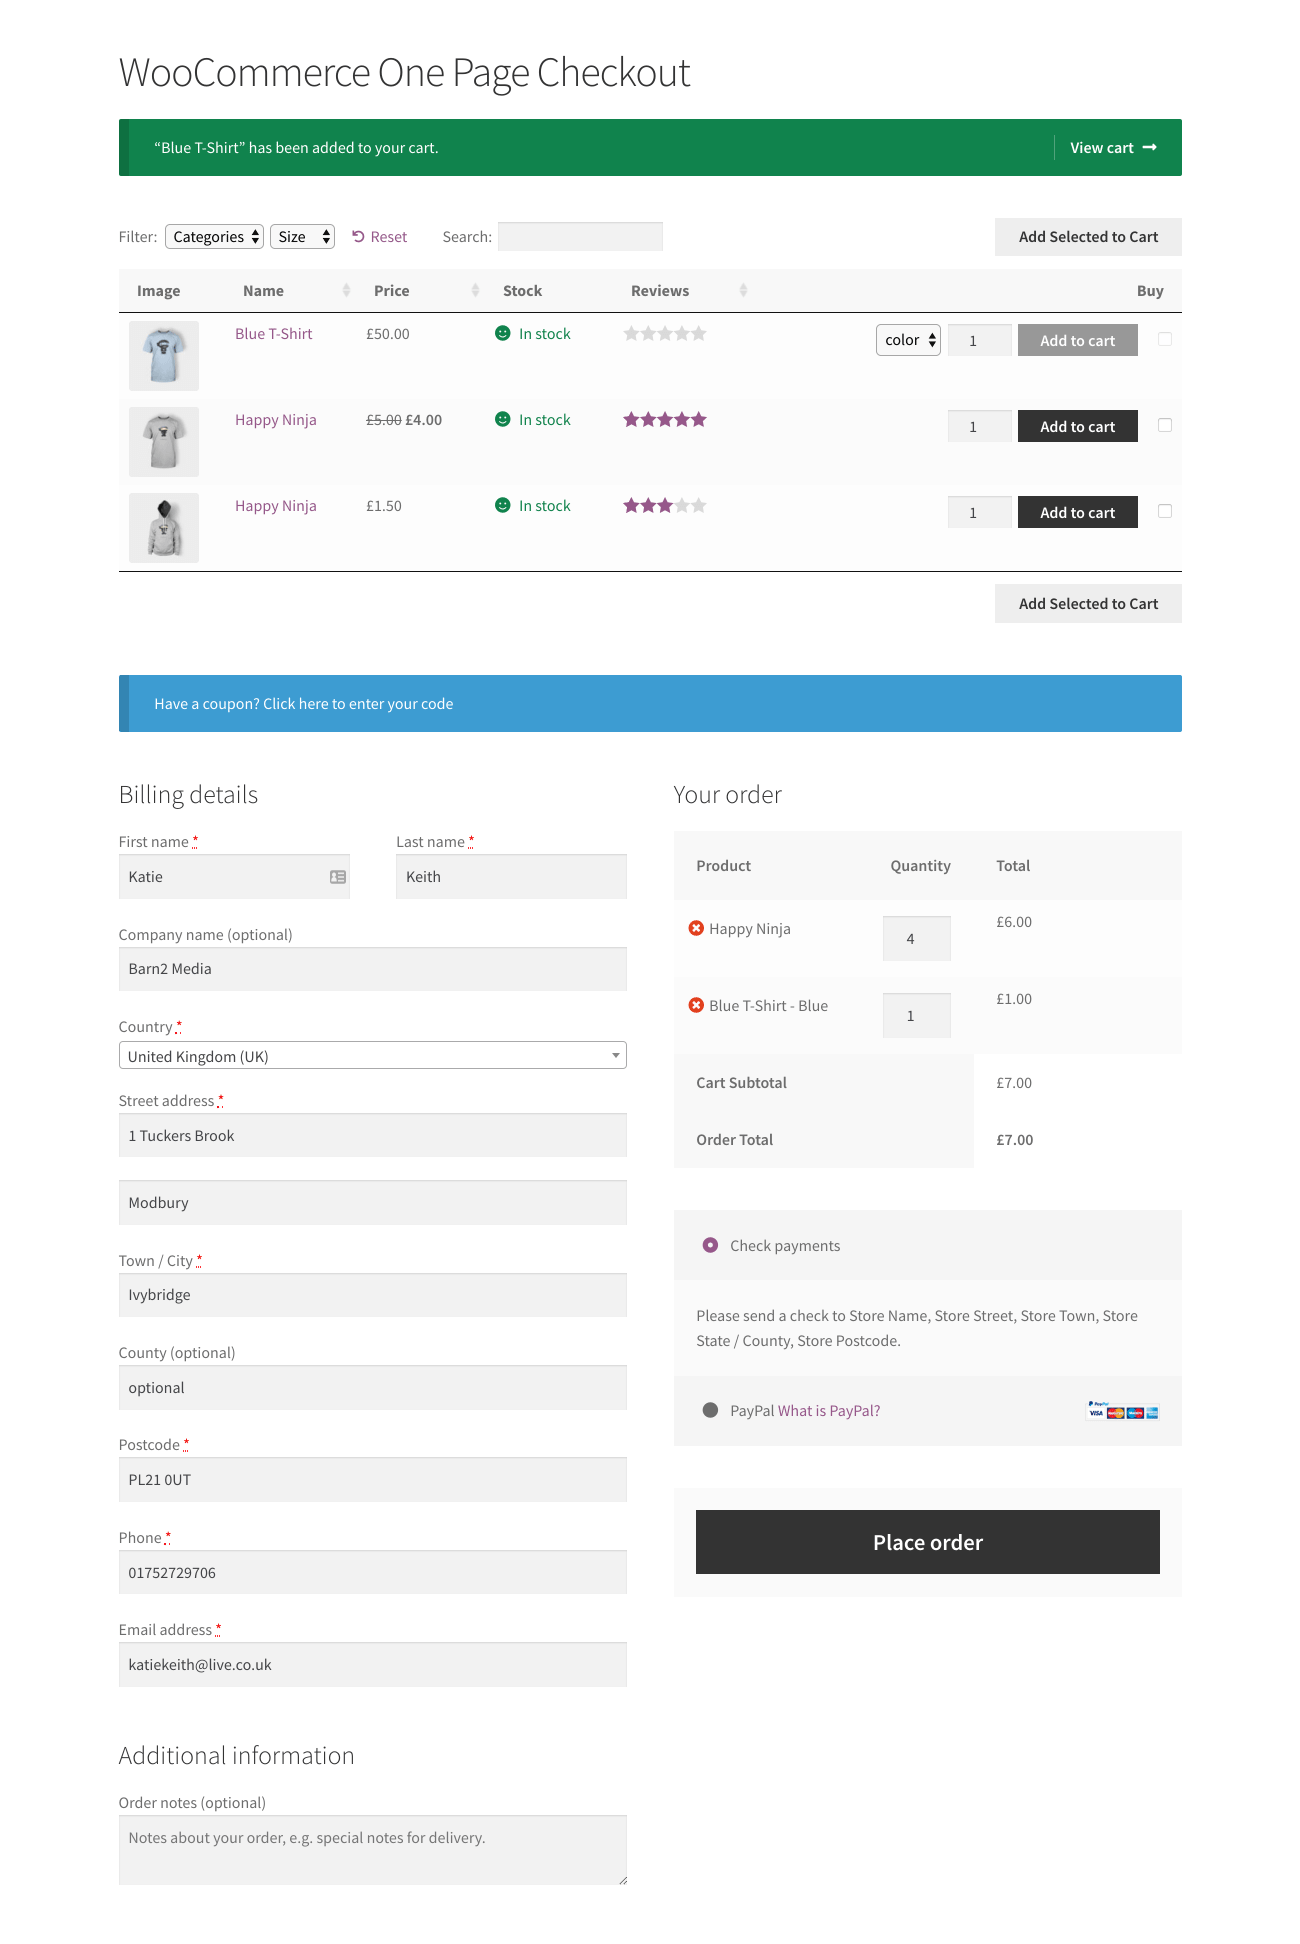
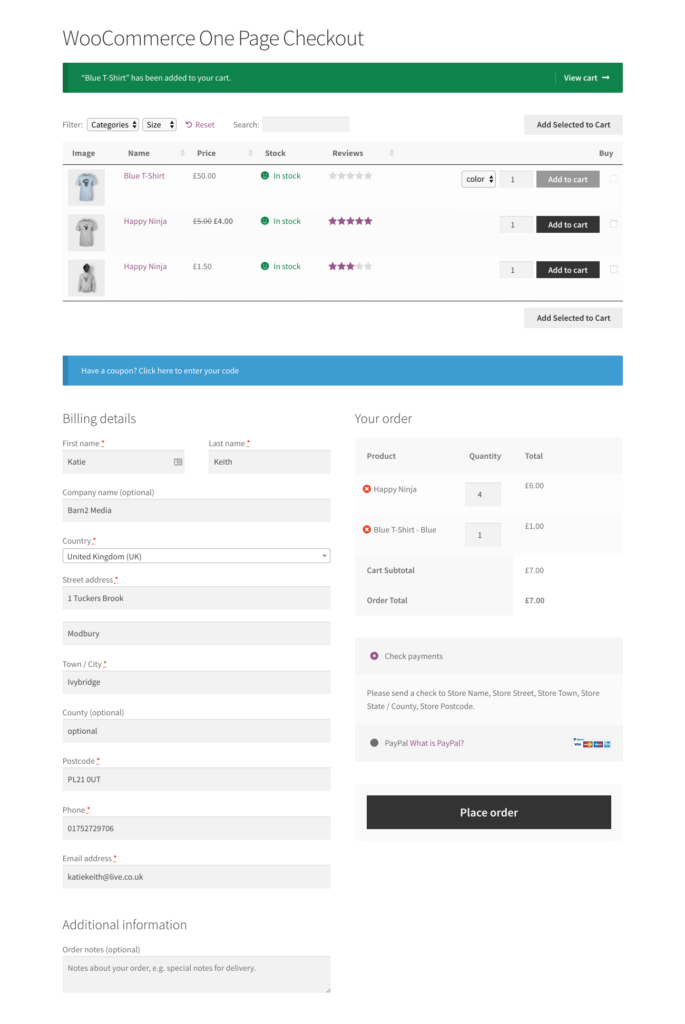
This bestselling WooCommerce one-page checkout plugin lists products in a searchable order form, allowing for quick browsing. You can list hundreds or even thousands of products, with quick search and sort filters so that customers can easily find what they want. After adding products to their order, customers can add their details and checkout, directly on the order form page!
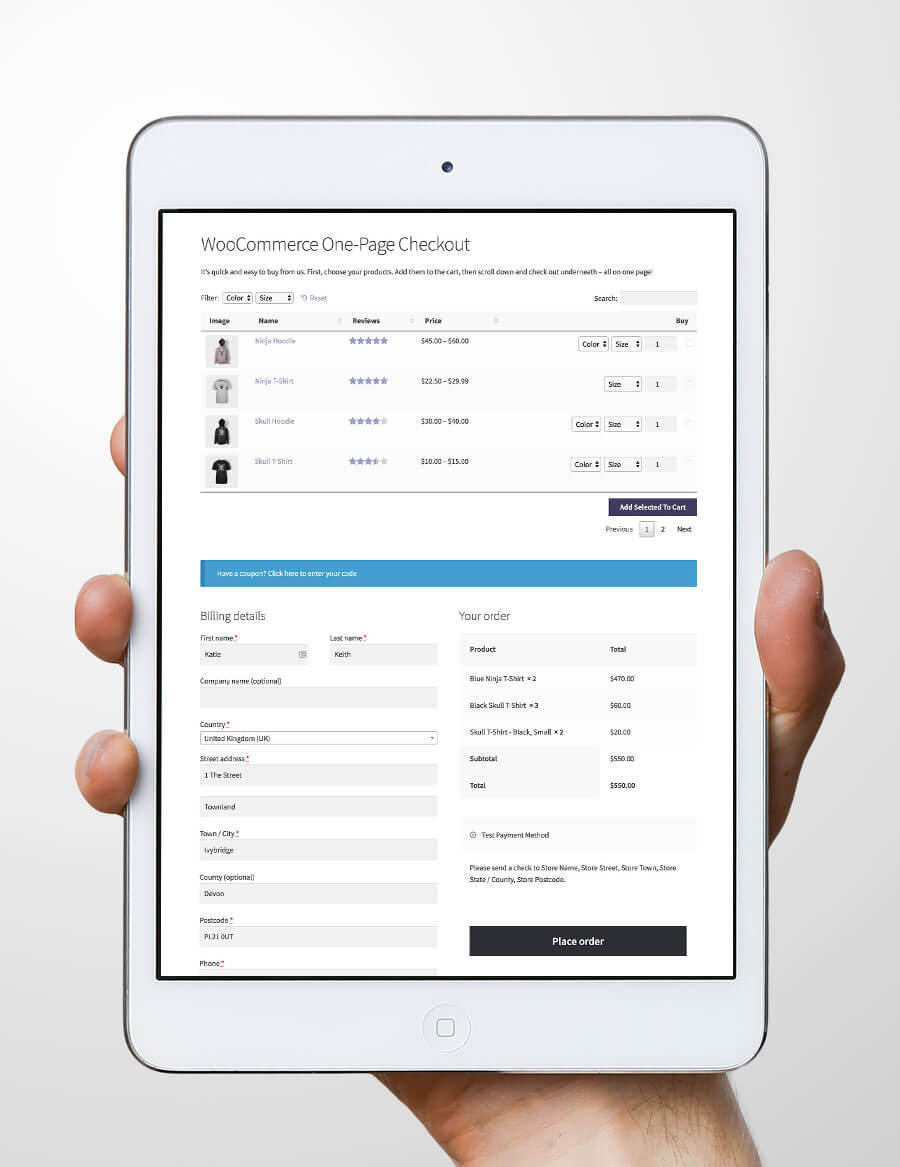
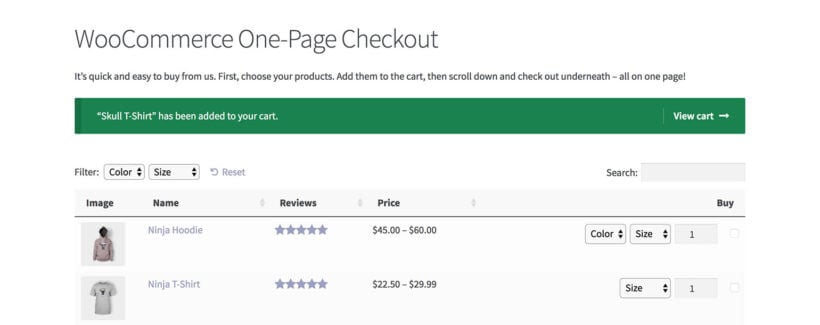
An example of one page shopping in WooCommerce
You'll need two plugins to implement this method:
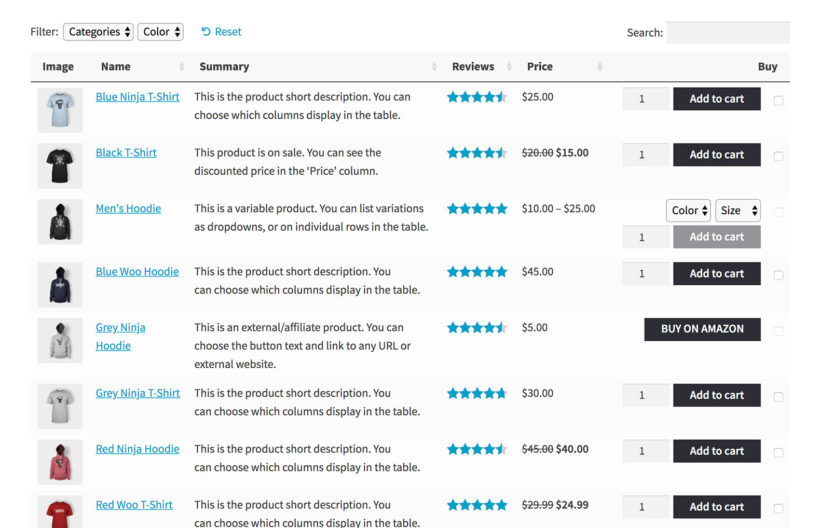
WooCommerce Product Table to list products in a searchable one-page order form. This will allow you to list all your products in a single easy-to-navigate table which you can place on any page. You can choose which columns of information to include, add product variation dropdowns, and even add a search box and filters. The lazy load option lets you list hundreds or even thousands of products, neatly separated by pagination links.
Together, this will create a seamless checkout experience for your customers. They won't have to switch between pages to find each product they are interested in. It's true one-page shopping, regardless of how many products you have.
Setup instructions for WooCommerce one-page checkout
Complete setup guide: This method takes about 30 minutes total and requires two plugins working together.
Install the plugin (2 minutes): Download and install the WooCommerce Product Table plugin on your WordPress site.
Configure table settings (15 minutes): Use the table builder at Products → Product Tables to choose the essential information about your product tables. This includes which columns of information to display about your products. Here are some tips for creating an effective WooCommerce one-page shopping experience:
You may wish to prevent people from leaving the one-page order form and clicking through to the single product page. To do this, click the pencil icon for each column and open the Advanced column to disable the link on that column.
If you want to list lots of products, you'll probably want to choose the 'Checkbox' add to cart option. This adds a multi-select option so that customers can add lots of products to the cart at once.
If you're selling variable products, then choose either the 'dropdown' or 'separate' variation options. This lets customers choose variations directly in the order form instead of having to click through to the single product page. (After all, that would defeat the purpose of a WooCommerce one-page checkout!).
Enable the 'Quantity' option so that customers can buy more than one of each product.
Final settings (3 minutes): Go to the plugin settings page at Products → Product Tables → Settings and make these changes:
Disable the 'Ajax Cart' option. By leaving this box unticked, the page will reload when customers add products to the cart, displaying the one-page checkout underneath with the correct products.
Keep the number of Products per page fairly low so that customers don't have to scroll too far to view the checkout under the table. If you have more products than the number of rows, then pagination links will appear under the table so that they can view more products without leaving the page.
Step 2: Create a landing page listing your products (5 minutes)
WooCommerce Product Table lists your products above the one-page checkout, like this
This is where we create the page that we'll be using as our WooCommerce single-page checkout:
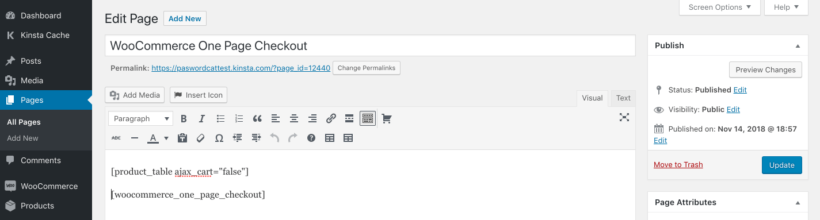
Create a new page (Pages → Add New).
Add a shortcode to the page: [product_table id="123"] (replace "123" with the actual ID for your table, which you can get from Products → ProductTables. Alternatively, if you're building the page with the Gutenberg editor then you can insert the 'Product Table' block instead of using a shortcode.
This will list all your products with the options you chose on the plugin settings page.
You can add as many product tables as you like to the page - just create multiple tables and insert them, each listing different products.
Step 3: Add one-page checkout to WooCommerce (5 minutes)
Next, you need to add one-page checkout to the page you just created.
Edit the product table page that you created in Step 2, above.
Add the following shortcode underneath the product table shortcode: [woocommerce_one_page_checkout]
Your finished WooCommerce order form page should look something like this in the WordPress back end:
This will create a WooCommerce single-page checkout with a product table at the top, and the checkout form below.
FAQ
How to choose the right one-page checkout method
Quick decision guide:
Selling 1-10 products? → Use Plugin #1 (Basic One Page Checkout)
Want the fastest setup? → Use Plugin #2 (Fast Cart popup)
Need search and filters? → Use Plugin #3 (Product Table + One Page Checkout)
What is the best WooCommerce one page checkout plugin?
The best WooCommerce one page checkout allows customers to complete their purchase as quickly as possible. You can achieve this with the WooCommerce Fast Cart plugin by allowing checkout in an on-page popup. Equally, you can achieve it by combining WooCommerce Product Table with the official One Page Checkout extension.
Both are good options from a functionality standpoint. However, you may want to consider your customer's behavior and preferences when choosing which WooCommerce single-page checkout to use. If your customers usually buy a single or just a couple of items per session, you may want to go with the pop-up checkout option. It's fast and seamless and allows for a very quick checkout:
On the other hand, if your customers tend to purchase several different items at a time or would prefer a more traditional checkout experience, you may want a checkout form below your products. This way, customers can take their time to add products to their cart one by one (or remove products if they change their mind). Finally, they can scroll down to the checkout form once they're ready to place the order.
How can I create a custom checkout page in WooCommerce?
In this article, we've looked at how to display the default WooCommerce checkout under a list of products; and how to display it in a popup checkout. None of these plugins will actually change the design of the checkout.
We have a separate article on how to create a custom checkout page. Once you've done this, the customized checkout will automatically appear in your one-page checkout - whichever of the above plugins you are using. That's because they inherit the styling of the default checkout, so if you edit this then it will be reflected in your one-page checkout.
Is a one step checkout better than a multistep checkout?
A multistep checkout is a checkout process divided into separate sections (like shipping, billing, payment) that can appear as tabs or accordions on one page or across multiple pages.
The beauty of WooCommerce one page checkout is the speed of making a purchase. WooCommerce multistep checkout does the opposite by adding extra steps to the process. However, the two concepts are more compatible than you might think. You can add a multistep checkout to a single page - for example, as tabs within that one page.
This handy plugin is perfect if you want to streamline your checkout process or even add custom checkout fields. For example, you can use it to collect extra information from each customer. This will appear on the WooCommerce one-page checkout, whether you've added it below the list of products or in a popup checkout.
You can also use the editor to write more persuasive calls to action and change the purchase button - instead of the standard 'buy now' CTA, you can easily do some A/B testing to find out what works best for your customers.
Can I disable the WooCommerce cart completely?
How to disable cart completely:
1. For Plugin #2 (Fast Cart): Enable 'Direct Checkout' + 'Skip Cart Page' (2 minutes)
2. For Plugins #1 or #3: Install Redirection plugin + create 301 redirect (10 minutes)
If you're using Plugin 2 (i.e. Fast Cart with a popup checkout), then you can easily disable the cart. Simply enable the 'Direct Checkout' and 'Skip Cart Page' options on the plugin settings page. That way, customers can only access the checkout and there are no back doors to the cart page.
However, this is a bit trickier if you're using Plugins 1 and/or 3. Even though the checkout appears below the list of products, there are still ways for customers to access the cart page. For example:
The cart link will still appear in your navigation menu and/or header (depending on your theme and menus).
When the customer adds products to the cart, they will see a success message linking to the cart.
If your WooCommerce order form page includes a sidebar with the 'WooCommerce Cart' widget, then the contents of the cart will show after they add products. This widget includes links to the cart and a separate checkout page.
An Add to Cart success message with a link to the Cart page.
It's absolutely fine to use these checkout features alongside one-page checkout. It gives customers a choice. For example, if they want to edit the contents of their cart, they can click through to the cart page and check out afterwards. This is handy because WooCommerce one-page checkout lists the products in the cart without any means to edit them.
However, some online store owners prefer to completely disable the WooCommerce cart and just use the one-page checkout. That's fine too.
How to disable the cart page (10 minutes)
Install Redirection plugin (2 minutes): Install the free Redirection plugin from WordPress repository.
Create redirect rule (3 minutes): Add a 301 redirect from your cart page URL to your checkout page URL.
Optional: Add anchor links (5 minutes): Create an anchor link to scroll customers to the checkout section when they click cart links.
For example, you might redirect the cart page to the WooCommerce checkout. This is the checkout page defined in the WooCommerce settings, and is separate from the one where you've added a product table.
Alternatively, you could add an anchor link to a point underneath the product table on your one-page checkout page, and create a redirect so that people are taken there when they click on a cart link. When a customer adds a product to the cart and sees the success message with 'View Cart' link, clicking it will scroll them down the page to the WooCommerce one-page checkout under the product table.
Get the best WooCommerce one-page checkout plugin now 🚀
In conclusion, a WooCommerce one-page checkout can greatly enhance the shopping experience for your customers. It can increase your conversion rate, and ultimately boost your online sales.
By streamlining the checkout process and reducing the number of steps, you can eliminate unnecessary barriers. This makes it easier for customers to complete their purchases.
With the right implementation and customization, a one-page checkout can be a powerful tool for any WooCommerce store looking to improve their checkout process and drive growth. So, take the time to consider which type of one-page checkout is best for your business.
To add one-page checkout to WooCommerce, you can either:
Both options offer a great way to reduce cart abandonment by optimizing how customers complete their purchases. Choose the right plugins for your needs, and make your customers happy 😄
Looking for a WooCommerce purchasing club plugin to create a free or paid members-only store? In this post, we're going to share two different plugins that you can use to create all types of purchasing clubs on WooCommerce.
With these plugins, you'll be able to make all or some of your store private and either give users access for free or require them to make a one-time or recurring payment.
There's a lot of flexibility and edge cases involved, but we're going to make sure to give you enough information to:
Choose the plugin/method that's right for you and your store.
Get set up with all the necessary WooCommerce purchasing club features at your store.
What types of WooCommerce store can benefit from a purchasing club?
Purchasing clubs have plenty of use cases that go beyond your stereotypical "wine of the month" club (though they're certainly great for that as well!).
Here are some of the many situations where a purchasing club can make sense:
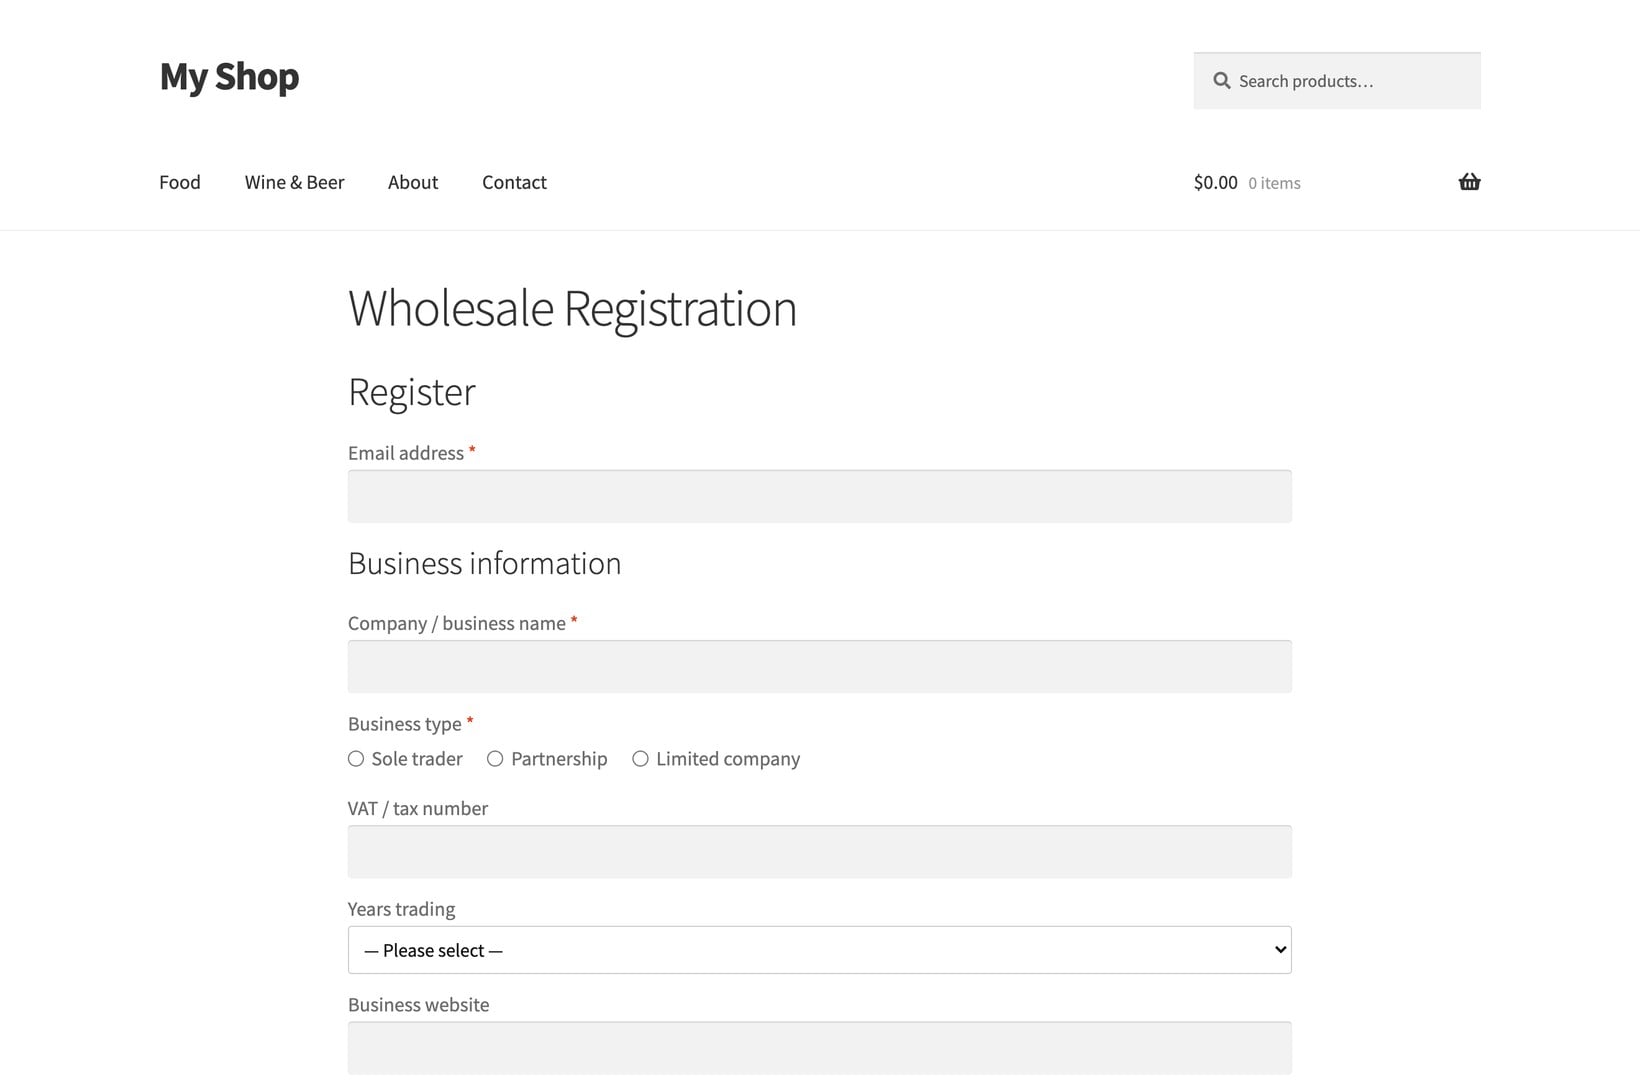
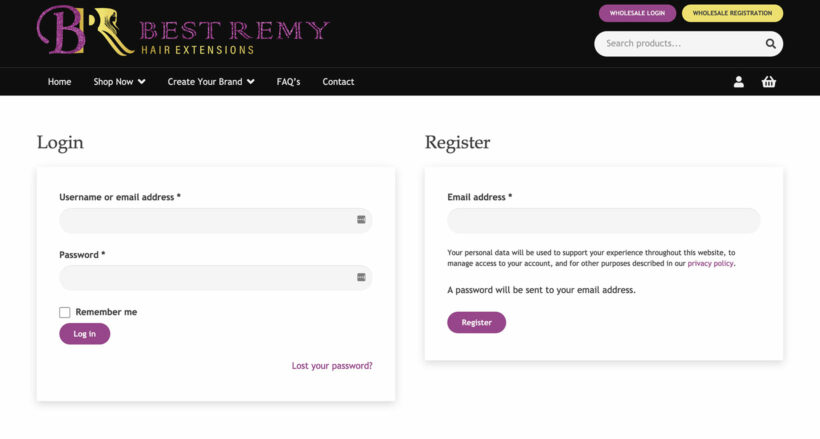
Wholesale stores - you can create a special area for wholesale members while keeping your regular store for retail customers. This is great for wholesale buying clubs running on WooCommerce.
Membership sites - if you run a membership site, you might want to create special products that only your members can purchase.
Special discounts - you might want to offer a special set of discounted prices for members to create a discount shopping club.
Employee/staff purchasing - if you sell special products to your employees (like uniforms), you want to keep that area private.
Marketing efforts - a purchasing club adds scarcity, which can aid your marketing efforts. For example, you can give users who register with an email address access to special products/prices as an incentive to help build your list.
You can probably think of plenty of other stores that can benefit from a purchasing club - this is by no means an exhaustive list! And here's the good news...
You have different options to create a WooCommerce purchasing club
As the saying goes, there is more than one way to skin a cat. No, I don't know who was running around skinning cats in the 1800s, but the core meaning holds true when it comes to creating a WooCommerce purchasing club.
That is - you have options. And these options depend on the type of WooCommerce purchasing club that you want to create.
Generally, purchasing clubs break down into a few distinct types. You have clubs where:
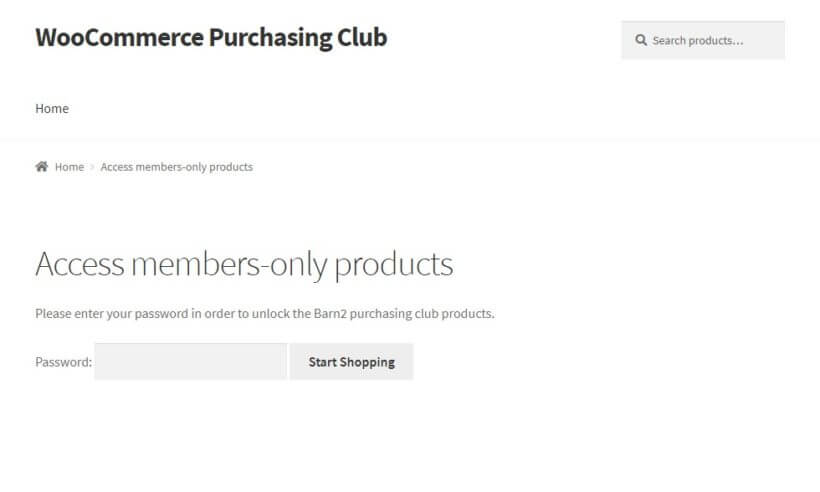
Only members can shop at the store - anonymous visitors can't purchase anything. This is a true private shopping club.
Members can view unique products that are members-only, but anonymous visitors can purchase the rest of the products. This is kind of a hybrid.
Members and anonymous visitors have access to the exact same products, but members get a special discount. This is more of a discount shopping club.
Then, you have the whole other decision of whether members need to pay for access or can register for free.
To address these various use-cases, we're going to show you tutorials on two different methods to create a members-only WooCommerce purchasing club:
WooCommerce Protected Categories - this method is more flexible and lets you choose between free/paid memberships and whether or not to make all of your products members-only. Skip to tutorial.
WooCommerce Private Store - this method is simpler but not quite as flexible. It makes your entire store private, which will only fit certain types of purchasing clubs. Skip to tutorial.
How to pick the WooCommerce purchasing club plugin that's right for you
Ok, so now that you know what your options are - how do you pick the approach that's right for you?
Here's a general guideline of when to pick each plugin...
WooCommerce Protected Categories
WooCommerce Protected Categories is your best option if you want any combination of these features (you don't need to use all the features at the same store):
Require members to pay a one-time or recurring subscription. Recurring revenue is a great way to monetize any club membership because it ensures you always have revenue coming in no matter how many products your customers actually buy.
Make some products public and some private. If you want to display different products based on which type of user is shopping, this is the method you want.
Create multiple levels of memberships. This lets you show different products to different types of members.
Make all of your products members-only. You can also just make everything private, if needed.
Essentially, WooCommerce Protected Categories can help you create all three types of private purchasing clubs that I listed above.
WooCommerce Private Store is your best option if you want these features:
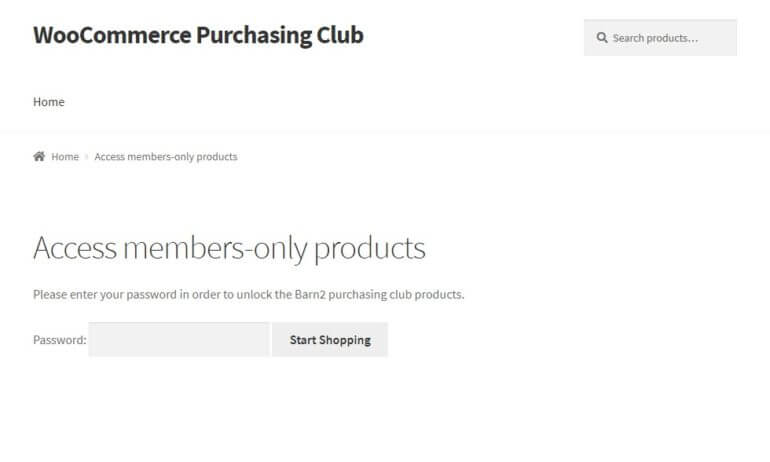
Create a 100% private purchasing club. With this method, only members will be able to purchase products - anonymous visitors won't see anything.
Make your club free to registered members or require payment. Because the entire store is private, this is good if you're offering free access or running a members-only store where users make their payment offline and then get digital access (e.g. a local purchasing club). You can also use a plugin like Gravity Forms to require users to pay to register.
Essentially, WooCommerce Private Store can help you create the first type of private purchasing club (where only members can shop).
Beyond the differences discussed above, WooCommerce Private Store is also a little simpler to setup, though both plugins can be configured fairly quickly.
Using WooCommerce Protected Categories to create a WooCommerce purchasing club
As a quick reminder, this method lets you:
Choose whether or not to require users to pay a subscription for access to your private products. Again, this subscription approach is great because it ensures you always have recurring cash flow coming into your business.
Make all your products part of the purchasing club or still leave some products available for guest users. You can also just offer different prices on the same products for members of your purchasing club.
Create multiple levels of membership, where different users have access to different products.
Step 1: Choose whether to make your purchasing club free or paid
There are three ways you can let users sign up:
For free
A recurring subscription
A one-time payment
WooCommerce Protected Categories can help you create a free members-only purchasing club all by itself, but if you want to accept recurring subscriptions, you'll need the YITH WooCommerce Subscriptions plugin.
If you're planning to make your purchasing club free, you can safely skip to the next step. But if you want to accept paid subscriptions to get the aforementioned benefit of stable, recurring revenue at your store, here's a high-level look at how you can use the WooCommerce subscriptions plugin.
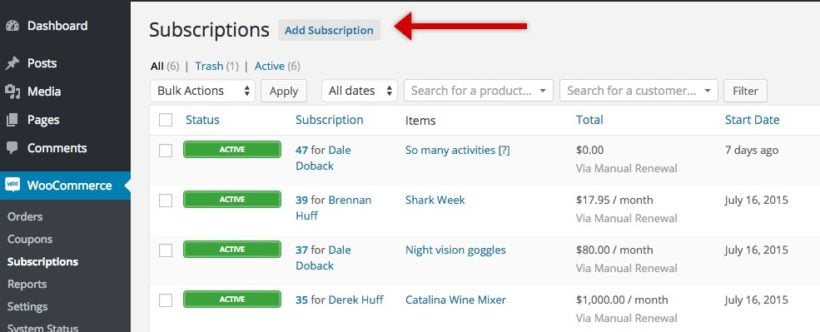
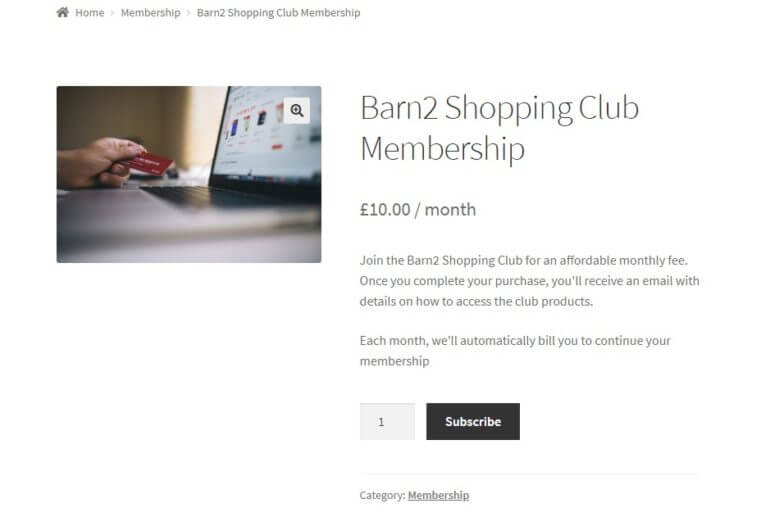
If you want to accept recurring subscriptions, you'll use the YITH WooCommerce Subscriptions plugin to create a "subscription product" that's public. Visitors can then purchase this product and, once they purchase it, unlock all of the other hidden purchasing club products.
All you need to do is use the plugin to grant access to the hidden products to the Subscriber role that WooCommerce Subscriptions uses. If users ever stop paying their subscription, the WooCommerce Subscriptions plugin will change their user role (and thus remove their access to your purchasing club). You can also give users a password if you'd rather not rely on user roles.
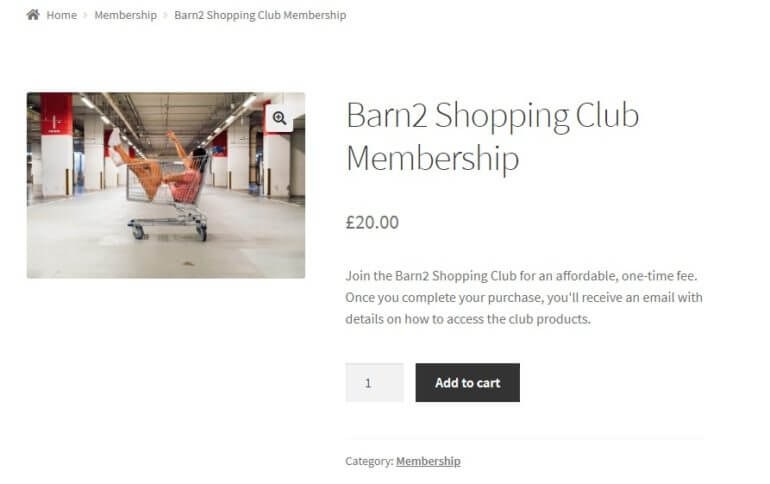
If you want to accept one-time payments, you can create a regular public WooCommerce product that gives users access to the store's password.
Do you want to hide all of your products or just specific categories of products?
Do you want to hide your products with a password or by WordPress user role? Or both?
Hide all products or just some products?
WooCommerce Protected Categories automatically hides any subcategories of a hidden category, as well as all the products inside the category/subcategories.
This opens up a few possibilities. If you want to...
Hide all of your categories, you can create one "Purchasing Club" parent category and put all your products inside.
Leave some products publicly available, you can leave most of your products in public categories and just make specific categories private with the plugin.
You can also use the latter approach to create discounts for purchasing club members by creating a private category with discounted versions of your products.
Tip: Using the free Duplicate Post plugin lets you quickly duplicate the products that you want to discount. You then just need to change the price in the hidden category.
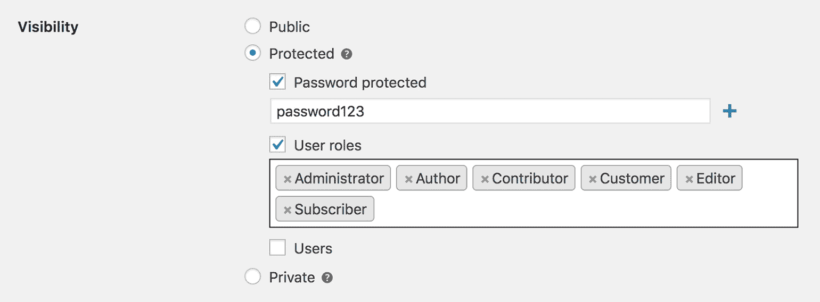
To make a category or categories private, go to Products → Categories and use the Visibility controls to make a category either:
Password protected
Private and only visible to specific user roles
What's the difference? That's the next question…
Use password protection or user role privacy?
WooCommerce Protected Categories gives you several different ways to hide your members-only products, which you saw above. The options to consider for your members-only purchasing club are:
Password Protected - users need to enter a password to view the hidden category (and all the products/subcategories contained inside). This gives you a lot of flexibility for granting access because it's not tied to user accounts.
User Role Protected - only logged in users with certain user roles can see the hidden category (and all the products/subcategories contained inside). This is most helpful for subscription purchasing clubs because you can automatically grant access to the Subscriber user role that the WooCommerce Subscriptions plugin utilizes for active subscribers. Or, you could grant access to any registered user or a custom user role created with the free User Role Editor plugin.
You can use either approach to restrict your private purchasing club to members only. And if you want to create different membership levels with access to different products, then you can do this too. With the password protection option, just create different passwords for different categories. Or with the role protection option, restrict different categories to different user roles. Easy!
Even with different membership levels, you can still use a single login page - users will be automatically redirected to the relevant category based on the specific password that they enter.
Step 3: Configure other plugin settings, like the login form
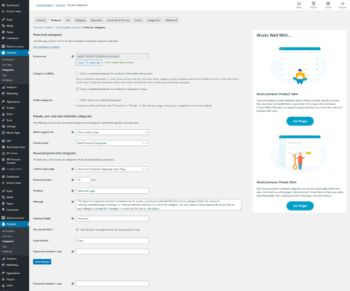
You can access the plugin settings by going to WooCommerce → Settings → Products → Protected categories. Then, you can configure:
Whether or not to show protected categories in navigation menus or your public-facing store
Where to locate the general login page for WooCommerce password protected categories
How long the password should unlock the hidden categories for
Specific details about your password login form
What happens if a logged out user tries to access a role protected purchasing club category
How shoppers can access your WooCommerce purchasing club
If you decided to use password protection, you can give access to shoppers either by:
Creating a unique password for each shopper (this is fine for small clubs, but doesn't work great at scale)
Using one shared password for all club members
If you're selling a membership product, you can automatically send the password by using the Follow Ups plugin to automatically send purchasers an email.
If you're using private role protected categories, WordPress will automatically send new users their login details. You should also add navigation menu links to make it easier for shoppers to find the purchasing club products.
To make it even easier, you can also:
Use the Peter's Login Redirect plugin to automatically send users to the private purchasing club category after they log in.
Use the Follow Ups plugin to send them an email with instructions on how to access their private club products.
Using WooCommerce Private Store to create a WooCommerce purchasing club
As a quick reminder, this WooCommerce purchasing club plugin lets you:
Make your entire WooCommerce store private
Give members access either by creating a WordPress account or just entering a password that you give them
Allow members to register for free, only register members who have made an offline payment, or require payment.
Step 1: Choose how to make your purchasing club private
The plugin is very simple to configure, which is one of the reasons it's a great option if your purchasing club won't be affected by its limitations in comparison to the previous method.
Once you install and activate the plugin, go to WooCommerce → Settings → Private Store to configure the plugin.
Here, you can either:
Create one or more passwords that give access to your store without the need for a WordPress user account.
Check the Logged in users box to automatically give access to users who do have a WordPress account. You can also select which user roles will have access.
You can also combine the two approaches if you want a way to give certain types of users access without creating an account for them.
If you're going to give any users the password, you can configure the plugin's login form in the Login form section. And you can also create a redirect URL to take users to a certain page after logging in.
If you're exclusively going with the password protected approach, you're pretty much done now!
All you need to do is give verified users the password and direct them to your store. When they land on any store page, they'll need to enter the password before they can see or purchase products:
Step 2: Customize registration page for a more branded experience (if allowing registration)
If you want to require users to create a user account rather than just entering a password, you'll want to create a more branded login/register page for WordPress accounts.
To do that, you can use:
Theme My Login - lets you customize the core WordPress login/register pages' appearances. Also includes a helpful option that lets you hold new registrants for admin approval before they can access the purchasing club products.
Gravity Forms - though this is a premium add-on, the User Registration Add-on gives you a lot of flexibility for handling new user registrations. It also lets you create a completely custom registration/login page (that is, you don't need to use the core WordPress pages). You can also require a payment via PayPal if you want to charge for membership.
Enjoy your new WooCommerce purchasing club
There you have it! Two different ways to create a members-only purchasing club at your WooCommerce store.
For most purchasing clubs, WooCommerce Protected Categories is the best option because it offers more flexibility. But if you just want to make your entire store private to create a 100% private shopping club, WooCommerce Private Store offers a simpler, but more limited, option.
Do you have any other questions about how to create a WooCommerce purchasing club using either of these plugins? Leave a comment and we'll do our best to help out!
If you’re running a wholesale ecommerce store or trade shop, then you know this type of business comes with particular challenges. You’ll need to find a way to display all your items effectively and cater to multiple types of customers. A WooCommerce trade account plugin is an essential part of this.
Fortunately, there are plenty of tools that can help you out. This is especially true if you’ve built your trade shop using WordPress and WooCommerce.
With a WooCommerce trade account plugin, you can get the exact functionality you need to keep your ecommerce platform running smoothly.
In this article, we’ll talk about why your store might need a WooCommerce trade account login. Then we’ll show you how to use the best WooCommerce trade account plugins and explain how to add a trade-friendly order form to your site. Let’s get started!
Introducing WooCommerce trade accounts
In WooCommerce, a trade account refers to a hidden ecommerce area designed for businesses and customers placing wholesale or trade orders. It is a distinct type of account that offers specific pricing and a user experience tailored to the needs of trade customers. Trade accounts provide a platform for trade customers to access these exclusive features.
Benefits of trade accounts in WooCommerce
There are lots of reasons to offer a trade account facility in your WooCommerce store:
Exclusive pricing: WooCommerce trade accounts allow you to offer trade customers exclusive pricing. This enables you to provide wholesale discounts and special pricing based on trade status, order volume, or other criteria. It helps foster stronger relationships with trade customers and encourages repeat business.
Tailored catalogs and products: With trade accounts, you can customize product catalog visibility specifically for your trade customers. This allows for the presentation of trade-only products or variations. You can highlight trade-specific items, and hide products only intended for retail customers. This improves the browsing experience for trade customers as they only see the products which are aimed at them.
Streamlined ordering process: The best WooCommerce trade account plugins provide a streamlined ordering process tailored to the needs of trade customers. They may include features such as bulk order forms, quick reordering of previous purchases, and advanced search options. This simplifies the buying experience, saves time, and improves efficiency for trade customers.
Account management and insights: WooCommerce trade accounts offer dedicated dashboards where trade customers can manage their account information, track order history, view invoices, and access other account-related features. It provides transparency and convenience for trade customers, enhancing their overall experience and facilitating efficient account management.
Enhanced customer support: Trade accounts often come with dedicated customer support channels, providing trade customers with personalized assistance and faster response times. It ensures that trade customers receive the necessary support and guidance for their specific needs, building trust and loyalty.
Increased order minimums and credit terms: Trade accounts allow businesses to set higher minimum quantities for trade customers, ensuring profitability and efficient order processing. Additionally, trade accounts can offer credit terms or payment methods tailored to the needs of trade customers, enabling them to manage cash flow effectively.
Industries that can benefit from having a trade account
Trade account functionality can benefit a variety of industries that engage in business-to-business (B2B) transactions. Here are some examples:
Wholesale distribution: Industries involved in wholesale distribution, such as electronics, consumer goods, or building materials, can benefit from trade account functionality. It enables them to offer custom pricing, bulk order options, and personalized catalogs to their B2B customers.
Manufacturing and industrial supplies: Manufacturers and suppliers of industrial equipment, machinery, or raw materials can utilize the WooCommerce trade account to provide B2B clients with specialized pricing, product customization options, and streamlined ordering processes.
Hospitality and food service: Industries like restaurants, hotels, or catering services can benefit from trade accounts to access exclusive pricing, bulk ordering capabilities, and specialized product ranges for their specific needs.
Health and beauty products: Suppliers or distributors of health and beauty products, such as cosmetics or salon supplies, can utilize trade account functionality to offer different prices, bulk ordering discounts, and personalized product recommendations to their B2B customers in the beauty industry.
Professional services: Industries offering professional services, such as consulting firms, marketing agencies, or software development companies, can benefit from trade account functionality by providing exclusive access to specialized services, discounted rates, and personalized support for their WooCommerce B2B client portals.
Educational materials: Companies involved in the production or distribution of educational materials, textbooks, or e-learning resources can utilize trade account functionality to offer discounted pricing options, bulk ordering options, and customized catalogs to educational institutions and B2B customers in the education sector.
Why you might need additional tradeshop plugins for your WooCommerce store
When it comes to building an online store of any type, WordPress is an excellent platform. It’s secure, beginner-friendly, and quick to set up. While WordPress does lack specific e-commerce features, these can easily be added using a trade shop plugin such as WooCommerce.
Small, basic shops may not need anything else. However, wholesale stores and trade shops have particular needs, which might not be fully met by WooCommerce. For example, here are just a few of the special challenges facing online trade stores:
Out of the box, WooCommerce doesn't differentiate between different types of customers. There's no way to separate out the experience for retail and trade customers. You can't charge dynamic pricing, show different products, or provide a separate WooCommerce trade account facility.
Trade buyers have different needs from retail shoppers, as they already know what they want and need a quick way to make their selections. You might be selling hundreds or thousands of items, so you’ll need a way to organize them effectively and help trade users find what they need quickly.
WooCommerce assumes that your store will be available to the public. However, if you’re only selling to other businesses, you might want to hide your entire store from public view.
To add these features to your trade shop, you’ll need some additional tools. As it turns out, the WooCommerce Wholesale Pro account login plugin is perfect for the job.
The best WooCommerce trade account plugin
Now, let’s look at WooCommerce Wholesale Pro - a WooCommerce trade account plugin that will help you customize your store. It's perfect whether you're creating a trade-only shop or a WooCommerce store with separate public and trade areas.
WooCommerce Wholesale Pro has all the features you need for trade login and every other part of your B2B area.
Trade account and user registration
Trade users can register for an account and log in on the trade account page. This gives them access to the trade-only section of WooCommerce, which normal retail customers can't see.
As the administrator, you can choose whether to allow trade users to register and log in immediately, or hold their application for approval first. Moderating new B2B users adds an extra layer of security to your trade login.
You can build the trade registration form to collect exactly the details you need to vet each applicant. The form builder supports text fields, dropdowns, radio buttons, checkboxes and file uploads. So a trade buyer can submit their company details, VAT number and even a copy of their reseller certificate when they apply.
Here's an example of a WooCommerce trade account and registration form in action. NRD Web Design used WooCommerce Wholesale Pro for their client Best Remy Hair Extensions. They added 'Wholesale Login' and 'Wholesale Registration' links to the website header, intuitively driving trade users to the private section.
WooCommerce trade prices
Nearly all B2B stores offer special trade-only pricing rules to logged-in users. Retail customers pay the recommended retail price (RRP), whereas trade users get variable discounts on the RRP.
WooCommerce Wholesale Pro makes it easy to add product pricing to WooCommerce. Logged in wholesale buyers will see the discounted pricing, and retail customers continue to see the standard pricing.
You can even add multiple wholesale user roles, each with percentage discounts. This is ideal if you offer tiered pricing or role-based pricing in your WooCommerce trade store.
Trade-only products
With WooCommerce Wholesale Pro, you can either sell the same products to everyone (with the correct trade pricing for B2B users, of course) - or you can sell different wholesale products to the two groups.
Each product category has the option to show it to public shoppers, trade users, or both. This makes it easy to sell trade-only products which are hidden from the retail store.
This feature is also ideal for creating a 100% private store, with no retail area. Simply mark all the categories as 'Wholesale Only', and your formerly public shop disappears from view! Only logged in B2B customers can see it from the private WooCommerce trade login area.
How to set up a WooCommerce trade account area
To get started, you’ll first want to purchase and install the WooCommerce Wholesale Pro plugin. Then, you’ll need to activate your license key. Navigate to WooCommerce → Settings, and select the Wholesale tab:
Enter your license key here, and click on Save changes at the bottom of the page.
Next, you’ll want to configure the powerful plugin’s settings. These are all located on the same Wholesale page. Choose a shop page to use for the trade login, and decide whether to enable WooCommerce trade account registration (with or without moderation).
There are lots of other options for customizing your trade login area. Go through all the settings and set it up exactly as you like.
That’s it! Now you can start adding trade users who can log into the B2B area or add them manually via the WordPress admin.
Create trade-only order forms for your WooCommerce store
By now, you know how to add a private WooCommerce trade account area to your store. Trade users can easily log into their accounts and access trade-only products and pricing. But what about the actual experience of using your WooCommerce trade shop?
Retail customers are happy to spend time browsing and choosing products. By default, WooCommerce is set up so that customers have to visit individual product pages to see and purchase each item they want. That's fine for most retail customers, who want to look at large images and read lots of information before making a decision. However, your trade users have completely different needs.
This creates a terrible user experience for a WooCommerce trade store, however. You’re selling a lot of products, and customers are likely to place large orders for multiple items at once. Requiring them to visit each specific product page will only slow them down.
Logged in trade customers already know all about your products. They've bought them before and are simply reselling them to their own customers. They don't want to waste time browsing or looking at pictures. Instead, they need to quickly view a list of all your trade products, where they can choose product quantity and add multiple products to the checkout at once.
You can do this by using WooCommerce Wholesale Pro with its sister plugin, WooCommerce Product Table. This adds a quick order form layout which perfects your WooCommerce trade shop.
What features can your WooCommerce trade order form have?
WooCommerce Product Table makes it easy to create a customizable one-page order form. It lists all of your items on the main trade store page, and also works on product category pages in the trade login area:
Woo Product Table lets you:
Make product comparisons simple, by showing off everything you have to offer side by side.
Help people find what they want quickly, by using searching, sorting, and filtering functionality.
Enable customers to tick all the items they want and purchase them from one page.
Enable the wholesale order form layout in the trade login area without affecting the experience for retail users. Or if you prefer, you can use it in the retail area too!
Where to get the trade order form
When you buy WooCommerce Wholesale Pro, you can choose whether to buy it on its own, or with WooCommerce Product Table for a discount. You'll need both trade shop plugins to get a trade login area complete with trade order forms.
Setting up user roles and permissions for trade customers
Setting up user roles and permissions for trade customers is a crucial aspect of managing wholesale operations using WooCommerce Wholesale Pro. This WordPress buy sell trade plugin offers robust features that allow you to customize user roles and access. Here's how you can set up user roles and permissions for trade customers using the best WooCommerce Wholesale plugins:
Creating custom user roles: WooCommerce Wholesale Pro enables you to create custom user roles specifically for trade customers. You can define roles such as "Wholesaler," "Trade Customer," or any other relevant designation. These roles will differentiate wholesale customers from regular retail customers within your WooCommerce system.
Assigning capabilities: Once you've created the custom user roles, you can assign specific capabilities or permissions to each role. Capabilities determine what actions or features a user with that role can access.
Controlling catalog visibility: WooCommerce Wholesale Pro allows you to control which variable products or product categories are visible to trade customers. You can set up rules that restrict certain products to wholesale customers only, ensuring that they have access to trade-specific offerings. This customization ensures that wholesale customers see relevant products and helps streamline their browsing experience.
Restricting access to non-wholesale areas: WooCommerce Wholesale Pro gives you the ability to restrict wholesale customers' access to non-wholesale areas of your wholesale website. This prevents them from accessing retail-specific features or wholesale prices that are not relevant to their WooCommerce trade account. By limiting access, you create a focused and streamlined experience for wholesale customers.
Integrating with user role management plugins: WooCommerce Wholesale Pro integrates with popular user role management plugins, such as "Members" or "User Role Editor." This integration provides additional flexibility and control over different user roles and permissions. You can leverage these WordPress buy sell trade plugins to fine-tune and customize the capabilities and access levels of WooCommerce wholesale suite further.
Add a WooCommerce trade account area today!
WooCommerce is an excellent way to sell online, but it’s designed to work best for customer-facing retail stores. If you’re building a trade shop, then you’ll need a WooCommerce trade account plugin to add the extra features you need.
The WooCommerce Wholesale Pro plugin adds everything you need for a professional trade account and B2B area. Either use it to power your entire store, or run it alongside your main retail shop.
Complete trade features include trade login and wholesale registration forms, trade cart discounts, trade-only products, unlimited user roles, quick order forms, and more!
Full documentation, support, and video tutorials.
Love it or your money back!
Do you have any questions about how to use WooCommerce tradeshop plugins effectively on your site? Let us know in the comments section below!
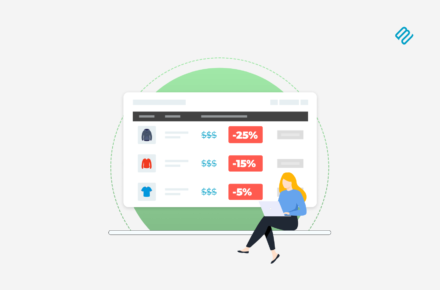
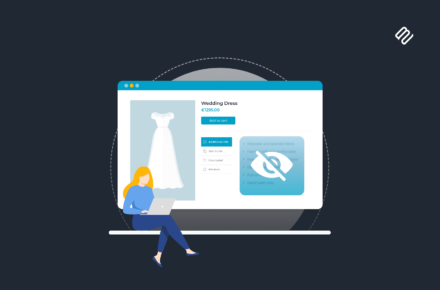
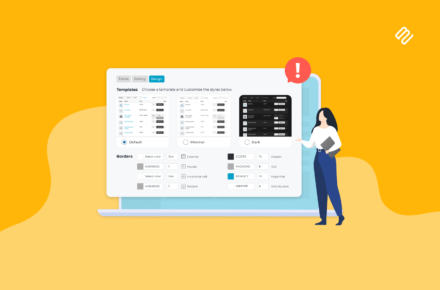
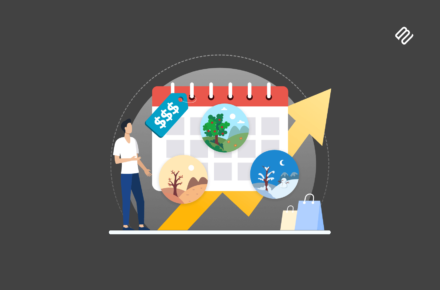
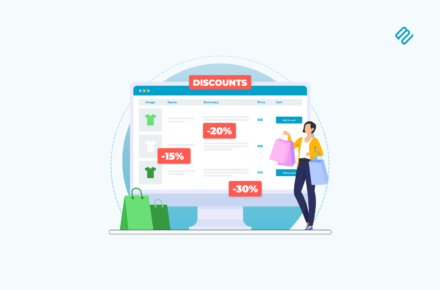
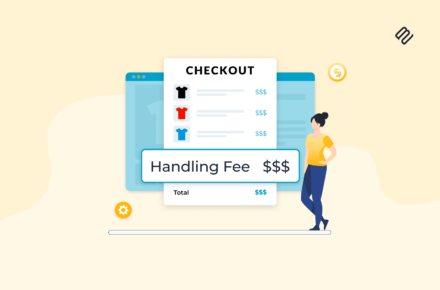


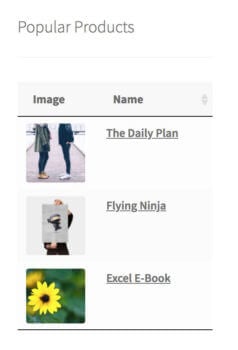
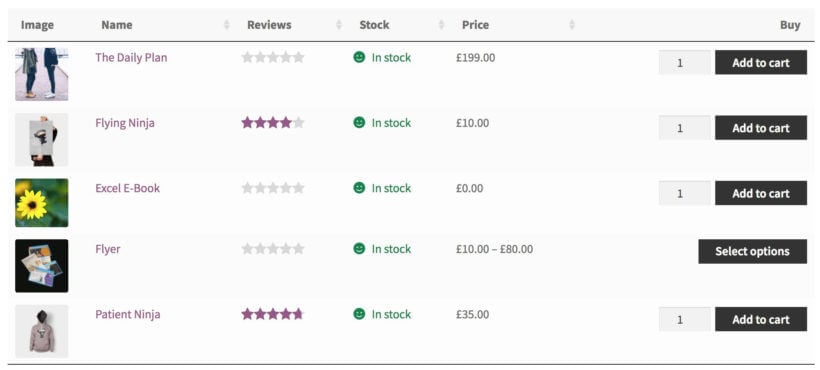
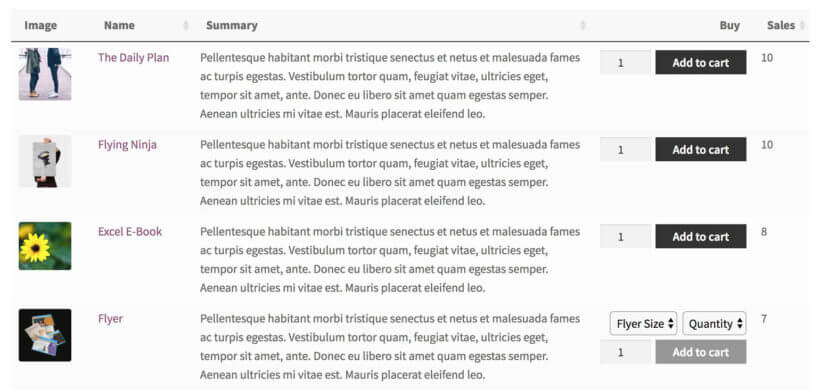
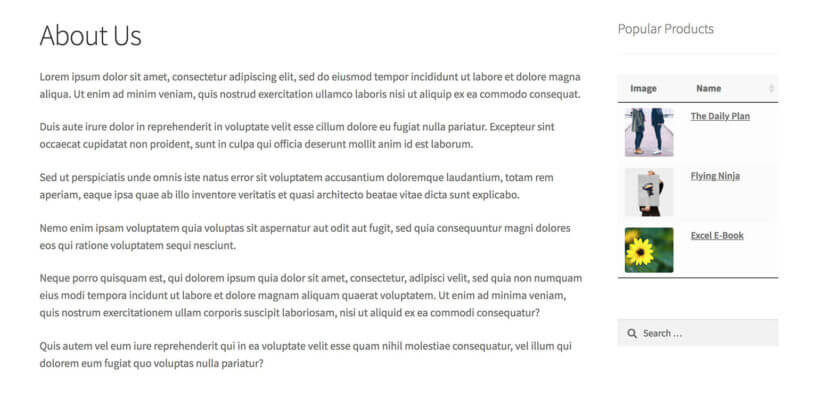

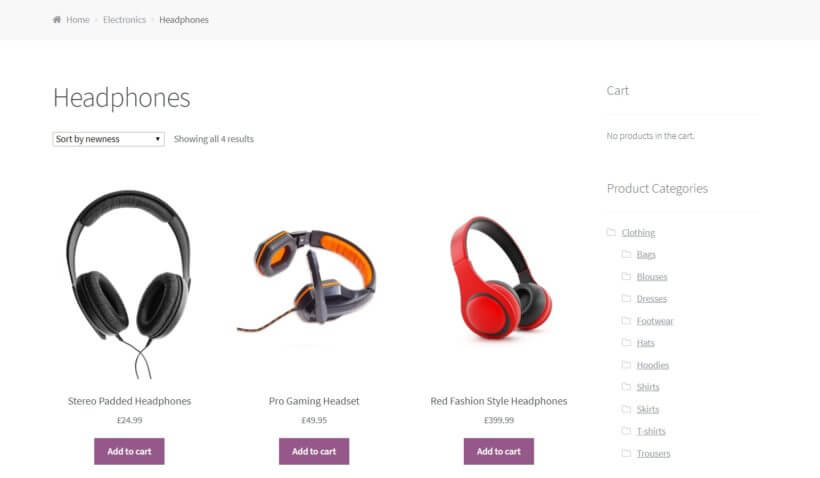
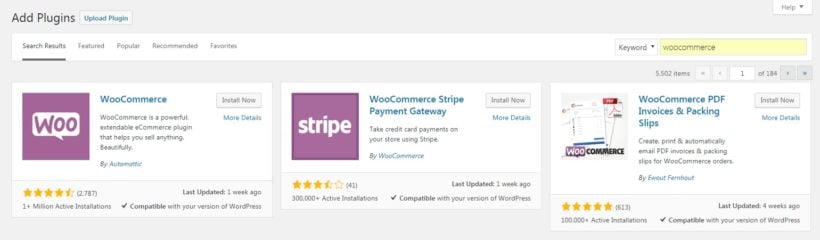
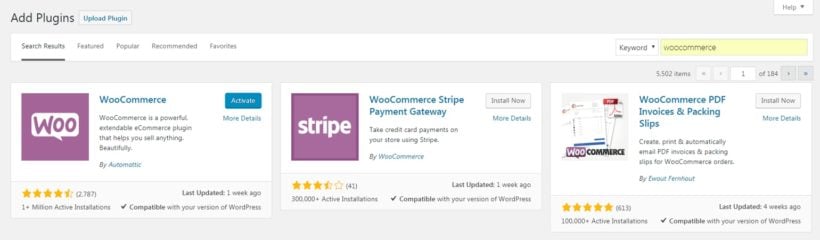
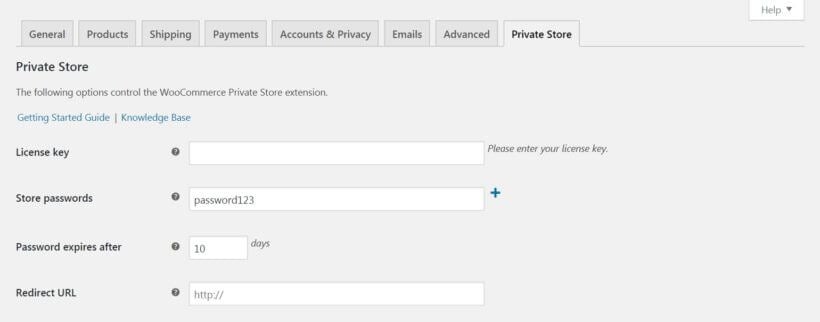

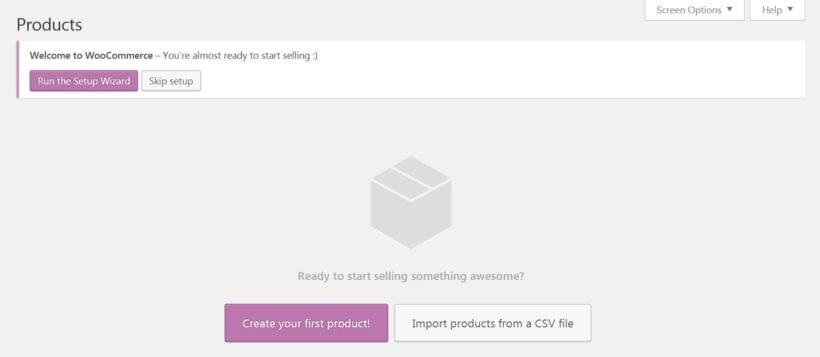

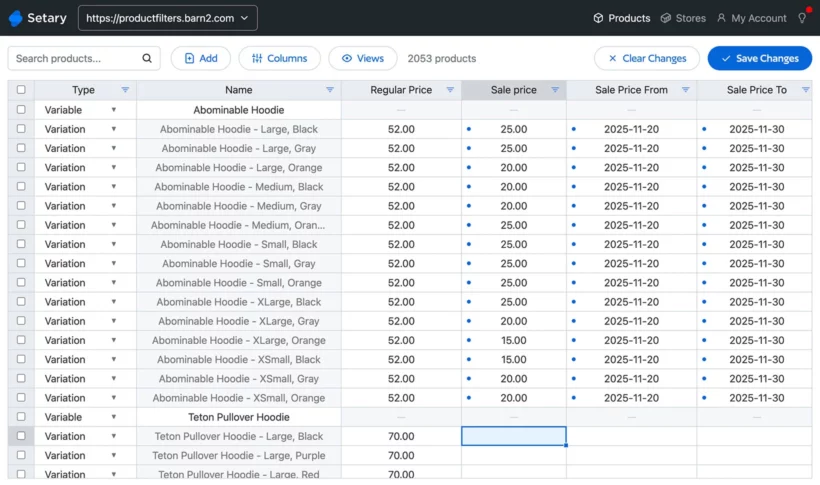
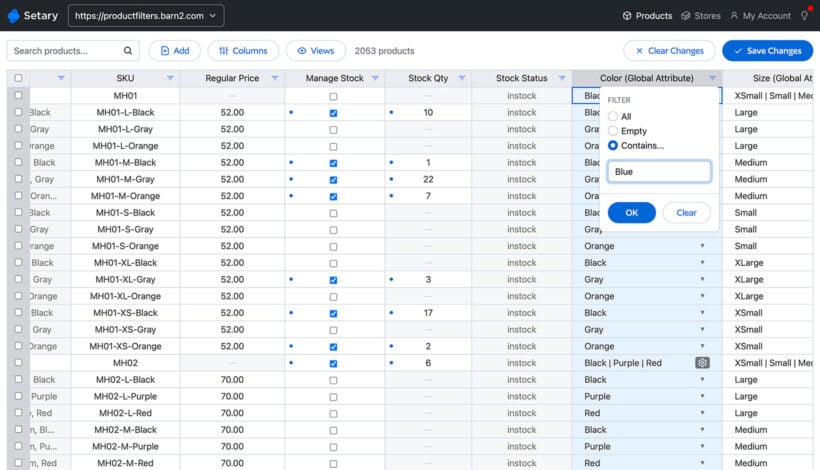


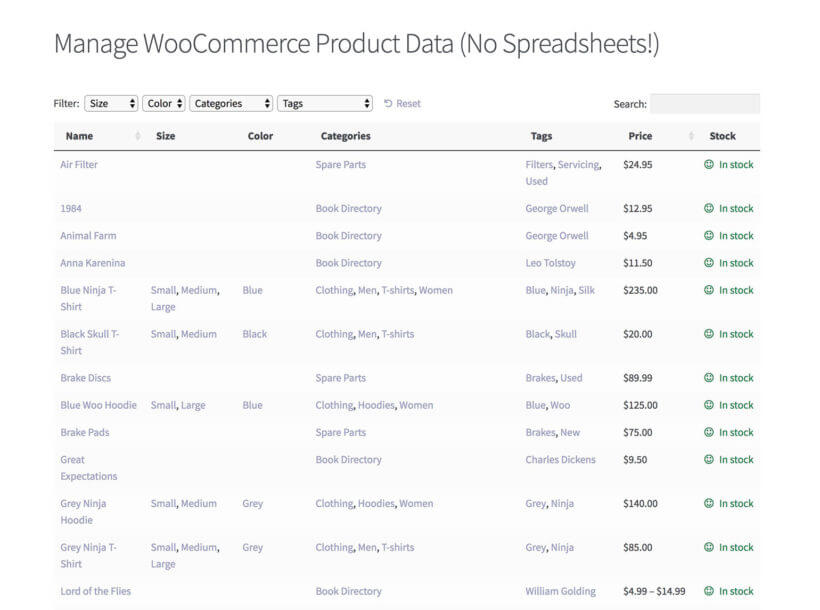
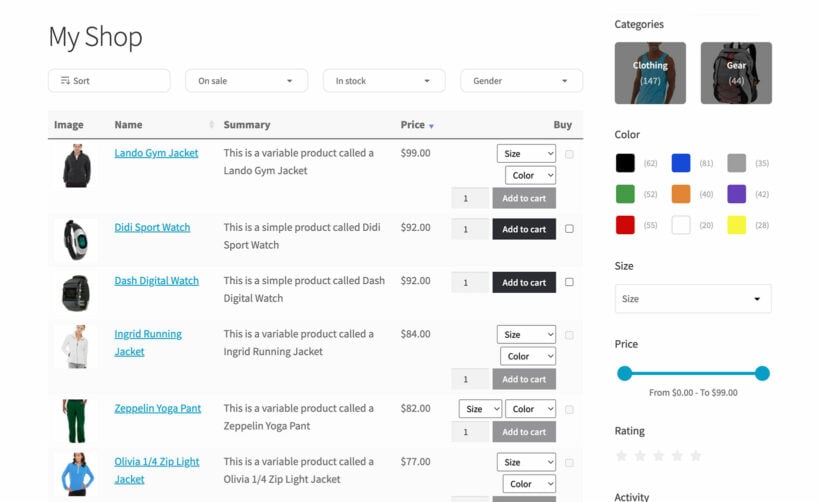
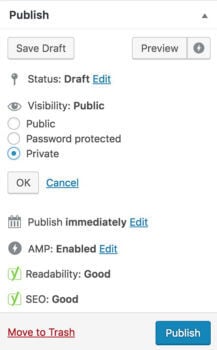
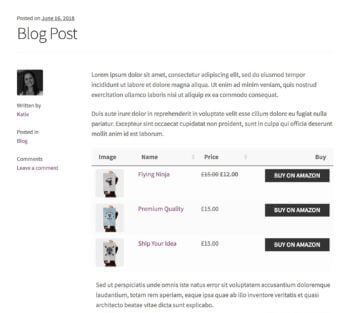 If you are monetizing your blog, you are likely doing a number of things – soliciting advertisers, acting as an affiliate for products or services, etc. And you may even be selling or promoting products directly from within blog posts.