How to add a custom fee at the WooCommerce checkout

Do you have an online store and looking for a way to add WooCommerce additional fees on the checkout? Well, look no further as we'll show you exactly how to do that with just a few clicks.
Lots of online stores add WooCommerce additional fees on checkout to sell extras or add a surcharge to an order. These extra charges help businesses to tailor their pricing strategies to specific needs, offset additional costs, and prepare customers for the actual price of a product.
If you're unfamiliar with the process, it can be challenging to figure out how to add these fees to the checkout page.
In this article, we'll look at the step-by-step process of adding additional fees to the WooCommerce checkout page using the Checkout Field Editor for WooCommerce by Themehigh.
We'll look at how to:
- Add fee field to the checkout page.
- Control what part of the website it is visible on.
- Set rules to display it only when a specific condition occurs.
Let's get started!
Why charge additional fees on the WooCommerce checkout?
Charging additional fees on the WooCommerce checkout can be super helpful for online store owners for many reasons. Let's try to understand this with different use cases where WooCommerce additional fees on checkout will be applicable.
- Delivery or shipping fees Stores that offer different shipping methods can add a custom fee to cover the shipping charges. This fee can be calculated based on the cart weight, size, and destination of the product.
- Handling fees Stores that sell delicate, fragile, or oversized items can offer a special handling option with an additional fee to cover the cost of special packaging and handling.
- Payment Processor fees Stores that accept payments through third-party payment gateways can add a custom fee to cover the processing fees charged by the payment processor.
- Gift wrapping fees Online stores that offer gift wrapping services can add additional charges to cover the cost of wrapping and packaging the product as a gift.
- Rush processing fees Stores that offer express delivery can add a custom fee to cover the additional cost of providing fast service.
The Checkout Field Editor by Themehigh is perfect for adding additional fees to your WooCommerce store's checkout page for all the use cases mentioned above. It offers a comprehensive solution to help manage your additional fees with ease.
Further reading: Complete guide to WooCommerce shipping
While this plugin is ideal, it's worth noting that there may be some scenarios where other plugins are more appropriate.
Below are a few use cases where other plugins are more appropriate:
1. Custom options fees
If your store offers custom options, such as engraving or embroidery, you can add a fee for each option selected by the customer.

Product-specific custom options are best to be added for each specific product ID rather than on the checkout for the entire order. This way, customers can see the total cost of the product upfront, and can help you prevent any confusion that might arise during the checkout.
We would highly recommend using the WooCommerce Product Options plugin for such a case. The plugin comes with loads of custom add-on types, like text fields, dropdown menus, file uploads, and more. This makes it super easy to add custom options with individual prices to your product page.
2. Taxes
Stores that are required to charge taxes can add an additional fee at the checkout to cover the tax amount. This fee can be calculated based on the location of the customer and the tax rate in that area.
For this case, we'll recommend using the tax settings available within the WooCommerce plugin rather than relying on a checkout plugin. You can enable tax settings by navigating to WooCommerce → Settings → General and enabling the tax option. This will add a new Tax tab on the settings page where you can further customize the tax rules.

With this approach, you can avoid the need for an extra plugin installation and ensure precise tax calculations.
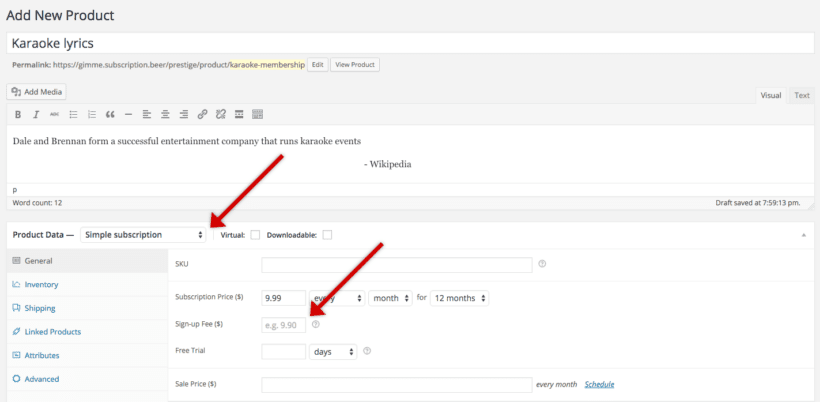
3. Subscription fees
Online stores that offer subscription services can charge a fixed fee for each new subscription to cover the extra cost of administrative and inventory.
Adding a custom sign-up fee for subscription services can be done easily using a dedicated subscription plugin such as the WooCommerce Subscriptions extension. It seamlessly incorporates the extra fee into the checkout process and displays it on the order details page as well as the notification email.
Now that we've discussed why custom fees are important and how they can be beneficial for your online store, let's jump into how you can add them to your checkout page.
How do I add a fee to WooCommerce checkout?
For this, we'll be using the Checkout Field Editor by Themehigh, which provides a straightforward method of adding custom fees to your checkout page. So, let's get started with the steps below!
Install the Checkout Field Editor for WooCommerce by Themehigh
As pricing field options are part of the premium version of the Checkout Field Editor plugin, you must first purchase the plugin from the website. Once you've completed the purchase, you'll find the zip file and a license key in your account section. You will need these two to install and activate the plugin.
After downloading the zip file, log in to your WordPress dashboard and go to Plugins → Add New. Click on the Upload Plugin button located at the top and select the zip file from your computer.
Next, click on the Install Now button and then activate the plugin.
In order to enable premium features and receive future updates, you need to activate the license. To do that, go to the WooCommerce → Checkout Form and switch to the Plugin License tab.
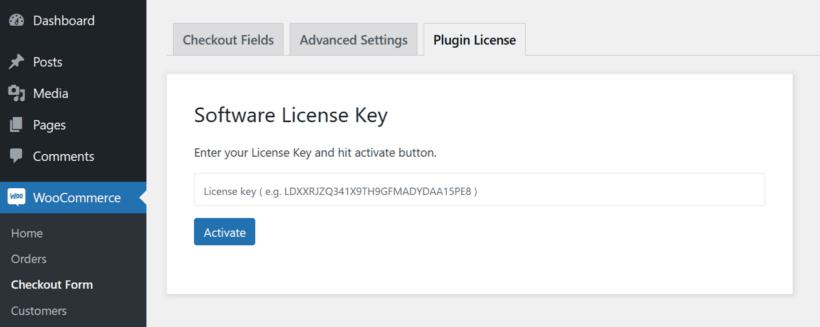
Enter the license key found in your account section into the designated box and then click on the Activate button.
Once the set up is complete, let's look at how to add a custom fee to the WooCommerce checkout page.
Add a custom fee field to WooCommerce checkout
To add the custom fee field to your checkout page, navigate to the Checkout Fields tab in the plugin settings and click the Add Field button.
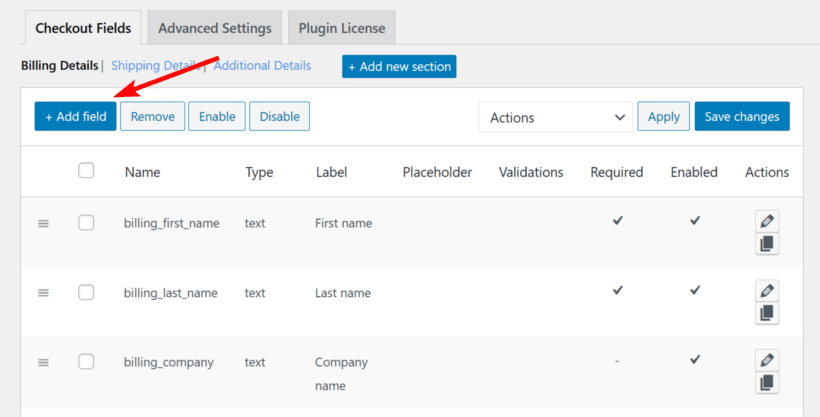
In addition to different fields, the Checkout Field Editor also lets you add new sections to the checkout page. This gives you the option to add the additional fee field as a separate section if you want. For this tutorial, we'll add it to the billing details section.
After clicking the Add Field button, a pop-up will open where you can configure and customize the pricing field. Let's start with the basic details, first.
Basic details
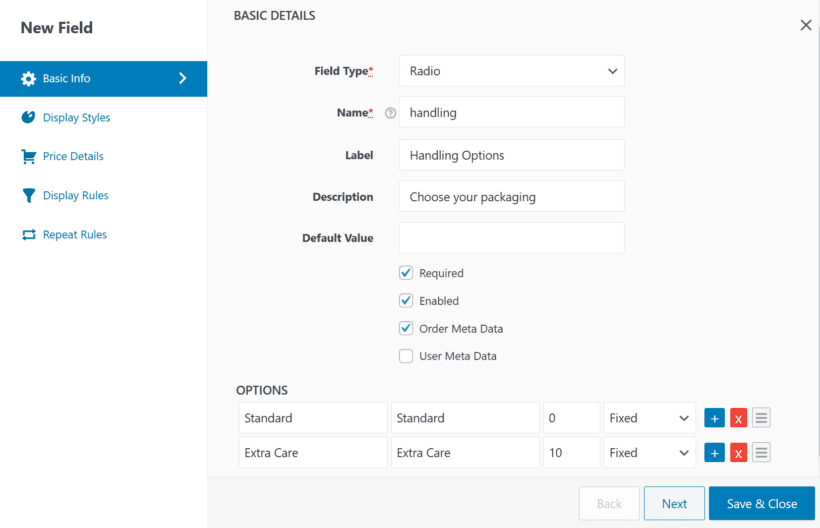
In the field type, choose Radio or Select and give it a name. The name should be unique and in lowercase without space.
Next, enter the label and the description which will be visible on the front end. Make sure to use something descriptive so that users will know what you are charging for.
Scroll down and check off the Required box if you wish to make selecting one of the options mandatory for users. Additionally, select the Enable box to ensure that this field is active on the checkout form.
Next, start adding the different pricing options, the amount, and the type of pricing such as the flat fee or percentage fee.
Now that we have added the basic details, let's move on to display styles.
Display styles
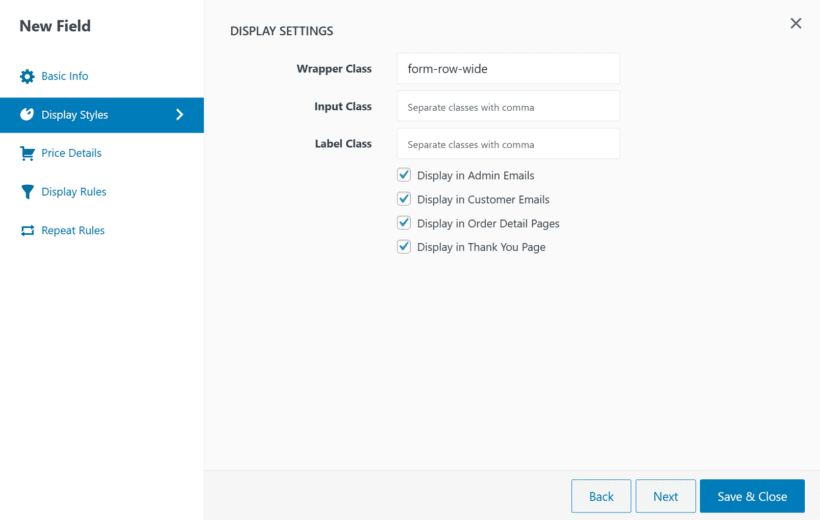
The Display styles page lets you choose where to display the custom fee field. By selecting the corresponding checkboxes, you can choose to have the fields displayed in specific areas such as the admin email, customer email, order details page, and thank you page. Simply select each option individually to activate them.
Next, let's move on to the Pricing Details tab.
Pricing Details
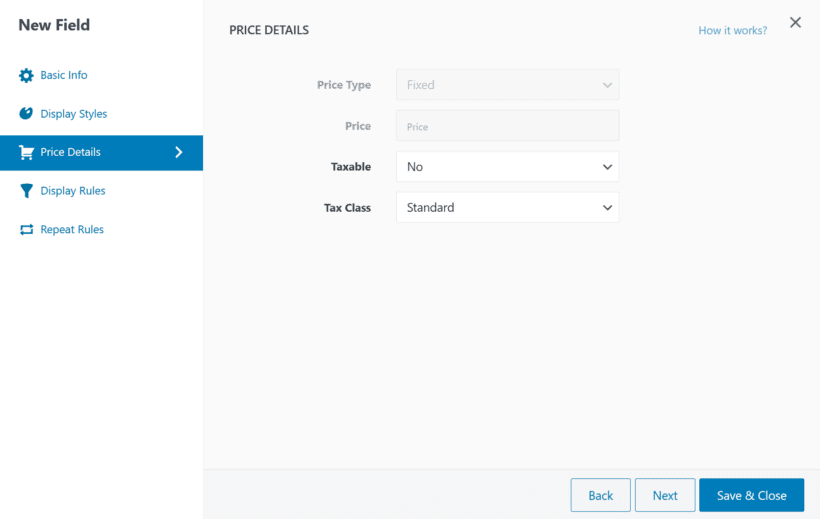
The Pricing Details tab lets you select whether or not to apply tax to the additional fee. If you decide to include tax, simply select Yes as the tax status and assign an appropriate tax class. If the tax does not apply to the fee, then select No and continue to the next step.
Display Rules
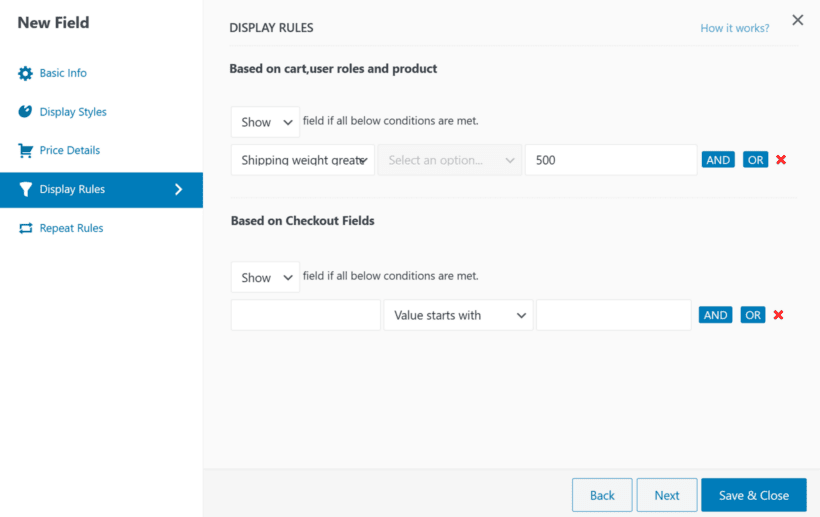
Checkout Field Editor comes with conditional rules that let you control when to show or hide the additional fee field based on a variety of display rules and conditions.
For example, we have set it to display only when the cart's total weight is above 500gm.
That's it! To save changes, click the Save & Close button. Now that the custom fee is live, let's test it on the front end to see if it works properly.
Test the additional fee field on the frontend
To preview the updated checkout page, add some items to your cart page and proceed to the checkout. If you scroll down the page, you'll see that the new field has been added.
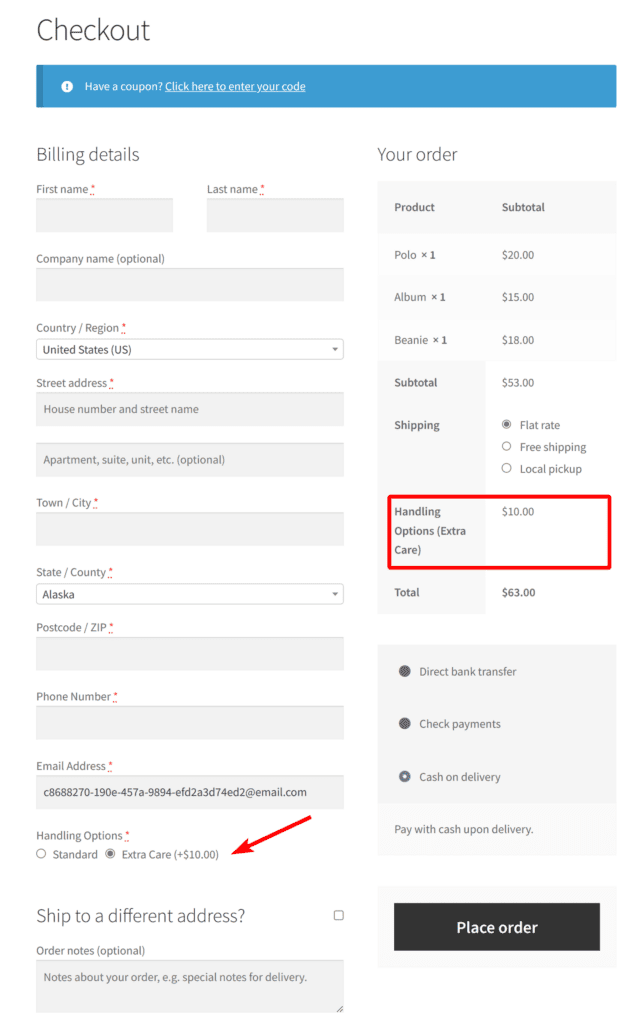
If you choose any of the options in the additional field, you'll notice that the cart subtotal is automatically updated. This means that there is no need to manually save the cart or refresh the page.
Next, fill out all necessary details, select the payment method, and place a test order to see how this will look on the backend.
After placing the order, go to your WordPress dashboard and navigate to WooCommerce → Orders to open the order details page.
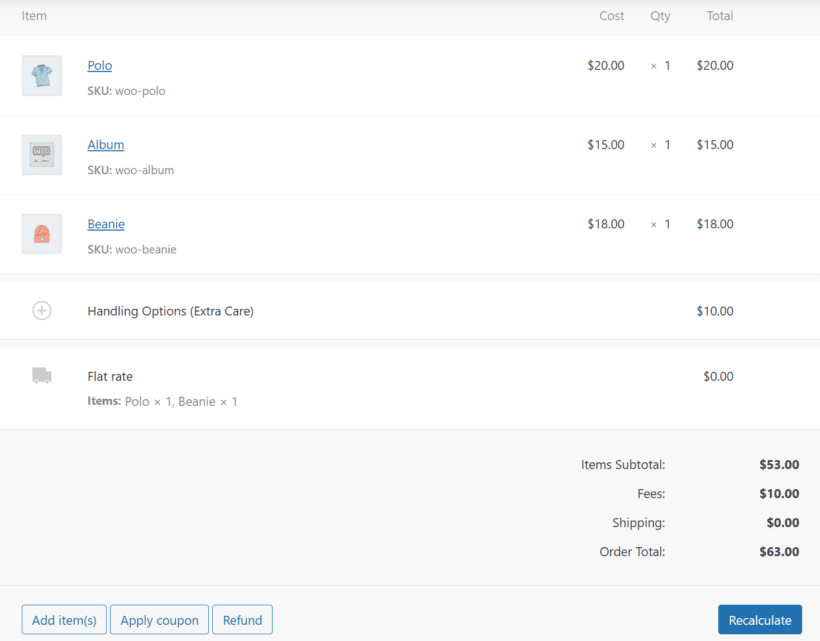
Upon accessing the order details page, you'll see the custom fee being visible on both the order details page and the invoice table. The same will also be reflected in the admin and customer email notifications that are sent once the order has been placed.
How do I customize my WooCommerce checkout?
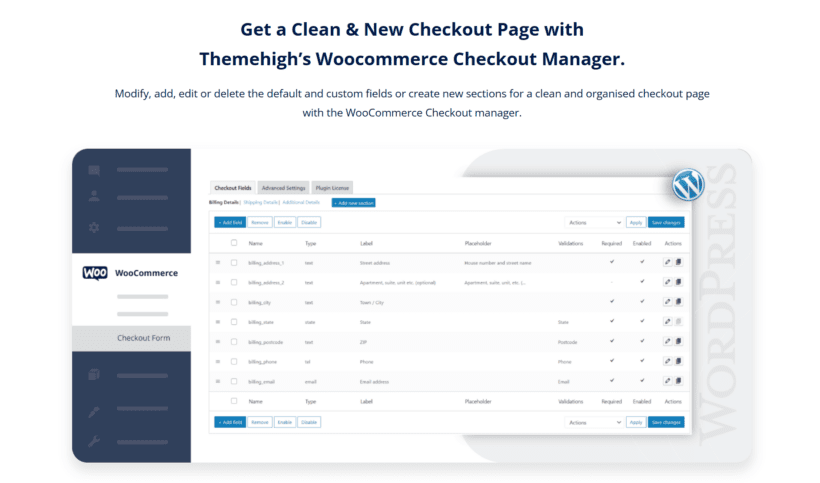
Customizing your ecommerce store's checkout page is essential to creating a seamless and easy shopping experience for your customers. The default WooCommerce checkout page may not offer the best user experience and is also not optimized for conversions. However, plugins such as the Checkout Field Editor by Themehigh can help you easily solve these issues.
It is an easy-to-use plugin that offers a broad range of customizable features, allowing users to create a clean and organized checkout page.
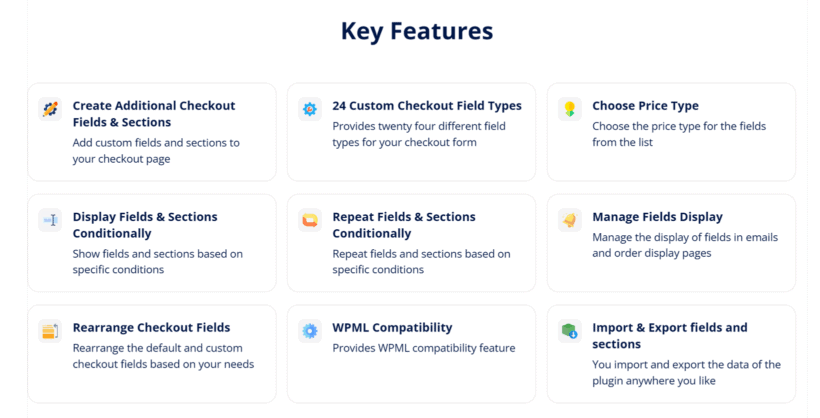
In addition to being an additional fee plugin, it also allows users to edit, hide, and rearrange existing fields. And not just that, you can also use it to add new sections and apply conditional displays and repeater fields. This flexibility means that you can optimize your checkout page to best suit your needs, resulting in a seamless and enjoyable shopping experience for your customers.
And if you're wondering how do I add a custom field to WooCommerce checkout using some other plugin, check out our recent tutorial that explores adding a text field to the checkout using the YITH Checkout Manager plugin.
That's all! We hope this article helps you easily add an additional fee to the WooCommerce checkout page.
Final Thought: Adding WooCommerce additional fees to checkout
Adding custom fee to your WooCommerce checkout page is a great way to handle any additional costs related to orders. The Checkout Field Editor by Themehigh makes it a simple process to add different kinds of fields to the checkout. This includes WooCommerce additional fees on checkout too.
By following the steps above, you should be able to easily add an additional fee to the WooCommerce checkout page. Apart from this, you can also use it to experiment with different checkout page layouts and optimize for better results.
So why wait? Download the Checkout Field Editor plugin today and start adding WooCommerce additional fees to the checkout page.
4 Comments
I want to add a field to the checkout where the customer can pick how many installments does he wish to split the payment. Upon choosing a corresponding additional fee would be applied. Can this be done with this plugin?
Hi Assaf! If you're already offering installment payment method in your WooCommerce store and you only need additional fields for the number of installments then you can use Checkout Field Editor by Themehigh for that. You can use the radio fields for the number of installments and set a corresponding price for each. For further questions, I recommend contacting Themehigh's support for you to get better assistance when it comes to using their plugin. Cheers!
Hi there, I'm using this plugin from ThemeHigh and have set a radio field for individuals (0%) en business (21%), which works great at check out. But the site I'm working on has products with 2 tax rates; zero rate and standaard rate (21%). I selected the 'Percent of Subtotal excluding tax' option and for 'Individuals' it works great, but for 'Business' the tax (21%) for the product with the standard rate (21%) is calculated double. This seems logical, but I presumed selecting the 'Percent of Subtotal excluding tax' option would solve this, but it doesn't. I will contact ThemeHigh as well, but I came across your tutorial in my search for the solution. Maybe you have experience with this issue? Thanks in advance.
Hi, Esther. Thank you for your comment!
As it stands, your current issue would be best handled by Themehigh support since your specific situation particularly revolves around the usage of the Checkout Field Editor for WooCommerce by Themehigh plugin. Your situation is unique and would be effectively handled by Themehigh support since they are the most knowledgeable about their plugin. If you have any other questions regarding any of our plugins, kindly reach out to us at our Support Center, and we will promptly assist you. Thanks again!