How to create a successful WooCommerce Printify store for your POD brand

In this article, we'll guide you on how to start your own custom printing store with a website built using WooCommerce, Printify and WordPress.
How would you like to design your own hoodie and sell it to the world? Or make unique office supplies and offer them online. It's a great idea, especially if you're interested in generating a passive income with minimal effort on your end.
Want to know how?
Simple, by starting an online store with a POD business model! And in this article, we'll guide you on how to start your own store today by simply using a website built with WooCommerce and Printify!
What is WooCommerce?
WooCommerce is a WordPress e-commerce plugin that allows users to create online stores. An open-source tool, WooCommerce comes with everything you need for a fully functioning online store. With WooCommerce, you can easily:
WooCommerce's user interface is designed with newcomers in mind, making it very easy to navigate. It is readily available for download in the WordPress plugin directory for everyone, completely free.
What is print-on-demand?
Print-on-demand (POD) model with dropshipping is one of the best ways to start an online store when you want to avoid managing a large inventory or making upfront investments.
With this model, POD platforms like Printify eliminate the requirement to maintain an inventory by allowing you to print your items when a customer places an order and directly ship them to their doorstep. The POD business model is best for an entrepreneur who:
- Does not have a huge sum of investment.
- Does not have people to manage inventory.
- Doesn't have storage space for inventory.
- Doesn't want the hassle of shipping orders.
Even for an entrepreneur who can do all of the above, choosing the POD business model can allow them to cut costs and focus on the core business and growth.
Create a WooCommerce Printify store
Now that you understand the POD business model and its benefits, let's explore how you can open a WooCommerce store using WordPress. You'll need to install WordPress and WooCommerce to set up your store. Do it with five simple steps given below:
- Install WordPress using a good web host such as Kinsta and create a website.
- Connect it to the domain address of your shop.
- Go to the WordPress admin and go to 'Plugins' on the sidebar on the left.
- Select 'Add New' and search for 'WooCommerce'.
- Install WooCommerce from the WordPress plugin directory and activate it.
Once the installation is complete, you'll receive a message, and the Setup Wizard will open. You could access Setup Wizard on the help page if you missed this. Once you get there, follow the next five steps below to set up your online shop:
- Fill in the details of your store, including your physical address and your email address.
- Fill in the industry your online store will fall into, such as fashion, home items, electronics, health, food, etc.
- Clarify the type of items you'll sell, which can be physical items or downloads. You can even sell subscriptions, memberships, bookings, bundles, and customizable products at a fee.
- Answer other questions about your business details, such as how many products you want to display.
- Allow recommendations for business features and select a WooCommerce theme for your ecommerce store.
Customize your store
After you've completed the steps above, your store will be ready and set up! While a theme will be automatically applied to the shop, you can customize the features and appearance of your store; however, it will require some knowledge of coding languages. But if you don't know how to code, you can play around with different themes and plugins that WooCommerce offers.
With only a few clicks under the 'Personalize my store' menu in the Setup Wizard, you can also change the look of your homepage, add a logo, and create a store announcement that will appear on every page of your online shop anytime.
When you go to the WooCommerce Settings, you review the following sections and customize additional store settings:
- Products - Customize the measurements of the product image. You can also allow buyers to leave product reviews. Remember to research best SEO recommendations and try to choose names/descriptions which will help people discover your online store.
- Tax - You can add consistent tax rates that will be calculated at the end on the final amount.
- Shipping - You can provide shipping zones to calculate shipping rates depending on the demographics of your customer. Additionally, add a shipping calculator on the product page if you'd like your customers to know how much shipping would cost beforehand. You can easily do this using the WooCommerce Shipping Calculator plugin.
- Payments - Here, you can choose the payment gateways to receive payments, including debit or credit cards, digital wallets, and even crypto transactions.
Customize your WooCommerce Printify products
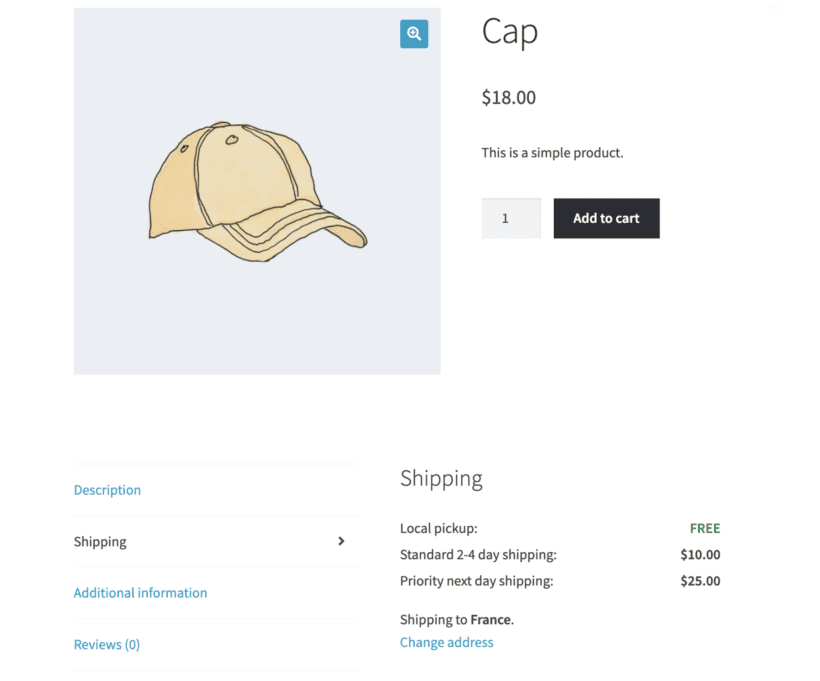
When working with WooCommerce Printify, availing of custom products like custom water bottles or baby blankets is a breeze. You can add your designs to a catalog of 700+ white-labeled products, and Printify will print them and ship them to your customer immediately every time you make a sale in your shop.
There are two ways to add custom designs to your products:
Design it yourself
Several tools out there can help you make catchy designs on your own, such as:
You can even take images from Shutterstock, edit them, and use them as your designs. If you're using WooCommerce Printify as your POD supplier, you can use their Shutterstock integration to look for the right image by searching with specific parameters.
Hire a designer
If designing is not your strong suit, you can hire a professional from various freelance platforms, such as:
You can also find some good designers with portfolios by asking around your social networks. Finding an artist is the first step in designing various products, so once you do, commission a single image before committing to check their technique.
WooCommerce Printify: The perfect combination
If you're thinking of using Printify services for WooCommerce powered online store, then we think it's a great option. You get:
- Great quality.
- Competitive pricing.
- Reasonable shipping rates.
- Quick order fulfillment.
- Great tools to bring your design to life.
- Great customer support.
Printify for WooCommerce provides all of the above and seamless integration of a POD model for your WooCommerce store. You can design, edit, and create your products on Printify and use a mockup generator to visualize and work on intricate details of your items. Once ready, you can easily make them available in your store.
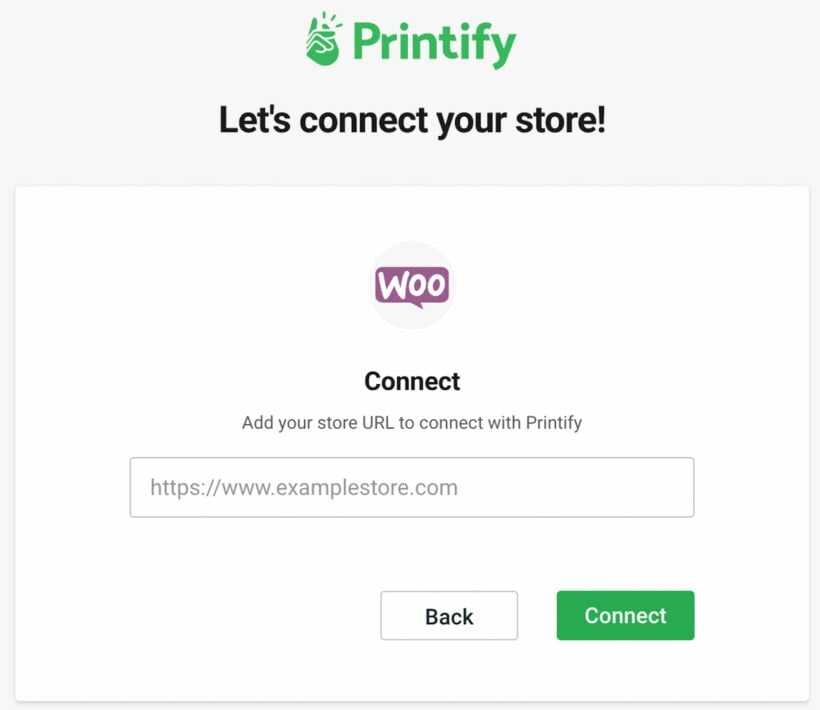
To connect WooCommerce Printify to each other, all you need to do is the following:
- Sign in on Printify and go to 'Manage My Store'.
- Choose the option to 'Add a New Store' and 'Connect'.
- Add the URL for your WooCommerce Store.
That's it! Your WooCommerce Printify account is integrated and set up!
Bonus tip 1: Create a quick WooCommerce order form of your Printify products
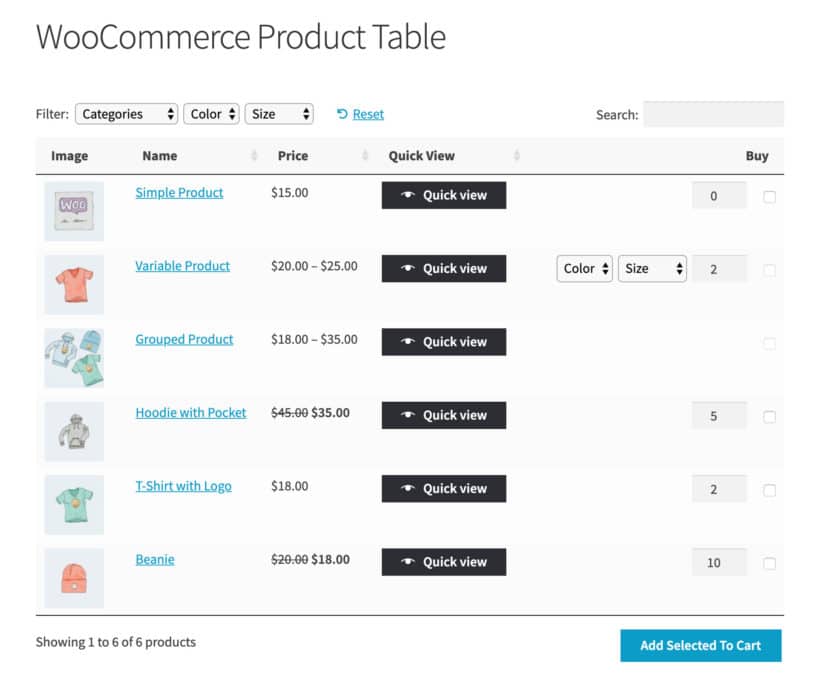
When you create a WooCommerce Printify store, it's easy to get carried away and create lots of products. After all, you don't have the usual e-commerce worries such as investing in and maintaining inventory!
And when you have lots of products, you'll probably notice that the default store layout in WooCommerce isn't ideal. For example, it makes it hard for customers to find what they're looking for. With just a few products per page, customers end up scrolling through multiple pages to find products they like.
The solution is to install the WooCommerce Product Table plugin. This takes your WooCommerce Printify products and displays them in a customer-friendly one-page order form. That way, customers can view multiple products at once and quickly add them to the cart. Much better!
Bonus tip 2: Add product filters to your shop pages

We've just seen how a product table can improve the shopping experience in your WooCommerce Printify store. However, it doesn't help customers to find products in the first place.
The other half of the solution is to add WooCommerce faceted search using the WooCommerce Product Filters plugin with your product tables. Install it and add user-friendly filters. Customers can quickly select the attributes of the products they're interested in, and then place an order. This is automatically routed to Printify, who take care of the order fulfilment for you. Perfect!
It's time to get started with WooCommerce Printify
Now you know that starting an online store of custom products with little effort is not a far-fetched dream. By simply integrating the POD business model with WooCommerce, you can create a successful WooCommerce store and generate a passive income with ease. You don't even have to make any large upfront investment or maintain an inventory!
So what are you waiting for? Follow our steps in this guide and get started today!