Illustration of a WooCommerce store collecting online donations

As an online store owner, there are many reasons why you might want to add charitable donations to your e-commerce checkout page. It helps you support a worthy cause and motivates customers to donate a fraction of their cart value. One way to do this is by using a WooCommerce donation plugin.

In this article, we’ll show you:

  • How you can add charitable donations to your online store using a WooCommerce donation plugin.
  • An easy way to list a range of donation products or options for customers to choose from.
  • How you can add donations to your checkout page using WooCommerce extensions.
  • How to let people choose between a selection of donation products before directing them to the checkout.

Let’s put everything into context before we begin.

Why you might want to offer charitable donation options to your customers

Did you know that it’s easier to find donations in retail verticals as compared to other spaces? This is mostly due to the fact that, at checkout, customers have their card or cash out and are ready to pay for their order. According to a recent survey, 71 percent of consumers said that they had made donations to charities at the register.

Another reason for adding donations to your checkout is that people prefer to do business with companies that give back to society and feel positive about them. According to a study, 65 percent of customers remembered the last retail business that asked them for donations, whereas 60 percent said that the experience made them feel positive about the retailer.

It’s easy to see that customers favor businesses that collect donations for a worthy cause and associate more trust with those brands. This is precisely why charity websites, as well as e-commerce stores wanting to make a difference, should encourage customers to make a donation at checkout.

This is incredibly easy to do with a WooCommerce donation plugin. Another reason for using a WooCommerce donation plugin to accept donations at checkout is that it can serve other purposes too. For example, it can also be used to enable a restaurant’s ordering system to take tips online or by service-based businesses that need a way to implement Buy me a cup of coffee!.

3 ways to offer charitable donation options

WooCommerce donation table offering a choice of charity projects and amounts

There are 3 main ways to offer charitable donation options through your website:

  1. Percentage of your order valueThis is calculated by taking a percentage of the customer’s order value. For example, 2% or 5% of their total purchase. This is a great option for store owners that want to donate a portion of their sales to charity.
  2. Fixed sum This involves asking customers to donate a fixed amount (for example $5 or $2.99) or in multiples of a base amount (for example $5, $10, $15, etc…) regardless of their order value.
  3. Offer a choice of donation productsAlternatively, you can list a range of donation options in a table before the customer visits the checkout page.

Of course, if you're a nonprofit website, you might consider taking things a step further and accepting recurring donations. Now that we’ve discussed the importance of offering charitable donation options to your customers, let's talk about how you can let customers choose which charity they’d like to support.

How to select a charity to collect donations for

As an online store owner, you might want to gather donations for multiple charities or non-profit organizations that use WooCommerce. This way, you can give your customers the option to select which charity they’d like to donate to. Letting customers donate to a charity of their choice can help you gather more donations and make customers more likely to leave a donation at checkout.

To do this, you’ll need to set up drop-down options on the checkout page that let customers pick a charity of their choice. You’ll also have to keep track of how many donations were collected for each charity. For example, Charity A got $250 at the end of the month, Charity B got $150, and Charity C got $125. This will be done in the back-end though some WooCommerce donation plugins let you display progress bars on your site’s front-end, as well.

Best way to encourage customers to donate

While there are many ways you can ask for donations from paying customers, we recommend that you follow tried-and-tested methods when speaking to prospective donors. This is because customers who leave a donation will only be able to interact with your website unlike a real-life scenario where you can talk to them face-to-face.

Here are some of the best practices for encouraging customers to donate to charities:

  • Share the impact of donations You need to let people know how their donations will make a difference. For instance, sponsoring children’s education, building a community center, or feeding the homeless. In simple words, let them know where their money will go.
  • Use social proof Social proofing is all about everyone does it, you should too!. When people see other customers making donations to a worthy cause, they’re motivated to do the same.
  • Give customers control over donation amount You should let your customers choose how much they’d like to donate. Some customers might want to donate $5 while others might want to donate $1.99 – every little bit helps!

Now that we have a better understanding of why you might want to accept donations from customers at checkout, let’s take a closer look at how you’d go about doing this in WordPress.

How to add charitable donations to your checkout page

It’s easy for customers to make donations when they’ve reached the checkout page since they already have their card (or alternative payment option) ready to go. It’s often easy for them to make a relatively small donation compared to their cart value. For example, if they purchase products that add up to $22.99, they might leave a donation of $2 without hesitation.

Another benefit of adding a donation option to your checkout page is that you don't need to create a new donation button. Instead, customers can pay for their order and donate to a charity in one go.

It’s worth mentioning, however, that you should make charitable donations an opt-in option. In other words, customers who want to donate should be able to do so by ticking a checkbox or entering the donation amount. And the rest of them can proceed to complete checkout without having to opt-out manually. They shouldn’t have to untick a checkbox as that would negatively affect their shopping experience.

GiveWP: The best WordPress donations plugin

GiveWP is a free WooCommerce donation plugin that makes it easy for WordPress site owners to accept donations regardless of whether they’re using WooCommerce or not.

GiveWP donation plugin homepage

This WooCommerce donation plugin is designed to help WordPress users easily create donation forms. You can quickly add fundraising campaigns to your e-commerce site as stand-alone web pages, display donation forms in your theme’s sidebar as widgets, or embed them using a shortcode.

GiveWP offers several options to customize the donation form templates along with extensive documentation to help you personalize the look and feel of your website. You can use GiveWP forms as widgets or add them to the checkout page. The plugin also lets you accept recurring donations from customers.

How to use GiveWP with WooCommerce

You can use the Donation Upsells for WooCommerce add-on to use the GiveWP plugin with your WooCommerce-based online store. This way, you can add donation options to your WooCommerce checkout (or cart) based on your GiveWP forms and form options.

One of the key benefits of using this add-on is that all payments made during the checkout process will be processed with the WooCommerce payment gateway you’ve enabled. In addition to this, the donation details you gather through your donation form will be saved in your GiveWP donation records in the back-end for reporting and donor management purposes.

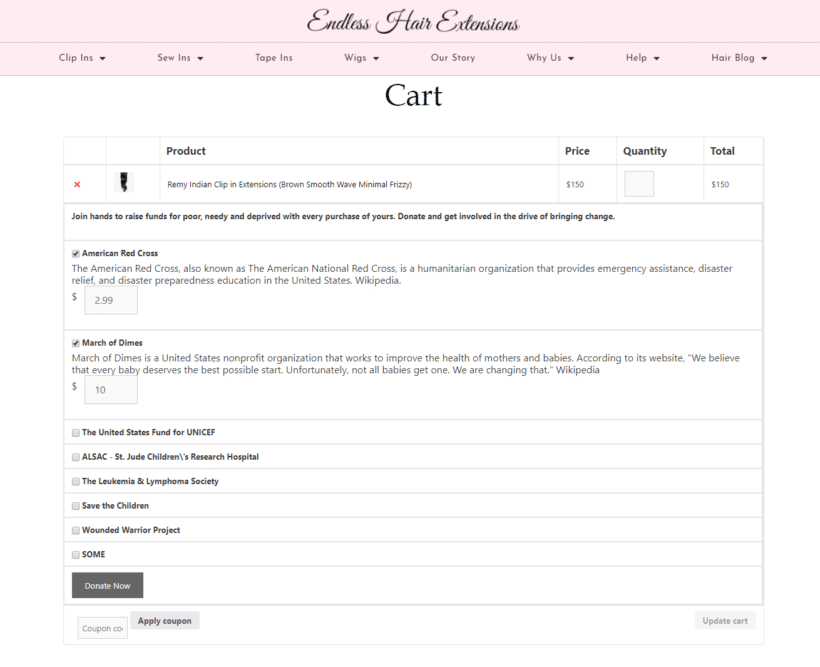
The plugin delivers a seamless donation experience to your customers. When they click to view their shopping cart, they'll see a donation option directly under the products they've added to cart. This way, they can select which charity they'd like to donate to and select a donation amount. This will depend on how you've configured the plugin.

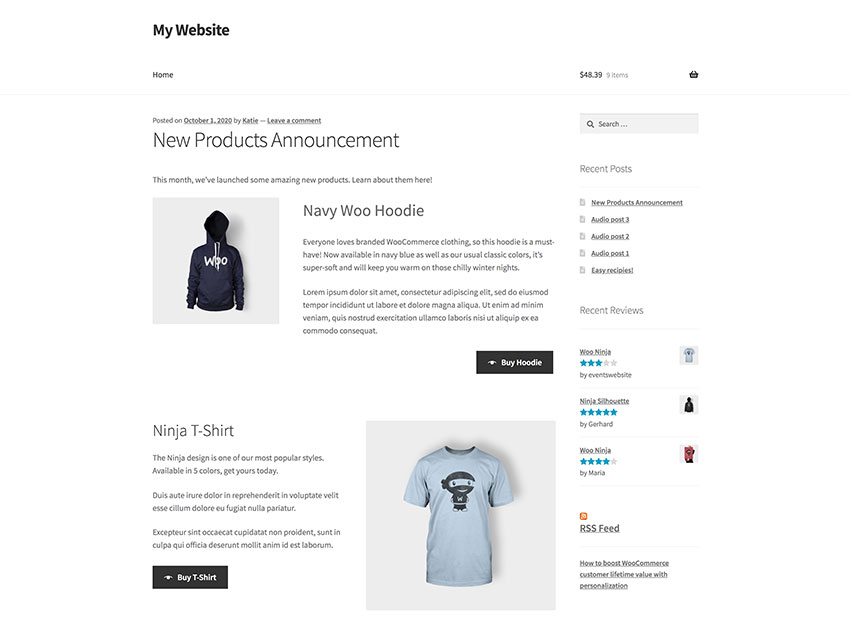
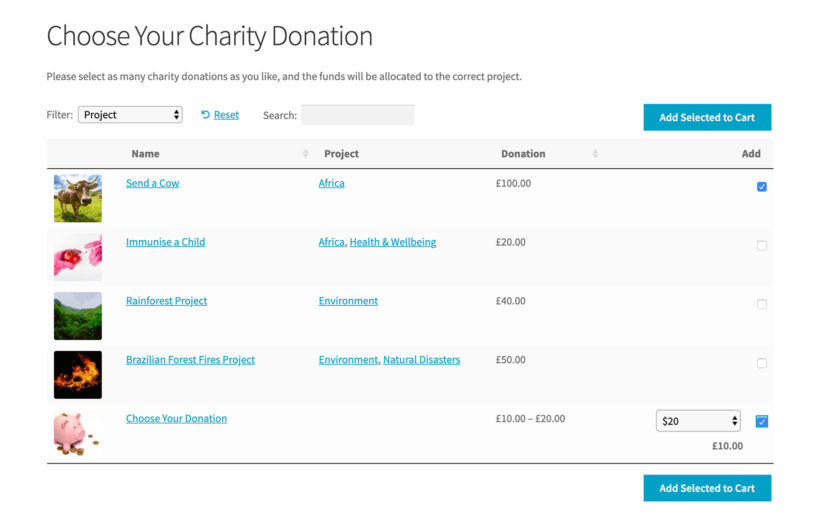
Here's an example of a website using the Donation Upsells for WooCommerce add-on to accept charitable donations at checkout:

Cart with charity donation checkboxes added below the product

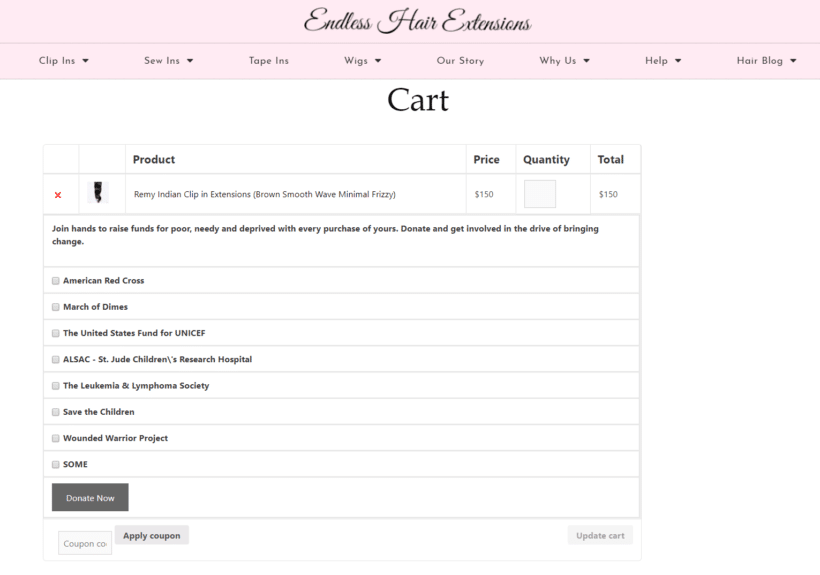
Notice how customers can choose which charity they'd like to donate to and enter their donation amount. Customers can also choose to donate to multiple charities in one go.

Donate to multiple charities

How to use GiveWP without WooCommerce

You can use the GiveWP plugin to accept donations even if your website doesn’t use WooCommerce. This is especially useful for online store owners that:

  • Use other e-commerce plugins (like Easy Digital Downloads) for selling products, or
  • Website owners that don’t use a WooCommerce plugin at all but would like to be able to accept charitable donations.

GiveWP offers several payment gateways right out of the box. These include PayPal Standard and Stripe in addition to offline donation options.

Let customers make a donation on the product page

WooCommerce donation form letting customers donate on the product page

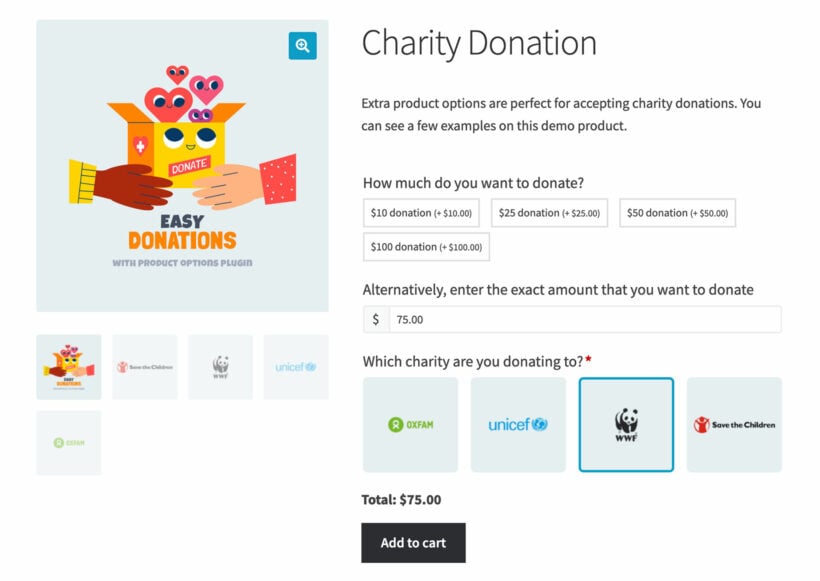
The WooCommerce Product Options extension lets you set up donations in a way that lets customers decide how much they’d like to donate. In other words, instead of setting a fixed donation amount, you can let customers donate as much as they’d like.

It also gives you the option to configure donation amounts in multiples of $10, $20, and $50. This is in addition to a name your price option which simply allows customers to enter their own donation amount. 

This perhaps the easiest way to accept donations at the checkout page. It gives you the option to:

  • Suggest a price.
  • Enforce a minimum acceptable donation amount.
  • Let customers decide how much they'd like to donate.

How to sell a choice of donation products before the checkout

Selecting from preset donation products before reaching the checkout

So far, we've talked about how to let customers to make a donation at the checkout. But what if you want to give customers a choice of donation options?

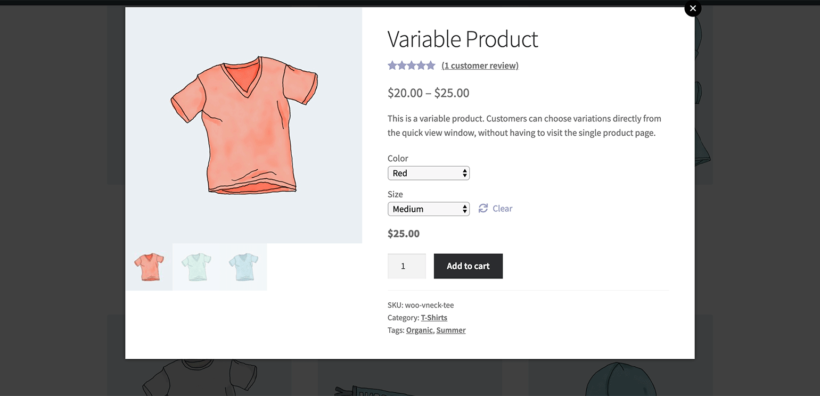
For example, maybe you offer a choice of charities or projects to donate to. Maybe you sell charity gifts, such as 'Send a Cow' or 'Pay to immunise a child'. If so, then it's best to create a quick order form listing all the donation options before taking customers to the checkout page.

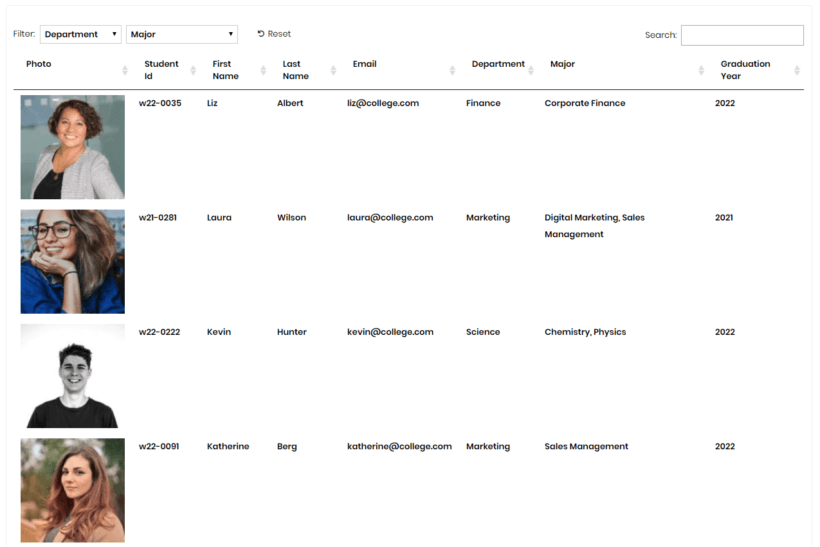
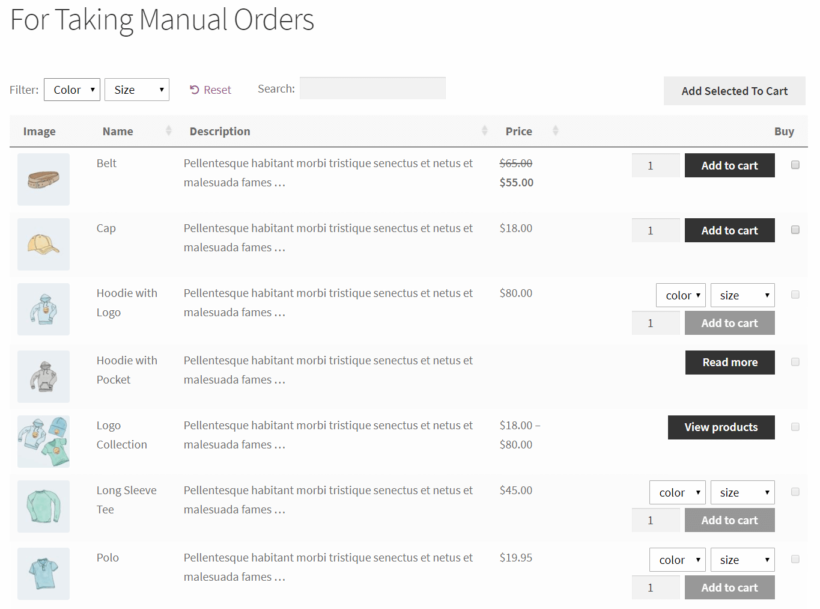
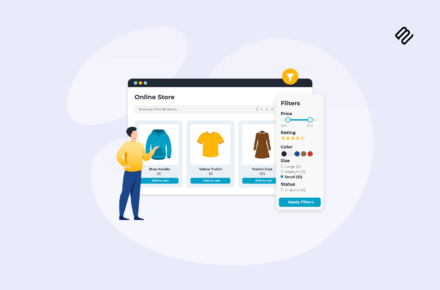
You can easily do this with the WooCommerce Product Table plugin. This handy plugin takes your donation products and lists them in an interactive table with search box and filters. Customers can quickly find and select the projects or charities they want to donate to, and then add them to the cart. They can then check out as usual and pay for the donation products along with any other products in their cart.

How to set it up

It's easy to list donation products with WooCommerce Product Table:

  1. Install the plugin on your WordPress site. (Make sure you install the free WooCommerce plugin too.)
  2. Go to Products → Add New and add all your donation products. Use 'Simple Products' for donations that don't come with any options; or 'Variable Products' if you're offering a choice. For example, if you're selling a 'Choose Your Donation' product then use variations to list the available donation amounts.
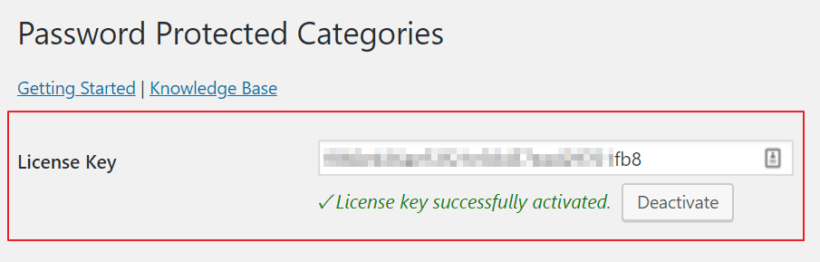
  3. Go to the WooCommerce Product Table settings page (WooCommerce → Settings → Products → Product Tables). Enter the license key from your order confirmation email, and choose your options. To sell charity donation products, we recommend the following options:
    • Choose columns that will give people the information they need to know. For example, an image illustrating what the donation will be used for, the name, the price, and add to cart column.
    • Choose the add to cart 'checkbox' style. This lets people quickly select multiple donation options and add them to the cart together. This encourages them to donate more.
    • If you've created any variable donation products, then select the 'Dropdown' variation option.
    • If you have a long list of donations, use filters to help people to find projects they care about more easily.
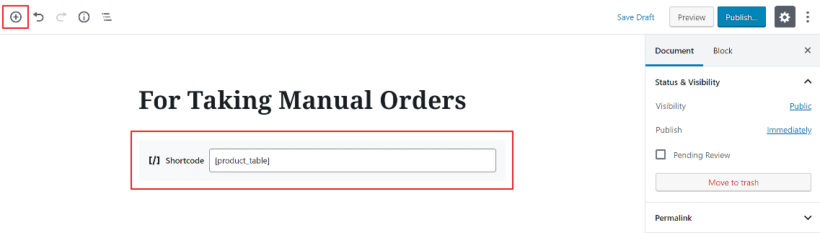
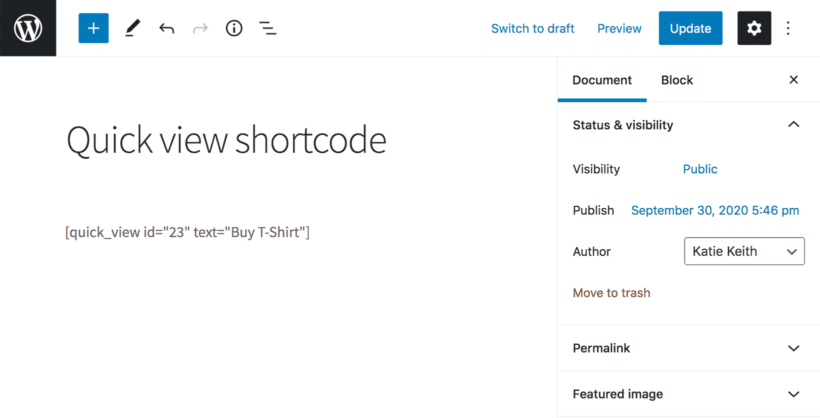
  4. Create a new page and add the shortcode [product_table]. This will list all your products in a table. If you've created a specific category for your charity donation products then use the category option to list those products only.

Where to get the plugins

Customers are more willing to buy from companies who support charities. The easier you make it for them to leave a donation, the more likely they’ll be to do so!

We explained how you can collect donations for charities at the checkout using a WooCommerce donation plugin like:

Are you thinking of using a donations plugin? Will you let customers enter their own donation amount or set a fixed donation amount? Let us know by commenting below.

Close-up of a person checking the time on a wristwatch

If you're displaying WooCommerce product lead times in your store, it's important to adapt it to your specific needs.

While the WooCommerce Lead Time WordPress plugin has 'lead time' in its title, that doesn't mean that you have to use these exact words on your site!

The purpose of the plugin is to tell customers how long they'll be waiting before the product is sent. There are many possible ways to do this, depending on what types of products you sell, and the setup of your business.

Alternative ways to describe WooCommerce product lead times

Here are some examples of popular alternatives to 'lead time', with advice on when to use each one:

Available on

Use this for non-stock products, for example if you are awaiting an order from the supplier. This is a good option for products that are normally in stock, where you have chosen to display the lead time text for out of stock or backorder products only. When the product goes out of stock, you can add the date when it will become available again. This tells the customer when to come back and place their order, resulting in more sales for you!

Ready for despatch in

Popular with websites selling handmade or made to measure products like Etsy, this wording is good for products that need some manual work to get them ready to send.

Handling time

Consider using this wording if you're showing WooCommerce product lead times for items that require some sort of handling or processing to get them ready for sending.

For example, you might use this for custom hampers or gift boxes which you compile based on the customer's selections.

Processing time

This text has a similar meaning to 'Handling time', but sounds slightly more formal because it removes the human element that is implied by 'Handling time'.

Made to order

You guessed it! This wording is good for made to order products. It indicates the reason for having to wait, which helps the customer to understand and reassures them that the product is worth waiting for.

You could also use 'Handmade' or 'Built to order'. They're both good alternatives for showing WooCommerce product lead times for this type of item.

Waiting time

This indicates how long the customer will be waiting before the product is dispatched.

Personally, I find it slightly negative. Customers don't want to view themselves as waiting! As a result, I would suggest choosing something that positively indicates when the product will be sent, rather than how long the customer must wait. However, it might work for some scenarios.

Delivery time

You can also use WooCommerce Lead Time to indicate predicted delivery times on the product page.

For example, you might add a note saying 'Standard delivery times' or 'Delivery time: 2 weeks'. Customers get frustrated at having to add products to the cart just to find out the delivery time, so showing it in the lead time field is an excellent solution.

Lead time

Of course, sometimes 'Lead time' is the best wording. Use it for non-stock products where there will be a wait before it becomes available to despatch. For example, this might include made to order products.

Are you managing stock?

When you choose your lead time label, remember that a stock message might be displayed next to it.

If you're actively managing stock for a particular product, then the stock text 'In stock', 'Out of stock' or 'On backorder' will appear before your lead time text. This might affect how you choose to word the lead time message.

How to set it up

Before we close, here's a quick video tutorial on how to display lead times for your WooCommerce products:

Where to get the WooCommerce Product Lead Times plugin

If you haven't started displaying WooCommerce product lead times in your store yet, then get the plugin today. You can set it up in minutes. Customers will instantly be able to make a more informed decision based on your lead times.

Illustration of a WooCommerce shopper seeing a personalised discount message

WooCommerce customer-specific pricing is a powerful strategy where you charge unique pricing to specific users in your online store. Discover the easy way to set it up - no technical knowledge needed!

In the bustling world of e-commerce, where every click counts and customer loyalty is paramount, businesses are constantly seeking innovative ways to enhance user experiences. Customer-specific pricing is a strategy that can significantly impact sales and customer satisfaction. Imagine tailoring your product prices to individual shoppers, offering personalized discounts and creating a sense of exclusivity - all while boosting your bottom line. It’s not just a dream; it’s a powerful reality 🔥

Keep reading to discover how to add WooCommerce customer-specific pricing to your store. We'll do it using Discount Manager, an easy-to-use WooCommerce plugin that makes it easy to add and display flexible pricing rules and custom fixed prices per customer.

What is WooCommerce customer-specific pricing?

As online retailers, we’ve all faced the dilemma: How do we cater to diverse customer needs without compromising profitability? Traditional pricing models treat everyone the same. However, in reality, each customer brings a unique set of preferences, behaviors, and purchasing power. A first-time buyer may need an extra nudge, while a loyal VIP deserves special treatment. And what about those high-volume wholesale clients who keep our revenue flowing?

It's ideal for any website that wants to charge different amounts to different types of customer. For example, WooCommerce wholesale stores often need to charge different amounts to retail and wholesale user roles, or even different amounts to each wholesale customer.

For businesses with established client relationships, you can create entirely customized fixed pricing contracts. Each client receives their own fixed pricing structure that reflects their unique agreement with your business. This approach is particularly valuable for service-based businesses or companies with long-term clients who purchase regularly. WooCommerce Discount Manager makes this easy by allowing you to assign specific discount rules to individual user accounts, ensuring your most valuable business partners always see their negotiated rates.

WooCommerce Discount Manager - the best customer-specific pricing plugin

Product page showing a personalised 50 percent discount message for a returning customer

Now you know why customer-specific pricing is so important, I'll tell you how to achieve it in your own store.

The best user-specific pricing plugin is WooCommerce Discount Manager. This powerful plugin lets you add simple or advanced pricing rules to WooCommerce.

You can choose from a choice of 6 discount types, each with plenty of options:

  • Select which products and categories the pricing will apply to.
  • Set the start and end dates for the special pricing, or run it permanently.
  • And most importantly - select which individual user accounts and/or user roles the pricing will apply to.

Unlike other WooCommerce customer-specific pricing plugins, Discount Manager actually lets you display unique information to each individual user. This helps to create a truly personalized user experience, boosting customer loyalty.

Next, I'll tell you how to set up user-specific pricing with the WooCommerce Discount Manager plugin.

How to charge custom fixed prices per customer in WooCommerce

To learn how to implement customer-specific pricing, either watch the video or follow the step-by-step written tutorial below:

Step 1: Install WooCommerce Discount Manager

  1. First, buy WooCommerce Discount Manager and download the plugin zip file to your computer.
  2. Go to Plugins → Add New in the WordPress admin and install and activate the plugin.
  3. The plugin setup wizard will open automatically. Use it to activate the license key from your order confirmation email.

Now the plugin is installed on your WooCommerce site, it's time to set up customer-specific pricing.

2. Create customer specific pricing rules

  1. Go to Marketing → Discounts and click the 'Add Discount' button.
  2. Choose the type of discount that you'd like to create for the user. There are several to choose from, each of which has a helpful explanation and examples. For example, you can choose a simple percentage pricing change, discounts based on the quantity ordered, and so on. All of these work with customer-specific pricing, so choose whichever one best fits the type of pricing rule you require.
    WooCommerce Discount Manager add discount type
  3. Next, fill in the information about how the customer-specific discount should work. This includes adding a name for the pricing rule, choosing how the user-based price will work, and selecting which products and categories it will be used on. The exact options depend on which type of discount you're creating.
  4. In the 'Applies to' section, select the individual user accounts or/roles that should receive the special pricing. For example, in the below screenshot I have selected a user called Ben. You can select as many users as you like, or entire user roles in order to give the same customer-specific prices to multiple people.
    Customer-specific discount rule assigned to a named customer
  5. In the 'Availability' section, you can optionally set dates when the customer-specific discount will run. For example, to give a personalized discount to Shanaz during her birthday month, you would select the start and end of that month.
  6. If you'd like to display a notice on the product page, then fill in the 'Product page content' and choose a location for it to appear:
    Display customer specific pricing message in product page content
  7. If required, you can also add a 'Cart notice' which will appear on the cart page for all users who the pricing rule applies to.
  8. Save the discount.
  9. Repeat the above steps for each customer-specific discount that you wish to create. There's a 'Duplicate' option for each discount to save you time. Simply copy an existing discount and change the details for the next user as needed.

Pro tip for setting customer specific prices for groups

When we talk about WooCommerce customer-specific pricing, it's easy to assume that you should create a separate pricing rule for each individual user. Before you do this, think about whether that's the most efficient way to charge different prices per product for each user.

For example, if you have several users who you want to give the same special pricing, then here are some easier ways to achieve the same result:

If you do this, then you should word the product page content and cart notice in a generic way that applies to all users who receive the group discount. For example, don't mention their individual names in it like I did in my screenshot above!

What sort of WooCommerce sites need user-specific pricing?

At first glance, charging different prices to specific users sounds a bit strange and unfair. However, personalized pricing is actually common practice in the ecommerce world.

Here are some examples of where a WooCommerce shop might need customer-specific pricing:

Loyal VIP customers

Give preferential rates to top-tier customers who consistently make high value purchases. Offer them a personalized discount or a custom price for specific products. For instance:

  • SuperVIP Jane gets 15% discount on all items.
  • Platinum customer Mark receives a fixed price of $50 for a premium product.

High-volume buyers

Recognize users who consistently order in bulk. Tailor pricing based on their historical order quantities. For example:

  • Wholesale partner Alex orders 100 units of a product regularly, so they get a 10% discount.
  • Bulk buyer Sarah purchases 500 units, earning a 20% discount.

Subscription-Based Pricing

Convert one-time purchasers into recurring revenue by offering subscription options for your products or services. With WooCommerce Discount Manager, you can create special pricing rules for customers who commit to regular purchases. For example:

  • When customers sign up for monthly deliveries, offer a 10% discount on products.
  • Or provide exclusive pricing tiers for subscription members.

Early adopters or beta testers

When launching a new product or feature, offer special pricing to users who participate in testing or provide valuable feedback. These users might receive a unique discount code or reduced price on all orders. This might be a permanent personalized discount, or it might be for a fixed period such as 6 months.

Referral program participants

Encourage users to refer others by offering personalized discounts. For instance:

  • Refer-a-friend Lisa receives a 10% discount for referring new customers.
  • Ambassador Mike gets a fixed price on a specific product for promoting your brand.

Birthday discounts

Celebrate users' birthdays by sending them a personalized coupon code. For example:

  • Birthday Girl Shanaz receives a 25% discount during her birthday month.

Dynamic pricing

Implement algorithms that automatically adjust prices based on market demand, inventory levels, or customer behavior. For example, you could set up rules that increase prices for high-demand products during peak seasons, or automatically lower prices for slow-moving inventory. The WooCommerce Discount Manager plugin supports this through its flexible rule system, allowing you to create dynamic pricing scenarios that respond to changing business conditions.

Customer-specific products

If you sell user-specific products, such as branded items to a school or sports team, then you might need customer-specific pricing too.

Behavior-driven discounts

Monitor user behavior (e.g., time spent on site, items viewed) and offer personalized discounts. For instance:

  • Frequent browser Alex gets a 5% discount after browsing specific products extensively.

Start charging custom fixed prices per user today 🚀

As you can see, user-specific pricing is a powerful way to reward your best customers while making your ecommerce store more profitable. Discount Manager is the best WooCommerce customer-specific pricing plugin because it has everything you need to tailor your product pricing per user:

  • Choice of 6 flexible discount types.
  • Select which individual user accounts and roles each pricing rule applies to.
  • Display customer-specific information on the front end.
  • No-risk 30-day money back guarantee.
  • Detailed documentation, plus access to expert support.

Shopper paying on a mobile online store with a credit card

Ever wondered how to turn off a WooCommerce store? There are many scenarios where online store owners might need to temporarily disable WooCommerce. For example, around the holiday season, due to a staff shortage, or simply because the products they sell aren’t available or on backorder.

In such cases, it’s a good idea to have a simple way to temporarily deactivate WooCommerce and let customers know when it’ll open up again. Ideally, you’d want to be able to use a plugin to do this instead of disabling your entire WooCommerce store or messing around with code. For example, a WordPress maintenance mode plugin takes your whole site offline - bad idea! Just disable WooCommerce while leaving the rest of your WordPress site live.

WooCommerce Private Store to disable WooCommerce demo

By using the right plugin to disable WooCommerce, you can automatically hide all the links to your shop pages. The best part is that you won’t even have to edit any content or re-configure menus and widgets.

With this in mind, in this article, we’ll explain three different ways to temporarily disable WooCommerce. We’ll cover how to:

  • Temporarily remove your entire WooCommerce store from your public-facing website. This is often referred to as "WooCommerce temporarily disable shop".
  • Hide specific categories only from your ecommerce store or disable the WooCommerce Shop page.
  • Temporarily hide the checkout page with a WooCommerce disable checkout plugin.

Along the way, we’ll also explain which solution is best for different scenarios.

3 ways to temporarily disable WooCommerce shop

Before we jump into the tutorial, let’s take a step back and quickly learn about the two options for temporarily disabling a WooCommerce shop.

Method #1: Use WooCommerce Private Store to temporarily disable WooCommerce

The first method involves using the WooCommerce Private Store plugin to temporarily disable or hide your WooCommerce store. It's perfect for anyone searching for how to turn off a WooCommerce store or disable the shop.

Using Private Store as a WooCommerce temporarily disable shop plugin is particularly useful for ecommerce store owners who:

  • Are sick or on leave. For example, a WooCommerce vacation mode plugin is useful around the holiday season, for maternity leave, or travelling. When you finish the Woo store vacation, just make it public again!
  • Need to temporarily close the store because they’ve run out of inventory or if products are on backorder.
  • Are short on staff and can’t complete customer orders on time.

Simply put, this is the best method for anyone wanting to know how to turn off WooCommerce store. Once you’ve installed the WooCommerce Private Store plugin to your WordPress site and followed the tutorial, it’ll hide your entire store from your public-facing website. It will disable the WooCommerce shop page and all your other store pages such as the products, categories, and so on.

If visitors try to access your online store either by going to it directly or searching for it on Google, they'll be redirected to a different page depending on how you configure the plugin's WooCommerce settings page.

WooCommerce Private Store demo store login page

That said, you’ll still be able to access it (from the front-end and the back-end) by entering a password. As well as the password protect option, you can unlock your hidden store for logged in users or roles. This is a great option for online store owners that would like to temporarily disable the WooCommerce shop for regular customers but would like wholesale buyers to be able to make purchases. For example, it's perfect as a WooCommerce store vacation plugin.

Method #2: Use WooCommerce Protected Categories to hide specific categories and their products

The WooCommerce Protected Categories plugin lets you hide one (or more) categories within your online store. In other words, instead of disabling your entire WooCommerce shop, you can simply disable specific categories and all the products within those categories.

This is a practical option for online store owners who:

  • Are running out of stock on certain product categories but would like to be able to continue selling other products.
  • Are restocking a particular category of products and need to temporarily disable those category pages from their public-facing website.
  • Have decided to pause the production of a category of products.
  • Wish to make certain product categories private and available only to select members/users.

Password login page locking down a WooCommerce product category

With the WooCommerce Protected Categories plugin, you’re able to protect specific categories in three different ways:

  • Password protection.
  • Making them available to certain user roles.
  • Allowing specific users to access them.

This way, you can disable specific categories from your WooCommerce store while still making them available to certain users. Make them public again on your chosen end date.

Method #3: WooCommerce disable checkout

The other two methods focus on disabling the entire WooCommerce store or a complete category. Alternatively, you might want to disable checkout options or turn off ordering for specific products.

A WooCommerce disable checkout plugin is useful for ecommerce business owners who: 

  • Have run out of stock or paused production of certain products but would like to be able to nudge customers to buy other products. 
  • Are facing a problem with a merchant or logistics and want to pause orders temporarily.

While you can disable checkout using code, it can easily get tricky and cause your site to break. Another way you could technically disable checkout for individual products is by using the External / Affiliate Product option available in default WooCommerce. This feature was built to enable store owners to showcase products on their site that customers will have to purchase on a different site. For instance, you can promote an Amazon product on your website but to purchase the product customers have to go to the Amazon product page. 

While this feature can be modified to allow you to disable the checkout page, that’s not what it was created for. It could also easily break your product variations which would require troubleshooting. That's why a WooCommerce disable checkout plugin isn't necessarily the best solution.

The best way to temporarily disable checkout or turn off orders for a product is to:

  1. Hide the price of the product, which in turn removes the add to cart button
  2. Mark the product out of stock

A better option: Display lead times and allow backorders

The problem with disabling ordering for specific products is that - by definition - no one can buy them! It’s better for business if you continue accepting orders for products that will come back in stock. The important thing is to clearly communicate with your customers so that they know there will be a wait.

You can easily achieve this by setting the stock status of the product to ‘On backorder’, and showcasing lead times. You won’t have to say no to sales!

How to temporarily disable a WooCommerce shop using plugins

Depending on whether you activate WooCommerce Private Store or WooCommerce Protected Categories to your online shop, some or all of your WooCommerce pages will immediately disappear from your public-facing website. Keep in mind that the rest of your WordPress site (your homepage, blog pages, galleries, etc.) will remain public.

In addition to this, your WooCommerce store will remain accessible to administrators and store managers from the WordPress admin area. They will also be able to access the store from the front-end as usual by entering the password or logging into a user account – depending on how you decide to set up the plugin.

The key benefit of using either WooCommerce Private Store or WooCommerce Protected Categories is that they simply hide all the links to your shop pages. This includes the main shop page, category pages, and single product pages. This way, you won’t have to edit any content on your site or mess around with menus and widgets. It’s the easiest way to WooCommerce temporarily disable shop.

Method #1: How to turn off WooCommerce store with the Private Store plugin

Once you have WooCommerce Private Store set up, it will automatically hide all WooCommerce-created pages from your store. This includes the account page, shopping cart links, checkout pages, main shop page, and product pages.

Assuming you already have an ecommerce store, here’s how to temporarily disable WooCommerce shop:

WooCommerce Private Store settings for temporarily disabling the shop
  1. Get the WooCommerce Private Store plugin. Download the plugin files and copy the license key from the order confirmation page or the email notification receipt.
  2. Log in to your WordPress admin panel and head over to Plugins → Add New.
  3. Click the Upload button and look for the plugin files you downloaded.
  4. Install and activate the WooCommerce Private Store plugin to your WordPress website.
  5. Navigate to WooCommerce → Settings → Private Store and paste your license key.
  6. From the same screen, you can configure other plugin settings, as well. For example, you can:
    1. Set a Store Password if you’d like to let administrators and store managers access it from the front end.
    2. Set a Login Redirect URL to redirect users to another page (such as your homepage) if they try to access a store page.
  7. Click the Save Changes button at the bottom of the screen to proceed.

That’s it! Your entire WooCommerce shop should be hidden.

To take things further, you can place your login form somewhere on your WordPress website. For example, on a dedicated login page or in a sidebar widget. All you have to do is paste the shortcode: [store_login] on the page or sidebar. This will automatically generate a login form based on the WooCommerce Private Store settings page. This way, administrators and store managers can easily access the shop from the front end while it's temporarily disabled.

WooCommerce Private Store to disable WooCommerce demo

It's an easy way to close your WordPress store until you're ready to start selling again. It basically lets you disable the WooCommerce shop page.

Method #2: How to use WooCommerce Protected Categories to hide specific categories and their products

Once you’ve installed and activated the WooCommerce Protected Categories plugin, it’ll give you the option to hide specific categories from your WooCommerce store. It also hides all of the sub-categories and products that fall under those categories.

Here’s what you need to do to temporarily deactivate or disable specific WooCommerce categories:

Category visibility settings for disabling specific WooCommerce categories
  1. Get the WooCommerce Protected Categories plugin. Copy the license key from the order confirmation page or the email notification.
  2. Log in to your WordPress dashboard and head over to Plugins → Add New.
  3. Click the Upload button and look for the plugin files on your computer.
  4. Install and activate the WooCommerce Protected Categories plugin to your WordPress website.
  5. Navigate to WooCommerce → Settings → Products → Protected categories and paste your license key.
  6. Click the Save Changes button at the bottom of the screen to proceed.
  7. Go to Products → Categories from the admin panel.
  8. From the Product categories screen, you can:
    1. Edit an existing category that you’d like to temporarily disable from your WooCommerce shop. Alternatively, you can create a new category, as well.
    2. Scroll down to the Visibility section and select the Protected option or the Private option depending on your preferences.
  9. Click the Add new category button to proceed.

That’s all there is to it! The category (and all subcategories and products that fall under it) should be temporarily disabled.

Demo login page hiding a disabled WooCommerce category behind a password

You can repeat these steps to hide as many categories as you’d like.

Method #3: How to hide checkout page by turning off orders

To turn off orders and essentially disable checkout, you’ll need to remove the price of the product. 

Default WooCommerce doesn’t give you the option to hide product prices. You could use code to hide the prices of specific products, categories, etc.  However, that comes at the risk of breaking your site as it involves editing and adding code snippets to crucial website components like your child theme, functions.php file etc. 

That’s why we recommend using a plugin. Our in-depth tutorial to hide WooCommerce product prices explores multiple ways to hide prices including:

  1. Hide prices from logged out users using WooCommerce Wholesale Pro
  2. Showcase product in table format (without prices) using WooCommerce Product Table
  3. Show a quick view of products without prices using WooCommerce Quick View

Once you’re hidden the price of your product,  you can also mark it out of stock. For this you can follow these steps:

  • Open the WordPress Dashboard, and go to the product you want to mark out of stock. 
  • Navigate to the ‘Product data’ section and click on “Inventory”
  • Here you can change the “Stock Status” to ‘Out of stock'.
  • Make sure to click on ‘Update’ once done. The product is now marked out of stock! 

Hiding the product price and marking it as “out of stock” is not the only way to deal with products that are out of stock. If you are in the middle of restocking products then showing lead time is a better idea as it’ll help you make a sale if customers decide to place a backorder. 

Products out of stock? Don't disable your store - show lead times instead!

WooCommerce product page marked out of stock with an expected availability date shown instead of a disabled add-to-cart button

In the previous sections, we assumed that disabling your WooCommerce store is the best way forward. However, it's worth thinking about whether there are any alternatives to hiding it completely. This depends on why you want to disable WooCommerce.

Some people decide to temporarily close their online store due to stock availability. For example, if your products are out of stock or you have lead time issues, then you might want to take them offline until the products are ready to despatch again.

If this is your reason for disabling WooCommerce, then there's a better option. Taking your store offline can affect your SEO because your shop pages aren't consistently available to search engines. It can also lead to missed opportunities because potential customers can't find your products.

How to add product lead times

As an alternative, you can use the WooCommerce Lead Time plugin to show when the products will be ready for dispatch.

This handy plugin lets you set a global lead time that will appear on all your product pages, or show lead times on specific products. This is much better than disabling ordering for out of stock products.

You can choose which stock statuses to show lead times for. For example, you could show lead times for 'Out of stock' or 'On backorder' products only, instead of taking them offline. This way, you can stop orders in WooCommerce temporarily.

You can also choose what text to display alongside your lead times (e.g. 'Waiting time', 'Available on 1st July', etc.). The plugin even has a dynamic lead time feature where you select the date when the product will be available, and the remaining waiting time is automatically displayed on the website.

If you're tempted to disable WooCommerce because of lead time issues, then it might be better to keep your store online and display the expected lead times instead. That way, customers (and search engines) can still see your store, while making an informed decision on whether to wait. This also enables you to accept backorders!

If you need to disable WooCommerce for any other reasons, then you're probably better off using the other methods discussed above.

Where to get the plugin

Traditionally, the only way to disable WooCommerce was to either deactivate the WooCommerce plugin from your WordPress website or mess around with your functions.php file. However, if you want to know how to temporarily disable WooCommerce shop, we recommend using a plugin.

More specifically:

It’s worth mentioning that both WooCommerce Private Store and WooCommerce Protected Categories are compatible so you can use both plugins together, as well. Both plugins allow you to configure WooCommerce to stop orders.

Do you have any questions on how to temporarily disable WooCommerce? We’re happy to help so let us know in the comments section below.

Shopper paying on a mobile online store with a credit card

Shipping is an essential part of most e-commerce businesses. The right shipping options can affect whether customers complete their purchase, or abandon their cart and shop elsewhere.

If you’re running a WooCommerce online store, then there are many shipping options available - right out of the box. You can configure WooCommerce shipping zones, shipping methods, shipping options, and shipping classes.

With this in mind, in this article, we’ll explain how you can configure WooCommerce shipping settings for your own online store. We’ll also introduce you to some advanced options that further improve the customer’s shopping experience.

You'll learn how to:

Let's get started!

What you need to know about WooCommerce shipping

WooCommerce is a powerful e-commerce plugin for WordPress that comes with several shipping options and settings out of the box. Before we jump into explaining how you can configure these settings and offer shipping through your online store, let's take a step back and see what each option means.

  • Shipping zones are the geographical areas that carriers ship products to. Generally speaking, these range from Zone 1 to Zone 8 (for shipments in the United States) and can also be defined by a region (for example Northern Ireland). This allows carriers to measure distance in groupings of zip codes (rather than miles) from where the package will be shipped from.
  • You need to assign shipping methods to each shipping zone you create. This lets customers know how you'll ship their order to them. Out of the box, WooCommerce lets you choose from one of three shipping methods i.e. flat rate, free shipping, local pickup.
  • The shipping options settings page in WooCommerce lets you configure general shipping settings related to calculations and shipping destinations. From here, you can choose to show (or hide) the built-in shipping calculator or decide to hide shipping costs until customers enter their address.
  • Online stores that sell products of various sizes (e.g. furniture stores that sell sofas, table lamps, ottomans, and carpets) might need to group similar-sized products together. This way, they can charge a higher shipping rate for larger products and a lower rate (or free shipping) for smaller products. WooCommerce's shipping classes options lets store owners create shipping classes and charge different rates for different shipping classes.

In addition to this, there's so much more you can do with WooCommerce to make it easier for customers to understand how you handle and charge for shipping. For example, you can use the WooCommerce Lead Time plugin to display an estimated shipping time for each product – more on this later.

WooCommerce shipping zones

Log into your WordPress website and navigate to WooCommerce → SettingsShipping to get started.

The first screen you’ll see shows a quick overview of the WooCommerce shipping zones your online store ships to. The first thing you need to do is add a shipping zone. For those unfamiliar, a shipping zone is a geographical region where you ship. This could mean a continent (such as South America) or a specific country (for example, Brazil).

WooCommerce shipping zones settings

Click the Add shipping zone button to get started. Give the new zone a name and choose the regions that fall under this shipping zone. You’ll also be able to restrict the region to specific postal codes by clicking the Limit to specific ZIP/postcodes link, which is useful if you’re looking to offer local pickup or local delivery.

Add a new shipping zone

When you’re done, click the Save changes button to proceed.

WooCommerce shipping methods

Now that you’ve created a shipping zone, the next step is to add and configure the shipping methods. From the same screen (i.e. WooCommerce → SettingsShipping → Shipping zones) click the Add shipping method button under the Shipping methods option to get started. You'll see a pop-up window with shipping methods to select from.

Add a new shipping method

WooCommerce comes with three shipping methods out of the box. These are:

  • Flat rateThis is a useful option for e-commerce sites that need to ship products to different shipping zones. For example, if you sell wholesale products through WooCommerce, you might need to charge customers in higher shipping zones more for getting their orders to them versus customers that are closer to your warehouse or fulfillment center.
  • Free shippingIf you sell subscription boxes or mix and match products locally, you might want to offer free shipping. This shipping method is also suitable for online store owners that bake the cost of shipping into their products to entice customers with Free shipping! messages.
  • Local pickupIf you're building a WooCommerce restaurant online ordering system, you might want to offer a local pickup option for people wishing to collect their meals from the restaurant.

Note: In some cases, you might need to offer a combination of shipping methods. For example, following our restaurant example, you might also set shipping zones to charge different delivery costs based on the customer's distance from the restaurant.

Once you've selected a shipping method, click the blue Add shipping method button to proceed.

You can add each shipping method more than once, which enables you to offer customers more options. The only problem is that your customers will be able to view all the shipping methods you create from their shopping cart. The cart contents will only affect the shipping prices that customers see. One way to refine this is by sorting through available shipping methods. You can do this by dragging and dropping the shipping methods into place. This way, you can decide the order in which customers see them.

Flat rate

The flat rate shipping method lets you charge a fixed shipping rate. Here are the available options to you for configuring its settings:

Set flat rate shipping options
  • Method title. Choose which payment method customers will see.
  • Tax status. Choose if the shipping method is taxable or non-taxable.
  • Cost. Fill in the cost of shipping the entire order. You can also use [qty] and [fee] parameters to charge custom shipping rates.

For example, you could add 5 + (1* [qty]) - [cost] which is $5 plus $1 for each product in the shopping cart. Or 10 + [fee percent = “5” min_fee = “2” max_fee = “5”] - [cost] which is $10 plus 5% of the total order, but no less than $2 and not greater than $5.

Free shipping

This is a special shipping method that can be triggered with coupons and minimum spend thresholds. By going into its settings, you can add in a custom title and set the free shipping condition. You can choose to set Free shipping requires... to:

Set free shipping options
  • N/A. Use this if you’re looking to offer free shipping to all of your customers.
  • A valid free shipping coupon. Create a coupon that enables customers to get free shipping. You can create coupons by navigating to WooCommerce → Coupons from the dashboard.
  • A minimum order amount. Enter the number of money customers would have to spend to receive free shipping.
  • A minimum order amount OR a coupon
  • A minimum order amount AND a coupon

Bear in mind that customers can use coupons even if the minimum order for free shipping has been set.

Local pickup

You can use this shipping method to let customers pick up orders themselves. You can add a custom title, set the tax status, and add in an optional additional cost for local pickup.

Set local pickup options

WooCommerce shipping options

From here you’ll be able to configure the general options related to shipping.

Configure front-end shipping options

The main options you need to configure are:

  • Enable the shipping calculator on the cart page Make sure this checkbox is ticked if you want to enable customers to calculate shipping costs based on shipping zones. (However, remember that customers actually need to see shipping costs before adding products to the cart. We'll talk about this in the next section.)
  • Hide shipping costs until an address is entered Tick this option if you want customers to view the shipping cost only after the order summary is generated.
  • Shipping destination Choose which address for the default shipping address. You can choose the customer's shipping address or the billing address as default. Alternatively, you can force all orders to ship to the customer's billing address.

Display shipping options on the product page

In the previous section, you learned how to enable a shipping calculator on the cart and/or checkout page. That's what you can do with WooCommerce as it comes. However, it doesn't actually reflect the needs of your customers, who need to know the shipping options before deciding whether to add products to their cart.

You can solve this problem by installing the WooCommerce Shipping Calculator plugin:

This useful plugin adds a shipping calculator to the location of your choice on the product page.

Having a shipping calculator on the WooCommerce product page is much better for user experience than hiding this information until customers get to the checkout. It completely eliminates the problem of customers abandoning their cart due to unexpected shipping costs. Customers can see the options where they need them and make an informed decision.

A product page shipping calculator also helps to avoid disappointment for customers in locations you don't ship to. That's because they can see that you don't ship to them before committing to buying the product.

WooCommerce shipping classes

Shipping classes are especially useful for online store owners who sell products of various sizes. Shipping classes can be used to group similar types of products. In addition to this, you can also configure some shipping methods (such as flat rate shipping) to provide different rates to different shipping classes.

WooCommerce shipping classes screen

Click on the Add shipping class button to get started. Next, enter the Shipping class name, Slug, and Description.

Add a new shipping class

Now that you’ve created the shipping classes, the next step is to assign shipping classes to products.

Assigning shipping classes to products

To assign shipping classes that you’ve created to products, navigate to Products → All Products and open the product you'd like to assign a shipping class to in the edit product screen. Next, scroll down to the Product data section and click on the Shipping tab.

Assign products to shipping classes

From here, you can set the Shipping class option to one of the shipping classes you created. Click the Update button to proceed.

Note: If you sell variations of the same product, you'll be able to assign separate shipping classes to each variation. You can do this by heading over to Variations from the Product data section.

Add shipping classes to product variations

Assigning shipping classes to products in bulk

You can also set the shipping class for multiple products all at once.

Navigate to Products → All Products and select all of the products you'd like to assign to the same shipping class. From the Bulk Actions dropdown, choose Edit and click on the Apply button.

Bulk assign products to a shipping class

Set the Shipping class value (under Product data) to whichever shipping class you'd like to assign. Finally, click the Update button to proceed.

Setting shipping class costs for flat rate shipping

Once you've added some shipping classes, you'll see a Shipping class costs section under Flat rate settings. It should look something like this:

Advanced flat rate shipping settings with shipping classes

From here, you can configure:

  • Shipping class costsThere is a separate field reserved to add in a shipping cost for each shipping class. You can enter an additional cost here for specific shipping classes.
  • No shipping class costOnly use this in case you’re using Per class calculation (we’ll talk about that next).
  • Calculation type When you’re calculating the shipping cost for shipping classes, you can go with one of two options:
    • Per class. The cost of shipping will be the total costs for each shipping class added up.
    • Per order. Of all the products in the shopping cart, the most expensive shipping class will be applied.

3 plugins for advanced WooCommerce shipping

There are several plugins and extensions out there that let you control your shipping options. Here, we'll dig deeper into three of the most popular (and most useful!) offerings.

WooCommerce Lead Time

WooCommerce product page showing a lead time of 14 days next to the add-to-cart button

Out of the box, WooCommerce doesn't let you add an estimated shipping time for individual products. This is important as it lets customers know when they can expect to receive their order or when it will be available for purchasing.

Thankfully, with WooCommerce Lead Time, you can display the estimated number of days it will take to restock a product in your inventory. This allows customers to make an informed buying decision and can make a big difference to conversion rates.

Armchair product page showing a three month waiting time notice

This is especially useful for online stores that:

  • Sell made-to-order products or handmade goods
  • Sell products that have long lead times or waiting times (like furniture)
  • Don't always have all items in stock or for products that are out of stock

WooCommerce Shipping

WooCommerce Shipping is a free extension that lets you add discounted shipping rates and print shipping labels directly from the WordPress dashboard. You can use this extension to print discounted USPS shipping labels. If you need a way to access additional carriers (including DHL, UPS, FedEx, and USPS), consider using Shippo instead. This is the easiest (and most cost-effective) way to print labels.

Table rate shipping plugins

Many online stores sell products of variable sizes and weights. For this reason, flat rate shipping isn’t always the best possible solution for them. They need a different (more advanced) way to calculate shipping costs. This is where a Table Rate Product Shipping plugin comes in. This WordPress plugin by YITH offers a convenient way for store owners to create and set rules for calculating advanced shipping costs.

Rules can be set based on:

  • Weight
  • Number of items
  • Number of items by class
  • Price
Table Rate Shipping settings screen

This gives store owners the flexibility to create rules like:

  • If the weight of all the products adds up to be anywhere between 1 lbs and 5 lbs, $15 will be added to the shipping cost.
  • If the order contains more than 5 products, add $10 to the total shipping cost.

Get the most out of WooCommerce shipping

Setting up WooCommerce shipping for your e-commerce website is a great way to enhance your offering while remaining profitable. All you have to do is configure options for shipping zones, set shipping methods and classes, and assign products to the right classes.

Once you've set up the default WooCommerce shipping options, you can install the best plugins to supercharge shipping in your store:

Do you have any questions on how to set up WooCommerce shipping for your online store? We're happy to help, so let us know in the comments section below!

Person unlocking a password protected client portal on a phone

As a business owner, if you offer services to multiple clients then a client or WordPress customer portal will help you better manage your business. You’ll be able to share files and documents with clients, distribute downloads, post news and updates, and much more. All of this is possible with a WordPress client portal plugin.

In this article, we’ll show you how to create a private WordPress client portal by using the Password Protected Categories plugin to simplify client management. You'll also learn how to create a searchable, filterable table layout to help clients to find information more easily.

Before we begin, let’s quickly take a look at why you might need to create a secure client portal on your WordPress site.

What is a WordPress client portal and why do you need one?

Preview of individual client logging in

A WordPress client portal is a private area on a WordPress website that only authorized clients can see.

To enter the secure client area, clients will visit your WordPress website and click on a link to a "Client login" page. Here, they will either enter a simple password (ideal if they don't have a user account on your website), or log into their account. Either way, they will be redirected to the WordPress portal where they can access exclusive information.

Having a private WordPress client portal (or WordPress customer portal) is a great way to enhance your service offering.

What are client portals used for?

Client portals are an excellent way to provide exclusive information for your clients, without having to send it to them manually via email. For example, you might use a WordPress portal for:

  • Sharing project information with all your clients, such as policy documents and questionnaires.
  • Providing private documents to individual clients, such as information specific to their project. With this type of client portal, different clients see different information.
  • Sharing information for potential clients, such as a private portfolio of your previous work.

Let's look at some popular use cases in more detail.

Use case 1 - Design and consultancy services

If you offer design services and consultancy, you could set up two different areas in your WordPress client portal: one for your graphic design clients and another for clients who are interested in design consultancy. This way, you could share all design-related news, updates, information, and downloadable resources with your graphic design clients and all consultancy-related updates and resources (such as Google Docs or Google Sheets) with your design consultancy clients.

Alternatively, if you’re a design agency that creates custom logos for businesses, you’d want to set up multiple private pages area for individual clients. In this way, you can create a separate private pages area for each one of your clients and share downloadable resources, files, and PSDs with them. This also makes it easy for your clients to access deliverables and resources and improves project management.

Use case 2 - Photography client portal

Photography client portal with private login shown on laptop, tablet and phone

Most professional photographers need to upload photos to individual clients after a photo shoot. The client can then view their photos from a private and secure area - and possibly select photos and order them online.

You can do this with a WordPress client portal plugin. For photographers, the exact method depends on whether you want to sell photos online:

  • Upload photos for clients to view only If you're uploading photos for viewing purposes only, then continue reading this tutorial. We'll provide step-by-step instructions on how to create a secure portal for each client in WordPress.
  • Upload photos for clients to buy online Alternatively if you want clients to pay (using PayPal, Stripe, and other payment option) for and order photos on your WordPress website, then you can do this too. Instead of reading the rest of this tutorial, use our complete guide to creating a WooCommerce photography website.

Introducing the best WordPress client portal plugin

Now you've learned what is a WordPress portal and why you need one, I'll tell you about the best plugin for adding one to your site.

Password Protected Categories is a WordPress client portal plugin that lets you create secure, hidden WP customer areas within your website.

Create client-only categories

True to its name, Password Protected Categories creates client-only content in the form of categories. This gives you a huge amount of flexibility because WordPress uses categories in many different ways.

For example, you might create:

  • Client-only post categories, for example to create a private blog within the client portal. This is a good way to share company news and updates with all your clients at once.
  • Confidential documents or information for each client. To do this, you might create a "Clients" custom post type in the WordPress admin (which you can easily do with the free Easy Post Types and Fields plugin) and structure it into a separate category for each client. You would then use these categories to share your private client documents, updates and information.
  • Private portfolios, if you want to share confidential information about previous projects that you're not allowed to publish on your public website.

2 easy ways for clients to unlock the secure portal

When creating a WordPress client portal, website owners often get stuck because some clients have user account on your site, and others don't. Fortunately, the Password Protected Categories solves this problem.

It does this by providing two different ways to access the secure client portal:

  • Password protection - Allow clients to unlock the portal by entering a simple password. This might be a shared password that you give to multiple clients, or it might be a different password per client. Either way, clients can access the hidden content without needing an actual user account on your WordPress website.
  • Individual user account protection - Alternatively, maybe you want to create a proper user account for each client. If so, then you can automatically unlock the client portal for each client when they log into their user account. The Password Protected Categories plugin lets you restrict categories within your WordPress to specific users or roles. Use role protection for areas of the client portal which contain information for multiple clients; or user protection for information that is unique to a specific client.

Incredibly easy to use

As you can see, the Password Protected Categories plugin has everything you need to create a secure WordPress client portal. It's perfect whether you're sharing the same information with all your clients, or sharing unique information with each person.

But the best thing about this client portal WordPress plugin is how simple it is to use. When creating a customer portal, website owners often install a full membership plugin and get stuck because they're so complex. Password Protected Categories is different because you simply create one or more categories and restrict access to them. You don't need to worry about creating a paywall, hierarchical membership levels, or anything else that would cause you a headache 😊

How to create a private WordPress client portal in 3 steps

Password Protected Categories make it easy to create a secure, private client portal WordPress. To create your own WordPress portal, follow these steps:

Step #1: Install and activate Password Protected Categories

Get the Password Protected Categories plugin and install it on your website. You’ll receive a license key along with the plugin’s zipped file in an email. Once the client portal WordPress plugin is installed on your site, click the Activate button.

Activated license key for the Password Protected Categories plugin

Next, head over to SettingsProtected Categories from the admin panel and enter the license key. Click the Save Changes button at the bottom of the screen to proceed.

You can also configure the plugin’s settings from this screen. For example, you can change the title, contact form message, password label, placeholder, and button text for your password protected category login form.

Step #2: Create categories and sub-categories for different types of clients or individual clients

First, you need to make two decisions about how to structure your WordPress client portal.

Decision 1 - One or multiple client areas?

The first thing you need to do is determine whether you’ll be:

  • Building a WordPress client portal where all clients can access the same information, or
  • Creating a private client area for specific types of clients, or
  • Creating a private client area for individual clients.

The process is the same for each approach. The only difference is how you’ll go about structuring and naming the categories and assigning passwords.

Regardless of which approach you go with, your clients will be able to access the appropriate area of the client portal WordPress with a password. Essentially, you can make shared or individual client areas as complex or as simple as you’d like without compromising on user experience.

Decision 2 - Posts, pages, or custom post type?

The Password Protected Categories client portal plugin works by restricting access to any type of category in WordPress. As a result, you can create your own portal using any content type.

The choices are:

  • WordPress posts - The simplest option is to create one or more hidden categories under the 'Posts' section of the WP admin. You'll add each piece of content to the client portal as a 'post' - for example, if you're adding resources then each one will be a separate post. The hidden client portal categories can run alongside your public blog
  • WordPress pages - If you'd rather use normal pages for the client portal content, then that's fine too. To do this, you need to enable categories for your pages and then you can create hidden password protected categories for your client portal.
  • Custom post type - Perhaps you'd like a dedicated area for adding information to the client portal. To do this, you can create a custom post type. For example, if you create a custom post type called 'Client Resources' then a 'Client Resources' section will appear on the left-hand side of the WordPress Dashboard.  You can then structure it into one or more password protected categories for your WordPress client portal.

How to set it up

Head over to Posts → Categories from the WordPress admin panel to create a parent category. (Or if you're using pages or a custom post type, then go to the appropriate Categories page instead.)

Next, add a category name and slug.

For example, if you wanted to create a private area for specific types of clients, you might call it Graphic Design Client Portal.

Create a WordPress customer portal area of your website

Alternatively, if you wanted to create a private client area for individual clients, you might call it Logos for ACME or something similar.

Adding a password protected client category named Logos for ACME

Once that’s done, scroll down to the Visibility section and select the Password protected or 'Users' option. This depends on whether you want each client to simply log in with a password, or for each person to have their own user account.

For password protected client categories, type a password. You can also choose to create multiple passwords. This way, you can give different clients different passwords to access the same client area. This makes your client area more secure and allows you to revoke a specific clients access without affecting other clients.

For user protected client categories, select which user(s) should have access.

Next, click the Add New Category button to proceed.

Setting multiple passwords on a protected client portal category

If you want to create a WP client portal where all clients can access the same information, then you can skip to the next step. Or if you want to show different resources to different clients, then repeat these steps. Create parent categories for the different types of clients you work with or for individual clients – depending on your specific requirements.

Create sub-categories

Now that you’ve created the main parent category, you can create as many sub-categories as you’d like to organize the resources to share with clients and set the parent category to Graphic Design Client Portal. This will help you keep things organized and enhance project management.

Creating sub-category in WordPress portal plugin

For example, if you need to share files, documents, templates, and resources with specific types of clients, you could create the following sub-categories: Files and Documents, Templates, and Downloadable Resources.

And if you wanted to make contracts, logo PSD files, and proposal requests available to individual clients, you could create sub-categories for each to keep things organized in the back end for each client.

Examples of parent categories and sub-categories

You don’t need to change the visibility settings for sub-categories as they will already be protected. In other words, they’ll only be visible to clients who have entered access to the parent category.

Step #3: Set up a centralized login page

To make it easy for clients to log in and view the relevant client area, we’ll create a centralized client login page. This only applies to password protected categories. If you've restricted the categories to each client's user account then you can use any type of WordPress login form, such as the one that comes with your theme or WordPress itself.

Head over to SettingsProtected Categories and make sure the box next to the Show Categories? option is unchecked.

WordPress client portal visibility options

Next, go to PagesAdd New to create a new client login page. You can name it something like Client Portal Login. In the text editor, enter the shortcode [category_login]. Click the Publish button to proceed.

If you preview the page on your site’s front end, you’ll be able to see the centralized and custom login page. It should look something like this:

WordPress client portal login page

So, when a specific type of client (such as a Graphic Design Client) uses the password permissions you’ve assigned them to log in to the client area, they’ll only be able to see resources that are relevant to them:

Preview of specific type of client logging in

Similarly, if you created private client areas for each client you work with, they’d be able to log in from the client area and access the resources that are relevant to them:

WordPress client portal front end login

That's it! You can pair with your best client portal with additional WordPress plugins and add-ons to leverage advanced functionality. For example, you could set up systems for invoicing, file uploads, and file-sharing or set up a fully white-label login page. You can also create a WordPress portal in the same way.

Step #4 - Add information to the client area

Once you've set up the overall structure of the WordPress client portal, it's time to start adding information to it!

Bonus tip - List your client portal in a searchable table

As you can see in the screenshots above, the default layout for your secure WordPress client portal will have a blog-style format. The posts are listed in reverse date order, just like a blog.

If you'll be adding lots of information to the client area, then you might prefer a more structured and interactive layout. That's where Posts Table Pro comes in:

Tabbed interface within a WordPress client portal

The Posts Table Pro plugin takes the contents of your WordPress portal categories and dynamically lists them in a searchable table with filters. As well as the instant AJAX search box, you can add dropdown filters above the table. It provides a much easier way for clients to quickly find the information they need.

Get Posts Table Pro

What else can the client portal plugin do?

You can also create different areas within the WordPress client portal for different groups of client. For example, if you offer training services, you could create different categories based on their level of proficiency: Beginner, Intermediate, and Advanced, each with different passwords.

In this way, clients who are beginners will only have access to Beginner resources and material. Whereas proficient clients would have access to Advanced training resources.

It's incredibly simple - both for you and your clients - because you don't need to create separate user accounts for each client. Instead, just give them a password and they can access the portal straight away. (Tip: You can add as many passwords as you like. So you can either give out shared passwords or create a unique password or user account for each client.)

Now that we have a good understanding of why you might need to create a secure WordPress client portal, let’s step through a quick tutorial on how to do this in WordPress using the Password Protected Categories plugin.

Where to get the plugin

Whether you’d like to create your own client portal area for the different types of clients you work with or a separate client area for individual clients, Password Protected Categories make it possible. The best part is that the plugin is incredibly flexible and intuitive which means you can tweak it to fit your specific needs and requirements. This is a great way to streamline back-end client management.

Do you have any questions about creating a private, secure WordPress client portal? Are you thinking of a different implementation than the one covered in the tutorial? Let us know by commenting below!

If you enroll students in courses or programs – whether that’s through an educational institute, school, university, tuition, or private classes – you probably maintain a student database such as a Microsoft Access database, Microsoft Excel, or Google Sheets. It might contain basic information about your students, such as their names, contact information, and the courses they’re enrolled in.

You might consider displaying this information on your site’s front end to make it easily accessible to students, parents, and staff members - either publicly or within a password-protected private area. One way to do this is by using the Posts Table Pro plugin to create a simple student database.

Preview of student database created using Posts Table Pro and Gravity Forms

In this post, we’ll explain why you need a student database plugin and how to choose the right one for your needs. We’ll also walk you through a step-by-step tutorial on how to create a student database on your WordPress site that:

  • Displays all student profiles on a single page in a neat and organized table layout.
  • Lets users look up students using built-in search, sort, and filter options.
  • Enable admin staff to update student information directly from the front-end of your site.

Let’s get started!

Why you need a WordPress student database plugin

Every school, college, and university needs to create a database of all their students. This directory typically contains student names, student ID, email, photo, date of birth, year of graduation, and department. Creating a physical record of all your students is useful for administration purposes and so is storing that information digitally on your website.

An online student database is convenient, can’t be misplaced, and can easily be updated. For WordPress users, the best way to create one is by using a WordPress student database plugin that offers these features:

  • A simple and easy way to add individual students and list them in one place.
  • Option to add as many additional fields as you need.
  • Searching and/or filtering functionality to enable users to quickly find what they’re looking for.

Once you have a student database in place, you can use it as a data system or a student information system for better school management.

Introducing Posts Table Pro

Fortunately, finding the best WordPress student database plugin isn’t as difficult as it may seem. Our Posts Table Pro plugin is a robust solution that meets all of the requirements mentioned above. More specifically, it lets you create a searchable and sortable student database that can be modified to fit your particular needs and then displayed on the front end of your WordPress site.

You’ll be able to include as much information as you want in your student records using a customizable shortcode, easily organize everything, and enable users to quickly find the student they’re looking for. Plus, by purchasing this plugin you’ll get expert support in case you need help getting started.

Key features on offer with Posts Table Pro:

  • Supports custom post types, fields, and taxonomies, which are perfect for creating a student custom post type with extra fields to save information about each student.
  • It offers easy-to-use search and sort features making it easy for users to find a specific student in the database.
  • Option to embed media files that you can use to display photos of students in the database on your site’s front end.
  • It offers several customization options for modifying the look and feel of your WordPress student database in any way you like!

How to create a student database using Gravity Forms and Posts Table Pro

In this tutorial, we’ll show you how to create a functional front-end student database in WordPress. You can read it from start to finish or jump to the specific steps you need:

  1. Use Gravity Forms to create a submission form
  2. Store the student information as a custom post type in WordPress
  3. Display the student database in a table on the front-end of your website

Step #1: Use Gravity Forms to create a submission form (optional)

Note: This step is optional. If you're happy adding students directly in the WordPress admin, then you can skip to Step 2

The first thing you need to do is use Gravity Forms to create a submission form that new students can use to upload their information.

Log in to your WordPress website and navigate to FormsNew Form from the admin panel.

Add a new student using Gravity Forms

In the Create a New Form pop-up, enter the form’s title and a brief description. Click the Create Form button to proceed.

Next, we’ll add relevant fields to the submission form depending on the type of educational institute you’re creating the student database for.

For example, if you’re creating a student database of high school students, you might consider asking for the student’s name, date of birth, locker number, class section, student attendance, school district, and teacher name. However, if you’re creating one for university students, you might instead ask for the student’s name, contact information, department, and year of graduation. And if you have a global student body, you could include information about the student's city (New York or Toronto) and country (the United States or Canada). This should give you a window into some of the student attributes you can include in your student database.

Here are some of the most common form fields to help you get started with a step in the right direction:

  • First and last name
  • Email
  • Student ID
  • Date of birth
  • Year of graduation
  • Student photo

First name, last name, and email address

For First and Last Name, add the Name field from Advanced Fields.

Gravity Forms form builder name and email fields

Similarly, for Email, use the Email field (under Advanced Fields).

Student ID

For student IDs simply add a Number Field (under Standard Fields) if you assign numeric student IDs. However, if your student IDs are alphanumeric, you’ll have to use a Single Line Text field instead. For alphanumeric student IDs, you can also choose to add an Input Mask.

Gravity Forms form builder single line text field

Date of birth and graduation year

For Date of Birth, add a Date field from Advanced Fields. Rename the field to Date of Birth and change the date format to yyyy/mm/dd.

Gravity Forms form builder date field

For the Graduation Year field, you can create Radio Buttons (under Standard Fields) instead of a date picker.

Gravity Forms form builder radio buttons field

Student photo

For Student photos, use the File Upload field (under Advanced Fields). Here’s what you need to do:

  • Change the Field Label to Student Photo.
  • Type jpeg, jpg, and png in the Allowed file extensions option. This will restrict users from uploading other image formats.
  • Enter a Maximum File Size value (such as 5MB or 10MB).

Gravity Forms form builder file upload field

Once you’ve created the submission form, click the Update button to proceed. Your submission form might look something like this:

Gravity Forms submission form preview

Step #2: Store the student information as a custom post type in WordPress

In Step #1, we showed you how to create a submission form using the Gravity Forms plugin that students can use to submit their information. Once a student fills out the submission form, you’ll receive this information via email and it will also be stored in the WordPress database.

In this step, you’ll learn how to create a custom post type and store the information you collect from students directly in custom posts on your WordPress website. This way, you won’t have to manually enter the data into your site.

Note: We don’t recommend storing user-submitted data as regular WordPress posts because it will quickly clutter up your entire website. Instead, we suggest that you create a dedicated custom post type for storing student data. Since we want to create a student database from user-submitted data, we can create a ‘Students’ custom post type. This way, you’ll be able to organize student data separately from other site content.

To create a custom post type that works seamlessly with the Gravity Forms plugin, we recommend using the free Gravity Forms + Custom Post Types plugin. Here are the steps you need to follow to create a custom post type and integrate it with your Gravity Forms submission form:

  1. Install the Gravity Forms + Custom Post Types plugin to your WordPress website and activate it.
  2. If you haven’t already created a custom post type, use the free Easy Post Types and Fields plugin to do this. For complete instructions, check out this step-by-step tutorial on how to create a custom post type then come back here to continue this tutorial.
  3. Finally, you need to map your form fields to the custom post type using the instructions provided on the plugin’s page under the FAQ section (How to map a form to a custom post type).

Or if you don't need a way to submit students from the front end, then you don't need to bother with Gravity Forms. Instead, just go to Students → Add New in the WordPress admin and add the students from there.

Step #3: Display the student database in a table on the front end of your website

By now, you should have a submission form that’s linked to a custom post type on your WordPress website. In other words, whenever a student fills out the form and submits their entry, the student data should automatically be populated into your WordPress site as a custom post.

Next, you’ll learn how to display the user-submitted custom posts on your site’s front end in a dynamic and organized table layout. We’ll use the Posts Table Pro plugin to do this.

Install Posts Table Pro to your WordPress website

If you haven’t done so already, get the Posts Table Pro plugin and install it on your WordPress website. You’ll receive the plugin files and license key in a confirmation email. Then follow the steps below:

  1. Download the plugin from the link provided in your order confirmation email. This will save a zip file to your computer.
  2. Go to your WordPress admin dashboard, then navigate to Plugins → Add New → Upload Plugin.
  3. Click the 'Choose File' button and select the posts-table-pro.zip file you downloaded earlier.
  4. Once the file has finished uploading, click the 'Activate' button to enable the plugin.
  5. The Posts Table Pro setup wizard will automatically open.

Create your database and set the post type option

When you first install the Posts Table Pro plugin, you will be guided through a setup wizard that walks you through the steps of creating your first table. If you need to create additional tables, you can access the 'Add New' option in the Post Tables section of your WordPress admin. Regardless of the method you choose, the plugin provides clear instructions for each stage of the table creation process.

The setup wizard will then guide you in a step-by-step process to create your first table.

  1. To get started with creating a table, give it a name and select the post type you want to display. If you don't have a content type yet, you can create one using the Easy Post Types and Fields plugin.
  2. Choose the posts or pages you want to include in the table. You can select from posts, pages, and custom post types (e.g. student). The options available will depend on the post type you selected earlier. For instance, custom taxonomies will be listed for post types with them.
  3. Customize your table by choosing which columns to display and in what order. To add a new column, select the column type from the dropdown menu and click "Add". For example, you can display the following information in our student database:
    • Student photo
    • Student ID
    • First name
    • Last name
    • Email
    • Date of birth
    • Graduation year

    You can also reorder columns by dragging and dropping the sort icon or column heading.

  4. Add filters to your table to help users narrow down their selections. You can add as many as you like, and each filter accepts more than one value at once with a count of matching records beside each option. If you want to collect additional information from students such as their ...
    • Department (Department of Education or Department of Information Technology) or
    • Majors (Small Business Sales Management or Corporate Finance)
    Posts Table Pro student database with extra fields
  5. The table loads one page at a time, so it handles hundreds or thousands of items without slowing down.
  6. Choose how to sort the table, including the default sorting option and the sort direction.
  7. Once you've finished creating your table, the setup wizard will provide instructions for inserting it onto your site.

Check out our step-by-step guide to creating tables with Post Table Pro!

Create a page to display the student database

Finally, we’ll create a page where we want to display the student database. Head over to PagesAdd New from the WordPress admin panel. Give your page a suitable title, such as the student database.

There are two easy ways to display the finished table on your site:

  • You can either use the 'Post Table' block in the Gutenberg editor or
  • Copy the shortcode from the table builder and paste it anywhere on your site. This gives you the flexibility to place the table on any page regardless of its content.

You can learn more about how to use custom fields with Posts Table Pro here!

Preview

Your student database should look something like this:

Posts Table Pro student database

Can students edit entries after submitting them?

Unfortunately, Gravity Forms doesn’t give users the option to let students edit entries or other information after they’ve submitted them through the submission form. However, you can make edits using Editus – a WordPress front-end editor plugin.

To achieve this, the students would have to click through to the single student profile page on your site. This is necessary because they can’t make changes to entries from within the Posts Table Pro table itself. However, they will be able to edit the content on the single post page as necessary.

Can I display Gravity Forms entries on the front-end without creating a custom post type?

The Posts Table Pro lets you display posts or custom post types in a table layout on your site’s front-end. Since form submissions are stored in a separate database field by Gravity Forms, you can’t list entries directly in a table layout using Posts Table Pro. The information needs to be stored as a post or custom post type.

This is why you’ll need to follow the instructions provided in the tutorial section above if you want to automatically store the information as a custom post type and then display these entries on the front-end in a table layout.

Can I import students in bulk?

Absolutely. You can mass-import students into the database using any WordPress import plugin such as WP All Import. This saves having to add each student individually, either via a front end form or the WordPress admin.

For the initial migration, WP All Import works well. For ongoing edits - adding a few students each week, updating grades or contact info across many records - Setary gives you a spreadsheet view of the Students post type.

Create a private student database

Finally, let's talk about how you hide your WordPress student database and make it secure. Some student directories are available to the public, and that's fine. However, others need to be hidden from public view.

The easiest way to protect your student database is to password protect the page where you're listing all the students. You can easily do this by setting the page to 'Password protected' and giving the password to your students and staff.

Password Protect Page WordPress

Conclusion

The Posts Table Pro plugin offers several useful features for private or public schools (elementary schools through high schools), non-profit educational institutes, colleges, and universities to create a searchable and filterable student database. By following the step-by-step instructions provided in this article, you’ll be able to create an all-in-one flexible student database (or student management system) that can easily be searched, sorted, and filtered directly from the front-end. In addition to this, you won't have to worry about creating student accounts or giving students access to your site's back-end.

What are some of the different fields you’re looking to display in your front-end student database? Let us know by commenting below!

WooCommerce manual phone orders

Many online shop owners need to be able to take and place WooCommerce manual orders for customers. This could either be phone orders, email, or chat. Typically, this involves creating an account for the customers, filling out their orders, and taking payment in person or over the phone.

Did you know that over a third of consumers prefer to speak directly with a salesperson when considering high-ticket items?. The only problem is that WooCommerce manual orders aren’t supported out of the box. Shop owners need an easy way to be able to place customer orders efficiently.

In this article, we’ll introduce you to a WooCommerce manual orders plugin that you can use and configure to quickly place customers' orders. We’ll also walk you through a step-by-step tutorial to help you integrate this functionality into your own WooCommerce store. We'll do this by creating a simple, one-page order form that's searchable, sortable, and filterable, and will allow your customers to make step-by-step orders on your store.

WooCommerce manual orders plugin with checkboxes only

Why you might need to take WooCommerce manual orders

Many online businesses cater to customers that would prefer to place orders in person, over the phone, by email, or live chat. In other words, they provide their order details and payment information like billing address, shipping method, and shipping address to a salesperson.

Since the ecommerce plugin doesn’t support WooCommerce manual orders out of the box, shop owners resort to other measures:

  • Accessing their online store from a private (or incognito) window or from the online store's backend to place the customer’s order.
  • Logging in and out of their admin user account to place orders for customers.
  • Placing the customers’ order only to find that they’re a new customers and, therefore, need a user account first.

Aside from the fact that this isn’t a user-friendly approach to placing orders, it’s also incredibly inefficient. Instead, shop owners need a way to be able to:

  • Create a WooCommerce order form that’s hidden from regular customers so they’re able to place new orders without logging out of their admin user accounts.
  • Make it easy for multiple salespeople to place customer orders through the hidden order form and choose from all of the available payment methods. It's a good idea to make all payment gateways available.
  • Place WooCommerce phone orders on behalf of their customers – whether they’re existing customers or new customers.
  • Create offline order forms that can be printed off and used in store for manual ordering.
  • Allow wholesale customrs to order in bulk directly, without having to place an order on the site.

With the right WooCommerce manual orders plugin and implementation, you’ll be able to do all of this and much more.

Taking manual orders in WooCommerce: 2 methods to consider

While ecommerce is the preferred method of shopping for many customers today, some may still prefer to place orders by phone or email or may face technical difficulties when trying to order online.

To accommodate these customers, it's important to have a system in place for taking manual orders. If you're using WooCommerce as your ecommerce platform, you have several options for taking manual orders, including using a dedicated WooCommerce manual order plugin or adding orders manually in the back end.

In this section, we'll explore these two methods in more detail, and discuss some best practices for taking manual orders in WooCommerce.

****The method described below will show you how to set up a manual ordering system directly within your WooCommerce store. If you want to know how to simply add a standalone manual order in the WooCommerce backend, click here!****

Method #1: Introducing the WooCommerce manual orders plugin

Taking WooCommerce orders from customers manually – either over the phone, email, or live chat – is incredibly important for some online businesses. One of the easiest ways to implement this sort of functionality into your own online store is by using a WooCommerce manual orders plugin such as WooCommerce Product Table Pro.

WooCommerce Product Table lets shop owners create a dynamic, front-end WooCommerce order form that’s hidden from public view. Salespeople will then be able to access the order notes (without having to log out of their own account) and place the customer’s existing order.

With WooCommerce Product Table, you’ll be able to create a searchable, sortable order form with filters that makes it easy to quickly find the product(s) customers would like to purchase. At the minimum, the WooCommerce manual order plugin lets you:

  • Add products to the cart without navigating to single product pages.
  • Select product variations directly from the order form or from a quick view lightbox.

Additionally, salespeople will also be able to place orders for customers with existing user accounts and new customers. You’ll also have the option to automatically create an account for new customers or offer a guest checkout option.

How to take WooCommerce phone orders manually using WooCommerce Product Table

With WooCommerce Product Table, you’ll be able to create a hidden page where admins and salespeople can take WooCommerce phone orders or add orders from paper order forms, emails, or live chat.

Assuming you already have a WooCommerce store setup with some products added to it, here’s what you need to do to take WooCommerce phone orders from customers.

Step #1: Install and activate the WooCommerce Product Table plugin

To get started, get the WooCommerce Product Table plugin and install it to your WordPress website. Once that’s done, head over to ProductsProduct Tables to activate the license key and your first table. This should list all the products which will be available in the manual order process.

Step #2: Create a WooCommerce order page

Create a new page (via PagesAdd New) where you’ll add the WooCommerce manual orders form. Use the product visibility section to make it private so that public customers can't see it.

To list products on the manual ordering page, either:

  • Insert the 'Product Table' Gutenberg block and select the table you created in Step 1, or;
  • Copy the table's shortcode from ProductsProduct Tables and insert it into your page.
Adding shortcode to Gutenberg editor

Once you’re done, preview the page on the front end. It should look something like this:

Default preview of the WooCommerce order form

The key benefit of using WooCommerce Product Table to create an order form is that it allows employees and salespeople to quick-find products, select variations, and place the customer’s order.

Pro tip for selecting products more quickly

If you sell a lot of inexpensive products or find that customers typically purchase multiple products from you at a time, you might consider replacing Add to Cart buttons in the table layout with add to cart checkboxes. You can easily do this on the 'Add to cart' step of the table builder. Just set the Add to cart button option to either Checkbox only or Button and checkbox.

Step #3: Hide the WooCommerce order form from public view

Since we don’t want the WooCommerce manual orders form to be accessible to regular customers, we’ll use an SEO plugin (such as Yoast SEO) to noindex the order form page.

Page set to noindex using Yoast SEO plugin
  1. Simply open up the page you created in Step #2, and scroll down till you reach the Yoast SEO widget.
  2. Click the cog icon to access the Advanced settings.
  3. Set the Allow search engines to show this Page in search results? option to No.
  4. Click the Publish button to proceed.

This way, the WooCommerce manual orders page won’t appear in search results. You can share a link to this page with salespeople and employees. However, you shouldn’t add a link to it to your online store’s navigation menu so that it remains hidden from public view.

Step #4: Take manual payments in WooCommerce

Next, you need a way to take WooCommerce manual payment from customers. It needs to work whether you're doing face-to-face sales, WooCommerce phone orders, or something else.

There are a few options here:

  • Enter their payment details manuallyThis is best for WooCommerce phone orders. Just choose a normal payment gateway such as Stripe, and enter the customer's credit card details on the checkout page. This is just as if the customer was ordering directly on the website, but you're doing it on their behalf.
  • Use WooCommerce In Person PaymentsWooCommerce has launched a service for the US and Canada where you order a card reader which takes credit card payments from customers.
  • Use a PayPal card readerIn the last few years, PayPal has introduced card readers which provide an affordable way to take face-to-face credit card payments. These are called "PayPal Here" card readers. Use the free WooCommerce PayPal Here plugin to take website payments using a PayPal card reader.

Step #5: Taking orders from customers

Now that you’ve set up the online order form using WooCommerce Product Table, there are two main ways you can place orders on behalf of the customer.

For customers with an existing account:

Install the WooCommerce Login and Shop as Customer plugin to your WordPress website. You can use it to switch to the customer’s user account before placing their order.

For new customers:

When taking orders for new customers, you can either offer them a guest checkout option or place an order as a new customer. For the latter, you’ll need to ensure you’re logged out. You’ll be able to create an account for the customer automatically since entering their email address is part of the order placement process.

Method #2: Adding new manual orders in the back end

We'll show you how to add manual orders in the back end of your WooCommerce store and provide some tips for establishing a clear manual ordering process. By following these steps and guidelines, you can ensure that your customers can place manual orders easily and that your staff can process them efficiently and accurately.

Steps in creating manual orders

Here are the steps to add new manual orders in the back end of your WooCommerce store:

  1. Log in to your WordPress dashboard and navigate to the "Orders" section.
  2. Click the "Add Order" button. This will take you to the "Add New Order" page.
  3. Enter the customer's details in the appropriate custom fields, such as their name, email address, and phone number. You can also select whether the order is for a registered customer or a guest.
  4. Add the items the customer wishes to order by clicking the "Add item(s)" button. You can search for products by name or SKU and select the quantity and any relevant variations.
  5. Set the pricing details, including the product price, tax, and shipping costs. You can also add any discounts or coupons if applicable.
  6. Select the payment method the customer will use to pay for their order. If they are paying by credit card, you can enter their details manually or use a payment gateway integration.
  7. Set the shipping details, such as the shipping method, address, and any notes or instructions for the delivery.
  8. Review the order details and click "Save Order" to complete the process.

While adding manual orders in the back end of your WooCommerce store can be a useful option, it's worth noting that it may be more time-consuming than using a dedicated plugin, particularly if you have a high volume of manual orders.

If you're using a plugin such as WooCommerce Wholesale Pro, you can take advantage of features such as the automatic calculation of wholesale prices based on the customer's role. Regardless of whether you use a plugin or not, it's essential to establish clear processes for manually creating orders to ensure that they are processed efficiently and accurately.

Tips for streamlining manual orders in your online store

Here are some tips for establishing a solid manual ordering process:

  1. Set up a dedicated phone line or email address for manual orders to ensure that they are tracked separately from online orders.
  2. Train your staff on how to WooCommerce create order for customers manually and provide them with clear guidelines and procedures to follow.
  3. Use a centralized system to manage and track manual orders alongside your regular online orders. This could include using a spreadsheet or order management software.
  4. Ensure that you have a clear process for handling WooCommerce manual payment and shipping details, such as verifying credit card information and selecting the appropriate shipping method.

Bonus: For orders with lots of variations

If you’re selling products with lots of variations, they’ll likely take up a significant amount of space on the one-page order form. Instead, you can use the WooCommerce Product Table plugin with WooCommerce Quick View Pro to add quick view lightboxes.

WooCommerce quick view with variation options

By doing so, salespeople will be able to choose product variations. As well as add them to cart directly from the quick view lightbox.

The WooCommerce manual orders process

Once that’s all done, your WooCommerce phone orders process will look something like this:

WooCommerce manual orders plugin with checkboxes only
  1. Whenever a salesperson receives a phone call (or paper order form), they’ll log in as the relevant customer, add a new user account on their behalf or select the guest checkout option.
  2. Next, they’ll place the customer’s order using the order form, select products and variations, and add them to the cart.
  3. Finally, they can head over to the main WooCommerce checkout to complete the order. From there they can choose from the available pending payment gateways to complete the transaction (or use a card reader for in-person payments).
  4. Customers will receive the usual email order confirmation email letting them know that their order has been placed along with other important details (such as the order status link).

Conclusion

Enabling customers to place WooCommerce phone orders can be a beneficial strategy for online store owners who wish to increase their sales. By using the WooCommerce create order for customer feature, store owners can improve the overall customer experience.

With a WooCommerce manual orders plugin – like WooCommerce Product Table – you can make it easy for customers to place orders over the phone while making the order placement process seamless for salespeople.

Do you have any questions about how to take WooCommerce manual orders – over the phone, by email, or via live chat? Let us know in the comments section below! And see this tutorial if you want to create a WooCommerce one page order form and checkout for your customers to use.

Quick view shortcode added in the WordPress block editor

As an online store owner, you might consider adding product quick view to improve search engine visibility, increase conversions, and boost sales.

The easiest way to do this is by using WooCommerce quick view shortcodes to add quick view buttons anywhere on your site. Use this guide if you need; quick view buttons on blog posts, product lists on custom pages, or advanced shortcode implementations.

Choosing a quick view plugin? See our comparison of best WooCommerce quick view plugins.

WooCommerce product shortcodes for WooCommerce Quick View Pro

With this in mind, in this article, we’ll explain how to use a WooCommerce Quick View shortcode to add quick view buttons to on your product pages, normal pages, blog posts, widgets or anywhere else. We’ll also explore three different methods for showing quick view buttons outside of the main shop and category pages.

3 ways to show WooCommerce quick view buttons outside of the main shop page

Using WooCommerce quick view shortcodes to showcase products outside of your shop page and category pages is a great way to simplify the buying process and improve your customers’ shopping experience.

For the purpose of this tutorial, we’ll assume that you already have a WooCommerce store set up with some products added to it. Here, we’ll explore 3 ways to use shortcodes to display products with quick view buttons:

  1. Use the WooCommerce Quick View Pro shortcode to insert quick view buttons
  2. Use WooCommerce quick view shortcodes to display products (with quick view)
  3. Use WooCommerce Product Table to list products in a table (with quick view)

Read about each approach and choose the one that best fits your needs, or use the jump links above to skip directly to each section. You can also implement all three methods on your WordPress site at the same time!


Method 1: Use the WooCommerce Quick View shortcode to add quick view buttons

The WooCommerce Quick View Pro plugin comes with a shortcode that you can use to insert quick view buttons anywhere on your site. It adds a simply quick view button for a specific product, with whichever text you'd like to display in the button.

This is perfect for providing a quick way to buy a specific product, for example within a blog post. The customer uses the quick view button to view product details in a lightbox. They can choose quantities and variations, and add the product to the cart - all without leaving the page.

Quick view buttons added to a blog post using a WooCommerce plugin shortcode

How to set it up

Step 1: Install WooCommerce Quick View Pro

  1. To get started, get the WooCommerce Quick View Pro plugin and install and activate it on your WordPress website.
  2. Next, head over to WooCommerceSettingsProductsQuick view to activate the plugin license.
  3. Click the Save Changes button at the bottom of the screen to proceed.

WooCommerce Quick View Pro automatically adds quick view buttons to your main shop page and category pages once you activate it. Whenever a customer clicks on the Quick View button, it will display each product in a quick view lightbox like this:

Default front-end preview of WooCommerce Quick View Pro

However, since we want to add quick view buttons elsewhere on our site, we’ll use the WooCommerce Quick View Pro product shortcode.

Step 2: Add the WooCommerce Quick View Pro shortcode

  1. Now, go to the page or post where you want to add a quick view button and add the shortcode [quick_view id="123"] shortcode.
  2. Replace "123" with the ID of the product (you can get this by hovering over a product in the main Products list in the WordPress admin).
  3. The button text will come from the Quick View plugin settings page. You can change this for each individual button by adding the text option to the WooCommerce Quick View Pro shortcode like this: [quick_view id="123" text="Buy Hoodie"]
    Quick view shortcode with custom button text in the block editor
  4. Repeat steps 1-3 for each quick view button that you'd like to add. For example, if you're writing a blog post about 5 featured products then you would use the shortcode 5 times, each with a different product ID.

Step 3: Choose which product details to display in the quick view lightbox

With WooCommerce Quick View Pro, you can choose which product details to display in the quick view lightbox. Here’s how:

Navigate to the plugin’s settings screen (WooCommerceSettingsProductsQuick view) and scroll down till you reach the Product details section.

Quick View Pro product details settings with checkboxes for price and description

From there, you can choose to display any combination of product details in the quick view lightbox including:

  • Reviews
  • Price
  • Short description
  • Add to cart button
  • Meta information (like product SKUs and categories)

For example, if you only wanted to display the product’s price, variations, and add to cart button, your quick view lightbox would look like this:

Preview of WooCommerce Quick View Pro displaying product details

Method 2: Using shortcodes to add products (with quick view) to any page or post

This method uses shortcodes to display WooCommerce products on product pages or anywhere on your online store.

Unlike method 1, it displays extra information about each product including the featured image, name, price and add to cart button. If you use these shortcodes with WooCommerce Quick View Pro installed, then it will include a quick view button for each product. You can also use this method to list multiple products at once, each with its own quick view button.

How to set it up

First, install WooCommerce Quick View Pro on your site - as described in Method 1, above. Next, you can start listing products using the built-in shortcodes. If you've got the quick view plugin installed, then each shortcode will include quick view buttons as well as the product image, name and add to cart button:

  1. Open the page, post or widget that you want to add the selected product(s) to.
  2. Next, use the [products] shortcode to display products by ID, SKU, categories, or attributes.

The [products] shortcode is pretty flexible, so let’s take a look at some examples:

Example #1: Single product

If you want to showcase a specific product, you can use the product’s ID or SKU with the shortcode:

[products skus="woo-hoodie-with-logo"]

It would look something like this:

Showcasing a single product using WooCommerce product shortcodes

To list multiple products, just add the ID or SKU or multiple products, separated by commas, e.g.: [products skus="woo-hoodie-with-logo,blue-tshirt"]

Example #2: Featured products

If you want to showcase featured products with quick view buttons, you can use this shortcode:

[featured_products per_page="3" columns="3"]

It would look something like this:

Showcasing featured products using WooCommerce product shortcodes

Example #3: Best-selling products

If you want to showcase your best-selling products, you can use this shortcode:

[best_selling_products per_page="3" columns="3"]

It would look something like this:

Showcasing best-selling products using WooCommerce product shortcodes

Example #4: Recent products

If you want to showcase your recent products, you can use this shortcode:

[recent_products per_page="3" columns="3"]

It would look something like this:

Recent products grid with quick view buttons added by a WooCommerce shortcode

This WooCommerce quick view shortcode makes it easy for users to add products anywhere on their site. This way, whenever a customer lands on your blog post, they can use the Quick View button to launch the quick view lightbox and:

  • View product details – including product name, description, reviews, price, and meta.
  • Select variations and set quantities.
  • View order details and add products to cart.

Further reading: Check out the official documentation for WooCommerce product shortcodes for more ideas! You could, for example, add your top rated products or related products to a blog post.


Method 3: Using WooCommerce Product Table to display products in a table layout on any page or post

By following the step-by-step instructions below, you’ll be able to list WooCommerce products in a table layout (with quick view) in blog posts and pages.

We’ll explain how you can add a product table to a blog post. However, you can follow the same steps to list products anywhere on your online store. For example, you might consider adding a product table shortcode to your WooCommerce checkout page (or WooCommerce cart page) or list sale products on a landing page.

Step #1: Install WooCommerce Quick View Pro and WooCommerce Product Table

To get started, get WooCommerce Quick View Pro and the WooCommerce Product Table plugin and install and activate both to your WordPress website. Next, head over to:

  • WooCommerceSettingsProductsQuick view (for WooCommerce Quick View Pro)
  • WooCommerceSettingsProductsProduct tables (for WooCommerce Product Table)

… to activate the plugin licenses.

Click the Save Changes button at the bottom of the screen to proceed.

Step #2: Configure the product table settings

From the WooCommerce Product Table settings screen, scroll down till you reach the Columns option under Table content. Enter image,name,description,price,quick_view,add-to-cart into the Columns option. Make sure you include a quick_view column.

Check out the complete list of available column options to customize your product table! For example, you might want to include product categories as a column. This way, customers could sort the product table based on product category.

Optionally, you can scroll down to the Quick View Pro section on the same screen to replace all links in the product table with quick view links. All you have to do is tick the Product links checkbox.

Enabling the replace product links with quick view option in Quick View Pro

Click the Save Changes button to continue.

Step #3: Add a product table

Open the page or post where you want to add the product table. Next, use the following shortcode to list products in a table layout:

[product_table]

This will list all your products. You can also edit the shortcode to list specific products only.

WooCommerce Product Table shortcode in text editor

Finally, click the Publish button and preview it on your site’s front-end. It will look something like this:

Preview of the WooCommerce Product Table plugin

Customers can use the filter options above the table to view products based on product attributes such as color or size.

Further reading: For more ideas on how to use WooCommerce Quick View Pro, be sure to check out this in-depth guide!

Where to get the plugin

With a WooCommerce quick view shortcode, you can add featured products anywhere on your site and make it easier for customers to buy from you. Customers can learn about your products, choose variations, set quantities, and add products to cart without leaving the page (or post) they’re on.

Let’s quickly recap the two different options we covered above:

How do you want to use WooCommerce quick view shortcodes in your store? We’d love to hear from you so let us know in the comments section below!