Best WooCommerce paywall plugin

Are you looking for a way to set up a WooCommerce paywall to start charging for content? Keep reading to learn how (and why) setting up a paywall is a sure-fire solution for monetizing your content 🔥.

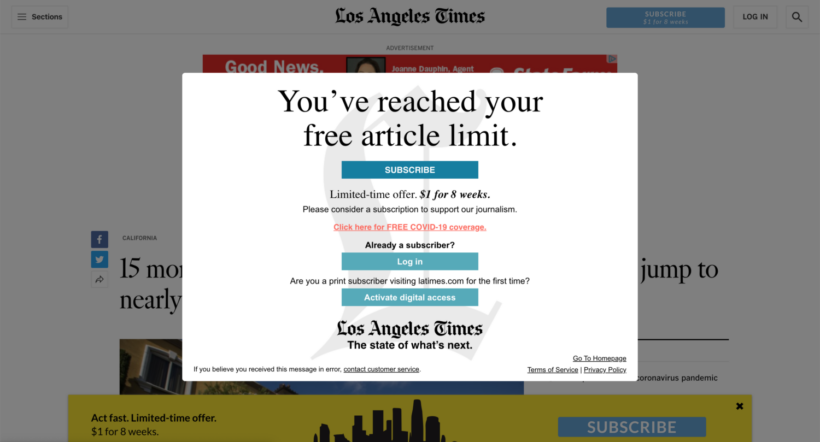
Subscription revenue is something that every online creator can benefit from, whether you're a blogger or a course creator. Paywalls are used to generate revenue by many large publishers, including The Wall Street Journal, The New York Times, and The Washington Post. And for a reason!

Paywalling is one of the quickest and easiest methods of monetizing a WordPress website. While online subscriptions and paywalls are not new to the publishing industry, they are becoming more widespread across the content creation industry.

In this post, we'll explain the concept of the WooCommerce paywall and discuss how you can quickly implement it on any WordPress website. You'll learn how to:

  • Use WooCommerce to charge for access to any type of content on your website (e.g. an exclusive members-only or subscribers area).
  • Charge for access to a hidden area of your eCommerce online store (e.g. a members-only purchasing club).
  • Use subscriptions to generate sustainable ongoing revenue from your WooCommerce paywall.

What is a WooCommerce paywall, and why set one up?

A paywall, in essence, is a mechanism to limit who can access the information on your website. Depending on the use case, the company's branding, and other factors, you may find several different names for this type of content restriction. You could find this referred to as a content locker, gated content, a WordPress paywall, a WooCommerce paywall, or another name.

WooCommerce paywall
Newspapers often use paywalls to restrict access to premium-only content

As the world's leading eCommerce solution, WooCommerce is an excellent way to charge for access to your website content. That's why we're focussing on WooCommerce paywalls in this article.

To set up your paywall, you need a WordPress website plus the following plugin stack:

  • The free WooCommerce plugin to get the essential eCommerce functionality, such as taking payments online.
  • A paywall solution to prevent non-paying visitors from accessing the premium material.
  • Finally, you might install a subscriptions plugin to take recurring payments for ongoing access to the WooCommerce paywall.

The benefits of setting up a WooCommerce paywall

Understanding paywalls and their importance

Content paywalls offer a straightforward yet efficient approach to monetizing your blog or WordPress site. If your audience likes the content you create, they will gladly pay $5 a month (or more) to access your finest work.

1,000 subscribers to your premium material would provide you with a full-time monthly revenue. If you still doubt it, here is a quick comparison to other forms of blog monetization:

  • Ads often bother people and degrade their online experience.
  • A decent ad network requires that your blog has hundreds of thousands of visitors in order to accept it.
  • The process of creating, testing, and launching a product for other forms of revenue might take months.

In contrast, creating a paywall takes just a few minutes and doesn't require hiring a web developer. With a smart WooCommerce paywall plugin, you can accomplish this instantly (and we will show you how below).

A WooCommerce paywall is also a great solution if you offer a course or a membership. Contrary to online course platforms, such as Kajabi or Teachable, setting up a paywall on your course or online program will save you money. Platforms such as Kajabi or Teachable charge either a monthly fee or a fee from every student you add to the course. You can see how quickly it adds up. 

What sorts of sites need a paywall?

A WooCommerce paywall can help to monetize all sorts of websites. All that matters is that you have some sort of content that people will pay to access.

Here are some examples:

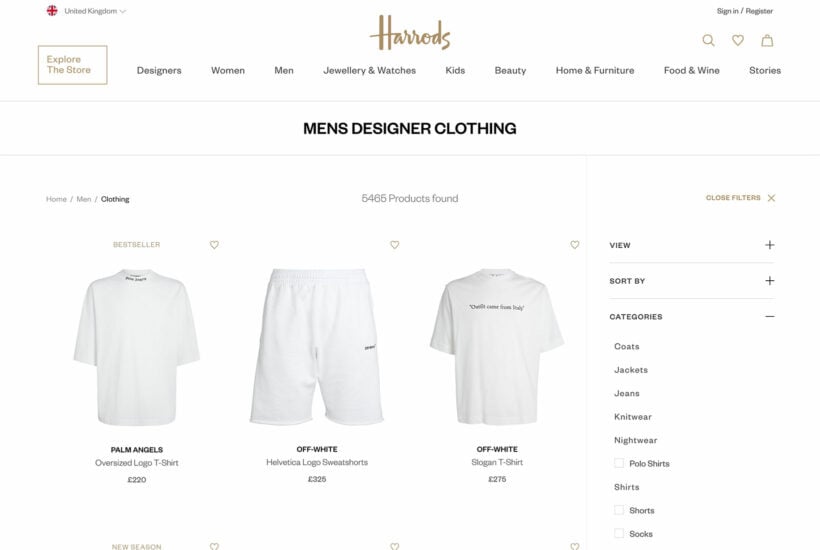
  • Media sites and newspapers with subscriber-only content.
  • Educational content, like a course or tutorial-style blog.
  • Private communities for your readers. This enhances community feeling, offers premium content, and improves brand image.
  • Purchasing clubs with products that only paying members can buy.

Paywalls vs memberships

It's worth understanding the difference between paywall and membership plugins. They are both methods which online content providers can use to monetize their offerings. However, they operate under different principles and have distinct characteristics:

Paywalls
  • Definition: A paywall is a feature used on websites to restrict access to content. Users must pay to gain access to specific articles, videos, etc., behind the paywall.
  • Types:
    • Hard paywalls: Users must pay to access any content.
    • Soft paywalls (or metered paywalls): You can access a limited number of articles for free before being required to pay.
    • Freemium paywalls: Some content is free, but premium content requires payment.
  • Access to content: Typically, access to individual pieces or groups of content, possibly time-limited or pay-per-view.
  • Target audience: Often used by news sites and other content-heavy platforms and apps.
Memberships
  • Definition: A membership site involves users subscribing to a service, often for a recurring fee. In return, they receive various benefits, including access to content, exclusive features, community engagement, etc. You might have one or multiple membership levels.
  • Access to content: Members usually get unlimited access to content or special benefits as part of their membership. It can include member-only forums, discounts, newsletters, and other add-on benefits.
  • Target audience: This model is often employed by content creators looking to cultivate an engaged community around their work, or services like streaming platforms that offer various content for a monthly fee. Memberships focus on building long-term relationships with customers beyond simply giving access to restricted content.

In general, paywalls are generally used to monetize individual pieces of content or groups of content. Memberships, on the other hand, focus on building a community and offering ongoing value to subscribers beyond access to content. WordPress paywall plugins therefore offer slightly different functionality from membership plugins. For example, these plugins might include MemberPress, WooCommerce Memberships, Restrict Content Pro or Paid Memberships Pro.

You can run both models on the same platform, for example offering paywall access as part of a membership plan.

In this article, we will focus specifically on setting up a WooCommerce paywall for access to restricted content. However, you can extend the information in the tutorial to add wider membership functionality.

Will a WooCommerce paywall have a negative impact on my SEO?

Lots of people worry that having a paywall will damage their SEO. After all, search engines can't crawl restricted content.

Luckily, the assumption that a paywall will drastically reduce visitors and revenue is false. A paywall may give you a stronger feeling of community and higher-quality traffic, which can actually help your SEO. This may seem counter-intuitive, so here's how it works:

  • Because your new users have paid to be there, they will really value your work.
  • Because your existing users are paying to stay, they will be more loyal to your brand and site.
  • You now have two groups of users who value your content so much that they are willing to pay for it. This increases the value of any hits you receive behind the paywall, and it can be seen in your comment sections, social media engagement and promotion, and much more.

Remember, you won't be putting all your content behind a paywall. You can still have plenty of search engine friendly content which everyone can read. This shows people the value you're offering, convincing them to sign up for the premium-only content.

Recommended plugins for your WooCommerce paywall

As you can see, there are many benefits to creating a WooCommerce paywall. Moreover, making a paywall is easy. You can do it without having to deal with complicated content restriction plugins, merchant accounts, building payment gateway integrations, or managing 1,000's of member accounts.

Now it's time to learn how to set one up. To do this, you need the following stack of plugins:

  1. The free WooCommerce plugin - this adds the basic eCommerce functionality to your site.
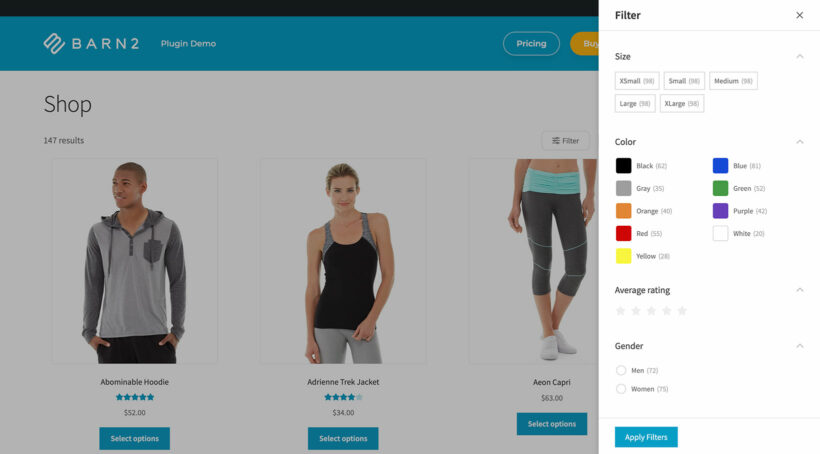
  2. Password Protected Categories - this restricts access to your website content, hiding it behind the paywall.
  3. YITH WooCommerce Subscriptions (optional) - this lets people make regular recurring payments to access the premium content. (Skip this step if you only require one-time payments.)

Tip: If you want to include pages within the paywall (rather than posts or a custom post type), then you'll also need to install a free plugin to categorize WordPress pages. I recommend the free Add Category to Pages plugin.

How the paywall works

People pay for premium access to your content and receive a login for your website. When they login, the unlock the paywall and can see links to the premium area in your website navigation menu. They can then navigate freely within the paywall.

You can use Password Protected Categories to hide any type of WordPress category or taxonomy. Only specific users, roles, or people with the password can get through the paywall.

Tutorial: Setting up a paywall on your WooCommerce site

Here, I'll show you how to set up a paywall on your WordPress pages easily in 3 simple steps. It's completely customizable so you can adapt it to your business.

First I'll provide a quick summary of all the steps, and then tell you how to implement them step-by-step.

How do I create a paywall in WooCommerce?

  1. Install the free WooCommerce plugin and set up your payment methods.
  2. Create the content that you plan to hide behind the paywall, then use the Password Protected Categories plugin to restrict access to certain user roles.
  3. Create a 'Paywall' product and set the price.

Keep reading for full details on each of these 3 steps.

Step 1: Install WooCommerce

  1. Log into the WordPress admin for your site, and go to Plugins → Add New.
  2. Search for 'WooCommerce' and install it. Don't confuse it with other plugins with a similar name. The main WooCommerce plugin is easy to spot as it has millions of installs!
  3. Once installed, disable 'Guest Checkout' under WooCommerce Settings Accounts & Privacy. This way, WooCommerce will create an account for each person when they subscribe.
  4. Use the other settings to configure whatever you need, such as taxes and payment options for accepting payments to the paywall. For example, you can easily set up online payments via PayPal or credit card (via Stripe).

Step 2: Set up the WooCommerce paywall plugin

Before you start putting content behind the paywall, it's worth thinking about what sort of content you'll be using. The options are:

  • Normal WordPress pages. This is a good option, but you'll need to use the free Add Category to Pages plugin to categorize your pages. 
  • WordPress posts. Do this if you're creating a paywall for blog or news posts. However, if you also have a public blog then I'd recommend using a custom post type instead.
  • A custom post type. If you want a dedicated area for the paywall-restricted content in the WordPress admin, then create a custom post type. You can easily do this with our free Easy Post Types and Fields plugin. For example, you might create a post type called 'Members Content'.

Once you've added some content and structured it into one or more categories, then you can start hiding it behind the paywall. To do this:

  1. Purchase and install Password Protected Categories.
  2. Go to edit one of the categories that will go inside the WooCommerce paywall. For example, if you're putting blog posts behind a paywall then go to Posts → Categories.
  3. Find the visibility section, select 'Protected' and then select the user role(s) that will have access to the paywall.
password protected categories - WooCommerce paywall plugin

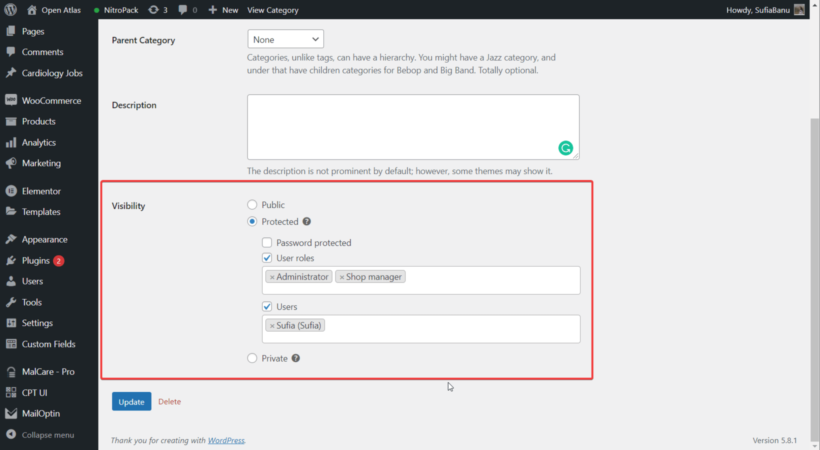
Which user roles need access to the paywall?

If you're only planning to use WooCommerce to sell access to the paywall, then you can just use the built-in 'customer' role. People will automatically be added to this role when they make a purchase, so that way they will get instant access to the restricted content.

However, that won't work if you're selling other types of products too. In this case, then you should use the free User Role Editor plugin to create a dedicated role for users with paywall access. Select this custom role for all the categories that will be hidden inside the paywall.

(Tip: I also recommend selecting 'Administrator' too, so that you have access to the payroll for testing purposes.)

Step 3: Create a paywall product

Finally, you need to create a product which people will purchase in order to access the premium content.

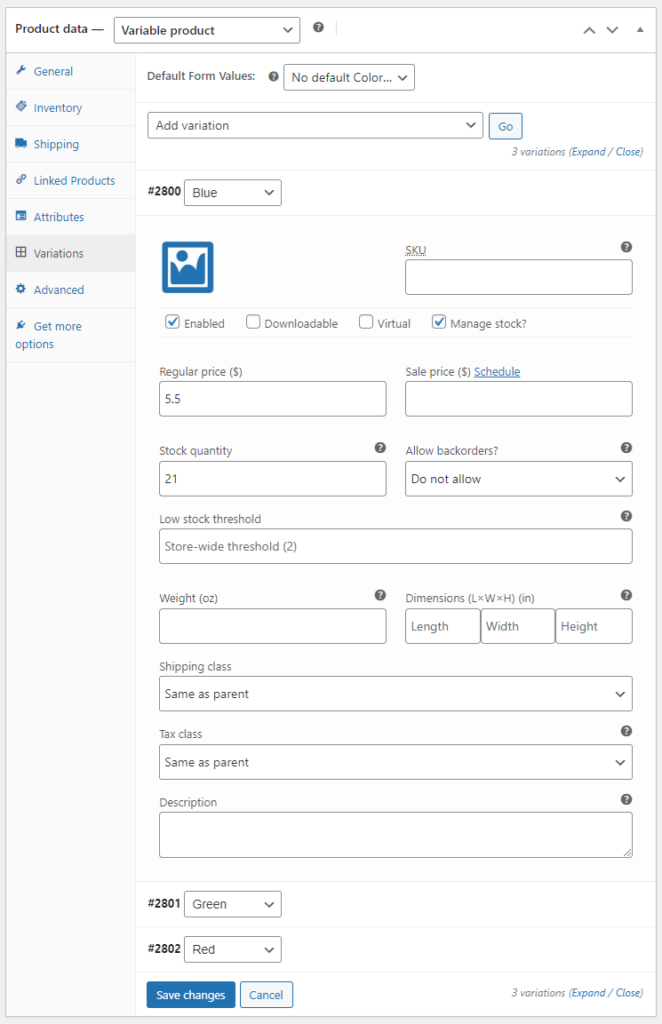
  1. Go to Products → Add New, and add information such as the product description and price. For example, the name of this product might be "Premium Access".
  2. Now go to Appearance → Menus and add the product you just created to your website navigation menu. People will go to this page in order to pay to access the paywall.
  3. If required, then install YITH WooCommerce Subscriptions and use it to set up a Subscription plan product for the premium content. Or if you just want to charge once for access to the paywall area, then create a standard WooCommerce product instead.

Once you have done this, then customers will immediately have access to the paywall area as soon as they buy your paywall product from its product pages. If you created a dedicated user role for paywall access in Step 2 above, then to make this work then you must use the Automatic User Roles Switcher plugin to change people's roles when they purchase the paywall product.

Bonus steps

The steps described above cover all the essentials to setting up your WooCommerce paywall. To make it even more professional and user-friendly, consider adding these extra features too.

Create a login form

WordPress itself provides a basic login form, but it's not very professional and doesn't match your website. If your WordPress theme/template provides a nice front-end login form, then I recommend using that. Add a prominent 'Login' link to your header or menu.

Alternatively, you can use the free Theme My Login plugin to create a professional-looking login page.

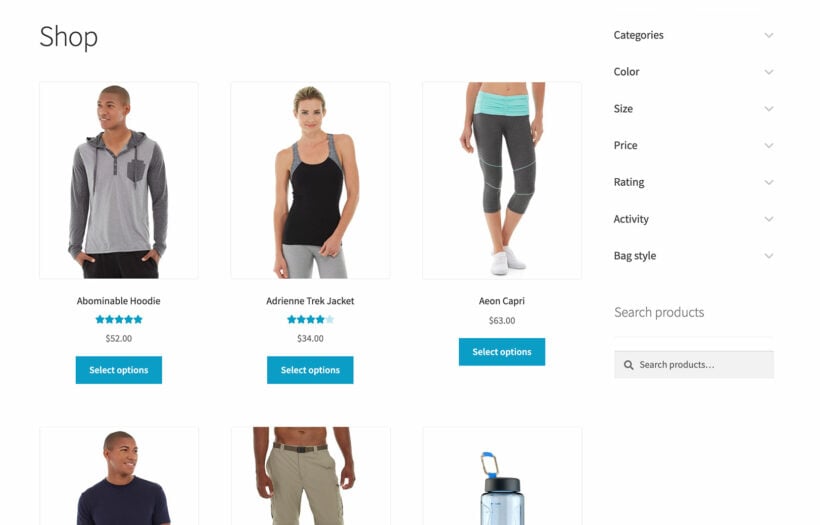
Add your paywall categories to the menu

Navigate to Appearance   Menus and add links to the paywall-restricted categories to the menu. These links will only appear to logged-in paying customers.

Edit the 'Welcome' email to customers

In the previous steps, I showed you how to disable guest checkout in WooCommerce. This means that when someone pays for premium access, a user account will automatically be created for them. WooCommerce will send their login details by email.

You can edit this email in WooCommerce → Settings → Emails → New Account Email.

Create a WooCommerce paywall today!

As you can see, setting up a WooCommerce paywall is an easy and quick solution to start monetizing your WordPress site. Setting up a paywall or membership subscription is the ideal choice if you want to make money from your blog but don't want to spam your readers with ads and affiliate links.

.There are more benefits than drawbacks to locking away and charging for some of your content. While you could lose some visits and non-paying users, you will also gain more devoted customers and perhaps even build a strongly engaged community. Whether you offer online courses, membership or simply want to lock away your blog content, the best paywall plugin for WordPress is Password Protected Categories.

Try out the Password Protected Categories plugin today. Use it with the other plugins mentioned in this tutorial to take payment for accessing the paywall (either one-off or as a monthly subscription), and give paying customers access to the premium content. 

setting up cart and checkout on the same page

WooCommerce takes users through multiple pages before they can complete their orders. If a customer wants to buy one product, they have to go through four pages! That's definitely not ideal. It's better to put the WooCommerce cart and checkout on the same page.

Yes, the situation really is that bad for customers. First, they go to the shop page, then the product page, then the cart page, and then finally, the checkout page. The process involves even more pages for customers buying multiple products.

One way to improve the user experience and shorten the customer journey is by bringing product selection, the cart page, and the checkout page all into one page.

In this article, we’ll show you two easy ways to set up the WooCommerce cart and checkout on the same page. By the end of this article, you'll be able to create a fully functioning one-page checkout in either of these two ways:

Best ways to set the WooCommerce cart and checkout on the same page

There are two easy ways you can display the WooCommerce cart and checkout on the same page and create a better checkout flow. This can help you make your online store more user-friendly and boost sales.

The popup cart and checkout method

My favorite way to speed up the purchase flow is by using the WooCommerce Fast Cart plugin to display the cart and checkout form in a popup on the same page. Keep reading to learn more about this method or skip ahead to the instructions.

WooCommerce Fast Cart lets you show the cart and checkout on any page of your WooCommerce site. This means that if a customer wants to purchase a product when browsing your store’s catalog, they can simply click on the “Add to cart” button to open the cart and checkout page in a popup. That way, customers can quickly order products from any page they’re on - without leaving the page.

WooCommerce Fast Cart - Display the WooCommerce checkout directly in the fast cart

Display a popup checkout - either alone, or with a popup cart

As a result, customers can review their orders, add more products, make changes to their orders, and checkout using the fast cart popup screen.

The WooCommerce Fast Cart plugin lets you display the cart and checkout in a side cart or a popup that appears in the center of the user’s screen. Either way, the entire shopping experience on your WooCommerce site is brought to a single page. It's a true one-click WooCommerce checkout.

WooCommerce Fast Cart - 2 layout options: Choose from a side cart of central popup
A central on-page popup WooCommerce cart

As a result, you’ll get happier customers who are less likely to abandon their cart when shopping from your WooCommerce site.

The one-page checkout method

There's a second way to put the WooCommerce cart and checkout on the same page. It involves listing your products at the top of the page, and then a combined cart and checkout below. Customers can add products to the cart and see them in the cart at the bottom of the page. They can remove products, edit quantities, and complete the checkout fields - all on the same page.

You can achieve this by combining the WooCommerce Product Table plugin with the WooCommerce One Page Checkout plugin. Keep reading to learn more about this method, or skip ahead to the instructions.

Together, these two plugins shorten the order process on your online store. This way, you speed up the customer journey by giving users a quick and easy way to select products and checkout from your WooCommerce site:

WooCommerce one page checkout with product table
A WooCommerce store with the products, cart and checkout on the same page

Why have a product table on the same page as the WooCommerce cart and checkout?

Used alone, the one-page checkout plugin puts the cart and checkout on the same page. However, it's not ideal because shoppers will still have to browse multiple product pages to find what they’re looking for.

This is why we recommend using the WooCommerce Product Table plugin. It lets you showcase products in a tabular layout so customers can quickly select products using sortable and filterable product tables. You can then use the WooCommerce One Page Checkout plugin to show cart and checkout options on the same page.

This way, shoppers can quickly find the products they want to buy and add them to their cart at once using a single button. Once that’s done, they can fill out their billing details and checkout from the same page. In addition to this, customers can even edit their orders from the same page.

This simplifies the one-page checkout process on your WooCommerce store and is a great way to encourage more sales.

Setup instructions

Method 1: WooCommerce Fast Cart

You can use the WooCommerce Fast Cart plugin to display the cart and checkout in a popup on the same page.

You can use the plugin to allow customers to use the popup cart and checkout. That way, the cart opens first so the customer can review their order before progressing to the on-page popup checkout. You can also speed things up further by skipping the cart completely and immediately initiating the same page checkout.

How to set up the WooCommerce Fast Cart plugin

  1. To get started, install and activate the WooCommerce Fast Cart plugin on your WordPress site.
  2. Use the plugin setup wizard to choose the main settings for your same page popup WooCommerce cart and checkout.
    • You can select from two different layouts. These include showcasing the cart and checkout in the side cart or using a centered popup using the Layout section. The Auto open checkbox will automatically open the cart and checkout popup as soon as a user adds the product to their cart.
    • Make sure to enable the Allow fast checkout checkbox. This will let customers quickly checkout with their order using the fast cart popup.
    • You can also choose to skip the cart page entirely and showcase the checkout options instantly. Do this by enabling the Direct checkout checkbox.
    • In addition to this, the plugin lets you select what to display in the popup, including product images, product prices, quantity pickers, item delete buttons, coupons, cross-sells, and shipping information.

Now when customers are finished adding products to their shopping cart, they can quickly checkout using a popup cart and checkout popup.

WooCommerce Fast Cart Center Popup

Method 2: WooCommerce Product Table

If you don't want to display the cart and checkout in a side cart or popup on the same page, then use method 2 instead. This displays a combined WooCommerce cart and checkout on the same page as a searchable product table.

Here's what you need to do to set the cart and checkout on the same page with WooCommerce Product Table:

Step 1: Set up the WooCommerce Product Table plugin

  1. To get started, install and activate the WooCommerce Product Table plugin on your WordPress site.
  2. The setup wizard will open automatically - use it to set up the defaults for your product table. For example:
    • Specify all the columns that you want to show in your product table using the Columns field.
    • Select the Quantities checkbox to let users purchase multiple products without having to leave the page.
    • In addition to setting other product table options, such as sorting options and filters, you can also let your customers select multiple products and add them all at once to their shopping cart using the Add to cart section. Simply select Add to cart checkboxes using the Adding products to cart dropdown menu. Choose where you want to display the “Add all to cart” button using the Multi-select cart button dropdown.

Used alone, your product tables might look like this. Keep reading to learn how to add a WooCommerce checkout underneath.

Shop page
A product table before adding the one-page checkout

Step 2: Create a page for your products, cart and checkout

Next, you need to create a page where you will display your products, cart and checkout on the same page:

  1. Create a page for your one-page WooCommerce shop and checkout. To do this, create a new page by navigating to Pages → Add New.
  2. Add the [product_table] shortcode - for example, within a aShortcode block:
WooCommerce Product Table shortcode

Step 3: Add a WooCommerce cart and checkout on the same page

Now that we’ve listed products in a sortable and filterable product table, you can use the WooCommerce One Page Checkout plugin to add a checkout form below the table:

  1. Once you install and activate the plugin on your WooCommerce site, head on over to the page we created earlier with the product table shortcode.
  2. Create another Shortcode block and paste the [woocommerce_one_page_checkout] shortcode before clicking on the Update button.
    WooCommerce One Page Checkout shortcode

Now view the page. Customers can browse the product table to find what they’re looking for. They can add multiple products to their cart at once, edit their selections in the cart, and checkout – all from the same page.

WooCommerce one page checkout with product table

Set up WooCommerce cart and checkout on the same page

The WooCommerce purchase flow is quite lengthy and overwhelming. It’s much better to use a same page WooCommerce cart and checkout plugin to improve the ordering process. Letting customers add products to their cart and checkout from the same page can help you reduce cart abandonment rates and increase conversion on your online store.

As we have seen, there are two excellent ways to do this:

Get your chosen plugin today, and start showing the WooCommerce cart and checkout on the same page 😀

Manage Stock for Your WooCommerce Variations

WooCommerce has various options for managing stock at variation level. It lets you set the stock status or manage stock by setting stock quantity, allowing backorders, and setting a low stock threshold. However, WooCommerce's options to manage stock at variation levels aren't perfect for all stores.

In this article, we’ll learn how to use the core WooCommerce features for variation stock control. We'll also discover 3 fantastic plugins to display and manage variation stock on the front end. These will allow you to:

  • Show variation stock information directly on the WooCommerce shop and category pages.
  • Display and manage variation stock in bulk.
  • Display the lead time or waiting time for each variation.

For example, this is what it might look like to display variation stock on the shop and category pages:

Product table with stock column

This way, customers can see at a glance which variations are in stock and which ones aren’t. Keep reading to learn how to do this and more

How to use WooCommerce to manage stock at variation level

WooCommerce has built-in options to manage stock for variable products (as well as simple products) on your online store. To enable the default stock management feature, simply navigate to WooCommerce → Settings → Products and clicking on the Inventory link from the top.

Inventory tab

Enable the Manage stock checkbox and set basic stock management settings. You can select the low stock level display and set a low stock threshold. This lets you show or hide out-of-stock variations. And, whenever a specific product variation is low on stock, a notification will be sent to the store manager about the stock level.

In addition to this, WooCommerce also lets you manage stock at the product variation level. To do this, navigate to the variable product’s edit page. Then click on the Variations tab under the Product data meta box.

Variations tab WooCommerce manage stock at variation level

From here, you can choose the variation you want to manage stock for and tick the Manage stock? checkbox to view the Stock quantity field. You can manage stock for each variation following this method and click on the Save changes button once you’re done.

This displays a stock status on the front-end when customers select the product variation they’d like to purchase.

3 ways to better display and manage stock at variation level

While WooCommerce lets you display stock information for product variations, it isn’t ideal if you want to offer a frictionless shopping experience on your online store.

Here’s why:

WooCommerce only displays stock status after a customer selects a variation from the variation dropdown menu. This means your customers have to select a variation before they find out if it’s in stock or not. This can lead to a frustrating shopping experience.

Default stock information
WooCommerce only displays variation stock information AFTER you select a variation

On the flip side, if you set out of stock products and variations to be hidden in your store, they won’t appear in your store at all. This may lead customers to believe you don’t sell the product or variation, and they won’t check back later.

If lots of product variations are out of stock, customers will end up making multiple selections one by one before they find something they can order. This can easily lead them to abandon your store.

In addition, WooCommerce doesn’t do anything helpful like grey out out-of-stock variations to help shoppers identify out-of-stock variations. It’s better to display variation stock information from the get-go, so that customers can see which product variations are available at a glance. This not only helps save time but also prevents them from bouncing off your online store frustrated.

Next, we’ll share several plugins that offer different ways to do this more clearly. It's time to dive deeper into different ways to display and manage stock at variation level in WooCommerce.

Manage stock at variation level in bulk

The WooCommerce Bulk Variations plugin makes it much quicker and easier to bulk-edit variation stock for each product:

WooCommerce Bulk Variations bulk actions
Select specific variations and quickly update the stock levels

For example, let's say that you sell a custom printed hoodie and have received a delivery of 5 units of all the Small variations. You can select all the variations with the 'Small' attribute and bulk-update the stock to 5.

This is how to use the bulk variation stock management features:

  1. Install the WooCommerce Bulk Variations plugin.
  2. In the plugin setup wizard, activate your license key and then skip the remaining steps.
  3. Go to the 'Edit' screen for the variable product that you want to bulk-edit the stock levels for.
  4. Open the Variations tab in the Product Data section.
  5. Select the variations that you want to manage stock for. To select variations with specific attributes only, use the filters above the list of variations.
  6. Use the bulk actions dropdown to change the stock status for all the selected variations.
  7. Save the variable product.

It's that easy!

List variations in a quick order form with stock information

Now we've learned the best ways to manage variation stock in the WordPress admin. Next, I'll share 3 plugins which improve how variation stock is displayed in the front end.

First, let's look at the WooCommerce Product Table plugin. This plugin helps WooCommerce store owners to better display stock information about variable products. It lets you display each variation individually in your store, complete with stock information. This ensures a top-notch user experience on your WooCommerce store.

WooCommerce variations table plugin

List variations individually in a quick order form, complete with stock information

You can use the plugin to display one product per row with dropdowns to select variations like how they appear on single product pages. However, the clearest way to show variable product stock is to list each variation on each row in the table. This “display variations as products” method allows you to have a stock column in the product table. Customers will be able to see the exact stock status of that variation.

An example

For instance, if your variable product has three color variations, each variation will be displayed in a separate row in the product table. This means instead of displaying a single product row for a variable product, you can showcase each variation option in a separate product row along with the stock information of each variation clearly.

This is great for showcasing the exact stock status of all product variations on your WooCommerce site. Customers can see which variations are in stock at a glance, preventing them from wasting time trying to select options that aren’t available or in stock.

WooCommerce Product Table lists the variations for multiple products at once and offers a great way to improve the layout of your main shop page and category pages. The best part is that the plugin is very easy to set up on your WordPress site.

WooCommerce Product Table tutorial

Once you activate the plugin on your WooCommerce site, the setup wizard will open. Use this to set up your product tables, paying particular attention to the following options:

  • In the Shop integration section, specify where to display the product table instead of using the default WooCommerce layout. For example, you can showcase the product table on the shop page, in product search results, in product categories, and for product tags.
  • The Columns section lets you specify which columns to display and how product images appear on the product table. For instance, you can display the product image, the product name, the price of your product, the stock status, and a purchase button. Check out the full list of columns you can display on the product table. Don't forget to include the "stock" column!
  • Now scroll down to the Add to cart section and select the Quantities checkbox to display a quantity box for each product listed on the product table.
  • Select how variations are displayed on the product table using the Variations option. Selecting the Show as dropdown lists option will display variation options in dropdowns on the product table. We recommend this option for showing the stock status clearly for each product variation. This lets your customers view the stock status for each variation option separately and helps them make informed purchase decisions when shopping from your online store.

Create a variations order form for each variable product

While the WooCommerce Product Table lists multiple products in a table on your main shop or category pages, the WooCommerce Bulk Variations plugin is different. We've already seen how this amazing product variations plugin helps you to bulk-edit variation stock statuses. However, it can also change how your variations are displayed in the front end.

You can use WooCommerce Bulk Variations to create an order form for one variation at a time. The order form replaces the standard-looking WooCommerce dropdowns on the single product page.

Manage variations grid stock information

The plugin offers an all-in-one solution for displaying your WooCommerce variations better on your online store. This also means displaying the stock information for each variation and displaying them in an easy-to-use grid or price matrix. This lets customers select multiple variations at once while being notified about the stock status for each variation option on the same screen.

WooCommerce Bulk Variations tutorial

Once you install the WooCommerce Bulk Variations plugin on your WooCommerce site, it’s pretty straightforward to showcase stock information when displaying variations using the price matrix. Navigate to WooCommerce → Settings → Products and click on the Bulk variations link from the top.

WooCommerce Bulk Variations settings

Simply select the Display stock information in the variations grid checkbox under the Grid options section to enable stock status for each variation option. You can also enable the variation grid display for all your shop’s products globally that have one or two variation options. Similarly, you can enable the variation grid for all products that have three or more variation options.

In addition to this, the plugin also lets you set variation grid display options for specific products on your WooCommerce site. To do this, navigate to the product’s edit page and scroll down to the Bulk Variations tab.

WooCommerce manage stock at variation level

Enable the Product-level control checkbox and the Enable checkbox to display a variations grid for the new product instead of the default WooCommerce dropdowns.

Bulk variations grid

This way, you create a better interface for your customers to view stock information for variations on the single product page and make it easier for them to order multiple variations at a time using a single button.

As a result, this provides your customers with essential information without them needing to select each variation first. It also creates a seamless shopping experience on your online store.

Show the lead time for each variation

WooCommerce Lead Time is displays accurate information about the stock status of your products and variations.

You can show lead times for all products and variations on your WooCommerce site. Including showcasing the lead time for out-of-stock products or products on backorder. This way, your customers know when to check back to place their order. Or even better, they can order backorder products immediately, safe in the knowledge of how long they will be waiting.

All you need to do is set a date for when the variation will be back in stock. After that, the plugin will automatically calculate a lead time for you. This helps keep your customers informed and encourages them to check back again when products restock.

On top of the basic stock information in WooCommerce, WooCommerce Lead Time allows you to display a special message. These messages notify customers when to check back or select a waiting time for each variation.

Static vs. dynamic lead times

It’s also important to understand the difference between static lead times and dynamic lead times. This way, you'll understand when to use each one with Lead Time. Static lead times are used when the information stays the same. For example, you can display a static lead time such as “Handling time: 10 days” for your products.

On the other hand, dynamic lead times are used to specify when out-of-stock products will come back in stock on a particular date. For instance, a dynamic lead time might look something like “Back in stock in 8 days”. You can specify a particular date and the WooCommerce Lead Time plugin will automatically display the remaining number of days before it comes back in stock.

WooCommerce Lead Time tutorial

Once you get the plugin, the setup wizard will open. Use it to choose how to display lead times in your store.

Here, you can select when to display lead times on your WooCommerce site as well as specify what to display as the lead time message to customers on the front-end. These settings will be applied to all products on your WooCommerce site.

In addition, you can set lead times for individual products and variations. Simply navigate to the product’s Edit page and click on the Inventory tab under the Product data meta box.

Inventory tab with lead time

Set the lead time for each product or variation using the Lead time text field and click on the Update button to save changes.

Lead time preview

Use multiple manage stock at variation level plugins for best results!

Now we've looked at 3 fantastic plugins for improving how you manage and display WooCommerce product variations. You can use each one on its own. But for best results, why not use them together?

Here are some examples:

Using WooCommerce Product Table with WooCommerce Lead Time

You can use the WooCommerce Lead Time plugin on its own so that the lead time information appears when customers select variations using the default dropdowns. Alternatively, you can use it with the WooCommerce Product Table plugin to display lead time for variations in each row of the table:

Lead times in a product table WooCommerce manage stock at variation level
For maximum benefit, display variation stock and lead times in a product table on the shop page

Using WooCommerce Lead Time with WooCommerce Bulk Variations

You can also use the WooCommerce Lead Time plugin with the WooCommerce Bulk Variations plugin. That way, you can display the lead time for each variation directly in the variations grid.

The better way to manage stock at variation level in WooCommerce

Used as it comes, you can use WooCommerce to manually manage stock at variation level and display information about out-of-stock variations on product pages. However, this doesn’t quite cut it. It takes ages to change the stock status and stock level for each variation individually. And even worse, the default WooCommerce layout doesn't let you display variation stock information before the customer makes their selections. This can lead to a frustrating shopping experience for customers.

Luckily, there are some amazing plugins to fix this for you:

Together, these plugins help you display your online store stock at the variation level.

We hope that this article has provided lots of useful information about the different options for using WooCommerce to manage stock at variation level. Follow the instructions to set up the plugins in your own store.

Ready to display stock information better on your e-commerce store? Get the plugins today!

How to set up pre orders for products in your WooCommerce store

Are you looking for a way to set up WooCommerce pre order for your upcoming product launch? Keep reading to learn how (and why) setting up pre orders on your WooCommerce store will spark interest among your clients, help you validate your product idea, and streamline your inventory process.

When it comes to launching new products, the vast majority of stores get it wrong. Most businesses either don't inform customers about new items, add a waitlist plugin, or only notify them when the product is released. However, if you can get more sales by accepting orders before the launch, while clearly letting clients know when the new product will be delivered.

You can use WooCommerce pre orders to promote interest in new items. It will help you evaluate demand and collect cash before manufacturing. This way, you can decide how many items to make on your first production run and get cash upfront.

In this article, we will show you how to set up pre orders on WooCommerce and present you with the best solution to do it - WooCommerce Lead Time. This plugin allows you to easily add a pre order time to a single product page. It will keep them informed of the exact release date. As a result, customers can buy your product before it is launched.

How can your WooCommerce store benefit from WooCommerce pre order?

It doesn't matter how many views, followers, and email subscribers you have. Nothing validates a concept like having someone place a purchase for your goods in advance. Some of the most significant incentives you can have come from a consumer paying you money for your concept or product before it is fully developed.

WooCommerce pre ordering involves providing customers with the choice to pre order things that haven't yet been released. When done correctly, it can assist you in the following ways:

  • With actual sales, build momentum before the product's debut.
  • Analyze the current market demand for a certain product or service.
  • Engage existing consumers and assist in acquiring new ones.
  • If you state that you will only release a certain quantity, you will create urgency.
  • Streamlines the configuration and follow-up stages of the WooCommerce pre ordering>

Why should you include WooCommerce pre order option?

WooCommerce pre ordering is an effective sales tactic that helps businesses convert leads to clients, improve client relationships, and upgrade the customer experience. Presales require time and effort to implement well. But they can significantly benefit a company's sales efforts. By prioritizing communication and focusing your sales on including pre ordering, you can achieve your business objectives way faster.

WooCommerce pre orders are also important because they help customers understand how a product or service can meet their specific business needs. Companies can guarantee clients receive the greatest and most accurate information. All thanks to improved communication at the start of the sales process. Preordering is particularly vital for businesses since it helps them to properly grasp their customers' goals and offer the greatest viable solutions for their specific needs. As a result, the sales experience is typically more tailored, with relevant solutions, streamlined procedures, and meaningful delivery.

How about physical products?

When it comes to physical products, implementing WooCommerce pre order techniques in your business can help you estimate the exact amount of products to manufacture. In this way, you won’t end up with too many or too few items.  Meeting your demand perfectly will decrease your inventory and keep costs low simultaneously.

Best plugin for Woocommerce pre orders - WooCommerce Lead Time

Even if you are a developer, putting up pre orders on your WooCommerce site without a specific pre orders plugin is challenging. Adding custom code to your theme and altering the default WooCommerce templates will be necessary. However, this way, there is a significant chances of mistakes in terms of setup, sales, and fulfilment of pre orders.

In the case of a standard WooCommerce setup, WooCommerce comes with the ability to indicate goods as in stock, out of stock, or on backorder. It does not, however, allow you to enter a lead time for out-of-stock or new items.

This information should ideally be shown on the single product page so that buyers can make an educated decision about pre ordering the product. Even though preordering usually means a longer wait time for the product, it also offers a bunch of benefits, such as discounts or bundles for the buyers. Ideally, you want this information to be obvious to the customer at the moment of purchase.

Currently, the default WooCommerce product classifications (in stock, out of stock, or on backorder) are not a good fit for preordering with a defined lunch date. Setting your new product as “out of stock” will make your customers leave your store empty-handed and go search for Google alternatives.

Our solution - WooCommerce Lead Time

WooCommerce Lead Time is the only WordPress plugin that displays pre order times on the product page, facilitating your WooCommerce product launches. The plugin streamlines the WooCommerce pre order process and eliminates the possibility of human mistakes in collecting payment information, maintaining pre order inventories, and fulfilling orders.

Instead of marking the product as Out of Stock until it is available, you can make it available for pre order straight away (e.g. using the backorder status) and clearly display the launch date or the number of days until the launch. WooCommerce will mark the pre-orders as 'Processing' in the WordPress admin until the product is launched. At that point you can remove the pre order wording and 'Complete' the orders.

WooCommerce Lead Time enables you to:

  • Show the WooCommerce stock status and lead time right on the shop and category pages. Customers may view this important information before clicking on any product.
  • Display a clear indication of when each item will be available to the buyer.

WooCommerce Lead Time is ideal for selling new not-available-yet-to-the-public items, as well as providing customers with accurate information before they make a purchase. The plugin is extremely light and works with any theme you already have on your online store.

It allows you to have total control over the stock state of WooCommerce and customise it depending on your launch dates. You will also get access to top-rated customer care, which will assist you at every step of the journey.

Before you set up WooCommerce pre order with WooCommerce Lead Time

Before you set up WooCommerce Lead Time on your online store, there are a few things you should think about:

  • When (day and time) will you begin taking online pre orders?
  • How long should your presale last?>
  • Will you offer some additional bonuses for customers who order during preordering phase?
  • When will the product be available for purchase and shipping?
  • Which payment gateways are you going to use?

Your customers will be charged upfront, so you will receive advance revenue during the pre-ordering period. We also suggest planning a bigger marketing campaign for your new item preordering to build momentum for your product launch and achieve the best results.

How to set up WooCommerce pre orders for your product

#Step 1: Get the WooCommerce Lead Time plugin

If you haven't already, install the WooCommerce Lead Time plugin. In a confirmation email, you will receive the plugin files and license key. Install and activate the plugin on your WordPress website. From the admin panel, navigate to WooCommerce → Settings → Products → Lead time.

The setup wizard will launch on activation of the plugin. It will take you through the main settings for displaying pre-order information.

Step #2: Show WooCommerce pre order status and lead times in your store

You may use the WooCommerce Lead Time plugin to display pre order status and lead times in prominent locations throughout your e-commerce business. It will display the product launch date on the cart, checkout and in the customer emails, so your customers will be very clear about when they will receive it.

However, we do suggest further highlighting your preorders by creating a special “New” or “Limited availability” category for them in your store.

Step #3: Set the WooCommerce pre order time

Depending on your launch and the number of products you want to include in your presale, you may set the processing time for WooCommerce Lead Time for the category of items, simple products, or variable products.

By going to WooCommerce → Settings → Products → Lead time  and entering the lead time in the Global lead time field, you can set the processing time globally

WooCommerce pre order
[/image_border]

To define the processing time for a certain product category, go to Products → Categories and select either Static (input static lead time text) or Dynamic (compute the processing time dynamically) from the Lead time selection.

WooCommerce pre order

You can also adjust the processing time for specific goods with WooCommerce Lead Time (and variations). On the Edit Product page, choose the product for which you want to establish a pre order time. Scroll down to the Product information section and select the Inventory tab. You may set the product's pre order time from here. This is also applicable to variable products.

Step #4: Customize the pre order text and color

One of the most useful aspects of the WooCommerce Lead Time plugin is the ability to change the text and text color. This means you can fine-tune it to achieve the exact look and feel you desire when displaying pre order products.

For instance, you might change the custom status phrase to something like:

  • Preorder ends in X days
  • Available in X days
  • Waiting time:
  • Coming soon
  • Dropping in X days

To change the text color, go to the plugin's settings page (WooCommerce → Settings → Products → Lead time) and pick a new color from the Lead time text color option.

Managing pre orders in WooCommerce

WooCommerce Lead Time makes it easy to manage your WooCommerce preorders. Once a customer purchases the product, the order is saved as "Processing", and the only thing you need to do is to mark them as "Complete" when you finally launch.

You can then despatch the product once you close your pre-order period and manufacture the needed amount.

As the payments are processed straight away, you won't need to worry about any complicated multi-step payment process or delayed payments.

Using WooCommerce Lead Time with other plugins

Customers should ideally be informed of the product lead time on the product information page. You may, however, utilize the plugin to display the lead time on your main store pages. When used with other plugins such Quick View Pro, you may display lead times in a quick view lightbox. This is particularly useful if you run a presale for multiple items in your store. This way, customers can see more information about the item they want to purchase without the need to leave the store, which increases the chances of conversion.

WooCommerce Lead Time with Quick View Pro (below)

WooCommerce pre order

Another plugin to consider for your WooCommerce pre orders is YITH WooCommerce Waiting List. This plugin displays an 'add to waiting list' button for items that are not yet available. When consumers add themselves to the waitlist, they receive an email as soon as the product is released. Everything is automated.

WooCommerce pre order

This is a good option if you don’t want to collect money before the release date of your new item. By using WooCommerce Lead Time and YITH WooCommerce Waiting List together, you can inform your customers about the lead time of your new product. And collect their email addresses at the same time.

Set Up WooCommerce Pre Orders for Products in Your Store Today

The WooCommerce Lead Time plugin may benefit your online store in various ways. It supports you in the marketing of your products or services by creating momentum before the product launch. It is also an excellent strategy to enhance income. Not only that, but also it helps your business with the technical and logistical management of the inventory on the back end.

A high-quality WooCommerce pre order plugin for your online shop allows you to manage the complexity of presales properly. Allowing customers to pre order things can help you generate income upfront for the manufacturing. It will also boost the likelihood of future product success.

WooCommerce Lead Time is the only WordPress plugin that displays lead times on the product page. It makes it easier to highlight the release date of your WooCommerce products. This plugin allows you to clearly communicate with customers when a product will be released. So that, they can order straight away (i.e. pre order) while knowing how long they will be waiting.

Ready to launch a WooCommerce pre ordering campaign? Get the WooCommerce Lead Time plugin right away!

Best WooCommerce Variation Swatches Plugins Compared Header

If you have multiple products with variations on your WooCommerce store, variation swatches can significantly help you retain customers and boost overall conversions.

Displaying product options in swatches can help your store customers easily visualize the available options for a product. This can reduce friction points and accelerate conversions significantly as customers can choose the exact variation they want.

In this article, we’ll cover the best plugins that let you display WooCommerce variation swatches on your online store.

By the time you’re done reading, you’ll know how to display WooCommerce swatches in different parts of your store and use them for different purposes:

  • You can showcase swatches with clickable images or color swatches that let your customers choose product options that aren’t variations. This is perfect for offering extra product options even if you don’t like using variations on your WooCommerce site.
  • Use WooCommerce swatches as clickable filters so that when customers click on an image, text label, or color swatch, they’ll see all relevant products that match their search criteria. This makes it easier for all types of users to easily navigate your store and find the products they need quickly.
  • The best part is that you can get rid of the generic-looking WooCommerce dropdowns and display attractive-looking variation swatches on your product pages to help customers better visualize product options.

What are WooCommerce swatches?

WooCommerce swatches are essentially a better way to display extra product options on your online store. Product variation swatches can be displayed in place of the usual WooCommerce dropdown fields to make your product pages more interactive and easier to navigate.

For instance, instead of displaying a dropdown that lets customers select their desired color when purchasing a product, you can display color swatches that offer a better visual representation and help customers differentiate between the available product options.

Depending on your brand and the type of WooCommerce site you run, you can use WooCommerce swatches in multiple ways.

For starters, you can showcase product options better without having to create variations on your online store, so it’s easier for customers to make quick, informed purchase decisions. You can also use WooCommerce product variation swatches as attribute filters. This makes it easier for your customers to quickly find the products they need. In addition, WooCommerce swatches can transform your product pages by neatly displaying variations using image or color swatches.

Why add variation swatches to WooCommerce?

Adding variation swatches is a great way to enhance the shopping experience and boost conversions on your WooCommerce store. Swatches makes it easier for customers to get an idea of different variations of the same product.

For instance, if a product has a lot of color options, you can display an image or color swatch to visually represent variation options better. As a result, you increase clarity for your customers. It gives them a better idea of what they’ll get if they select a specific product option.

Adding WooCommerce variation swatches helps you enhance the end-user experience tremendously on your website. With product variations, customers can make a visual connection with what they’re looking for instead of reading through dropdown lists. This makes it easier for customers to decide quickly on what they want to purchase.

Benefits of adding variations swatches to WooCommerce products:

  • Increases store conversions. If you’re offering an easy way to let customers select product options, there’s a better chance more customers will be encouraged to shop from your online store. As a result, it can increase store conversions and help your business generate more revenue.
  • Simplifies the shopping experience. You want to consider all types of users (even people who aren’t very tech-savvy) when thinking about what the shopping experience on your online store should be like. Using variations swatches, you essentially simplify the shopping experience on your online store. In return, this encourages more users to shop from your online store and helps your brand cater to all types of customers.
  • Displays product attributes and options visually. Ideally, you want to make sure your product pages look professional and are easy to navigate. A great way to do this is by displaying product attributes and options visually using WooCommerce swatches on your online store.

Best WooCommerce swatches plugins for WordPress

1. WooCommerce Product Options

The WooCommerce Product Options plugin lets shoppers customize products before adding them to their cart. This way, customers can select the correct product options while making a purchase instead of sending you the details later manually.

Benefits of using the WooCommerce Product Options plugin:

  • You can automate everything: Customers won’t have to send you personalization or customization requests after placing their orders. They can select the correct options directly from the single product page.
  • An alternative to product variations: Product variations aren’t ideal for all kinds of products. For example, if you have an online cake shop, you can add multiple options for cakes. You can add the option to select the flavor and icing color, enter a message, or upload a photo. In this case, product options are more suitable than product variations.
  • Display upsells: You can display upsell offers directly on your online store with product options. Following our example, customers will be more likely to pay a bit extra for a personalized cake than a regular one.
  • Add visual options to products: Product variations take a lot of time to create, and they’re even more difficult to manage. The product options plugin lets you add visual options to your WooCommerce products – like images and color swatches – without having to create product variations.

The swatches on the single product page will appear under the variation dropdowns and above the add to cart button. WooCommerce Product Options lets you charge extra for any of the product options you create. If the customer selects a product option with a cost attached to it, they’ll see the total cost of the product appear above the add to cart button.

What’s more is that you can use the WooCommerce Product Options plugin with other Barn2 plugins like:

  • WooCommerce Product Table - product options appear in the ‘Buy’ column
  • WooCommerce Quick View Pro - product options appear in the quick view lightbox

How to set up swatches with WooCommerce Product Options

Here's what you need to do to set up swatches with the WooCommerce Product Options plugin:

Step #1: Install WooCommerce Product Options

Get the WooCommerce Product Options plugin and install and activate it on your WordPress site.

Next, head over to the plugin's settings page by navigating to Settings → WooCommerce Product Options and enter the license key given to you in the confirmation email. Click on the Activate button to proceed.

Step #2: Create a product options group

Go to Products from the WordPress dashboard and click on the Product Options tab. Click on the Add Group button to create a product options group.

Next, set the display parameters and adjust its settings based on your preferences. Once that's done, click on the Add group button to continue.

Step #3: Add product options

Now that we've created a product options group, we can start adding the different options to it. Click on the Manage option group link to get started.

Enter a name for the product option and select the field type of option you want to add. WooCommerce Product Options lets you choose from a variety of options including:

  • Radio buttons
  • Checkboxes
  • Dropdowns
  • Text
  • Paragraph
  • File upload
  • Images
  • Color swatches
  • HTML

You can also add prices to each product option you add to the group. The plugin lets you add a flat price or set variable pricing.

Once that's done, you can add the choices for each product option and choose to select specific options by default or leave all options unselected. The plugin also gives you the option to display the option name and description on the front-end.

Finally, you can choose to make the product option Required.

With the WooCommerce Product Options plugin, you can add advanced attributes to the product options you create. The available options include:

  • Quantity rules - limit the number of product options a user can choose
  • Character limit - limit characters for text and paragraph options
  • Conditional logic - show certain options when the user makes a particular choice from the 'parent' option

Step #4: Add options to products

Once you're done creating an option, click the Add option button to add it to the product options group. Repeat this step to add multiple product options to the group.

2. WooCommerce Product Filters

WooCommerce swatches aren’t just for displaying on product pages. You can also use them as product filters. The benefit of doing it this way is that it lets customers click on an image, text label, or color swatch to quickly refine the product catalog by their selection(s).

Filtering products is a more visual way for customers to find the type of products they want to see and, ultimately, add to their shopping cart.

The WooCommerce Product Filters plugin is perfect for this. It comes with attribute color swatches and image filters based on an attribute, category, or taxonomy that customers can click to filter the list of products. In addition to this, it also lets you add image labels (like a tag cloud) that you can use for categories, attributes, taxonomies, and tags.

Best WooCommerce variation swatches plugins

While we’ve gone over other types of swatches plugins, all the remaining plugins in the list are more traditional WooCommerce swatches plugins. They replace the standard WooCommerce variation dropdowns on product pages with image, color, or text swatches. You can use one of these “traditional” swatches plugins if you need to add swatches to variable products.

All of these plugins work great with the WooCommerce Product Filters plugin. This way, you can showcase the attribute filters on the main shop page or category pages while using the variation swatches plugin to display swatches instead of generic-looking dropdown menus on single product pages.

This is a great combination as it lets you offer customers an easy way to find the products they’re interested in quickly. At the same time, you’re showcasing visual product options on your product pages, so it’s easier to differentiate between the available options. As a result, it helps enhance the shopping experience and helps shoppers on your online make quick, informed purchase decisions.

1. WooCommerce Attribute Swatches

WooCommerce Attribute Swatches

The WooCommerce Attribute Swatches plugin by Iconic is a professional solution for displaying product variations better on your online store.

You can use the plugin to visualize product options on single product pages and give your WooCommerce site a modern look and feel. For instance, you can let customers select product colors by using a color picker or use image swatches to display the product’s material and texture to describe how it looks in real life.

In addition, the plugin also lets you display product variation swatches on the main shop page. This way, customers can select variation options for multiple products at once using attractive-looking swatches without having to navigate to each product page one by one.

Iconic’s WooCommerce Attribute Swatches is the perfect solution for displaying product variation options and also works with other popular WooCommerce plugins, including the WooCommerce Product Table and WooCommerce Quick View Pro plugins. This way, you can display the variation swatches in product tables and quick view lightboxes.

2. Variation Swatches and Photos

Variation Swatches and Photos

Variation Swatches and Photos is a simple yet robust plugin for WooCommerce that lets you replace the default-looking dropdown fields for variable products.

The plugin is simple to use and lets you showcase image and color swatches to represent variation options for any product on your online store. This helps you enhance the visual aspect of your product pages and encourage more sales on your online store.

3. WPMozo Variation Swatches

WPMozo Variation Swatches

The WPMozo Variation Swatches for Woo plugin is great if you want your online store's customers to be able to interact with the product and discover everything about it. This plugin makes it simple to display product colors, sizes, and views from multiple viewpoints. Another option is to use hover tooltips, which can show both text as well as images of the products.

You can display the variation swatches separately on the product and shop pages using WPMozo swatches. Use Inline and Separate layouts to appropriately arrange the product variation swatches. Use the styling options to add a unique touch to the variation swatches.

4. Variation Swatches for WooCommerce

Variation Swatches for WooCommerce

Variation Swatches for WooCommerce is a free WooCommerce swatches plugin that offers an all-in-one solution for creating visually pleasing variable products on your online store.

Using the plugin, you can replace the default WooCommerce variation options display with attractive-looking color, images, and text variation swatches. This way, you make it easier for your customers to differentiate between product attributes or extra options when shopping from your online store. As a result, you improve the shopping experience on your online store and enhance customer satisfaction.

5. Swatchly

Swatchly

Similar to other plugins in this list, the free Swatchly plugin also lets you display beautiful variation swatches on your online store.

Using the free plugin, you can add multiple types of swatches to your variable products, including label swatches, color swatches, or image swatches. The best part about Swatchly is that it lets you auto convert all default WooCommerce variation dropdown menus into swatches.

This can save you a lot of time and hassle in adding swatches to all of your variable products, especially if you have a lot of variable products on your online store. In addition to this, you can also override global swatch settings for each product individually. This makes it easier for you to manage variation swatches on your WooCommerce site.

6. Variation Swatches for WooCommerce

Variation Swatches for WooCommerce

Variation Swatches for WooCommerce is a fully responsive plugin designed to help create an interactive shopping experience for your store. In addition to that, the plugin makes your product pages look more appealing with beautifully designed swatches.

The plugin makes it super simple to display variation swatches. You get options such as color, image, radio button, or label button swatches and customize how swatches look on the front-end.

7. WooSwatches – WooCommerce Color or Image Variation Swatches

WooSwatches

The WooSwatches - WooCommerce Color or Image Variation Swatches is a premium plugin. The plugin is designed to help you add image or color variation swatches to your product pages.

This way, you can replace the default variation dropdowns WooCommerce creates with beautiful-looking swatches that help enhance the shopping experience on your site. Your customers will have an easier time differentiating between product variation options while being able to quickly select product options and add the product to their shopping cart.

8. Product Variations Swatches for WooCommerce

Product Variations Swatches

The Product Variations Swatches for WooCommerce offers an effective solution for displaying variation swatches on your online store.

With this free plugin, you can customize your store’s global product attributes easily. It also gives you full control over the look and design of your variation swatches. The great thing about the plugin is that it’s fully responsive and displays product variation swatches beautifully, even on responsive devices.

Easily add product variation swatches with WooCommerce Product Options!

Adding product variation swatches to WooCommerce is a great way to enhance the shopping experience on your online store. This way, you make it easier for customers to differentiate between product attributes and select their desired options quickly. As a result, it helps you increase conversions and makes your product pages look more professional.

You can use WooCommerce variation swatches on your online store in a number of ways. You can showcase variation swatches as product filters, display product options without creating variations, and display variation options better on your store. This ultimately creates the ideal user experience on your store and encourages customers to make informed purchase decisions.

Our recommendation

Here’s our recommended list of WooCommerce variation swatches plugins to help you create the ideal shopping experience:

Ready to start displaying extra product options using WooCommerce swatches? Get WooCommerce Product Options today!

Best WooCommerce custom product designer plugins in 2022

Looking for an easy way to allow customers to customize products to meet their exact needs?

Allowing users to customize products when placing an order can greatly accelerate conversions on your eCommerce store.

WooCommerce is an excellent foundation for a product designer website. It handles all standard e-commerce tasks, such as adding basic products, inventory, tax, shipping, and payments. However, on its own, it doesn’t allow customers to place custom orders.

This is why you need to use a WooCommerce custom product designer plugin. A good product designer plugin can help you add this feature. And you can start taking orders for bespoke products that aren’t otherwise possible in WooCommerce.

In this post, we’ll take a look at the best WooCommerce product designer plugins in the market. All of these plugins will let you add custom options to products in your WooCommerce store.

Benefits of using product designer plugins

Here, we’ll dive deeper into why you should consider using a WooCommerce product designer plugin so it’s easier to understand how they can benefit your business.

Some key benefits of using WooCommerce product designer plugins include:

  • Enhances shopping experienceCreating customizable products and giving customers an easy way to choose product options or view product details when shopping from your online store is a great way to offer a unique shopping experience. Customers will be easily able to select product options and view additional information about a product before they add it to their shopping carts. This helps enhance the shopping experience and cater to all types of users, even non-tech-savvy ones.
  • Gives an interactive experience to potential customersYou can create a more interactive experience on your single product pages by displaying additional product fields or displaying products differently. This enhances the shopping experience while also making it easier for customers to shop from your online store.
  • Allows you to target new markets, which isn’t possible with WooCommerce as it comes You can create and sell custom products on your online store. For instance, you can create a customizable product such as a hoodie or t-shirt and let customers design their own hoodie or t-shirt using extra product options before they add the product to their shopping cart.

WooCommerce product designer plugins transform your single product pages and give your online store a more professional look. Without them, you’ll be stuck with default-looking WooCommerce products that customers can find on most online stores elsewhere.

Best WooCommerce product designer plugins

Here's the list of the best WooCommerce product designer plugins. Each one of the plugins listed below allows you to add product customization feature to your store easily.

1. WooCommerce Product Options

WooCommerce custom product designer t-shirt plugin

The WooCommerce Product Options plugin lets users customize products directly on the single product page. This way, they can make selections, enter a custom message, or upload a design before placing their order.

The key benefit of this is that it automates the product design process. So, instead of going back and forth with customers about the personalizations they require, you can simply let them use the product designer to customize the products or add details regarding their custom order before placing an order.

The plugin lets you add a variety of product options that are perfect for creating custom-designed products.

Some of the different product options you can add include:

WooCommerce custom t-shirt product designer plugin
  • File upload: Allow customers to upload a logo, image, or design to appear on the product.
  • Checkbox and radio button: Allow customers to configure different aspects of the product by making selections.
  • Text fields: Allow customers to add custom text that needs to be printed on the product. This is also perfect for entering custom instructions for the manufacturer to implement.
  • Dropdowns: Let customers choose from multiple options. For example, you can use this to allow users to choose a font in which the text will be printed on a product.
  • Color swatches: These are perfect for letting customers pick the product color in a more visual way.
  • Text area fields: This is ideal for products where detailed instructions related to the custom product orders are required to process them.
  • Other niche use-case product options: Apart from the ones mentioned above, you also add HTML, Visual Editor, and customer-defined price.

With the WooCommerce Product Options plugin, you can charge extra for customizations. This is a great way to upsell products and increase the average order value for your store. For example, if you give customers the option to have the product delivered in a gift box for an extra $5, they’ll be more likely to opt for it.

All upsells for custom product orders are updated automatically. You get multiple options for pricing as well, such as Flat fee, quantity-based fee, percentage increase/decrease, and character count.

There's also a conditional logic feature, where you can show and hide options in the product designer based on user selection. For example, if you're creating a WooCommerce t-shirt designer then you can hide the options for the t-shirt back until the user chooses the '2 sided' option.

WooCommerce Product Options conditional logic t-shirt designer

2. Product Designer for WooCommerce

Product Designer for WooCommerce

Product Designer for WooCommerce is a robust product designer plugin that makes it easy for customers to design and customize a product according to their specific requirements.

Key features:

  • You have full control over the shopping experience of your online store. This means you can create a customizable WooCommerce product and showcase additional options for the product.
  • Lets you add product attributes such as product color, size, gift wrap message box, or free shipping checkboxes to your customizable products.
  • Customizable products created by the plugin let your customers view the Product Designer page. This way, they can add images, clip art, text, or shapes to customize their product.
  • You can also set pricing for each extra customizable option according to your business requirements. This is a great way to charge an extra fee for customized products and increase the average order value on your online store.

3. Fancy Product Designer

Fancy Product Designer

With over 15,000 downloads, Fancy Product Designer is a popular option for creating highly customized products on your WooCommerce site.

Key features:

  • Let users customize products in various ways, including by letting them upload their own media, select colors using a color picker, add their own text, or customize the image position, size and opacity when customizing products.
  • You can customize the “product designer” and showcase product extra options in multiple ways using pre-designed layouts or by creating one yourself from scratch.

4. Product Designer for WooCommerce WordPress

Product Designer for WooCommerce WordPress

Product Designer for WooCommerce WordPress is a product design plugin that makes it easy to create attractive-looking custom products on your online store.

Key features:

  • The plugin comes with a great-looking WordPress theme, Lumise. This gives you more options when customizing the look and feel of your single product pages.
  • You can let customers design products on your online store using an intuitive interface that’s easy to understand, even for non-tech-savvy users.
  • The editor is fully responsive and lets you create custom layouts using pre-designed templates for products, including hoodies, sneakers, mugs, business cards, stickers, caps, and t-shirts.

5. WooCommerce Custom Product Designer

WooCommerce Custom Product Designer

WooCommerce Custom Product Designer is a simple yet effective solution for creating fully customized WooCommerce products.

Key features:

  • Using the smart product builder, customers can drag and drop various elements and add multiple layers to their product directly from your single product pages.
  • Customers can add and customize text, names, or numbers, upload clipart, and save their design for future purchases, as well.
  • The plugin also lets you offer customers the ability to choose print sizes while letting you set prices based on the print size a customer selects. This gives you more control over the pricing of printable products on your online store.

6. Variation Swatches for WooCommerce

Variation Swatches for WooCommerce

Variation Swatches for WooCommerce is a top-notch WordPress designer plugin that offers an easy way to display additional product options better.

Key features:

  • Display extra product options or variation options in interactive images, colors, or button swatches.
  • You have full control over how your swatches look, and you can display out-of-stock variation options on the front end of your online store.
  • The plugin works seamlessly with popular page builders, such as the Elementor page builder, allowing you to create unique-looking product pages.

7. Product Designer

Product Designer

Product Designer is a full-fledged product designer plugin that makes it easy to let customers design their custom products on your online store.

Key features:

  • You can showcase a “customize” button on your product pages. This gives your customers an easy way to design and customize products before adding them to their cart and checking out from your online store.
  • You can let customers upload their own clip art and images, add custom text using Google Fonts, or add custom shapes when customizing products.
  • The plugin is perfect for selling custom products such as hoodies, t-shirts, mugs, caps, or custom business cards.

8. WooCommerce Online Designer Tool

WooCommerce Online Designer Tool

WooCommerce Online Designer Tool is a simple yet powerful product designer tool. It comes with multiple features and options to help you make your store's custom product checkouts more efficient.

Key features:

  • The plugin lets you sell any type of personalized products on your store. Such as apparel, paper, photo, image, merchandise, or packaging products.
  • You can display a simple “customize” button on your product pages. This will help customers design their products before adding them to the shopping cart.
  • A fully responsive layout helps keep up your site’s performance and ensures a great shopping experience for all users.

9. Designer Suite for WP

Designer Suite for WP

Designer Suite for WP offers a complete solution for offering web-to-print services on your WooCommerce site. This means you can let customers design and customize products that can be printed according to their own unique requirements.

Key features:

  • The easy-to-use online product customizer lets your customers quickly make design changes when purchasing customizable products from your online store.
  • You can let customers select the design of their product using preset templates. This ensures a smoother shopping experience and drives better conversions.
  • The price is automatically calculated for the final printing according to the options the customer selects.

10. PH WooCommerce Product Addons

PH WooCommerce Product Addons

The PH WooCommerce Product Addons is a solid WooCommerce product designer plugin that makes it easy to offer all types of customizable products on your WooCommerce site.

Key features:

  • You can sell any type of customizable product that you can think of. For instance, you can sell shoes that let users customize the shoe color, design, or size accordingly. Similarly, you can also sell custom t-shirts that let customers choose their own unique size and color before adding the product to their cart.
  • You also have full control over the pricing of extra product options. This way, you can charge extra to let users customize products when purchasing from your online store.

11. WooCommerce Product Configurator

WooCommerce Product Configurator

WooCommerce Product Configurator makes it possible to display image layers for customizable products on your online store. This way, when customers make changes, all design customizations will be visually displayed to them in real time.

Key features:

  • The product customization is very easy for your customers as each customization is visually represented in the product image. This helps create an enhanced shopping experience while also letting customers make informed purchase decisions quickly.
  • You also have access to advanced product inventory management features that make it easy to edit stock levels for each product option easily.
  • You can display the product customization changes across all devices as the plugin is fully responsive.

Show lead times for custom-designed products

Custom orders can take a bit longer to manufacture and ship to customers as compared to simple products. This makes it a good idea to inform your customers about the lead time or the time it will take for their order to reach them. This helps set realistic expectations for customers who place orders with you and improves customer satisfaction.

Display WooCommerce Lead Time per product

This is why we recommend using the WooCommerce Lead Time plugin along with a product designer plugin to create the ultimate shopping experience on your online store.

This way, you don’t have to leave customers guessing about how long it will take for their custom product to arrive. The great thing about the plugin is that it can automatically calculate the lead time for custom products. So you don’t have to manually edit the code in the back-end or calculate the lead time.

For more information on how to set up lead times on your WooCommerce site, you can check out our guide on WooCommerce Lead Time so you can set realistic expectations for users who purchase custom-designed WooCommerce products from you.

Start selling custom-designed WooCommerce products

Using a product designer plugin such as WooCommerce Product Options can enable you to create an interactive shopping experience on your online store.

This is important as the default WooCommerce interface isn’t enough to encourage conversions and create an enhanced user experience. This way, you can sell all types of custom products on your online store and let customers design their products according to their own requirements before they add them to their cart and checkout from your online store.

WooCommerce Product Options is the perfect product designer plugin for eCommerce stores. It lets you create all sorts of product options and gives you the option to charge extra fees for selected options. In addition to this, the WooCommerce Product Options plugin works seamlessly with other WooCommerce plugins (like WooCommerce Lead Time), enabling you to create a unique shopping experience.

Looking for the perfect product designer plugin for your online store? Get WooCommerce Product Options today!

There are lots of ways to add WooCommerce product filtering to your store. You can do it very effectively, or very badly! Discover our top tips on the best way to provide filtering options for your customers.

While designing our WooCommerce Product Filters plugin, we did a lot of research and analysis into what makes effective product filtering. Today I'm going to share my top tips on how to use WooCommerce product filtering in a way that will delight your customers and maximize your sales.

We'll cover various areas of filtering products, including subtle but important details that people normally overlook.

Tip 1: Choose WooCommerce product filtering styles that suit your product data

If you look at the basic filter widgets that come with WooCommerce yourself, you'll see that they're very limited. Compare them with the world's top e-commerce stores (many of which don't use WordPress) and you'll see a huge difference. The best stores have a much more creative approach to WooCommerce product filtering, with a huge range of filter styles.

But don't go crazy! Think carefully about the types of product data that your customers will be filtering by. Choose a filter style that suits each type of data and will create a logical experience for customers.

Filtering types and style options

The WooCommerce Product Filters plugin comes with a big choice of filter styles. This includes checkboxes, dropdown lists, radio buttons, text labels, images (with or without text), and color swatches. Which one you choose for each type of product data can make a big difference to your customers' experience.

Here's a summary of the different filtering styles that you can choose from:

Dropdown filters

WooCommerce category filter dropdown
  • What is a dropdown filter: A dropdown list, which customers click to open the list of options.
  • Hierarchical?: Yes - sub-categories are indented under their parent categories.
  • Selection method: Single choice.
  • Recommended for: Product filtering where there is lots of options. That's because a dropdown doesn't take up much space on the page. Only use dropdowns where the customer only needs to choose one option at a time.

Checkbox filters

WooCommerce category filter plugin checkbox
  • What is a checkbox filter?: A list of tick boxes.
  • Hierarchical?: Yes - sub-categories are indented under their parent categories.
  • Selection method: Multiple choice.
  • Recommended for: Non-visual types of product data where customers need to select more than one WooCommerce product filtering option at a time.

Radio buttons

WooCommerce category radio button filters
  • What is a radio button filter?: A list of options, each with a circle that customers can click on.
  • Hierarchical?: Yes - sub-categories are indented under their parent categories.
  • Selection method: Single choice.
  • Recommended for: Filters where customers must make an either-or choice to select one option at a time.

Text labels

WooCommerce filter by category label
  • What are label filters?: A cluster of small boxes, each containing the name of the option - similar to a tag cloud.
  • Hierarchical?: No - only top level options are included (e.g. parent categories).
  • Selection method: Multiple choice.
  • Recommended for: Types of product data which don't have images, but where customers will benefit from a more visual way to display the options. For example, size options (e.g. Small, Medium and Large) look good displayed as text labels. This is a particular good way to display WooCommerce tag filters.

Images

WooCommerce category filter image with name
  • What are image filters?: A grid of images, each representing one of the filter options (e.g. a category or an attribute). You can choose whether to show the image on its own, or to add a dark overlay with the option name over the image.
  • Hierarchical?: No - only top level options are included (e.g. parent categories).
  • Selection method: Multiple choice.
  • Recommended for: Visual types of product data where customers will appreciate being able to click on an image of what they are looking for, instead of having to read through a list of text options. For example, categories often work well when displayed as image filters.

Color swatches

WooCommerce faceted search filters
  • What are color swatch filters?: A grid of coloured squares, each representing a color attribute option. Customers click on a color to filter for products of that color. You can display the colors on their own, or with the name of each color alongside.
  • Hierarchical?: N/A
  • Selection method: Multiple choice.
  • Recommended for: Color attributes.

Choosing the right product filtering styles

Think about whether you're using the most appropriate style for each filter on your site. If not, then head over to Products → Filters and change it - it only takes a second!

Tip 2: Show WooCommerce product filtering in the right parts of your store

Did you know that there are 3 different ways that you can add filters to different parts of your store?

Method 1: Above your shop

WooCommerce add category filter above shop products

The most obvious way to show filters on your site is by displaying a filter group above your shop. You can enable this in the setup wizard, or on the plugin settings page at Products → Filters → Settings.

This method displays the filters as dropdowns above your default store pages (shop, category pages, etc.). But what if you want to add filters to the sidebar, or to pages other than your default store pages? That's when you need Methods 2 and 3.

Method 2: As sidebar widgets

WooCommerce sidebar widget filters

Lots of e-commerce stores display filters in the left or right sidebar of their shop pages. That's a great option because the customer can see all the options at once.

To add a filter group to the sidebar, go to Appearance → Widgets and use the 'Product Filters' widget. To show the widget on some pages but others, you can use a free plugin like Widget Options.

Method 3: As a shortcode

The final way to insert filters is a bit more technical than the others, but also the most flexible. You'll need this if you're creating custom pages to list products and want to display filters above - for example, if you're using a page builder plugin or our WooCommerce Product Table plugin.

To find the shortcode, go to Products → Filters and copy the shortcode for the relevant group. Paste it wherever you want the filters to appear - for example, above a product table shortcode, in a Gutenberg text or shortcode block, in an Elementor or Divi block, or anywhere else.

You can either use the shortcode as it comes, or configure it using the shortcode options.

Choose the right location for your WooCommerce product filtering

Armed with this information, think about whether you have added filters to all the locations where they would be helpful to your customers.

Tip 3: Choose between horizontal, vertical and hidden filters

Amazingly, the WooCommerce Product Filters plugin provides three layout options for your filters.

That's right - you can choose between:

  • Horizontal layout - This normally appears above the list of products, with each filter hidden within a dropdown.
  • Vertical layout - This is normally use for sidebar widget filters.
  • Hidden filters - You can also display a 'Show filters' button above the list of products, which opens the filters in a slide-out panel.
Show hidden filters button

So, how can you choose which layout(s) to use in your store? Here are my top tips to help you decide:

  • Do your shop pages have a sidebar? If not, then you should definitely use the horizontal or hidden layout!
  • Do you want customers to be able to see all the filter options all the time? If so, then the vertical layout is best.
  • Do you have large numbers of filters? Consider using a combination of both layouts, as in the above screenshot.
  • Are you worried about cluttering up the page? Hide the filters so that customers must click a button to view them.

What about mobile?

WooCommerce filter plugin with mobile slide-out panel

So far, we've only considered desktop users. Most mobile sites don't have a sidebar so even if you add filter widgets on desktop, WooCommerce Product Filters will automatically hide these and display a 'Show filters' button on mobile instead.

This means that for mobile users, your only choices are to either show the 'Show filters' button, or to show the horizontal filters above the list of products. I recommend using the 'Show filters' button if you have lots of filters, and making them visible above the list of products if you just have a few.

WooCommerce mobile filters above shop

Use these options to plan the best possible locations for the filters in your store - whatever devices your customers are using.

Tip 4: List products in a structured order form with filtering

If you use product filters on your e-commerce site, chances are that you have lots of products. After all, that's why you need filters!

And when you have lots of products, the default store layout often isn't good enough. Each product takes up a lot of space, and even after using the filters, it's still difficult for customers to compare products and make quick buying decisions. It's also a pain for customers to have to visit a separate page for each product in order to choose quantities and variations, and add to the cart.

You can solve all these problems by using WooCommerce Product Filters with our other plugin, WooCommerce Product Table:

WooCommerce Product Filters Table Integration
A product table with WooCommerce product filtering

WooCommerce Product Table lists your products in a conversion-optimized one-page order form. Customers can view more products per page, and choose quantities and variations without leaving the page.

It's a much faster way to buy. And as everyone knows, faster shopping means more sales for you!

Tip 5: Decide whether to hide the product filtering

Next, let's look at whether your store will be better if you show or hide your product filters.

Most WooCommerce stores show the filters all the time. However, if you look at some of the world's leading e-commerce sites outside of WordPress - particularly clothes stores - then you'll see that this isn't always the best option. Depending on the layout of your store and the type of products, it's often better to hide the filters so that customers can choose whether to see them.

The WooCommerce Product Filters plugin provides several ways to do this:

Slide-out panel

WooCommerce Product Filters slide-out panel

You can hide filters from the page on mobile and/or desktop. When you do this, customers can click a button to view the filters in a user-friendly slide-out panel.  That way, customers can still filter your products - but you keep the page clean and clutter-free.

Add open/close toggles

Maybe you don't want to hide the filters all the time, but you want them to take up less space on the page.

You can achieve this by enabling the Toggle option in WooCommerce Product Filters. Either show the toggles as open or closed by default, and customers can click on a filter heading to show and hide the options within:

WooCommerce toggle product filters open closed

Take a look at your store and think about whether you're using the visibility options in the best possible way for your customers. It can make a big difference!

Tip 6: Should you use AJAX filtering?

When people first install the WooCommerce Product Filters plugin, they tend to select the "Instant" filtering option without really thinking about it. But is it definitely best option for your store?

Now I'm going to tell you a bit about the "Button click" option and help you think about which filter mode you should be using.

WooCommerce Product Filters comes with a choice of 2 filter modes:

  • Instant - This uses AJAX to filter the list of products as soon as the customer clicks on an option.
  • Button click - Customers can select as many options as they like from the filters, and then click an 'Apply' button to view the results.

Most of the world's top e-commerce stores use AJAX filtering. That's because it reduces the number of clicks for the customer, and shows results without reloading the page.

However, AJAX filtering can sometimes create a worse user experience. This can happen when you sell the sort of products where customers want to make all their choices in one go, and only view the results at the end of the process. ]

Some examples

To illustrate this, let's look at two possible use cases:

  • Clothes websiteI'd generally recommend AJAX filtering for this because the customer wants to see some products after selecting some initial filters, and then might select additional options to fine-tune the results. When they start shopping, they don't know the exact combination they're looking for. They'll keep selecting filters one at a time until they find items they like.
  • Car parts websiteWith this type of product, customers know exactly what they need. They want to select all the criteria from faceted search filters and then view the results all at once. As a result, I'd recommend the button click method for this type of store.

Based on the above, which filter mode do you think is best for your store? It's easy to change - just head to Products → Filters → Settings.

Tip 7: Check the order of your filtering options

And finally - another thing to check is the order of your filters. There are two things to check here:

Are your filters in the right order?

When you created your WooCommerce product filtering options you might have added them to the end of the group without considering the order. Edit the filter group and drag and drop the sort icons to put them in the best possible order.

I recommend putting the most high level filters first to create a logical journey for your customers. For example, it would make sense to put the category filter first. Next, you can have the most important attribute filters, and then general data such as price filter and average  rating.

Are the options within each filter ordered correctly?

It's also worth checking the order of the options within each individual filter. For example, if you have created a filter using the 'Size' attribute then you may want to order the attributes in size order instead of alphabetically.

Category, Attribute, Color and Taxonomy filters are ordered via the term_order option that is built into WordPress. While WordPress doesn't have a built-in way to re-order taxonomy terms, you can change the order using free plugins such as Category Order and Taxonomy Terms Order.

Once your filters are up to date and ordered logically, it will be easier then ever for customers to find what they're looking for.

Where to get the plugin

We built the Product Filters plugin to allow any store owner to add professional-quality product filtering to WooCommerce.

There's no one-size-fits-all approach, and different stores work best with different types and configurations of filtering.

As a result, use the above tips when adding WooCommerce product filtering to your store. Think about the types of products you sell, and what will create the best possible experience for your customers. Create logical filtering options that suit your products and guide customers to the products they're looking for. As a result, they're much more likely to find what they're looking for - resulting in more sales for you!

How to Filter Products by Category

If you run a WooCommerce store with lots of categories, then it's essential for customers to have a quick way to find products by category. Discover the easy way to add a WooCommerce category filter to your store, and watch your sales grow!

Product filters add value to online stores and help customers to find products quickly and easily. It’s no surprise that more and more store owners are adding product filters to their online stores.

However, the filters that come with the WooCommerce plugin are pretty basic and don’t include a category filter. There's a basic categories widget that simply lists the categories in your store with links to each one, but no actual category filter widget.

When your customers shop in popular non-WordPress online stores, they're used to being able to filter by category. So why is this so difficult in WordPress and WooCommerce?!

An e-commerce site with category filter checkboxes

Fortunately, there's an easy solution. Keep reading to learn how to add a category filter in WooCommerce. You'll discover how to add WooCommerce filter by category using checkboxes, just like in the example above. And for even more flexibility, you'll learn how to create other types of category filter. This might include clickable images, radio buttons, dropdown lists, text labels, and more.

Why do you need product filters and how does filtering by category help?

WooCommerce is the best e-commerce platform to sell online with ease. It’s also the most popular.

However, the built-in widgets for filters are pretty limited. You can only filter products by basic information such as attribute, price or rating. The page refreshes every time a customer chooses an option from a filter. And even worse - there's no built-in WooCommerce category filter. As a result, there’s no way for customers to refine their search by category and see more specific types of products.

By adding WooCommerce category filters to your store, you make it easy for customers to narrow down their search and find the products they want to buy faster. The faster they find the products, the faster they’ll move to checkout.

Let’s step through some of the main benefits of filtering by category in WooCommerce:

  • Improves user experience. When customers are given the option to filter by a category, they have an easier time finding the exact types of products they’re looking for.
  • Reduces your bounce rate. After running a search if customers see the type of product they’re looking to purchase quickly, they’ll be more likely to visit the product page, add it to their cart, and proceed to checkout.
  • Increases product views. By allowing customers to filter by category, you can increase product views. Customers can quickly refine their search and see the exact types of products they’re looking for.
  • Boosts your store conversions. As a WooCommerce store owner, if you show products that customers are looking for, they’ll be more likely to act on your conversion goal.

And the best thing about filtering by category?

The best part is that WooCommerce category filters are even more useful when used alongside other types of filters. For example, if you set up a category filter with a price filter, attribute filter, and in-stock status filter, customers will be able to refine their search even more.

Picture this: a customer is looking to buy a red t-shirt and has a $40 budget.

Scenario 1: You’re not using category filters – The customer will use the category widget to see all T-shirt products. They’ll see a product catalog of dozens of t-shirts to browse through to find a red one that’s under $40.

Scenario 2: You’re using category filters – The customer will use category filters to make the following selections and refine their search:

  • Category: T-shirt
  • Color: Red
  • Price range: $20 to $40

And the result? They’ll only see red t-shirts that are within their budget.

Introducing WooCommerce Product Filters

WooCommerce faceted search filters
Display category filters as images, dropdowns, checkboxes - whatever you like!

The WooCommerce Product Filters plugin makes it easy for store owners to set up AJAX product filters, including by category, product attributes, or taxonomies. It lets you create different types of filters and display multiple filters on your WooCommerce shop pages and category pages at a time.

The WooCommerce Product Filters plugin was built out of a necessity for a high-quality AJAX product filter plugin for WooCommerce that’s easy for non-coders to use. Store owners can use it to add a customized product category filter to their WooCommerce store in a few steps.

The product filters can be based on categories, attributes, custom taxonomies, product tags, colors, price sliders, and more. You can also display the total product count next to each filter option. It's perfect for anyone looking for a WooCommerce category filter plugin.

Different options for adding a category filter to WooCommerce

Using the WooCommerce Product Filters plugin, you can add a category filter to your store in a variety of different ways:

Dropdowns

WooCommerce category filter dropdown

The dropdowns option lets you display the different categories in a hierarchical list view. Customers can select a single category at a time to filter their search results. This is useful for stores that sell lots of different products organized into a few different categories and sub-categories. The parent-child category relationships are visible at a glance.

A huge benefit of creating category filter dropdowns is that you can make them dependent on each other. This means that only one dropdown appears when the page first loads, and then additional dropdowns appear as the customer makes their selections. Linked filters like this are popular for websites that structure products in a hierarchical way, for example when selling car parts online:

WooCommerce stepped filter dropdowns

Checkboxes

WooCommerce category filter plugin checkbox

The checkboxes WooCommerce category filter lets you display categories with a checkbox next to each one. This way, customers can select multiple categories. This is useful for stores that sell lots of similar types of products such as clothing. Customers can tick the checkboxes next to Blouses, T-shirts, Tunics, and Dress shirts to find a suitable top.

Category checkbox filters are probably the most popular way of filtering by category. That's because it's so easy for customers to select multiple categories at a time.

Radio buttons

WooCommerce category radio button filters

The radio buttons category filter lets you display categories with radio buttons next to each one. This way, customers can filter by category to see the available categories at a glance and select the one they want to filter by.

With radio button filters, you can only select one category at a time.

Text labels

WooCommerce filter by category label

The labels option lets you display WooCommerce categories like a tag cloud. Customers can quickly click on a label to view products from that category only.

Like the category checkbox filtering, you can filter by multiple text labels at a time.

Images

The images option lets you display category image thumbnails, with or without the category name over it. This way, customers can click on the category image to refine their search. It's a much more visual way to filter by category in WooCommerce.

As with WooCommerce category checkbox and label filters, image filters support multiple selections.

Add a category filter the list of products

WooCommerce add category filter above shop products

All of the screenshots above show WooCommerce category filters as sidebar widgets. However, that's not the only option. You can also show each type of category filter at the top of your shop.

With this option, the filters appear as dropdowns at the top of the main Shop page, category pages, and so on. You can display any of the category filter styles (checkboxes, radio buttons, images etc.) within the dropdown. For example, the screenshot above shows how a category checkbox filter looks at the top of the shop.

Mobile category filters

Finally, let's not forget mobile filtering. The majority of e-commerce purchases now take place on mobile devices. However, filtering requires careful thought on mobiles because of the small screen size. You don't want the filters to take up the whole page!

Fortunately, the WooCommerce Product Filters plugin handles this perfectly in its category filters. You can either show the mobile filters as dropdowns above the shop, or in a mobile-friendly slide-out panel:

Organizing WooCommerce category filters

One of the standout features of this WooCommerce category filter plugin is that it lets you create individual filters and then structure them into groups. The groups can then be added anywhere on your WordPress website or automatically be enabled on store pages.

The plugin lets you customize filters to offer dependent items, hide invalid filters, and hide products that are uncategorized. It also enhances the customer experience by offering the option to clear filters and scroll to the top of the page at the click of a button.

Finally, WooCommerce Product Filters lets you display the product count against each filter option. This means that you can show the number of products in each category next to the category name in the filter.

How to add WooCommerce category filters using the Product Filters plugin

Here’s what you need to do to add WooCommerce category filters to your online store:

Step #1: Install and activate the WooCommerce Product Filters plugin

Get the WooCommerce Product Filters plugin if you haven’t done so already. Install and activate it on your WordPress site.

The filter plugin setup wizard will now open. Use it to activate your license key and choose other options to configure your filters. For example, you can:

  • Choose whether to use instant AJAX category filters or whether to apply filters when the customer clicks a button.
  • Configure filter visibility to deliver a good user experience to your customers. You can show or hide filters by default, either on mobile or desktop.
  • Customize the text - you can change the text that appears on your filters to make it more relevant to your store, and in your language.
  • Hide filters within space-saving toggles like this:
WooCommerce toggle product filters open closed

Step #2: Create filters and group filters together

The WooCommerce Product Filters plugin makes it easy to create a category filter:

  1. Navigate to Products Filters in the WordPress panel.
  2. Either open the default filter group or create a new one.
  3. On the 'Edit filter group', page, click the 'Add new filter' button.
  4. Fill in the details to add a new filter. You can set the name, filter by, filter type, and assign to group options. Set the filter data option to Categories to create a category filter.
  5. When you select a category filter, an option appears letting you choose the style of the WooCommerce category filter. This is where you choose whether you want checkboxes, a dropdown, images, etc.
  6. Repeat this step to create more filters. For example, you might want to create an attributes filter and price filter to go with the categories filter. This way, customers will be able to narrow down their search even further.
WooCommerce product filter styles types
Choose a style for your WooCommerce product categories filter

Tip: If you're creating category dropdown filters, then you can choose whether they will always be visible, or whether additional dropdowns will appear as the customer makes their selections. (Like in a car parts shop.) To do this, select the "Display categories and sub-categories as separate dropdowns" option.

woocommerce dynamic filter categories and subcategories in simple or different dropdowns

Step #3: Add filters to shop pages

It's easy to display a group of filters anywhere on your WooCommerce site.

You can configure the WooCommerce Product Filters plugin’s settings to enable filters on the shop page and archive pages. The filter group you select will appear on the product list pages that WooCommerce creates – including the shop pages, categories page, and product tag archives.

By default, the category filter will appear in a horizontal layout above the list of products. Optionally, you can choose to display the filters in a sidebar or on specific pages using shortcodes. Simply go to Appearance → Widgets, add a 'Product Filters' widget to the sidebar, and select the group containing your category filter:

WooCommerce product attribute filter widget

Alternatively, the category filter plugin comes with a shortcode which you can use to display filters anywhere. This is useful if you're listing your products in custom ways, for example using Gutenberg, Elementor, Divi Builder, or the [products] shortcode that comes with WooCommerce. Just copy the shortcode from the main list of filter groups in the admin, and add it where you want the filters to appear. (See the plugin documentation for a list of shortcode options.)

WooCommerce products shortcode with filter shortcode
An example of a store which has added a filter group above the products shortcode which comes with WooCommerce

This method is also useful when you're using WooCommerce Product Filters with third party plugins. For example, it integrates with the WooCommerce Product Table plugin so that you can create one page order forms with category filters:

WooCommerce Product Filters Table Integration
Using WooCommerce Product Filters with the Product Table plugin

Add category filters to WooCommerce today

Adding WooCommerce category filters to your online store makes it easy for customers to narrow down their product search and quickly find the product they’re looking for. The easiest way to do this is by using the WooCommerce Product Filters plugin.

This well-designed plugin makes it incredibly easy for non-coders and developers to add product category filters. It can save you valuable time and effort, while also enabling you to have a professional and organized store. And the end result? More sales for you.

Ready to set up a category filter in WooCommerce? Get the WooCommerce Product Filters plugin today!

WooCommerce Product Table is our bestselling plugin of all time. We've been working hard to make it even better. Keep reading to learn what's new.

We've just released version 3.0 of our WooCommerce Product Table plugin. Here's a summary of the new features and improvements.

Show hidden products

The top item on our feature request list is an option to display hidden products in the table.

Until now, WooCommerce Product Table always respected the WooCommerce visibility settings for each product. These are:

  • Shop and search results
  • Shop only
  • Search results only
  • Hidden

Lots of our customers have asked for a way to display hidden products in the product table. For example, you might need this if you use product tables to sell specific products which aren't available in your main shop.

In version 3.0, we've added a new option to the plugin settings page which lets you show hidden products in the table.

Variation name options for variable products

Prices for multiple products listed in a table
A product table with each variation listed on its own row

When you use the 'separate variations' option to list each variation on its own row in the table, until now the name of each variation would include both the product name and its attributes. For example, "Organic T-Shirt - Small, White".

Some of our customers want the flexibility to only show the product name or attributes, but not both. This is useful if a table already includes separate columns for the attributes; or if you're listing variations on the single product page and don't need to repeat the product name in every row.

You can now choose the variation name format on the plugin settings page.

New 'Date modified' column

We've also had requests for a 'Date modified' column which shows when the product was last updated. Previously, our knowledge base contained a code snippet on how to do this. We have now added it as a column, so you can add a date_modified column without needing to edit any code.

No more empty short descriptions

If you've included the product short description in the table, then it's a shame when this appears empty for products that don't have a short description. To stop this from happening, the main product description will now appear if no short description is available. This matches the logic in our other plugins, such as WooCommerce Restaurant Ordering.

As well as these new features, you'll benefit from many other fixes and improvements - check out the full list in the WooCommerce Product Table changelog.

Where to get WooCommerce Product Table version 3.0

If you're already using WooCommerce Product Table then you can update to version 3.0 via the WordPress dashboard. Otherwise, get the plugin and transform the way you display your products today!