


If you’re looking to add a product builder to your online store, it simply can’t be done with WooCommerce as it comes. But if you want to allow customers to build custom products without having to add a huge number of variations, you can achieve this by installing the right plugin.
By the end of this article, you’ll know exactly how to add a product builder to WooCommerce. This will allow customers to build products using a simple and flexible interface.
But before we get into the detail, let’s consider why having a product builder is a must-have feature for your store. After that, I'll show you how to create a WooCommerce customizable product builder with the best plugin on the market:
Why you might want to use a product builder in WooCommerce
Imagine this: You sell shoes in WooCommerce. A customer lands on your product page and is excited about the shoe in front of them. They love the sneaker design, the material, and the price. Great! Except, the shoe laces are not in the color they like.
They’re struggling with the purchase because they know this color doesn’t particularly suit them or their personal preferences, but they can’t see other colors available (although you have more!). Without a proper product builder in your WooCommerce store, you might lose this potential customer.
You may also like: Use WooCommerce to sell 'Build Your Own' products: Veg boxes, gift baskets & more!
If you fit into any of these categories then you’ll benefit from a product builder plugin
You sell build-your-own products
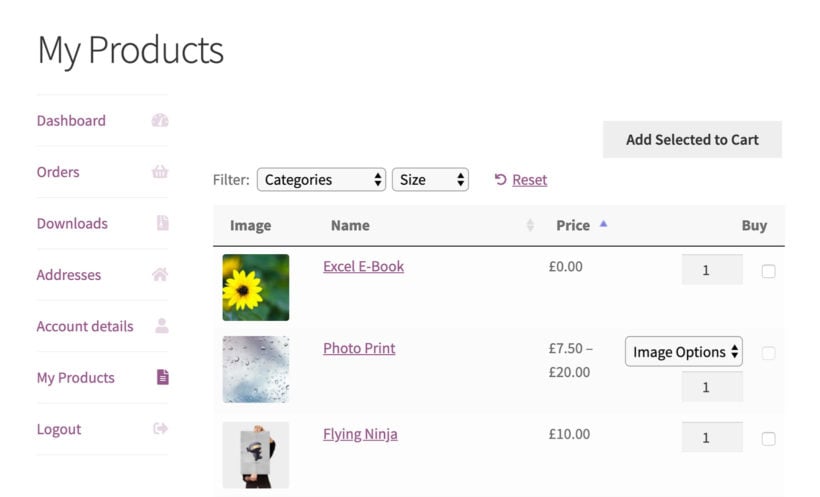
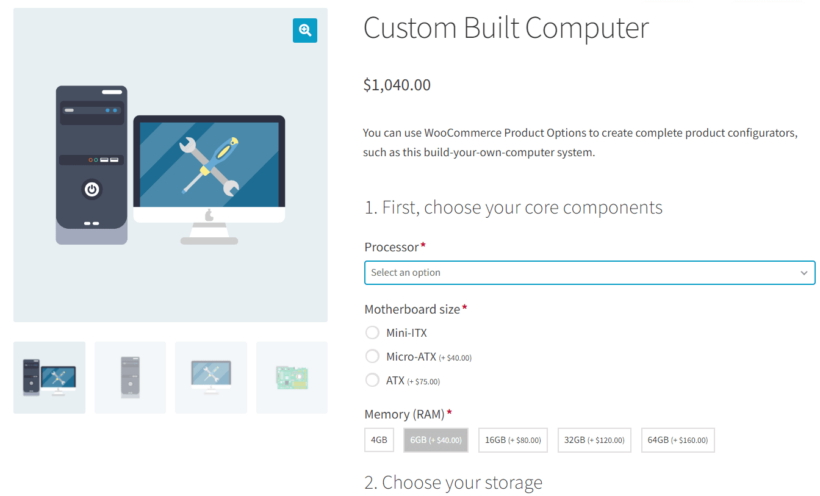
If you sell fully configurable products then you need a way to allow customers to configure them to their specifications. A custom built computer is an excellent example of this, as in the screenshot above.
Customers can make a range of technical decisions to build the computer step-by-step. They can select components, view the final price, and order online. That's much more efficient then making them phone you and order manually!
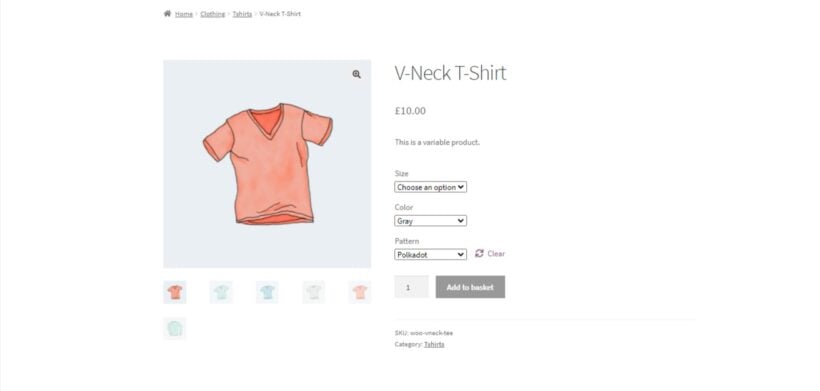
Customizable clothing or accessories
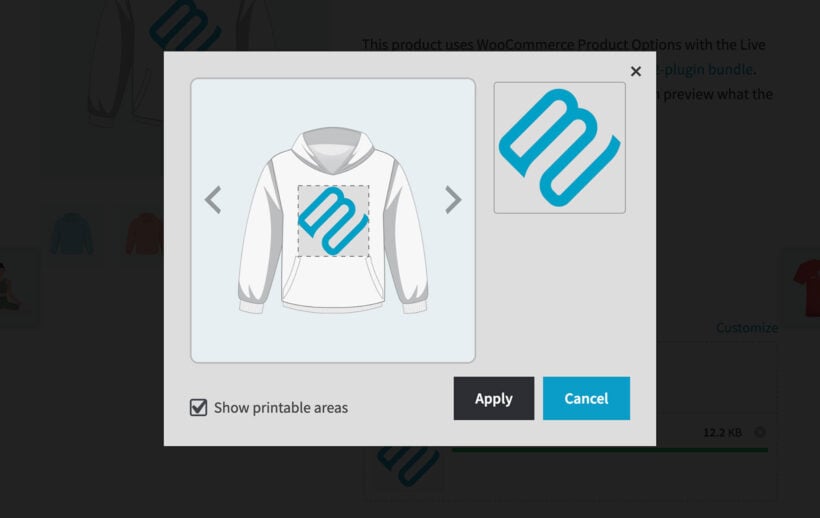
Let’s use a custom printed hoodie as an example of a customizable product. Lots of stores now sell personalized clothing, where customers can upload a file and configure the look of the product. With a product builder plugin, your customer will be able to seamlessly upload and preview their custom t-shirt or hoodie.
You sell customizable furniture
If you’re in the furniture business, you might want to offer your customers different fabric colors or leg combinations. If this is the case, you’ll likely want a visible representation of the final selected product rather than having them click through back and forth from dropdown selections.
You sell sports equipment
The tennis player that comes to your store to purchase a racket will want the ability to modify their grip and head size, as well as the racket’s weight, depending upon their level. You don’t want them leaving the product page to go search for these attributes on a separate screen.
If your products are configurable then you’ll need a WooCommerce product builder plugin to help you take your store to the next level.
Can't I just create a product builder using product variations?
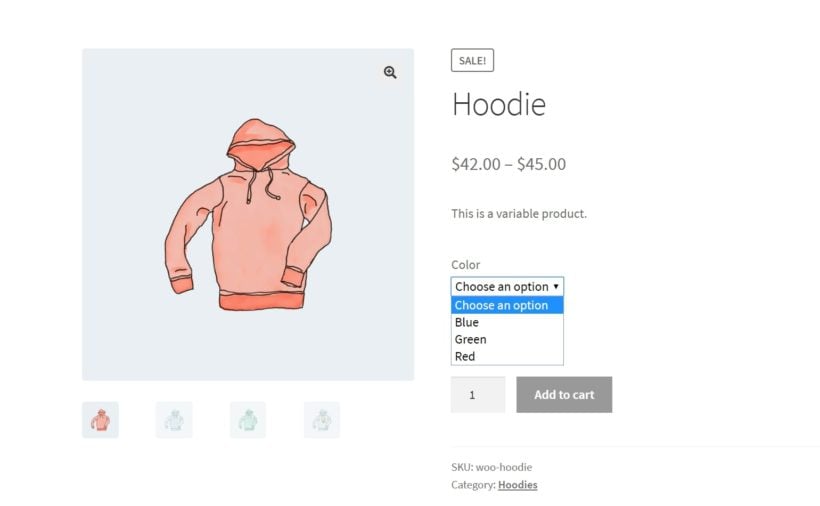
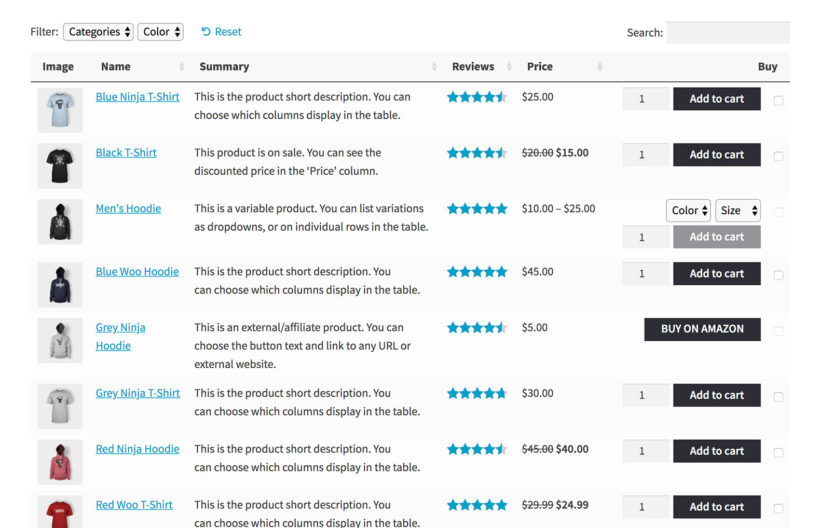
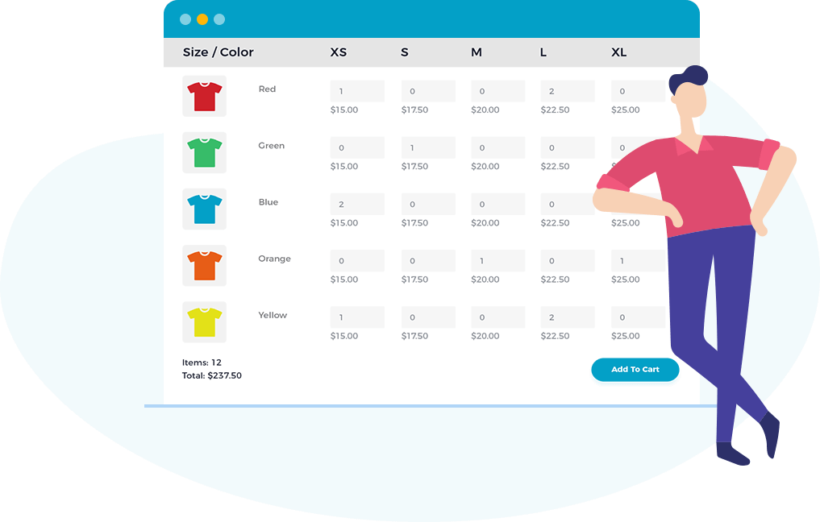
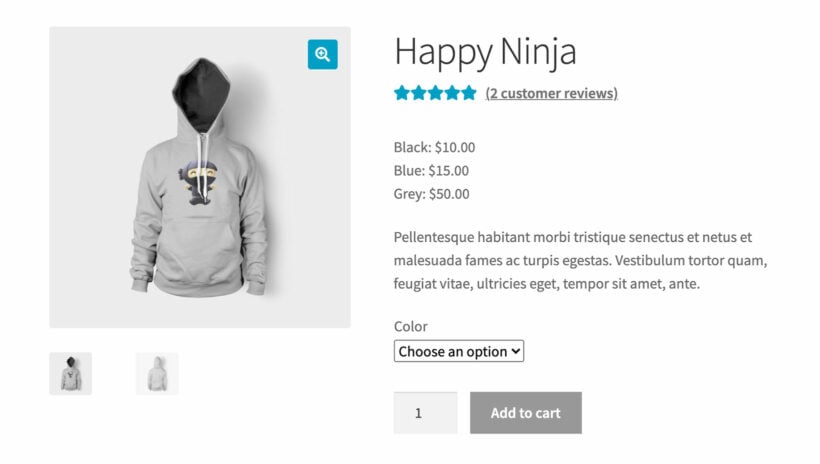
Yes! You can do most of what I described above using product variations. However, the problem with variations is that each option will be displayed in a dropdown list. To purchase product variations, customers must select their chosen combination from a series of dropdowns. That's not a very visual way to configure a product, and won't present your site as very innovative or professional. It's also time-consuming for the customer compared to quickly ticking boxes for their required options, or clicking on images.
If you're using variable products then it's best to use it with a WooCommerce product builder plugin so that you can display the variations in more interactive ways.
Even so, sometimes you may want to create options directly in the product builder plugin instead of using variations. That's because:
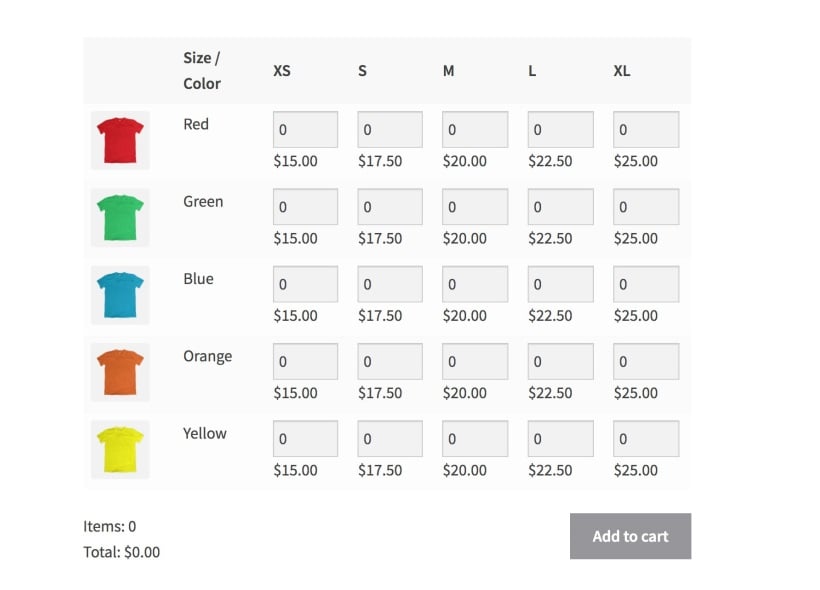
- It's time-consuming to create a variation for every possible combinationImagine that you're selling a tennis racket which has 3 grip settings, 5 head sizes and 4 weight options. To set this up as a variable product, you'd need to create 60 variations - each with its own price, stock information, image, and so on. What a nightmare!
- You can only select one variation at a timeThis is a fundamental limitation of WooCommerce product variations, even if you're displaying them using a product builder plugin. The customer must select 1 item from each attribute, with no multi-select option. If you need multi-select, then variations aren't suitable.
Keep reading to discover the best plugin to solve these problems - whether or not you're using product variations.
Which is the best WooCommerce product builder plugin?

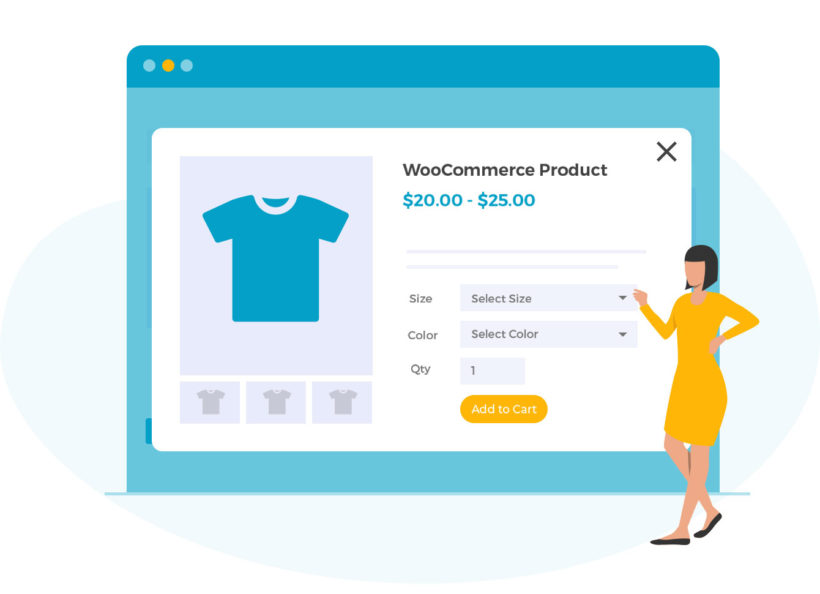
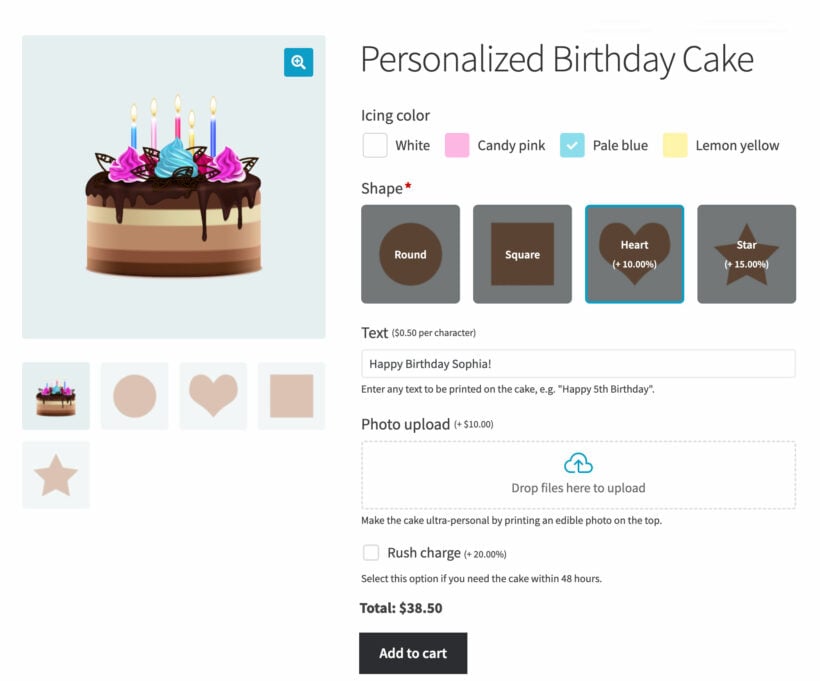
The WooCommerce Product Options plugin is perfect for creating a custom product configurator. It works by letting you add a huge range of options to your products, which are infinitely flexible and easy to set up and manage.
For example, you can add checkboxes, radio buttons, clickable images, color swatches, text buttons, file upload fields, text fields and more. Given the variety of options available, customers will enjoy building the product to their exact specification.
You can either create them directly in the plugin, or display existing variations using the styles provided by WooCommerce Product Options.
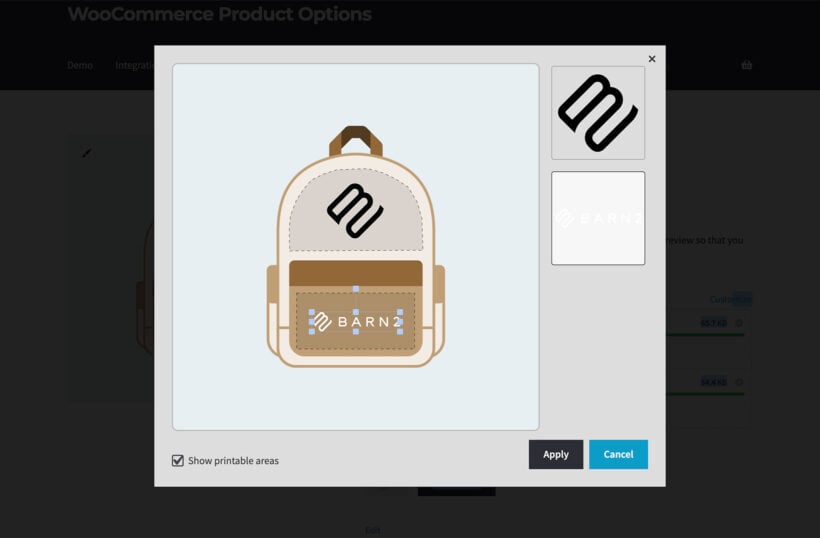
If the WooCommerce product builder lets customers upload an image for personalization, then you can also let them display a live preview of the finished product.
You can add extra prices and fees for each option in the product configurator. This adjusts the price as the customer configures their products, creating a completely custom product just for them. Alternatively, you can create a custom price calculator for more complex pricing rules.
How to add a custom product builder to WooCommerce
To use WooCommerce Product Options to create an interactive product builder, you need to add a series of extra options to your products.
- First, get the plugin and install it on your WordPress site.
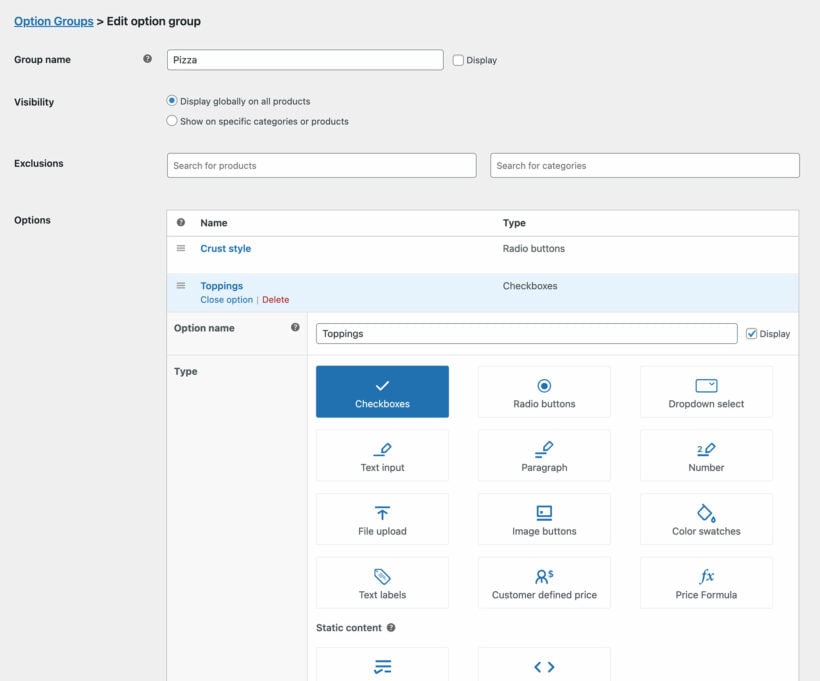
- Next, go to Products → Product Options.
- Create an option group and select the product(s) that you want the product builder to appear on.
- Now add your first option to the builder. Choose what you want it to look like (checkboxes, dropdpwn lists, clickable images, etc.). Configure it as needed, for example to add prices, minimum/maximum quantities, or conditional logic so that it only appears when the customer selects a different option.
- Repeat step 4 to add as many options as you like to the WooCommerce product builder.
- Save the option group.
Now view the product that you just added the configurator to. You'll see a highly visual product configurator on the product page. Customers can select options one by one to build their custom product.
Create your WooCommerce product builder today
That’s it! You’re now ready to allow customers to create their own products in your WooCommerce store.
The only plugin you'll need is WooCommerce Product Options, which adds a range of customizable options to the product page. It's perfect for adding a wide range of visually appealing options to create an interactive product builder.
Set it up today and add infinite flexibility to your store 🛠️🛒