Some WooCommerce stores need a way for customers to set priorities when placing an order. By entering a number for each product before adding to the cart, they can indicate how you should prioritize their choices. For example, a customer might be selecting a selection of similar items without knowing which are available. You will ship a product to them based on the priorities they have entered against each item.
The best way to let customers order similar items and set priorities is to list the products in an order form style layout. This makes it easy for them to view multiple products alongside one another and choose their favourites. They can enter their priorities and add the selected products to the cart.
The good news is that you can let your users prioritize by combining two easy-to-use plugins. These are: WooCommerce Product Table and the WooCommerce Product Options plugin. They're both easy to set up, and you don't need to add or edit any code.
Here's how to do it!
Before you start
I'm assuming that you already have a WordPress WooCommerce site with some products added. If you haven't got to this stage yet, do it now. The WooCommerce documentation has an excellent Getting Started section.
Step 1: Set up WooCommerce Product Options to let customers prioritize products
To set priorities, go to Products → Options in the WordPress admin. This will add the priority options to all your products, or to specific products or categories only.
Next, choose which add-ons you'll use to prioritize products
There are 3 types of add-on option that are suitable for letting customers prioritize products. Each of these will appear in the 'add to cart' button of your product table order form. The options are:
Radio buttons - Adds a clickable circle for each priority. Customers can only choose 1 priority for each product.
Select lists - Customers select the priority from a dropdown list of predefined priority options.
Custom input (Only numbers) - Users can type a priority value into a box for each item.
Dropdown/select box
Textarea (number)
Once you've chosen which type of add-on you'll use to collect customers' priorities, carry on below:
Set up your add-ons like the screenshot below, choosing whichever option type you like.
I used 'Radio buttons' in this example. Radio buttons and select boxes need multiple lines, as shown below. If you're using the Text entry so that customers can enter a number in a box, you just need 1 line. Add clear instructions to the description like 'Set Priority (1-5)'.
The table builder will open, or you can access it via Products → Product Tables.
Go through each step of the builder and choose how you want the table to work.
The final page will give you a shortcode for inserting the table. Copy this.
Create a page in WordPress and add the shortcode, or insert the 'Product Table' Gutenberg block instead.
Check the page and you'll see your products listed in a neat order form layout.
Step 3: Test your product priority options
Lastly, view the product table and make sure the priorities are added to the cart correctly. In this screenshot, you can see the products listed with their priority options in the cart widget on the right:
Can't I just use variable products?
If you don't want to use the WooCommerce Product Options plugin then you can collect priorities using normal product variations.
I like add-on options because they're easier to set up behind the scenes than variations, and you can collect priorities in different ways such as radio buttons and text entry boxes. However, you can use product variations to add a 'Choose priority' dropdown list which will appear in your product table order form, just like the 'Select list' add-on type.
Here are the 2 extra bits of information that you need to use variations to set priorities and display them in a product table order form:
To add product variations, go to the 'Add/Edit Product' page for each product. Add each priority option as an attribute, and then go to the variations tab and create variations based on these attributes.
Now your customers can set priorities in WooCommerce!
Using WooCommerce to set priorities is definitely a niche case, but lots of people need to do it.
This tutorial will help you set up WooCommerce so that customers can choose and prioritize products before adding them to the cart.
Lots of people use WooCommerce to sell user-specific products. For example, you might want to sell different apparel or merchandise to sports teams or soccer clubs. Maybe you privately sell uniform products to to schools. You might sell branded company workwear with the company's logo, and need a hidden area of WooCommerce for each customer.
Perhaps you sell the same products to each customer, but with different prices. Maybe you're a health practitioner or service provider, and only sell to existing patients rather than the general public.
Whatever your reason for creating WooCommerce user-specific products, I'll show you how to do it. And the best thing is, it's really easy and you don't need to edit any code!
This simple plugin lets you add hidden product categories to any WordPress WooCommerce store. You can have a separate category for each customer, each with their own user-specific items.
Your sports teams, clubs, companies or other types of customer will use a simple password to log into their organization's hidden category. Or if you prefer, you can automatically restrict your user-specific categories so that each one is only visible to a specific logged in user. Once they've unlocked their private WooCommerce category, they can view and buy their user-specific products. No one else will even know that their hidden products exist!
You can also use this plugin for user-specific pricing in WooCommerce. Simply follow the instructions in this tutorial, and add a different version of each product - each with its own unique price - to each customer's category.
Tips:
If you need a way to quickly clone products for each organization, then the free Duplicate Posts plugin is perfect.
If you're cloning products and want to manage inventory across each version of the product then we recommend the Group Stock Manager plugin. This lets you share stock levels across multiple products.
Let's get started.
Before you follow this tutorial
Before you start, you should have a WordPress website set up with the free WooCommerce plugin installed. The official WooCommerce documentation is a good starting point.
You can then use this tutorial to create your WooCommerce user-specific products and categories.
How to create user-specific product categories in WooCommerce
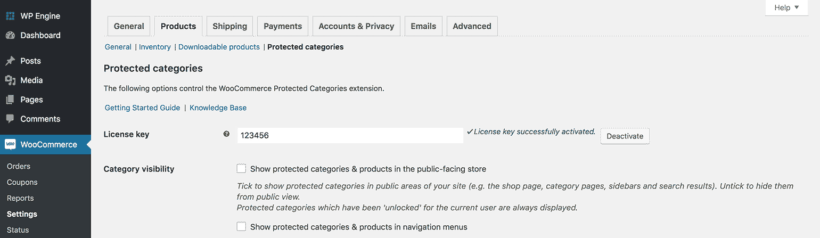
Configure the plugin on the WooCommerce Protected Categories settings pageFirst, get the WooCommerce Protected Categories plugin. You'll use this to create your hidden customer-specific products.
Secondly, install the plugin and enter your license key on the plugin settings page. You'll find this in the order confirmation email.
Also on the plugin settings page, DO NOT tick the boxes to show your protected categories and products in the public parts of your store. This is important, as your WooCommerce user-specific products should only be visible to sports teams and organizations with the correct password.
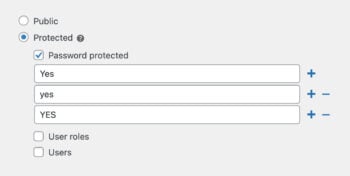
Next, go to Products -> Categories in the WordPress admin. Create a separate category for each sports club/organization that you wish to sell user-specific products to. Tick 'Protected' and either password protect it, or restrict it to a specific user.
If you want to provide multiple categories for each organization, then you can do this by adding 1 or more sub-categories. You can create nested structures with as many sub-category levels as you like. As long as you set all the sub-categories to 'Public' and select the organization's main password-protected category as the 'Parent', all the sub-categories and their products inherit the same protection. Organizations only need to login to their account or enter a password once to unlock their whole hidden area.
Now add your user-specific products
Now, you can add all the user-specific products. For each one, tick the appropriate product category. Leave the product visibility settings as the default. The plugin will automatically protect them with the same password(s) as the protected category.
Lastly, create a user-specific category login page. This depends on whether you've set up password-protected or user restricted categories:
WooCommerce password protectedcategories. Add the shortcode [category_login] to any page of your site. All the sports teams/organizations will use this login page to access their user-specific products. The plugin will redirect them to their own personal category when they enter the password.
Now, link to this page in any way you like, for example from your navigation menu, website header or footer. Or you can keep the login page hidden and email it to your customers instead.
User restricted categories - Add a link to a front end login page. This could be the main WooCommerce 'Account' page, which displays a login form to logged out users and guests. Or you could install a front end login plugin such as Theme My Login. Either way, users can use this page to login to their account and unlock their hidden products.
Finally, you can instantly redirect customers to their personal WooCommerce store by installing the free Peter's Login Redirect plugin. This has a handy feature to add a custom redirect URL for each individual user. Simply add the URL of their hidden WooCommerce category.
And that's it!
In 7 simple steps, you have created WooCommerce user-specific products and categories.
The sports teams or other types of organization will visit your website and access the login page. They will enter the password for their user-specific category, or log in to their WordPress user account. They will be redirected to the correct hidden category containing their user-specific products.
Each organization's category and their products are hidden from public view, so only people with the correct access details can see them. This includes hiding them from search engines and other places that people might accidentally find them.
Once your customers have found their user-specific products, they can add them to the cart and checkout using the standard WooCommerce checkout. You can use other plugins to add multiple payment gateways, shipping options, and everything else you need to make your store a success.
Bonus tip #1 - Get more sales with a WooCommerce product table layout
Before we finish, I'll tell you about another great plugin for selling WooCommerce customer-specific products.
Our bestselling WooCommerce Product Table plugin lists products in a space-saving table view. It's an ideal layout for user-specific products because you are selling to the same customers on a regular basis. They're already familiar with your products and would rather order quickly from a one-page WooCommerce order form. They don't want to scroll through large images and multiple pages of products.
The WooCommerce table view lets your customers see all their branded products in one place. They can quickly search, sort and filter the table to find what they want. The multi-select checkboxes make it easy to tick as many products as they need. Finally, they can click a single button to add everything to the cart.
WooCommerce Product Table integrates beautifully with WooCommerce Protected Categories. Once the customer has unlocked their user-specific category, their own personal products will appear in the product table. This means that you can create a product table listing all your products, and each customer will only be able to see their own personal products. Neat!
Bonus tip #2 - Sell customizable products with Product Add-Ons
Many WooCommerce stores sell customizable client-specific products. For example, perhaps you sell sportswear or workwear and the client needs to upload their logo. Maybe the client wants to add custom text which you will print on their products.
You can do all this by adding another Barn2 plugin, Product Options. This lets you add extra fields to your user-specific products, such as File Upload fields and Text Input boxes. These fields appear on the single product page. Your customers can provide the extra information, and you will receive it via email once they place their order.
What do you need user-specific products for?
I hope the advice in this tutorial is useful and helps you to create your own WooCommerce user-specific products and categories. I'd love to know what sorts of organization you sell to that have their own unique products.
Do you provided branded apparel to sports teams? Maybe you sell corporate workwear with the company's logo. Maybe you do something else that I haven't thought of! Please let me know in the comments.
A WooCommerce secret sale plugin is perfect for creating a hidden sale, with special discounted prices that only pre-approved customers can see. Today, I'm going to tell you how to create secret sales for your own WooCommerce store.
We'll do it using the WooCommerce Protected Categories plugin, which just takes a couple of minutes to set up. You'll have your secret sale up and running in no time!
How does the WooCommerce secret sale plugin work?
WooCommerce Protected Categories is the perfect WooCommerce secret sale plugin. It works by creating a hidden WooCommerce category for your secret sale. The sale category contains your discounted products with the special pricing.
It's completely hidden from the public parts of your site, so only people with access to this hidden category can see the sale prices and buy at the reduced rates. Everyone else continues to see the full priced version of each product. They'll have no idea that the secret sale even exists!
There are 2 ways to share access to your hidden WooCommerce secret sale category:
You can password protect the sale category with 1 or more secret passwords. Give the password to everyone who needs to access the secret sale.
Alternatively, you can mark the WooCommerce secret sale category as 'private' so that only logged in users with the correct role can see it.
Next, I'll show you how to create a secret sale in WooCommerce with both options.
To follow these instructions, I'm assuming that you already have a WooCommerce website with full-priced versions of the products that you want to include in the secret sale. (If not, then the official WooCommerce documentation will help you get to this stage.)
Use the instructions in the 'Getting Started' email to install the plugin and activate your license key.
On the plugin settings page, DO NOT tick the 2 options to show the hidden categories in the public parts of your store. You need the plugin to hide your secret sale products!
Now, go to Products > Categories in the WordPress admin. Create a category called 'Secret Sale' (or whatever you want to call it). Don't worry about protecting it for now - we'll do this in the next section.
If you want to sub-divide your secret sale into sub-categories, create these too. Select the main Secret Sale category as the 'Parent' of your sub-categories.
Next, install the free Duplicate Post WordPress plugin. Go to the plugin settings page and make sure you have enabled the option to duplicate the 'Products' post type.
How to duplicate a product in WooCommerce
Now go to the main list of Products in the WordPress admin (this is the 'Products' list on the left). Hover over each product that you want to include in the WooCommerce secret sale and click the 'Duplicate' link that appears.
This will clone the product and save the new version as a draft with '(Copy)' in the title. Click on each of your cloned products and make the following changes:
Remove '(Copy)' from the title.
Remove the product from the full-price category, and tick the secret sale category instead.
Change the main product price to the correct sale price.
Click the blue 'Update' button.
Now, your WooCommerce secret sale category contains a cloned version of each product with the special discounted price.
The next step is to protect your hidden sale category and hide it from public view.
Option 1 - Password protect your secret sale category
The easiest option is to password protect the category that you're using for the WooCommerce secret sale. Go back to the Edit Category page (Products > Categories in the WordPress admin). Click to edit the category and click the 'Password protected' option in the Visibility section. Enter 1 or more passwords to protect the secret sale category.
If your secret sale category has any sub-categories, leave these set to 'Public'. They will automatically be protected with the same password(s) as the main secret sale category, so customers can unlock the entire sale area with a single password.
Next, you need to create a way for eligible customers to access the WooCommerce secret sale category. You can either link directly to the secret sale category page (e.g. from your navigation menu or an email). Or, you can create a secret sale login form by adding the shortcode [category_login] anywhere on your site.
Either way, whenever someone tries to access the secret sale category (or one of its sub-categories), they must enter a valid password before they can see the sale products inside.
Option 2 - Restrict your sale category to specific logged in user roles
If all your customers already have a user account on your WordPress website, then you may want to automatically show the secret sale to eligible customers. This is more customer-friendly than forcing them to enter a separate password to unlock the secret sale.
You can achieve this using the private categories option in WooCommerce Protected Categories. Private categories (and their products and any sub-categories) are completely hidden from public view. They are visible to logged in users with the correct role.
Go to Products > Categories and click to edit your WooCommerce secret sale category.
Go to the Visibility section and select 'Private'.
Save the category.
Chose which user roles can access the WooCommerce secret sale
By default, this will make the secret sale products visible to logged in administrators and WooCommerce store managers. You probably want other user roles to be able to access the sale too. The free User Role Editor WordPress plugin is the solution. Follow these instructions to choose which role(s) have access to the private secret sale content.
If you want ALL logged in users to have access to the secret sale, then you need to make private content available to the Customer and Subscriber roles. If you want to create a separate user role for the secret sale, then you can do this too. That way, you can continue showing the prices to normal customers, with an extra user role for people who can access the secret sale.
Tip: You can change each customer's user role by going to the main Users page in the WordPress admin, clicking to edit the user, and selecting a different role from the dropdown.
How do users log into the secret sale?
If you're using the private categories option for your WooCommerce secret sale, then the discounted products will automatically be available to logged in users with the correct role. You don't need a separate login form for the secret sale.
Instead, customers can simply login using the standard login form for your WooCommerce store. If you haven't added one yet, then the WooCommerce 'My account' page will automatically show a login form to logged out users. Or if you prefer, you can create a login form using a plugin such as Theme My Login. Either way, logging in will unlock the secret sale for the correct user roles.
Ending your WooCommerce secret sale
All good things come to an end, and secret sales are no exception.
When it's time to end your secret sale, it just takes a minute to close it down:
Use the free Redirection WordPress plugin to automatically direct everyone who tries to access your secret sale category to your main WooCommerce store. This will prevent people from seeing any broken links, for example if they have bookmarked the sale page. If you want to be really belt and braces, then you can also do the same for your sale products.
Next, you can either delete your secret sale category completely via Products > Categories. Or, if you're planning to reactivate your WooCommerce secret sale in future, then just change the password to something that no one else knows. That way, you can easily create new sales in future, but you've locked everyone out for the time being. (If the category is set to private, then you just need to switch it to 'Password protected' and add a password.)
Decide whether to delete your sale products or keep them dormant until the next secret sale. If you decided to keep them, then you don't need to worry about anyone seeing the discounted prices while the sale is inactive. They're still in the password protected category and will remain hidden from public view.
Now you're ready to set up the WooCommerce secret sale plugin
And that's it! In this tutorial, I've told you everything you need to know about how to create a WooCommerce secret sale. You can create a category for your sale, add a discounted version of each product, and hide it from public view. I've shown you how to password protected the secret sale, or make it available to specific user roles only.
Now it's time to get started and use the WooCommerce secret sale plugin on your own website. The plugin comes with a full 30-day money back guarantee, so you can try it risk-free today. Happy selling!
In this tutorial, I'll show you two ways to display a WooCommerce variations dropdown on the shop page and category pages. This makes it much faster for customers to add products to their cart, helping to grow your conversion rate.
By default, WooCommerce only shows a variations dropdown menu on the single product page. It's the standard way to choose different options for variable products. But what if your customers need to select variation options from other parts of your shop - such as the main shop page, product category pages, or any other page on your WordPress website? There's where a WooCommerce variations dropdown plugin comes in.
Keep reading to discover two easy ways to add WooCommerce variations dropdowns to other parts of your site.
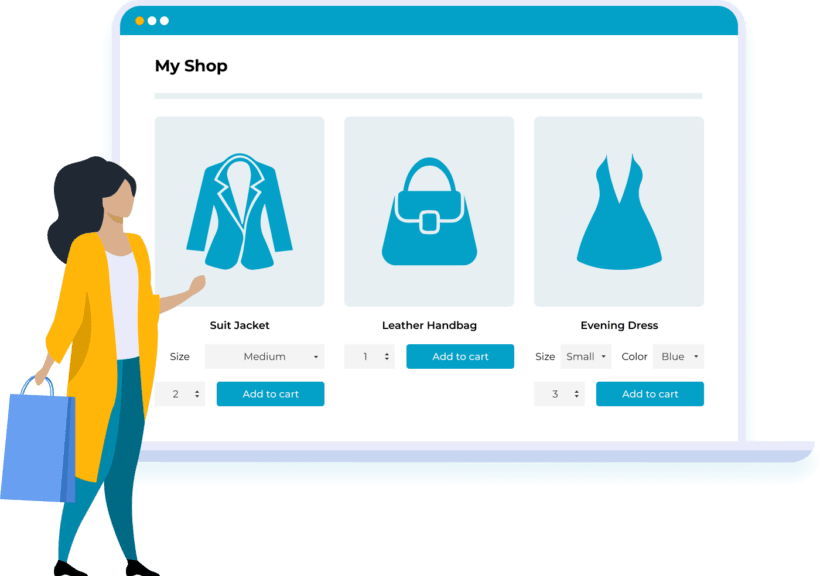
After that, you'll learn how to add WooCommerce product dropdown options to your shop and category pages like this:
First, I'll tell you how to take this a step further by displaying your products in a one-page order form complete with variation dropdown menus, like this:
Both plugins are excellent ways to add a WooCommerce product drop down list of variations directly to the WooCommerce shop page. Customers can view products, choose variations from a dropdown, and add to the cart without visiting the single product page.
How does WooCommerce display variations?
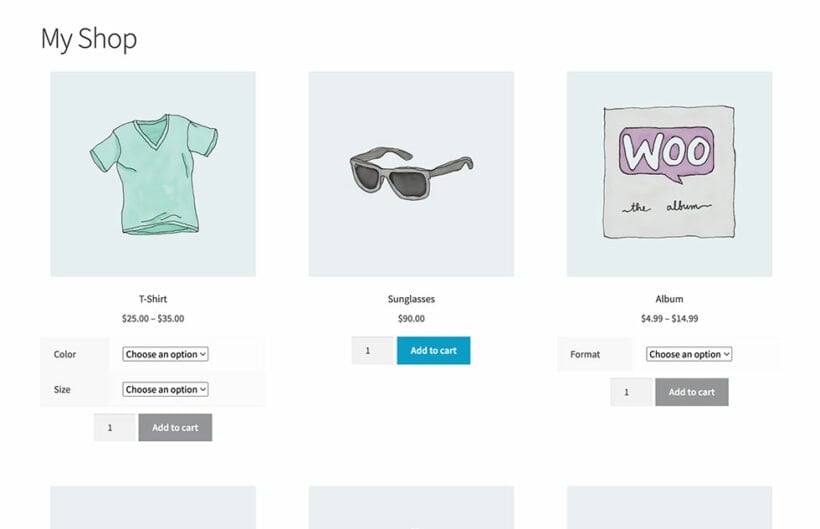
Before we start, let's look at what you can do with WooCommerce variation dropdowns without any extra plugins. The free WooCommerce plugin comes complete with a variable product type. You can add a choice of options for each product.
For example, you might want to create a WooCommerce variations dropdown for color and another for size.
This type of WooCommerce dropdown menu is listed as product attributes dropdowns on the product detail page. Customers can select any combination of the variation options from the dropdowns before adding the product to the cart. Their choices will add to the cost of the product, and added to the cart with the correct totals.
This is all built into the WooCommerce core, without needing any extra plugins.
So why do I need a WooCommerce variations dropdown plugin?
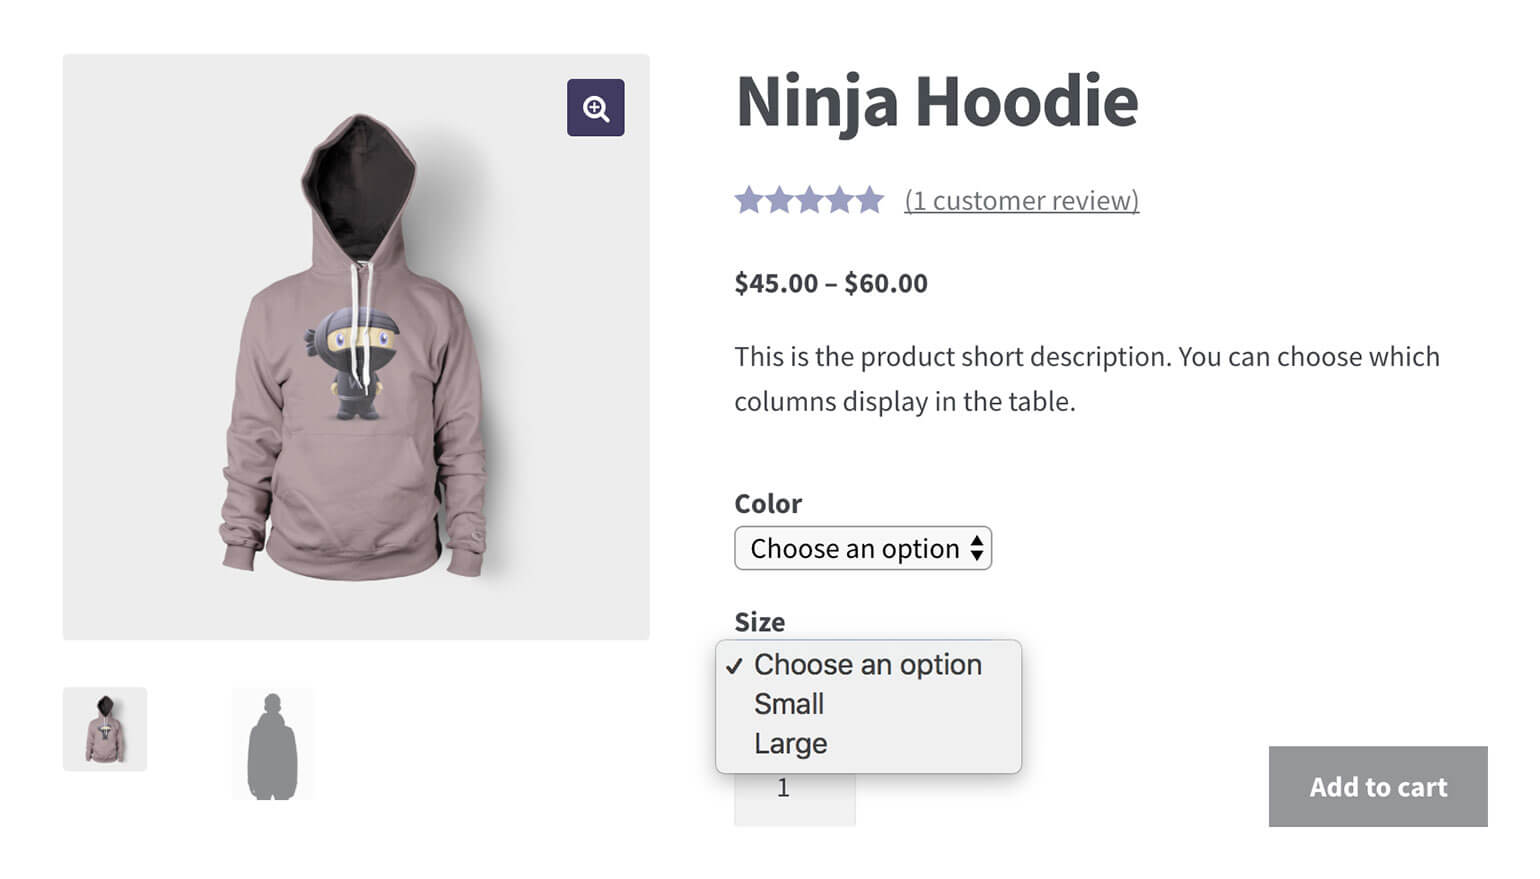
Now it's time for the bad news. The built-in WooCommerce variations dropdown is perfect if customers only need to select variations from the single product page. The limitation is that the product options dropdown doesn't appear anywhere else on your WooCommerce store.
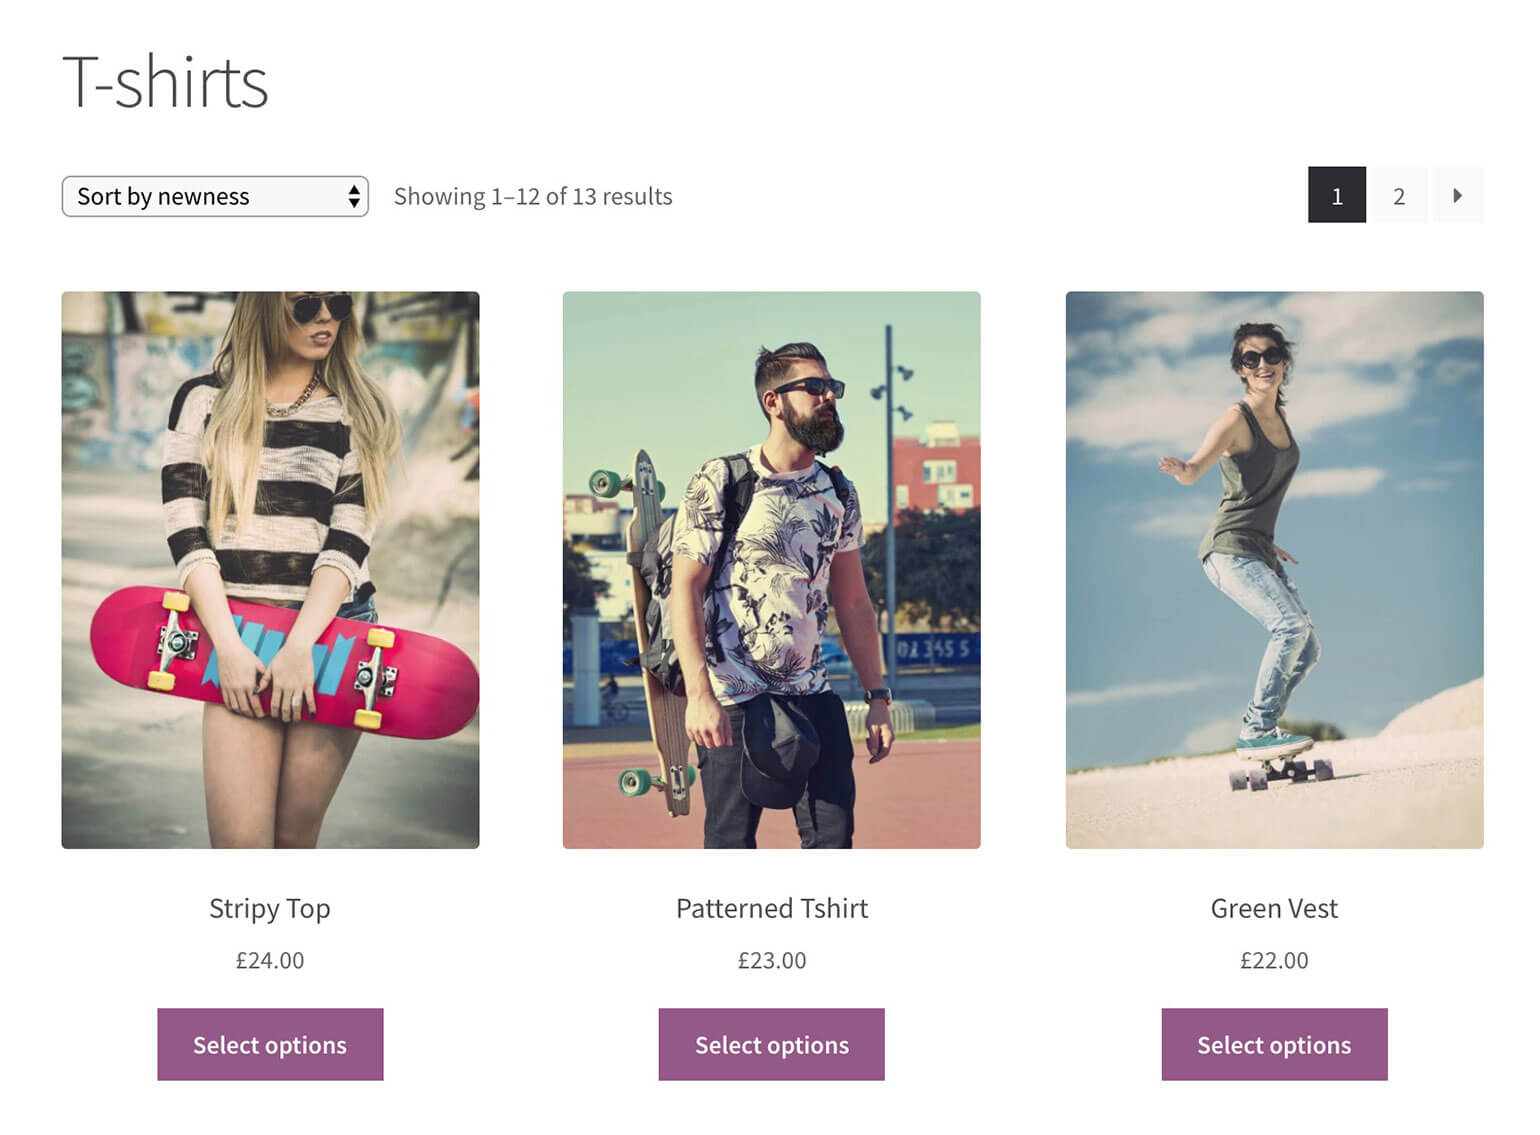
WooCommerce shop page - no product dropdown options for variations!
The variations dropdown menu doesn't appear in the list of products on the shop or category pages. Instead, the usual add to cart button (which appears for simple products without variation) is replaced with a 'Select options' button linking to the single product page.
This means that customers have to click through to the product details page to buy variable products. They can't view the variation options or prices on the product listings pages at all. This adds an extra click to the process and lengthens the buying process.
No one wants that, as customers are more likely to get frustrated and give up!
It's better to list WooCommerce variations dropdown wherever your products are displayed. You'll get more sales if customers can view all the options and buy straight away, without having to click through to another page.
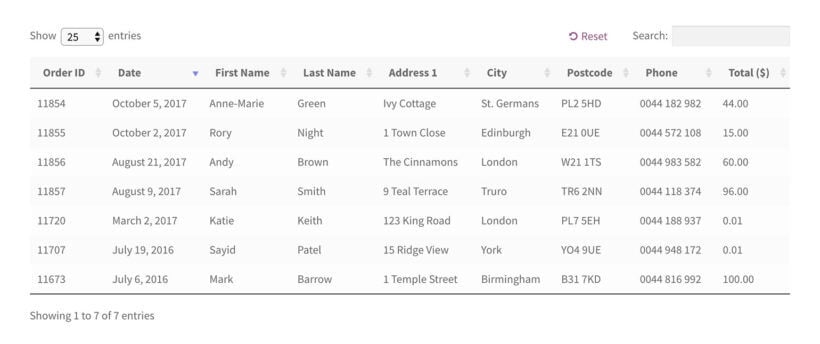
Case study – variation dropdown menus on OrderAmysFood.com
OrderAmysFood.com have a food ordering service on their website. Customers can order a whole meal along with entrees, side dishes, drinks and dessert.
OrderAmysFood.com want to accommodate everyone, so there are variations to most menu items. A customer can choose a larger portion size, or ask for their curry to be extra spicy, or even ask that it’s made vegan-friendly. To make this happen, they’ve created WooCommerce dropdown menus for variations using the Woo Product Table plugin.
The order form includes at least one dropdown for each dish. Each time a customer selects a dropdown variation, the cost of the product is recalculated to show how much it’ll cost exactly. It’s extra convenient for the customer to be able make these selections right there and then. And seeing the price change instantly means there’s no surprises around the corner.
Carry on reading to find out how to add your own WooCommerce variation dropdown menus using either the Express Shop Page or Product Table plugins.
Method 1: How to list attribute options in a table with WooCommerce variations dropdown lists
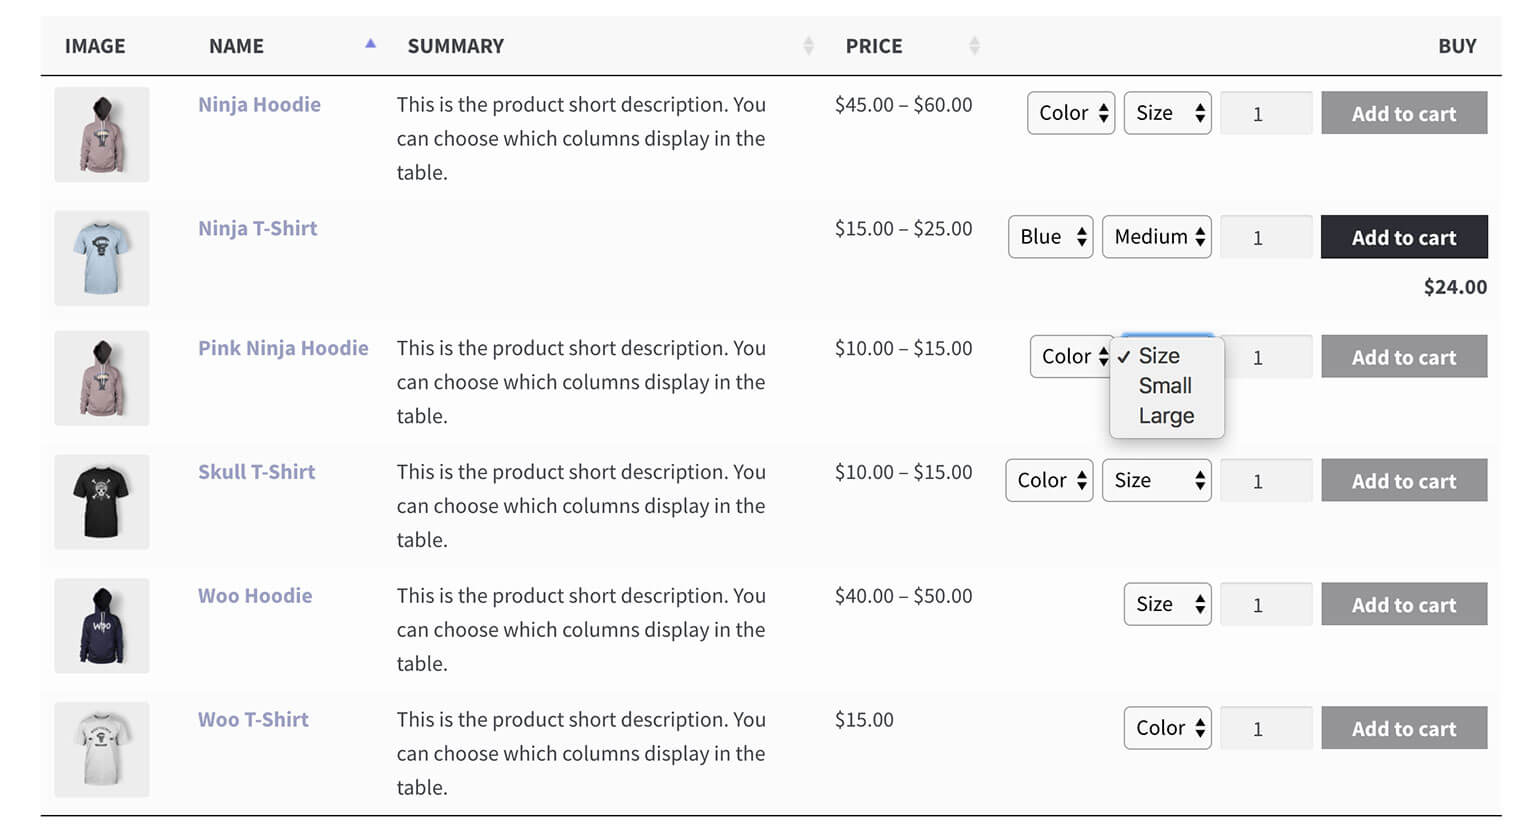
Add a product table with WooCommerce variations dropdowns anywhere on your site
Method 1 takes a unique approach to showing variations on the shop page. Instead of just adding the product dropdown options to your existing store layout, it actually improves the display of your products.
It does this by creating a fast one-page ordering experience.
The Product Table plugin is the perfect way to create quick order forms complete with WooCommerce variation dropdowns and add to cart buttons.
It's much more flexible than the default Woo shop and category page layouts. You have full control over what's displayed in the table. This includes several ways to list variation options including WooCommerce product dropdown lists. You can choose your columns, show or hide the images, choose the type of add to cart buttons, and much more.
While you can't use it to show the variation price in a dropdown, the price of each variation is clearly displayed when the customer selects a variation. Or to make the variation price even more visible, you can display each variation on its own row in the table instead of as product dropdown options. This keeps the price and other variation data visible all the time.
There's plenty you can do with product tables. But for the purposes of this tutorial, we're looking at how to add the WooCommerce variations dropdown lists for variable products. Now we'll get started!
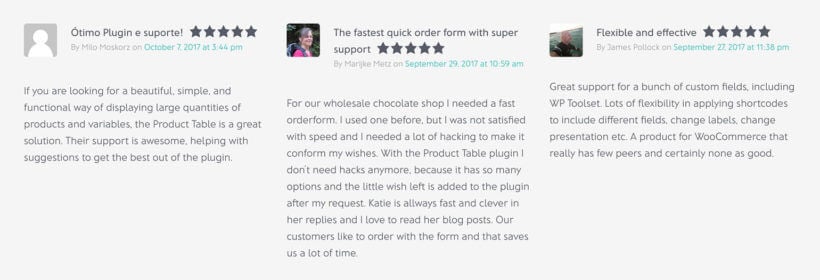
Praise for how WooCommerce Product Table lists variation options
Set up Product Table with WooCommerce variation dropdown menus
Before you start, I expect you to have a WordPress website with WooCommerce installed and some variable products added. If you don't know how to do this, then the official WooCommerce documentation will walk you through it.
Then, follow these easy steps to list variation dropdowns on the shop page and other parts of your store:
Go to Products → Product Tables. This will launch the table builder (which also opens automatically on activation).
Enter your license key and choose the options for your first product table.
On the 'Select products' page, either select which of your default shop pages to display the table on; or opt to add it manually to a page later. If you choose the latter then you can then select which products/categories/etc. to display.
Make sure you include the 'Buy' column in the 'Columns' section.
Select the variations dropdown option under 'Variations'. This will show your WooCommerce variations as dropdown lists in the add to cart column.
Use the other pages to add filters, change the default sort order, etc.
After this, if you selected to display the table automatically on your shop page templates then it will start appearing on your site immediately. If you selected to add it manually then you need to create a page and either add the 'Product Table' Gutenberg block - or the shortcode from the last page of the table builder.
Either way, once you've finished you'll see a WooCommerce table with variations dropdowns.
Method 2: Add WooCommerce variation dropdowns to the shop page
Our second method for creating shop page variation dropdowns is super-simple. After all, the WooCommerce Express Shop Page plugin was designed exactly for this purpose!
This simple plugin takes the variation dropdowns from the single product page, and displays them on the main shop page and category pages. It does the same for quantity boxes. That's why it's the perfect WooCommerce select variation on shop page plugin - customers use the variation dropdowns and quantity fields directly on the main shop and category pages.
Unlike method 1, the overall layout of your shop pages won't change. The only difference is that after installing the plugin, you will have variation dropdowns and quantity fields on these pages - keeping your existing store layout.
A quick setup wizard will open when you first activate the plugin.
Use the setup wizard to choose whether you want the WooCommerce product dropdown options and/or quantity fields to appear on your shop and/or category pages.
And that's it! An incredibly simple way to show WooCommerce variation dropdown lists on your main shop pages.
Can I create dropdown lists of other types of product option?
So far, we've just talked about how to create WooCommerce variation dropdown lists for your variable products. Everything in this tutorial equally applies to the extra product add-on fields that you can create with the WooCommerce Product Options plugin.
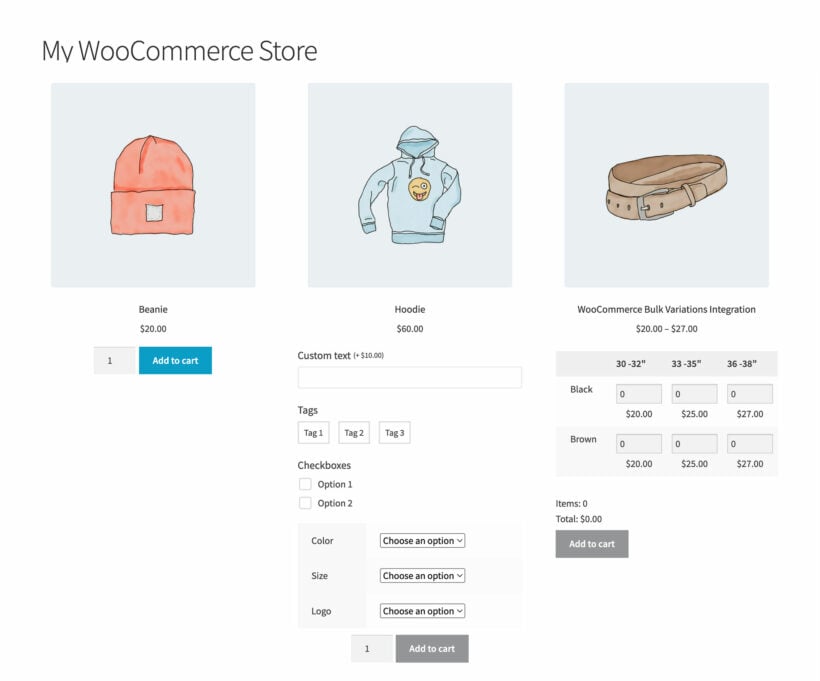
This plugin adds extra options for your products including more flexible dropdown lists, checkboxes, radio buttons, text entry fields for custom messages, and more. You can use it with either the WooCommerce Express Shop Page or WooCommerce Product Table plugin to show the extra product options on the shop page. Here's an example of what it looks like with the Express Shop Page plugin:
Use the WooCommerce Product Options plugins to add other types of product add-on on the shop page
That way, you can show all sorts of product options on the shop page - not just WooCommerce variation dropdowns.
Some store owners don't like the style of the WooCommerce dropdown menu for variations. Instead, they would prefer to display variation swatches for WooCommerce instead of a dropdown.
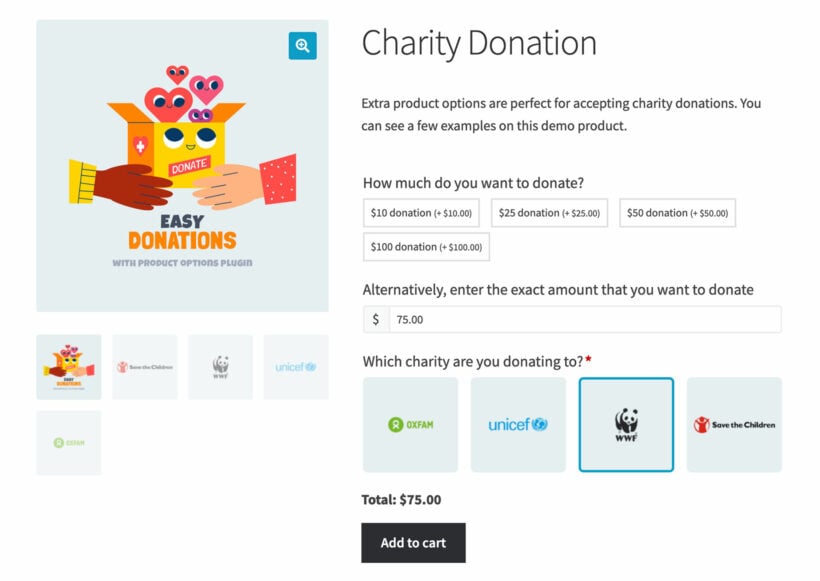
You can do this by using the WooCommerce Product Options plugin to set up your options instead of using variations. This gives you extra styling options instead of just drop down lists. For example, this screenshot shows a charity donation product with the options added using different types of button instead of dropdowns. The "How much do you want to donate?" option displays text buttons for the customer to click on. The "Which charity are you donating to?" option has image buttons. As you can see, these are much more visual than using WooCommerce variation dropdowns:
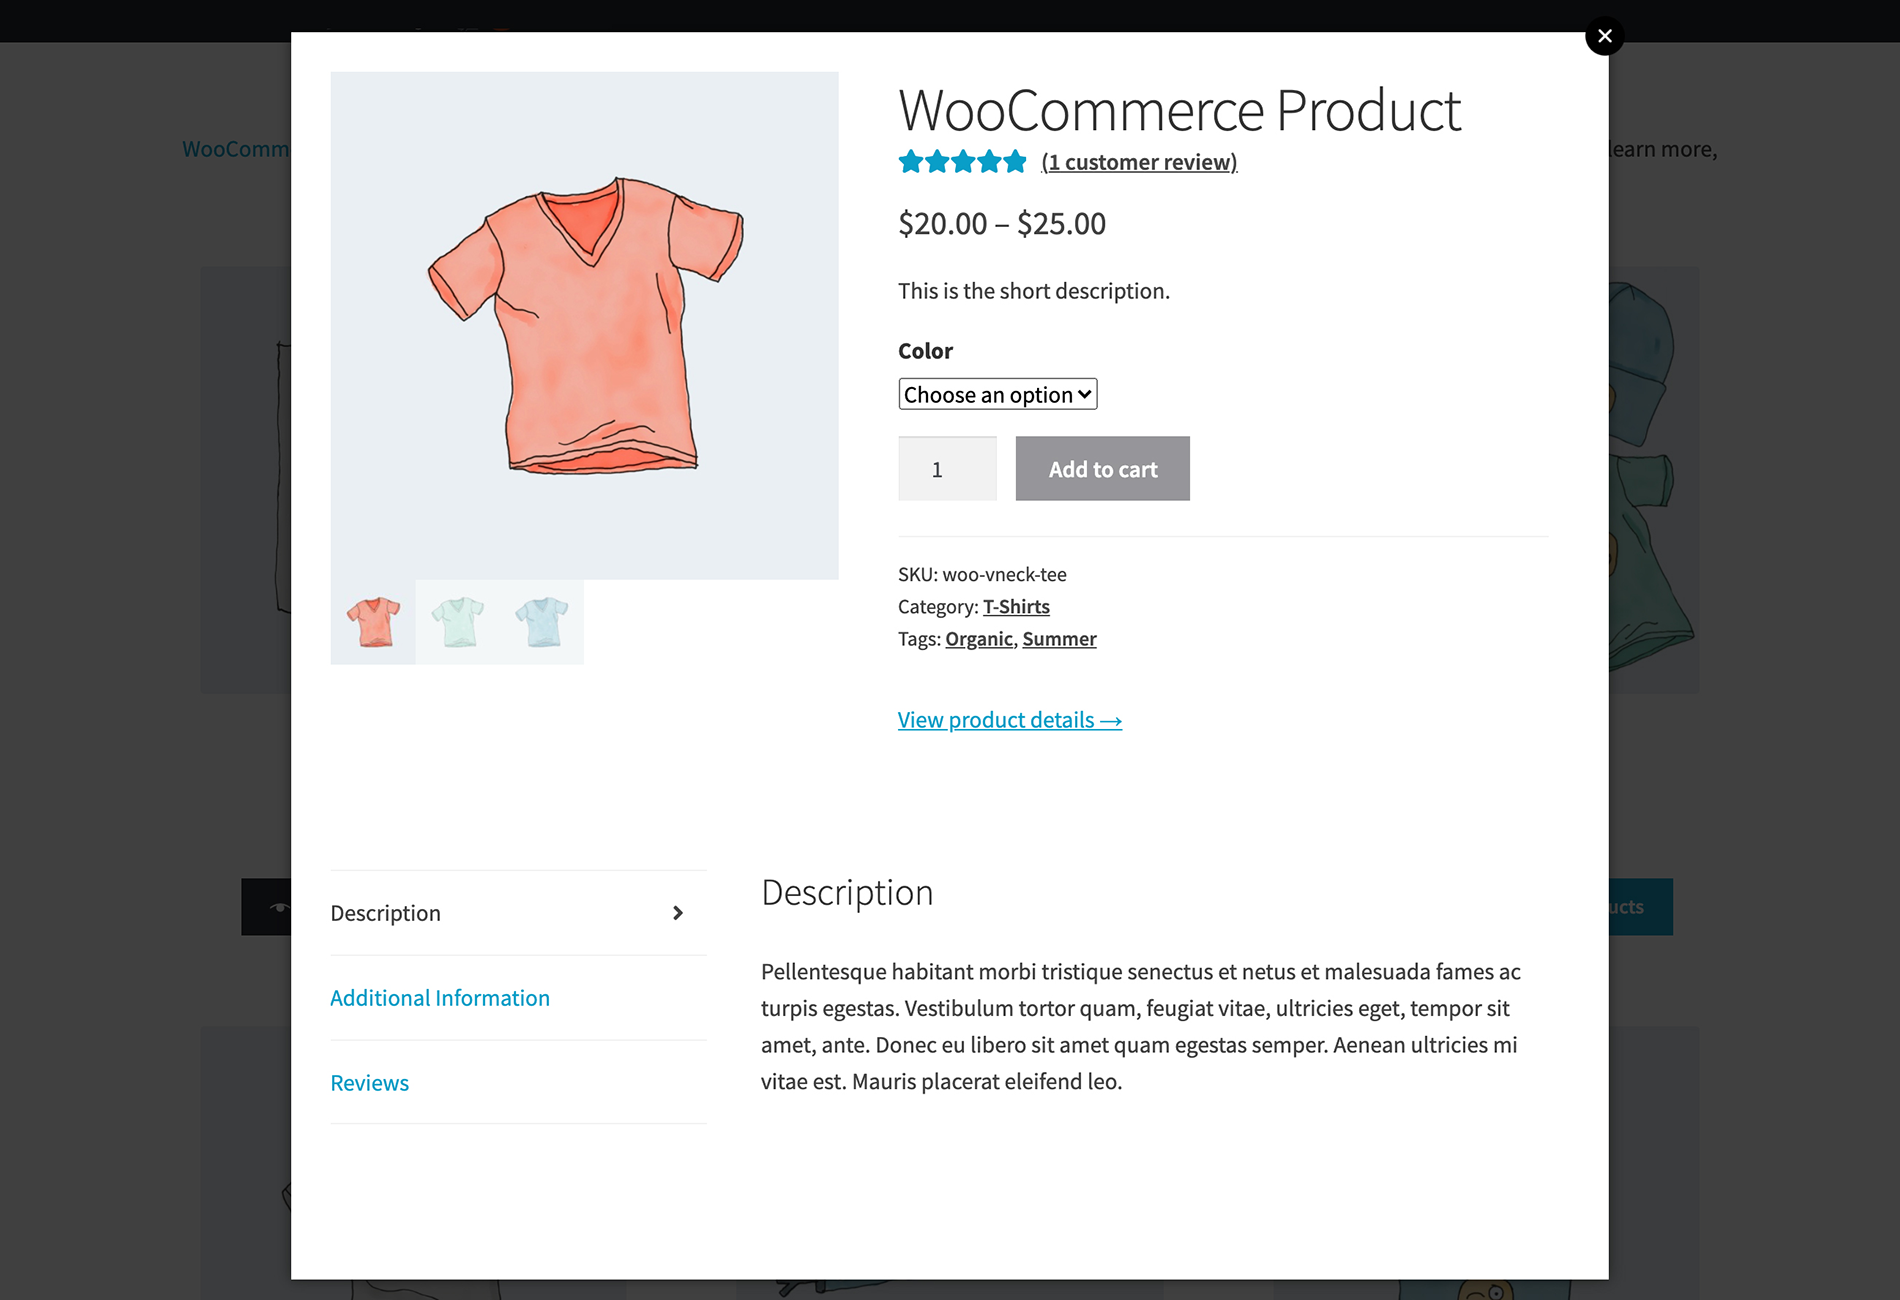
Bonus tip - Show WooCommerce variation dropdowns in a quick view lightbox
So far, you've learned how to display WooCommerce variation dropdowns within a product table layout. You can also list variations as dropdowns in a quick view lightbox. To do this, you need the WooCommerce Quick View Pro plugin.
The quick view plugin is super-flexible. Here are some suggestions of how you can use it for your product variation dropdown lists:
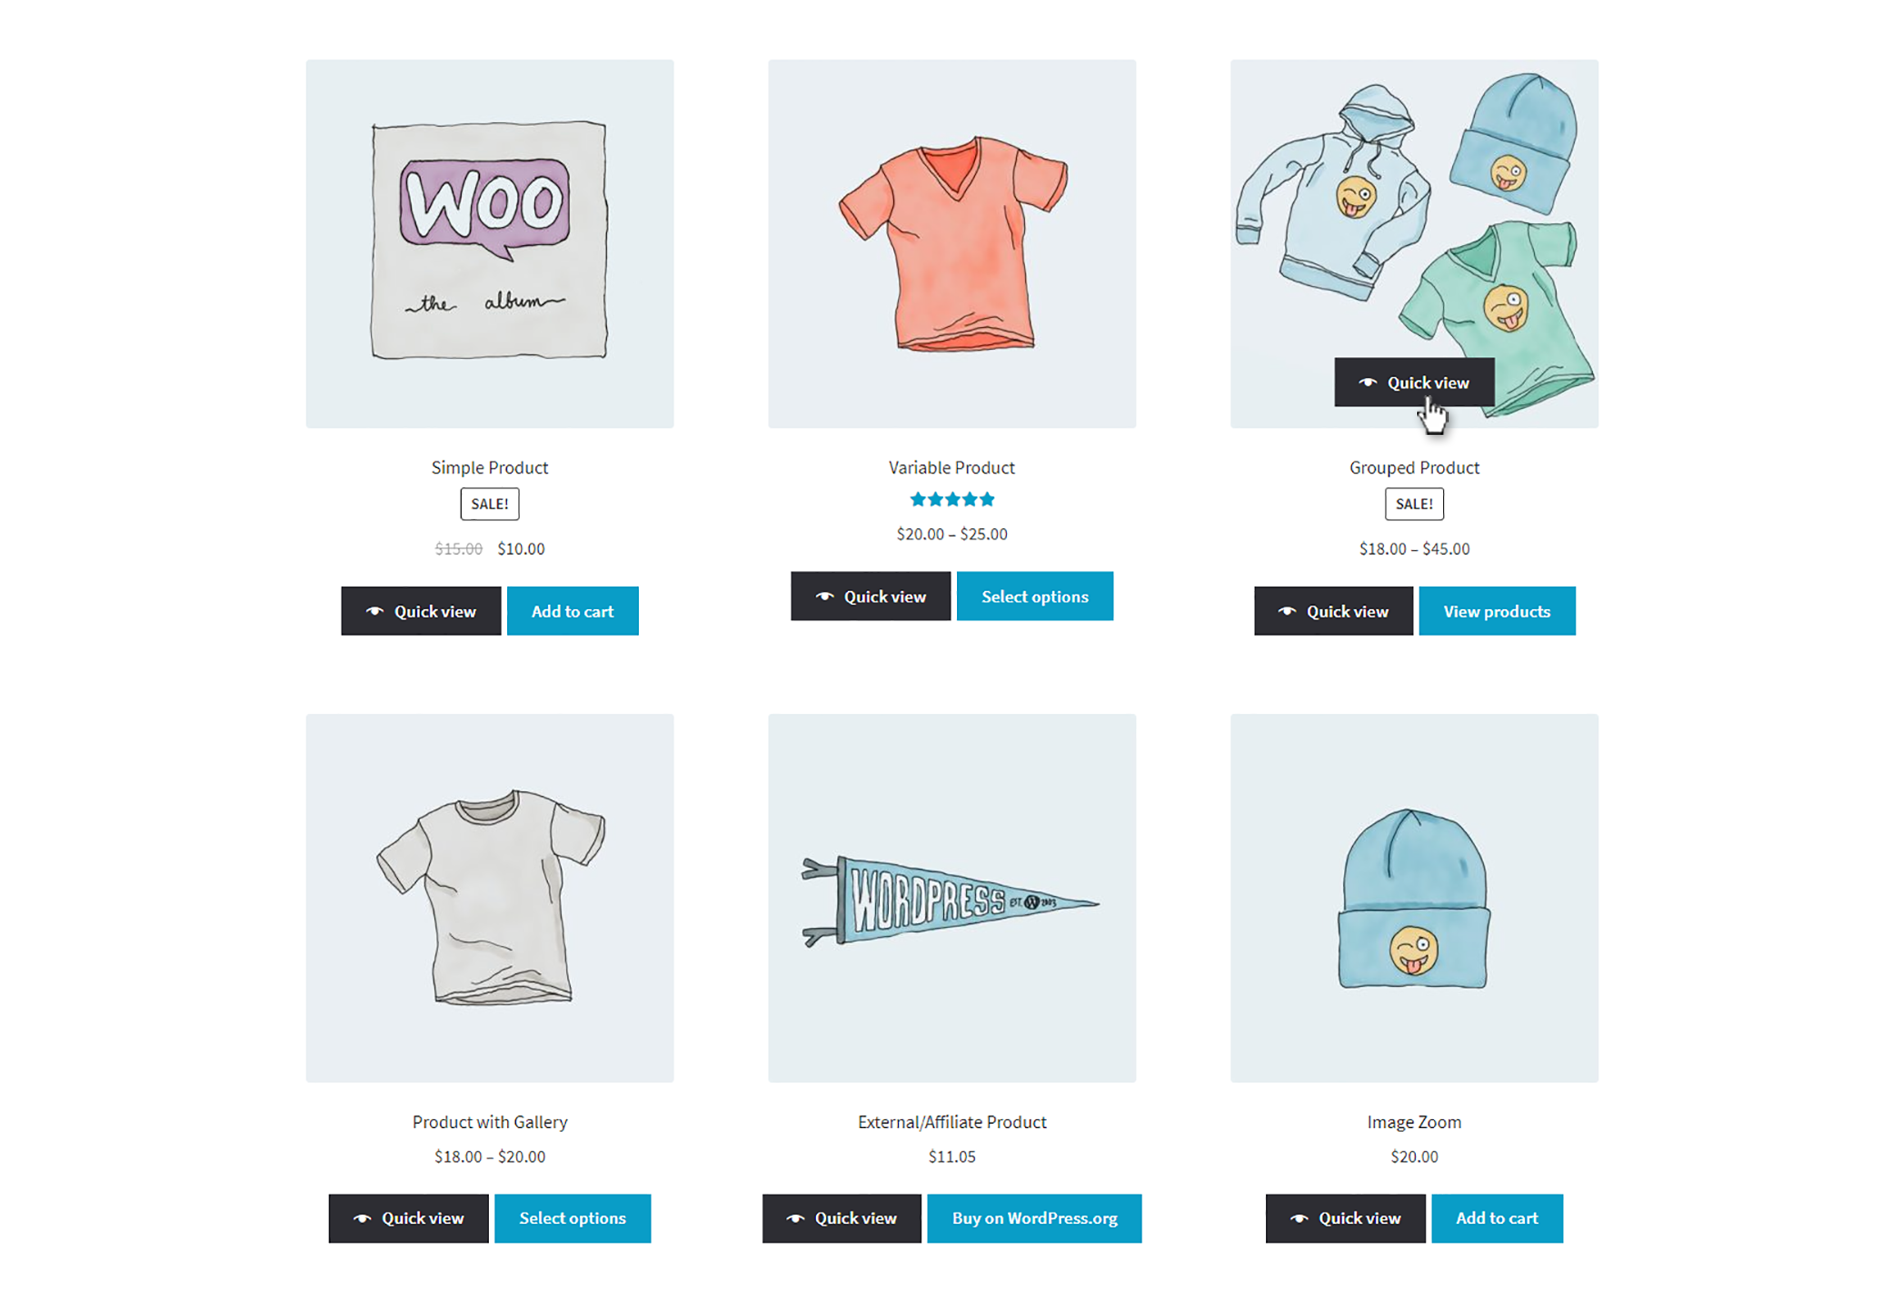
Add Quick View buttons, links and hover effects to the shop and category pages
Use product tables with our WooCommerce Quick View Pro plugin
Transform your store layouts by using Quick View with our WooCommerce Table plugin
Now you're ready to create variation dropdowns in WooCommerce
That wraps up our guide on 2 easy ways to add WooCommerce product variation dropdowns to the shop page:
Either create quick order forms with variation dropdowns using the WooCommerce Product Table plugin, or;
Add variation dropdowns to your usual store layout with the WooCommerce Express Shop Page plugin.
Either way, this is a great way to improve the shopping experience for your customers. Both options make it easy for customers to select variations on the shop page in WooCommerce - a faster way to shop. Customers no longer have to click to the product detail page to view variation attributes and pricing.
By saving your customers time and making it easier to buy from you, displaying product variation dropdown menus in this way can have a big impact on sales. Get your favorite plugin today, and make life easier for your customers!
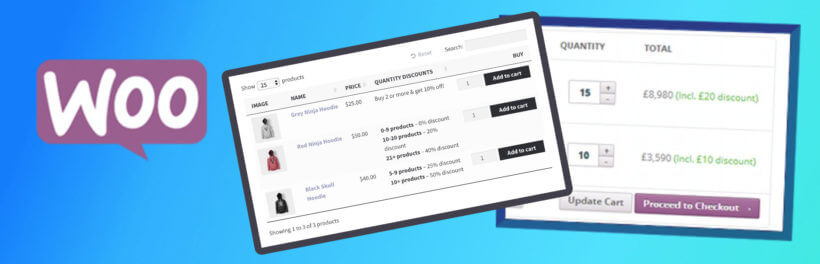
In this tutorial, we'll explain how you can use bulk discounts and dynamic pricing with your own product tables and quick view popups on your WordPress site. You can also see a product table with WooCommerce Discount Manager in action on our demo page.
WooCommerce Discount Manager lets you create bulk discounts based on a minimum and maximum quantity for specific products, across your entire WooCommerce store, or for specific categories or even specific products. It's an incredibly advanced WooCommerce discount plugin and you can use simple or advanced logic to create sophisticated pricing rules. You can create multiple prices per WooCommerce product based on a wide range of discount rules and logic.
We built it because most dynamic pricing plugins create discounts in the back end but do little to show them on the front end. It also means our own plugins, like Product Table and Quick View Pro, integrate with it reliably.
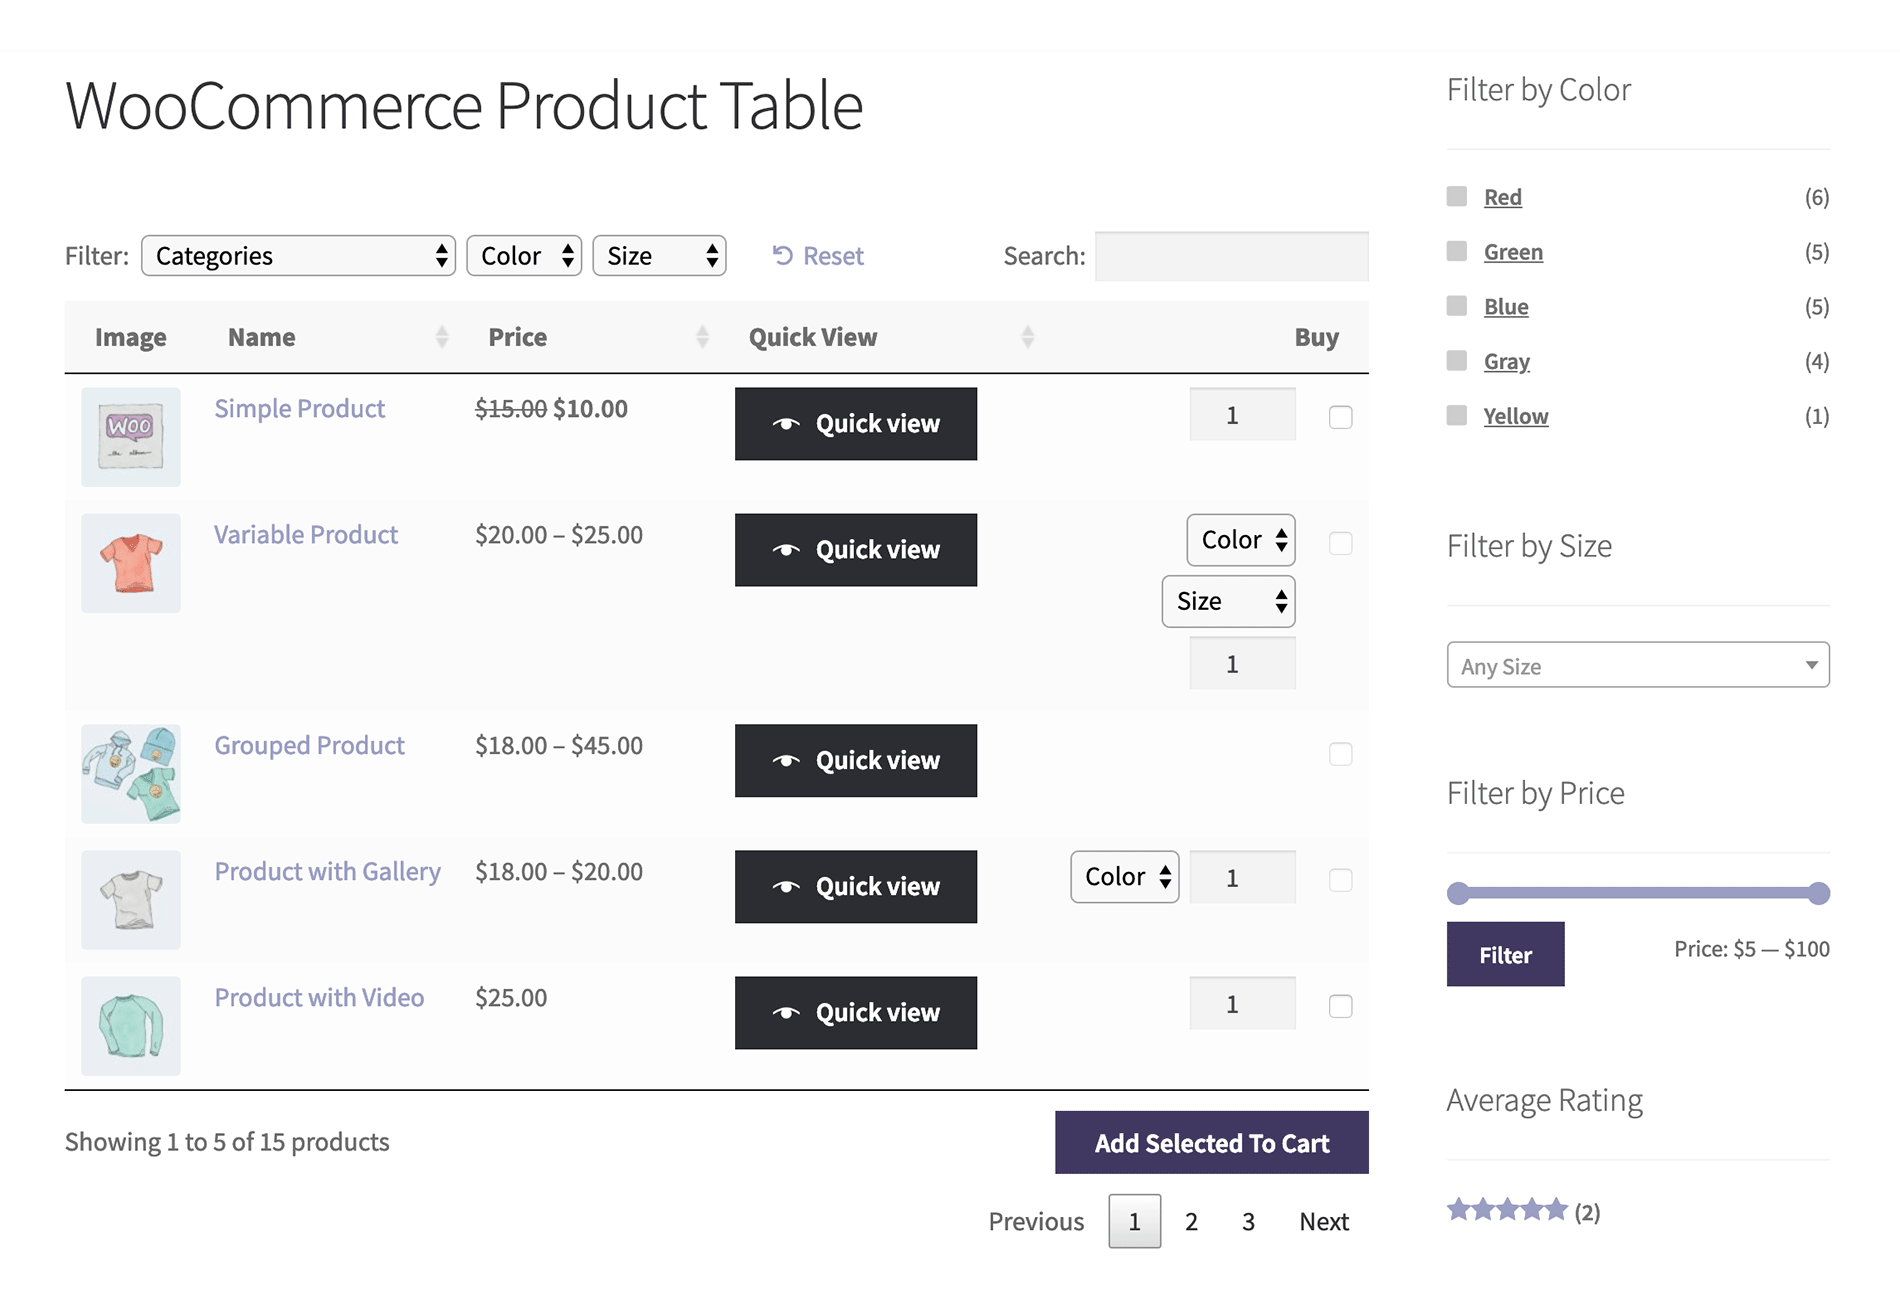
How it works with WooCommerce Product Table
If you're using WooCommerce Discount Manager on your WordPress site, then customers can choose a quantity from the product table and click the Add to Cart button. When they click through to the cart and checkout page, the correct quantity based pricing discount will be applied based on the quantity ordered.
If your product table page has a sidebar, then you can add the WooCommerce Cart widget. When people add products to the cart, the correct volume discount or quantity discount will be shown in the Cart widget on your WooCommerce store. This reassures customers that the volume discounts are working.
If there's no Cart widget on the page, then customers can see the cart discount when they click through to the cart and checkout.
The 'Price' column in the product table will always show the price for a single item. See below for some suggestions on how you can display available bulk discounts in the product table.
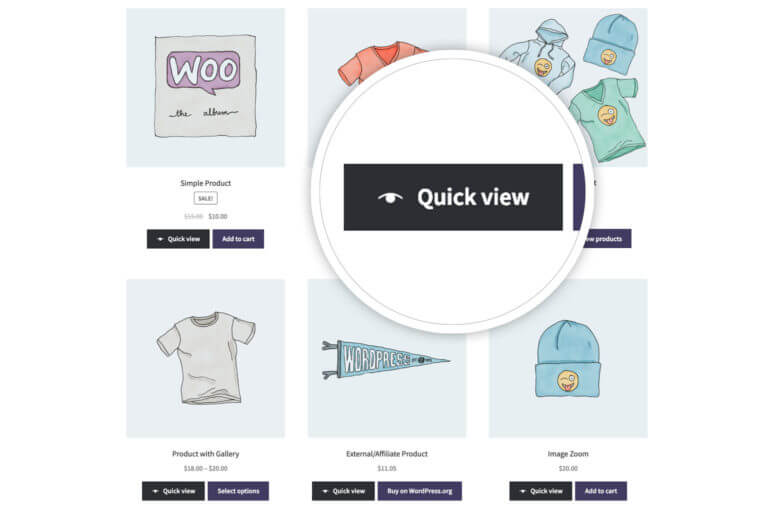
How it works with WooCommerce Quick View Pro
If you're using the Discount Manager dynamic pricing plugin with WooCommerce Quick View Pro, then the correct discounted price will appear in the quick view lightbox.
Can I show the bulk discount prices in the product table?
If your product table includes a product Price column then this will always show the product price for 1 item. This applies whichever bulk discount or dynamic pricing plugin you use - the Price column never changes.
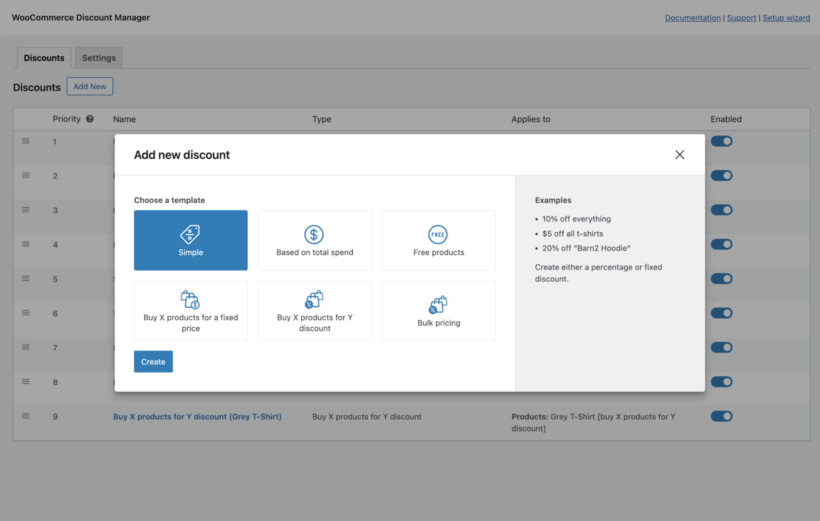
When you create a discount, you can add some text to be displayed about the deal, and/or enable a tiered pricing table. These always appear on the single product page (and in the WooCommerce Quick View Pro lightbox), and you can also display them in a special discount_content column of the product table like this:
Where to get the plugins
As you can see, WooCommerce Discount Manager works beautifully with the product table layout. It also works nicely with WooCommerce Quick View Pro if you want to show the discounted prices in a quick view lightbox on your WordPress site.
Passive income is the holy grail for modern online entrepreneurs. The term conjures up images of the successful web store owner reclining in a hammock on some golden-sanded beach, cocktail in one hand, while a sales counter on a nearby laptop slowly ticks upward. A WooCommerce Amazon affiliates website is one of the best ways of achieving this holy grail of online marketing.
The internet – and WordPress (with WooCommerce) in particular – has created unique opportunities to earn money online without having to work for each sale. And one of the most effective, not to mention simplest, ways of doing this is by creating a WooCommerce product reviews website. It works by comparing and reviewing products from Amazon, utilizing the Amazon affiliates program.
You can start a WooCommerce product reviews website on a shoestring budget (under $200) and gain substantial rewards. With that in mind, this guide will show you how to build a WordPress website that can earn Amazon affiliates commissions by publishing product reviews and comparisons. We’ll focus on free tools and plugins where possible. I will only recommend paid options if there’s no free alternative.
You'll build your WooCommerce amazon affiliates site using WordPress, which is free. We’ll bolt-on to WordPress the similarly free WooCommerce plugin, which powers over 41% of all online shops worldwide. This means you’re in good company :)
We’ll also be looking at how to use the WooCommerce Product Table plugin to list products and reviews in a user-friendly product comparison table, with extra features such as search, sort, and filter. This will make it easier for customers to compare the products you’ve reviewed at a glance, make quick buying decisions. And – most importantly – click on your Amazon affiliate links.
What is the Amazon affiliates program and how does it work?
We’ve been discussing the Amazon affiliates program. But what is it, exactly, and how does it work? Well, it’s very simple. Here are the three steps involved:
You develop a genuinely useful website with comparisons and reviews of other companies’ products. These might be reviews you have added yourself and/or reviews that other visitors to your website have written.
Consumers find your website and use the information to decide what to purchase. You’ll list the products on your website using the WooCommerce plugin. But instead of selling the products directly on your site, the Buy button will take the visitor directly to the Amazon listing. This is your affiliate link.
The consumer decides to buy! They’ll do this on Amazon as usual, but since they came to Amazon via your site, and you used your Amazon affiliates link, Amazon will share roughly 5% of the value of the sale with you. (This varies depending on the specific product). This is your affiliate commission.
The great thing about this system is that everyone wins: readers find helpful information and reviews about products they’re interested in, Amazon gets more sales, and you take a share of the proceeds.
If it’s that easy, why isn’t everyone doing it?
So here’s the thing: developing this kind of site is simple (as you’ll see from this guide) – but it would be a bit of a stretch to call it “easy”. As we’ve discussed, there is a small cost involved along with the time required to set the site up. There's also the skill of making sure the reviews and comparisons are valuable to consumers.
The key phrase you should have picked up on in the previous section is that your website needs to be genuinely useful. Your WooCommerce Amazon affiliates website will only be truly successful if you offer meaningful, engaging content that provides value for consumers.
A key part of the strategy of getting visitors to your Amazon affiliates website will be ranking your site well for relevant search terms. (We’ll discuss this later.) Thus, you have to make sure Google is happy. Here’s a tweet from a Google employee that summarizes Google’s position:
DYK there's no inherent problem with affiliate links? The problem is when a site's sole purpose is to be a shallow container for aff links pic.twitter.com/y149XZ0JP6
— Gary 鯨理/경리 Illyes (so official, trust me) (@methode) March 14, 2017
You must publish quality reviews and comparisons that aren’t already available elsewhere. If you don’t get this part right, search engines (rightly) won’t think highly of your site. Consumers won’t have a reason to visit your site, and you won’t earn any Amazon affiliates commission.
However, if you work hard at finding a niche and spend time adding and promoting unique content, then the obvious appeal of passive income can work well for you. The quality content point is especially important, so be sure to get that right. Now, we’ll move on to look at how to select the niche of your WooCommerce Amazon affiliates website.
Which niche should your WooCommerce Amazon affiliates target?
If you can earn a commission for each sale you refer to Amazon, your site should just list as many Amazon products as possible, and you’ll get more commission – right? Unfortunately, no. Your WooCommerce Amazon affiliates website must focus on a niche.
Search engines will respect the authority of a site that clearly focusses on one thing. Here are some examples of good niches for a WooCommerce Amazon affiliates store:
guitars
office supplies
televisions
hot tubs (!)
These examples are fairly disparate, but they all have a couple of features in common:
Customers have a lot of choice, with no obvious “best” product. Furthermore, all the products are fairly similar in outcomes. A consumer wanting to buy a guitar is plausibly confused and will search for reviews – this is where you come in.
Each item is relatively expensive. You earn a fixed commission from Amazon, so the higher the price of the product, the higher your commission.
Amazon offers a good selection of all these products. To run a WooCommerce Amazon affiliates website you must, obviously, be able to link to Amazon products.
How to choose the right niche
When selecting your niche, you should also consider your expertise or personal experience. If you happen to be an expert (or at the very least an enthusiast) in electric guitars, you’ll find it a lot easier to comprehensively review and compare guitars.
Finally, consider the competition. Who else is already reviewing the product you’re considering? If a potential niche is particularly crowded – such as guitar reviews – then get more specific! Guitar reviews may be a well-covered market, but what about the best guitars for teenage girls? Television reviews will be well-covered, but what about the best televisions for small apartments? Get creative and find a space within your niche that is under-served. Search the relevant terms your potential visitors will use to get a sense of what is well-covered and where there is a gap in information. For a more data-driven view of a niche, some site owners also use amazon scraping to analyze product listings, pricing, and review patterns before deciding which categories or comparisons to focus on.
Take a pen and some time now to work out your niche. You may need to go through a couple of ideas before you hit on the right one, but that’s fine! It’s incredibly important to get this section right, as it will directly impact how much affiliate commission your site will drive later.
Search engines will reward the websites and content that are demonstrably the best in their given field. The vast majority of search clicks go to the top couple of search results, so make sure your chosen niche is specific or under-competed enough, so that you can produce the best content, and take those top search rankings.
Case Study – Best Toys for 2 Year Olds WooCommerce Amazon Affiliates Site
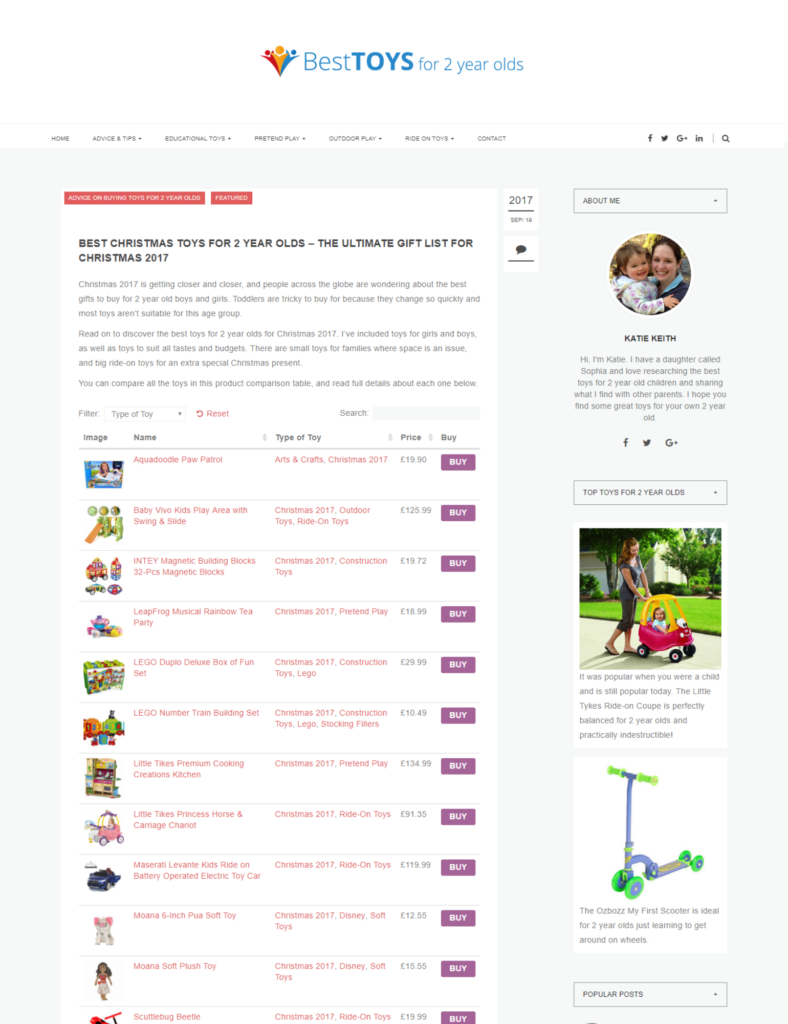
Just to prove that I’m not afraid to put my money where my mouth is, let’s take my own Amazon affiliates site Best Toys for 2 Year Olds as an example. This site is powered by WooCommerce and uses precisely the same formula as you’ll find here.
I founded the site because at the time, I had a daughter this age and had been struggling to find developmentally age-appropriate toys. It occupies a niche about which, thanks to my personal experience, I felt I could speak with some authority, giving value to readers.
It’s a very simple website that provides parent-friendly advice and reviews on the best toys for 2 year old children. It’s intentionally non-corporate and speaks from one parent to another. Parents can read the advice and then click through to buy the products on Amazon, which generates the affiliate commissions.
On posts such as the Best Christmas Toys for 2 Year Olds, I’ve used the WooCommerce Product Table plugin in order to display the products in very convenient, sortable tables. This lets parents generate personalized comparison lists, specific to their own criteria. If, for example, they are focused on price, they can find the cheapest toys; if they want toys from a specific category, they can also sort by these. This is the kind of genuine, added value that has made my WooCommerce Amazon affiliates site successful, and it can do the same for you.
Now that you’ve seen what can be done, let’s get on to the specific detail and step-by-step instructions you need to get started.
How much does a WooCommerce Amazon affiliates site cost?
As we’ve mentioned already, there are a handful of costs involved when setting up your WooCommerce Amazon affiliates website. The good news is that this is not expensive to set up, and a successful site will have no problem making this upfront money back in no time.
Remember, thanks to the magic of passive income, once you’ve done the work, each additional sale is pure profit, so the upside is very large!
Here are the three costs involved in setting up your site
NameCheap This is the name of your website (for example, barn2.com). You’ll need to choose a name (i.e., barn2) and an extension (i.e., .com or .co.uk). You should choose a name relevant to the niche you’ve selected, but keep in mind that millions of domains have already been registered, so you may need to get a little creative. You can use a tool such as NameMesh to make the process of finding an available domain easier and a registrar such as NameCheap for your registration.
Web hosting This is how your website is powered. As such, it’s incredibly important! Good hosting will make sure your website is fast, secure, and reliable (all this is very important for keeping and retaining visitors, and making search engines happy). We recommend WP Engine, an excellent WordPress-specialist host that does everything for you. You can get cheaper hosting elsewhere (if you have to do this, choose SiteGround), but you’ll find excellent hosting is money very well spent.
WooCommerce Product Table plugin This is the only paid plugin for WooCommerce needed for this tutorial. You need it to display your products, ratings, and affiliate buttons in a nice, user-friendly comparison table or grid, which can maximize your affiliate income. This is made by our development team at Barn2, so you can be confident of the quality.
The costs come to the low hundreds of dollars; it’s cheap to set this up, and the main investment, therefore, is your time. The setup itself won’t take long, but you will need to spend time on your content. We’ll talk more about this later on.
How to set up a successful WooCommerce Amazon affiliates website in 5 easy steps
With the prerequisites taken care of, let’s turn our attention to the specific steps you need to set up a successful WooCommerce Amazon affiliates website. You’ll want to take the time to methodically follow each of these, and once you’re at the end, you’ll have your new site live! Let’s make a start.
Step 1 – Sign up to the Amazon affiliates program
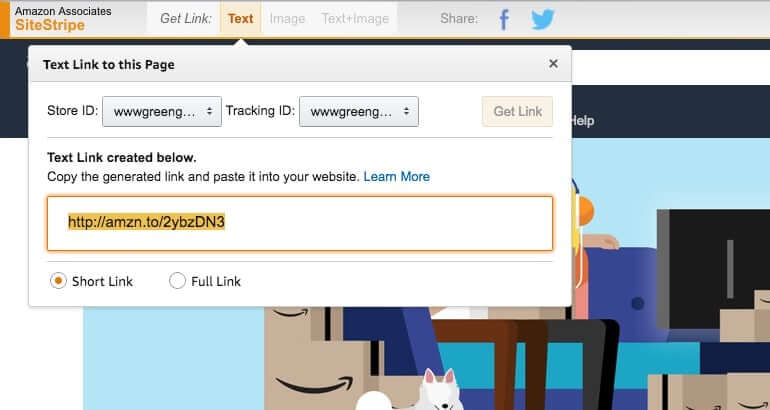
The obvious first step is to sign up for the Amazon affiliate program. You can do this from the Amazon Associates page: follow the prompts, agree to the terms, and you’ll be good to go.
Once signed up, it’s easy to get Amazon affiliate links for any product: your Amazon account will have an “Amazon Associates SiteStripe” added across the top of the site, and you just need to click Get Link → Text to get personalized affiliate links from any page on Amazon. This is what you’ll use later when linking products from your website, instead of regular Amazon links.
You can make things easier for yourself later on by selecting ten products that you want to review or compare on your site, and getting their affiliate links now. You might find it useful to save them in a spreadsheet for easy reference.
It’s worth mentioning that while this guide is focused on creating a WooCommerce Amazon affiliates website, you don’t have to use Amazon. The method here will work for any affiliate program; we’re focusing on Amazon as it’s the easiest and most convenient. You could, for example, choose to join our WordPress plugins affiliate scheme, and earn a 30% commission on the sales you refer to us :)
Step 2 – Set up WordPress with WooCommerce
It’s now time to get started with your WordPress website
If you’ve chosen WordPress hosting with WPEngine (as we recommended), you’ll find everything set up for you. If you went with SiteGround, the cheaper, option, you’ll need to follow a couple of simple steps, but it’s all self-explanatory.
Once WordPress is setup, head to your new WordPress Dashboard (available at yoursite.com/wp-admin). You’ll want to take a minute to get familiar with how WordPress works: click around to get a feel.
Install a WooCommerce-ready theme
The first thing we’ll do is install a WordPress theme. This is a pre-built, professionally-made website design that can be dropped onto any WordPress site – including yours! Here, we’ll be using a free WordPress theme specifically designed for WooCommerce called Storefront.
Storefront is really easy to install: from the WordPress Dashboard, head to Appearance → Themes, search for Storefront, find the theme, then click Install > Activate.
If you don’t like the design, you can use one of the Storefront child themes, which provide a nice choice of skins. The child theme designs are either free or $39. They all come with full instructions and documentation on how to set them up.
If you want a more versatile theme, there are plenty of WooCommerce-ready themes on ThemeForest. These typically have significantly more features than Storefront and its child themes, but take a lot more work to set up. There’s also a greater potential for things to go wrong, due to the extra complexity. You should only choose a more flexible/complex theme if you’re sure you know what you’re doing and can see that there are definite benefits in doing so.
WordPress makes it remarkably simple to install a theme (it’s just the setup that can take longer), so whichever you go with, you’ll find you very quickly have a great design on your site.
Step 3 – Install WooCommerce
Next, we’ll install WooCommerce. As we’ve touched on, this is the leading ecommerce platform that we’ll use to list and sort the products you’re reviewing. WooCommerce is normally used for selling products, but it can equally be used to power affiliate websites. We’ll get to this later on.
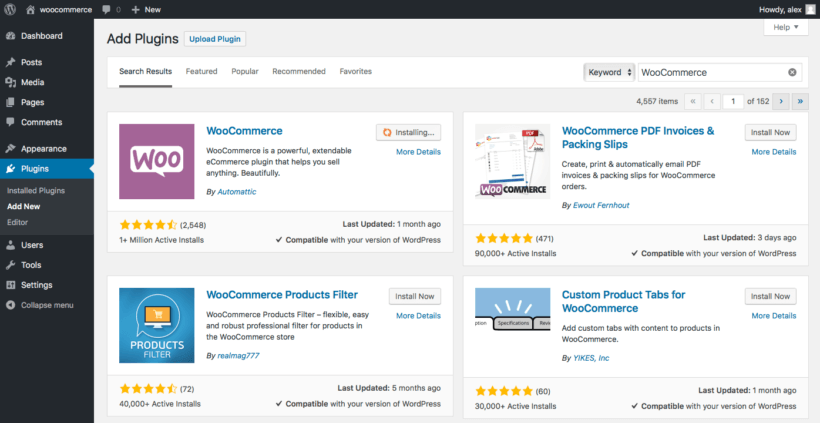
WooCommerce is free and incredibly easy to install. Head to the WordPress Dashboard, then Plugins → Add New. Search WooCommerce, and then install and activate the plugin.
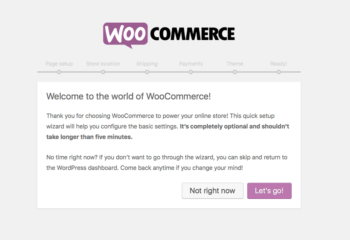
Next, run through the WooCommerce Setup Wizard. This is the quick way to set up your affiliate store, so follow the steps through to the end. Skip any steps that only apply to regular ecommerce stores.
Now you're all set up with WooCommerce!
Nice work: you now have a website, a professional design, and the world’s leading ecommerce platform. Next up, it’s time to add your products.
Step 4 – Add your Amazon affiliate products, with descriptions or reviews
This has all been fairly straightforward so far - technical, perhaps, but straightforward nonetheless. Here we get to the part that requires your personal skills: adding your products and writing the descriptions and reviews.
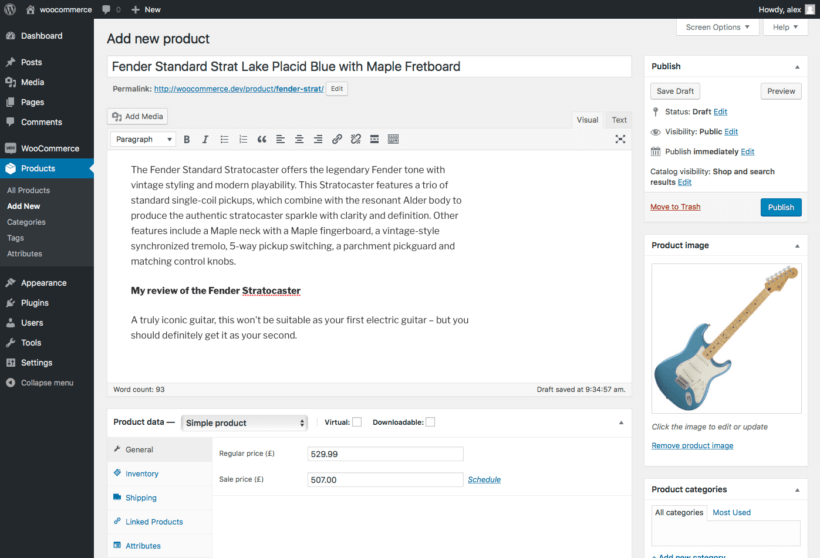
You can add your first product by heading to Products → Add New, and filling in the fields:
Add all the information for the product, starting with the title. Some info, such as categories or tags won’t be relevant, but make sure to add everything that is. You can copy this from the Amazon listing.
Add a product image. Images ensure that your reviews are more engaging. You can also copy these from the Amazon listing, and add them under the Product Image box.
Add the main description! Now we’re getting into the fun part. You’ll need to describe the product in your own words; do not just copy from the Amazon listing, as visitors and search engines will want to see original content here. Remember, visitors need a good reason to come to your website, so add value here by adding extra information or by displaying the information in a more accessible format.
Add your review of the product. If you decide to add product reviews rather than just comparisons, then add your review below the main description! Make it easy for the reader by highlighting the key information they need to know, answering the questions they’re likely to have, and making a recommendation on whether the product is right for them.
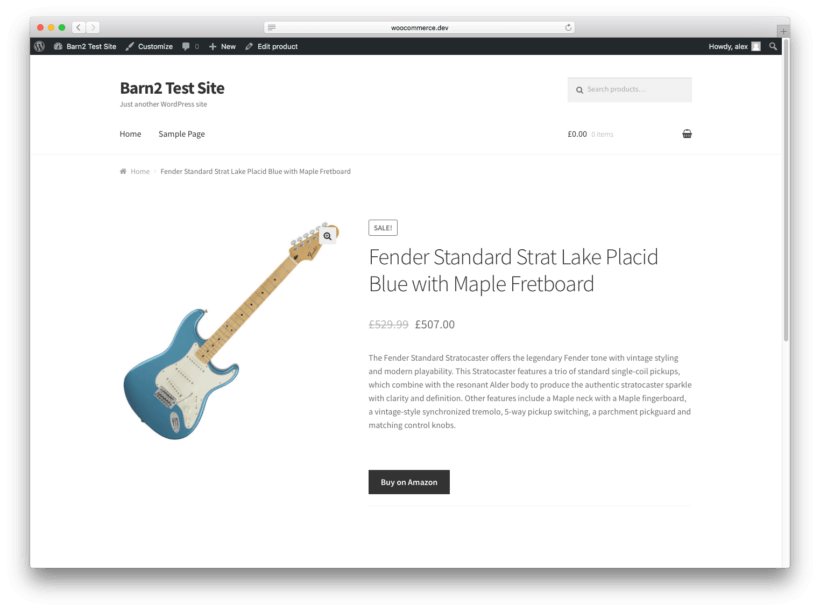
Now add your WooCommerce Amazon affiliates product info
This section is where your site can really add value – something that makes or breaks the success of a WooCommerce Amazon affiliates site – so take the time to get this right. With this section complete, you can turn to add the product data. Again, there are a couple of steps to follow:
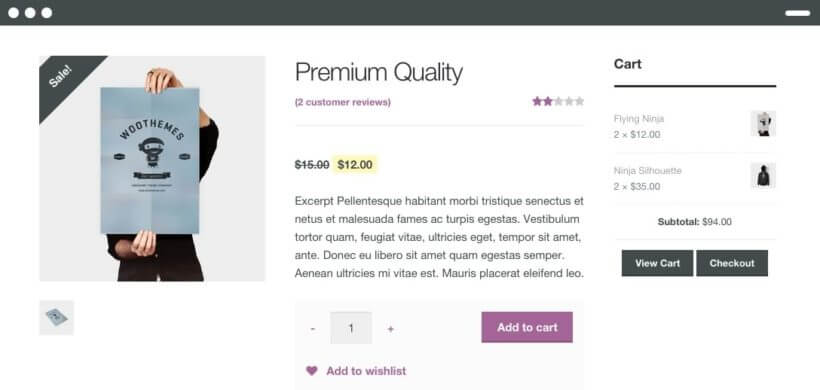
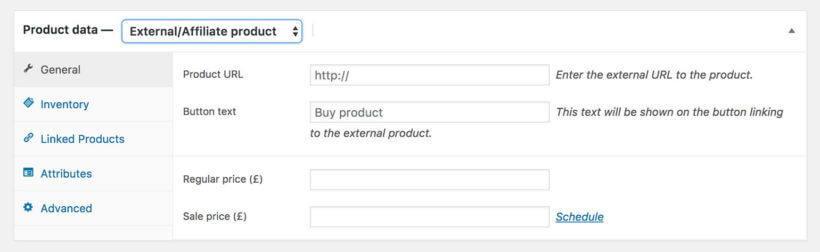
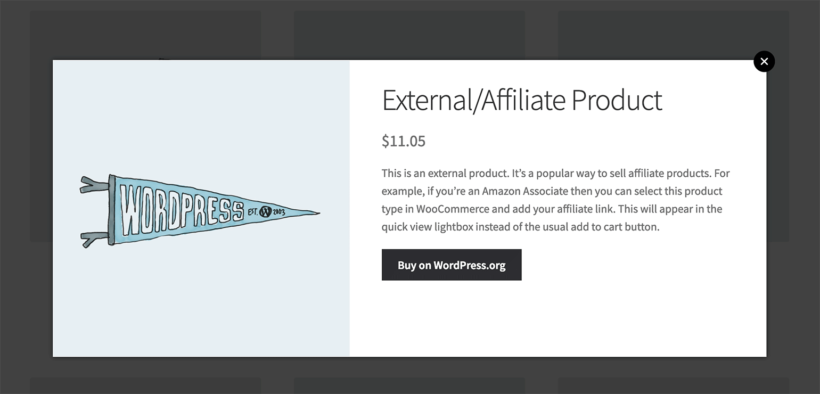
Select External/Affiliate product from the dropdown list in the Product Data section. Add your Amazon affiliate link for the product under Product URL, and add the text you want to appear on the button under Button text. “Buy on Amazon” or similar will be appropriate.
You may wish to add the product price and sale price. This makes it more convenient for the reader by displaying the product price before they click through – but lines you up to have to update the price regularly. If you’re okay keeping this up to date, you’ll find readers appreciate the extra information.
Reader-generated content is some of the best content you can have. Why? Because it adds value and you don’t have to write it! Under the Advanced tab, you can tick “Enable reviews” to let visitors leave their own reviews. This has the added benefit of adding “social proof” to your site, which can in turn make your own reviews more credible. WooCommerce will collate the product ratings, and you can display these as a column in your comparison tables (we’ll get to this in the next section).
Finally, click the blue ‘Publish’ button to set your product live!
Now add your other Amazon affiliate products in WooCommerce
It’s now just a case of repeating the steps for all of the products you want to add. This will take you some time, but do make sure to do a thorough job: these reviews will be the backbone of your site!
Once you’ve got your content added, we’ll move onto making their display look nice.
Step 5 – Setup the WooCommerce Product Table
A site filled with excellent products and reviews is no use if nobody can find them! Your next task is to lay out your products and reviews into an easily-accessible format, so that visitors can both browse and find what they’re looking for more effectively.
To do this, you’re going to need the WooCommerce Product Table plugin we mentioned earlier. Buy yourself the plugin (this is the only plugin you’ll have to pay for in this guide). Follow the included instructions to install, and then enter the license key.
You can now add a neat table of your products to any post or page on your site! Earlier, we mentioned the advantages of having this in practice on Best Toys for 2 Year Olds. Readers can take the available information and sort it according to the criteria most important to them. This makes your site much more valuable!
The product table also lets you collate products for specific events and dates. On our case study site, birthdays and Christmas would be great examples.
Add your WooCommerce affiliate product tables
First, go to Products → Product Tables → Add New and create a table listing the products you want to include in the affiliate review blog post.
Create a new post by heading to Posts → Add New. You’ll need to flesh the post out with a title, introduction, categories, images, and so on, but you can come back to these later.
The process for adding the list of affiliate products to the blog post depends on whether you use the WordPress block editor to create your posts:
Block editor - Add a 'Product Table' block and select the table you created a minute ago.
All other editors - Get the shortcode from Products → Product Tables and add it to the page wherever you want the products to appear.
An example
Here’s an example to get you started. This product table is suitable for most WooCommerce Amazon affiliates or review websites:
This table will list products from a category called “clothes” with their image, name, full description, overall star rating, and affiliate link buttons. Replace “clothes” with the slug of the category you want to list in the table.
The description may be the full review that you have written or simply your description of the product.
If you prefer, you can reduce the description length to show an excerpt, and customers can click through to the read the rest on the single product page.
Or, if you don’t want customers to be able to access the single product page, then edit your table (Products → Product Tables) and click the pencil next to each column to view the option to disable the links. This means that the only action that people will be able to take is to click your affiliate links!
The product reviews column will contain the average star rating, based on reviews that other visitors to your website have added. (The stars will be empty or colorless at first, as there are no reviews yet.)
You can now click Publish in order to set your post live, or continue reading for extra WooCommerce Product Table tricks :)
Table Tricks 1: Replace the single product page with quick view
The faster customers can complete a purchase, the less likely they are to give up and go elsewhere. As a result, you need to ensure that customers can buy as quickly as possible. This involves minimising the number of pages that the customer has to visit.
If you're building an Amazon affiliate website then by definition, customers have to load an extra page in order to buy. That's because they have to visit your website first, and then click through to the affiliate site to buy the product.
By default, WooCommerce creates a separate page for each product. This includes affiliate products.
If you want to show extra product images or a short description directly on your WordPress Amazon affiliate website, then you can do this on the single product page. Customers can view products in the comparison table layout, and click on one to access the individual product page. However, this involves loading an additional page for each product.
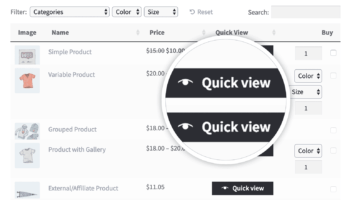
Add quick view buttons to the list of affiliate products.Instead, you can install the WooCommerce Quick View Pro plugin. This lets you add 'quick view' buttons to the product table. Customers click on these to view the full product image gallery and/or extra information. This might include the short description and a button with your affiliate link. The extra information appears in a quick view lightbox popup. It's much more user-friendly than taking them to a separate page.
Customers use the quick view to speedily learn more about each product. When they're ready, they click on your affiliate link to complete their purchase on Amazon.
To add quick view buttons to the product table, make sure both WooCommerce Product Table and WooCommerce Quick View Pro are installed. You can then edit the table at Products → Product Tables and add a 'Quick View' column.
Tip: If you're using WooCommerce quick view, then you might want to disable the links to the single product page completely. This is an option on the WooCommerce Product Table plugin settings page.
Table Tricks 2: Add extra product data to the comparison table
When we added our products earlier, we added various types of data such as title, description, price, categories and tags. You can display all of this in the WooCommerce product comparison table.
If you need to store and display even more data about the products, then you can do this by creating WooCommerce custom fields and taxonomies. Add them as columns in the table. You could, for example, add extra technical data to your televisions review site. This will help visitors filter which products are right for them.
Remember that you need to add value with your site. Adding extra information to your comparison table is a great way of doing this.
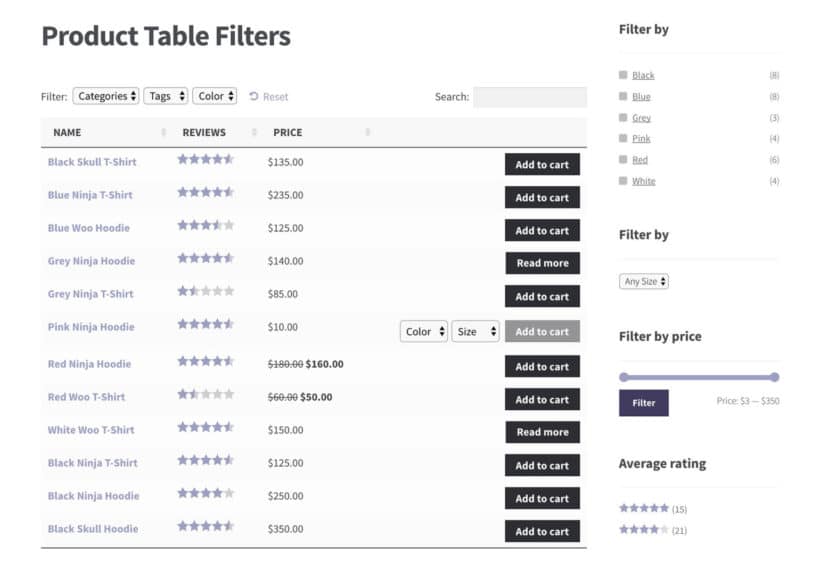
Table Tricks 3: Add filters to the WooCommerce Amazon Affiliates product table
If you’re comparing lots of products, then filters can make it easier for visitors to find the products they’re looking for.
WooCommerce Product Table has 2 types of filters: dropdown lists above the comparison table, plus sidebar widgets. Customers can use these to filter by various types of product data, price, or average rating.
These are just additional ways of adding extra information, sortability, and value to your site. This won’t be appropriate for all WooCommerce Amazon affiliates sites, but think about whether it works for yours.
Note: If you’re just comparing a couple of products, then there’s no need to worry about filters. This is because everything will be on one page regardless.
You’re now ready to enjoy your passive income
That wraps up our guide to earning Amazon affiliates commission – and that sweet passive income – by starting a WooCommerce product reviews website. We’ve shown you the step-by-step details (and a real life case study). So you’ve got all the information you need to make your website a success.
The most effective product review websites will continue to receive attention after launch, with new reviews and comparisons added. You don’t have to spend a lot of time on these. However, do spend some time on them in order to keep visitors and search engines happy.
If you’d prefer, we can take some of the pain out of dealing with search engines with our WordPress SEO packages. Take a look, and discover how we can promote your website for you.
Thanks for reading, and we hope we’ve helped set you on the way to enjoying passive income! Now over to you: do you already earn affiliate income by publishing product reviews and comparisons in WordPress and WooCommerce? Let us know your thoughts and experiences in the comments below :)
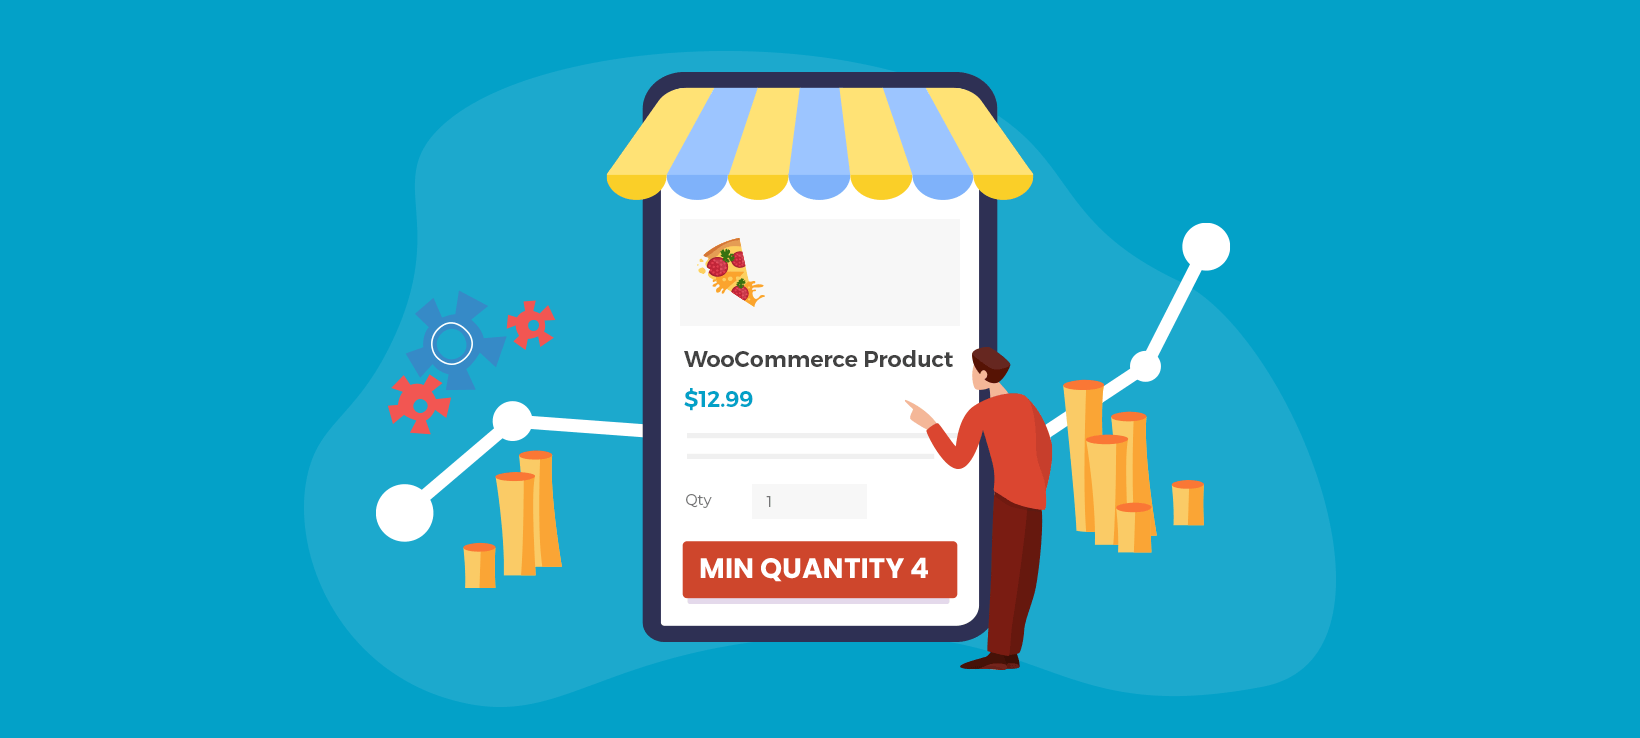
Adding minimum and maximum quantity rules to WooCommerce ensures that every sale is both profitable and manageable for your online store. This article will introduce you to the best min max quantity WooCommerce plugin, and show you how to set it up in just a few minutes.
When you use WooCommerce as it comes, your customers can order as few - or as many - of each product as they like. There are no min or max quantity restrictions. This can cause several problems for your company, including:
Unprofitable orders - customers can place tiny orders that are not cost-effective to fulfil.
Products with low profit margins - some products are only profitable when ordered in larger quantities, otherwise you lose money.
Capacity issues - you risk receiving huge orders that are too big for your warehouse to manage.
Packaging difficulties - some products can only be packaged efficiently in certain quantity groupings, e.g. in packs of 4.
Lack of flexibility - you may have different operational processes for certain user groups, such as wholesale buyers. A one-size-fits-all quantity setting makes this difficult.
The WooCommerce Quantity Manager plugin solves all these problems and more. Unlike other min max quantity WooCommerce plugins, it's easy to use and 100% flexible. It gives you total control over the product quantities in your store, without slowing it down.
6 reasons why a WooCommerce minimum and maximum quantity plugin can increase profits
Before we start, let's look at why you might need a WooCommerce min max quantity plugin in the first place. I firmly believe that you should only install plugins that you have a genuine need for. Ask yourself: "Will this plugin make my store more profitable or easier to manage?"
The best min max quantity WooCommerce plugin lets you answer "Yes" to both questions. Here are 6 reasons why it can increase your profits while making your store easier to manage:
Reason #1 - Use the woocommerce min max quantity to increase profits
Many WooCommerce orders are only profitable if they're over a certain minimum and maximum quantity or minimum order value.
This is a big problem if you sell low value products and expect customers to order multiple items at once. For example, an online restaurant ordering system assumes that people will order an entire meal. If someone orders an individual drink or one small side salad then it's not worth preparing and packing their order.
A minimum order WooCommerce plugin lets you guarantee that every order is profitable. Simply set the min/max quantity or value. Customers will be encouraged to continue adding to their order until they can check out at a level that is profitable for you.
Reason #2 - Set a WooCommerce minimum quantity per product to make every product profitable
At the same time, you might have certain products that are only profitable when ordered in bigger quantities. In this case, setting a minimum quantity isn't much use because the issue relates to each product, rather than the overall order value.
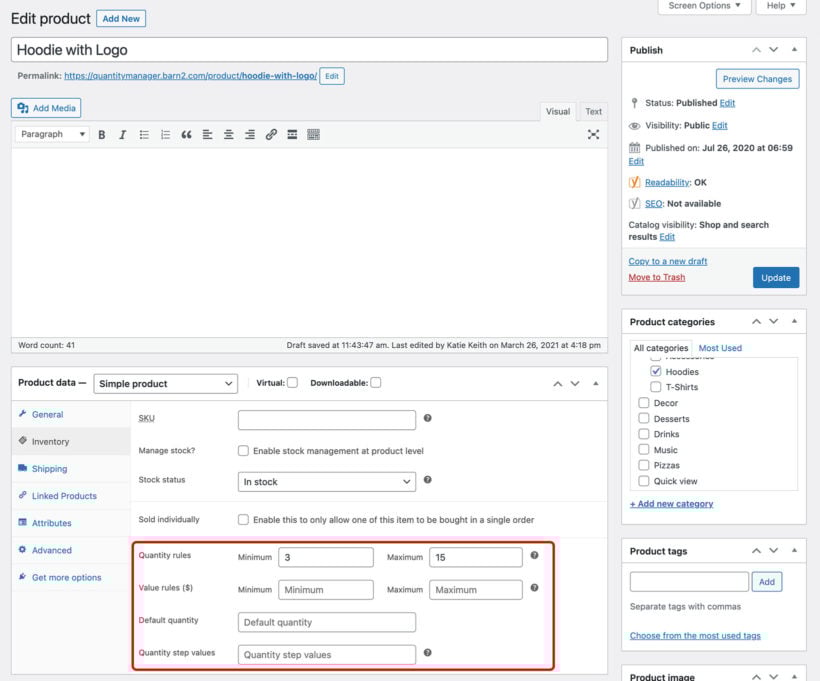
Instead, you need a plugin that lets you set the WooCommerce product minimum quantity.
WooCommerce Quantity Manager lets you set a minimum quantity for categories, products or variations. This gives you more flexibility and saves you time. For example, if you have a hardware store with a 'Nails and screws' category then you can set a minimum quantity for this whole category, instead of having to edit each individual product.
Setting minimum quantities helps you make sure that every product is sold for a suitable profit margin.
Reason #3 - Use WooCommerce max quantity to manage capacity and keep your orders manageable
Every business loves to receive big orders, but there is a limit. Realistically, you can only handle orders that your team and warehouse have the capacity to manage. If you receive orders that you can't handle then you risk letting down customers and damaging your reputation.
Of course, WooCommerce itself has stock management features. These manage your inventory and make sure you only sell items that you actually have in stock. However, this only applies to one product at a time. Stock management won't prevent you from receiving unmanageably large orders.
The solution is to use a WooCommerce max quantity plugin such as Quantity Manager. Use it to set a max quantity for entire orders, orders from a specific category, or for each individual product or variation. Depending on your store's needs and capacity issues, you can set a maximum quantity or maximum order value.
This ensures that your store has the capacity to handle every order and won’t get overwhelmed. Your staff and customers will thank you for it!
Reason #4 - Use default quantities to increase your average order value
WooCommerce min and max quantity rules physically control the quantity that customers can order. You can also benefit from a more gentle approach.
The WooCommerce Quantity Manager plugin lets you change the default quantity which appears on the quantity field for each product. While this doesn't control what customers can buy, it's a powerful way to nudge them in the right direction.
The default quantity in WooCommerce itself is 1. Unconsciously, this suggests that it's normal to buy 1 of each product. But you want customers to buy more than 1!
Increase the default quantity or set it to zero. Either way, you're creating the impression that it's normal to buy larger quantities of your products. It's a great way of increasing the average order value in WooCommerce!
Reason #5 - Use WooCommerce quantity increments to improve operational efficiency
In WooCommerce itself, customers can select quantities in increments of 1. This means that they can order in quantities or 1, 2, 3, 4, and so on.
The Quantity Manager plugin lets you change the quantity step value to anything you like - either globally, or per product/category/variation. This works nicely alongside your WooCommerce min max quantity rules to make your warehousing, packaging and delivery more profitable.
For example, you might sell a certain type of product in pallets or boxes that can fit 4 products. If the customer orders a quantity that is not a multiple of 4 then you're paying to ship empty space. This reduces your profits, as well as increasing the carbon footprint. Instead, you can set the quantity increment to 4 and ensure that customers order in groupings of 4.
Quantity increments also help to increase profits if you have a custom manufacturing process and your order quantities need to fit with this.
Reason #6 - Set min and max quantity rules for certain user groups
So far, we've assumed that all your customers will have the same quantity requirements. That's not necessarily the case.
If you have a multi-purpose store that sells to different types of customers, then you might want to set WooCommerce min and max quantities for certain groups only. For example, if you have a B2B wholesale store (e.g. using the WooCommerce Wholesale Pro plugin) then you might want to set a WooCommerce minimum quantity for wholesale buyers only. Wholesale users often have different terms, such as bulk shipping options, which aren't available to normal customers. As a result, it makes sense to set quantity minimums for them without affecting other customers.
You can easily do this with the WooCommerce Quantity Manager plugin. Just choose which user role(s) your minimum maximum quantity rules will apply to.
Why WooCommerce Quantity Manager is the best min max quantity WooCommerce plugin
As you can see, setting minimum and maximum quantity rules can increase both profitability and efficiency. The next step is to choose which WooCommerce order quantity plugin to use.
We built WooCommerce Quantity Manager after struggling with other WooCommerce min max quantity plugins. The problems we found were:
Performance problems - particularly slowing down the cart page.
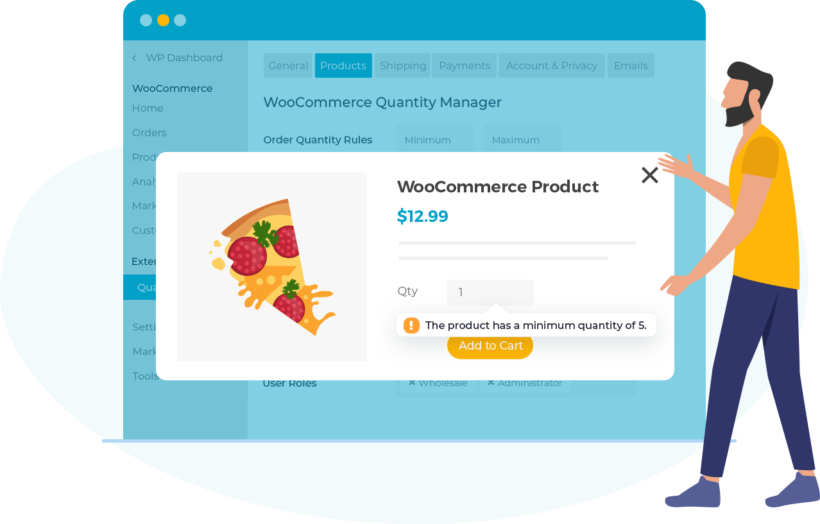
Unhelpful errors - some of the error messages were quite rude and abrupt, telling the customer that there is a problem without explaining what they need to change in order to check out.
Multiple errors showing at once - some plugins display multiple errors at once if a customer is breaking more than one quantity rule. These can fill up the page and look terrible unless the min max quantity plugin makes an effort to combine and rationalize them.
Confusing logic - A quantity plugin for WooCommerce needs to be written very carefully to achieve the right logic between the different levels of quantity rule. For example, global quantity rules should override category rules, which should override product and variation rules. Otherwise, things get confusing for the store owner and their customers.
Missing options - Most WooCommerce min/max quantity plugins focus on specific features only, so you're left with gaps in functionality. For example, a minimum order WooCommerce plugin might let you set the minimum quantity and value, without offering product minimum quantities or features such as quantity increments and defaults. To get the full business benefits, you need a fully featured WooCommerce quantity plugin that controls all aspects of your product quantities.
We decided to build a plugin that solves all these problems. WooCommerce Quantity Manager was the result.
Which industries need minimum and maximum quantities?
Before we get to the setup tutorial, let's look at some specific industries that can benefit from WooCommerce min max quantities.
WooCommerce wholesale stores with bulk ordering
B2B sales are all about buying in bulk. After all, wholesale buyers are selling on your products to their own customers. As a result, it makes sense to set a WooCommerce minimum quantity per product. This ensures that your store is only used for bulk buying.
If you run a public store alongside a wholesale area, then the 'User Role' feature in the WooCommerce quantity plugin lets you add minimum rules for B2B users only.
If you only sell in bulk then quantity groupings can also be helpful. These lets you set large step values between quantity options. For example, customers might be able to purchase in groups of 5, 10, and so on.
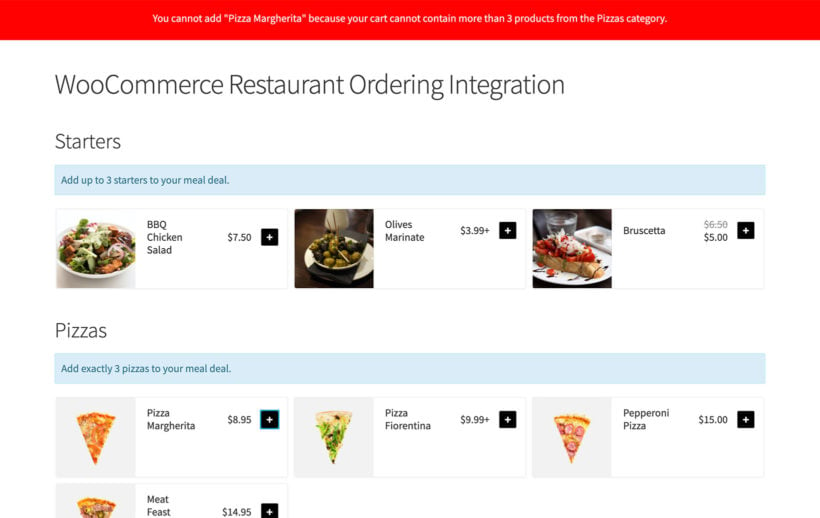
Restaurants selling meal deals
Selling meal deals with WooCommerce Restaurant Ordering and Quantity Manager
They might create a fixed price menu 'product' and then add all the food options as products with the price set to 0.00. To build their meal deal, customers must order the correct number of items from each category. For example, a meal deal might contain up to 2 starters, 2 main courses and up to $15 worth of side dishes or desserts. You can easily add these min max quantity rules and values with the WooCommerce min max quantity plugin.
Even if your restaurant doesn't sell meal deals, it might still need a minimum or maximum quantity. For instance, this is useful if you offer free delivery. Use a WooCommerce minimum quantity to ensure that all overs are expensive enough to justify the delivery cost.
Event tickets
Selling events with WooCommerce Product Table and Quantity Manager
Event tickets often need to be sold in certain groupings based on the layout of the venue. You might also want to force people to buy at least 2 tickets at a time. This ensures that you fill each part of the venue, with no awkward empty seats.
For example, let's say that you're selling tickets to events. Create a different variation for each type of seat. Add quantity groupings to force customers to buy them in pairs, or to sell an entire row together.
You can also set the default ticket number to 0. This is much better for selling events than the usual default of 1. That's because customers can make a fresh choice of how many tickets to buy, instead of assuming that they will buy one at a time.
Selling WooCommerce products in pairs
If you are displaying prices of individual items which are only available in pairs, then quantity increments are the perfect solution. Examples of this might include 'Mummy and Daughter' t-shirts, sets of chairs, sets of drinks glasses or place mats.
Your products will appear to be better value if you display the price per item. However, if it's not possible to buy items individually then you need to set quantity groupings.
Product bundles
If you're selling 'build your own' product bundles, such as gift baskets, then it's important to add min max quantity rules to WooCommerce.
Let customers build a product bundle by selecting the correct number of items from each category. This might include custom gift baskets, cosmetics sets, food boxes, and so on.
For example, you might instruct customers to choose 1 item from the shampoo category, 1 from the conditioner category and 2 from the make-up category. Use WooCommerce minimum and maximum quantity rules to prevent mistakes.
Seasonal sales
When you run a sale, it's important to make sure that everyone can access the discounts. Otherwise, a small number of customers can buy all your discounted stock before anyone else gets a chance.
During sale periods, set a maximum order quantity in WooCommerce. This prevents abuse of the sale prices and ensure that lots of different customers can benefit from the price reduction. This is particularly important for major sales such as Black Friday.
In-demand products
For the same reasons, you can ensure that popular items are shared fairly between customers. Use a WooCommerce max quantity per product to limit the number of in-demand items that each customer can buy. This helps to keep more customers happy overall.
This is also useful for products with low stock levels, preventing just one customer from buying all the remaining stock.
Now you know how you can benefit from minimum and maximum quantities, and which plugin to use. The next step is to install it. I'll show you how in the next section.
Tutorial: How to add WooCommerce min and max quantities
Ok, now we've reached the tutorial section of this article. The min max quantity WooCommerce plugin is really easy to use, and you can start adding minimums and maximums in minutes.
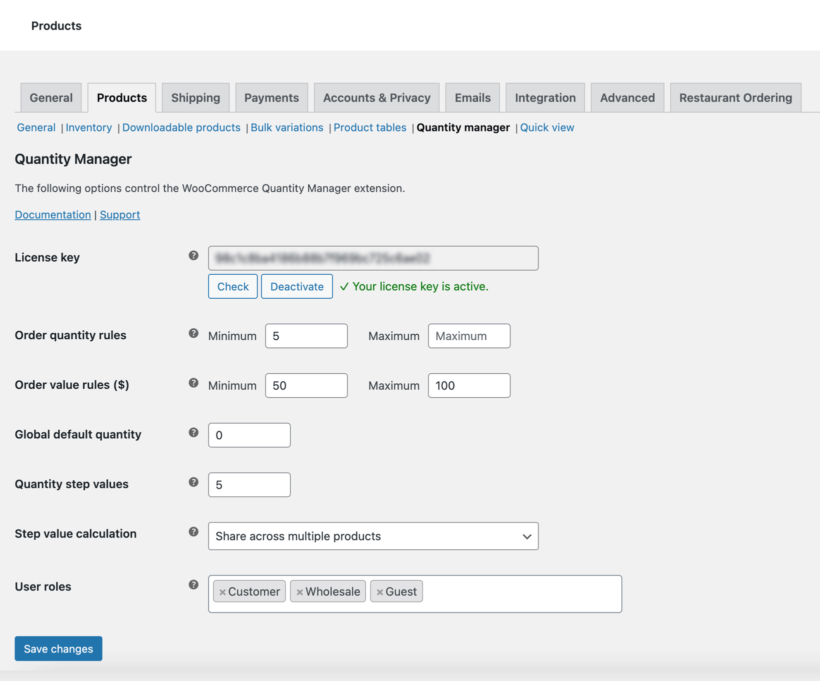
The main thing to think about is where to add the quantity rules:
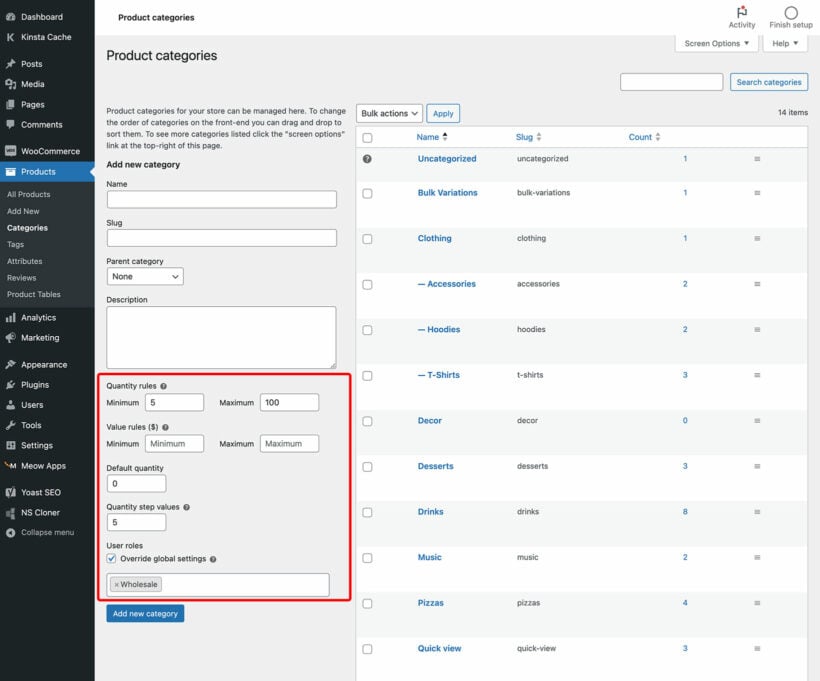
You can set them globally so that they apply to the entire order.
There are category-level quantity rules which force customers to buy a min or max number of products from specific categories.
It's also possible to add min/max quantities to individual WooCommerce products and variations.
To save yourself time, I recommend adding min and max quantity rules to WooCommerce at the highest possible level. That's because you only have to set global rules in one place, whereas product-level rules need configuring for every product.
With this in mind, follow the instructions below that are most relevant to your store. You don't need to add every type of minimum and maximum quantity rule. Just add the ones you need, and ignore the rest. For example, it's fine to set a minimum quantity without adding a max quantity. The WooCommerce min/max quantity plugin will cleverly apply the correct rule to each product, without any conflicts.
Create a global WooCommerce minimum and maximum order quantity
You can also choose which user roles the min max quantity rules in your store will apply to.
Add category min max quantity rules to WooCommerce
Do this if you want the quantity rules to be shared across all products in a specific category, instead of the entire order. For example, a restaurant creating meal deals should set min and max quantities or values for the starters category, the main courses category, and so on.
Go to WooCommerce → Products → Categories and click to add or edit a category.
Add a WooCommerce minimum quantity and/or WooCommerce maximum quantity for the category. Or if you prefer, then you can set min and max spend limits for the category (e.g. spend between $20 and $50).
You can also set quantity increments and step values for the category, although these are applied to each product individually instead of being shared across the category.
Now, if a customer adds at least one product from the category to their cart, then they must meet the category quantity rules. The cart page will contain helpful notes on any changes they need to make in order to meet the rules.
Add a WooCommerce minimum/maximum quantity per product
As we saw earlier, you can also add min max quantities per product in your WooCommerce store. This means that the quantity rules will be applied to that product individually.
Go to WooCommerce → Products and click to edit the product that you are adding min/max quantities to.
Scroll down to the 'Product Data' section and open the 'Inventory' tab.
Add a WooCommerce minimum quantity per product, a maximum quantity, or a min/max value that the customer must spend when they buy this product.
As always, you can also set a quantity step value and default starting value.
Add min and max quantity rules to individual variations
The above instructions for adding min/max quantities to specific products work for simple or variable products. If you add product-level rules for variable products then they will be shared across all the variations for that product. For example, if there's a per-product minimum quantity of 10 then customers can mix and match variations until there are at least 10 in the cart.
If you want to set min and max quantity rules on each variation individually, then you can do this. Instead of setting the rule in the 'Inventory' tab, go to the 'Variations' tab and click to edit each variation. You'll see min/max quantity fields for the variation here.
Using quantity minimums and maximums with other plugins
One of the best things about the Quantity Manager plugin is that it works with the native WooCommerce quantity field. It also uses native WooCommerce errors to advise customers how to meet the min/max quantity rules. This makes it compatible with a wide range of other plugins.
Here are some examples of how you can use it with other plugins to make your store even more profitable.
Create a one-page order form with quantity rules
Our bestselling WooCommerce Product Table plugin lists products in a quick order form. Customers can quickly enter quantities, choose variations and add multiple products to the cart at once.
Use it with WooCommerce Quantity Manager to add min and max quantity rules to the order form.
Add quick view lightboxes with quantity controls
Our WooCommerce Quick View plugin saves customers time by letting them choose quantities and add to the cart away from the single product page. When you use it with WooCommerce Quick View Pro, they are forced to select the correct quantities from within the quick view lightbox.
Start adding min/max quantities to WooCommerce today!
As you can see, nearly any online store can benefit from adding min and max quantities to WooCommerce. The WooCommerce Quantity Manager plugin has everything you need to add every type of quantity rule, so install it today.
Min/max quantities, values, step values, defaults and user role control.
Quantity rules for entire orders, or at category/product/variation level.
In-depth documentation and video tutorials.
Expert support direct from the Barn2 team.
Try it risk-free!
WooCommerce hides order data in the WordPress admin by default, but many businesses need to display this information on the front end. Whether you're creating dashboards for delivery drivers, providing vendors with their sales data, or building custom inventory management systems, you need a way to list WooCommerce orders.
The standard WooCommerce setup only shows customers their own orders through the My Account page. It doesn't provide any built-in method to display all orders or create custom order views on your website's front end.
This creates challenges for businesses that need to:
Give staff members access to order data without WordPress admin privileges.
Display order information to delivery partners or fulfillment teams.
Create vendor-specific order views for multi-vendor marketplaces.
Build custom reporting dashboards for different user roles.
Implement front-end inventory management systems.
This guide covers two proven methods to list WooCommerce orders on the front end. The first uses Posts Table Pro, a plugin solution that requires no coding. The second uses the wc_get_orders() function for developers who need custom implementations.
Both methods let you display comprehensive order information including customer details, shipping addresses, payment data, and order status. You'll learn how to create filtered views, implement security measures, and customize the display to match your exact requirements.
What is Posts Table Pro?
Posts Table Pro is a WordPress table plugin that lists any WordPress content in a structured HTML table, including WooCommerce orders.
Posts Table Pro is developed and supported by us at Barn2. It displays pages, posts, custom post types, and WooCommerce order lists in organized tables.
The plugin includes dozens of configuration options. You can select which columns of order data to display. You can control how the table is sorted. You can customize the search functionality and filtering options.
Posts Table Pro differs from our WooCommerce Product Table plugin. WooCommerce Product Table lists standard WooCommerce products in a table format. Posts Table Pro handles WooCommerce orders, which are stored as separate custom post types. This distinction makes Posts Table Pro the correct choice for displaying order lists.
This tutorial covers two methods: listing all WooCommerce orders in the front end and showing orders for specific customers only.
Which solution should you use for WooCommerce orders?
This comparison table helps you choose the right solution based on your technical skills and requirements for displaying WooCommerce orders:
Feature
Posts Table Pro
WooCommerce Product Table
Native WooCommerce
Custom wc_get_orders() code
Purpose
Display orders, posts, and custom post types
Display products only
Basic customer order history
Custom order displays
Can display orders
✅ Yes
❌ No
✅ Limited (customer's own only)
✅ Yes
Technical skills required
None
None
None
PHP development
Setup time
5-10 minutes
5-10 minutes
Already included
1-3 hours
Customization options
Extensive (via settings)
Extensive (via settings)
Very limited
Unlimited (requires coding)
Front-end display
✅ Yes
✅ Yes
✅ Yes (My Account only)
✅ Yes
Admin display
❌ No (use native)
❌ No (use native)
✅ Yes
✅ Possible
Show all orders
✅ Yes
❌ No
❌ No
✅ Yes
Filter by status
✅ Yes
N/A
❌ No
✅ Yes
Filter by customer
✅ Yes (with setup)
N/A
✅ Automatic (logged-in user)
✅ Yes
Search functionality
✅ Yes
✅ Yes
❌ No
✅ Can implement
Sortable columns
✅ Yes
✅ Yes
❌ No
✅ Can implement
Export options
✅ Yes
✅ Yes
❌ No
✅ Can implement
Responsive design
✅ Yes
✅ Yes
✅ Yes
Depends on implementation
HPOS compatibility
Requires compatibility mode
N/A
✅ Full support
✅ Full support
Maintenance required
Plugin updates only
Plugin updates only
None
Code maintenance needed
Support available
✅ Professional support
✅ Professional support
✅ WooCommerce support
❌ Self-supported
Cost
Paid plugin
Paid plugin
Free
Development time/cost
Best for
Non-technical users needing full order management
Product catalog displays
Basic customer order history
Developers needing custom solutions
Key takeaways:
Use Posts Table Pro when you need to display WooCommerce orders on the front end without coding
Use WooCommerce Product Table for product displays only - it cannot show orders
Use native WooCommerce when customers only need to see their own order history
Use custom wc_get_orders() code when you need highly specific functionality and have PHP development skills
How to list WooCommerce orders in a table on the front end
Step 1. Create the table of orders
Follow these steps to create an instant table listing WooCommerce orders:
Upon installing the plugin, you will be prompted with an automatic setup wizard to help you create your first table.
Provide a name for your table. Select "Shop orders" as your custom post type. Choose which posts or product pages to include in the table. Available options include posts, pages, and custom post types.
Customize your table's appearance by selecting columns and their display order. To add a new column, choose the column type from the dropdown menu and click "Add."
Configure sorting options by selecting the default sorting method and sort direction. This controls the order in which WooCommerce orders appear in your list.
Navigate to Post Tables → Settings. Find the "Links" option and enter "none". This prevents orders from being clickable, which is necessary because WooCommerce doesn't provide individual front-end order pages to link to.
Essential columns to Include in your WooCommerce order list with Posts Table Pro:
ID - rename this column to "Order ID".
Date
Shipping first name - Add this as a custom field column, enter _shipping_first_name as the custom field name, and rename the column to "First Name".
Shipping last name - Add this as a custom field column, enter _shipping_last_name as the custom field name, and rename the column to "Last Name".
Shipping address 1 - Add this as a custom field column, enter _shipping_address_1 as the custom field name, and rename the column to "Address 1".
Shipping city - Add this as a custom field column, enter _shipping_city as the custom field name, and rename the column to "City".
Postcode - Add this as a custom field column, enter _shipping_postcode as the custom field name, and rename the column to "Postcode".
Phone - Add this as a custom field column, enter _shipping_postcode as the custom field name, and rename the column to "Phone".
Total - Add this as a custom field column, enter cf:_order_total as the custom field name, and rename the column to something like "Total ($)".
Quick reference: all available WooCommerce order fields
This quick reference lists all available WooCommerce order fields you can display in Posts Table Pro. Each field requires creating a custom field column with the specified field name:
Field category
Field description
Custom field name
Customer data
Customer IP address
_customer_ip_address
Customer browser/OS
_customer_user_agent
Order creation method
_created_via
Billing information
Complete billing address
_billing_address_index
Billing first name
_billing_first_name
Billing last name
_billing_last_name
Billing company
_billing_company
Billing email
_billing_email
Billing phone
_billing_phone
Billing country
_billing_country
Billing address line 1
_billing_address_1
Billing address line 2
_billing_address_2
Billing city
_billing_city
Billing state
_billing_state
Billing postcode
_billing_postcode
Shipping information
Complete shipping address
_shipping_address_index
Shipping first name
_shipping_first_name
Shipping last name
_shipping_last_name
Shipping company
_shipping_company
Shipping country
_shipping_country
Shipping address line 1
_shipping_address_1
Shipping address line 2
_shipping_address_2
Shipping city
_shipping_city
Shipping state
_shipping_state
Shipping postcode
_shipping_postcode
Payment information
Order currency
_order_currency
Prices include tax
_prices_include_tax
Payment method code
_payment_method
Payment method title
_payment_method_title
Order total
_order_total
Shipping cost
_order_shipping
Total discount
_cart_discount
Payment date
_date_paid
Payment date (formatted)
c_paid_date
Tax information
Total tax
_order_tax
Shipping tax
_order_shipping_tax
Tax discount
_cart_discount_tax
Order status
Transaction ID
_transaction_id
Completion date
_date_completed
Completion date (formatted)
_completed_date
Step 2. Ensure Posts Table Pro can display your WooCommerce orders
WooCommerce versions 8.2 and later store order data differently. Posts Table Pro requires compatibility mode to access this data. Sites created before WooCommerce 8.2 already have orders stored in the compatible format and can skip this step.
For newer sites, enable compatibility mode:
Navigate to WooCommerce → Settings → Advanced → Features
Under Order data storage, tick the Enable compatibility mode checkbox
Compatibility mode forces WooCommerce to use pre-HPOS data storage methods. This may impact performance on high-traffic sites. Test thoroughly before implementing on production sites. This requirement exists because Posts Table Pro currently reads from the traditional WordPress database structure.
What else can I list in the table of WooCommerce orders?
The WooCommerce order table supports numerous data columns beyond the basic examples provided. You can add any column that matches your inventory management needs through the table builder's Columns page.
Order status
Order status displays the current processing state of each order. Add a "status" column to include this information in your WooCommerce order list.
Order meta fields
WooCommerce stores extensive order metadata in the wp_postmeta database table. Each meta field can become a table column by creating a custom field column and entering the corresponding field name:
Customer IP address - _customer_ip_address
Customer's browser and operating system - _customer_user_agent
Order creation method - _created_via
Billing details:
Complete billing information - _billing_address_index
Billing first name - _billing_first_name
Billing last name - _billing_last_name
Billing company name - _billing_company
Billing email address - _billing_email
Billing phone number - _billing_phone
Billing country - _billing_country
Billing address line 1 - _billing_address_1
Billing address line 2 - _billing_address_2
Billing city - _billing_city
Billing state - _billing_state
Billing postcode - _billing_postcode
Shipping details:
Complete shipping information - _shipping_address_index
Shipping first name - _shipping_first_name
Shipping last name - _shipping_last_name
Shipping company name - _shipping_company
Shipping country - _shipping_country
Shipping address line 1 - _shipping_address_1
Shipping address line 2 - _shipping_address_1
Shipping city - _shipping_city
Shipping state - _shipping_state
Shipping postcode - _shipping_postcode
Order payment data:
Currency - _order_currency
Tax inclusion status - _prices_include_tax
Payment method code - _payment_method
Payment method name - _payment_method_title
Total order cost - _order_total
Shipping cost - _order_shipping
Total discount - _cart_discount
Payment date - _date_paid
Payment date (formatted) - c_paid_date
Tax information:
Total tax - _order_tax
Shipping tax - _order_shipping_tax
Tax discount - _cart_discount_tax
Transaction ID - _transaction_id
Order status data:
Completion date - _date_completed
Completion date (formatted) - _completed_date
This comprehensive list serves as a reference for WooCommerce database fields. These fields enable detailed order tracking and reporting through your front-end tables.
List WooCommerce orders based on their status
Order status filtering allows you to display specific order types like completed, pending, or refunded orders in separate tables.
Posts Table Pro can filter orders by their current status. Configure this using the status parameter in your table shortcode.
Other options to customize your list of WooCommerce orders
Posts Table Pro provides extensive customization options for WooCommerce inventory management. Beyond column selection, you can configure sort order, search functionality, pagination, and display elements.
Column names can be customized to match your requirements. The column heading documentation explains how to rename any WooCommerce order table column.
The plugin knowledge base contains detailed documentation for all available configuration options.
WooCommerce inventory management: Can I link to the individual order?
WooCommerce doesn't create front-end order pages. Posts Table Pro's default links point to non-existent pages. The solution is disabling all links in your order table as shown in the setup instructions.
Custom code can create links to admin Edit Order pages. This requires PHP development skills. For professional implementation, consider hiring a WordPress expert through Codeable.
Can I list the products for each order?
Product listings within individual orders aren't accessible through Posts Table Pro. WooCommerce stores this data in a format the plugin cannot display directly.
Access individual order product lists through the WordPress admin:
Copy the Order ID from your front-end order table
Navigate to [your-domain]/wp-admin/post.php?post=12345&action=edit (replace 12345 with your Order ID)
This method provides direct access to the Edit Order screen containing complete product information.
Don't forget customer confidentiality!
Customer data protection is essential when displaying WooCommerce orders on the front end. Always implement appropriate security measures.
WooCommerce restricts front-end order display by default because order information contains confidential customer data.
Legitimate use cases exist for front-end order displays. Delivery drivers may need order access without admin privileges. Administrative and finance staff might require order visibility through dedicated interfaces. These scenarios benefit from controlled front-end WooCommerce inventory management.
Can customers see a front-end list of their own orders?
WooCommerce includes built-in customer order visibility. The 'My Account' page displays order history for logged-in customers. No additional plugins are required for this basic functionality.
The [my_orders] shortcode displays customer orders anywhere on your site. Users must be logged in to view their order history through this shortcode.
Posts Table Pro becomes necessary when displaying all orders or creating custom filtered views beyond individual customer orders.
Can customers see a list of their own orders?
Displaying user-specific orders requires additional configuration. WooCommerce doesn't store customer details as taxonomies on the 'shop_order' post type. This limitation requires workarounds for customer-specific order displays.
Multi-vendor sites particularly benefit from vendor-specific order views. Each vendor can access their order table or report without seeing other vendors' data.
Two implementation approaches exist: manual configuration for non-technical users and automated solutions for developers.
Option 1 - Create a hidden page for each customer listing their orders
Create a hidden page for each customer. Apply password protection to each page.
Create a custom taxonomy named 'Customer'. Tag each order with the appropriate customer username or ID.
Configure Posts Table Pro on each page. Select "Custom taxonomy" when choosing posts to include. Choose the term matching the individual customer.
Send customers their unique page link and password.
Repeat this process for all customers requiring front-end order access.
Option 2 - Automated solution
Developers can implement this automated approach:
Create a custom taxonomy on 'shop_order' post type. Configure automatic population with order placer's username.
Modify the WooCommerce Account page template. Replace the default order list with a Posts Table Pro shortcode.
Update the shortcode to reference your custom taxonomy slug.
Dynamically populate the taxonomy term with the current user's username.
This implementation creates an automated table displaying user-specific orders on the WooCommerce Account page.
How to use wc_get_orders() to get WooCommerce orders
The wc_get_orders() function is a PHP method for programmatically retrieving and displaying WooCommerce orders on your site's front end.
Developers can use the wc_get_orders() function to fetch order data programmatically. This approach enables custom dashboards and reports with complete control over data presentation.
Step 1: Understand the wc_get_orders() function
wc_get_orders() retrieves orders based on specified criteria. Filter options include date ranges, order status, customer ID, and custom parameters. The function returns an array of order objects for processing.
Step 2: Add the PHP snippet
To display orders on the front end, add this PHP snippet to your child theme’s functions.php file or a custom plugin:
function display_woocommerce_orders() {
    $orders = wc_get_orders(array(
        'limit' => 10, // Number of orders to fetch
        'status' => 'completed', // Filter by order status
        'orderby' => 'date',
        'order' => 'DESC',
    ));

    if (!empty($orders)) {
        echo '<table class="woocommerce-orders-table">';
        echo '<tr><th>Order ID</th><th>Customer</th><th>Total</th><th>Date</th></tr>';

        foreach ($orders as $order) {
            $order_id = $order->get_id();
            $customer_name = $order->get_billing_first_name() . ' ' . $order->get_billing_last_name();
            $order_total = $order->get_total();
            $order_date = $order->get_date_created()->format('Y-m-d');

            echo "<tr>
                <td>#{$order_id}</td>
                <td>{$customer_name}</td>
                <td>\${$order_total}</td>
                <td>{$order_date}</td>
            </tr>";
        }

        echo '</table>';
    } else {
        echo '<p>No orders found.</p>';
    }
}

add_shortcode('display_orders', 'display_woocommerce_orders');
Step 3: Display the orders
Display orders on any page using this shortcode:
[display_orders]
Step 4: Customize the output
Our example pulls completed orders, but you can adjust the wc_get_orders() parameters to retrieve orders by:
Order status - Use values like processing or on-hold
Customer ID - Filter by specific customer using customer_id => 5
Date range - Set date parameters like date_created => '>=2024-01-01'
Payment method - Filter by payment gateway used
Shipping method - Filter by shipping option selected
wc_get_orders() provides complete flexibility for custom order displays. Posts Table Pro remains the preferred solution for users seeking code-free implementation with built-in filtering and sorting controls.
Over to you!
You now have comprehensive instructions for listing WooCommerce orders in front-end inventory management systems. Get Posts Table Pro and configure your order display today!
Share your implementation details in the comments. What columns do you display? How do you use front-end order lists? What security measures protect your customer data? Your experiences help other store owners optimize their WooCommerce inventory management.
A WooCommerce age verification plugin prevents underage people from buying age restricted products on your website. You'll need one if you're selling items such as tobacco, alcohol, 18+ competitions, or adult products. It works by asking customers to verify their age before they can view or buy age restricted products from your WooCommerce store.
In this tutorial, I'll introduce you to 2 popular WooCommerce age verification plugins:
WooCommerce Private Store - Restrict your entire WooCommerce store so that people can only access it after verifying their age.
WooCommerce Protected Categories - Restrict specific product categories, while leaving your other products available to all age groups.
Both plugins will leave your homepage and other main pages (About, Contact, etc.) public. They only provide age verification for your age restricted products. You don't have to lock down your whole website. This lets you create public areas of your website, build your SEO, and get a good search engine ranking (which wouldn't be possible if your whole website was age-restricted. Google's crawlers can't get past age verification!).
I'll provide advice on which WooCommerce age verification plugin best meets your needs. Then I'll show you how to set them up, using a choice of 3 methods. Let's get started!
Age restriction is a tricky issue in e-commerce because the customer isn't physically present for you to verify their age. Lots of countries simply require website owners to ask customers to confirm their age before allowing them to purchase. WooCommerce age verification plugins work on this basis. It's the customer's responsibility to verify their correct age.
Before we start, I recommend that you check the law for your own country to make sure this is acceptable. If not, then you might need a more comprehensive approach. For example, in extreme circumstances, you might need each customer to provide proof of identify before you will ship age restricted products to them. Method 2 covers a WooCommerce age restriction plugin that can do this, but it does mean more work for you. Fortunately, this isn't normally needed - but you should always check.
Introducing 2 WooCommerce age verification plugins
You should choose an age verification plugin for WooCommerce based on exactly what you need to restrict:
Method 1 - WooCommerce Private Store with online age verification This simple plugin locks down ALL your WooCommerce content while leaving the rest of your website public. Customers can view your homepage and other main pages, but must verify their age in order to view and buy any products. Use this plugin to add a global age gate which will restrict ALL your products.
Method 2 - WooCommerce Private Store with individual user accounts Perhaps you still want to age restrict your entire store, but need to manually confirm each user's age before they can start shopping. You can do this by using the WooCommerce Private Store age verification plugin to hide your products from public view, and manually creating individual user accounts for each customer. Logging into their user account will unlock the age restricted store.
Method 3 - WooCommerce Protected Categories This WordPress plugin is perfect for age restricting specific groups of products within a WooCommerce store, while leaving other products available to everyone. Use it if you only want to restrict some of your products, while leaving others available for all ages.
How do the age verification plugins work?
Methods 1 and 3 are very simple, in that they both password protect parts (or all) of your store. To use them as WooCommerce age verification plugins, you need to set a password for each age that the products are available to. Whenever someone enters their age in the box, the plugin recognises it as a valid password. This tells the plugin that their age is validated and they can view and buy the products within the restricted area.
Method 2 is slightly different because it unlocks the age restricted store for eligible logged in users, while hiding your products from guests.
Next, I'll provide detailed instructions on how to set up each plugin to age restrict your products.
Method 1: How to use WooCommerce Private Store to age restrict your entire shop
This is how to use the WooCommerce Private Store plugin to lock down your entire WooCommerce store. Customers must enter a valid age to unlock the age restricted store.
Setup instructions
First, buy WooCommerce Private Store. Download the plugin and upload it to your site (Plugins → Add New).
Go to WooCommerce → Settings → Private Store and change these settings:
License Key - Enter your license key.
Store Passwords - Add a password for each age that can access the age restricted WooCommerce store. For example, if your store is restricted to people aged 18+, then you need a password for each age over 18. So, you would have a password called 18, one called 19, one called 20, and so on. (I realise this is quite a few passwords, but it only takes a second to add each one, so it won't take you long to create them all.) When someone enters a valid age on the WooCommerce age verification page, the plugin will unlock the store if their age matches one of these passwords.
If you want a faster option, then consider having people simply enter "Yes" to unlock the category. If you do this then I recommend adding "Yes" in different cases to avoid confusion:
Password Expires After - Add a whole number here to specify the number of days that people can continue accessing the store from their browser until they have to re-validate their age. I recommend adding '1' here for added security.
Login Redirect URL - Normally, a customer will be redirected to whichever page they were trying to access when they had to verify their age. If you prefer, you can enter a specific URL here that they will always be redirected to after validating their age. (E.g. this might be main WooCommerce shop page.)
Login Form - Finally, you'll see settings for customising the page that people will use to validate their age. In the 'Form Message' field, I recommend adding something self-explanatory that will help people to validate their age. For example, it's helpful to state the format in which people need to enter their name.
Save your changes.
Now add an age validation page
In 2 simple steps, you have already age restricted your WooCommerce store so that only people with the correct ages can access it. The final step is to provide a way for them to enter their age and unlock the store. To do this, create a page and add the shortcode [store_login]. This will create an age verification form, with the text you added on the settings page. Add it to your menu or provide other user-friendly ways for people to find it.
Note: This applies to your entire shop. If you want to sell some age restricted products and some products that are available to everyone, then you need WooCommerce Password Protected Categories instead. (See next section.)
Method 2: How to use WooCommerce Private Store with individual user accounts
Method 2 is identical to method 1 and uses the same WooCommerce age verification plugin. However, it's more secure because instead of trusting users to enter their own age, you would vet each customer manually and then create a user account for them.
With this method, you'll be using the WooCommerce Private Store plugin in a different way. Each customer must log into their individual user account on your website. This will automatically unlock all the age restricted WooCommerce content (i.e. your main Shop page, products, categories, etc.).
3 simple steps to create an age restricted store
First, get WooCommerce Private Store. Download the plugin from the link in your confirmation email. Upload it to your website (Plugins → Add New).
Go to WooCommerce → Settings → Private Store and change the following settings:
License Key - Enter the license key from your confirmation email. (The plugin only works with a validated license key.)
Logged In Users - Tick this box. This means that instead of having a separate password for your age restricted WooCommerce store, the store is unlocked whenever someone logs into their user account. An option appears underneath to choose which user roles will have access.
Finally, create a login page. This should allow customers to log into their main WordPress user account. Either link directly to the main WordPress login page (yourdomain.com/login.php). Or - for a more professional result - create a front end login form using a plugin such as Theme My Login.
And that's it! Your main homepage and other standard WordPress pages will remain public and can appear in search engines etc. All your WooCommerce store content will be hidden from guests, and will immediately appear for logged in users.
Can customers create their own accounts?
Plugins such as Theme My Login add customizable registration forms as well as login forms. Theme My Login also has an option to hold new user registrations for moderation, so that they can only access your hidden store after you've manually validated their age.
If you're not using Theme My Login, then you can add this as a standalone feature with the New User Approve plugin.
Method 3: How to use WooCommerce Protected Categories to create an age restricted area within your store
Unlike methods 1 and 2, this WooCommerce age verification plugin lets you create an age restricted area within WooCommerce, while leaving the other parts of your store public. It works by creating one or more private product categories, which can only be viewed after the customer enters a valid age.
First, setup the WooCommerce age verification plugin
Go to the plugin settings page: WooCommerce → Settings → Products → Protected Categories. Change the following settings:
License Key - Enter your license key so that the plugin will work.
Category Visibility - You would normally leave both these boxes unticked for WooCommerce age restricted products. However, it's ok to tick them if you want the age restricted products to appear in the public areas of your site. If you do this, then when someone clicks on one, they will be asked to verify their age before they can add to cart or access the single product page.
Password Expires After - Add a whole number to set the number of days that each person can continue accessing the age restricted store before having to re-validate their age. I recommend adding '1' here for extra security.
Client Login Page (optional) - If you like, you can select a page here which will automatically contain an age verification form form. This is optional because you can link directly to your age restricted category page or products, and people will also see the age validation form there.
Password Form - This section customises the login page where people enter their age to unlock the protected products. Adapt the Form Heading, Form Heading, Password Label and Button Text to an age verification form. (See the below screenshot for an example).
Age verification form settings
Age verification form
Now create a WooCommerce age verification category
Next, go to Products → Categories and either create a new category, or edit an existing one. You'll see a 'Visibility' section with a 'Password protected' option. Tick this.
Instead of just adding 1 password, add lots of passwords - one for each age over 18. So, you would have a password called 18, one called 19, one called 20, and so on. As with method 1, I realise this is quite a lot of passwords. However, it only takes you a second to add each one, you can create them all within a couple of minutes.
Finally, you need to add links to your age restricted products. If you selected a Login Page on the plugin settings page, then you can link to this from your menu etc. You can also link directly to the age restricted category, if you have ticked the appropriate box on the settings page. Either way, customers will have to verify their age before they can view and buy the restricted products.
What about navigation for my age restricted store?
If parts or all of your WooCommerce store are hidden from underage visitors, then the navigation needs to reflect this. For example, you might want to include menu links to all your product categories once people have verified their age, while hiding these links from everyone else.
Happily, both the WooCommerce Private Store and WooCommerce Protected Categories plugins will automatically do this for you. If you add links to WooCommerce content to your main navigation menu, then these will only be visible to people who have verified their age. You don't have to bother creating different menus for different types of user, as the dynamic links happen automatically.
How to display products to everyone, but require age verification to purchase
Finally, I'll give you a tip that lots of age restricted WooCommerce stores have asked us about.
If you want everyone to be able to browse your store, but only people over 18 or 21 can make a purchase, then you need to use WooCommerce Protected Categories (i.e. method 3 of this tutorial). When you set it up, tick the 'Category visibility' boxes on the plugin settings page:
When you do this, your age restricted products will appear on the main WooCommerce shop page, search results and widgets. When someone clicks on a product, they must login or enter the password (depending on how you've chosen to set up the age restriction) before they can access the single product page or add to cart.
You can use WooCommerce Protected Categories to make your entire store private, as well as hiding specific categories only. To put all your products behind the age gate, simply put them all in age restricted categories.
Which WooCommerce age verification plugin will you use?
In this tutorial, I've taught you how to set up 2 WooCommerce age verification plugins, using 3 different methods. These are designed to suit different types of WooCommerce store, whether you're selling alcohol, gambling, CBD products, or any other age-restricted items.
I'd love to hear how you get on with your age restricted WooCommerce store. Please add your comments below!


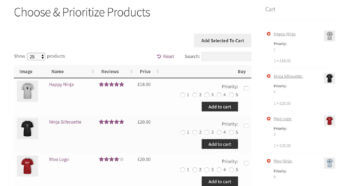 Some WooCommerce stores need a way for customers to set priorities when placing an order. By entering a number for each product before adding to the cart, they can indicate how you should prioritize their choices. For example, a customer might be selecting a selection of similar items without knowing which are available. You will ship a product to them based on the priorities they have entered against each item.
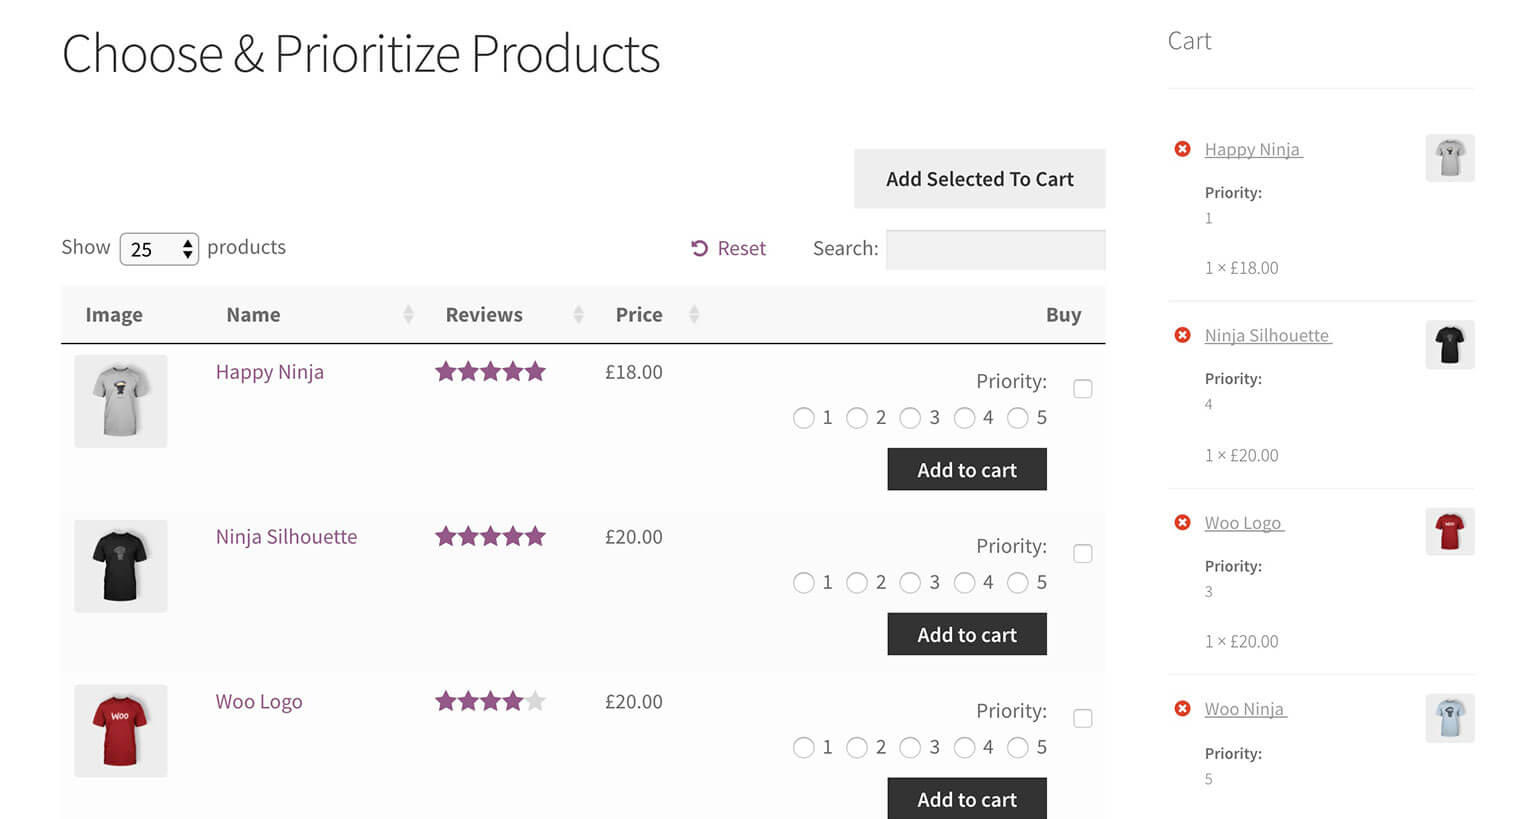
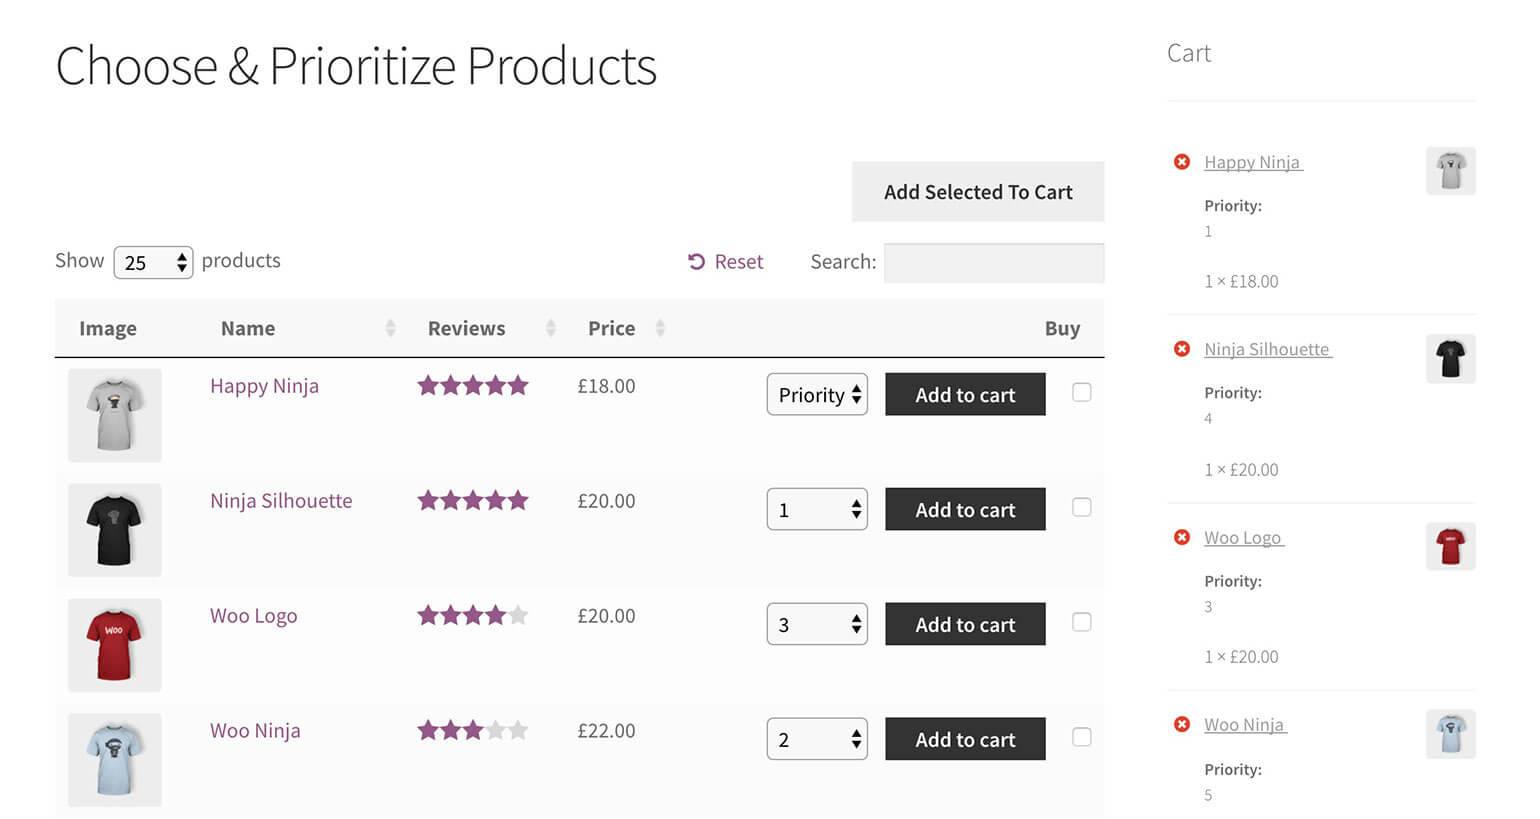
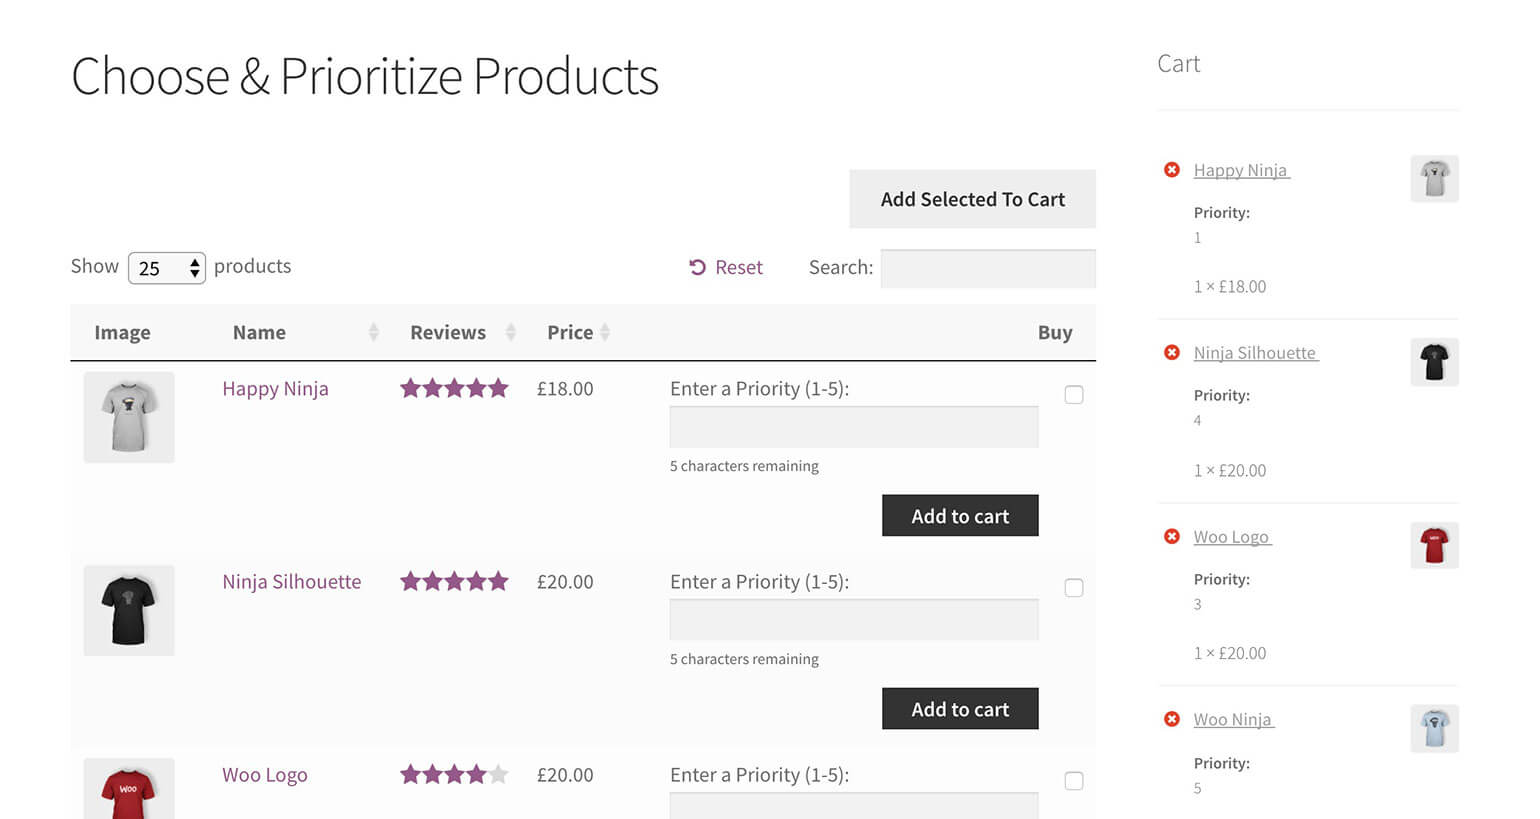

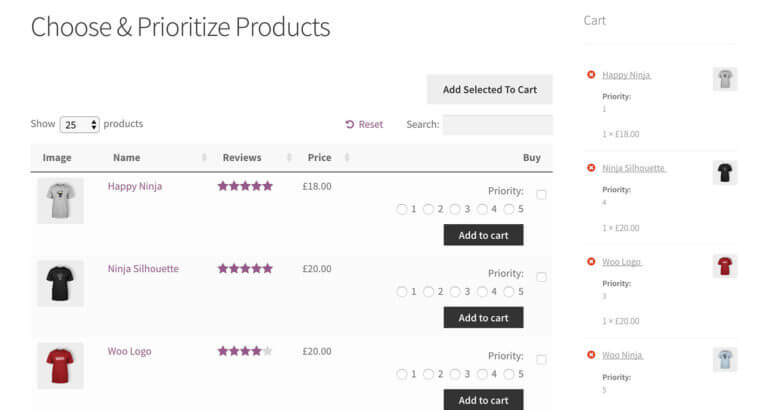


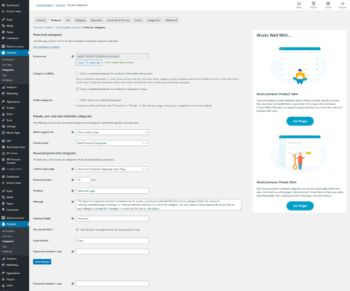
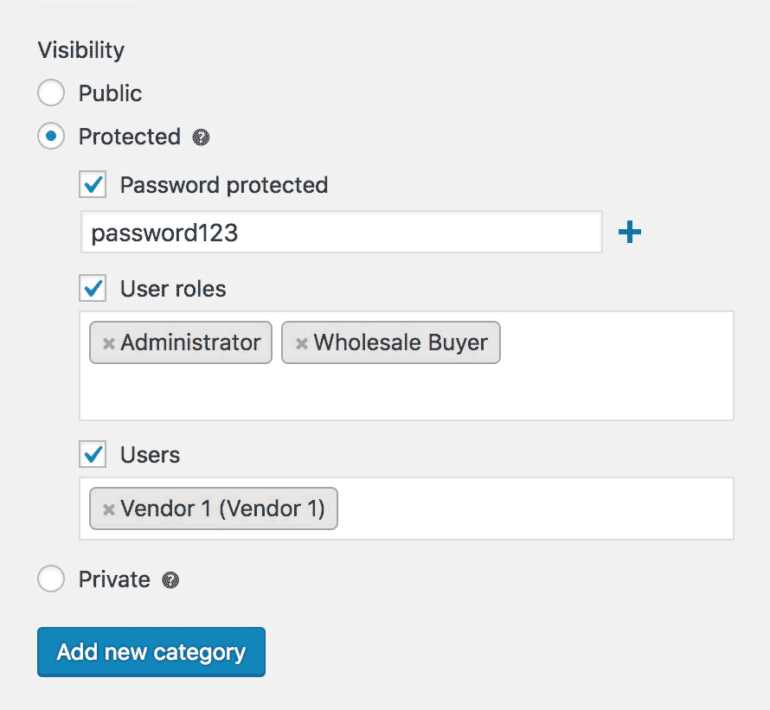

 Before we finish, I'll tell you about another great plugin for selling WooCommerce customer-specific products.
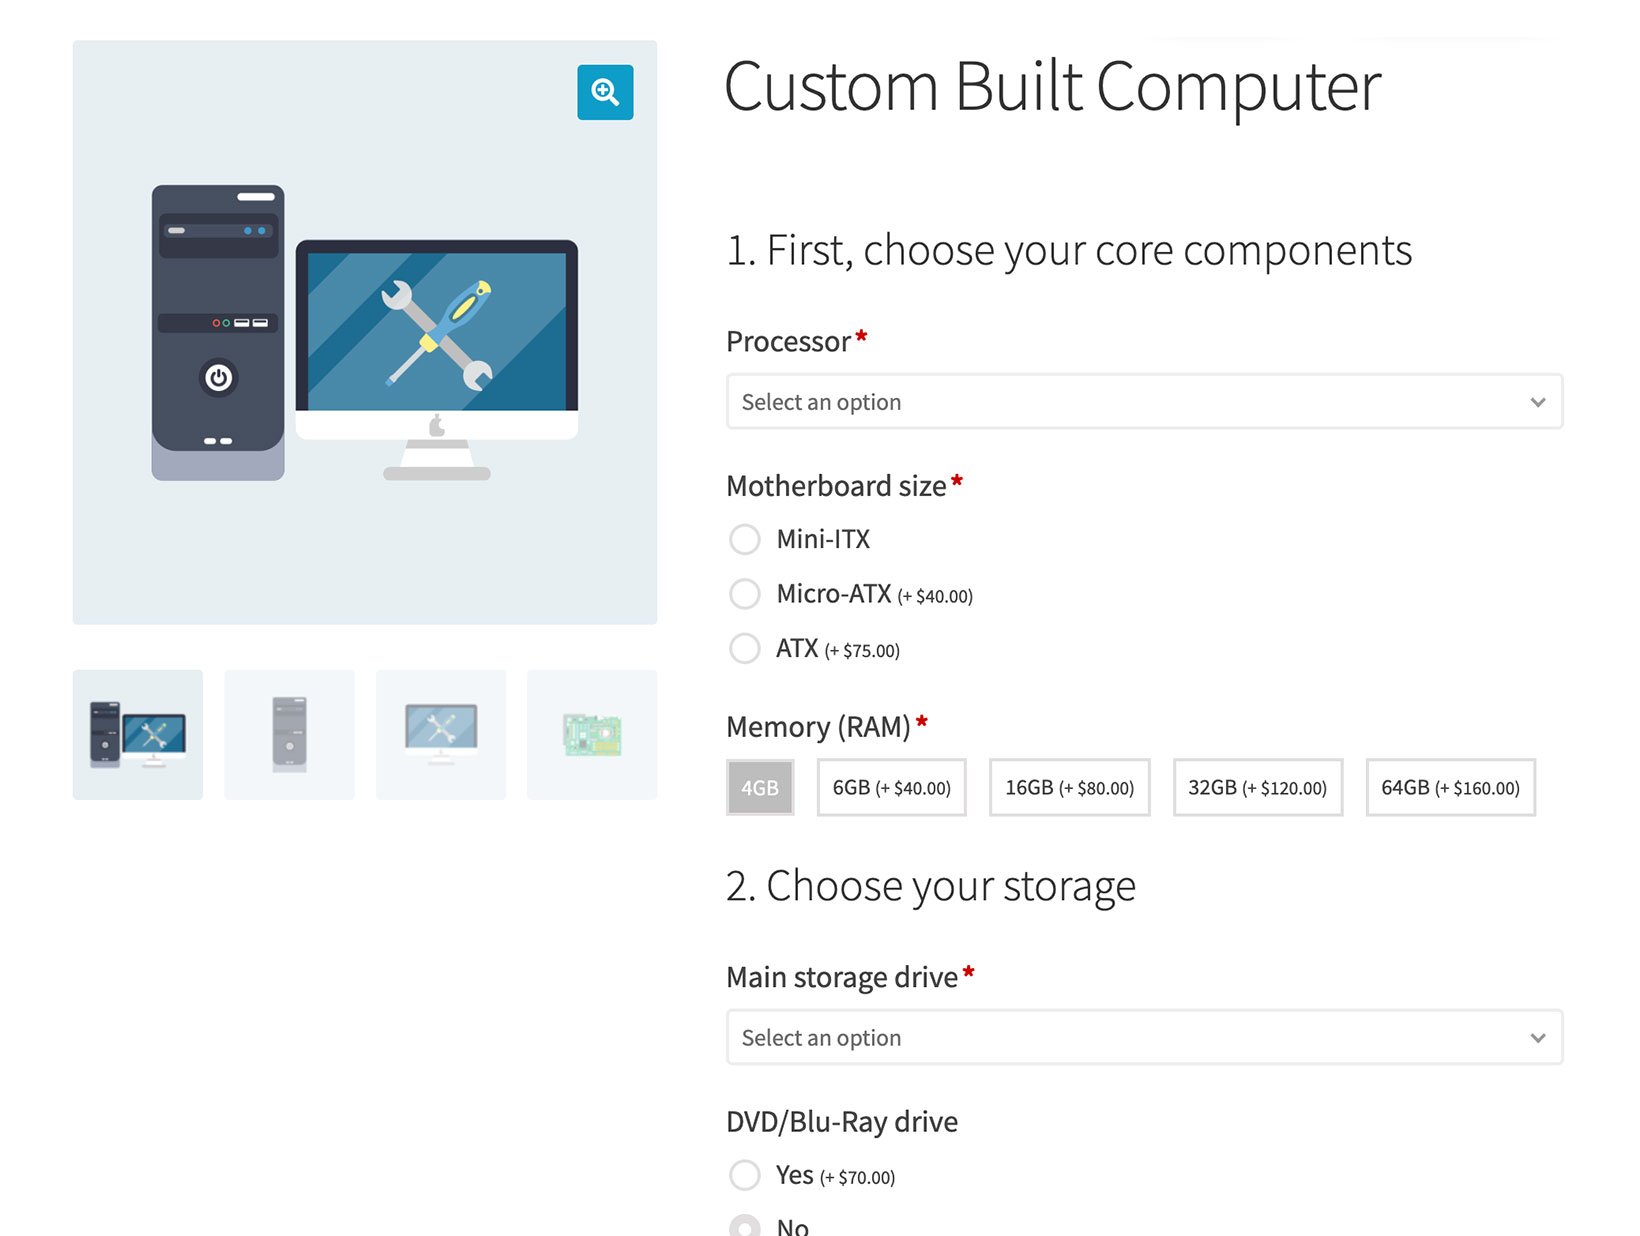

 You can password protect the sale category with 1 or more secret passwords. Give the password to everyone who needs to access the secret sale.
 The easiest option is to password protect the category that you're using for the WooCommerce secret sale. Go back to the Edit Category page (Products > Categories in the WordPress admin). Click to edit the category and click the 'Password protected' option in the Visibility section. Enter 1 or more passwords to protect the secret sale category.