A WooCommerce order list shown in a front-end table of orders

WooCommerce hides order data in the WordPress admin by default, but many businesses need to display this information on the front end. Whether you're creating dashboards for delivery drivers, providing vendors with their sales data, or building custom inventory management systems, you need a way to list WooCommerce orders.

The standard WooCommerce setup only shows customers their own orders through the My Account page. It doesn't provide any built-in method to display all orders or create custom order views on your website's front end.

This creates challenges for businesses that need to:

  • Give staff members access to order data without WordPress admin privileges.
  • Display order information to delivery partners or fulfillment teams.
  • Create vendor-specific order views for multi-vendor marketplaces.
  • Build custom reporting dashboards for different user roles.
  • Implement front-end inventory management systems.

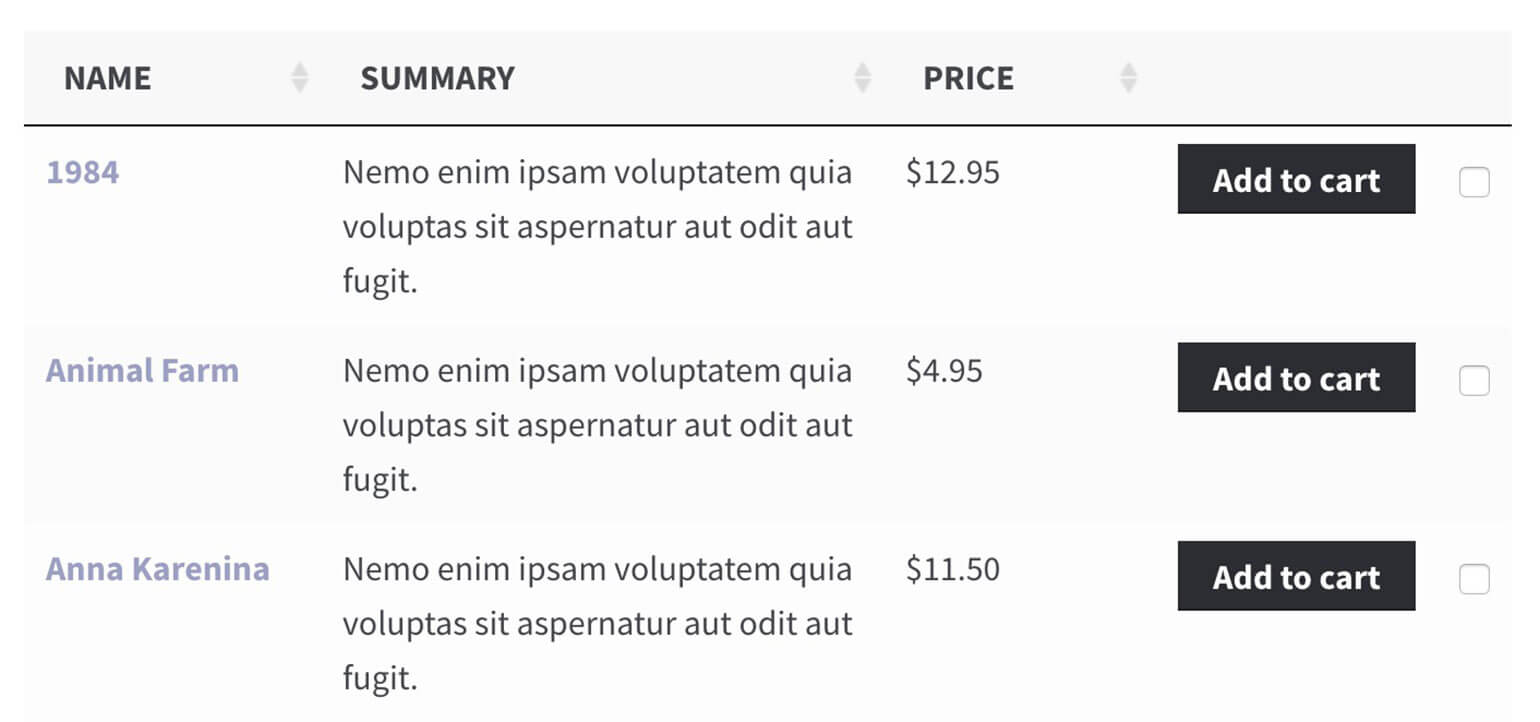
This guide covers two proven methods to list WooCommerce orders on the front end. The first uses Posts Table Pro, a plugin solution that requires no coding. The second uses the wc_get_orders() function for developers who need custom implementations.

Both methods let you display comprehensive order information including customer details, shipping addresses, payment data, and order status. You'll learn how to create filtered views, implement security measures, and customize the display to match your exact requirements.

What is Posts Table Pro?

Posts Table Pro is a WordPress table plugin that lists any WordPress content in a structured HTML table, including WooCommerce orders.

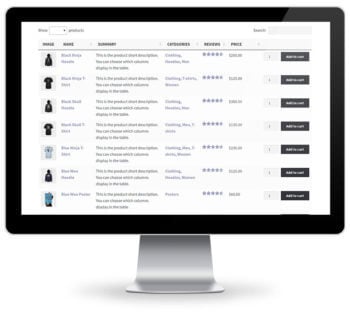
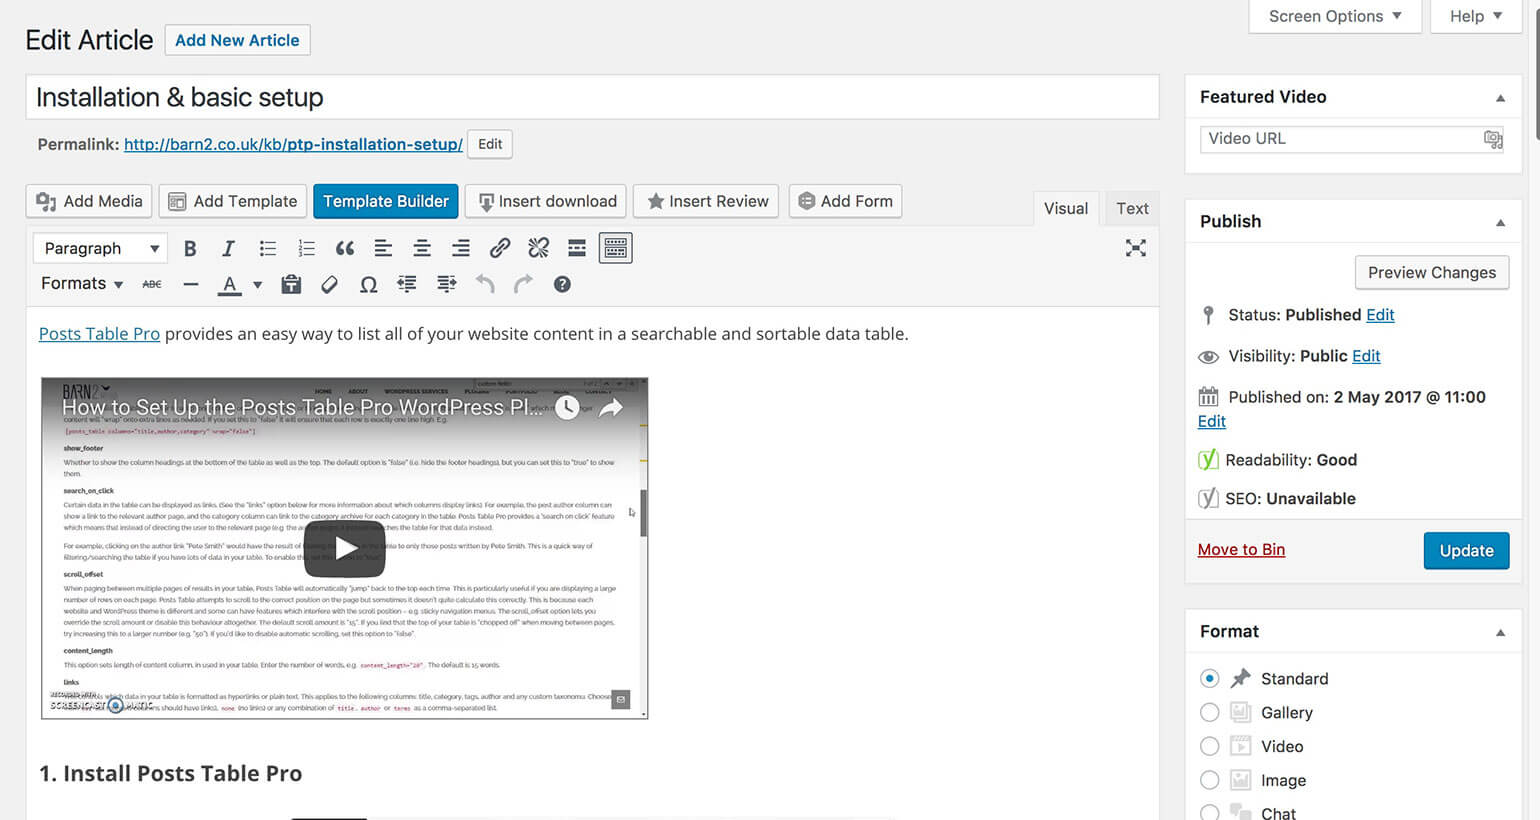
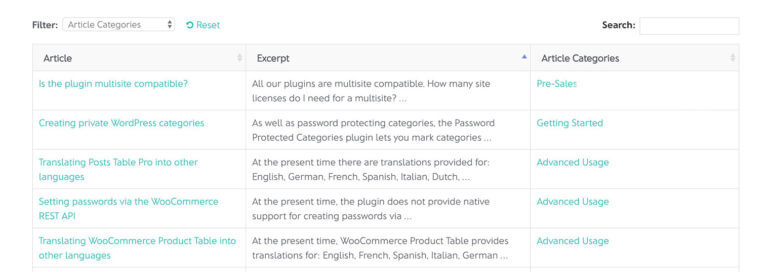
Posts Table Pro is developed and supported by us at Barn2. It displays pages, posts, custom post types, and WooCommerce order lists in organized tables.

The plugin includes dozens of configuration options. You can select which columns of order data to display. You can control how the table is sorted. You can customize the search functionality and filtering options.

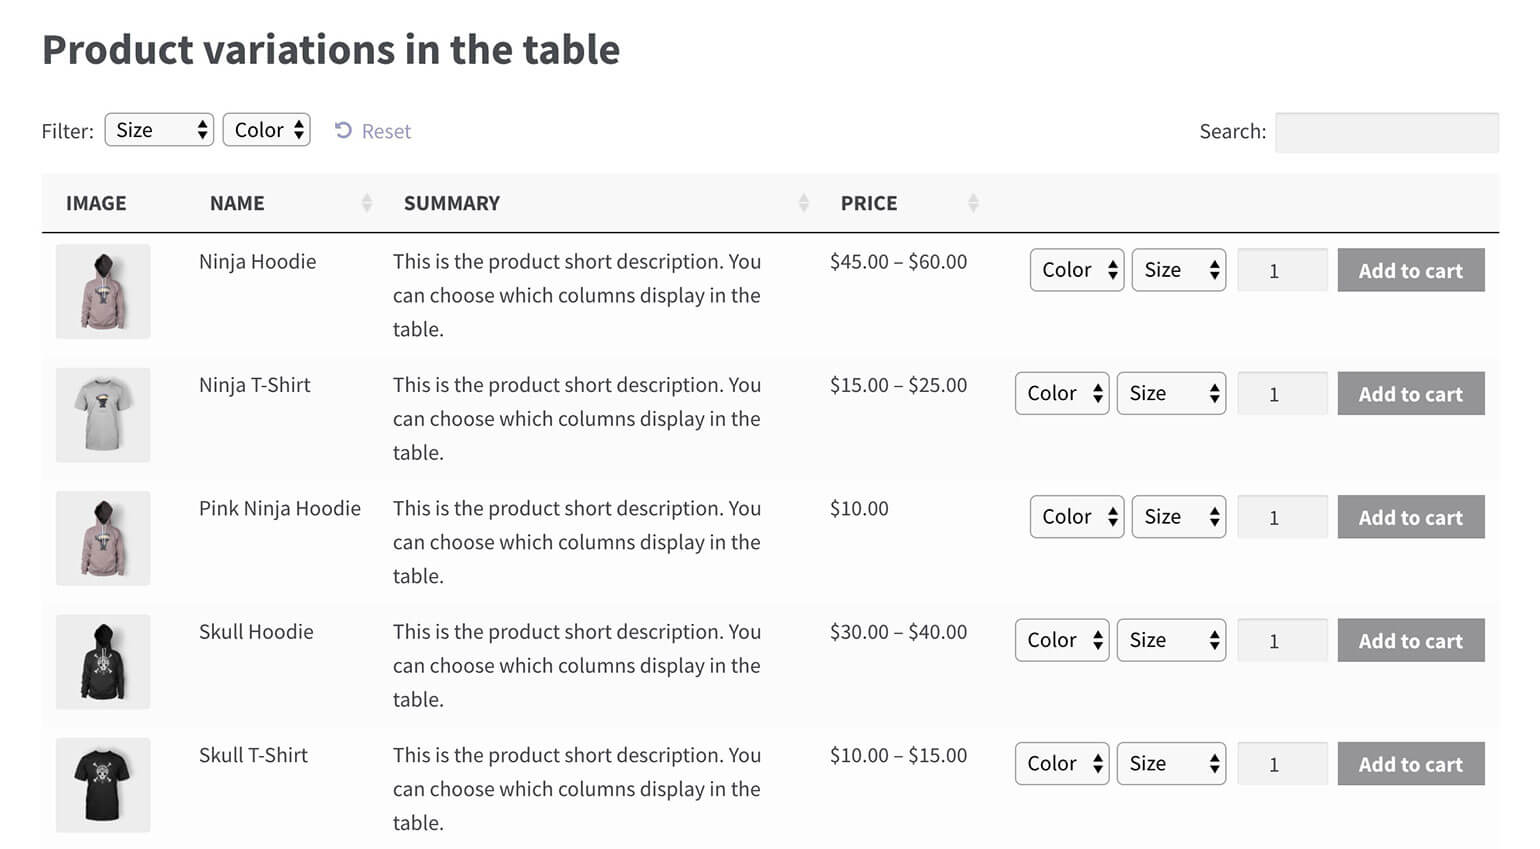
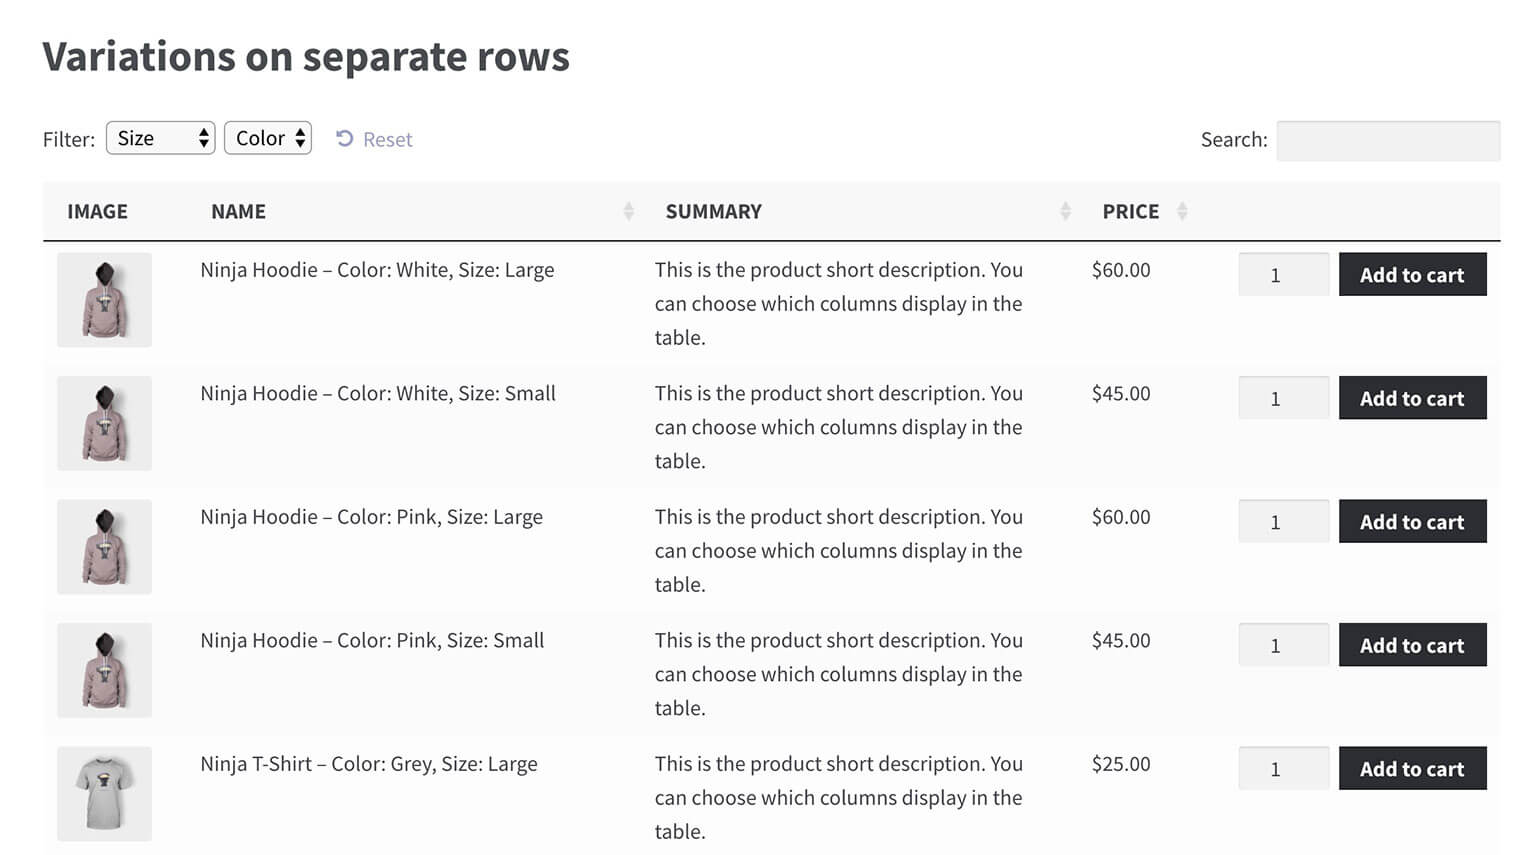
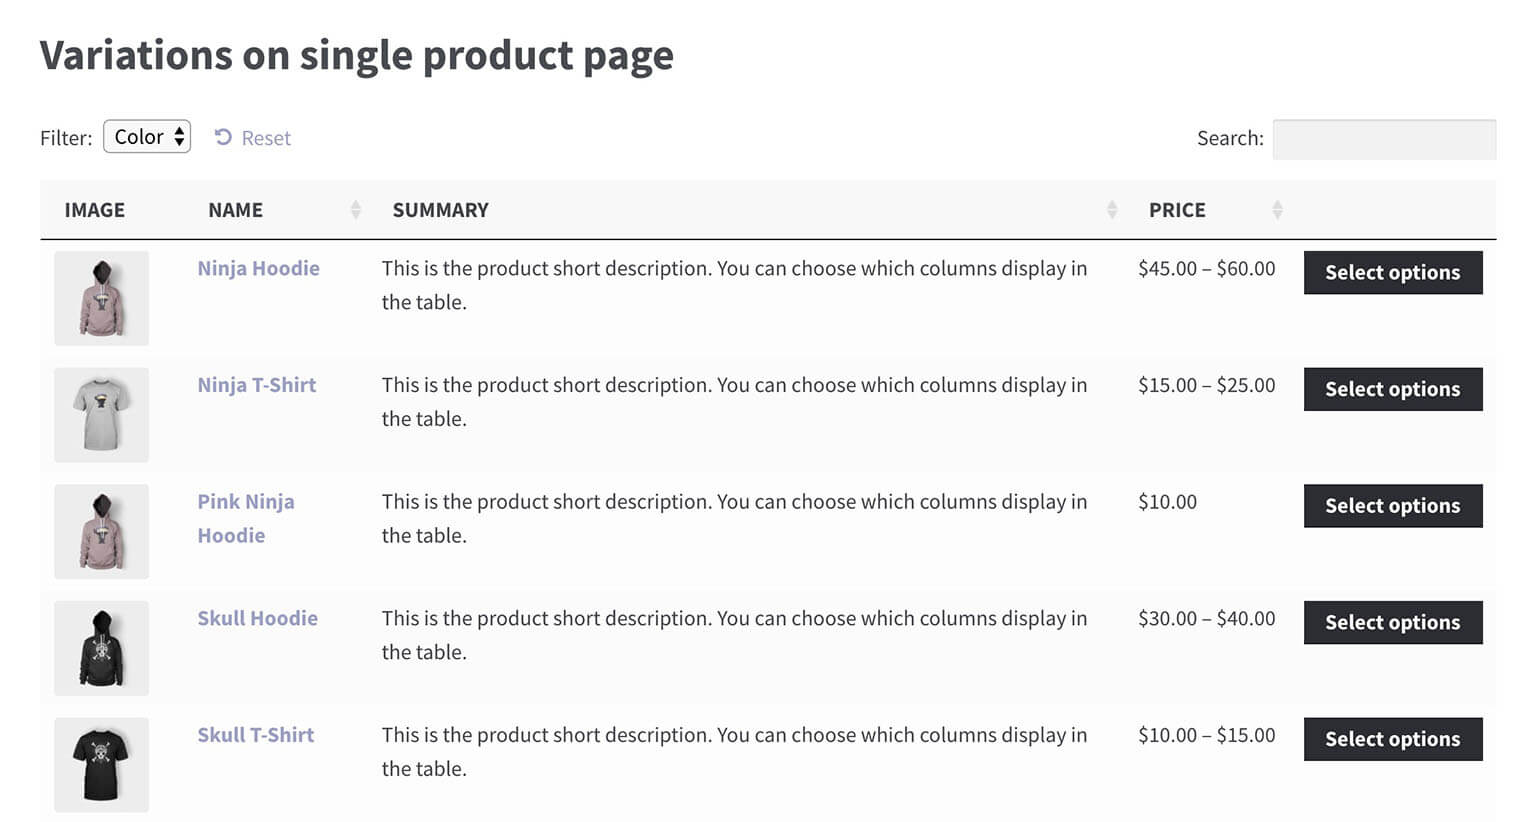
Posts Table Pro differs from our WooCommerce Product Table plugin. WooCommerce Product Table lists standard WooCommerce products in a table format. Posts Table Pro handles WooCommerce orders, which are stored as separate custom post types. This distinction makes Posts Table Pro the correct choice for displaying order lists.

This tutorial covers two methods: listing all WooCommerce orders in the front end and showing orders for specific customers only.

Which solution should you use for WooCommerce orders?

This comparison table helps you choose the right solution based on your technical skills and requirements for displaying WooCommerce orders:

Feature Posts Table Pro WooCommerce Product Table Native WooCommerce Custom wc_get_orders() code
Purpose Display orders, posts, and custom post types Display products only Basic customer order history Custom order displays
Can display orders ✅ Yes ❌ No ✅ Limited (customer's own only) ✅ Yes
Technical skills required None None None PHP development
Setup time 5-10 minutes 5-10 minutes Already included 1-3 hours
Customization options Extensive (via settings) Extensive (via settings) Very limited Unlimited (requires coding)
Front-end display ✅ Yes ✅ Yes ✅ Yes (My Account only) ✅ Yes
Admin display ❌ No (use native) ❌ No (use native) ✅ Yes ✅ Possible
Show all orders ✅ Yes ❌ No ❌ No ✅ Yes
Filter by status ✅ Yes N/A ❌ No ✅ Yes
Filter by customer ✅ Yes (with setup) N/A ✅ Automatic (logged-in user) ✅ Yes
Search functionality ✅ Yes ✅ Yes ❌ No ✅ Can implement
Sortable columns ✅ Yes ✅ Yes ❌ No ✅ Can implement
Export options ✅ Yes ✅ Yes ❌ No ✅ Can implement
Responsive design ✅ Yes ✅ Yes ✅ Yes Depends on implementation
HPOS compatibility Requires compatibility mode N/A ✅ Full support ✅ Full support
Maintenance required Plugin updates only Plugin updates only None Code maintenance needed
Support available ✅ Professional support ✅ Professional support ✅ WooCommerce support ❌ Self-supported
Cost Paid plugin Paid plugin Free Development time/cost
Best for Non-technical users needing full order management Product catalog displays Basic customer order history Developers needing custom solutions

Key takeaways:

  • Use Posts Table Pro when you need to display WooCommerce orders on the front end without coding
  • Use WooCommerce Product Table for product displays only - it cannot show orders
  • Use native WooCommerce when customers only need to see their own order history
  • Use custom wc_get_orders() code when you need highly specific functionality and have PHP development skills

How to list WooCommerce orders in a table on the front end

Step 1. Create the table of orders

A WooCommerce order list with order ID, date, customer and total columns

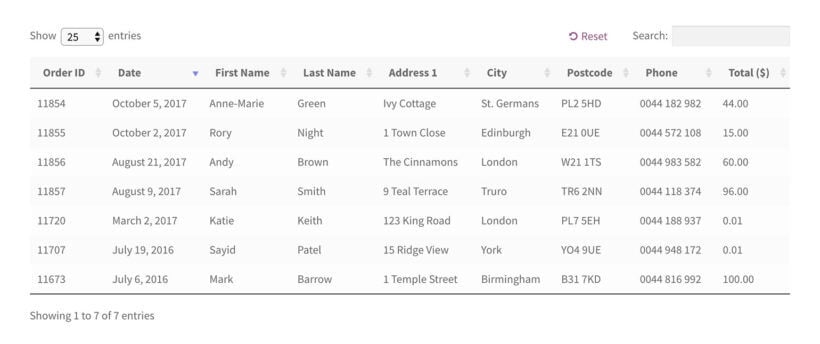
Follow these steps to create an instant table listing WooCommerce orders:

  1. First, get the Posts Table Pro plugin.
  2. Upon installing the plugin, you will be prompted with an automatic setup wizard to help you create your first table.
  3. Provide a name for your table. Select "Shop orders" as your custom post type. Choose which posts or product pages to include in the table. Available options include posts, pages, and custom post types.
  4. Customize your table's appearance by selecting columns and their display order. To add a new column, choose the column type from the dropdown menu and click "Add."
  5. Configure sorting options by selecting the default sorting method and sort direction. This controls the order in which WooCommerce orders appear in your list.
  6. Navigate to Post Tables → Settings. Find the "Links" option and enter "none". This prevents orders from being clickable, which is necessary because WooCommerce doesn't provide individual front-end order pages to link to.

Essential columns to Include in your WooCommerce order list with Posts Table Pro:

    • ID - rename this column to "Order ID".
    • Date
    • Shipping first name - Add this as a custom field column, enter _shipping_first_name as the custom field name, and rename the column to "First Name".
    • Shipping last name - Add this as a custom field column, enter _shipping_last_name as the custom field name, and rename the column to "Last Name".
    • Shipping address 1 - Add this as a custom field column, enter _shipping_address_1 as the custom field name, and rename the column to "Address 1".
    • Shipping city - Add this as a custom field column, enter _shipping_city as the custom field name, and rename the column to "City".
    • Postcode - Add this as a custom field column, enter _shipping_postcode as the custom field name, and rename the column to "Postcode".
    • Phone - Add this as a custom field column, enter _shipping_postcode as the custom field name, and rename the column to "Phone".
    • Total - Add this as a custom field column, enter cf:_order_total as the custom field name, and rename the column to something like "Total ($)".

Quick reference: all available WooCommerce order fields

This quick reference lists all available WooCommerce order fields you can display in Posts Table Pro. Each field requires creating a custom field column with the specified field name:

Field category Field description Custom field name
Customer data Customer IP address _customer_ip_address
Customer browser/OS _customer_user_agent
Order creation method _created_via
Billing information Complete billing address _billing_address_index
Billing first name _billing_first_name
Billing last name _billing_last_name
Billing company _billing_company
Billing email _billing_email
Billing phone _billing_phone
Billing country _billing_country
Billing address line 1 _billing_address_1
Billing address line 2 _billing_address_2
Billing city _billing_city
Billing state _billing_state
Billing postcode _billing_postcode
Shipping information Complete shipping address _shipping_address_index
Shipping first name _shipping_first_name
Shipping last name _shipping_last_name
Shipping company _shipping_company
Shipping country _shipping_country
Shipping address line 1 _shipping_address_1
Shipping address line 2 _shipping_address_2
Shipping city _shipping_city
Shipping state _shipping_state
Shipping postcode _shipping_postcode
Payment information Order currency _order_currency
Prices include tax _prices_include_tax
Payment method code _payment_method
Payment method title _payment_method_title
Order total _order_total
Shipping cost _order_shipping
Total discount _cart_discount
Payment date _date_paid
Payment date (formatted) c_paid_date
Tax information Total tax _order_tax
Shipping tax _order_shipping_tax
Tax discount _cart_discount_tax
Order status Transaction ID _transaction_id
Completion date _date_completed
Completion date (formatted) _completed_date

Step 2. Ensure Posts Table Pro can display your WooCommerce orders

WooCommerce versions 8.2 and later store order data differently. Posts Table Pro requires compatibility mode to access this data. Sites created before WooCommerce 8.2 already have orders stored in the compatible format and can skip this step.

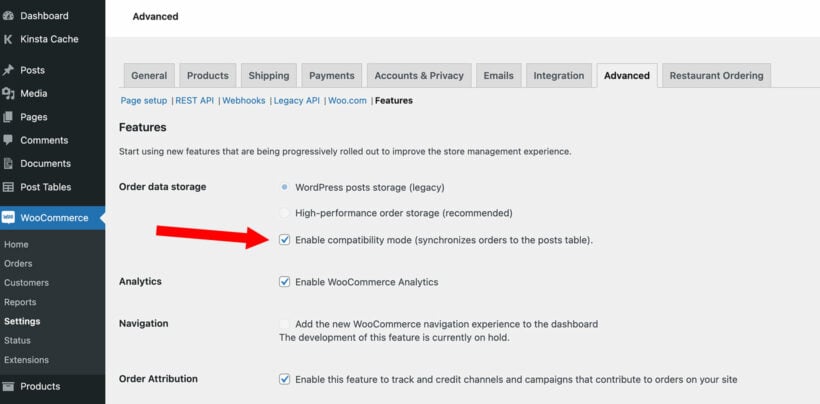
For newer sites, enable compatibility mode:

  1. Navigate to WooCommerce → Settings → Advanced → Features
  2. Under Order data storage, tick the Enable compatibility mode checkbox

Compatibility mode forces WooCommerce to use pre-HPOS data storage methods. This may impact performance on high-traffic sites. Test thoroughly before implementing on production sites. This requirement exists because Posts Table Pro currently reads from the traditional WordPress database structure.

Enabling order data storage compatibility mode in WooCommerce advanced settings

What else can I list in the table of WooCommerce orders?

The WooCommerce order table supports numerous data columns beyond the basic examples provided. You can add any column that matches your inventory management needs through the table builder's Columns page.

Order status

Order status displays the current processing state of each order. Add a "status" column to include this information in your WooCommerce order list.

Order meta fields

WooCommerce stores extensive order metadata in the wp_postmeta database table. Each meta field can become a table column by creating a custom field column and entering the corresponding field name:

  • Customer IP address - _customer_ip_address
  • Customer's browser and operating system - _customer_user_agent
  • Order creation method - _created_via
  • Billing details:
    • Complete billing information - _billing_address_index
    • Billing first name - _billing_first_name
    • Billing last name - _billing_last_name
    • Billing company name - _billing_company
    • Billing email address - _billing_email
    • Billing phone number - _billing_phone
    • Billing country - _billing_country
    • Billing address line 1 - _billing_address_1
    • Billing address line 2 - _billing_address_2
    • Billing city - _billing_city
    • Billing state - _billing_state
    • Billing postcode - _billing_postcode
  • Shipping details:
    • Complete shipping information - _shipping_address_index
    • Shipping first name - _shipping_first_name
    • Shipping last name - _shipping_last_name
    • Shipping company name - _shipping_company
    • Shipping country - _shipping_country
    • Shipping address line 1 - _shipping_address_1
    • Shipping address line 2 - _shipping_address_1
    • Shipping city - _shipping_city
    • Shipping state - _shipping_state
    • Shipping postcode - _shipping_postcode
  • Order payment data:
    • Currency - _order_currency
    • Tax inclusion status - _prices_include_tax
    • Payment method code - _payment_method
    • Payment method name - _payment_method_title
    • Total order cost - _order_total
    • Shipping cost - _order_shipping
    • Total discount - _cart_discount
    • Payment date - _date_paid
    • Payment date (formatted) - c_paid_date
  • Tax information:
    • Total tax - _order_tax
    • Shipping tax - _order_shipping_tax
    • Tax discount - _cart_discount_tax
  • Transaction ID - _transaction_id
  • Order status data:
    • Completion date - _date_completed
    • Completion date (formatted) - _completed_date

This comprehensive list serves as a reference for WooCommerce database fields. These fields enable detailed order tracking and reporting through your front-end tables.

List WooCommerce orders based on their status

Order status filtering allows you to display specific order types like completed, pending, or refunded orders in separate tables.

Posts Table Pro can filter orders by their current status. Configure this using the status parameter in your table shortcode.

Available status codes:

  • Completed orders - wc-completed
  • Orders pending payment - wc-pending
  • Payment processing - wc-processing
  • On hold orders - wc-on-hold
  • Cancelled orders - wc-cancelled
  • Refunded orders - wc-refunded
  • Failed payment - wc-failed

Example shortcode for completed orders only:

[posts_table_template="1" status="wc-completed" links="none"]

Other options to customize your list of WooCommerce orders

Posts Table Pro provides extensive customization options for WooCommerce inventory management. Beyond column selection, you can configure sort order, search functionality, pagination, and display elements.

Column names can be customized to match your requirements. The column heading documentation explains how to rename any WooCommerce order table column.

The plugin knowledge base contains detailed documentation for all available configuration options.

WooCommerce doesn't create front-end order pages. Posts Table Pro's default links point to non-existent pages. The solution is disabling all links in your order table as shown in the setup instructions.

Custom code can create links to admin Edit Order pages. This requires PHP development skills. For professional implementation, consider hiring a WordPress expert through Codeable.

Can I list the products for each order?

Product listings within individual orders aren't accessible through Posts Table Pro. WooCommerce stores this data in a format the plugin cannot display directly.

Access individual order product lists through the WordPress admin:

  1. Copy the Order ID from your front-end order table
  2. Navigate to [your-domain]/wp-admin/post.php?post=12345&action=edit (replace 12345 with your Order ID)

This method provides direct access to the Edit Order screen containing complete product information.

Don't forget customer confidentiality!

Customer data protection is essential when displaying WooCommerce orders on the front end. Always implement appropriate security measures.

WooCommerce restricts front-end order display by default because order information contains confidential customer data.

Legitimate use cases exist for front-end order displays. Delivery drivers may need order access without admin privileges. Administrative and finance staff might require order visibility through dedicated interfaces. These scenarios benefit from controlled front-end WooCommerce inventory management.

Essential security measures include:

  • Implementing SSL certificates for encrypted data transmission
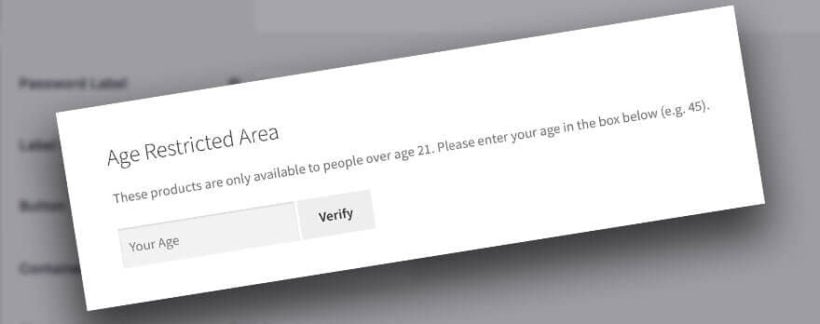
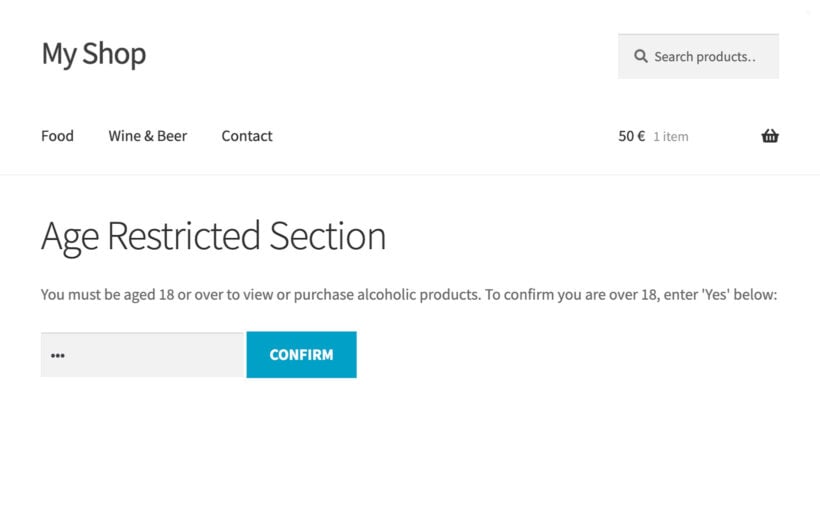
  • Using password-protected pages for order lists
  • Restricting access to authorized personnel only
  • Regular security audits of your implementation

Can customers see a front-end list of their own orders?

WooCommerce includes built-in customer order visibility. The 'My Account' page displays order history for logged-in customers. No additional plugins are required for this basic functionality.

The [my_orders] shortcode displays customer orders anywhere on your site. Users must be logged in to view their order history through this shortcode.

Posts Table Pro becomes necessary when displaying all orders or creating custom filtered views beyond individual customer orders.

Can customers see a list of their own orders?

Displaying user-specific orders requires additional configuration. WooCommerce doesn't store customer details as taxonomies on the 'shop_order' post type. This limitation requires workarounds for customer-specific order displays.

Multi-vendor sites particularly benefit from vendor-specific order views. Each vendor can access their order table or report without seeing other vendors' data.

Two implementation approaches exist: manual configuration for non-technical users and automated solutions for developers.

Option 1 - Create a hidden page for each customer listing their orders

  1. Create a hidden page for each customer. Apply password protection to each page.
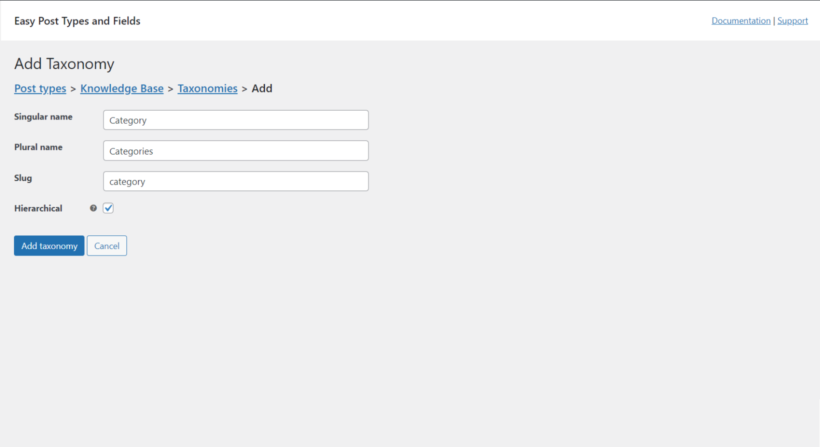
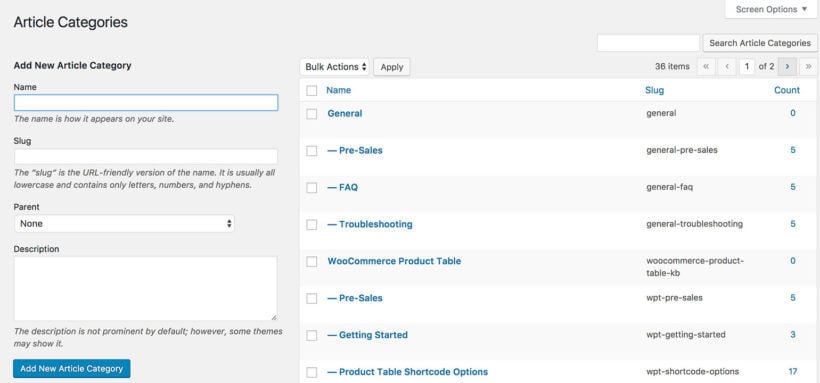
  2. Create a custom taxonomy named 'Customer'. Tag each order with the appropriate customer username or ID.
  3. Configure Posts Table Pro on each page. Select "Custom taxonomy" when choosing posts to include. Choose the term matching the individual customer.
  4. Send customers their unique page link and password.
  5. Repeat this process for all customers requiring front-end order access.

Option 2 - Automated solution

Developers can implement this automated approach:

  1. Create a custom taxonomy on 'shop_order' post type. Configure automatic population with order placer's username.
  2. Modify the WooCommerce Account page template. Replace the default order list with a Posts Table Pro shortcode.
  3. Update the shortcode to reference your custom taxonomy slug.
  4. Dynamically populate the taxonomy term with the current user's username.

This implementation creates an automated table displaying user-specific orders on the WooCommerce Account page.

How to use wc_get_orders() to get WooCommerce orders

The wc_get_orders() function is a PHP method for programmatically retrieving and displaying WooCommerce orders on your site's front end.

Developers can use the wc_get_orders() function to fetch order data programmatically. This approach enables custom dashboards and reports with complete control over data presentation.

Step 1: Understand the wc_get_orders() function

wc_get_orders() retrieves orders based on specified criteria. Filter options include date ranges, order status, customer ID, and custom parameters. The function returns an array of order objects for processing.

Step 2: Add the PHP snippet

To display orders on the front end, add this PHP snippet to your child theme’s functions.php file or a custom plugin:

function display_woocommerce_orders() {
    $orders = wc_get_orders(array(
        'limit' => 10, // Number of orders to fetch
        'status' => 'completed', // Filter by order status
        'orderby' => 'date',
        'order' => 'DESC',
    ));

    if (!empty($orders)) {
        echo '<table class="woocommerce-orders-table">';
        echo '<tr><th>Order ID</th><th>Customer</th><th>Total</th><th>Date</th></tr>';

        foreach ($orders as $order) {
            $order_id = $order->get_id();
            $customer_name = $order->get_billing_first_name() . ' ' . $order->get_billing_last_name();
            $order_total = $order->get_total();
            $order_date = $order->get_date_created()->format('Y-m-d');

            echo "<tr>
                <td>#{$order_id}</td>
                <td>{$customer_name}</td>
                <td>\${$order_total}</td>
                <td>{$order_date}</td>
            </tr>";
        }

        echo '</table>';
    } else {
        echo '<p>No orders found.</p>';
    }
}

add_shortcode('display_orders', 'display_woocommerce_orders');

Step 3: Display the orders

Display orders on any page using this shortcode:

[display_orders]

Step 4: Customize the output

Our example pulls completed orders, but you can adjust the wc_get_orders() parameters to retrieve orders by:

  • Order status - Use values like processing or on-hold
  • Customer ID - Filter by specific customer using customer_id => 5
  • Date range - Set date parameters like date_created => '>=2024-01-01'
  • Payment method - Filter by payment gateway used
  • Shipping method - Filter by shipping option selected

wc_get_orders() provides complete flexibility for custom order displays. Posts Table Pro remains the preferred solution for users seeking code-free implementation with built-in filtering and sorting controls.

Over to you!

You now have comprehensive instructions for listing WooCommerce orders in front-end inventory management systems. Get Posts Table Pro and configure your order display today!

Share your implementation details in the comments. What columns do you display? How do you use front-end order lists? What security measures protect your customer data? Your experiences help other store owners optimize their WooCommerce inventory management.

WooCommerce Age Restriction Plugin

A WooCommerce age verification plugin prevents underage people from buying age restricted products on your website. You'll need one if you're selling items such as tobacco, alcohol, 18+ competitions, or adult products. It works by asking customers to verify their age before they can view or buy age restricted products from your WooCommerce store.

In this tutorial, I'll introduce you to 2 popular WooCommerce age verification plugins:

Both plugins will leave your homepage and other main pages (About, Contact, etc.) public. They only provide age verification for your age restricted products. You don't have to lock down your whole website. This lets you create public areas of your website, build your SEO, and get a good search engine ranking (which wouldn't be possible if your whole website was age-restricted. Google's crawlers can't get past age verification!).

I'll provide advice on which WooCommerce age verification plugin best meets your needs. Then I'll show you how to set them up, using a choice of 3 methods. Let's get started!

Age restriction is a tricky issue in e-commerce because the customer isn't physically present for you to verify their age. Lots of countries simply require website owners to ask customers to confirm their age before allowing them to purchase. WooCommerce age verification plugins work on this basis. It's the customer's responsibility to verify their correct age.

Before we start, I recommend that you check the law for your own country to make sure this is acceptable. If not, then you might need a more comprehensive approach. For example, in extreme circumstances, you might need each customer to provide proof of identify before you will ship age restricted products to them. Method 2 covers a WooCommerce age restriction plugin that can do this, but it does mean more work for you. Fortunately, this isn't normally needed - but you should always check.

Introducing 2 WooCommerce age verification plugins

WooCommerce age restriction plugin

You should choose an age verification plugin for WooCommerce based on exactly what you need to restrict:

  1. Method 1 - WooCommerce Private Store with online age verification This simple plugin locks down ALL your WooCommerce content while leaving the rest of your website public. Customers can view your homepage and other main pages, but must verify their age in order to view and buy any products. Use this plugin to add a global age gate which will restrict ALL your products.
  2. Method 2 - WooCommerce Private Store with individual user accounts Perhaps you still want to age restrict your entire store, but need to manually confirm each user's age before they can start shopping. You can do this by using the WooCommerce Private Store age verification plugin to hide your products from public view, and manually creating individual user accounts for each customer. Logging into their user account will unlock the age restricted store.
  3. Method 3 - WooCommerce Protected Categories This WordPress plugin is perfect for age restricting specific groups of products within a WooCommerce store, while leaving other products available to everyone. Use it if you only want to restrict some of your products, while leaving others available for all ages.

How do the age verification plugins work?

Methods 1 and 3 are very simple, in that they both password protect parts (or all) of your store. To use them as WooCommerce age verification plugins, you need to set a password for each age that the products are available to. Whenever someone enters their age in the box, the plugin recognises it as a valid password. This tells the plugin that their age is validated and they can view and buy the products within the restricted area.

Method 2 is slightly different because it unlocks the age restricted store for eligible logged in users, while hiding your products from guests.

Next, I'll provide detailed instructions on how to set up each plugin to age restrict your products.

Method 1: How to use WooCommerce Private Store to age restrict your entire shop

This is how to use the WooCommerce Private Store plugin to lock down your entire WooCommerce store. Customers must enter a valid age to unlock the age restricted store.

Setup instructions

  1. First, buy WooCommerce Private Store. Download the plugin and upload it to your site (Plugins → Add New).
  2. Go to WooCommerce → Settings → Private Store and change these settings:
    • License Key - Enter your license key.
    • Store Passwords - Add a password for each age that can access the age restricted WooCommerce store. For example, if your store is restricted to people aged 18+, then you need a password for each age over 18. So, you would have a password called 18, one called 19, one called 20, and so on. (I realise this is quite a few passwords, but it only takes a second to add each one, so it won't take you long to create them all.) When someone enters a valid age on the WooCommerce age verification page, the plugin will unlock the store if their age matches one of these passwords.
      Setting store passwords for age verification in WooCommerce Private Store settings

      If you want a faster option, then consider having people simply enter "Yes" to unlock the category. If you do this then I recommend adding "Yes" in different cases to avoid confusion:
      Setting multiple password variations as accepted age verification answers
    • Password Expires After - Add a whole number here to specify the number of days that people can continue accessing the store from their browser until they have to re-validate their age. I recommend adding '1' here for added security.
    • Login Redirect URL - Normally, a customer will be redirected to whichever page they were trying to access when they had to verify their age. If you prefer, you can enter a specific URL here that they will always be redirected to after validating their age. (E.g. this might be main WooCommerce shop page.)
    • Login Form - Finally, you'll see settings for customising the page that people will use to validate their age. In the 'Form Message' field, I recommend adding something self-explanatory that will help people to validate their age. For example, it's helpful to state the format in which people need to enter their name.
    • Save your changes.

Now add an age validation page

  1. In 2 simple steps, you have already age restricted your WooCommerce store so that only people with the correct ages can access it. The final step is to provide a way for them to enter their age and unlock the store. To do this, create a page and add the shortcode [store_login]. This will create an age verification form, with the text you added on the settings page. Add it to your menu or provide other user-friendly ways for people to find it.
Front-end age verification screen asking visitors to enter their age

For more information, see the plugin knowledge base.

Note: This applies to your entire shop. If you want to sell some age restricted products and some products that are available to everyone, then you need WooCommerce Password Protected Categories instead. (See next section.)

Method 2: How to use WooCommerce Private Store with individual user accounts

Method 2 is identical to method 1 and uses the same WooCommerce age verification plugin. However, it's more secure because instead of trusting users to enter their own age, you would vet each customer manually and then create a user account for them.

With this method, you'll be using the WooCommerce Private Store plugin in a different way. Each customer must log into their individual user account on your website. This will automatically unlock all the age restricted WooCommerce content (i.e. your main Shop page, products, categories, etc.).

3 simple steps to create an age restricted store

  1. First, get WooCommerce Private Store. Download the plugin from the link in your confirmation email. Upload it to your website (Plugins → Add New).
  2. Go to WooCommerce → Settings → Private Store and change the following settings:
    • License Key - Enter the license key from your confirmation email. (The plugin only works with a validated license key.)
    • Logged In Users - Tick this box. This means that instead of having a separate password for your age restricted WooCommerce store, the store is unlocked whenever someone logs into their user account. An option appears underneath to choose which user roles will have access.
  3. Finally, create a login page. This should allow customers to log into their main WordPress user account. Either link directly to the main WordPress login page (yourdomain.com/login.php). Or - for a more professional result - create a front end login form using a plugin such as Theme My Login.

And that's it! Your main homepage and other standard WordPress pages will remain public and can appear in search engines etc. All your WooCommerce store content will be hidden from guests, and will immediately appear for logged in users.

Can customers create their own accounts?

Plugins such as Theme My Login add customizable registration forms as well as login forms. Theme My Login also has an option to hold new user registrations for moderation, so that they can only access your hidden store after you've manually validated their age.

If you're not using Theme My Login, then you can add this as a standalone feature with the New User Approve plugin.

Method 3: How to use WooCommerce Protected Categories to create an age restricted area within your store

Unlike methods 1 and 2, this WooCommerce age verification plugin lets you create an age restricted area within WooCommerce, while leaving the other parts of your store public. It works by creating one or more private product categories, which can only be viewed after the customer enters a valid age.

First, setup the WooCommerce age verification plugin

  1. Buy WooCommerce Protected Categories and install the plugin on your WooCommerce website.
  2. Go to the plugin settings page: WooCommerce → Settings → Products → Protected Categories. Change the following settings:
    • License Key - Enter your license key so that the plugin will work.
    • Category Visibility - You would normally leave both these boxes unticked for WooCommerce age restricted products. However, it's ok to tick them if you want the age restricted products to appear in the public areas of your site. If you do this, then when someone clicks on one, they will be asked to verify their age before they can add to cart or access the single product page.
    • Password Expires After - Add a whole number to set the number of days that each person can continue accessing the age restricted store before having to re-validate their age. I recommend adding '1' here for extra security.
    • Client Login Page (optional) - If you like, you can select a page here which will automatically contain an age verification form form. This is optional because you can link directly to your age restricted category page or products, and people will also see the age validation form there.
    • Password Form - This section customises the login page where people enter their age to unlock the protected products. Adapt the Form Heading, Form Heading, Password Label and Button Text to an age verification form. (See the below screenshot for an example).

Now create a WooCommerce age verification category

  1. Next, go to Products → Categories and either create a new category, or edit an existing one. You'll see a 'Visibility' section with a 'Password protected' option. Tick this.
  2. Instead of just adding 1 password, add lots of passwords - one for each age over 18. So, you would have a password called 18, one called 19, one called 20, and so on. As with method 1, I realise this is quite a lot of passwords. However, it only takes you a second to add each one, you can create them all within a couple of minutes.
    Adding a password to protect a product category for age verification
  3. Finally, you need to add links to your age restricted products. If you selected a Login Page on the plugin settings page, then you can link to this from your menu etc. You can also link directly to the age restricted category, if you have ticked the appropriate box on the settings page. Either way, customers will have to verify their age before they can view and buy the restricted products.

What about navigation for my age restricted store?

If parts or all of your WooCommerce store are hidden from underage visitors, then the navigation needs to reflect this. For example, you might want to include menu links to all your product categories once people have verified their age, while hiding these links from everyone else.

Happily, both the WooCommerce Private Store and WooCommerce Protected Categories plugins will automatically do this for you. If you add links to WooCommerce content to your main navigation menu, then these will only be visible to people who have verified their age. You don't have to bother creating different menus for different types of user, as the dynamic links happen automatically.

How to display products to everyone, but require age verification to purchase

Finally, I'll give you a tip that lots of age restricted WooCommerce stores have asked us about.

If you want everyone to be able to browse your store, but only people over 18 or 21 can make a purchase, then you need to use WooCommerce Protected Categories (i.e. method 3 of this tutorial). When you set it up, tick the 'Category visibility' boxes on the plugin settings page:

Category visibility settings with license key and show in store options

When you do this, your age restricted products will appear on the main WooCommerce shop page, search results and widgets. When someone clicks on a product, they must login or enter the password (depending on how you've chosen to set up the age restriction) before they can access the single product page or add to cart.

You can use WooCommerce Protected Categories to make your entire store private, as well as hiding specific categories only. To put all your products behind the age gate, simply put them all in age restricted categories.

Which WooCommerce age verification plugin will you use?

In this tutorial, I've taught you how to set up 2 WooCommerce age verification plugins, using 3 different methods. These are designed to suit different types of WooCommerce store, whether you're selling alcohol, gambling, CBD products, or any other age-restricted items.

I'd love to hear how you get on with your age restricted WooCommerce store. Please add your comments below!

Close up of a regional road map suggesting location based pricing

A customer recently told me that there are no WooCommerce location based pricing plugins. I didn't believe this, so I had a look - and I couldn't find one either!

I'm writing this step-by-step tutorial to show you how to set up WooCommerce zipcode based pricing using the WooCommerce Protected Categories plugin. You can use it to charge different prices depending on the customer's zip code, postcode, area, location, region, or country. And it only takes a few minutes to set up!

Importance of location based pricing in ecommerce

There are lots of reasons why location based pricing can be useful on an ecommerce platform:

  • Firstly, it allows you to customize your pricing strategies based on specific market conditions and consumer behavior in different geographical locations. By considering factors such as local competition, purchasing power, and demand patterns, you can optimize your pricing to remain competitive and maximize profits.
  • Secondly, location based pricing enables you to offer personalized pricing to customers, taking into account their specific location. This approach allows you to provide targeted discounts, coupons, or promotions to customers in certain regions, increasing customer satisfaction and loyalty.
  • Furthermore, location based pricing can help you effectively manage shipping rates and logistics costs. By adjusting the process based on the proximity of the customer's location to the warehouse or distribution center, store owners can ensure that the shipping costs are reasonable and aligned with the customer's location.

Examples of industries that can benefit from location based pricing

Several industries can benefit from implementing WooCommerce location based pricing strategies. Here are some examples:

  1. Ecommerce store and retail: Online retailers can use location based pricing to account for variations in shipping costs. local competition, and customer preferences. By adjusting prices based on different zones, a postcode WooCommerce plugin lets them remain competitive while keeping each area profitable.
  2. Travel and hospitality: Hotels, airlines, and travel agencies can implement WooCommerce location based pricing to reflect regional demand, seasonal fluctuations, and local competition. Pricing can be adjusted based on popular travel destinations, high-demand areas, or specific tourist seasons.
  3. Food delivery services: WooCommerce location based pricing can be beneficial for food delivery platforms and services. Pricing can be adjusted based on the delivery distance, traffic conditions, and availability of local restaurants and food suppliers. This allows for accurate cost calculations and fair pricing for customers.
  4. Insurance: Insurance companies can use WooCommerce location based pricing to account for different risk factors associated with specific locations. Factors such as crime rates, weather patterns, and accident statistics can be considered when determining insurance premiums for different postcode WooCommerce prices.
  5. Subscription services: Companies offering subscription-based, such as streaming platforms or software providers, can implement WooCommerce location based pricing to adjust flat rate prices based on regional demand and market conditions. This approach allows them to optimize revenue and cater to specific customer segments.

Why use a WooCommerce zip code based pricing plugin?

In an ideal world, everyone would pay the same amount regardless of where they live. However, there are situations where you might want to change your product pricing based on the customer's zip code or location.

Here are some reasons why you might need location-based pricing:

  • If you offer free shipping, then your profitability will vary depending on the customer's location. There's no way to avoid this because shipping companies often charge different rates depending on the customer's zip code, area, or country. The easy solution is to set up WooCommerce shipping zones to charge zip code-based shipping and keep your product prices consistent for all customers. However, if free shipping costs are a big selling point for your WooCommerce site, then you could keep this while charging higher specific product prices for customers in more remote locations.
  • If your website sells worldwide then it's important to be aware that accepting payments from customers in different currencies may lead to higher fees for your business. A WooCommerce price based on country plugin can help with this.
  • There may be higher legal or administrative fees relating to selling in certain places. You might try to recoup some of this by charging higher prices to those customers. For example, different WooCommerce zip code validation may have different tax rules or legal requirements which make it harder to sell to that area.
  • If you provide local services then your prices may differ based on each customer's zip code area.
  • Perhaps you want to reward locals with lower pricing depending on their zip code.

If this sounds like you, then you may be able to increase profitability with WooCommerce location based pricing. Continue reading to find a step-by-step guide on how to set up a price by country WooCommerce plugin.

What is WooCommerce Protected Categories?

WooCommerce Protected Categories is a WordPress plugin developed by us at Barn2 Media. It restricts access to certain product types in your WooCommerce store so that only people with the password can see and buy them.

I'll talk you through how to achieve zip code based pricing in WooCommerce. You can also change product prices depending on postcode, zone regions, location, country - whatever you like.

In a nutshell, the plugin lets you create a separate product category for each of your price bands. Each category is password protected using one or more zip codes or area names. The customer visits a central login page and enters their area or zip code as the password. This unlocks the category for their area and instantly directs them to the products with the correct pricing. Each product page will then show the right prices.

Each password protected category will contain a different version of your products, with the correct pricing for that zip code area, region, or price by country WooCommerce .

Customers will only be able to see the pricing for their own zip code area (i.e. category).

How to set up WooCommerce zipcode based pricing

Setting up WooCommerce location based pricing gives you the flexibility to customizable product prices based on specific zip codes, countries, etc. Installing the WooCommerce Protected Categories plugin is a straightforward process. Let's dive into the installation and basic setup. You can do all this in the WordPress backend.

Installation and activation process

  1. Get the plugin, and you will receive a confirmation email containing your license key and a download link to the plugin. If you don't find the email, please check your spam folder or contact support for assistance.
  2. Download the plugin by clicking on the provided link. In your WordPress dashboard, navigate to Plugins → Add New → Upload plugin. Choose the downloaded file and click on "Activate". Note that you need to have the WooCommerce plugin already installed for the WooCommerce Protected Categories plugin to work seamlessly.
  3. Enter your license key. You can find your license key in the email confirmation that was sent to you after purchase. The plugin will not work until you activate your license key. There are two ways to enter your license key: In the setup wizard - Once activated, the setup wizard will open. This walks you through each step of the setup process, including entering your license key. On the WooCommerce settings page - Alternatively, you can go to WooCommerce → Settings → Products → Protected Categories and enter your license key.
  4. Finally, save changes.

Configuring the WooCommerce location based plugin

  1. On the plugin settings page, choose the text that will appear above and on the category login form. For example, you will want to replace 'Enter your password' with 'Enter your zip code' or similar.
  2. Create a separate WooCommerce product category for each area that requires its own pricing. For example, you might sell products to 15 local zip codes based on 3 price bands. You would put the 5 zip codes for Band 1 in one category, the 5 zip codes for Band 2 in a second category, and so on.
  3. Password protect each category using the option in the 'Visibility' settings on the add/edit category page. Create a password using each area or zip code that you want to restrict the category to. For example, if you want customers in zip codes 123456 and 987654 to be able to access the category, then create 2 passwords: 123456 and 987654.
  4. Next, create a separate version of each product - one for each of the categories you just created. (Note: You can't put the same product in more than 1 password protected category. To get around this, the Duplicate Post plugin provides one-click cloning of WooCommerce products. If you're cloning products and want to manage inventory across the retail and wholesale versions of each product then we recommend the Group Stock Manager plugin. This lets you share stock levels across multiple products.)
  5. Put each product in the correct category.
  6. Change the pricing of each product as required.
  7. Create a category login page by adding the following shortcode wherever you want people to log in to the category for their zipcode or area: [category_login].

When customers enter the password (i.e. their zipcode or area) into the category login form, they will automatically be directed to a hidden category containing the products with their local pricing.

But I want the public to be able to see my products!

When you use a price by country WooCommerce plugin, the products will be hidden from the public parts of your website so that only customers with the password can view them. However, you don't have to protect all your products using this functionality.

Perhaps you want to list each product on your front end public site but also want a hidden version of each product for people from different zip code areas. You can achieve this by creating one or more public categories, which will not be password protected. These will appear in the public parts of your online store in the usual way.

The pricing of your public products will NOT change depending on the customer's location. The same price will appear for everyone. This means that you need to either show a standard cost that will always be visible in the public part of your site.

If this isn't appropriate for your site, then you can list the public products without prices. WooCommerce will automatically disable the checkout buttons for these products. People can view them but not buy them online. Customers will have to request the password to view pricing and buy.

How can customers request the password for their zip code?

There are various options for how you can give each customer the password for their zip code. This will depend on how private you want your area-based pricing to be, and whether you have regular or one-off customers:

  • If your pricing is not confidential then you could list all the passwords publicly, above the category login form. Customers simply need to find the password relating to their zipcode area and enter it to see their pricing.
  • You could use a WP contact form plugin such as Contact Form 7 to let customers request the password. This is a more secure option, as you can ensure that each customer can only access the prices for their own local WooCommerce zip code validation.
  • If you have a members-only WooCommerce shop or WooCommerce wholesale store, then you might only sell to pre-approved customers. If this is the case, then you can give them the password directly.

Location-based shipping methods

After setting up location-based pricing for your WooCommerce products, it's important to make sure that shipping will always be profitable for you regardless of the customer's location. Fortunately, you can easily do this using the built-in WooCommerce shipping methods.

WooCommerce lets you create an unlimited number of shipping zones and shipping classes. You can create different zones per continent or country, or make it fine-grained and charge different shipping based on city, zipcode, etc. Choose which areas get free shipping, local pickup, and which areas you won't ship to at all.

You can add one or more shipping options for each shipping zone. For example, each zone might have a free shipping option with a different minimum order amount to quality; flat rate shipping with a different cost, and so on.

To get full setup instructions, check out our complete guide to WooCommerce shipping. This covers how to add shipping zone or zones to your store, and how to add shipping methods. You can add a zone name for each one, and set multiple pricing options.

Let customers enter their location on the product page

Normally, WooCommerce stores only let customers enter locations on the cart page or single product page. That's no use - customers need to enter their location before deciding whether to buy a product!

It's much better to use the WooCommerce Product Page Shipping Calculator plugin to let customers enter their shipping location and view costs directly on the product page. That way, they can easily see if you will ship to their location and what it will cost. This is much more user-friendly and avoids disappointment while improving your conversion rates. After all, there's nothing worse than getting abandoned carts when customers get put off by seeing the shipping cost too late in the process!

Location-based payment gateways

The WooCommerce location-based pricing plugin described above will work with any WooCommerce-compatible payment gateway. However, you may need an extra plugin if you want to offer different payment options based on the customer's location. For example, maybe you offer PayPal as an option in some countries but not others.

For this, I recommend the Conditional Shipping and Payments plugin from woocommerce.com. This gives you full control over which customers see each shipping and payment option. You can Show different payment gateways based on the customer's billing country, shipping method, country, state or postcode.

Best practices for WooCommerce location based pricing

To effectively implement WooCommerce location based pricing, start by conducting thorough market research. Understand how prices vary in different areas by analyzing factors such as income levels, competition, and customer preferences. This research will help you segment your customers based on WooCommerce postcode and identify patterns in their behavior and purchasing power. By understanding these dynamics, you can develop a comprehensive pricing strategy that caters to the specific needs of each segment.

Use product data analytics to analyze historical sales data and identify trends across different postcode WooCommerce. This will enable you to adjust your prices dynamically based on real-time market conditions.

By implementing dynamic pricing, you can respond to changes in demand and stay competitive in the market. Keep a close eye on your competitors' pricing strategies to ensure your prices remain attractive while offering unique value-added features or services that differentiate your offerings.

It's time to add location pricing to your store!

WooCommerce Protected Categories provides a unique way to offer location-based pricing. Simply install the plugin and create a separate product category for each location, each with its own pricing.

I was really interested to hear that a customer was using it as a WooCommerce zip code based pricing plugin and thought that others might like to do the same.Please leave your comments below!

Illustration of sending blog posts by email through Mailchimp

Allowing people to receive your latest WordPress blog posts by email is a great way to build a following. Forget about RSS, Twitter etc. Some people just like to read the latest articles from your website using good old-fashioned email.

Today, I'm going to share 2 easy ways to send WordPress blog posts by email:

  1. Use the MailOptin WordPress plugin
  2. Use MailChimp (no plugins needed!)

You'll learn how to email new blog posts to subscribers - either globally or specific categories only. I'll also share some handy tips on how to take your blog posts by email to a new level. For example, I'll tell you how to create a private members-only blog and email it to approved members only.

Let's get started.

Should I use MailChimp to send new blog posts?

First, let's talk through the different ways to send new blog posts via email.

WordPress plugins

There are several plugins which allow you to send 'new post' emails directly from your WordPress website - JetPack Subscriptions and Subscribe2 being some of the main players:

  • JetPack Subscriptions can't be branded and allows your visitors to subscribe to your sites and other WordPress blogs under a single account. This may not be appropriate for a corporate blog.
  • Subscribe2 requires a lot of custom development to look professional. The 'Manage My Subscriptions' page is in the WordPress admin rather than on the front end of your website. This isn't appropriate for most websites.

Another problem with sending bulk emails directly from your WordPress website is that your emails are more likely to be spammed. You can add features such as SMTP mail to increase email deliverability. However, WordPress is not a specialist email platform.

Some WordPress hosting companies such as WP Engine or Kinsta (our recommended host) don’t even allow you to send mass emails directly from your website. This is because it uses a lot of server resources and can slow down your website.

If you want a WordPress plugin to do this for you, then I recommend using MailOptin with MailChimp instead. I tell you how in Method 2 of this tutorial. This sends the emails using MailChimp instead of WordPress, therefore avoiding these problems.

Dedicated mailing list platforms

It's better to use a specialist mailing list provider to email your subscribers when you publish a new WordPress blog post. Their servers are configured to maximise deliverability so your emails are less likely to be flagged as spam. They also have built-in features to help you comply with data protection legislation. And you also get professional options for email templates that aren't available with most WordPress plugins.

MailChimp is the world's leading mailing list provider and is free until you have 2,000 subscribers. Next, I will describe 2 easy methods to set up MailChimp to send WordPress blog posts by email. Read through both and choose the method that best matches your needs.

Getting started

If you haven't already started using MailChimp, follow these steps to get set up. You need to do this whether you're using Methods 1 or 2 of this tutorial.

Create a MailChimp account

First, go to mailchimp.com and create an account. It's free to set up and you will only ever have to pay anything to MailChimp if you have particularly high numbers of emails or subscribers (view their pricing page to see if this will apply to you).

Create an Audience

Go to the Audience section of your MailChimp account and create a new audience (previously called 'list' in MailChimp - they changed it in 2019). This is where all your subscribers will be stored.

Follow the instructions to set up and configure a new audience.

Import your subscribers

If you have existing subscribers that you wish to import to MailChimp, create a CSV file containing the data for your subscribers. There should be 1 column for each field - for example column 1 would include your subscribers' email addresses (1 per row), column 2 would be their first names and column 3 would contain their last names, if these are the fields you wish to store. (If you don't know how to create a CSV file, create an Excel spreadsheet with all your contacts, go to File > Save As and choose the '.csv' file type.)

Go to the Audience section of your MailChimp account and click on your audience. Click 'Import subscribers' from the 'Add subscribers' dropdown list. Follow the instructions to upload your CSV file. MailChimp will ask you to match the columns in the CSV file with the fields for your MailChimp audience, then you can go ahead with the import. MailChimp will tell you if there are any problems with the data.

Note: Your subscribers will NOT receive an email to tell them that they have been imported into your MailChimp audience.

Later in this tutorial, I'll tell you how to add a MailChimp signup form to your WordPress blog.


Method 1: Use the MailOptin plugin

MailOptin is a WordPress plugin that automatically emails your blog posts to your Mailchimp subscribers. You can choose whether to send the email as soon as each blog post is published, or as a daily, weekly and monthly newsletter roundup of your posts.

MailOptin is very easy to set up. It doesn’t require any coding knowledge.

To send email notification of new blog posts, you'll need the Pro or Agency plan. Get the plugin, login to your WordPress site and install and activate it.

Step 1 - Connect MailOptin to your Mailchimp account

Firstly, you need to get your Mailchimp API key:

MailChimp API key
  1. Go to 'Integrations' under the MailOption Dashboard menu.
  2. Click on the MailChimp tab to reveal the settings. Enter your API key and hit the 'Save Changes' button.
Connecting Mailchimp by entering the API key in MailOptin

Step 2 - Set up a new post notification email automation

Next is to set up the email automation that will be responsible for emailing your MailChimp subscribers when you publish a new post.

  1. Click 'Emails' under the MailOptin Dashboard menu.
  2. Click on the 'Add New' button at the top and select 'Email Automation'.
    Selecting email automation when creating a new Mailchimp email in MailOptin
  3. Enter a title for the campaign and select a type:
    • Choose 'New Post Notification' to send the email as soon as a new post is published.
    • Select 'Posts Email Digest' to create a daily, weekly or monthly newsletter digest of your posts.
      Setting up a new post notification email automation to Mailchimp subscribers in MailOptin
  4. Now select a template. You will then be redirected to the email builder.
  5. On the email builder, use the Body, Header, Content and Footer panels to customize the email template to your heart's content. You have options to change colors, add a header image, add custom content and more.
MailOptin email builder
Email subject, content length and post type options for a MailOptin automation
The Settings panel is where the the actual setup is done. Open it to set up the email subject and the maximum content length. You can also restrict the automation to specific categories, tags and authors. This is ideal if you want to send an email when blog posts are added to a specific category in WordPress.

Next, scroll down to the 'Recipient' section, select 'Mailchimp' and choose which of your MailChimp audiences (i.e. lists) the email will be delivered to:

MailOptin select recipient

When you are done, click the 'Save Changes' button at the top right corner and then toggle the activation switch to the right to enable the automation.

Step 3 - Add a MailChimp signup form

Now, you need to provide a way for subscribers to sign up to receive new blog posts by email.

With MailOptin, you do not need a separate plugin or form solution to capture and save subscribers to your MailChimp list. Simply follow the instructions in their documentation on how to create a Mailchimp signup form.

MailOptin Mailchimp integration settings beside a popup email signup form

And that's it! Whenever you publish a new post in WordPress, MailOptin will email it to your list subscribers - either straight away, or as a daily, weekly or monthly round up of newly published posts.


Method 2: Use MailChimp to send new blog posts by email

This basic method allows you to send new posts by email directly in MailChimp, without having to install any WordPress plugins. It works equally for wordpress.com or self-hosted wordpress.org sites.

Step 1 - Prepare your WordPress blog

Get your RSS feed URL

WordPress automatically generates an RSS feed listing all your blog posts. This is all you need to integrate MailChimp with your WordPress website.

If you want your MailChimp emails to display all the posts that you add to your website then your RSS feed will be https://your-domain.com/feed/ (e.g. the RSS feed for this website is https://barn2.com/feed/).

If you want to email your subscribers when you add posts to a specific blog category then the RSS feed will be the URL for your blog category followed by feed/ (e.g. https://barn2.com/category/wordpress-web-design-blog/feed/).

Find the URL for your RSS feed and save it in a handy place, as you'll need to paste this into MailChimp later.

Important note: The trailing slash / is compulsory, and MailChimp will only recognize your RSS feed if you add it as https://barn2.com/feed/ rather than https://barn2.com/feed. 

Displaying WordPress featured images in your MailChimp emails

Featured Images in RSS Feeds plugin settings for adding images to feedsBy default, any images that you insert into the main content area of your WordPress posts will appear in your MailChimp emails. However featured images will not because WordPress doesn't output them into the RSS feed.

There's a handy plugin called Featured Images in RSS and MailChimp Email (what a mouthful!). This outputs the featured images into your RSS feed so that they are pulled through into your MailChimp emails.

Simply install and activate the plugin, go to Settings > Featured Images in RSS Feeds in the WordPress Admin, and configure the 2 settings. For best results, I recommend selecting the 'Medium' or 'Large' image size and 'Image Centred Above Text' for the position.

The plugin uses the image sizes that you have set in Settings > Media so you can change the size of your Medium or Large image size. Make sure your chosen image size is smaller than 600 pixels - if it's bigger than this, it won't fit into the available space in your emails (annoyingly, MailChimp won't make the images fit automatically).

Can I display other WordPress content types instead of blog posts?

Yes! WordPress posts and ALL custom post type come with RSS feeds that you can use to send alerts via MailChimp. You can use exactly the same method to send email notifications for new events, projects, e-commerce products and more.

Check out our separate article about how to send 'New product' alerts from your WooCommerce store.

Step 2 - Set up MailChimp to send your 'new post' emails

Create a campaign

A 'Campaign' is basically any email that is sent by MailChimp to your subscribers. The next step is to create an RSS-Driven Campaign which will automatically send your new blog posts to your subscribers.

  1. Go to the Campaigns section of your MailChimp account
  2. Click the Create Campaign button in the top right corner
  3. On the 'What do you want to create?' screen, select Create an Email
  4. On the next screen, go to the Automated tab and click Share blog updates. (This is the new way to send an RSS-driven campaign in MailChimp, and isn't easy to find!)
    MailChimp create RSS automated campaign
  5. Name your campaign and select which audience it will send to, then click Begin
  6. MailChimp Create RSS EmailRSS Feed and Send Timing screen:
    1. Add the RSS feed URL which you copied in Step 1 - e.g. https://your-domain.com/feed
    2. Choose how often the emails will be sent and click Next
  7. On the To which audience shall we send? screen, select the audience you created in Step 2 and click Next
  8. On the Campaign info screen, fill in all the information (email subject, From name etc.) and click Next
  9. Select any Template and then click through to the Design tab.
Create a dynamic email subject line

You can use MailChimp merge tags in the subject line, for example to include the title of your latest post.

For example, we use MailChimp to send our own Barn2 blog posts and tutorials by email each week. The subject line is '*|RSSITEM:TITLE|*' & More! For example, if our latest post is called How to use MailChimp to send WordPress blog posts by email then the subject of the weekly RSS email would be 'How to use MailChimp to send WordPress blog posts by email' & More!

MailChimp RSS email subject line

Now design your MailChimp RSS email

Now you get to design the email that will be sent to your subscribers whenever you add a new blog post. This is fairly self-explanatory although you'll need to spend some time familiarising yourself with it. Here are some tips:

  1. Mailchimp email design using RSS feed merge tags for blog postsTo automatically include your new blog posts in the email, you need to add the RSS Header and/or RSS Items content block into your email. Find this in the Content section of the Design tab. The RSS Header element will add the title and description of your RDD feed and isn't essential. The RSS Items block will add the title, content and a link to each new post on your WordPress website, so this is essential!
  2. It's fine for you to add your own text before and after the RSS merge tags - for example, an introduction to the email. But don't edit anything within the *| |* merge tags. If you want to edit or remove any of the merge tags then you can read more about them at https://kb.mailchimp.com/merge-tags/rss-blog/rss-merge-tags. If the merge tags look scary and too technical for you then just ignore them and don't make any changes to the sections that contain them, then you won't risk breaking anything
  3. MailChimp will let you make various design changes to the email using the Style tab. This includes changing the background colour, fonts, spacing, link colour, etc. Use these to style the email to match your brand, as well as uploading your logo to the header of the email.
  4. Once you have finished designing your email, click Preview and Test at the top of the screen. Enter Preview Mode lets you view how the email will look on mobiles and full-sized screens. Send a Test Email lets you send a test email to yourself. Test your email in both of these ways before sending anything to your subscribers.
  5. Once you're completely happy with your email, click Next at the bottom right of the screen.
  6. On the next screen, check there are no errors. If everything looks good, click Start RSS.

What's next?

Now your email is set up and will start being sent to your subscribers at the frequency you have selected. The email will only be sent when you have added new blog posts to your website, otherwise, nothing will be sent.

Step 3 - Add a MailChimp signup form to your WordPress blog

Now everything is in place, you need to create a signup form so that readers can subscribe to your blog by email. The best way to do this is usually to add a 'Receive blog posts by email' form to the right-hand column of your blog or website. You can see this in action in the sidebar of this page.

There are lots of WordPress MailChimp plugins that will add a signup form for you. I recommend ChimpMate Pro which is a popular option. It’s simple to set up, has great reviews and there’s a free version as well as the premium version with extra features.

There are many other ways to build your MailChimp mailing list and I won't go into them all here. For example, you can automatically subscribe people who comment on your blog posts, purchase in your e-commerce online shop, submit your contact form, etc. Plan the best way to grow your mailing list as part of your overall online marketing strategy.

Now start blogging!

Everything is now in place. Regularly add new posts to your WordPress website and MailChimp will take care of the rest.

MailChimp will automatically check when new posts are available in your RSS feed, and will email your subscribers at the specified time. Make sure you subscribe to your own list so that you receive the emails yourself. This allows you to spot any problems and make improvements over time.


Bonus tip #1 - Email new blog posts to members only

So far, I've assumed that your WordPress blog is private and everyone can access it. But what if you want to mark part or all of your blog private and members-only? What if you only want to send the emails to members?

Fortunately, that's easy too. Here's how to do it:

  1. Install our WordPress Password Protected Categories plugin. Use it to password protect any or all of your blog categories.
  2. Use the instructions in Step 1, above, to get the RSS feed URL of the category (or categories) you wish to email to members.
  3. Follow the instructions in Step 2, above, to create a MailChimp Campaign to email new blog posts in the private category. Add the password to one of the static sections of the email (outside of your RSS merge tags), with instructions to use it to unlock the private blog. You may wish to create a Group or Segment within your MailChimp Audience for your private blog members, and set the Campaign to only send to this Group/Segment.
  4. Finally, decide how members will sign up for the private blog. If they have already joined your organisation separately then you can simply import them to MailChimp. Alternatively, you may wish to use a plugin such as Gravity Forms to create a MailChimp signup form that links with PayPal, so members have to pay to sign up.

Bonus tip #2 - List blog posts in an easy-to-find table

Once you've been blogging for a while (and emailing your new posts via MailChimp, of course!), your blog might start getting harder to navigate. This is inevitable because most blogs are listed in reverse date order, so older posts easily drop off the bottom - never to be seen again. It's a shame because unless your posts are very time-specific, they can continue providing value well into the future.

The solution is to use the Posts Table Pro plugin to list your posts in a more searchable, sortable format with extra features such as search box and filters. Your blog readers can easily use these tools to find posts about their topics they're interested, regardless of when they were published. It's the perfect way to revive old blog posts.

You'll basically be creating a WordPress blog index, which lists all your posts in an easy-to-navigate table. For example, Journey with Omraam found that their blog was getting difficult to navigate as it grew. They list large numbers of blog posts in a table with instant search above.

Large list of blog posts shown in a table with instant search

You can also add filters above the table of blog posts. This makes things even easier for your blog readers, as they can filter to find posts by category, tag, or any custom taxonomy:

Blog posts listed in a filterable table by category, tag and date

This helps to keep your blog posts active and relevant, well after they were first emailed to your MailChimp subscribers.

Wrapping up

As you can see, there are lots of ways to integrate your WordPress blog with MailChimp, either on its own or using MailOptin!

And if your requirements are more complex, then you can combine this method with other WordPress plugins to add extra features. For example, you can add fancy MailChimp signup forms or even make parts of your blog private so that only existing members can read them and receive the emails!

Members-only WooCommerce store displayed on a laptop and tablet

'WooCommerce is perfect for building any type of e-commerce website. That's why it's no. 1! One of its less obvious uses is to create a private, members only WooCommerce store, which restricts access so only pre-approved customers can enter. Read more on how to add a WordPress membership plugin with WoCommerce to create your membership website today.

This is the complete guide to building a WooCommerce members only shop. We'll look at 2 plugins: WooCommerce Private Store and WooCommerce Protected Categories.

I'll help you to choose the right WooCommerce members only plugin for your specific needs, and provide full instructions on how to set it up for your members.

Do I need a members only WooCommerce shop?

There are lots of reasons why you might want a private shopping club where members can buy exclusive products that aren't available to the public. Here are some examples:

  • Members-only WooCommerce store shown across tablet and phone with a private product table
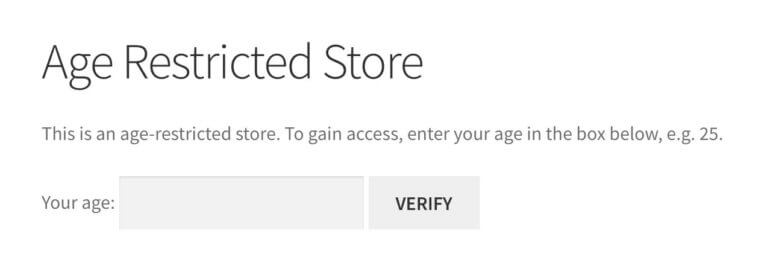
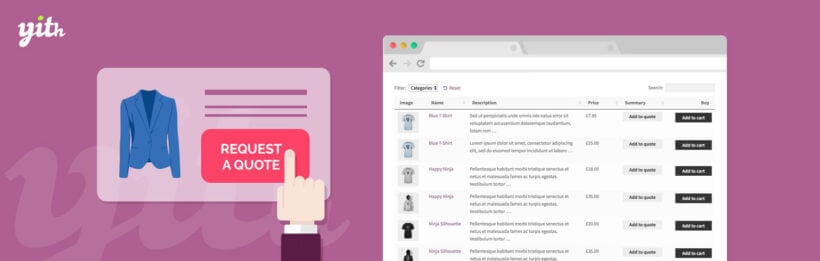
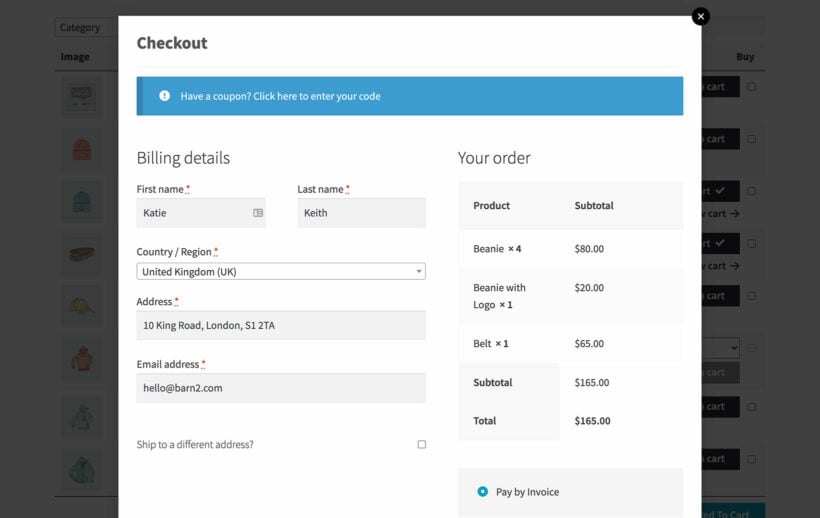
Members buying club - Some stores offer membership plans in return for discounted access to their products. For example, you could use a WooCommerce extension/plugin such as YITH WooCommerce Subscriptions to sell membership on your public store with recurring payments. You can then use this tutorial to create a WooCommerce members only area containing the products.
  • WooCommerce wholesale store - A trade-only e-commerce store might have created a wholesale store to sell products to approved members at trade product prices. (Note: if you're building a B2B store then you might prefer our dedicated WooCommerce Wholesale Pro plugin, instead of one of the more generic plugins in this tutorial.)
  • Branded products for members only WooCommerce stores - A trade association or membership group might sell branded merchandise that is exclusively available to its members. This might include clothing with the logo of the membership organization.

Whatever your reason for needing a members only WooCommerce plugin, read on to find the right solution for you.

What sort of membership store do I need?

First, let's look at the different types of WooCommerce members-only extension plugins. There are a few methods for structuring a private area and membership store, depending on which customers need access to which products:

  1. 100% private WooCommerce store with 1 membership level With this option, your overall website will be public (e.g. the homepage, core pages, and any custom post types), but the WooCommerce shop will be hidden from public view. Members must log into the private shopping club to view the products and buy them. Once logged in, all members will have access to the same products. Setup instructions...
  2. 100% private WooCommerce store with multiple WordPress membership plugin with WooCommerce tiers Again, your main web pages can be public but the whole of your WooCommerce store will be private and hidden. Different members will have access to different products. Setup instructions...
  3. Members only WooCommerce store with public and WooCommerce members areas With this option, you can have a public WooCommerce store that anyone can access and buy from. In addition, you can have 1 or more private WooCommerce members-only areas. All within the same WooCommerce shop! Setup instructions...

Method 1 - 100% private WooCommerce store with 1 membership level

This method uses the WooCommerce Private Store plugin. Use it to make all parts of WooCommerce private shopping club. Once a member logs into the hidden store, they can view and buy all your products.

Setup instructions for your private members only WooCommerce store

Before you start, I expect you to have a WordPress website with WooCommerce already installed and set up. Create all your products.

At this point, you will have a regular ecommerce store that is available to the public. Use the following instructions to transform it into a hidden WooCommerce members only store:

  1. First, get WooCommerce Private Store. Download the plugin files from the confirmation page or email, and copy your license key.
  2. In the WordPress admin, find Plugins → Add New and upload the plugin files. Activate the plugin.
  3. Activate WooCommerce Private Store license
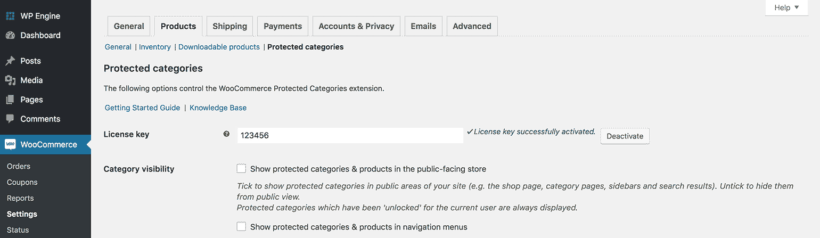
Go to the plugin settings page at WooCommerce → Settings > Private Store. Add your license key, choose 1 or more passwords for your store, make any changes to the login page text, and Save.
  4. Now create a page that clients will use to log into the WordPress portal. Use the shortcode [store_login] to automatically add a login form to the page.
  5. Finally, link to the login page from your navigation menu, header, footer, or keep it hidden and just send the link to your members. (This depends on how you want people to access your private store.)

And that's it! That's all you need to do to lock down WooCommerce and turn it into a members only store.

Public visitors can visit your membership site, view your main pages, and access the login page. Your WooCommerce products, categories, etc. will be completely hidden from public view and won't show up in search results or anywhere else. On entering a correct password, members can unlock the WooCommerce members only store and view and buy the products within.

Using individual user logins to unlock the members store

By default, WooCommerce Private Store uses password protection to protect your WooCommerce members only shop. There's also a 'Logged In Users' box on the settings page. Enabling this option will replace the password protection with automatic access to the members' shop when customers log in to their WordPress user account on your website. However, if you want to limit access only to certain user roles, you can customize the settings accordingly.

If you use this option, then you don't need to use the store login page that comes with the plugin. Instead, members can access the entire store simply by logging into their account via the default WordPress login page. (Tip: You can also use any other WordPress login or social login plugin, such as Theme My Login.)


Method 2 - 100% private WooCommerce store with multiple tiers of membership

This method uses the WooCommerce Protected Categories plugin to restrict access to your shop. The shop part of your website is completely hidden from the public. Your  WooCommerce members-only shop is divided into multiple sections. Each member can have access to 1 or more areas within the shop.

This is a great opportunity to sell different private products to different members. For example, if you have different groups or tiers of membership, then you can create a separate area of your store for each category.

Before you start, you should already have a WordPress site with WooCommerce and various products. At this point, your store will be fully public.

Use the following instructions to turn it into a multi-level WooCommerce members only store, with different product pages available to different groups of members.

(You can also use these instructions to sell user-specific products, such as branded clothing for a sports team or school. In this case, you will have a different category of products for each member.)

Setup instructions for a multi-level WooCommerce members store

  1. First, buy WooCommerce Protected Categories. Copy your license key and download the plugin from the confirmation email or confirmation page.
  2. In WordPress, go to Plugins → Add New and upload and activate the plugin.
  3. Navigate to WooCommerce → Settings → Products → Protected Categories. Enter your license key, make any other changes (e.g. to the members' area login form), and click Save. DO NOT tick the boxes to show protected categories in public parts of the store.
  4. Protected category settings restricting access to logged-in members only
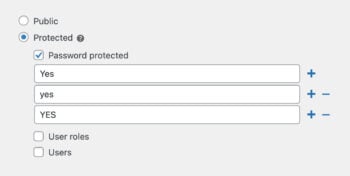
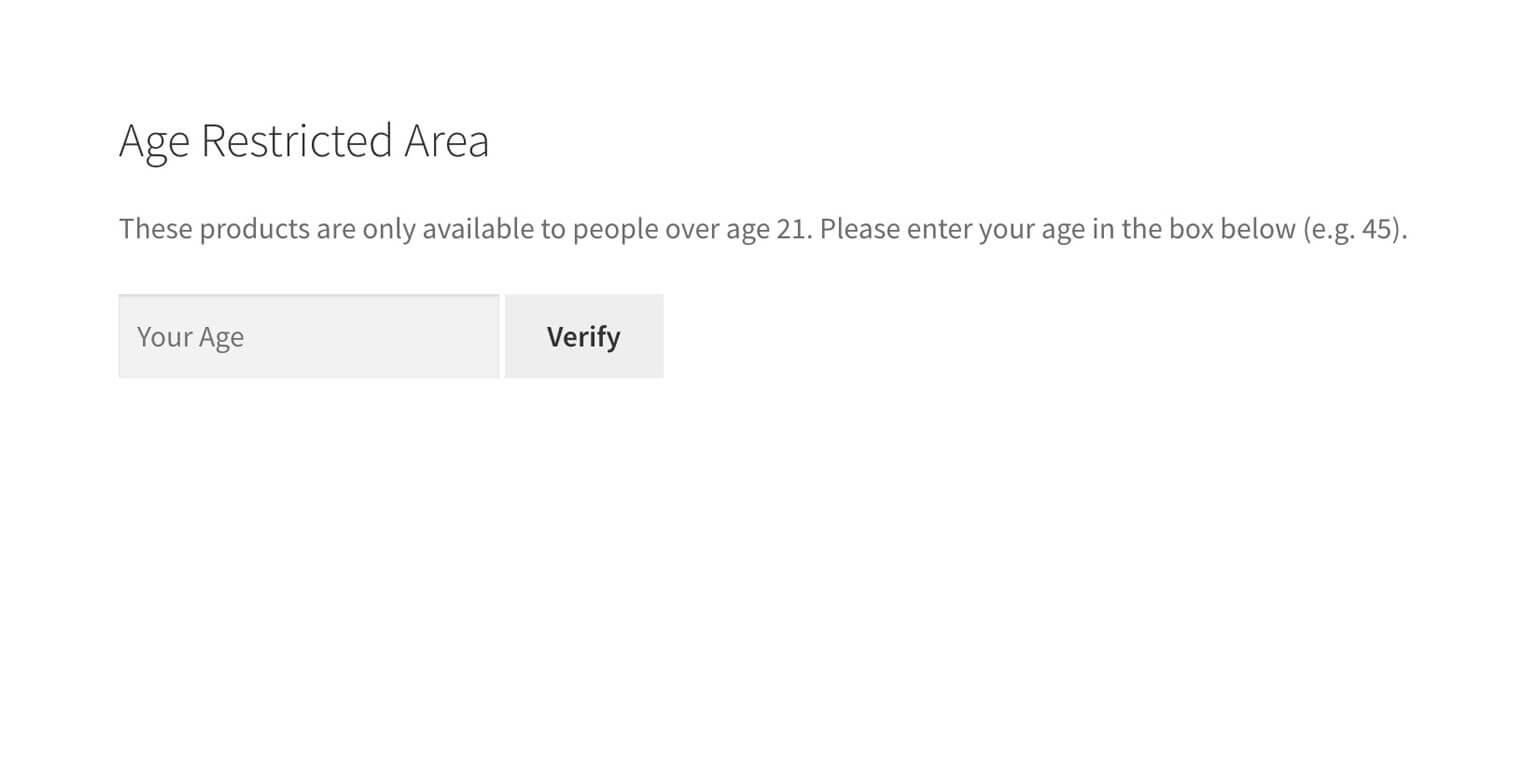
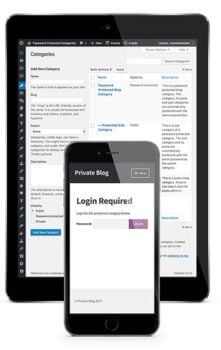
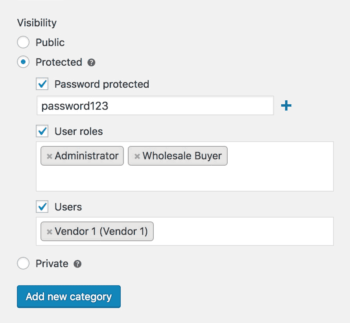
Now, go to Products → Categories. Create a category for each membership level or group. For each category, select one of the 'Protected' options:
    • Password protected - Members must enter a password to access each members-only product category. This WooCommerce password protection is separate from WordPress user logins. It's a good option if you don't require separate accounts for each member.
    • User roles - Automatically unlock the members-only category for logged in users with a specific role. (Tip: The free User Role Editor plugin works great for creating additional WordPress membership plugin with WooCommerce levels, which you can then protect using WooCommerce Protected Categories.)
    • Users - Alternatively, select the individual member accounts that should have access to the members-only WooCommerce category. This option is probably best for smaller WordPress membership sites. I'd recommend the password protection or user roles options for WooCommerce stores with lots of members.
  5. Next, add any sub-categories to your members' area categories. Leave these set to 'Public', as they will automatically inherit the same protection as the parent category.

Now add your protects and allow members to login

  1. Next, go to the main Products page in WooCommerce. Put each product in one of your members-only categories. (I recommend using Quick Edit to categorize products more easily - hover over each product and click 'Quick Edit'.)
  2. Finally, create a page that members will use to log into their area of the members only store. Add a 'Member Login' link to your navigation menu. This depends on what type of protection you're using for your membership plugin categories:
    1. If you're using password protection, then use the shortcode [category_login] to add a login form to any page. You can link to this from the public parts of your website as needed. When someone logs into a members-only category, the plugin will instantly redirect them to the category matching the password entered.
    2. If you're using user roles or user restrictions, then you should link to a user login page such as the main WooCommerce Account page. To make your WooCommerce members store more user-friendly, you can use a free plugin named Peter's Login Redirect to automatically redirect each user or role to the correct category page after logging in.

How the multi-level members store works

Once you have completed the above instructions, you will have a complete WooCommerce members only shop with multiple levels.

Customers can view the public parts of your website as usual. They can go to the members' store login page and either enter a password or log into their WP user account.

Members can only see the products that they have access to. The restricted products are hidden from everyone else.

You will need to set up a process for giving the password to your members or allowing new members to register for the store.

Giving the password to your members

For password protected membership areas, you might want to include the password for the appropriate product category in your members' welcome pack or 'new member' email. The WooCommerce members only plugin supports multiple passwords, or you can use the same one for each user.

Creating a user account for new members

The WooCommerce 'Account' page turns into a login and registration form for logged out users and guests. If you have enabled user registration, then you can let new members use WooCommerece shop only for registered users here. Once they have logged into their new WP user account, they can access the members-only store.

Alternatively, you can use any WordPress front-end registration/login plugin to create a fancy registration form. The Theme My Login plugin has a useful feature to hold new member registrations for approval by an administrator before they can access the members-only store.

If you'd rather sell membership via your website, then you can do this by creating a public product that everyone can buy. To find out how skip ahead now.

Can I sell the same product to more than 1 membership level?

Each product can only be in 1 protected members only category. If you want to sell the same products to 1 or more groups of members, then you should clone these products and put one version in each WooCommerce protected category. The Duplicate Post plugin makes it easy to clone WooCommerce products. (If you want to manage inventory across each product version, then we recommend the Group Stock Manager plugin. This lets you share stock levels across multiple products.)


Method 3 - WooCommerce store with public and WooCommerce members areas

This method also uses the WooCommerce Protected Categories plugin. It builds on method 2 by adding a public shop as well as one or more WooCommerce members only areas. Some products are available to everyone, while you can also have private members only products.

Setup instructions for a public and members only WooCommerce shop

The instructions for this use case are identical to method 2. The only difference is that as well as creating protected members-only categories, you should create some public product categories.

The next step is to create a user-friendly navigation structure for your public and WooCommerce members only store. We'll look at this now.

Store navigation

Think carefully about how to structure your WooCommerce store. It needs to be intuitive for both members and non-members:

  1. Public store navigation - This bit's easy. Simply add links to your public store in the usual way. For example, you might add menu links to the main WooCommerce shop page and maybe your public store categories. You can also use the widgets that come with WooCommerce to help people navigate the public store.
  2. Membership plugin: Members only shop navigation - The public shop will remain visible to logged in members, so you need to create navigation links that make it clear when they're in the members only WooCommerce shop. Some tips:
    • Create a page which members will use to log into the members only store. If you're using password protected categories, then use the shortcode [category_login] to add a login form to the page. If you're using role or user protection, use a front-end user login page such as the WooCommerce Account page. You can link to your members store login page from the public areas, such as a 'Members Store' link in the navigation menu. Or if you want to keep it hidden, don't link to it at all and just send the link to your members. Once someone enters a correct password, they will be redirected to the members only store category for that password.
    • If you add direct links to your WooCommerce members only categories to the navigation menu, then these will be hidden from public view. Once a member unlocks their hidden products via the category login page, these menu links will magically appear in the menu for them! This is a neat way of adding more complex structures within your members only WooCommerce store. Each member will only see the products that they have access to.

Can the same product appear in the public and members only areas?

If you've ticked the box on the settings page, then your members only WooCommerce products can appear in the public store. When people click on them, they will have to enter the password in order to purchase.

However, each single product page can only be in a public OR a password protected category. If you want to sell the same products to the public and use the WooCommerce shop only for registered users feature, then you will need to clone the individual products. The Duplicate Post plugin is a great add-on that makes it easy to clone WooCommerce products. Then, you can put 1 version of each product in the different parts of your store.

How can I sell access to my WooCommerce members only store?

Finally, I'll reveal how you can sell access to your members only WooCommerce store with this membership solution. Skip this section if you don't want to charge for membership.

  1. First, create a public category under Products → Categories.
  2. Now add a product to this category - Products → Add New. Call this 'Buy Membership' or whatever you like. Add a price and other information about joining your WooCommerce membership purchasing club.
  3. Your membership product should be a normal simple or variable product if people have to make a one-off payment to join. Alternatively, if you want to take regular ongoing payments from members, then use the YITH WooCommerce Subscriptions plugin to create a subscription product. This can include free trials and different payment frequencies.
  4. Create more than one membership product if you want to sell different paid membership tiers on this membership plugin.
  5. Link to the membership products from prominent places on your public website, such as the navigation menu.
  6. Lastly, consider how to give new members access to your WooCommerce members only store. This depends on the type of protection you're using:
    • Password protection - Use the Follow-Up Emails plugin as an add-on to automatically send an email containing the members' area login link and password to everyone who buys the membership plugin. This plugin provides fine-grained control, and you can create different emails for each membership product.
    • Role protection - The easiest way to do this is to automatically unlock the hidden membership plugin for all logged in Customers. Disable guest registration in the WooCommerce settings (WooCommerce → Settings). When someone buys a product, including membership, they will receive the logins for a customer-level account. They can log into this account to unlock the WooCommerce members only store.
    • Individual logged in user protection - Finally, is your members only store is restricted to individual logged in users? If so, then you will need to manually give each user access when they purchase a membership. Just head to the 'Edit' screen for the members only category, and select them under the 'Protection' options.

Use WooCommerce to create a members only store

Using the above methods and funtionality, you can use WooCommerce to create content restrictions and sell exclusive products to pre-approved customers. Whether you have a WooCommerce shop only for registered users or a separate public online store, there is always a best WooCommerce members only plugin that will suit your needs.

YITH request a quote banner beside a product table with quote buttons

Customers often ask if our bestselling Product Table plugin works with any WooCommerce 'add to quote' plugins. In this article, I'll share an excellent Request a Quote plugin that allows customers to add products to their shortlist directly from the product table

If you're using WooCommerce Product Table to list products in a table, you might want customers to request a quote instead of buying online. This is essential if you provide bespoke services or custom pricing which varies for each customer.

A WooCommerce add to quote plugin provides 'add to quote' buttons, which you can use in addition to or instead of the usual add to cart buttons. Your customers can select as many products as they like, choose the quantity, and create a bespoke list. They can then view the list and submit the quote request to you.

Which WooCommerce quote plugin can I use with product tables?

Most add to quote plugins don't work with WooCommerce Product Tables straight out of the box. However, we have integrated with the YITH WooCommerce Request A Quote plugin so that you can easily add quotation buttons to your product tables.

WooCommerce product table with add to quote buttons for adding products to a quote list
This video shows the 'Add to Quote' buttons in the product table. When you add a product to the quote, it is added to a list.

Setup instructions

  1. Install WooCommerce Product Table and the premium version of YITH Request a Quote.
  2. When you create your product table columns, add the Request quote column.
  3. Follow the documentation for both plugins to set them up as required.

That's it! When you view the product table, it will contain an Add to Quote column containing the buttons from YITH's plugin.

FAQ

Can I hide the add to cart button?

Some people like to use add to quote buttons alongside the usual add to cart buttons. Others like to remove the add to cart button completely so that the only option is to get a quote.

The YITH WooCommerce Request A Quote plugin has an option to hide the add to cart button. This does not work with WooCommerce Product Table and will remove the add to cart button from the single product page. You can easily remove the add to cart buttons from your product tables - simply don't include an add to cart column when you add columns to the product tables.

Where can customers see their quote request?

Customer quote request list showing products, quantities and totalsThe YITH WooCommerce Request A Quote plugin comes with a 'Request a Quote' page. This lists the products you have added to the quote request, and includes a form to submit the request.

When a customer uses the product table to add an item to the quote, a link to the Quote Request page will appear in place of the button. This makes it really easy for them to add multiple products to the quote and then click to review the quote.

You can also link to this page from your navigation menu. Alternatively, you can add a button linking to the page above/below the product table.

The premium version of the YITH WooCommerce Request A Quote plugin also has many extra features. This lets you customize the quote features to your exact needs.

Can customers choose a quantity for their quote request?

It can be a bit tricky to make the quantity picker in WooCommerce Product Table work with the YITH Request a Quote buttons. This is because the quantity picker appears in a different column of the table from the 'Request a Quote' buttons, and the two columns don't relate to each other.

Here are two suggested workarounds:

  1. If you've enabled the option to display the product tables on your main Shop page then you can follow these instructions to make the quantity picker work with YITH's Add to Quote buttons. This method will only work when you display product tables and quote buttons on your shop page templates, and not when you create tables using a shortcode.
  2. Where you have created tables using a shortcode, your customers should use the 'Add to Quote' buttons in the product table to built their quote. This will add a quantity of '1' to the quote for each product. When they click through to the quote page, they can modify the quantity of each product as required.

Does it work with variations?

If you want people to be able to add variations to the quote, then you need to enable the option on the WooCommerce Product Table settings page to list each variation on its own row of the table. If you display the variations as dropdowns then YITH's plugin won't know which variation to add to the quote.

Conclusion

We hope you enjoy using YITH's Request a Quote plugin with WooCommerce Product Table to create table layouts with add to quote buttons.

Person analysing conversion rate data on a laptop

All WooCommerce stores share a single aim: To increase conversions and get more sales. Whatever your wider business goals, that's what it all comes down to!

If you Google 'WooCommerce conversion rate optimization', you'll find lots of general advice on how to convert more visitors into paying customers. This usually focusses on improvements to the cart and checkout. These are important, but often forget that you need to convince customers to buy your products in the first place.

In this article, I'm going to do the opposite. I'll provide specific and actionable tips on how you can convince customers to add more products to their cart using a specific tool: product tables.

WooCommerce product tables are an excellent tool for increasing your sales. By adding well designed table layouts to your store, you can present products in user-friendly ways that make it easier for customers to buy from you.

What is a WooCommerce product table?

WooCommerce product table layout designed to help shoppers buy fasterA WooCommerce product tables lists products in a structured table layout. This will consist of rows and columns, with each product as a separate row in the table.

The WooCommerce Product Table plugin is the easiest way to create a table view for your store. It comes with dozens of options, and saves having to code complex table layouts from scratch.

Product tables sound simple, but they provide lots of opportunities to optimise your WooCommerce conversion rate. Read on to discover how to get more sales by listing products in a table layout.

Products listed in a WooCommerce table with filters and add to cart buttons

#1 - Display sales-winning product data in the table

Most store owners don't stop to consider what product data to include on the WooCommerce shop pages. Big mistake!

WooCommerce and your theme will display pre-defined information on the shop and category pages. This typically includes the product image, title, price, ratings and add to cart button. But what if this isn't the data that will convince your customers to buy?

WooCommerce Product Table lets you choose exactly what data to provide on product listing pages. Each piece of information is displayed as a column in the product table. The plugin supports all the standard product data such as SKU, name, short and full description, categories, tags, featured image, reviews, stock, size, and price. If this isn't enough, you can also show custom product data by creating custom fields and taxonomies.

WooCommerce product table on a tablet listing each variation on its own row

With so many possible columns, you have full control over the product information in the table. Think carefully about what data your customers need to see on each page. If your product tables have links to the single product page, the aim is to provide enough information to inspire customers to click through and learn more.

If your WooCommerce tables include add to cart buttons, they'll need to include enough data to decide to buy without clicking elsewhere.

Don't just add columns to your WooCommerce product tables because you can. Think carefully about all the available columns. Only use the ones that will actively convince customers to buy your products.

Examples - choosing the right product data for your store

  • A WooCommerce wholesale order form might use product tables to show as many products as possible per page. Wholesale customers already know what they want to order, so they don't need images or descriptions. The product table will therefore contain columns with factual data such as SKU or ID, name, attributes, and multi-select checkboxes.
  • A WooCommerce restaurant order system might use product tables with a small image of each dish, plus columns for name, short description, price, and add to cart buttons. It might also include custom fields and taxonomy to show extra information such as calorie count and meat-free labels.

Restaurant order form table with notes prices and add to cart buttons

See the knowledge base for a list of all the product data you can show in the WooCommerce table layout.

#2 - Make it easier to buy with add to cart buttons & checkboxes

Amazingly, WooCommerce Product Table comes with 3 options for adding products to the cart. Well, there are 4 options really, as you'll see below:

  1. 'Add to cart' button for each product.
  2. Multi-select checkbox to add multiple products to the cart.
  3. Use the add to cart button and checkbox together, giving customers a choice.
  4. Perhaps you want customers to buy on the single product page instead of directly from the table. You can include a button linking to the single product page instead of (or as well as) having add to cart buttons.

How to choose an add to cart button type

First, you need to decide whether add to cart buttons will help or hurt your WooCommerce conversion rate optimization.

There's no one-size-fits-all answer to this question. It depends on the type of products you sell, and how much information your customers need to convince them to buy.

Some tips

  • Do you sell high value products, where customers spend a long time reading and researching before deciding to purchase? If so, it's often best not to include add to cart buttons in your product table at all. Instead, add a 'Details' button linking to the single product page. Or don't bother with buttons at all, as customers can click on the title to access the product details. Once customers click through to view more information, they can spend more time reading full details, reviews, and other data that will convince them to buy. They will only click the 'Add to cart' button after they have read all the information, so there's no point including them in the product table view.
  • Do you want to disable online ordering, with different calls to action? This article is about optimizing your WooCommerce conversion rate. However, conversions don't have to be online sales. You might sell your products offline, for example via phone or in person. If this is you, then you can create a product table without add to cart buttons. You can disable all the links in the table so that customers can't click through to the single product page at all. Instead, create a custom field with a different call to action - for example, a 'Call us now' button. Show this as a column in the product table, encouraging customers to do whatever action counts as a conversion for you.

And what about multiple purchases?

  • Do customers buy one product at a time? If customers are likely to order single products only, then the best option is a single add to cart button for each product in the table. For example, if you're selling hot tubs then customers will only ever buy one, so there's no need for multi-select boxes.
  • Do you want customers to buy several different products? Lots of WooCommerce stores want customers to buy as many products as possible. This applies to all sorts of store including clothing websites, online food ordering systems for restaurants, and shops selling low-value products such as stationery. If this is you, then you can vastly increase your income by taking steps to increase the average order value. It's more profitable to increase your average order value than to attract more low value customers - for example, because it reduces advertising and support costs. Multi-select checkboxes are a great way to do this. Customers can quickly tick all the products they want, and add them all to their basket in a single click. Nice!

Use quantity pickers to sell more products

If your product tables have add to cart buttons, then it might also be worth adding a quantity selector. This is always worth doing if you want customers to buy more than one of each product.

For example, if you're selling pens then having 'add to cart' buttons without a quantity picker will encourage customers to buy one pen at a time. This isn't what you want! In contrast, adding a quantity selector will unconsciously prompt customers to stock up and buy more. This is another great way to increase the average order value, which can hugely increase your revenue.

#3 - Should the product table link to the single product page?

We've already touched on this, but let's delve deeper into the question of whether to use the single product page. The great thing about WooCommerce Product Table is that you can choose whether or not to have a separate 'Details' page for each product.

By default, customers can click on any product in the WooCommerce table to access the product details page. If you like, you can also add buttons linking to the product pages.

This is ideal if customers will want to see more information about your products than you can include in the table. However, not all stores will benefit from using the single product page.

Some examples

  • WooCommerce quick order formsWooCommerce quick order form on a desktop monitor simplify the buying process by keeping everything on the product table page. There's no need for customers to click through to separate pages.
  • Read-only product catalogues provide information about each product, without an option to buy. The single product page includes Buy buttons, so you may want to remove access to these pages.
  • WooCommerce wholesale stores are for regular trade customers who already know what they want. They want to order quickly from the wholesale order form, without having to click elsewhere.

To stop customers accessing the product details page, you can disable these links in the product table. When they view the products in the table, the only action they can take is to buy!

#4 - Use quick view to give your conversions an added boost

WooCommerce shop with Quick view and Add to cart buttons on every product card to reduce clicks and boost conversions

As you can see from these top 13 tips, product tables are a fabulous way to convert more customers into paying customers.

In many ways, it boils down to using one-page shopping as an alternative to sending customers to a separate page for each product. This in turn speeds up the buying process and encourages customers to buy multiple products at once.

But what happens if your customers need more information than you can fit into the product table layout? Sure, you can add extra columns to show information in the table view. However, some types of product do need extra information. Or they may have too many variations to fit into one-page shopping. So how do you provide extra information without requiring extra page loads?

The answer is to add WooCommerce quick view to your product tables. 

Quick view buttons added to a WooCommerce product tableThe Quick View Pro plugin adds quick view buttons or links to WooCommerce Product Table. Customers use these to view the full product image gallery and read extra information such as the short description in a lightbox popup. They can even choose variations, quantities and add to the cart directly from the lightbox.

This is the perfect way to provide extra product details without taking customers away from the product table page. Customers remain on the list of products throughout the process, offering true one-page shopping with an extra boost.

#5 - Use variations & add-ons to optimize your WooCommerce conversion rate

Do you sell product options or variations? WooCommerce Product Table fully supports variable products, and add-ons creating using the WooCommerce Product Options plugin.

There are 3 user-friendly ways for customers to choose a variation before adding a product to the cart. If you're using the add-ons plugin then you can also add various combinations of check boxes, text input fields, radio buttons and more. To increase your WooCommerce conversion rates, present options in a way that will make customers more likely to buy:

Think about which option will maximise your WooCommerce conversion rate optimization. Again, different types of store will benefit from presenting variations and add-ons in different ways.

For example:

  1. Show variations as dropdown lists if you have lots of products. The dropdowns let you save space by listing as many products as possible per page.
  2. List variations on separate rows if you have a small number of products and want to draw more attention to each variation. For instance, you might sell a single product but offer it in several variations. The best way to sell this product using a table view is to list each variation as a separate row in the table.
  3. Use add-on fields if the logic of variations doesn't meet your needs - for example, if you want customers to be able to select multiple options.

#6 - Use image sizes that will sell your products

The great thing about WooCommerce product tables is that you have full control over the images. Most WooCommerce themes display product images in a standard size. This may not present your products in a way that will show them off and maximise conversions.

When creating product tables, think about what image size will sell your products most effectively.

How to get your product images right

WooCommerce Product Table displaying apparel with image, name, description and price columns to aid conversion

  • Do you need product images at all? Lots of WooCommerce websites upload an image for each product, just because the theme expects them to. This leads to some strange results, such as huge images to promote non-visual products such as e-books. Think about whether images will attract customers to your products, or whether they'd prefer a text-based layout with more products per page.
  • How big should the images be? Again, most WooCommerce stores use big images because the theme automatically sizes them. Images take up a lot of space and reduce the number of products that will fit on each page. Only use big images if they actively help to sell your product. Many types of product will benefit from an image, but a small thumbnail is enough. For example, a WooCommerce website selling spare automobile parts need product images to reassure customers that it's the right part. However, customers aren't buying based on what the part actually looks like, so it's best to keep the images small.
  • What about the image proportions? The most popular WooCommerce themes require square images. This may not be ideal, for example if you're selling a tall and thin product such as clothes.

By listing products in a WooCommerce table layout, you can choose whether or not to include an image column. If you add featured images, you have full control over the image size and dimensions. This is an opportunity to improve WooCommerce conversion rates by making your images more appropriate and ensuring they will actively sell your products.

Experiment with the image size option to get the perfect balance to sell your products. Try to achieve a balance between creating images that will make customers want to buy, and fitting the optimal number of products onto each page.

#7 - Use social proof to convince customers to buy

WooCommerce Product Table listing t-shirts with image, name, price, star ratings and quantity plus Add to cart per row
Research shows that almost 70% of customers read reviews before making a purchase, and having customer reviews on your website can increase conversions by nearly 75%.

This highlights the power of social proof as a tool for WooCommerce conversion rate optimization.

There are several easy ways to include social proof in your WooCommerce product tables. Think about the best way to use them to sell your products:

  • Product reviews Include a 'Reviews' column in the product table. This is built into the table plugin and shows each product's average star rating. Customers can click to read full reviews on the single product page.
  • Product audio & video reviews Word of mouth is the best sales tool. Leverage this by adding audio or video testimonials from happy customers, with embedded players in the product table. People can click the 'Play' button to watch or listen to customers talking about why they should buy each product. What better way to convince them to buy?

#8 - Find creative ways to bring your products to life

Photo gallery with print size options and buy buttons to boost conversions

With WooCommerce Product Table, you can think of exciting new ways to bring your products to life. This can have a big impact on your conversion rate.

You can be really inventive here, as the WooCommerce table plugin supports shortcodes from your theme and other plugins. This means that you can add content provided by other shortcodes and display them in the product table.

For example, you might have promotional videos or 360 degree tours to promote your products. You can embed them directly in the product table. Customers can see the product in action without having to click elsewhere.

#9 - Make your products easy to find

So far, we've looked at some conversion-winning ways to display products with WooCommerce Product Table. That's all well and good, but your sales will only increase if it's quick and easy for customers to find the products they want in the table.

If customers have to scroll through lots of products to find what they're looking for, they'll quickly give up and look elsewhere. This increases your bounce rates and reduces conversions.

To get the most benefit from your product tables, you need to design them in a way that makes it super-easy for customers to find products. If you only have a few products, this isn't really an issue. But if you have a large product catalog, then it becomes incredibly important.

How many product tables do you need?

First, decide how many product tables you need. You can list your entire inventory in a single product table. Or, you can create multiple tables, each containing different products.

There are several ways to use multiple product tables on your WooCommerce site:

  • Restaurant order form with tabbed starters and main coursesMultiple product tables on a single page One option is to divide up a single page with multiple product tables. For example, a WooCommerce restaurant might create a single page for ordering their foods online. They would structure the page with a heading for each section of their menu (Starters, Main Courses, etc.), followed by a product table listing foods from that category. Alternatively, they can create a tabbed layout or accordion with a product table in each section. Customers can select their foods and place an order from this one-page order form.
  • Product tables on separate pages Alternatively, you can add product tables to different pages across your site. The tables might replace your standard WooCommerce product category page layout. Customers can navigate between pages via the navigation menu, sidebar links and other internal links.

How will customers search, sort and filter the WooCommerce table?

WooCommerce Product Table comes with lots of ways to help customers find products in the table. To optimize your WooCommerce conversion rate, don't just activate them all! Think about the number of products in the table and how customers will use it. Armed with this knowledge, you can add search and filter options that will be most useful to your customers.

First, think about whether you need to make it easier to find products. If you only have a few products, then there's no need to clutter up the table with a search box or filters. Instead, keep it minimal - this draws more attention to your products.

If you have lots of products, then you can definitely improve your WooCommerce conversion rate by adding extra search and filter options.

Search & filter options

Adding search and filter options above a WooCommerce product table to lift conversion rate
  • Sort columns Customers can click on any column to sort the table by that column. The sort arrows appear automatically and make it easier for your customers. You can also change the default sort order for when the WooCommerce table first loads.
  • Keyword search box By default, a search box appears above the table. There are options to hide or reposition this. Keep it if customers might want to search for a product by typing a particular keyword. For example, this can be a life-safer if customers already know the name, ID or SKU of the product they're looking for.
  • Filter dropdowns You can show filter dropdowns above the table to let customers filter by category, tag, attributes, variations, etc.
  • WooCommerce filter widgets The product table plugin comes with its own version of the built-in WooCommerce filter widgets. These let you filter the table by selecting a product attribute, price, or rating in the sidebar.

Add even better filters with WooCommerce Product Filters

As you can see, WooCommerce Product Table comes with lots of options for adding filter dropdowns and widgets. For even more flexibility, you can use it with its sister plugin - WooCommerce Product Filters.

This comes with a huge range of filter styles and the ability to filter by any type of product data.

WooCommerce product table with sidebar product filters to help improve store conversion rates
Using WooCommerce Product Table with the Product Filters plugin

#10 - Let customers sample products before deciding whether to commit

Lots of products - e.g. curtains, make-up or paint colors - are difficult to sell online. Customers simply can't tell whether the product is suitable based on pictures on a screen. That's when you need WooCommerce Product Sample to improve your conversion rate.

When you use WooCommerce Product Table with product samples, it works like this:

  1. The customer views the products in the product table. Each product or variation has an 'Order Sample' button as well as the usual 'Buy' button.
  2. If the customer wants to compare sample items in their own home, then they simply order a sample of each product.
  3. The WooCommerce Product Sample plugin sends them a friendly email a few days later to ask which was their favorite and remind them to order the full product.

Product samples give customers 100% certainty that they're ordering the right thing, removing the risk factor - and therefore improving your WooCommerce conversion rate. You can choose whether or not to charge for samples or delivery, so it's a great opportunity to boost conversions at no cost to you. The product table is particularly useful for ordering samples because customers can see all the options on one page.

#11 - Let customers complete their order without leaving the page

Product table with a Fast Cart popup checkout to lift conversions
WooCommerce Product Table with Fast Cart popup checkout

As we have seen, WooCommerce Product Table makes it super-fast to find and add products. After that, customers complete their order using the standard WooCommerce cart and checkout pages.

To supercharge the customer journey even more, you can replace the multi-page checkout process with an on-page cart popup. WooCommerce Fast Cart lets customers view their cart, pay and complete their order from within the popup cart. This all happens directly on the product table page, so there's zero chance that your customers will get bored and give up. That can give a nice boost to your WooCommerce conversion rate.

#12 - Increase the WooCommerce conversion rate for mobile users

Responsive WooCommerce product table on a tablet and phone
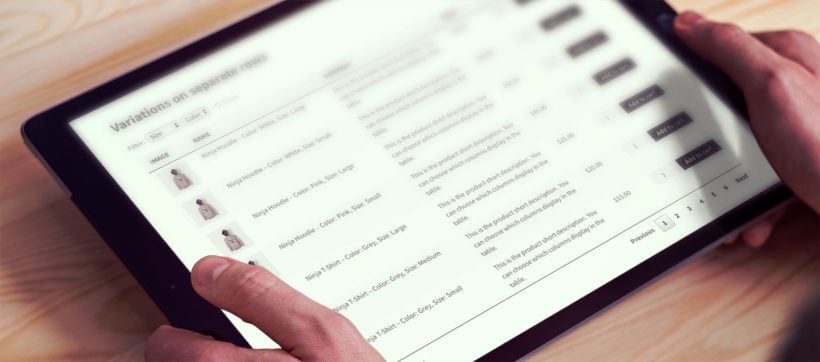
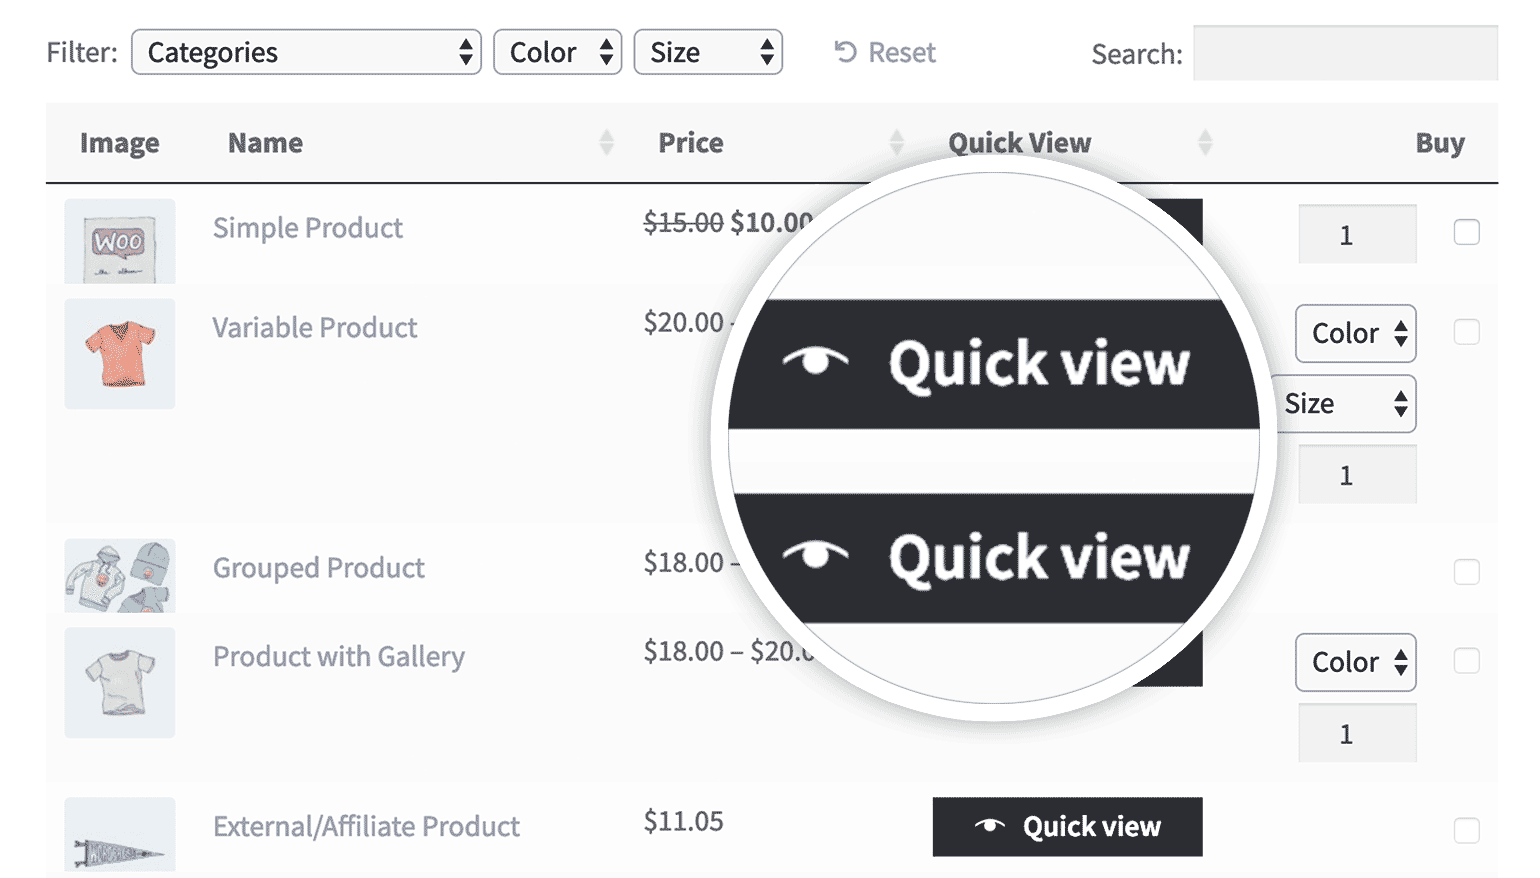
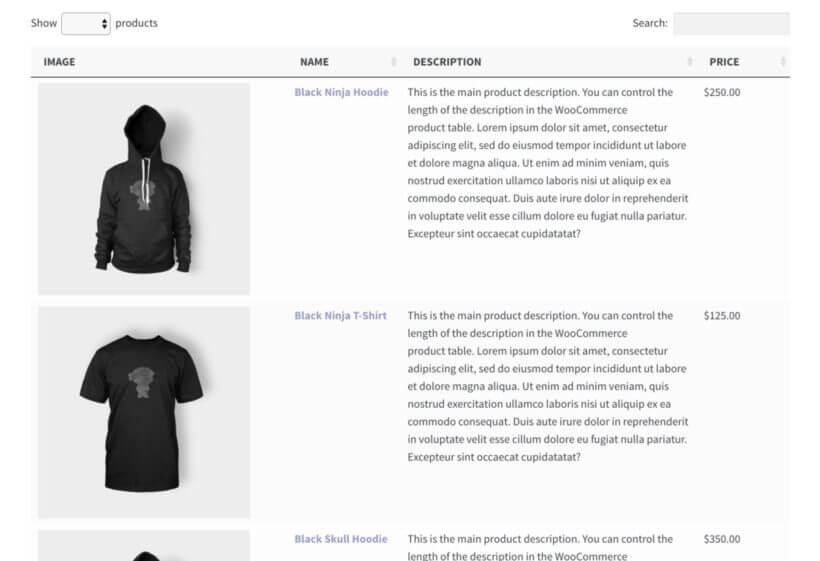
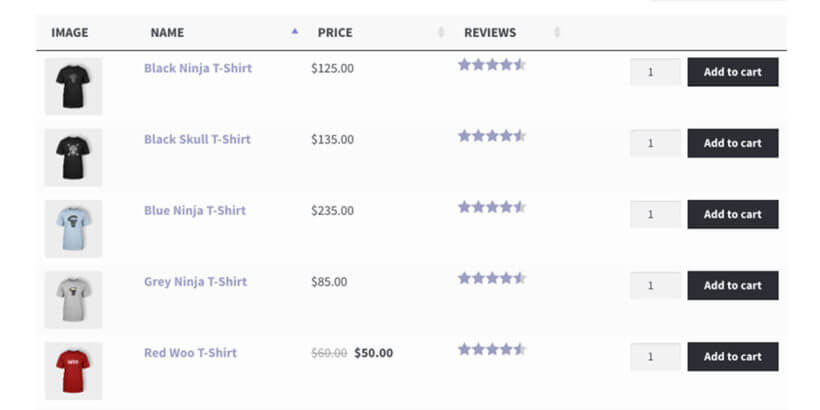
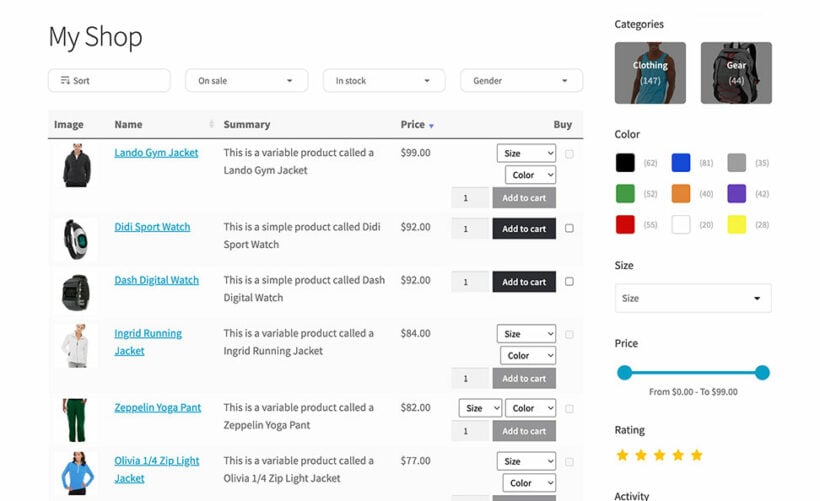
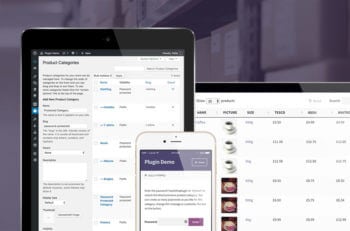
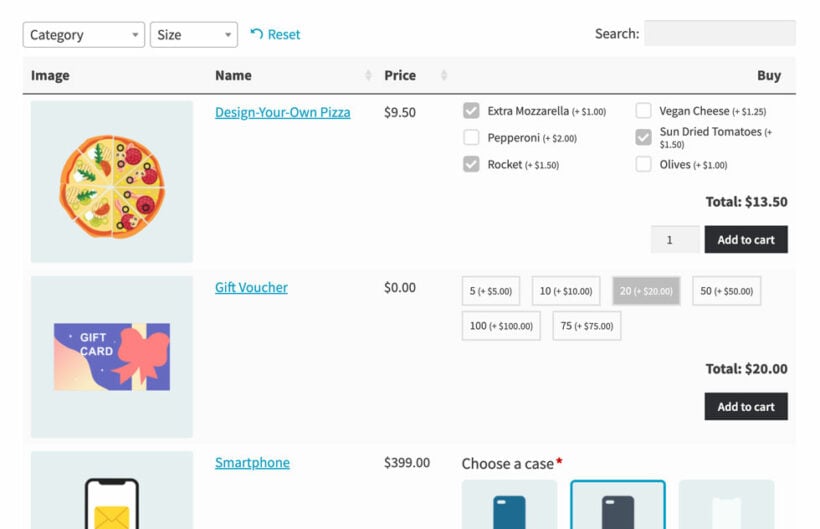
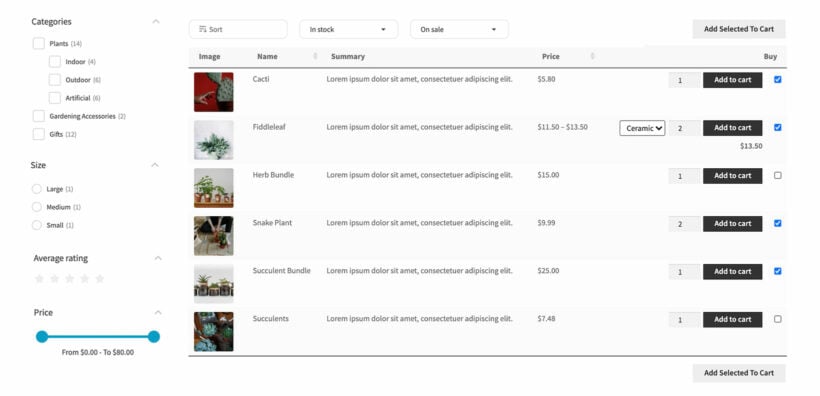
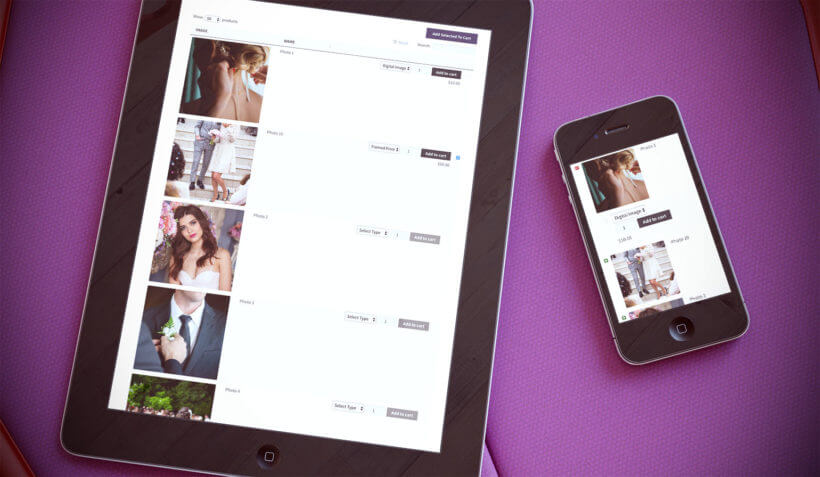
WooCommerce Product Table is responsive and mobile-friendly straight out of the box. Resize your browser to see the table resize before your eyes.

Even so, you can take further steps to increase your WooCommerce conversion rate for mobile users. This is definitely worth doing, as most stores have higher bounce rates for mobile users. It's more of a challenge to create a good buying experience on mobiles compared to larger screens.

How to perfect your product tables on mobiles

By default, the WooCommerce table plugin will automatically prioritise which columns are visible on mobiles. If you have too many columns to fit onto smaller screen sizes, then some columns will be hidden. Customers can click a small cross icon to view the hidden columns.

This may or may not be the best way to maximise your mobile conversion rates. WooCommerce Product Table has several responsive options to control how the table works on mobiles. This includes:

  • Priorities Choose which columns are visible and which are hidden on mobiles. Use this option to make sure the most important columns are always visible, such as the product name and add to cart buttons.
  • Responsive Display Choose what happens when not all the data in the table will fit on the screen. Instead of hiding columns behind the cross icon, you can show it all by default, or let it appear in a modal window.

By perfecting your store's user-experience on mobiles, you can optimize your WooCommerce conversion rates for mobile users and get more sales.

#13 - Measure the impact of your WooCommerce conversion rate optimization

If you're making improvements designed to increase conversion rates, it's important to make sure they actually work! Conversion tracking lets you monitor your conversions in an evidence-based way. Make each improvement one at a time, and track the impact on your WooCommerce conversion rate. Use this information to do more of what works best, and less of what doesn't.

Google Analytics is the best tool to track conversions in WooCommerce. You can easily set it up using a free WordPress plugin such as WooCommerce Conversion Tracking. Once it's in place, check your Google Analytics regularly. Dive into the data and learn about where your best referrals come from, who your best customers are, and much more.

You'll also want to discover how the product tables are affecting your WooCommerce conversion rate. By default, Google Analytics doesn't record data about changes you make to your website. However, you can use a little-known option to record the improvements you make, and view them alongside the conversion rate tracking data.

How to record website edits in Google Analytics

  1. Go to any screen in Google Analytics that has an Overview chart (similar to the line graph shown below).
  2. Click on the tiny up arrow underneath the chart.
  3. Click 'Create new annotation'.
  4. Select the date when you made each change to your website (e.g. adding product tables), and add some text describing the change.
Google Analytics ecommerce conversion rate chart with a change annotation

Remember to create an annotation every time you do something that might affect your conversion rate optimization. The date of each animation will appear as a dot on the chart. When you're viewing your WooCommerce conversion rate data, if there are any major changes in the graph then you can easily see which change/annotation they were caused by.

For example, adding product tables should increase your WooCommerce conversion rate. If you see a sudden spike in the conversion rate tracking chart, you can easily see if it happened after you added the product tables.

It's time to optimize your WooCommerce conversion rate!

Conversion rate optimization is a cost-effective way to invest in improving the success of your store. With a bit of time and the cost of a plugin, you can see an immediate increase in your sales which will continue well into the future.

The amazing thing about improving the conversion rate is that you can increase your WooCommerce store's revenue without spending any extra on marketing or customer acquisition. If you're already getting a decent amount of traffic, then conversion rate optimization increases your sales for very little effort.

As you've seen, WooCommerce product tables provide lots of opportunities to increase conversions. Of course, you'll see the greatest success if you combine WooCommerce conversion rate optimization with other ways to increase revenue.

How to get even more conversions

To start increasing your WooCommerce store revenue, get WooCommerce Product Table today and follow the tips in this article. Combine it with excellent products at the right prices, and enjoy healthy sales well into the future.

WordPress knowledge base articles displayed in a sortable filterable table

A WordPress knowledge base plugin is the perfect way to provide online documentation for your customers.

In this tutorial, I'll explain why the Posts Table Pro table plugin is ideal for this purpose. You'll learn why it's better than 3rd party knowledge base platforms. I'll even show you how to set it up, from start to finish. You don't need any technical expertise or knowhow and you don't need to write any code. Simple!

In this article

Do I need a knowledge base or online documentation?

Before we start, it's worth considering whether you need a WordPress knowledge base plugin at all. As a general rule, you should provide online documentation for your customers if:

  • You sell products (whether online or physical) that require instructions.
  • Customers regularly ask questions about how to use your products.
  • You find yourself answering the same question more than once.
  • You'd like to reduce the burden of customer support.

If you've answered 'Yes' to 1 or more of these questions, then a WordPress knowledge base or documentation plugin could be just what you need.

Should I use a 3rd party help center platform such as Zendesk?

When I first researched knowledge base solutions for our own WordPress plugins, I assumed that I'd need something outside of our company website. I couldn't have been more wrong. I'll explain why.

The reason I was seeking a 3rd party solution was that a website can be slowed down by too many free plugins. I do it if there's a valid business case for incorporating a function into our website. However, I believe that some things should be kept outside of your WordPress website. For example, customer invoicing, CRM and accounting have no place on your main company website.

I originally thought that our WordPress plugin knowledge base would fall into this category. We trialed some 3rd party help desk solutions such as the ones from Zendesk and Help Scout. Lots of other WordPress plugin companies (e.g. WP Engine) use these help desk systems for their support ticketing, so why shouldn't we?!

So, we set up a draft knowledge base with each of these companies. We tweaked the colors and images to suit our brand. We set up the knowledge base structure and added lots of articles. Finally, we set up the built-in customer support request form.

Unfortunately, we weren't satisfied with any of these 3rd party help centers. They all had the same drawbacks:

Inconsistent branding

While you can tweak the colors and header images on the hosted knowledge base platforms, they didn't truly match our main website. For example, the fonts and overall look and feel were different. Sure, they looked clean and modern. But the user experience was disjointed as you switched between the two.

You can pay more for further customization options and the ability to add custom CSS. However, these elements are already in place on our main website. Styling a 3rd party knowledge base to match our main website felt like reinventing the wheel. And frankly, a waste of time.

Harder to find articles

I had expected that a dedicated help center platform has more features than a WordPress knowledge base plugin. However, all the ones we tested were lacking in basic functionality. The options for searching the documentation were very basic, making it hard for customers to find the needed articles.

For example:

  • There was no option to sort articles by name, topic, etc.
  • There were no filter options.
  • The articles could only be categorized by a single level of category. As a long-time WordPress user, I'm used to being able to structure information into more complex hierarchies. For example, I wanted to create a top-level category for each of our WordPress plugins, divided into 2 levels of sub-categories. Strangely, this wasn't possible with the hosted solutions we tested.

Inferior support request forms

The 'Request Support' form was incredibly basic. You could add custom fields, but nothing more dynamic. Our support request form is sophisticated and collects different data depending on the customer's answers to each question.

For example, if a customer selects the 'Bug report' option then they're prompted for their login details so that we can investigate. This is a great way to get the information we need, while only displaying fields that are relevant to each customer. It was a shame to be forced to lose all this.

More expensive

As with any hosted solution, you have to pay a monthly fee for a 3rd party knowledge base. It comes free if you use their support ticketing system too. However, we provide personal customer support via email and don't want to hide behind support tickets.

Less good for SEO

With external knowledge base platforms, your documentation will either be on a subdomain of your main domain (e.g. support.barn2.com) or a different domain (e.g. barn2.zendesk.com). If you set your WordPress knowledge base to the public (which you should do!) then it can be crawled and indexed by search engines. However, its rankings will be separate from your main website.

We've spent years building a good search engine ranking for our WordPress website. It seemed a shame to have to start again with the knowledge base.

Incorporating a knowledge base into your WordPress site gives you the best of both worlds:

  • Your main WordPress site benefits from the huge amount of SEO-friendly content in your documentation and knowledge base. This can potentially improve Google search results.
  • The WordPress knowledge base articles benefit from the wider authority of your main domain name, so they're more likely to get good rankings.
  • With a WordPress knowledge base plugin, you get full control over your SEO data. For example, if you use a WordPress SEO plugin then you can add custom title tags, descriptions, etc. Just like you can with the rest of your website!

You don't own your data

Another downside of hosted platforms is that you don't own your own data. Everything is lost if the company goes out of business.

You get more control by hosting a knowledge base on your own WordPress website. Ideally, you should also take regular off-site backups to be doubly secure.

No integration between the knowledge base & support system

Search knowledge base before submitting support ticketWhen I send a support request on WooCommerce.com, it automatically searches the knowledge base and suggests articles. It forces me to confirm the articles aren't relevant before I can send a support request. This is a great way of encouraging customers to self-serve and reduce support tickets!

I know that WooCommerce uses Zendesk for its support tickets, so I assumed that this feature was available. On trialing Zendesk, I discovered that this is only possible via custom API integration. That puts this feature out of reach for most people.

To date, I haven't found ANY off-the-shelf solution to auto-search the documentation before you can request support. Instead, I recommend structuring your knowledge base and documentation to make it really easy for customers to self-serve. Make the link to request support less prominent and put it below the list of articles.

Using a WordPress knowledge base plugin gives you more flexibility to do this. Whereas a 3rd party knowledge base puts the support link right at the top, so customers use it without thinking.

Your knowledge base should be part of your website!

By using a WordPress documentation plugin, you can instantly overcome a lot of the drawbacks listed above. Your knowledge base will be part of your WordPress website and not an afterthought.

Everything will integrate seamlessly, boosting your SEO and providing a much better customer experience.


But which WordPress knowledge base plugin to use?
WordPress knowledge base shown as a table on a tablet

Surprisingly, the plugin I'd recommend for your documentation isn't a dedicated knowledge base plugin! It's a WordPress table plugin - Posts Table Pro.

Posts Table Pro is popular for displaying information in a wide range of ways. For example, it's one of the most popular AJAX based WordPress document library plugins. Following the steps later in this tutorial also provides the perfect knowledge base for any WordPress website.

It automatically lists your knowledge base articles in an interactive table layout. The table gives your customers more ways to find the information they need, compared to typical knowledge-base plugins.

Behind the scenes, you can either use normal WordPress posts for your knowledge-base articles. Or you can create a dedicated custom post type for your articles (my recommendation). Adding a WordPress knowledge base article is as easy as creating a new blog post – no technical know-how required!

Why is Posts Table Pro so great for online documentation?

Easy-to-find articles

There are multiple ways to navigate the WordPress knowledge base, so people can choose the method that suits them. For example:

  • The table plugin can list all your articles, with columns for categories, tags, and even custom taxonomies. Customers can filter by category, tag, or custom taxonomy to narrow down the list.
  • Alternatively, you can divide the knowledge base into categories and display the articles from each category in different parts of your site. Since your knowledge base articles will be WordPress posts (or custom posts), you can create hierarchical categories with multiple levels. You can either list everything on a single page, with a separate table for each category. Or, you can spread your WordPress knowledge base across multiple pages - each listing different articles. It's hugely flexible and you can structure your knowledge base as you would structure any WordPress website or blog. But with the added benefit of searchable, sortable tables listing your documentation articles.
  • There's a keyword search box above the list of knowledge-base articles. Customers can use this AJAX search to find exactly what they're looking for.
  • Customers can sort by any column by clicking on it. You don't get this feature with any dedicated WordPress knowledge base plugin.
  • You can display filter dropdowns above the table to let customers refine the list of articles. Customers can combine several filter values at once, and each shows a count of matching articles. Customers can also refine the list by clicking on a category, tag, or taxonomy term. It's AJAX based which means customers won't have to refresh the page to see filtered results.

Everyone works in different ways, so it's good to offer customers a choice.

Easy to make changes

A successful knowledge base should evolve constantly. Whenever a customer requests support, you should think about why they had to ask the question. Consider how you could improve the knowledge base to prevent people from asking the same thing in the future.

As a result, you're likely to be making constant changes to your WordPress knowledge base. Especially in the first few months.

With Posts Table Pro, your documentation is added as a series of posts that you can easily add and edit via the WordPress admin. If you're a website owner like me, then you're probably logged into the WordPress admin most of the time anyway. It's ridiculously easy to tweak a WordPress knowledge base while you're dealing with support requests. This is much better time management than adding changes to a long 'To Do' list and hoping you find the time in the future!

Once you've updated your knowledge base content, the tables listing the articles will automatically update in the front end. You don't need to do this manually.

You get all the benefits and flexibility of WordPress

Since your knowledge base articles are essentially WordPress 'posts', you can benefit from all the fantastic features that WordPress has to offer. There's no learning curve because you already know how to use WordPress. You can do everything you're used to, such as:

  • Use the full WordPress editor - with all the usual formatting options, Add Media button, and extra features added by other plugins. For example, we added a standard WordPress gallery to one of our knowledge base articles. You couldn't do this with most knowledge base programs.
  • Display global content from other parts of your website, such as the header, footer and widgets.
  • Integrate with other features, such as live chat and contact form plugins. (We use Gravity Forms for our customer support requests.)
  • Works with knowledge base WordPress themes.

Enhance your documentation with embedded video

Knowledge base table row embedding a video alongside the articlePosts Table Pro supports embedded video players. This is a great opportunity to improve your online documentation.

Create a video for all your main documentation topics. You can add them to the individual articles. Or even better, you can display the videos directly on the list of articles.

Customers can watch short videos which answer their questions directly from the main WordPress knowledge base page. They don't even need to click through to read the full article!

Get Posts Table Pro


How to use Posts Table Pro as a WordPress knowledge base plugin

By now, you've discovered the benefits of having a knowledge base as part of your main website. You've also seen why Posts Table Pro is ideal as a WordPress knowledge base plugin. Now, I'll show you how to set it up!

Prerequisites

Before you can do this tutorial, you will need these things. If you don't have them yet, get them before you start:

  1. A WordPress website.
  2. The Posts Table Pro plugin, is installed according to the instructions from your order confirmation email.
  3. A knowledge base theme for WordPress.

That's all!

1. Create a WordPress 'knowledge base' custom post type

First, you need to create the basic infrastructure for your knowledge base content and documentation. If you're feeling lazy, you can use normal WordPress posts for this. This is fine if you're not using posts for anything else. Even if you're using posts for your blog, you can create some dedicated knowledge base categories within Posts → Categories.

However, for most WordPress knowledge bases, I would recommend creating a dedicated post type. This will give you a proper section for your documentation on the left of the WordPress admin. It keeps everything neat and easy behind the scenes. Much more future-proof for you, especially as your knowledge base grows.

There are several ways to create a custom post type in WordPress. If you're a developer, then you can do this programmatically. If not, here is a free and easy-to-use plugin:

You can use this plugin to create custom post types, custom fields, and custom taxonomies. Some knowledge base themes come with custom post types out of the box.

How to create a custom post type

Here are instructions for creating a WordPress knowledge base post type using Easy Post Types and Fields plugin. You can call it anything you like, e.g. Knowledge Base, Articles, Documentation, etc. I think 'Articles' works well for both the singular and plural versions.

Naming an Articles custom post type for a knowledge base
  1. Install and activate the free Easy Post Types and Fields plugin from WordPress.org.
  2. Go to Post Type → Manage in your WordPress dashboard.
  3. Click Add New.
  4. Once the setup wizard loads, enter the singular and plural post type names. For example:
    1. Plural name – e.g. Articles
    2. Singular name – e.g. Article
  5. Click on the Next button.
  6. Select the type of information you need for the Article post type. Click on the Create button.


knowledge base custom post type

Now, you will see a link to your WordPress knowledge base post type on the left of the dashboard.

2. Create knowledge base categories

Next, you need to plan the structure for your WordPress knowledge base plugin or online documentation. For this, you need to add a custom taxonomy to your post type.

To add a custom taxonomy, go to Post Type → Manage. Click on the taxonomies button for the respective post type you wish to customize (Here, Knowledge Base). On the Manage taxonomies page, click on the Add New button.

Enter the singular and plural names and the slug for your new taxonomy.

If you want your categories to be in hierarchical order, tick the checkbox. Enabling this will allow you to structure your content on multiple levels.

Once you are done, click on the Create taxonomy button.

Add taxonomy for knowledge base

Once you have created the taxonomy, hover over the knowledge base section on the left of the WordPress admin, and click the 'Categories' link. The name might be different if you named your taxonomy differently.

Add as many categories as you like. This can be a simple list of categories, or you can create hierarchical categories with sub-categories, sub-sub-categories, and so on. As with WordPress posts, there are no limits here!

The important thing is to think logically about the best knowledge base structure. Try to think from your customer's perspective. You want to make it as easy as possible for them to find the article they need. Otherwise, they're more likely to contact you for the support! So don't rush this bit.

WordPress knowledge base category structure

Tip: Make a note of the category slug as you create them. You'll need these later if you're planning to create tables listing articles from specific categories. 

3. Add articles, documentation, and FAQs to your WordPress knowledge base

This is the most time-consuming part of creating a knowledge base. It's time to add the actual content to your online documentation.

To do this, hover over the knowledge base link (or whatever you decided to call it) on the left of the WordPress admin. Click the 'Add New' link that appears underneath. The 'Add New' page is just like the screen for adding normal WordPress posts. You can add a title, the main content, categories, tags, etc.

If you're migrating written instructions or a single page of documentation to your knowledge base, break it down into multiple articles. Categories and tag each article to make them easy to find.

The good news is that you don't have to do this all in one go. To launch your WordPress knowledge base, you just need to provide the basic information for customers to use the product. Over time, you can add more and more articles and provide more extensive documentation.

Alternatively, save time right away by installing a bulk spreadsheet editing tool like Setary. This displays all your knowledge base articles, categories and tags in a spreadsheet interface. It makes it much faster to update everything than clicking into each page in the WordPress admin.

A knowledge base should be flexible and constantly evolving. This means that you shouldn't worry too much about perfecting it straight away.

Tip #1 - Structure long articles with a knowledge base table of contents

Knowledge base articles can often get quite long, divided up by multiple subheadings. If this applies to you, I'd recommend installing Table of Contents Plus.

This free WordPress plugin lets you create instant lists of all the headings in your knowledge-base article. You can either add the list to the top of the article or as a sidebar widget.

You can see a knowledge base table of contents in the screenshot above. The 'In this article widget was created automatically and lists the headings from the article. It's a great way for customers to quickly find the section that will answer their questions.

Tip #2 - Add a widget promoting your product

Most people aim their knowledge base at their existing customers. This can lead to missed opportunities to attract new customers.

Your documentation is published on your public website, so it's available for the world to see. Potential customers might be searching the web for a specific solution, and find a specific knowledge base article without having any background knowledge about your product. Therefore, every page of your knowledge base should contain some basic information about your product and how they can get it.

Did you spot the "Not bought the plugin yet?" sidebar widget in the screenshot above? Here it is again.

Using WordPress knowledge base plugin to sell products

The widget doesn't dominate the page for existing customers but puts the article in context for potential customers. Entering a website directly in a knowledge base article can be confusing as you don't know what you're reading about. This simple widget provides an overview of the plugin that the article relates to, with a subtle call to action. The image of the product in action will attract people who are looking for the solution you're offering.

Tip - Display different widgets in different parts of the knowledge base

You can use the Widget Options plugin to show the relevant widget in the appropriate knowledge base category. That way, you can showcase different products in different sections of the WordPress knowledge base. Whichever product the article is about, customers always see the widget for the correct product.

Tip #3 - Create a WordPress wiki where users can edit your documentation in the front end

If you need a collaborative knowledge base, then transform your documentation into a wiki! You can use a WordPress front end editor plugin to let your users make changes to your knowledge base articles.

Here is another example of a WordPress wiki plugin with front-end editing.

The way it will work is that the Posts Table Pro plugin will automatically list your documentation articles in a table layout. Users will click through to the single article page. From there, they can click 'Edit' to edit the article content. Their changes will automatically appear in the table and on the single article page.

5. Display your knowledge base content in interactive tables

By now, the overall infrastructure for your online documentation is in place. The only remaining task is to display the articles in an easy-to-find format on your public-facing website. We'll do this by using Posts Table Pro as your WordPress knowledge base plugin.

  1. If you haven't already done so, buy posts Table Pro. Check your order confirmation email and find the link to download the plugin.
  2. Download the zip file and save it on your computer.
  3. Access your WordPress admin dashboard and navigate to Plugins → Add New → Upload Plugin.
  4. Click on "Choose File" and select the zip file you just downloaded.
  5. Click "Upload" and wait for the plugin to finish uploading, then click "Activate".
  6. After activation, the Posts Table Pro setup wizard will automatically open and guide you through entering your license key.

6. Configure your knowledge base tables

Upon installing the plugin for the first time, a setup wizard will automatically open up, guiding you through a step-by-step process to create your first table. This process will allow you to customize your table's appearance. You can also create new tables any time by navigating to Post Tables → Add New.

  1. To begin creating your table, you'll need to provide a name for it and select the post type that you want to display. In this case, you would want to choose the custom post type "articles".
  2. After that, you can choose the posts or pages that you wish to include in the table. The plugin allows you to choose from a range of options, including posts, pages, and custom post types.
  3. Once you have selected the content to include in your table, you can proceed to customize its appearance. The plugin offers a wide range of customization options, allowing you to determine which columns to display and in what order. includes columns for name, content, categories and tags. You can include lots of other columns in the table. This includes featured image, excerpt, date, author, custom fields, custom taxonomies, and much more. If you want to add a new column, you can choose the column type from the dropdown menu and click "Add."
  4. To make it easy for your users to find what they're looking for, you can add filters to your table. For your table, you can use article categories and tags as filters.
  5. Additionally, you can customize the sorting options for your table, selecting the default sorting option and the sort direction that you prefer. This gives you complete control over the order in which your table is displayed.
  6. The table loads page by page automatically, so even a knowledge base with hundreds or thousands of articles loads quickly and smoothly.
  7. Lastly, you can choose how to sort your table, setting the default sorting option and the sort direction that you prefer. With all these options, you can create a table that is functional, easy to use, and visually appealing to your users.

Once you’re done, your knowledge base table should look something like this:

WordPress knowledge base articles listed in a searchable table

Displaying your knowledge base tables

After successfully creating your table using the Post Table Pro plugin, the setup wizard will confirm that you've completed the process and provide clear instructions on how to insert the table onto your WordPress site. The plugin offers different options for adding the table to your site, depending on your preference.

You can use the "Post Table" block in the Gutenberg editor to add the table directly to your page. Alternatively, you can copy the shortcode from the table builder and paste it onto any page on your site. This provides you with the flexibility to place the table wherever you want, regardless of the content on the page.

If you're creating a knowledge base and want to list all your articles on one page, you can go to Pages → Add New and create the main homepage for your knowledge base. This page will serve as the hub for all your articles, making it easy for your users to find what they're looking for. However, if you prefer to list different articles on different pages, you can create as many pages as you like and customize each page's content to suit the articles you're featuring.

Overall, the Post Table Pro plugin makes it easy to create functional and visually appealing tables that are easy to integrate into your WordPress site. With the flexibility to customize and place the table anywhere you want, you can create an organized and user-friendly experience for your audience.

7. Enable customers to request support

Knowledge base article page with a get support button highlightedHowever useful your knowledge base is, customers will still need to contact you for support. Getting this right is a delicate balance. On the one hand, customers should be able to contact you when they need to. On the other hand, you'll benefit from gently encouraging them to help themselves where this is realistic.

You can achieve this by making your documentation user-friendly, easy to navigate, and easily searchable. Using Posts Table Pro as your WordPress knowledge base plugin will help with this. This will help customers to self-serve and find answers themselves.

Choose a suitable support platform

Think of the best way for customers to contact you for support. This might be a live chat plugin on your website. It might be a phone helpline. Or it might be a support request form, created using a contact forms plugin such as Gravity Forms or Contact Form 7. This might send you an email, or it might feed into a full ticketing system. You can integrate any of these options with your WordPress knowledge base.

Whichever option you choose, make it accessible to your customers without being too easy. I know it sounds harsh, but making it too easy encourages them to be lazy. Research suggests that most customers self-service, as this is quicker than contacting you and waiting for a response.

Place the 'Request Support' links AFTER your knowledge base articles and search results. Customers should have to search for a solution and look through the articles. They should only contact your support team if this process fails. Don't shoot yourself in the foot by making the support link too obvious!

8. Create a hidden, password-protected WordPress knowledge base

Password protected WordPress knowledge base login shown on phone and tablet
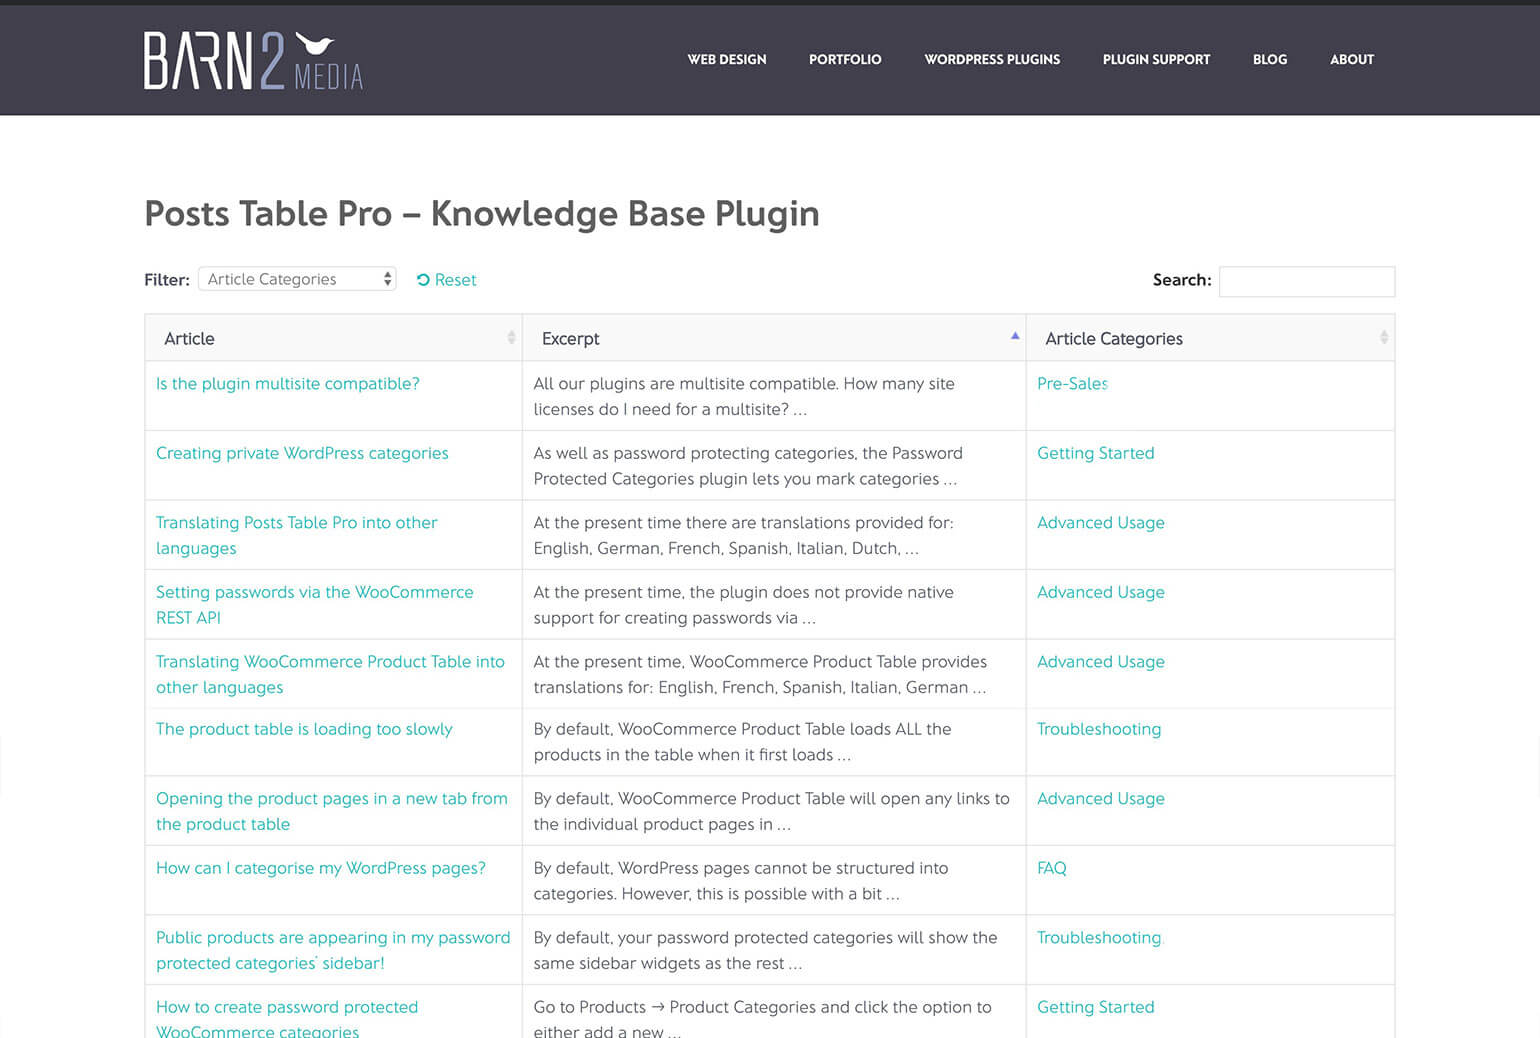
Finally, I'll provide some tips on how to hide your knowledge base from the public view. This is useful if your knowledge base is part of your main website, but you want to restrict the documentation to existing customers only.

Document Library Pro includes built-in access control to hide your knowledge base and documentation. Create a main category for your knowledge base and set it to Protected in the visibility options. You can restrict access by password, user role, or individual user - customers must meet the chosen criteria to view the content.

Any sub-categories automatically inherit the same protection settings as the main category, keeping your entire knowledge base secure and hidden from public view.

After that, it's up to you how to share access to the knowledge base. You could include the password in the order confirmation email or include it with your product. Or you could use a plugin such as Contact Form 7 to add a 'Request access' form to your website. People can submit the form, and provide evidence of their purchase, and you can then send them the password. Either way, this is a simple way to hide and protect your WordPress knowledge base.


It's time to create your own WordPress knowledge base!

Using the best WordPress knowledge base plugin can make a huge difference to customer satisfaction AND your bottom line.

Remember - the easier it is for customers to find answers to your questions, the less likely customers are to request support. They'll be happier, more likely to recommend your products, and more likely to buy from you again. This frees you up to build your business rather than spending all your time on customer support.

So, now you can get started and create your own WordPress knowledge base with the Posts Table Pro plugin. Set it up and make life easier for customers and you at the same time. And if you like the plugin, become a Barn2 affiliate and earn a 30% commission for recommending it!

I'd love to hear how you get on with your knowledge base plugin. Please leave your comments below.

Searchable book directory table with filters on a tablet

As the number of WooCommerce websites continues to grow, more and more people are using it for large product directories. A WooCommerce directory plugin lists products on a much bigger scale than typical online stores. Products are listed in a logical structure with extra data to help customers find what they're looking for.

In this article, I'll explain the main features needed in a WooCommerce directory plugin. I'll then provide full instructions on how to use WooCommerce Product Table to create an online store directory.

Your WooCommerce directory will include all the features you need to display large numbers of products. This includes searching, sorting and filtering to help customers find your products more easily. I'll show you how to display different types of product data including all the standard WooCommerce data, plus custom fields and taxonomies. Customers will be able to click from the directory listings to the single product page and/or buy straight from the table.

Create a complete WooCommerce directory with the WooCommerce Product Table plugin.

How to create a product directory in WooCommerce

  1. Plan a logical WooCommerce directory structure
  2. Add products to the directory
  3. Set up WooCommerce Product Table
  4. Launch & promote your WooCommerce directory

What makes a good WooCommerce directory plugin?

There are several things that make WooCommerce directory sites different from other types of e-commerce store. Directories need some extra features to list products in a suitable layout, often with extra information.

Essential directory features

  • Table-based product layout WooCommerce product directories list many products per page in a less visual way than traditional online stores.
  • Extra product data Directory databases list various product information. Most WooCommerce stores just list basic data such as name, image and price. A WooCommerce directory can display far more product data. This can include descriptions, embedded audio/video, custom fields, product attributes and variations, prices, reviews, stock and more. You can even include extra options created with the WooCommerce Product Options plugin.
  • Easy to search & filter With a WooCommerce directory plugin, customers aren't forced to scroll through many pages of products to find what they need. Instead, should be able to use advanced search, sort and filter options to find products matching their criteria.
  • One-page ordering A lot of product directories function as a one-page WooCommerce order form. This means that customers can view all the directory listings and add products to the cart from a single page. Some WooCommerce directories will disable the add to cart buttons and let customers click to the single product page in order to view more information and purchase. However, one-page ordering is an important feature for many directory sites.
  • Ability to handle large numbers of products A directory-based e-commerce store may have 100's or even many 1,000's of products. A WooCommerce directory plugin needs to be able to handle large amounts of information without server crashes or performance issues.
  • See information quickly without multiple page loads Many online directories are frustrating to use because you have to visit a separate page for each product. It's better to be able to view extra information in a quick view lightbox, without being taken away from the directory listings. You can do this by using WooCommerce Product Table with its sister plugin, WooCommerce Quick View Pro.

What sort of websites need a directory structure?

WooCommerce bookstore

WooCommerce book directory shown as a product table on a tablet
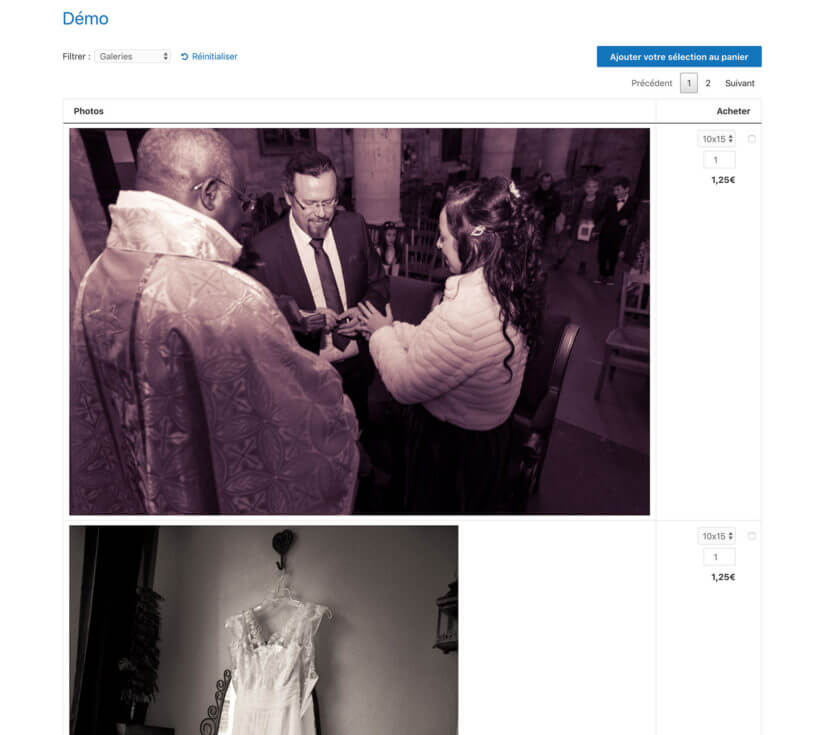
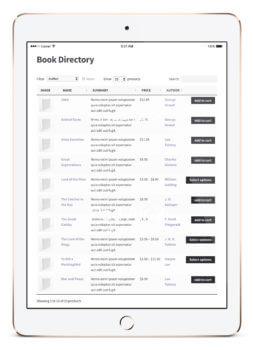
Many WordPress websites sell large numbers of books. A good directory plugin can be used as a WooCommerce bookstore plugin.

Books for sale can be listed in a table with relevant data such as title, author, publisher, date, price and add to cart buttons. It's even possible to display a small image of the front cover in the book directory listings.

You can sell both printed books and digital e-books in WooCommerce. By adding each book to the directory as a variable product, each version can be sold at a different price. Customers can choose from the directory results page and buy one or more books.

WooCommerce audio directory

Close up of a DJ mixing console with knobs and fadersIf your WooCommerce directory plugin supports embedded audio players then you can use it as a music or audio directory.
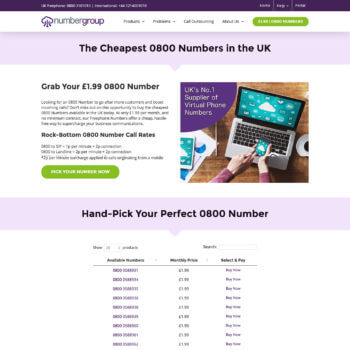
Lots of audio stores display 100's or 1,000's of CD's or audio products. Since large images aren't relevant to selling music online, the best layout is a table-based directory view. Many more products can be displayed per page. Customers can use the keyword search, sort options and product filters to quickly find the music products they're looking for.

The best WooCommerce directory plugins support embedded audio players. This is a good opportunity to sell more music by including audio samples, embedded directly into the music directory. You can include sample tracks alongside other information about each product such as CD name, track name, artist, length and more.

If you sell physical CD's and downloadable versions of your audio products then you can add each one as a variation. The variation options can be listed a dropdown on the directory page, or customers can click to the single product page to view the options and buy online.

WooCommerce business directory

Like all WordPress sites, WooCommerce is hugely popular as a business directory. This is less common than a more generic business directory in WordPress because not all business directories need to sell online. However, this is an option with a WooCommerce directory - for example, if you need to sell products for each business via the directory.

(Tip: If you want to create a WordPress business directory without the ability to buy online, check out our other plugin Posts Table Pro. This lets you create a custom post type for your businesses and display these in a tabular directory structure with search, sort and filters.)

Directory of telephone numbers

Number Group website listing 0800 phone numbers in a table
WooCommerce directory with phone numbers for sale

Directory structures are excellent for selling data-base products such as phone numbers. For example, Numbergroup uses WooCommerce Product Table to create a telephone number directory. Customers can browse the phone numbers and buy using WooCommerce.

You can search the directory for a specific number, change the number of products per page, and sort by telephone number or price. Once you've found the number you want, you can add it to the shopping cart and buy through the usual WooCommerce checkout.

The WooCommerce Product Table plugin is perfect for creating any type of directory like this. Check out our demo of a WooCommerce book directory in action!


How to create a WooCommerce directory to sell absolutely anything!

As you can see, there are lots of reasons to use a WooCommerce directory plugin. Next, I'll show you how to use WooCommerce Product Table to create a directory selling books, music or other types of product.

1. Plan a logical WooCommerce directory structure

The first step is to plan your WooCommerce directory. It's worth doing this beforehand to make sure it's logical and intuitive to navigate.

These questions will help you to plan your store's directory structure:

  • Will you have a central directory page listing all the products?
  • Would you be better off with multiple pages, each listing different products based on their category, tag or custom taxonomy term?
  • Will each page of directory listings contain a single table of products? Or will you add multiple tables to each page, listing different products?
  • Is your server powerful enough to support the number of products per page in the directory? Later, I'll tell you about the lazy load plugin option which boosts performance for large WooCommerce directories. However, if you want to list 100's of products on a single page without pagination, performance could be an issue and you'll need a fast server.

2. Add products to the directory

Add new product screen in WooCommerce with the parts labelledNext, you need to add the content for your WooCommerce store directory:

  1. Install the free WooCommerce plugin and run the Setup Wizard. Use the plugin documentation to configure store settings such as tax and postage.
  2. Add all your products to the directory in WooCommerce. You can do this manually via Products → Add New. Or if you have a large product directory, use a WooCommerce listing plugin such as Product CSV Import Suite to import products from CSV to WooCommerce.

3. Set up WooCommerce Product Table

WooCommerce directory displayed as a product table on a desktop monitorNow you're ready to display your WooCommerce products in a directory structure. You'll need the WooCommerce Product Table plugin for this:

  1. Get WooCommerce Product Table and install and activate the plugin.
  2. Go to Products → Product Table → Add New, or just use the table builder which opens automatically on activation.
  3. Choose the settings for your WooCommerce directory as required.
  4. Either choose which shop page templates you want to display the directory listings on, or opt to add the directory to a page manually. If you choose to add it manually then you can then choose which products to include.

If you selected to show the directory on shop pages then you don't need to do anything else. If you chose the manual method then add a page and either insert the shortcode from the final page of the table builder, or insert a 'Product Table' Gutenberg block.

This will create a basic directory listing your WooCommerce products in a table-based grid layout.

Use the product table knowledge base to customize your directory. It's hugely flexible and there are many different personalization options. Here's a summary of the main options you're likely to use to perfect your WooCommerce directory plugin.

Choose the product data & directory headings

WooCommerce Product Table supports all the standard product data such as name, short and long description, price, dimensions, stock, reviews, and attributes. It also supports custom data via WooCommerce custom fields and taxonomies.

You have full control over which columns appear in the directory. It's also possible to rename or remove the column headings - just click on the pencil icon.

Choosing which columns to show in the WooCommerce Product Table

Turn your directory into an order form with add to cart buttons, variations & quantity selector

Transform the store directory into a one-page WooCommerce order form by letting customers order straight from the directory page. You can do this by including an 'Add to Cart' column in the table.

Choose between 3 styles of add to cart buttons, including standard boxes and multi-select check boxes. It's also possible to display variable products and a quantity selector directly in the table. Customers can select variations, choose quantities and add multiple products to the cart without having to visit the single product page. You can even disable links to the single product page - to do this, edit your table and then using the advanced options to disable the link for each column.

And if you're using the WooCommerce Product Options plugin, then you can also display your add-on options in the product directory. For example, you might want to add checkboxes or text fields to your products and have them appear on the directory page.

Using WooCommerce Product Table and Product Options together to show add-ons
A product table with extra options added using the WooCommerce Product Options plugin

Search, sort & filter

You can choose how customers can interact with the WooCommerce directory to find products quickly and easily. Customers can click on a column heading to sort by that column. You can also add product filters so that customers can narrow down the directory listings by category, tag, price, custom taxonomy, etc.

Adding filter dropdowns in the product table Search and Sort step

One plugin that can be particularly useful for adding advanced product filtering options to your directory is the WooCommerce Product Filters plugin. With this plugin, you can add a range of different filters, including categories, attributes, tags, custom taxonomies, price, ratings, and stock status, and display them as dropdown lists, checkboxes, radio buttons, labels/tag cloud, images, or color swatches.

Garden centre product table with category, size and price filters

By adding these advanced filters, you can help customers quickly and easily find the products they're looking for in your directory, which can ultimately lead to increased sales and customer satisfaction. Plus, with the ability to customize the placement and appearance of the filters, you can create a user-friendly browsing experience that encourages customers to spend more time exploring your product offerings.

Lazy load/AJAX option for large WooCommerce directories

As your WooCommerce directory grows, the plugin needs to grow with it. Fortunately, WooCommerce Product Table has a lazy load option to boost performance as your store grows.

By default, all the product listings in your directory load straight away. This is fine for small directories but can cause a performance hit if you have many products. With lazy load, only 1 page of the directory is loaded at a time. This means that you can have an unlimited number of products in the directory. Even if you have many thousands of WooCommerce products, lazy load keeps everything running smoothly without slowing down your site.

There are further options to boost performance, such as setting a limit for the number of products in the directory. This is available on the plugin settings page. You can also change the number of products shown on each page of the directory.

Embed audio & video in the directory

WooCommerce directory listing audio tracks with embedded players and buy buttons

WooCommerce Product Table supports embedded audio and video. If you're creating a music or video directory then customers can watch or listen straight from the directory listings page. This is ideal if you use audio or video snippets to convince people to buy your products.

Add multiple tables to your directory

Most WooCommerce directories list all their products in a single directory, with easy search options such as the keyword search and filter.

If you prefer, you can add multiple directories to your WooCommerce store. For example, you might want to create a different directory table for each product category.

The plugin supports adding as many directories as you like. Simply create multiple tables at Products → Product Tables and display different products in each one. You can quickly do this by duplicating an existing table. For each one, you can then choose which products to include based on category, tag, ID, custom taxonomy term, custom field, date, etc.

Create an A-Z directory

You can also use a directory planning to create A-Z listings. Simply use the tabs that come with your theme or a plugin such as Shortcodes Ultimate to create a tabbed layout with a tab for each letter. Include a separate product table to each tab containing a directory of products for that letter.

You may also like: WordPress Member Directory Plugin Tutorial with Searchable Table & Profiles

Add extra information in a quick view lightbox

Quick view buttons added to a WooCommerce product table
Add quick view buttons to your WooCommerce directory.

If you use WooCommerce Product Table on its own, then customers can click through to the single product page to view more information about each product.

That's fine if you only expect each customer to buy one product. But most WooCommerce directory websites want to increase the value of each sale. And that requires buying more than one product.

That's why you can significantly increase revenue by adding the WooCommerce Quick View Pro plugin. This lets you add a 'quick view' column to the WooCommerce directory (which you can rename to anything you like). Customers use this button to view more information about each directory product in a handy lightbox popup.

You can choose what information to show in the lightbox. This might be more product images, variation and add to cart options, the short description, meta information such as categories and tags, or something else.

This is a perfect way for customers to learn more about each products without being taken away from the main WooCommerce directory listings. That way, there's no chance they'll get lost. They remain on the list of products at all times. As a result, they spend longer browsing the products in the directory, and are likely to buy more and more.

4. Launch & promote your WooCommerce directory

Crates of vinyl records arranged for browsing like a directory

Your store directory is now complete and ready to launch:

  1. Test everything thoroughly to ensure your WooCommerce directory is running smoothly. You need to be certain that customers can order from you from different browsers, mobile devices etc.
  2. Follow our go-live checklist to make sure the launch goes smoothly.
  3. Plan and implement a marketing strategy to make sure people can find your website and buy from you. Our WordPress SEO packages can help you with this.
  4. Continue improving your WooCommerce directory with our top 10 tips on using product tables to optimise conversion rates.

It's time to build your WooCommerce directory!

I hope this tutorial has provided everything you need to create a fully functioning store directory using WooCommerce Product Table. The plugin comes with full support from our UK WordPress experts at Barn2 Media.

Get in touch if you have any questions about how it works that aren't covered in the knowledge base, or if you need any advice on setting it up to create the perfect directory. Or if you like the plugin, sign up as an affiliate and we'll pay you 30% commission for reselling it!

I'd love to know which method you use for your own product directory. What do you sell in your WooCommerce directory? Please leave your comments below.