Customers often ask if our bestselling Product Table plugin works with any WooCommerce 'add to quote' plugins. In this article, I'll share an excellent Request a Quote plugin that allows customers to add products to their shortlist directly from the product table
If you're using WooCommerce Product Table to list products in a table, you might want customers to request a quote instead of buying online. This is essential if you provide bespoke services or custom pricing which varies for each customer.
A WooCommerce add to quote plugin provides 'add to quote' buttons, which you can use in addition to or instead of the usual add to cart buttons. Your customers can select as many products as they like, choose the quantity, and create a bespoke list. They can then view the list and submit the quote request to you.
Which WooCommerce quote plugin can I use with product tables?
Most add to quote plugins don't work with WooCommerce Product Tables straight out of the box. However, we have integrated with the YITH WooCommerce Request A Quote plugin so that you can easily add quotation buttons to your product tables.
This video shows the 'Add to Quote' buttons in the product table. When you add a product to the quote, it is added to a list.
When you create your product table columns, add the Request quote column.
Follow the documentation for both plugins to set them up as required.
That's it! When you view the product table, it will contain an Add to Quote column containing the buttons from YITH's plugin.
FAQ
Can I hide the add to cart button?
Some people like to use add to quote buttons alongside the usual add to cart buttons. Others like to remove the add to cart button completely so that the only option is to get a quote.
The YITH WooCommerce Request A Quote plugin has an option to hide the add to cart button. This does not work with WooCommerce Product Table and will remove the add to cart button from the single product page. You can easily remove the add to cart buttons from your product tables - simply don't include an add to cart column when you add columns to the product tables.
Where can customers see their quote request?
The YITH WooCommerce Request A Quote plugin comes with a 'Request a Quote' page. This lists the products you have added to the quote request, and includes a form to submit the request.
When a customer uses the product table to add an item to the quote, a link to the Quote Request page will appear in place of the button. This makes it really easy for them to add multiple products to the quote and then click to review the quote.
You can also link to this page from your navigation menu. Alternatively, you can add a button linking to the page above/below the product table.
The premium version of the YITH WooCommerce Request A Quote plugin also has many extra features. This lets you customize the quote features to your exact needs.
Can customers choose a quantity for their quote request?
It can be a bit tricky to make the quantity picker in WooCommerce Product Table work with the YITH Request a Quote buttons. This is because the quantity picker appears in a different column of the table from the 'Request a Quote' buttons, and the two columns don't relate to each other.
Here are two suggested workarounds:
If you've enabled the option to display the product tables on your main Shop page then you can follow these instructions to make the quantity picker work with YITH's Add to Quote buttons. This method will only work when you display product tables and quote buttons on your shop page templates, and not when you create tables using a shortcode.
Where you have created tables using a shortcode, your customers should use the 'Add to Quote' buttons in the product table to built their quote. This will add a quantity of '1' to the quote for each product. When they click through to the quote page, they can modify the quantity of each product as required.
Does it work with variations?
If you want people to be able to add variations to the quote, then you need to enable the option on the WooCommerce Product Table settings page to list each variation on its own row of the table. If you display the variations as dropdowns then YITH's plugin won't know which variation to add to the quote.
Conclusion
We hope you enjoy using YITH's Request a Quote plugin with WooCommerce Product Table to create table layouts with add to quote buttons.
All WooCommerce stores share a single aim: To increase conversions and get more sales. Whatever your wider business goals, that's what it all comes down to!
If you Google 'WooCommerce conversion rate optimization', you'll find lots of general advice on how to convert more visitors into paying customers. This usually focusses on improvements to the cart and checkout. These are important, but often forget that you need to convince customers to buy your products in the first place.
In this article, I'm going to do the opposite. I'll provide specific and actionable tips on how you can convince customers to add more productsto their cart using a specific tool: product tables.
WooCommerce product tables are an excellent tool for increasing your sales. By adding well designed table layouts to your store, you can present products in user-friendly ways that make it easier for customers to buy from you.
What is a WooCommerce product table?
A WooCommerce product tables lists products in a structured table layout. This will consist of rows and columns, with each product as a separate row in the table.
The WooCommerce Product Table plugin is the easiest way to create a table view for your store. It comes with dozens of options, and saves having to code complex table layouts from scratch.
Product tables sound simple, but they provide lots of opportunities to optimise your WooCommerce conversion rate. Read on to discover how to get more sales by listing products in a table layout.
#1 - Display sales-winning product data in the table
Most store owners don't stop to consider what product data to include on the WooCommerce shop pages. Big mistake!
WooCommerce and your theme will display pre-defined information on the shop and category pages. This typically includes the product image, title, price, ratings and add to cart button. But what if this isn't the data that will convince your customers to buy?
WooCommerce Product Table lets you choose exactly what data to provide on product listing pages. Each piece of information is displayed as a column in the product table. The plugin supports all the standard product data such as SKU, name, short and full description, categories, tags, featured image, reviews, stock, size, and price. If this isn't enough, you can also show custom product data by creating custom fields and taxonomies.
With so many possible columns, you have full control over the product information in the table. Think carefully about what data your customers need to see on each page. If your product tables have links to the single product page, the aim is to provide enough information to inspire customers to click through and learn more.
If your WooCommerce tables include add to cart buttons, they'll need to include enough data to decide to buy without clicking elsewhere.
Don't just add columns to your WooCommerce product tables because you can. Think carefully about all the available columns. Only use the ones that will actively convince customers to buy your products.
Examples - choosing the right product data for your store
A WooCommerce wholesale order form might use product tables to show as many products as possible per page. Wholesale customers already know what they want to order, so they don't need images or descriptions. The product table will therefore contain columns with factual data such as SKU or ID, name, attributes, and multi-select checkboxes.
A WooCommerce restaurant order system might use product tables with a small image of each dish, plus columns for name, short description, price, and add to cart buttons. It might also include custom fields and taxonomy to show extra information such as calorie count and meat-free labels.
See the knowledge base for a list of all the product data you can show in the WooCommerce table layout.
#2 - Make it easier to buy with add to cart buttons & checkboxes
Amazingly, WooCommerce Product Table comes with 3 options for adding products to the cart. Well, there are 4 options really, as you'll see below:
'Add to cart' button for each product.
Multi-select checkbox to add multiple products to the cart.
Use the add to cart button and checkbox together, giving customers a choice.
Perhaps you want customers to buy on the single product page instead of directly from the table. You can include a button linking to the single product page instead of (or as well as) having add to cart buttons.
Add to cart button
Add to cart checkbox
Button and checkbox
How to choose an add to cart button type
First, you need to decide whether add to cart buttons will help or hurt your WooCommerce conversion rate optimization.
There's no one-size-fits-all answer to this question. It depends on the type of products you sell, and how much information your customers need to convince them to buy.
Some tips
Do you sell high value products, where customers spend a long time reading and researching before deciding to purchase? If so, it's often best not to include add to cart buttons in your product table at all. Instead, add a 'Details' button linking to the single product page. Or don't bother with buttons at all, as customers can click on the title to access the product details. Once customers click through to view more information, they can spend more time reading full details, reviews, and other data that will convince them to buy. They will only click the 'Add to cart' button after they have read all the information, so there's no point including them in the product table view.
Do you want to disable online ordering, with different calls to action? This article is about optimizing your WooCommerce conversion rate. However, conversions don't have to be online sales. You might sell your products offline, for example via phone or in person. If this is you, then you can create a product table without add to cart buttons. You can disable all the links in the table so that customers can't click through to the single product page at all. Instead, create a custom field with a different call to action - for example, a 'Call us now' button. Show this as a column in the product table, encouraging customers to do whatever action counts as a conversion for you.
And what about multiple purchases?
Do customers buy one product at a time? If customers are likely to order single products only, then the best option is a single add to cart button for each product in the table. For example, if you're selling hot tubs then customers will only ever buy one, so there's no need for multi-select boxes.
Do you want customers to buy several different products? Lots of WooCommerce stores want customers to buy as many products as possible. This applies to all sorts of store including clothing websites, online food ordering systems for restaurants, and shops selling low-value products such as stationery. If this is you, then you can vastly increase your income by taking steps to increase the average order value. It's more profitable to increase your average order value than to attract more low value customers - for example, because it reduces advertising and support costs. Multi-select checkboxes are a great way to do this. Customers can quickly tick all the products they want, and add them all to their basket in a single click. Nice!
Use quantity pickers to sell more products
If your product tables have add to cart buttons, then it might also be worth adding a quantity selector. This is always worth doing if you want customers to buy more than one of each product.
For example, if you're selling pens then having 'add to cart' buttons without a quantity picker will encourage customers to buy one pen at a time. This isn't what you want! In contrast, adding a quantity selector will unconsciously prompt customers to stock up and buy more. This is another great way to increase the average order value, which can hugely increase your revenue.
#3 - Should the product table link to the single product page?
We've already touched on this, but let's delve deeper into the question of whether to use the single product page. The great thing about WooCommerce Product Table is that you can choose whether or not to have a separate 'Details' page for each product.
By default, customers can click on any product in the WooCommerce table to access the product details page. If you like, you can also add buttons linking to the product pages.
This is ideal if customers will want to see more information about your products than you can include in the table. However, not all stores will benefit from using the single product page.
Some examples
WooCommerce quick order forms simplify the buying process by keeping everything on the product table page. There's no need for customers to click through to separate pages.
Read-only product catalogues provide information about each product, without an option to buy. The single product page includes Buy buttons, so you may want to remove access to these pages.
WooCommerce wholesale stores are for regular trade customers who already know what they want. They want to order quickly from the wholesale order form, without having to click elsewhere.
To stop customers accessing the product details page, you can disable these links in the product table. When they view the products in the table, the only action they can take is to buy!
#4 - Use quick view to give your conversions an added boost
As you can see from these top 13 tips, product tables are a fabulous way to convert more customers into paying customers.
In many ways, it boils down to using one-page shopping as an alternative to sending customers to a separate page for each product. This in turn speeds up the buying process and encourages customers to buy multiple products at once.
But what happens if your customers need more information than you can fit into the product table layout? Sure, you can add extra columns to show information in the table view. However, some types of product do need extra information. Or they may have too many variations to fit into one-page shopping. So how do you provide extra information without requiring extra page loads?
The answer is to add WooCommerce quick view to your product tables.
The Quick View Pro plugin adds quick view buttons or links to WooCommerce Product Table. Customers use these to view the full product image gallery and read extra information such as the short description in a lightbox popup. They can even choose variations, quantities and add to the cart directly from the lightbox.
This is the perfect way to provide extra product details without taking customers away from the product table page. Customers remain on the list of products throughout the process, offering true one-page shopping with an extra boost.
#5 - Use variations & add-ons to optimize your WooCommerce conversion rate
Do you sell product options or variations? WooCommerce Product Table fully supports variable products, and add-ons creating using the WooCommerce Product Options plugin.
There are 3 user-friendly ways for customers to choose a variation before adding a product to the cart. If you're using the add-ons plugin then you can also add various combinations of check boxes, text input fields, radio buttons and more. To increase your WooCommerce conversion rates, present options in a way that will make customers more likely to buy:
Option 1 - List variations as dropdown lists before the add to cart button.
Option 2 - List each variation on its own row in the product table.
Option 3 - Customers select variations and add to cart from the single product page.
Extra options added using the Product Options plugin.
Think about which option will maximise your WooCommerce conversion rate optimization. Again, different types of store will benefit from presenting variations and add-ons in different ways.
For example:
Show variations as dropdown lists if you have lots of products. The dropdowns let you save space by listing as many products as possible per page.
List variations on separate rows if you have a small number of products and want to draw more attention to each variation. For instance, you might sell a single product but offer it in several variations. The best way to sell this product using a table view is to list each variation as a separate row in the table.
Use add-on fields if the logic of variations doesn't meet your needs - for example, if you want customers to be able to select multiple options.
#6 - Use image sizes that will sell your products
The great thing about WooCommerce product tables is that you have full control over the images. Most WooCommerce themes display product images in a standard size. This may not present your products in a way that will show them off and maximise conversions.
When creating product tables, think about what image size will sell your products most effectively.
How to get your product images right
Do you need product images at all? Lots of WooCommerce websites upload an image for each product, just because the theme expects them to. This leads to some strange results, such as huge images to promote non-visual products such as e-books. Think about whether images will attract customers to your products, or whether they'd prefer a text-based layout with more products per page.
How big should the images be? Again, most WooCommerce stores use big images because the theme automatically sizes them. Images take up a lot of space and reduce the number of products that will fit on each page. Only use big images if they actively help to sell your product. Many types of product will benefit from an image, but a small thumbnail is enough. For example, a WooCommerce website selling spare automobile parts need product images to reassure customers that it's the right part. However, customers aren't buying based on what the part actually looks like, so it's best to keep the images small.
What about the image proportions? The most popular WooCommerce themes require square images. This may not be ideal, for example if you're selling a tall and thin product such as clothes.
By listing products in a WooCommerce table layout, you can choose whether or not to include an image column. If you add featured images, you have full control over the image size and dimensions. This is an opportunity to improve WooCommerce conversion rates by making your images more appropriate and ensuring they will actively sell your products.
Experiment with the image size option to get the perfect balance to sell your products. Try to achieve a balance between creating images that will make customers want to buy, and fitting the optimal number of products onto each page.
#7 - Use social proof to convince customers to buy
Research shows that almost 70% of customers read reviews before making a purchase, and having customer reviews on your website can increase conversions by nearly 75%.
This highlights the power of social proof as a tool for WooCommerce conversion rate optimization.
There are several easy ways to include social proof in your WooCommerce product tables. Think about the best way to use them to sell your products:
Product reviews Include a 'Reviews' column in the product table. This is built into the table plugin and shows each product's average star rating. Customers can click to read full reviews on the single product page.
Product audio & video reviews Word of mouth is the best sales tool. Leverage this by adding audio or video testimonials from happy customers, with embedded players in the product table. People can click the 'Play' button to watch or listen to customers talking about why they should buy each product. What better way to convince them to buy?
#8 - Find creative ways to bring your products to life
With WooCommerce Product Table, you can think of exciting new ways to bring your products to life. This can have a big impact on your conversion rate.
You can be really inventive here, as the WooCommerce table plugin supports shortcodes from your theme and other plugins. This means that you can add content provided by other shortcodes and display them in the product table.
For example, you might have promotional videos or 360 degree tours to promote your products. You can embed them directly in the product table. Customers can see the product in action without having to click elsewhere.
#9 - Make your products easy to find
So far, we've looked at some conversion-winning ways to display products with WooCommerce Product Table. That's all well and good, but your sales will only increase if it's quick and easy for customers to find the products they want in the table.
If customers have to scroll through lots of products to find what they're looking for, they'll quickly give up and look elsewhere. This increases your bounce rates and reduces conversions.
To get the most benefit from your product tables, you need to design them in a way that makes it super-easy for customers to find products. If you only have a few products, this isn't really an issue. But if you have a large product catalog, then it becomes incredibly important.
How many product tables do you need?
First, decide how many product tables you need. You can list your entire inventory in a single product table. Or, you can create multiple tables, each containing different products.
There are several ways to use multiple product tables on your WooCommerce site:
Multiple product tables on a single page One option is to divide up a single page with multiple product tables. For example, a WooCommerce restaurant might create a single page for ordering their foods online. They would structure the page with a heading for each section of their menu (Starters, Main Courses, etc.), followed by a product table listing foods from that category. Alternatively, they can create a tabbed layout or accordion with a product table in each section. Customers can select their foods and place an order from this one-page order form.
Product tables on separate pages Alternatively, you can add product tables to different pages across your site. The tables might replace your standard WooCommerce product category page layout. Customers can navigate between pages via the navigation menu, sidebar links and other internal links.
How will customers search, sort and filter the WooCommerce table?
WooCommerce Product Table comes with lots of ways to help customers find products in the table. To optimize your WooCommerce conversion rate, don't just activate them all! Think about the number of products in the table and how customers will use it. Armed with this knowledge, you can add search and filter options that will be most useful to your customers.
First, think about whether you need to make it easier to find products. If you only have a few products, then there's no need to clutter up the table with a search box or filters. Instead, keep it minimal - this draws more attention to your products.
If you have lots of products, then you can definitely improve your WooCommerce conversion rate by adding extra search and filter options.
Search & filter options
Sort columns Customers can click on any column to sort the table by that column. The sort arrows appear automatically and make it easier for your customers. You can also change the default sort order for when the WooCommerce table first loads.
Keyword search box By default, a search box appears above the table. There are options to hide or reposition this. Keep it if customers might want to search for a product by typing a particular keyword. For example, this can be a life-safer if customers already know the name, ID or SKU of the product they're looking for.
Filter dropdowns You can show filter dropdowns above the table to let customers filter by category, tag, attributes, variations, etc.
WooCommerce filter widgets The product table plugin comes with its own version of the built-in WooCommerce filter widgets. These let you filter the table by selecting a product attribute, price, or rating in the sidebar.
Add even better filters with WooCommerce Product Filters
As you can see, WooCommerce Product Table comes with lots of options for adding filter dropdowns and widgets. For even more flexibility, you can use it with its sister plugin - WooCommerce Product Filters.
This comes with a huge range of filter styles and the ability to filter by any type of product data.
Using WooCommerce Product Table with the Product Filters plugin
#10 - Let customers sample products before deciding whether to commit
Lots of products - e.g. curtains, make-up or paint colors - are difficult to sell online. Customers simply can't tell whether the product is suitable based on pictures on a screen. That's when you need WooCommerce Product Sample to improve your conversion rate.
When you use WooCommerce Product Table with product samples, it works like this:
The customer views the products in the product table. Each product or variation has an 'Order Sample' button as well as the usual 'Buy' button.
If the customer wants to compare sample items in their own home, then they simply order a sample of each product.
The WooCommerce Product Sample plugin sends them a friendly email a few days later to ask which was their favorite and remind them to order the full product.
Product samples give customers 100% certainty that they're ordering the right thing, removing the risk factor - and therefore improving your WooCommerce conversion rate. You can choose whether or not to charge for samples or delivery, so it's a great opportunity to boost conversions at no cost to you. The product table is particularly useful for ordering samples because customers can see all the options on one page.
#11 - Let customers complete their order without leaving the page
WooCommerce Product Table with Fast Cart popup checkout
As we have seen, WooCommerce Product Table makes it super-fast to find and add products. After that, customers complete their order using the standard WooCommerce cart and checkout pages.
To supercharge the customer journey even more, you can replace the multi-page checkout process with an on-page cart popup. WooCommerce Fast Cart lets customers view their cart, pay and complete their order from within the popup cart. This all happens directly on the product table page, so there's zero chance that your customers will get bored and give up. That can give a nice boost to your WooCommerce conversion rate.
#12 - Increase the WooCommerce conversion rate for mobile users
WooCommerce Product Table is responsive and mobile-friendly straight out of the box. Resize your browser to see the table resize before your eyes.
Even so, you can take further steps to increase your WooCommerce conversion rate for mobile users. This is definitely worth doing, as most stores have higher bounce rates for mobile users. It's more of a challenge to create a good buying experience on mobiles compared to larger screens.
How to perfect your product tables on mobiles
By default, the WooCommerce table plugin will automatically prioritise which columns are visible on mobiles. If you have too many columns to fit onto smaller screen sizes, then some columns will be hidden. Customers can click a small cross icon to view the hidden columns.
This may or may not be the best way to maximise your mobile conversion rates. WooCommerce Product Table has several responsive options to control how the table works on mobiles. This includes:
Priorities Choose which columns are visible and which are hidden on mobiles. Use this option to make sure the most important columns are always visible, such as the product name and add to cart buttons.
Responsive Display Choose what happens when not all the data in the table will fit on the screen. Instead of hiding columns behind the cross icon, you can show it all by default, or let it appear in a modal window.
By perfecting your store's user-experience on mobiles, you can optimize your WooCommerce conversion rates for mobile users and get more sales.
#13 - Measure the impact of your WooCommerce conversion rate optimization
If you're making improvements designed to increase conversion rates, it's important to make sure they actually work! Conversion tracking lets you monitor your conversions in an evidence-based way. Make each improvement one at a time, and track the impact on your WooCommerce conversion rate. Use this information to do more of what works best, and less of what doesn't.
Google Analytics is the best tool to track conversions in WooCommerce. You can easily set it up using a free WordPress plugin such as WooCommerce Conversion Tracking. Once it's in place, check your Google Analytics regularly. Dive into the data and learn about where your best referrals come from, who your best customers are, and much more.
You'll also want to discover how the product tables are affecting your WooCommerce conversion rate. By default, Google Analytics doesn't record data about changes you make to your website. However, you can use a little-known option to record the improvements you make, and view them alongside the conversion rate tracking data.
How to record website edits in Google Analytics
Go to any screen in Google Analytics that has an Overview chart (similar to the line graph shown below).
Click on the tiny up arrow underneath the chart.
Click 'Create new annotation'.
Select the date when you made each change to your website (e.g. adding product tables), and add some text describing the change.
Remember to create an annotation every time you do something that might affect your conversion rate optimization. The date of each animation will appear as a dot on the chart. When you're viewing your WooCommerce conversion rate data, if there are any major changes in the graph then you can easily see which change/annotation they were caused by.
For example, adding product tables should increase your WooCommerce conversion rate. If you see a sudden spike in the conversion rate tracking chart, you can easily see if it happened after you added the product tables.
It's time to optimize your WooCommerce conversion rate!
Conversion rate optimization is a cost-effective way to invest in improving the success of your store. With a bit of time and the cost of a plugin, you can see an immediate increase in your sales which will continue well into the future.
The amazing thing about improving the conversion rate is that you can increase your WooCommerce store's revenue without spending any extra on marketing or customer acquisition. If you're already getting a decent amount of traffic, then conversion rate optimization increases your sales for very little effort.
As you've seen, WooCommerce product tables provide lots of opportunities to increase conversions. Of course, you'll see the greatest success if you combine WooCommerce conversion rate optimization with other ways to increase revenue.
How to get even more conversions
Make sure nothing else is putting customers off buying from you. For example, is your pricing competitive?
To start increasing your WooCommerce store revenue, get WooCommerce Product Table today and follow the tips in this article. Combine it with excellent products at the right prices, and enjoy healthy sales well into the future.
A WordPress knowledge base plugin is the perfect way to provide online documentation for your customers.
In this tutorial, I'll explain why the Posts Table Pro table plugin is ideal for this purpose. You'll learn why it's better than 3rd party knowledge base platforms. I'll even show you how to set it up, from start to finish. You don't need any technical expertise or knowhow and you don't need to write any code. Simple!
Do I need a knowledge base or online documentation?
Before we start, it's worth considering whether you need a WordPress knowledge base plugin at all. As a general rule, you should provide online documentation for your customers if:
You sell products (whether online or physical) that require instructions.
Customers regularly ask questions about how to use your products.
You find yourself answering the same question more than once.
You'd like to reduce the burden of customer support.
If you've answered 'Yes' to 1 or more of these questions, then a WordPress knowledge base or documentation plugin could be just what you need.
Should I use a 3rd party help center platform such as Zendesk?
When I first researched knowledge base solutions for our own WordPress plugins, I assumed that I'd need something outside of our company website. I couldn't have been more wrong. I'll explain why.
The reason I was seeking a 3rd party solution was that a website can be slowed down by too many free plugins. I do it if there's a valid business case for incorporating a function into our website. However, I believe that some things should be kept outside of your WordPress website. For example, customer invoicing, CRM and accounting have no place on your main company website.
I originally thought that our WordPress plugin knowledge base would fall into this category. We trialed some 3rd party help desk solutions such as the ones from Zendesk and Help Scout. Lots of other WordPress plugin companies (e.g. WP Engine) use these help desk systems for their support ticketing, so why shouldn't we?!
So, we set up a draft knowledge base with each of these companies. We tweaked the colors and images to suit our brand. We set up the knowledge base structure and added lots of articles. Finally, we set up the built-in customer support request form.
Unfortunately, we weren't satisfied with any of these 3rd party help centers. They all had the same drawbacks:
Inconsistent branding
While you can tweak the colors and header images on the hosted knowledge base platforms, they didn't truly match our main website. For example, the fonts and overall look and feel were different. Sure, they looked clean and modern. But the user experience was disjointed as you switched between the two.
You can pay more for further customization options and the ability to add custom CSS. However, these elements are already in place on our main website. Styling a 3rd party knowledge base to match our main website felt like reinventing the wheel. And frankly, a waste of time.
Our Zendesk Help Center homepage - looks fine, but slightly off-brand
Fully integrated WordPress knowledge base using Posts Table Pro plugin
Harder to find articles
I had expected that a dedicated help center platform has more features than a WordPress knowledge base plugin. However, all the ones we tested were lacking in basic functionality. The options for searching the documentation were very basic, making it hard for customers to find the needed articles.
For example:
There was no option to sort articles by name, topic, etc.
There were no filter options.
The articles could only be categorized by a single level of category. As a long-time WordPress user, I'm used to being able to structure information into more complex hierarchies. For example, I wanted to create a top-level category for each of our WordPress plugins, divided into 2 levels of sub-categories. Strangely, this wasn't possible with the hosted solutions we tested.
Inferior support request forms
The 'Request Support' form was incredibly basic. You could add custom fields, but nothing more dynamic. Our support request form is sophisticated and collects different data depending on the customer's answers to each question.
For example, if a customer selects the 'Bug report' option then they're prompted for their login details so that we can investigate. This is a great way to get the information we need, while only displaying fields that are relevant to each customer. It was a shame to be forced to lose all this.
Our Zendesk support request form (very basic, no conditional logic)
The Gravity Forms support form on our main website
More expensive
As with any hosted solution, you have to pay a monthly fee for a 3rd party knowledge base. It comes free if you use their support ticketing system too. However, we provide personal customer support via email and don't want to hide behind support tickets.
Less good for SEO
With external knowledge base platforms, your documentation will either be on a subdomain of your main domain (e.g. support.barn2.com) or a different domain (e.g. barn2.zendesk.com). If you set your WordPress knowledge base to the public (which you should do!) then it can be crawled and indexed by search engines. However, its rankings will be separate from your main website.
We've spent years building a good search engine ranking for our WordPress website. It seemed a shame to have to start again with the knowledge base.
Incorporating a knowledge base into your WordPress site gives you the best of both worlds:
Your main WordPress site benefits from the huge amount of SEO-friendly content in your documentation and knowledge base. This can potentially improve Google search results.
The WordPress knowledge base articles benefit from the wider authority of your main domain name, so they're more likely to get good rankings.
With a WordPress knowledge base plugin, you get full control over your SEO data. For example, if you use a WordPress SEO plugin then you can add custom title tags, descriptions, etc. Just like you can with the rest of your website!
You don't own your data
Another downside of hosted platforms is that you don't own your own data. Everything is lost if the company goes out of business.
You get more control by hosting a knowledge base on your own WordPress website. Ideally, you should also take regular off-site backups to be doubly secure.
No integration between the knowledge base & support system
When I send a support request on WooCommerce.com, it automatically searches the knowledge base and suggests articles. It forces me to confirm the articles aren't relevant before I can send a support request. This is a great way of encouraging customers to self-serve and reduce support tickets!
I know that WooCommerce uses Zendesk for its support tickets, so I assumed that this feature was available. On trialing Zendesk, I discovered that this is only possible via custom API integration. That puts this feature out of reach for most people.
To date, I haven't found ANY off-the-shelf solution to auto-search the documentation before you can request support. Instead, I recommend structuring your knowledge base and documentation to make it really easy for customers to self-serve. Make the link to request support less prominent and put it below the list of articles.
Using a WordPress knowledge base plugin gives you more flexibility to do this. Whereas a 3rd party knowledge base puts the support link right at the top, so customers use it without thinking.
Your knowledge base should be part of your website!
By using a WordPress documentation plugin, you can instantly overcome a lot of the drawbacks listed above. Your knowledge base will be part of your WordPress website and not an afterthought.
Everything will integrate seamlessly, boosting your SEO and providing a much better customer experience.
But which WordPress knowledge base plugin to use?
Surprisingly, the plugin I'd recommend for your documentation isn't a dedicated knowledge base plugin! It's a WordPress table plugin - Posts Table Pro.
Posts Table Pro is popular for displaying information in a wide range of ways. For example, it's one of the most popular AJAX based WordPress document library plugins. Following the steps later in this tutorial also provides the perfect knowledge base for any WordPress website.
It automatically lists your knowledge base articles in an interactive table layout. The table gives your customers more ways to find the information they need, compared to typical knowledge-base plugins.
Behind the scenes, you can either use normal WordPress posts for your knowledge-base articles. Or you can create a dedicated custom post type for your articles (my recommendation). Adding a WordPress knowledge base article is as easy as creating a new blog post – no technical know-how required!
Why is Posts Table Pro so great for online documentation?
Easy-to-find articles
There are multiple ways to navigate the WordPress knowledge base, so people can choose the method that suits them. For example:
The table plugin can list all your articles, with columns for categories, tags, and even custom taxonomies. Customers can filter by category, tag, or custom taxonomy to narrow down the list.
Alternatively, you can divide the knowledge base into categories and display the articles from each category in different parts of your site. Since your knowledge base articles will be WordPress posts (or custom posts), you can create hierarchical categories with multiple levels. You can either list everything on a single page, with a separate table for each category. Or, you can spread your WordPress knowledge base across multiple pages - each listing different articles. It's hugely flexible and you can structure your knowledge base as you would structure any WordPress website or blog. But with the added benefit of searchable, sortable tables listing your documentation articles.
There's a keyword search box above the list of knowledge-base articles. Customers can use this AJAX search to find exactly what they're looking for.
Customers can sort by any column by clicking on it. You don't get this feature with any dedicated WordPress knowledge base plugin.
You can display filter dropdowns above the table to let customers refine the list of articles. Customers can also refine the list by clicking on a category, tag, or taxonomy term. It's AJAX based which means customers won't have to refresh the page to see filtered results.
Everyone works in different ways, so it's good to offer customers a choice.
Easy to make changes
A successful knowledge base should evolve constantly. Whenever a customer requests support, you should think about why they had to ask the question. Consider how you could improve the knowledge base to prevent people from asking the same thing in the future.
As a result, you're likely to be making constant changes to your WordPress knowledge base. Especially in the first few months.
With Posts Table Pro, your documentation is added as a series of posts that you can easily add and edit via the WordPress admin. If you're a website owner like me, then you're probably logged into the WordPress admin most of the time anyway. It's ridiculously easy to tweak a WordPress knowledge base while you're dealing with support requests. This is much better time management than adding changes to a long 'To Do' list and hoping you find the time in the future!
Once you've updated your knowledge base content, the tables listing the articles will automatically update in the front end. You don't need to do this manually.
You get all the benefits and flexibility of WordPress
Since your knowledge base articles are essentially WordPress 'posts', you can benefit from all the fantastic features that WordPress has to offer. There's no learning curve because you already know how to use WordPress. You can do everything you're used to, such as:
Use the full WordPress editor - with all the usual formatting options, Add Media button, and extra features added by other plugins. For example, we added a standard WordPress gallery to our knowledge base article about lazy load. The gallery contains 2 animated gifs showing how the plugin works with and without lazy load. You couldn't do this with most knowledge base programs.
Display global content from other parts of your website, such as the header, footer and widgets.
Integrate with other features, such as live chat and contact form plugins. (We use Gravity Forms for our customer support requests.)
Works with knowledge base WordPress themes.
Enhance your documentation with embedded video
Posts Table Pro supports embedded video players. This is a great opportunity to improve your online documentation.
Create a video for all your main documentation topics. You can add them to the individual articles. Or even better, you can display the videos directly on the list of articles.
Customers can watch short videos which answer their questions directly from the main WordPress knowledge base page. They don't even need to click through to read the full article!
How to use Posts Table Pro as a WordPress knowledge base plugin
By now, you've discovered the benefits of having a knowledge base as part of your main website. You've also seen why Posts Table Pro is ideal as a WordPress knowledge base plugin. Now, I'll show you how to set it up!
Prerequisites
Before you can do this tutorial, you will need these things. If you don't have them yet, get them before you start:
The Posts Table Pro plugin, is installed according to the instructions from your order confirmation email.
A knowledge base theme for WordPress.
That's all!
1. Create a WordPress 'knowledge base' custom post type
First, you need to create the basic infrastructure for your knowledge base content and documentation. If you're feeling lazy, you can use normal WordPress posts for this. This is fine if you're not using posts for anything else. Even if you're using posts for your blog, you can create some dedicated knowledge base categories within Posts → Categories.
However, for most WordPress knowledge bases, I would recommend creating a dedicated post type. This will give you a proper section for your documentation on the left of the WordPress admin. It keeps everything neat and easy behind the scenes. Much more future-proof for you, especially as your knowledge base grows.
There are several ways to create a custom post type in WordPress. If you're a developer, then you can do this programmatically. If not, here is a free and easy-to-use plugin:
You can use this plugin to create custom post types, custom fields, and custom taxonomies. Some knowledge base themes come with custom post types out of the box.
How to create a custom post type
Here are instructions for creating a WordPress knowledge base post type using Easy Post Types and Fields plugin. You can call it anything you like, e.g. Knowledge Base, Articles, Documentation, etc. I think 'Articles' works well for both the singular and plural versions.
Go to Post Type → Manage in your WordPress dashboard.
Click Add New.
Once the setup wizard loads, enter the singular and plural post type names. For example:
Plural name – e.g. Articles
Singular name – e.g. Article
Click on the Next button.
Select the type of information you need for the Article post type. Click on the Create button.
Now, you will see a link to your WordPress knowledge base post type on the left of the dashboard.
2. Create knowledge base categories
Next, you need to plan the structure for your WordPress knowledge base plugin or online documentation. For this, you need to add a custom taxonomy to your post type.
To add a custom taxonomy, go to Post Type → Manage. Click on the taxonomies button for the respective post type you wish to customize (Here, Knowledge Base). On the Manage taxonomies page, click on the Add New button.
Enter the singular and plural names and the slug for your new taxonomy.
If you want your categories to be in hierarchical order, tick the checkbox. Enabling this will allow you to structure your content on multiple levels.
Once you are done, click on the Create taxonomy button.
Once you have created the taxonomy, hover over the knowledge base section on the left of the WordPress admin, and click the 'Categories' link. The name might be different if you named your taxonomy differently.
Add as many categories as you like. This can be a simple list of categories, or you can create hierarchical categories with sub-categories, sub-sub-categories, and so on. As with WordPress posts, there are no limits here!
The important thing is to think logically about the best knowledge base structure. Try to think from your customer's perspective. You want to make it as easy as possible for them to find the article they need. Otherwise, they're more likely to contact you for the support! So don't rush this bit.
Tip: Make a note of the category slug as you create them. You'll need these later if you're planning to create tables listing articles from specific categories.
3. Add articles, documentation, and FAQ's to your WordPress knowledge base
This is the most time-consuming part of creating a knowledge base. It's time to add the actual content to your online documentation.
To do this, hover over the knowledge base link (or whatever you decided to call it) on the left of the WordPress admin. Click the 'Add New' link that appears underneath. The 'Add New' page is just like the screen for adding normal WordPress posts. You can add a title, the main content, categories, tags, etc.
If you're migrating written instructions or a single page of documentation to your knowledge base, break it down into multiple articles. Categories and tag each article to make them easy to find.
The good news is that you don't have to do this all in one go. To launch your WordPress knowledge base, you just need to provide the basic information for customers to use the product. Over time, you can add more and more articles and provide more extensive documentation.
A knowledge base should be flexible and constantly evolving. This means that you shouldn't worry too much about perfecting it straight away.
Add new article screen
Front end view of the article
Tip #1 - Structure long articles with a knowledge base table of contents
Knowledge base articles can often get quite long, divided up by multiple subheadings. If this applies to you, I'd recommend installing Table of Contents Plus.
This free WordPress plugin lets you create instant lists of all the headings in your knowledge-base article. You can either add the list to the top of the article or as a sidebar widget.
You can see a knowledge base table of contents in the screenshot above. The 'In this article widget was created automatically and lists the headings from the article. It's a great way for customers to quickly find the section that will answer their questions.
Tip #2 - Add a widget promoting your product
Most people aim their knowledge base at their existing customers. This can lead to missed opportunities to attract new customers.
Your documentation is published on your public website, so it's available for the world to see. Potential customers might be searching the web for a specific solution, and find a specific knowledge base article without having any background knowledge about your product. Therefore, every page of your knowledge base should contain some basic information about your product and how they can get it.
Did you spot the "Not bought the plugin yet?" sidebar widget in the screenshot above? Here it is again.
The widget doesn't dominate the page for existing customers but puts the article in context for potential customers. Entering a website directly in a knowledge base article can be confusing as you don't know what you're reading about. This simple widget provides an overview of the plugin that the article relates to, with a subtle call to action. The image of the product in action will attract people who are looking for the solution you're offering.
Tip - Display different widgets in different parts of the knowledge base
You can use the Widget Options plugin to show the relevant widget in the appropriate knowledge base category. That way, you can showcase different products in different sections of the WordPress knowledge base. Whichever product the article is about, customers always see the widget for the correct product.
Tip #3 - Create a WordPress wiki where users can edit your documentation in the front end
If you need a collaborative knowledge base, then transform your documentation into a wiki! You can use a WordPress front end editor plugin to let your users make changes to your knowledge base articles.
The way it will work is that the Posts Table Pro plugin will automatically list your documentation articles in a table layout. Users will click through to the single article page. From there, they can click 'Edit' to edit the article content. Their changes will automatically appear in the table and on the single article page.
5. Display your knowledge base content in interactive tables
By now, the overall infrastructure for your online documentation is in place. The only remaining task is to display the articles in an easy-to-find format on your public-facing website. We'll do this by using Posts Table Pro as your WordPress knowledge base plugin.
If you haven't already done so, buy posts Table Pro. Check your order confirmation email and find the link to download the plugin.
Download the zip file and save it on your computer.
Access your WordPress admin dashboard and navigate to Plugins → Add New → Upload Plugin.
Click on "Choose File" and select the zip file you just downloaded.
Click "Upload" and wait for the plugin to finish uploading, then click "Activate".
After activation, the Posts Table Pro setup wizard will automatically open and guide you through entering your license key.
6. Configure your knowledge base tables
Upon installing the plugin for the first time, a setup wizard will automatically open up, guiding you through a step-by-step process to create your first table. This process will allow you to customize your table's appearance. You can also create new tables any time by navigating to Post Tables → Add New.
To begin creating your table, you'll need to provide a name for it and select the post type that you want to display. In this case, you would want to choose the custom post type "articles".
After that, you can choose the posts or pages that you wish to include in the table. The plugin allows you to choose from a range of options, including posts, pages, and custom post types.
Once you have selected the content to include in your table, you can proceed to customize its appearance. The plugin offers a wide range of customization options, allowing you to determine which columns to display and in what order. includes columns for name, content, categories and tags. You can include lots of other columns in the table. This includes featured image, excerpt, date, author, custom fields, custom taxonomies, and much more. If you want to add a new column, you can choose the column type from the dropdown menu and click "Add."
To make it easy for your users to find what they're looking for, you can add filters to your table. For your table, you can use article categories and tags as filters.
Additionally, you can customize the sorting options for your table, selecting the default sorting option and the sort direction that you prefer. This gives you complete control over the order in which your table is displayed.
If you're dealing with a large amount of data, you can enable lazy loading to improve the table's performance. This ensures that even when your table contains hundreds or thousands of items, it loads quickly and smoothly.
Lastly, you can choose how to sort your table, setting the default sorting option and the sort direction that you prefer. With all these options, you can create a table that is functional, easy to use, and visually appealing to your users.
Once you’re done, your knowledge base table should look something like this:
Displaying your knowledge base tables
After successfully creating your table using the Post Table Pro plugin, the setup wizard will confirm that you've completed the process and provide clear instructions on how to insert the table onto your WordPress site. The plugin offers different options for adding the table to your site, depending on your preference.
You can use the "Post Table" block in the Gutenberg editor to add the table directly to your page. Alternatively, you can copy the shortcode from the table builder and paste it onto any page on your site. This provides you with the flexibility to place the table wherever you want, regardless of the content on the page.
If you're creating a knowledge base and want to list all your articles on one page, you can go to Pages → Add New and create the main homepage for your knowledge base. This page will serve as the hub for all your articles, making it easy for your users to find what they're looking for. However, if you prefer to list different articles on different pages, you can create as many pages as you like and customize each page's content to suit the articles you're featuring.
Overall, the Post Table Pro plugin makes it easy to create functional and visually appealing tables that are easy to integrate into your WordPress site. With the flexibility to customize and place the table anywhere you want, you can create an organized and user-friendly experience for your audience.
7. Enable customers to request support
However useful your knowledge base is, customers will still need to contact you for support. Getting this right is a delicate balance. On the one hand, customers should be able to contact you when they need to. On the other hand, you'll benefit from gently encouraging them to help themselves where this is realistic.
You can achieve this by making your documentation user-friendly, easy to navigate, and easily searchable. Using Posts Table Pro as your WordPress knowledge base plugin will help with this. This will help customers to self-serve and find answers themselves.
Choose a suitable support platform
Think of the best way for customers to contact you for support. This might be a live chat plugin on your website. It might be a phone helpline. Or it might be a support request form, created using a contact forms plugin such as Gravity Forms or Contact Form 7. This might send you an email, or it might feed into a full ticketing system. You can integrate any of these options with your WordPress knowledge base.
Whichever option you choose, make it accessible to your customers without being too easy. I know it sounds harsh, but making it too easy encourages them to be lazy. Research suggests that most customers self-service, as this is quicker than contacting you and waiting for a response.
Place the 'Request Support' links AFTER your knowledge base articles and search results. Customers should have to search for a solution and look through the articles. They should only contact your support team if this process fails. Don't shoot yourself in the foot by making the support link too obvious!
8. Create a hidden, password-protected WordPress knowledge base
Finally, I'll provide some tips on how to hide your knowledge base from the public view. This is useful if your knowledge base is part of your main website, but you want to restrict the documentation to existing customers only.
The Password Protected Categories WordPress plugin hides your knowledge base and documentation. Simply install this simple plugin, create a main category for your knowledge base, and select the 'Password protected' option. You can then add 1 or more passwords - customers must enter a correct password to access the restricted knowledge base.
Your password-protected WordPress knowledge base category can have as many sub-categories as you like. They'll automatically be protected with the same password as the primary parent category. They will be completely hidden from the public parts of your website.
After that, it's up to you how to share access to the knowledge base. You could include the password in the order confirmation email or include it with your product. Or you could use a plugin such as Contact Form 7 to add a 'Request access' form to your website. People can submit the form, and provide evidence of their purchase, and you can then send them the password. Either way, this is a simple way to hide and protect your WordPress knowledge base.
It's time to create your own WordPress knowledge base!
Using the best WordPress knowledge base plugin can make a huge difference to customer satisfaction AND your bottom line.
Remember - the easier it is for customers to find answers to your questions, the less likely customers are to request support. They'll be happier, more likely to recommend your products, and more likely to buy from you again. This frees you up to build your business rather than spending all your time on customer support.
So, now you can get started and create your own WordPress knowledge base with the Posts Table Pro plugin. Set it up and make life easier for customers and you at the same time. And if you like the plugin, become a Barn2 affiliate and earn a 30% commission for recommending it!
I'd love to hear how you get on with your knowledge base plugin. Please leave your comments below.
As the number of WooCommerce websites continues to grow, more and more people are using it for large product directories. A WooCommerce directory plugin lists products on a much bigger scale than typical online stores. Products are listed in a logical structure with extra data to help customers find what they're looking for.
In this article, I'll explain the main features needed in a WooCommerce directory plugin. I'll then provide full instructions on how to use WooCommerce Product Table to create an online store directory.
Your WooCommerce directory will include all the features you need to display large numbers of products. This includes searching, sorting and filtering to help customers find your products more easily. I'll show you how to display different types of product data including all the standard WooCommerce data, plus custom fields and taxonomies. Customers will be able to click from the directory listings to the single product page and/or buy straight from the table.
There are several things that make WooCommerce directory sites different from other types of e-commerce store. Directories need some extra features to list products in a suitable layout, often with extra information.
Essential directory features
Table-based product layout WooCommerce product directories list many products per page in a less visual way than traditional online stores.
Extra product data Directory databases list various product information. Most WooCommerce stores just list basic data such as name, image and price. A WooCommerce directory can display far more product data. This can include descriptions, embedded audio/video, custom fields, product attributes and variations, prices, reviews, stock and more. You can even include extra options created with the WooCommerce Product Options plugin.
Easy to search & filter With a WooCommerce directory plugin, customers aren't forced to scroll through many pages of products to find what they need. Instead, should be able to use advanced search, sort and filter options to find products matching their criteria.
One-page ordering A lot of product directories function as a one-page WooCommerce order form. This means that customers can view all the directory listings and add products to the cart from a single page. Some WooCommerce directories will disable the add to cart buttons and let customers click to the single product page in order to view more information and purchase. However, one-page ordering is an important feature for many directory sites.
Ability to handle large numbers of products A directory-based e-commerce store may have 100's or even many 1,000's of products. A WooCommerce directory plugin needs to be able to handle large amounts of information without server crashes or performance issues.
See information quickly without multiple page loads Many online directories are frustrating to use because you have to visit a separate page for each product. It's better to be able to view extra information in a quick view lightbox, without being taken away from the directory listings. You can do this by using WooCommerce Product Table with its sister plugin, WooCommerce Quick View Pro.
What sort of websites need a directory structure?
WooCommerce bookstore
Many WordPress websites sell large numbers of books. A good directory plugin can be used as a WooCommerce bookstore plugin.
Books for sale can be listed in a table with relevant data such as title, author, publisher, date, price and add to cart buttons. It's even possible to display a small image of the front cover in the book directory listings.
You can sell both printed books and digital e-books in WooCommerce. By adding each book to the directory as a variable product, each version can be sold at a different price. Customers can choose from the directory results page and buy one or more books.
WooCommerce audio directory
If your WooCommerce directory plugin supports embedded audio players then you can use it as a music or audio directory.
Lots of audio stores display 100's or 1,000's of CD's or audio products. Since large images aren't relevant to selling music online, the best layout is a table-based directory view. Many more products can be displayed per page. Customers can use the keyword search, sort options and product filters to quickly find the music products they're looking for.
The best WooCommerce directory plugins support embedded audio players. This is a good opportunity to sell more music by including audio samples, embedded directly into the music directory. You can include sample tracks alongside other information about each product such as CD name, track name, artist, length and more.
If you sell physical CD's and downloadable versions of your audio products then you can add each one as a variation. The variation options can be listed a dropdown on the directory page, or customers can click to the single product page to view the options and buy online.
WooCommerce business directory
Like all WordPress sites, WooCommerce is hugely popular as a business directory. This is less common than a more generic business directory in WordPress because not all business directories need to sell online. However, this is an option with a WooCommerce directory - for example, if you need to sell products for each business via the directory.
(Tip: If you want to create a WordPress business directory without the ability to buy online, check out our other plugin Posts Table Pro. This lets you create a custom post type for your businesses and display these in a tabular directory structure with search, sort and filters.)
Directory of telephone numbers
WooCommerce directory with phone numbers for sale
Directory structures are excellent for selling data-base products such as phone numbers. For example, Numbergroup uses WooCommerce Product Table to create a telephone number directory. Customers can browse the phone numbers and buy using WooCommerce.
You can search the directory for a specific number, change the number of products per page, and sort by telephone number or price. Once you've found the number you want, you can add it to the shopping cart and buy through the usual WooCommerce checkout.
The WooCommerce Product Table plugin is perfect for creating any type of directory like this. Check out our demo of a WooCommerce book directory in action!
How to create a WooCommerce directory to sell absolutely anything!
As you can see, there are lots of reasons to use a WooCommerce directory plugin. Next, I'll show you how to use WooCommerce Product Table to create a directory selling books, music or other types of product.
1. Plan a logical WooCommerce directory structure
The first step is to plan your WooCommerce directory. It's worth doing this beforehand to make sure it's logical and intuitive to navigate.
These questions will help you to plan your store's directory structure:
Will you have a central directory page listing all the products?
Would you be better off with multiple pages, each listing different products based on their category, tag or custom taxonomy term?
Will each page of directory listings contain a single table of products? Or will you add multiple tables to each page, listing different products?
Is your server powerful enough to support the number of products per page in the directory? Later, I'll tell you about the lazy load plugin option which boosts performance for large WooCommerce directories. However, if you want to list 100's of products on a single page without pagination, performance could be an issue and you'll need a fast server.
2. Add products to the directory
Next, you need to add the content for your WooCommerce store directory:
Add all your products to the directory in WooCommerce. You can do this manually via Products → AddNew. Or if you have a large product directory, use a WooCommerce listing plugin such as Product CSV Import Suite to import products from CSV to WooCommerce.
3. Set up WooCommerce Product Table
Now you're ready to display your WooCommerce products in a directory structure. You'll need the WooCommerce Product Table plugin for this:
Go to Products → Product Table → Add New, or just use the table builder which opens automatically on activation.
Choose the settings for your WooCommerce directory as required.
Either choose which shop page templates you want to display the directory listings on, or opt to add the directory to a page manually. If you choose to add it manually then you can then choose which products to include.
If you selected to show the directory on shop pages then you don't need to do anything else. If you chose the manual method then add a page and either insert the shortcode from the final page of the table builder, or insert a 'Product Table' Gutenberg block.
This will create a basic directory listing your WooCommerce products in a table-based grid layout.
Use the product table knowledge base to customize your directory. It's hugely flexible and there are many different personalization options. Here's a summary of the main options you're likely to use to perfect your WooCommerce directory plugin.
Choose the product data & directory headings
WooCommerce Product Table supports all the standard product data such as name, short and long description, price, dimensions, stock, reviews, and attributes. It also supports custom data via WooCommerce custom fields and taxonomies.
You have full control over which columns appear in the directory. It's also possible to rename or remove the column headings - just click on the pencil icon.
Turn your directory into an order form with add to cart buttons, variations & quantity selector
Transform the store directory into a one-page WooCommerce order form by letting customers order straight from the directory page. You can do this by including an 'Add to Cart' column in the table.
Choose between 3 styles of add to cart buttons, including standard boxes and multi-select check boxes. It's also possible to display variable products and a quantity selector directly in the table. Customers can select variations, choose quantities and add multiple products to the cart without having to visit the single product page. You can even disable links to the single product page - to do this, edit your table and then using the advanced options to disable the link for each column.
And if you're using the WooCommerce Product Options plugin, then you can also display your add-on options in the product directory. For example, you might want to add checkboxes or text fields to your products and have them appear on the directory page.
A product table with extra options added using the WooCommerce Product Options plugin
Search, sort & filter
You can choose how customers can interact with the WooCommerce directory to find products quickly and easily. Customers can click on a column heading to sort by that column. You can also add product filters so that customers can narrow down the directory listings by category, tag, price, custom taxonomy, etc.
One plugin that can be particularly useful for adding advanced product filtering options to your directory is the WooCommerce Product Filters plugin. With this plugin, you can add a range of different filters, including categories, attributes, tags, custom taxonomies, price, ratings, and stock status, and display them as dropdown lists, checkboxes, radio buttons, labels/tag cloud, images, or color swatches.
By adding these advanced filters, you can help customers quickly and easily find the products they're looking for in your directory, which can ultimately lead to increased sales and customer satisfaction. Plus, with the ability to customize the placement and appearance of the filters, you can create a user-friendly browsing experience that encourages customers to spend more time exploring your product offerings.
Lazy load/AJAX option for large WooCommerce directories
As your WooCommerce directory grows, the plugin needs to grow with it. Fortunately, WooCommerce Product Table has a lazy load option to boost performance as your store grows.
By default, all the product listings in your directory load straight away. This is fine for small directories but can cause a performance hit if you have many products. With lazy load, only 1 page of the directory is loaded at a time. This means that you can have an unlimited number of products in the directory. Even if you have many thousands of WooCommerce products, lazy load keeps everything running smoothly without slowing down your site.
There are further options to boost performance, such as setting a limit for the number of products in the directory. This is available on the plugin settings page. You can also change the number of products shown on each page of the directory.
Embed audio & video in the directory
WooCommerce Product Table supports embedded audio and video. If you're creating a music or video directory then customers can watch or listen straight from the directory listings page. This is ideal if you use audio or video snippets to convince people to buy your products.
Add multiple tables to your directory
Most WooCommerce directories list all their products in a single directory, with easy search options such as the keyword search and filter.
If you prefer, you can add multiple directories to your WooCommerce store. For example, you might want to create a different directory table for each product category.
The plugin supports adding as many directories as you like. Simply create multiple tables at Products → Product Tables and display different products in each one. You can quickly do this by duplicating an existing table. For each one, you can then choose which products to include based on category, tag, ID, custom taxonomy term, custom field, date, etc.
Create an A-Z directory
You can also use a directory planning to create A-Z listings. Simply use the tabs that come with your theme or a plugin such as Shortcodes Ultimate to create a tabbed layout with a tab for each letter. Include a separate product table to each tab containing a directory of products for that letter.
Add quick view buttons to your WooCommerce directory.
If you use WooCommerce Product Table on its own, then customers can click through to the single product page to view more information about each product.
That's fine if you only expect each customer to buy one product. But most WooCommerce directory websites want to increase the value of each sale. And that requires buying more than one product.
That's why you can significantly increase revenue by adding the WooCommerce Quick View Pro plugin. This lets you add a 'quick view' column to the WooCommerce directory (which you can rename to anything you like). Customers use this button to view more information about each directory product in a handy lightbox popup.
You can choose what information to show in the lightbox. This might be more product images, variation and add to cart options, the short description, meta information such as categories and tags, or something else.
This is a perfect way for customers to learn more about each products without being taken away from the main WooCommerce directory listings. That way, there's no chance they'll get lost. They remain on the list of products at all times. As a result, they spend longer browsing the products in the directory, and are likely to buy more and more.
4. Launch & promote your WooCommerce directory
Your store directory is now complete and ready to launch:
Test everything thoroughly to ensure your WooCommerce directory is running smoothly. You need to be certain that customers can order from you from different browsers, mobile devices etc.
I hope this tutorial has provided everything you need to create a fully functioning store directory using WooCommerce Product Table. The plugin comes with full support from our UK WordPress experts at Barn2 Media.
Get in touch if you have any questions about how it works that aren't covered in the knowledge base, or if you need any advice on setting it up to create the perfect directory. Or if you like the plugin, sign up as an affiliate and we'll pay you 30% commission for reselling it!
I'd love to know which method you use for your own product directory. What do you sell in your WooCommerce directory? Please leave your comments below.
This ultimate guide contains everything you need to know about WooCommerce login for your customers. We'll look at the different ways you can let customers log into a WooCommerce online store, and why.
I'll tell you how to set up a WooCommerce login straight out of the box, with or without compulsory registration and social login. I'll also share some handy login plugins to create a hidden or private WooCommerce store that only logged-in customers can access. You will learn how to:
Add user login to your WooCommerce store (no plugin needed).
Make users log in before purchasing (no plugin needed).
Send your customers WooCommerce auto-login links using the free URL-Based Login plugin.
Read on, or watch this video to see how each login method works.
Importance of a customer login for WooCommerce
Personalized user experience: WooCommerce customer login allows you to provide a personalized experience to your customers. They can easily access their order history, saved payment methods, and shipping details, which can save them time and effort.
Increased security: With a WooCommerce customer login, you can secure customer data by allowing access only to registered users. It also allows you to monitor and track user activity to prevent any fraudulent or suspicious activity.
Targeted marketing: A WooCommerce customer login feature allows you to track customer behavior and preferences, which can be used to create targeted marketing campaigns. You can also offer personalized discounts and promotions to customers based on their purchase history.
Improved customer engagement: WooCommerce customer login feature can help you create a loyal customer base. You can send personalized emails, update them on new products or services, and gather feedback on their experience.
Simplified checkout process: When WooCommerce customers log in, they can save their payment and shipping details, making the WooCommerce checkout process faster and more convenient. This can increase customer satisfaction and encourage repeat business.
What are the different types of WooCommerce login?
By 'WooCommerce login', I'm talking about the process where customers log into your online store. It's quite a vague term and there are several ways to set it up. Which one you choose depends on how you want your store to work.
Public WooCommerce store with guest checkout- This is the most common WooCommerce setup. Anyone can browse your products and there is no hidden WooCommerce content. Customers can buy products as a guest without having to log in, or they can optionally create a WooCommerce account during checkout.
Customer portal with protected product categories - Instead of (or as well as) individual customer accounts, you can password-protect parts of a WooCommerce store or restrict them to specific users or user roles. Anyone can buy from the public areas of your shop, while only customers with the right credentials can access your protected categories. Once a customer logs into your protected categories, they can view and buy the hidden products inside.
100% private WooCommerce store - Some websites want to hide a whole WooCommerce store from public view so that customers must log in or enter a password to access it.
WooCommerce auto-login links - Let customers log in more easily by clicking on a personal login URL. No more usernames or passwords!
With nearly 2 million using WooCommerce sites according to the latest WooCommerce stats, there are plenty of people looking for all these login options.
Which type of customer login is best for my WooCommerce store?
I've created a quick quiz to help you with this. Answer the simple questions about your requirements, and the quiz will recommend the best WooCommerce customer login plugin for your website.
Option 1 - Public WooCommerce store with guest checkout
Most WooCommerce stores let anyone view and buy their products, whether or not they're logged in.
How to enable guest checkout in WooCommerce
Log into the WordPress dashboard and navigate to WooCommerce → Settings → Checkout.
You'll see a box with the label 'Enable guest checkout'.
Tick this box and customers will be able to purchase without logging in or creating a user account.
How to prevent user account creation in WooCommerce
If you like, you can prevent customers from creating user accounts at all. To do this, go to WooCommerce → Settings → Accounts. Untick the boxes to enable registration on the Checkout and My Account pages. This will prevent customers from registering for your site at all, so you don't need to provide a login page.
Check out this free Helpie WooCommerce FAQ plugin which helps to create an FAQ section on your WooCommerce product page to easily answer customers' questions about the products.
Option 2 - Public WooCommerce store with mandatory user accounts
How to add a Register/Login page to WooCommerce
When you first install WooCommerce and run the Setup Wizard, there's an option to automatically create all the essential pages for your store. Do this, and you'll see a 'My Account' page in your list of pages (along with other new pages for shop, cart, and checkout).
The WooCommerce login shortcode [woocommerce_my_account] will appear on the page. You can use this page as your register/login page, for example by linking to it from your header or sidebar.
The WooCommerce login/register form works as follows:
Guest users will see the WooCommerce login form, possibly with a registration form. To include the registration form on the login page, go to WooCommerce → Settings → Accounts and tick 'Enable registration on the "My Account" page'.
Logged-in users will see their Account page, with their order history, profile, and other information.
You can add the WooCommerce login shortcode[woocommerce_my_account] anywhere else on your website to create extra login forms. There are other plugins available to do this such as Sidebar Login and Woocommerce Login / Signup Lite. These let you create more complex WooCommerce login forms. However, you only need an extra plugin if the built-in WooCommerce login shortcode isn't suitable for you.
Tip: If you want to control where users are redirected after they log in, try Peter's Login Redirect. It's easy to set up and we've used it on lots of our client's websites.
How to force WooCommerce customers to log in or register before they buy
In the WordPress dashboard, go to WooCommerce → Settings → Checkout.
Untick the 'Enable guest checkout' box. This will force users to create an account when they buy from your WooCommerce store.
You can further configure how user accounts are created in WooCommerce → Settings → Accounts. This WooCommerce page has several settings such as whether to include a registration form on the checkout page and whether to automatically generate WooCommerce customer login usernames and passwords.
There's also a box to display a login reminder on the checkout so that existing customers can log in. This is really useful if guest checkout is disabled, as you need to make it easy for customers to log in.
Note: If a customer completes checkout without logging in then an account will be created for them behind the scenes. They will receive the login details by email so that they can log in the next time they purchase from you.
WooCommerce social login
As well as the standard WooCommerce login facility, you can let customers log in with their social media accounts. With WooCommerce's social login, you create a public store as usual so that anyone can browse your products. As part of the checkout, they can log into your website using their social media accounts.
You might offer social login in addition to - or instead of - the option to register directly on your WooCommerce website.
Research suggests that over 77% of customers prefer to log into WooCommerce or other websites using social media. This is hardly surprising given that it saves them the hassle of creating a new WooCommerce account for your website and remembering their logins. (And of course, WordPress insists on secure passwords these days so they can't just log in with an easy-to-remember password!)
Back in 2014, I wrote about a 'deadly embrace' caused by WordPress social login plugins. At the time, the available plugins conflicted with built-in WordPress user accounts. Things have improved since then but if you're considering social login then I recommend you use the official WooCommerce extension. This offers the best chance of creating a user-friendly WooCommerce social login for your website.
How to add social login to a WooCommerce store
To add social login to your WooCommerce website, I recommend the official WooCommerce Social Login plugin. Once you've purchased the plugin, follow the instructions in the knowledge base to enter your license key and set it up.
Given the issues I previously identified with social login, I recommend thorough testing before it goes live. Make sure your WooCommerce login process works seamlessly. In particular, test the following aspects of the login process:
First time WooCommerce logins using each social network.
Repeat logins using the same social network.
Repeat logins using a different social network. (i.e. what happens if a customer forgets which social network they logged in with previously?)
Register using social login and then try logging in directly on the website using the Lost Password link.
Basically, try to break it and send a support request to WooCommerce if you discover any problems. Social login is a great idea but needs thorough testing to get right, as customers may forget how they previously logged into your WooCommerce store.
Option 3 - Login portal with WooCommerce protected categories
Options 1 and 2 are about letting customers log in to a public WooCommerce store. They might have to log in to purchase, but anyone can browse the store and see the products. You can also create a WooCommerce login system where customers have to log in or enter a password in order to see your products or other store content.
The WooCommerce Protected Categories plugin creates a login portal where different customers can see different products. It locks down one or more of your product categories so that no one else can see them. Customers must log into WooCommerce with the correct credentials to see the products inside their portal.
You can create separate categories for different groups of customers, and you can even create customer-specific products. Each customer logs in and views the restricted products that they have access to.
Who needs protected product categories?
You can use WooCommerce Protected Categories in several ways:
Show products from protected categories in the public areas of your store. When someone clicks a protected product, they must enter the password or login to view the single product page or purchase. This lets you display all products in the public store, while only pre-approved customers can buy protected ones.
Hide protected categories and products from the public store. Alternatively, you can hide protected WooCommerce categories and their products from public areas of your store. Authorized users can log in and be directed to the correct hidden category. This is perfect WooCommerce wholesale stores or customer-specific products where you sell different products to each customer.
Hide your entire WooCommerce store. Finally, you can put ALL your products within one or more protected categories. This way, customers have to log in before they can view your products or buy. (Tip: While it's possible to hide your whole store with this plugin, you might prefer Option 5, below. Both plugins let you create a WooCommerce hidden store)
How to create protected categories in WooCommerce
You can read full setup instructions in the plugin knowledge base. Here's a quick guide to get you started:
Go to WooCommerce → Settings → Products → Protected Categories and enter your license key.
Change any settings such as customizing the text on the password WooCommerce login page, and hide protected categories from the public areas of your store.
Now, go to the product category that you want to hide behind the WooCommerce login page. You'll find this in Products → Categories. The plugin has added a new 'Visibility' section with options to password protect the category or make it private. Choose 'Protected' and either password protect the category, or restrict it to specific users or roles.
Repeat step 5 for all the categories you want to protect.
Finally, test your WooCommerce protected categories from different customer login scenarios. For example, try it when you're logged in and out of the website. Also, try it before and after you log in to a category.
Option 4 - Create a login-only store
WooCommerce Private Store forces customers to log in to your WooCommerce store before they can see your shop page, products, categories, or any other store content. It's a simple but effective plugin to hide WooCommerce from public view, without affecting the public parts of your site.
By logging into their user account or entering a simple password on the WooCommerce private store login page, customers can unlock the store and access the products and other content inside. Your public users won't even know you have a WooCommerce store unless you decide to link to the WooCommerce login page. (In which case, they will be able to see the WooCommerce login page but none of the content behind it.)
How to hide your whole WooCommerce store behind password protection or a user login form
The plugin knowledge base contains full setup instructions for WooCommerce Private Store. I've also provided details below. Setting it up literally just takes a few minutes:
Go to WooCommerce → Settings → Products → Private Store.
Enter your license key and change any settings such as customizing the WooCommerce login form text. Either choose a password to password protect WooCommerce, or tick the 'Logged In Users' option to automatically unlock it for logged-in users or specific roles.
Once you've saved the settings page, your whole e-commerce store will be protected. Customers will have to log in or enter the password before they can see ANY WooCommerce content such as the main shop page, products, categories, etc. Your WooCommerce content will also be blocked from search engines, so it's a simple yet secure way to make WooCommerce private.
WooCommerce Protected Categories or Private Store?
I realize that the plugins mentioned in options 4 and 5 are quite similar. You can use them in similar ways but they can also be used very differently in terms of WooCommerce login options. Check out my article and quiz on which WooCommerce protection plugin to use.
Option 5 - WooCommerce auto-login by URL
Finally, you might want an easier way for your WooCommerce store's customers to log in.
WordPress and WooCommerce auto login plugins provide a dynamic link that automatically logs customers into their accounts. This saves customers from having to remember or store usernames and passwords. All they need is their personal auto-login URL.
You can use this option with options 1, 2, 4, and 5 listed above.
As you can see, there are many types of WooCommerce login designed for different types of stores. I hope this guide has helped you to choose the right login method for your WordPress site and to set it up properly.
How do you allow customers to log in to your site? Are there good WooCommerce plugins I've missed? What pitfalls did you come across and what would you advise other WooCommerce users? Please add your comments below.
With over 60,000 active users, Easy Digital Downloads is the third most popular WordPress e-commerce plugin. It has all the features that most e-commerce websites need to sell digital downloads online. However, it not obvious how to password protect parts of your downloads store or make it private.
This is the ultimate guide on how to do just that. I'll show you how to protect parts of your Easy Digital Downloads store or even your whole shop. There are written instructions and video tutorials to help you set it up.
Why would I want to make Easy Digital Downloads private?
Most e-commerce stores selling digital products are available to the public so that anyone can buy the downloadable files. However, many stores need to be partly or completely private and hidden from public view. This might seem strange, as the whole purpose of an e-commerce website is to make as many sales as possible! But there are many reasons why an Easy Digital Downloads store might need password protected categories.
For example:
Public Easy Digital Downloads store with password-protected members area Lots of e-commerce websites have public and private areas. Perhaps you have a public store selling downloads that are available to anyone, and a private area for wholesale or trade users.
Client-specific products If you sell downloadable products which are unique to each customer then you could create a hidden password protected category for each client. This might be useful for a photographer selling digital prints of their images online after a photoshoot.
Members-only Easy Digital Downloads store You might want to create a completely hidden downloads store which is only available to your members.
Temporarily hide downloads from public view There are lots of occasions when you want to temporarily hide products from public view. For example, on the Barn2 EDD site, we use a password protected category to pre-launch certain products to specific people, before launching them to the wider public. We simply give the password to each pre-approved customer and then can buy the download before it's officially launched.
I have a website selling digital music downloads for primary education.
I needed a private category for this which can only be accessed by users who have paid to download the educational material (song videos and worksheets).
I am delighted to have been able to achieve this aim using this simple and effective plug-in.
Simple as it may be, I am completely new to WP and support to help me achieve my goal was vital. I am delighted to say that help was at hand, quickly and was most professional.
I highly recommend this plug-in to you.
Case study - How Lemony Fizz restrict downloads to their subscribers
Lemony Fizz is a craft company providing paper crafts, planners and printables. They use Easy Digital Downloads with the Free Downloads extension to provide free project downloads to their subscribers. The Password Protected Categories plugin restricts the downloads so that only registered subscribers can download them.
If they are a subscriber then they can click on any download and enter a password to unlock it. Once they have done this, the entire library is unlocked for them.
Non-subscribers can sign up using the form at the top of the page, which integrates with their mailing list software. After confirming their subscription via email, they receive a welcome letter containing the password to the downloads library.
Note: Lemony Fizz has chosen to list their protected downloads in public parts of their site, but require a password to access the single download page. If you prefer, then you can hide the protected downloads from public view so they are invisible until you unlock the protected area.
Downloads are listed for everyone, with a signup form above
Visitors must enter a password to download the files
As you can see, there are lots of reasons to password protect Easy Digital Downloads. Next, I'll talk you through 3 ways to make downloadable products private. I'm assuming that you already have an Easy Digital Downloads site with downloadable products and categories set up.
3 ways to protect Easy Digital Downloads
Here's a summary of the 3 methods described in this article. You can jump straight to the type of password protection best suited to your website:
How to password protect categories in Easy Digital Downloads
Password protecting Easy Digital Downloads categories is a more user-friendly solution. Adding password protection to specific categories locks down the category page and all its downloads with a single password. (Or multiple passwords, if you'd rather have a unique password for each customer.) Once the customer has entered a correct password, they will have access to that category, its sub-categories and all the downloads within it.
You can achieve this with the Password Protected Categories WordPress plugin. This is a simple plugin that lets you password protect Easy Digital Downloads categories in just a few minutes.
1. Set up the Password Protected Categories plugin
Go to Settings → Protected Categories in the WordPress admin and enter your license key. (Get this from the confirmation page or email after you buy the plugin.)
Select a page for customers to log into the protected categories.
Choose what text will appear on the 'Submit' button on the password login page.
Add a custom message which will appear above the password entry form on the login page.
Decide whether to tick the 'Show password protected categories and posts to visitors' box. If you leave the box unticked then your protected categories and their downloads will appear on the main Downloads page. They can also appear in your navigation menus, widgets and search results if you're using these. Ticking this box hides the protected categories from your public-facing website.
Choose how many days will pass before a customer has to re-enter the password. For example, if you choose '3' days then when a customer logs into a password protected category, they won't have to re-enter the password again for 3 days. The aim is to get the right balance between user experience and security.
Click 'Save Changes'.
2. Create your password-protected EDD categories
Once you've installed and activated the plugin, go to Downloads > Categories in the WordPress admin.
Go to create a new category or edit an existing one.
You'll see a new 'Visibility' option that wasn't there before. Choose 'Password Protected' and enter a password for your category. If you want multiple passwords, click the + icon to add more.
Click 'Add New Download Category' or 'Update' (depending on whether you're adding or editing a category).
If you want to add sub-categories, add these now. Choose your password-protected category as the 'Parent' and leave these set to 'Public'. They will automatically be protected with the same password as the parent category.
Repeat steps 1-6 to create any other password-protected categories for your Easy Digital Downloads store.
3. Add downloads to your protected categories
Next, go to the Downloads page in the WP admin, where you'll see a list of all your downloadable products. If you don't have any yet, add them now.
Tick the relevant boxes to put some of your downloads within your password-protected categories. You can either do this on the Add/Edit Download screen or use Quick Edit on the main Downloads page.
Click 'Update'.
4. Link to your password-protected categories (optional)
If you want, you can add links to your protected categories in the usual way. For example, you might want to link to your login page from the menu. This is completely optional and you can choose how to incorporate your protected categories into the overall structure of your website.
And that's it! You've password-protected your Easy Digital Downloads categories and protected the downloadable products within them! For more information, please see the plugin knowledge base.
User and role protected categories in Easy Digital Downloads
The Password Protected Categories WordPress plugin also includes options to restrict Easy Digital Downloads categories to specific users or user roles.
You probably noticed this when I showed you how to password protect categories in the previous section.
Private categories are different from password-protected categories because they only appear for logged in users with the right permissions. In contrast, password-protected categories are separate from WordPress users - anyone can enter the password, regardless of whether they have a user account on your website.
User and role protected Easy Digital Downloads categories are completely invisible and hidden from public view. They automatically appear to logged in customers depending on their role.
How to create user role and role restricted categories
Follow the steps in the previous section on creating password-protected categories in Easy Digital Downloads. The only difference is that instead of choosing 'Password Protected' when you add or edit a download category, select 'User' or 'Role'.
Easy!
Password protect an entire Easy Digital Downloads store
So far, we've covered the options to protect specific categories in Easy Digital Downloads. Finally, I'll tell you how to use these techniques to create a completely private or hidden Easy Digital Downloads store.
You can make your whole WP downloads store private using password-protected or role protected categories. The trick is to create one password-protected category and structure your entire e-commerce store within this category.
The simplest option is to put all your downloadable products within the hidden EDD category. Or if you like, you can use sub-categories to divide up your EDD store. If you choose your password-protected category as the 'parent', all the sub-categories and their downloads will automatically be protected with the same password. (Don't password protect your sub-categories - leave them set to 'Public' as this will happen automatically.)
Once you've done this, anyone who clicks on a link to your main store category or any of its downloads or sub-categories will be prompted for the password or login details. The rest of your WordPress website will remain public as usual.
Linking to your hidden Easy Digital Downloads shop
Once you've password protected Easy Digital Downloads, you need to decide how people will access it.
You can either keep it completely hidden and give the link to authorised customers, along with the password. Or if you prefer, you can add a link to your Easy Digital Downloads customer login page. You can call this 'Store Login' or similar and can add the link to your website header, footer, navigation menu or wherever you like.
How can I password protect other WordPress e-commerce plugins?
The techniques described in this article will work for Easy Digital Downloads or any other WordPress e-commerce plugin. The Password Protected Categories plugin is compatible with any plugin that uses categories.
There's also a dedicated WooCommerce version of the plugin - WooCommerce Protected Categories. This works in a very similar way to Password Protected Categories but is specifically designed for WooCommerce.
Want a better layout for your EDD product lists?
If you like Password Protected Categories then you'll love our plugin to list your Easy Digital Downloads inventory in a product table.
Posts Table Pro takes your downloads and creates an instant table or one-page order form, complete with AJAX search form and quick filtering.
If you sell any sort of digital products to people in the EU, then you're legally required to charge them the tax rate for their local country. You have to do this even if your EDD store isn't based in the EU!
The Easy Digital Downloads EU VAT plugin makes this easy. It automatically charges the correct VAT to each customer and provides everything you need for your EU VAT returns.
How do you protect your Easy Digital Downloads store?
Now it's your turn. Do you have hidden areas within an Easy Digital Downloads store, and what do you use them for? Do you use Password Protected Categories or are there other solutions you'd recommend? Please leave your comments below.
When we used to offer web design services (before we switched to selling plugins), our web design quote calculator was the most visited page on our website. Lots of people asked us how to create an instant online quote calculator for their own WordPress website. It's time for me to share the secret of how we did it, so that you can too!
The good news is that we used a widely available WordPress plugin for our instant quote calculator. With over a million users, Gravity Forms is the world's most successful WordPress forms plugin. Most people use Gravity Forms for straightforward enquiry forms like the ones in our own support center. However, you can also use it to create instant online quote calculators.
This is how we did it.
This post was originally published in 2017. If you'd like an up-to-date tutorial on how to do the same thing, check out GravityView's article on How to Create an Advanced Quote Calculator.
Getting Gravity Forms
First, you'll need to buy Gravity Forms. Install and activate it on your WordPress website.
To create an instant quote calculator like ours, their Personal License will be fine. If you want to sign people up to MailChimp when they submit the form, you'll need the Business License. Or if you want to take payment from people who submit the form (e.g. a PayPal deposit), you'll need their Developer License. Check out the Gravity Forms extensions to decide which license you need.
How to create an instant quote calculator with Gravity Forms
Gravity Forms provide excellent documentation on how to get started with creating online forms in WordPress.
I'll talk you through the specifics of using Gravity Forms to create an instant online quote calculator for your website. We'll base this on our own quote calculator. If you want something different then you can follow these steps in conjunction with the official documentation.
I've added a screenshot of our own price calculator so you can see how it looks in the WordPress admin. You can also download it directly here.
Front end
Back end
1. Add the quote calculator title and description
First, create a new form in the 'Forms' section of the WordPress admin. Add the form title and description. When you add the form to the page, you can choose to show or hide these. On our quote calculator, we show them at the top of the page.
2. Add headings
You can make your price calculator more user-friendly by adding sub-headings to divide up the form.
To do this, drag an HTML element from the right to the left - one for each heading. Add your heading content and format it as needed. This uses HTML which is a bit confusing for some people, so leave your headings as plain text if needed.
HTML elements are a good opportunity to add static information to your form which won't be part of the price calculations. So use it for headings, explanatory information, etc.
3. Add products
Now it starts to get a bit tricky!
Open up the Pricing Section Fields section on the right of the form editor screen. Drag a 'Product' from the right to your form on the left.
Choose 'Hidden' field as the product will just be used as a base price for your calculations.
In our calculator, we set the product price to £0 because we offer a free web design option and only charge for extras. You may want to add a base price here which will be added to all prices, even if your customers don't select any other options.
Most online quote calculators will just need 1 product, which is used for the base price.
We added 2 products because we use 1 product for the base price, and another to calculate the price for extra pages. To give you some background, our standard web design cost includes 4 pages and we charge a price-per-page for additional pages. To do this, we added a second 'Product' field in Gravity Forms to set the price per page. When we added the other options to the calculator (see step 4), we selected the Base Price product for most of the fields and the Price Per Page product for the extra pages field.
4. Add extra options
Next, drag some 'Option' fields from the Pricing Section Fields section on the right to your form on the left. Add one Option for each of the options you want to include in your instant quote calculator.
We added Option fields for:
Blog or latest news - this actually doesn't affect the cost so we set the price to £0
Online shop
Search engine optimisation (SEO)
Mailing list signup form
SSL certificate
Free website setup service - this is a bit more complicated because we have different prices depending on whether or not people want an online shop. To achieve this, we added 2 Options for 'Free website setup service', and used Conditional Logic to display the correct one depending on whether they have ticked the 'Online shop' Option. To use conditional logic, click the 'Advanced' tab when you edit the Option. You can show or hide the Option depending on which other Options have been selected. Have a play - it's really clever once you figure it out!
We also added extra pages as a Quantity field associated with a different Product (see step 3, above). This let us add an extra price depending on the number of extra pages people wanted for their website.
4. Display the total price quoted
Next, drag a 'Total' field from the Pricing Section Fields section into your form. This will automatically calculate all the other fields to create the total.
5. Bonus tip - monthly costs
Our requirements for the instant quote calculator are a bit complex as our quotes consist of one-off setup fees PLUS ongoing monthly pricing.
We used the 'Total' field (see step 4) for the one-off quote, which was fairly straightforward. We added a static HTML element to display the monthly pricing.
The monthly pricing changes depending on which options are selected in the form. To achieve this, we used conditional logic to display different HTML elements depending on the options selected. This is a bit of a workaround, but suited our purposes and is the only way to do it in Gravity Forms.
6. Add a 'Submit my quote' section
Once someone has calculated an instant quote on your website, you presumably want them to submit the quote to you and place an order!
You can do this by adding more fields to the end of the form - either on the same page or a different one. (To divide your form into multiple pages, drag a 'Pages' element from the `Standard Fields' section on the right.)
Add fields for name, email address, phone number etc. A Submit button will automatically be added to the bottom, which you can reword in the form settings tab.
7. Configure the form settings
Now go back to the top of the page and go through all the settings and notifications. Make sure the quotes will be sent to the correct address, the 'Success' message is relevant and professional, etc.
8. Add the form to a page
Finally, go to edit any page or create a new one via Pages > Add New. You'll see an 'Add Form' button above the toolbar. Click this and insert your form into the page.
Save the page and start testing your form!
9. Test, test, test!
Online price calculators are complicated, with lots of possible options. Spend a long time testing every combination and make sure your sums are all correct. Make any tweaks to get it just right.
Styling the form
We did some custom styling to ensure the website quote calculator matches our overall branding and colour scheme.
Gravity Forms looks pretty good on most websites straight out of the box, so you may not need to restyle it. You can restyle your website quote calculator using CSS. If you don't know how to do it, I recommend posting a job on Codeable. Their panel of pre-approved WordPress experts will bid for the work so you can easily find a good developer for the right price.
Help, I'm stuck!
In this tutorial, I've explained how we created our own instant online quote calculator so that people can get web design prices online. Your needs will inevitably be different and the logic to get your pricing right can be quite complicated.
If you get stuck, your first port of call should be the Gravity Forms documentation. This contains a wealth of knowledge. You can also contact Gravity Forms support for help in getting your online price calculator just right.
Do you have an online quote calculator for your website?
Have you set up an instant quote calculator on your own website? Did you use Gravity Forms or is there another tool you'd recommend? Please let me know in the comments below.
In WooCommerce, it's surprisingly difficult to charge different shipping costs to England, Wales, Scotland, Northern Ireland, Republic of Ireland and the Channel Islands.
It's all very well and good for countries like the US where you can set the shipping cost for each state individually. But WooCommerce treats UK countries such as England, Scotland and Wales as a single country, even though postage costs to each country can vary.
Sadly, there are no WooCommerce plugins to do this for you. This tutorial will teach you how to charge separate shipping rates for each UK country.
It's quite a fiddly process so if you can't be bothered to do it yourself, skip to the end of this article and sign up to be notified when we release a new WordPress plugin for WooCommerce shipping to different UK countries.
1. First, select which countries you sell to
The easy bit is to set up shipping for the Republic and Ireland and the Channel Irelands Jersey and Guernsey. The reason this is easy is because they're separate countries. This means that you don't have to set add postcode areas for each one.
Go to WooCommerce > Settings in the WordPress admin and find the 'Selling Location(s)' option.
If you sell to customers worldwide, set this to 'Sell to All Countries' or 'Sell to All Countries, Except for...'
If you only sell to specific countries, enter them here. Make sure you enter United Kingdom, Republic of Ireland, Jersey and Guernsey as they're treated as separate countries in WooCommerce.
Add the same information for the 'Shipping Location(s)' field below.
Scroll down and click 'Save changes'.
This will tell WooCommerce which countries you accept orders from and where you will ship your products. Lots of people enter 'United Kingdom' thinking that it includes Jersey and Guernsey, not realising that people from the Channel Irelands can't order from them.
2. Add a Shipping Zone for each postage rate
Next, go to the Shipping tab in the WooCommerce settings. You need to create a separate shipping zone for each group of areas that will have its own postage costs. For example:
If postage to England & Wales is £10 and postage to the other countries is £20 then you should add 2 shipping zones - 1 for England/Wales and 1 for elsewhere.
If each country or region will have different postage rates then you should add each one as a separate shipping zone - e.g. England, Wales, Scotland, Northern Ireland, Republic of Ireland, Scottish Isles, Isle of Man, Channel Islands etc.
If any of these areas will have the same postage cost then you can group them into the same shipping zone. This keeps it simple - if England and Wales have the same shipping rate then there's no need to add them as separate shipping zones.
The below screenshot lets you charge different shipping rates for England & Wales, Scotland & North Ireland, the Scottish Isles & Isle of Man, and the Channel Islands and Southern Ireland - so we added 4 shipping zones.
Now it's time for the complicated bit. You need to tell WooCommerce how to determine which customer is in which shipping zone. Unfortunately this doesn't happen automatically.
Hover over a shipping zone and click 'Edit'.
In the 'Regions' column, you will see a box titled 'Select regions within this zone'. This should only be used for entire countries that have a single shipping rate - for example if all Isle of Man postcodes will have the same shipping cost then select 'Isle of Man' here.
Click in the box to view a list of all the countries that you ship to. Select the countries that should be used for that shipping zone. This puts that entire country within a single shipping zone, so DO NOT select any countries that you're dividing into multiple shipping rates. For example, if you are charging separate postage for England and Scotland then don't add United Kingdom into this box - instead, you need to add the individual postcode areas (see step 4).
If you need to divide a country across multiple shipping zones then click the 'Limit to specific ZIP/postcodes' link. A box will appear underneath where you can add the postcodes for that shipping rate. At the end of this article, I've provided a list of UK postcodes divided by area/country. This will hopefully save you a lot of time.
3. Add your Shipping Methods
Once you've added your WooCommerce shipping zones, it's time to add all the shipping methods. Each shipping zone needs one or more shipping method.
To add a shipping method, click the + icon on the right of the shipping zone.
Select the type of shipping method and click 'Add shipping method'. This will add the method to the 'Shipping Method(s)' column on the WooCommerce Shipping Zones page.
Next, click on the shipping method you just created and fill in all the information to set it up.
Repeat the process to create all the shipping methods for each zone.
4. Test your WooCommerce shipping rates
Finally, you need to thoroughly test your shipping rates. To do this, log out of your website and add a product to the cart. Go through to the checkout and use the shipping calculator to test the postage from various countries and postcode areas.
If something isn't working properly, it can be tricky to figure out what has gone wrong. Something must be wrong with the logic somewhere - for example you might have accidentally added the same area to 2 shipping zones.
Some common pitfalls:
If the customer's default location in WooCommerce > Settings is set to 'Geolocate' then it's hard to accurately test the postage as the website can detect your location. Switch off this setting to test it more accurately.
Are you using wildcards incorrectly? For example, you might have entered E* to cover all the East London postcode areas. If you do this then ALL customers whose postcode starts with an E will be charged the England postage, even if they're in a different shipping zone - e.g. Edinburgh, which is EH*. To solve this problem, you need to add the 2-digit version of all the 1-digit postcodes that share a first letter with a postcode in a different shipping zone. In this example, you need to add E1*, E2*, E3* instead of just E*.
If a customer in the Isle of Man (for example) selects their country as 'United Kingdom' then they will be charged UK postage. This is fair enough, as they quite rightly think of themselves as within the UK. If this happens, it's worth adding the postcodes for the other countries into the relevant shipping zone just in case. For example, you can select 'Isle of Man' AND add the Isle of Man postcode areas (IM*) to the Isle of Man shipping zone. This will allow you to charge the correct postage whether an Isle of Man customer selects their country as 'United Kingdom' or 'Isle of Man'.
5. Checklist - have you missed anything?
As you can see, it's quite fiddly to set up different shipping rates for each UK country/region. This checklist will help you ensure you haven't missed anything:
Have you added all the separate UK countries individually on the WooCommerce > Settings page?
Make sure you've created a separate shipping zone for each country/region that will have its own postage rate.
Have you accurately selected the correct countries and postcodes for each shipping zone?
Test the shipping costs from various countries and areas.
Would you like a plugin to set up shipping to different UK countries?
I completely understand that the process outlined in this article is very fiddly and difficult to get right. We're developing a WordPress that will do all this for you. If you're interested, please add your email address below and we'll let you know when it's available.
To help you add your postcode areas, here's a list of UK postcodes divided into country.
We created this by collating the postcode lists on several Wikipedia pages and can't guarantee the accuracy, but hopefully it will save you time on defining the areas for your shipping zones. Please get in touch if you have any corrections to the list.
Our sortable table WordPress plugin - Posts Table Pro - lets you display various types of content from your WordPress website in a searchable and sortable jQuery table.
Based on the jQuery DataTables plugin, your visitors can view your posts, pages, or other content from your website in a fully sortable table.
You can set up the WordPress table to sort by any column by default, and you can change the default sort order. Your visitors can click the column headers to sort the table as they wish. They can also search for a keyword or filter the table by category, tag, custom taxonomy, etc.
In this video tutorial, I explain how to install and configure Posts Table Pro, using the example of a staff directory to help you create a sortable table. If you prefer written instructions, please see below for a step-by-step written tutorial.
The free plugin lets you display blog posts from your WordPress website in a searchable, sortable table. The Posts Table Pro plugin builds on this by adding support for custom post types, custom fields, and custom taxonomies. It has various other options to create more sophisticated sortable tables.
Posts Table Pro is perfect for many different use cases including:
If you have a staff custom post type, you could use it to create a staff directory
If you're storing data on books or music or something else then you can display it in a sortable table, WordPress member directory, or other types of directory
You might need a table of contents on your website, a content table, or an index of pages. You can display your pages using a sortable table
If you've got an e-commerce plugin, you can create a sortable table for your product catalog. (If you use WooCommerce, check out our dedicated WooCommerce Product Table plugin)
As you can see, the Pro plugin lets you create sortable tables in WordPress for many use cases that aren't available with the free plugin.
How to set up the Posts Table Pro sortable table plugin
1. Install the plugin
First of all, you purchase the plugin on our website and download the plugin.
Then you go into your WordPress admin and go to Plugins → Add New.
Then you click Upload → Choose File and select the file from the link in your order confirmation email. This will save a zip file to your computer.
Once uploaded, click Activate.
After activation, the Posts Table Pro setup wizard will automatically open and guide you through entering your license key.
Now we'll use the plugin to create a WordPress Staff Directory. It will add a simple staff list to your website with links to the staff profiles. The list will appear in a searchable, sortable table. You can use the plugin to display various types of content, so this is just an example.
2. Add the information to display in the WordPress table
Post Table Pro's role is to create a sortable table of content already on your website. It does not create custom post types or taxonomies or anything, it just displays them. So you would add those previously using whatever method you're using to set up your website and data. You then get Posts Table Pro to allow you to display that data within a table.
If you want a separate 'Staff' section in the WordPress admin to store your staff data, I recommend the Easy Post Types and Fields plugin to create a custom post type and any extra fields of information. I used this to create a Staff custom post type and add various data relating to the staff profiles. Once you've decided how to store your staff data, go ahead and add all your staff members to the website.
3. Create your sortable table in WordPress
Upon installing the plugin, an automatic setup wizard will initiate, guiding you through the process of creating your first table. The setup wizard takes you through a step-by-step process, making it easy for you to create a sortable table that suits your needs.
To begin creating your sortable table, you'll need to provide a name for it and select the post type that you want to display. After that, you can choose the posts or pages that you wish to include in the table.
The plugin allows you to choose from a range of options, including posts, pages, and custom post types. Suppose you're building a database and want to include documents. In that case, you can select the custom post type option and proceed accordingly.
The plugin offers a wide range of customization options, allowing you to determine which columns to display and in what order. To add a new column, choose the column type from the dropdown menu and click "Add". You can also reorder columns by dragging and dropping the sort icon or column heading.
You can also add filters to your table. Filters appear as dropdowns above the table, and you can add as many as you like.
To customize the sorting options for your table, select the default sorting option and the sort direction that you prefer. This gives you complete control over the order in which your table is displayed.
If you're dealing with a large amount of data, you can enable lazy loading to improve the table's performance. This ensures that even when your table contains hundreds or thousands of items, it loads quickly and smoothly.
Next, you can choose how to sort your database, setting the default sorting option and the sort direction that you prefer. With all these options, you can create a table that is functional, easy to use, and visually appealing to your users.
Finally, once you have completed creating your sortable table using the Post Table Pro plugin, the setup wizard will confirm that you have finished and provide you with instructions for displaying the table on your WordPress site. You have two options for displaying the table: using the 'Post Table' block in the Gutenberg editor, or copying the shortcode from the table builder and pasting it anywhere on your site. This gives you the flexibility to place the table on any page regardless of its content.
Create sortable tables more easily
The Posts Table Pro plugin is a versatile and user-friendly tool for creating sortable tables on WordPress websites. With its easy-to-use setup wizard and customizable features, you can create sortable tables that suit your specific needs, whether it's for displaying blog posts, product listings, or other types of content.
The plugin's ability to add filters and customize sorting options makes it easy for users to navigate and find the information they need quickly. Overall, the Posts Table Pro sortable table plugin is a must-have for website owners who want to enhance their user experience and improve the organization of their content.
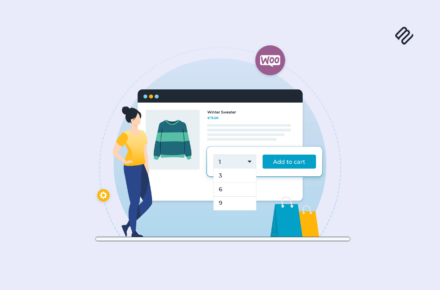
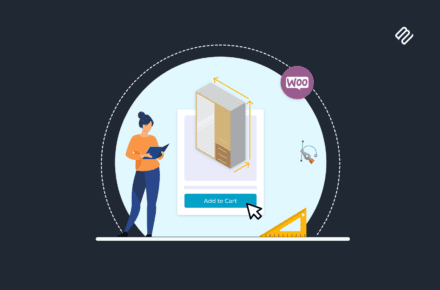
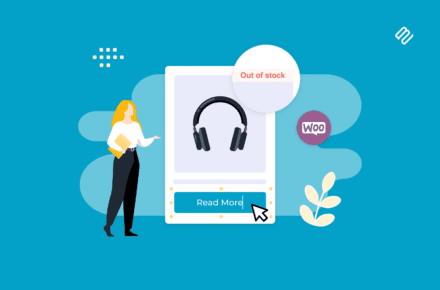

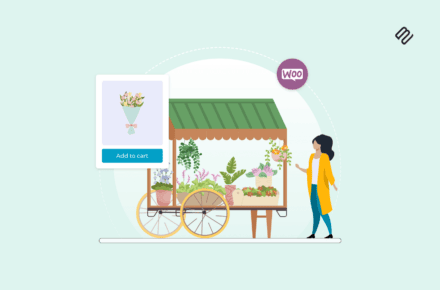
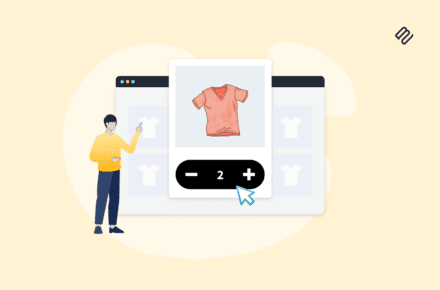

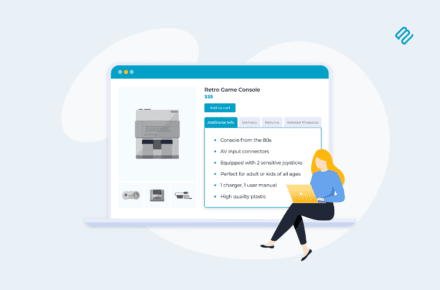
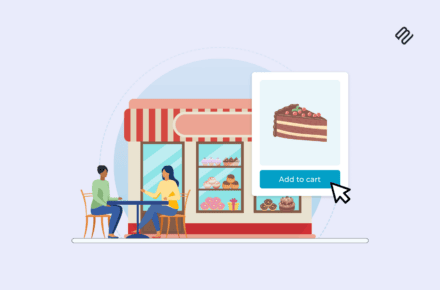

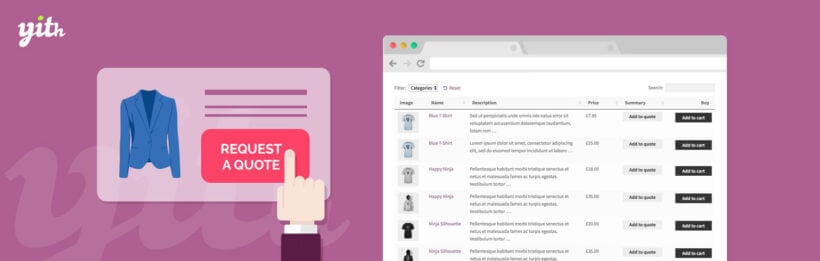

 The YITH WooCommerce Request A Quote plugin comes with a 'Request a Quote' page. This lists the products you have added to the quote request, and includes a form to submit the request.
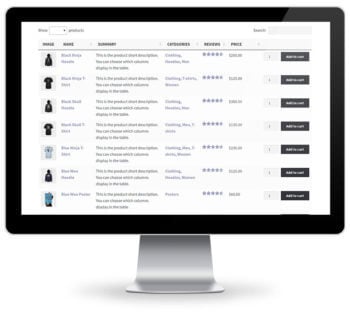

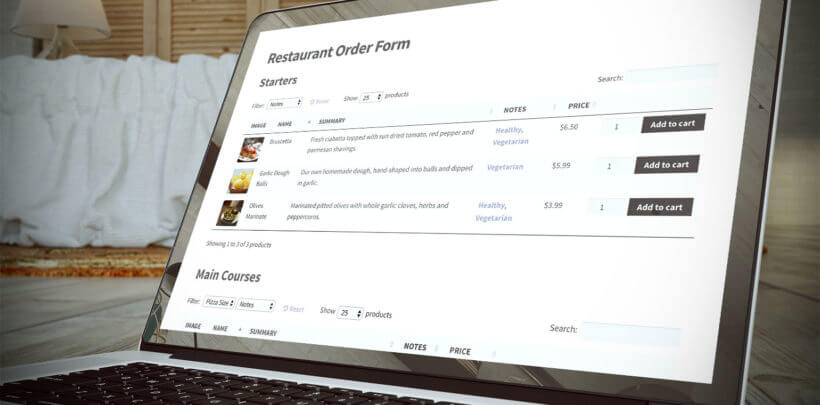


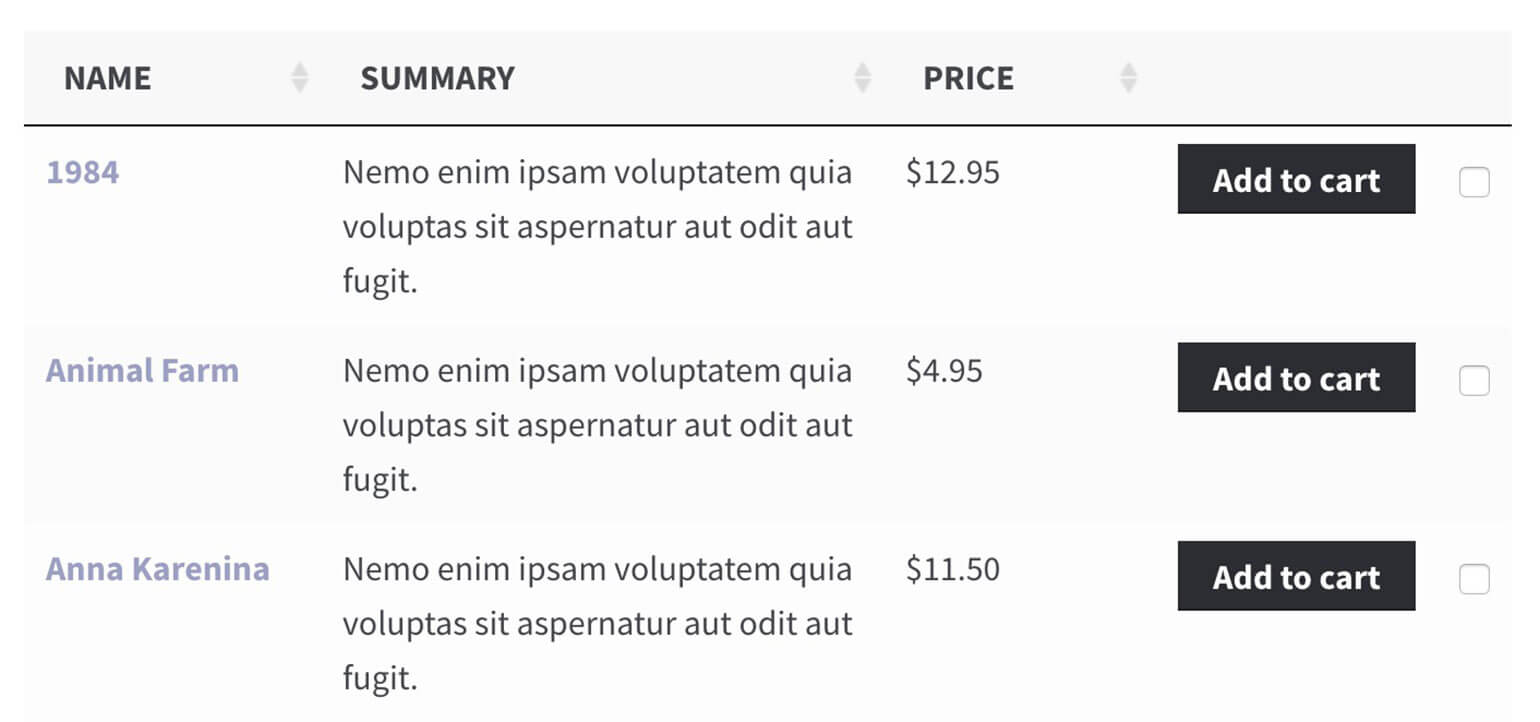

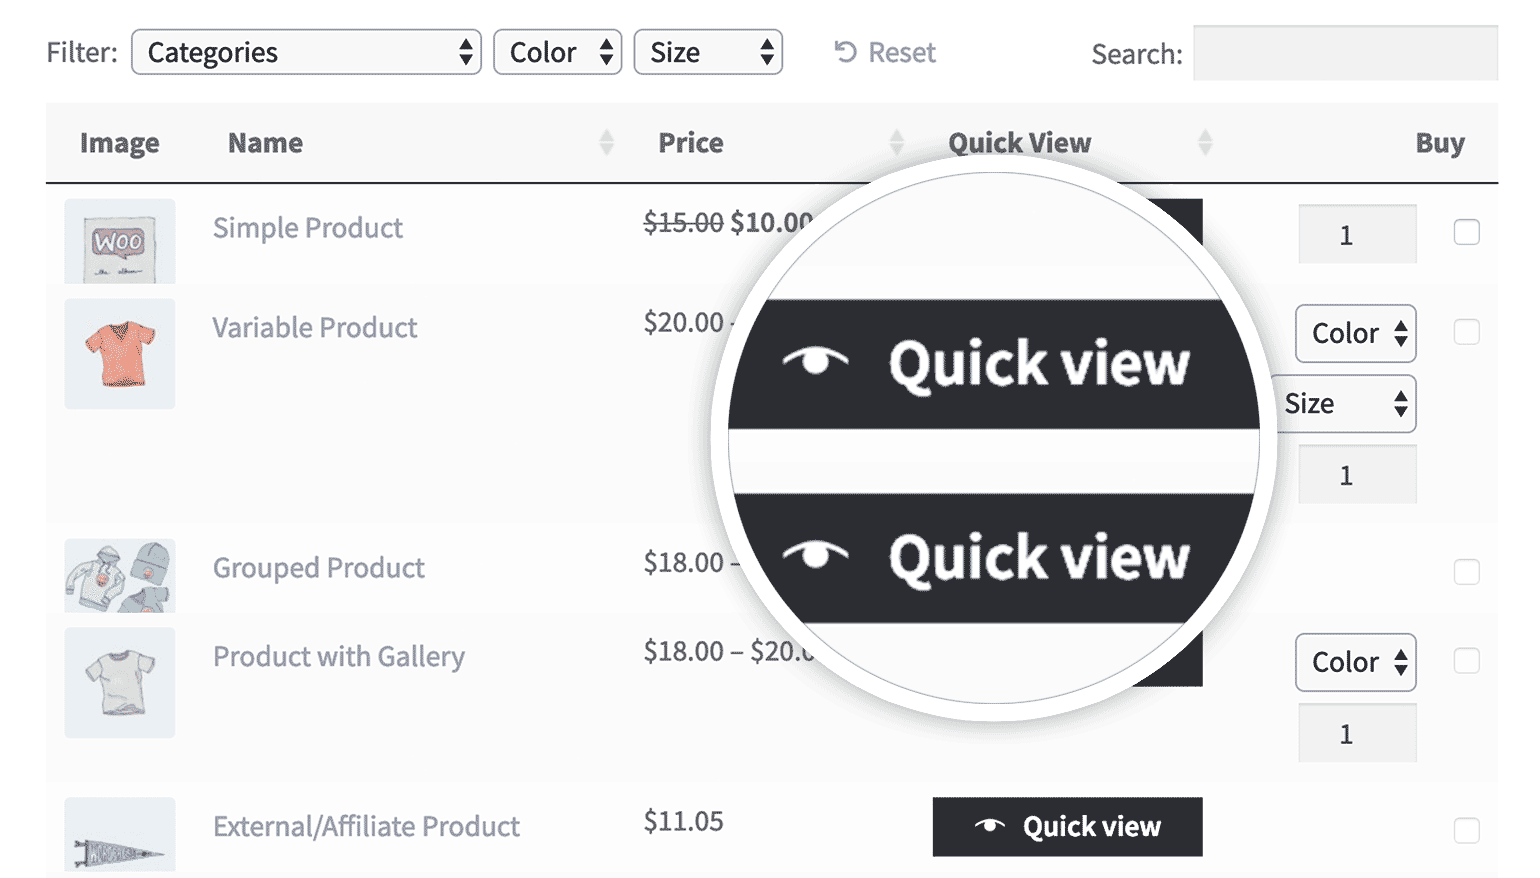
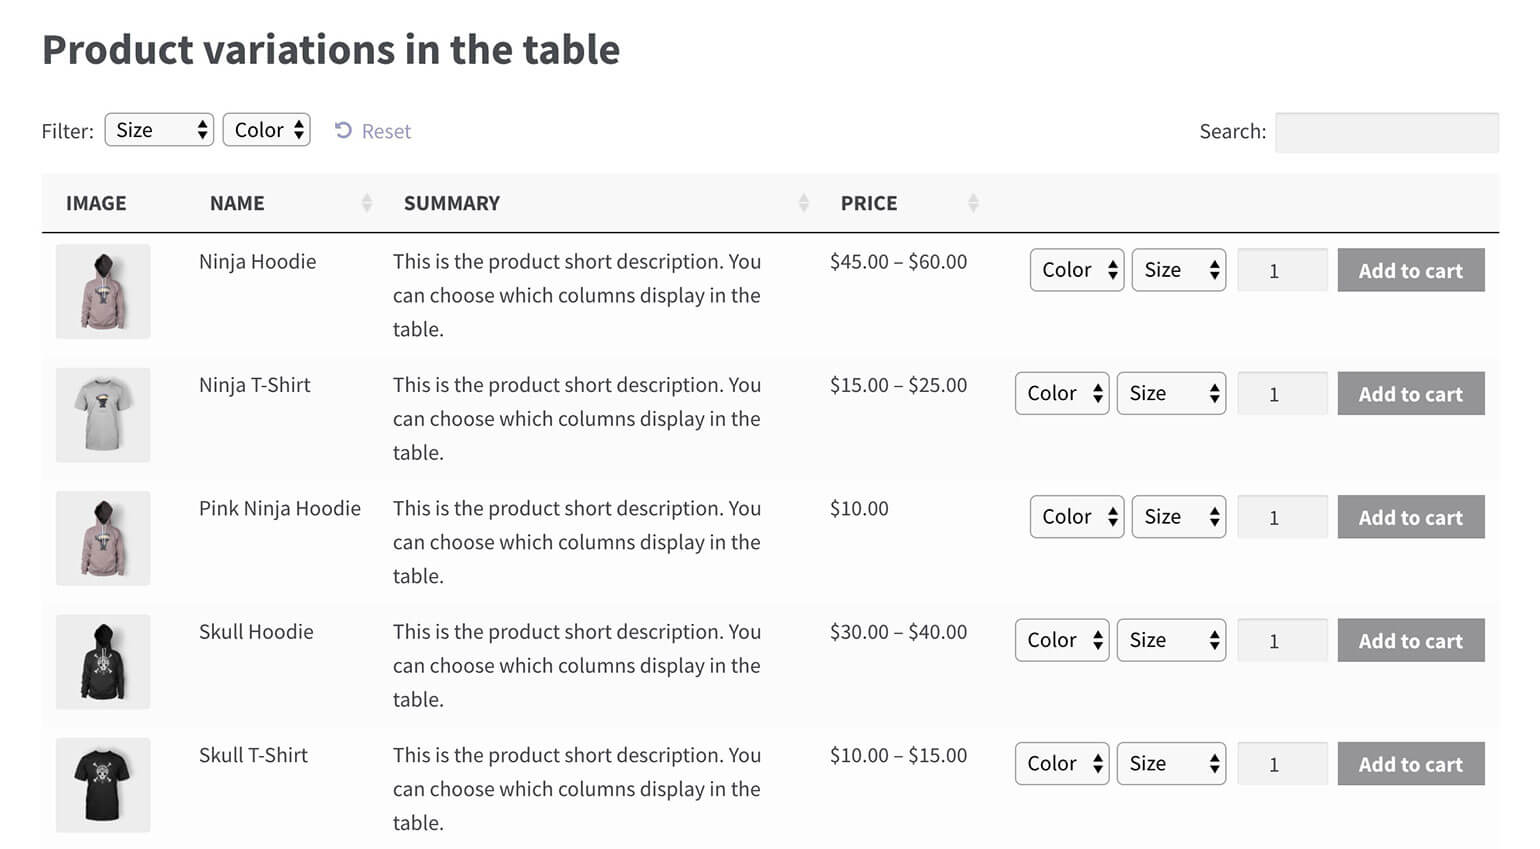
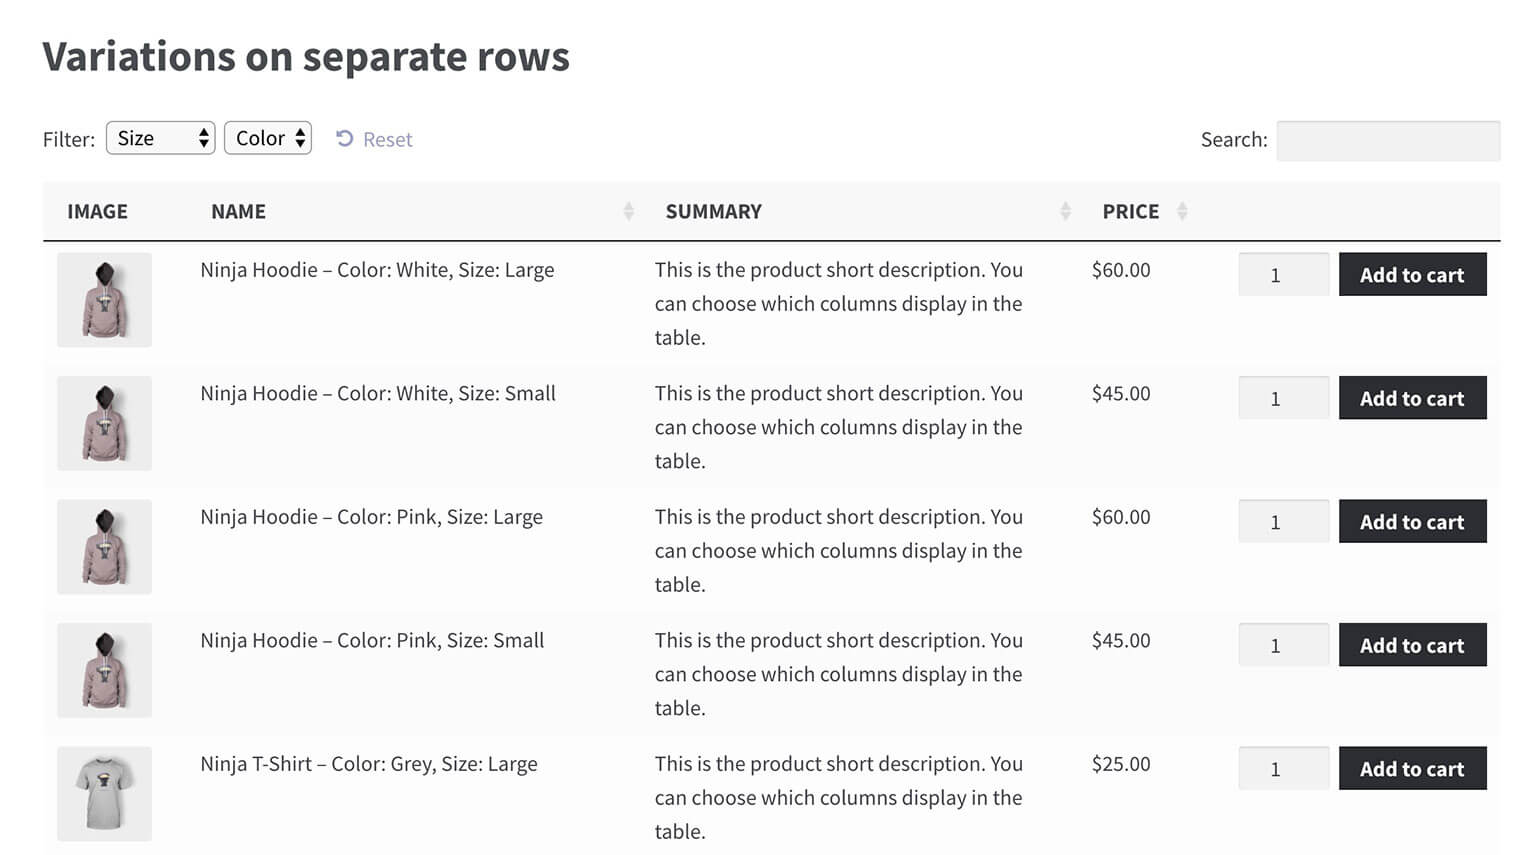
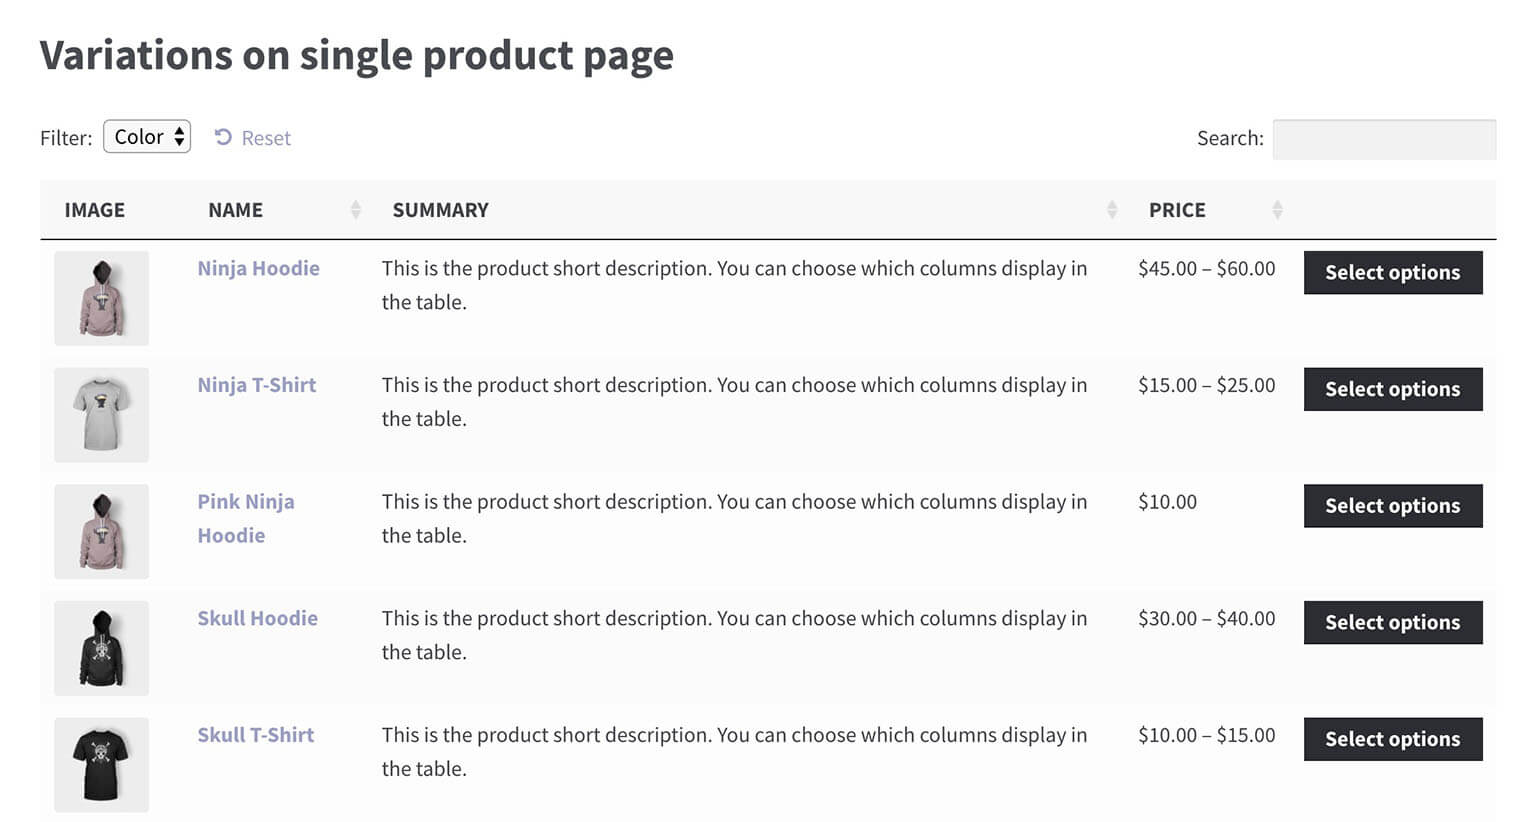

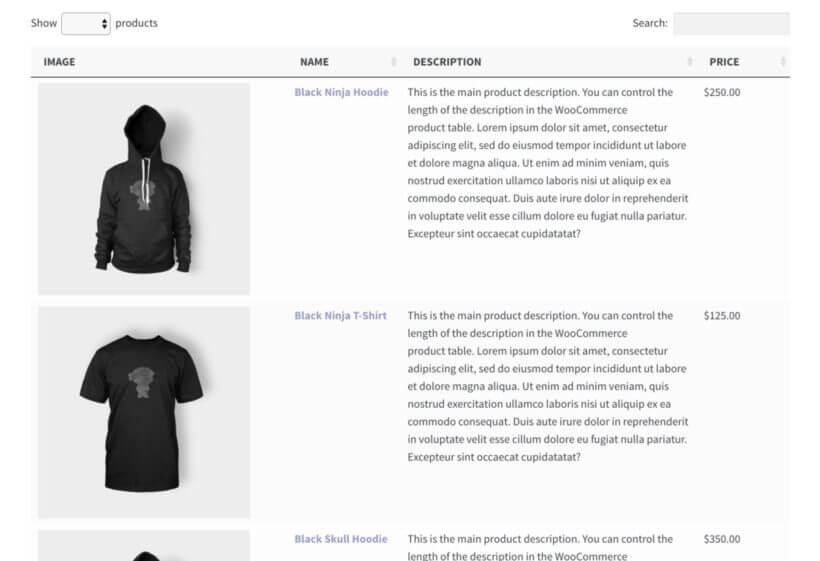
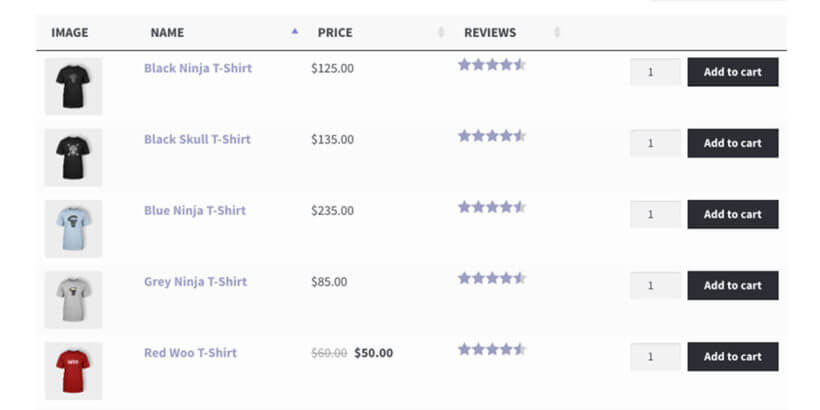
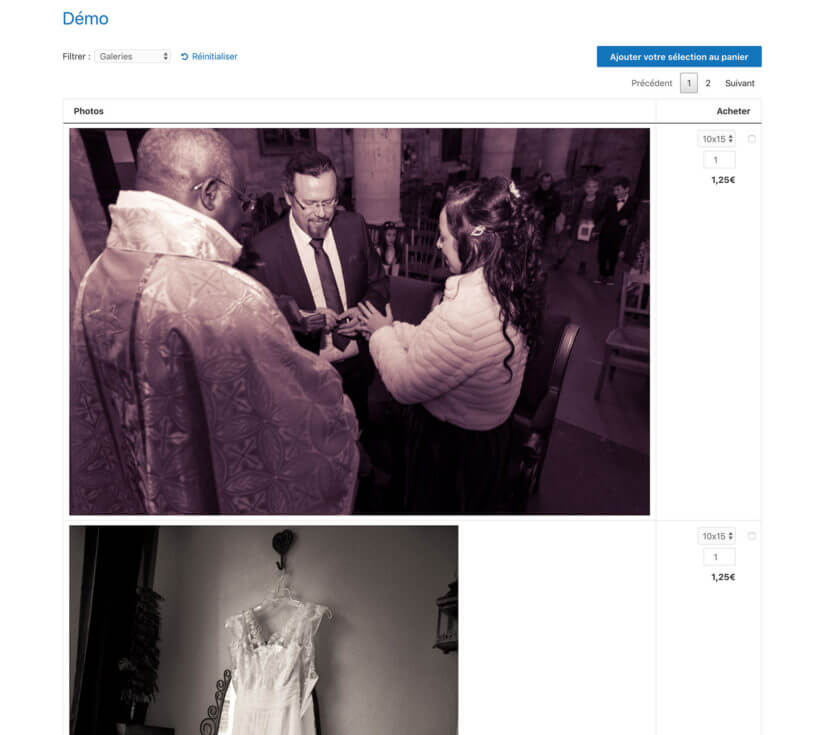
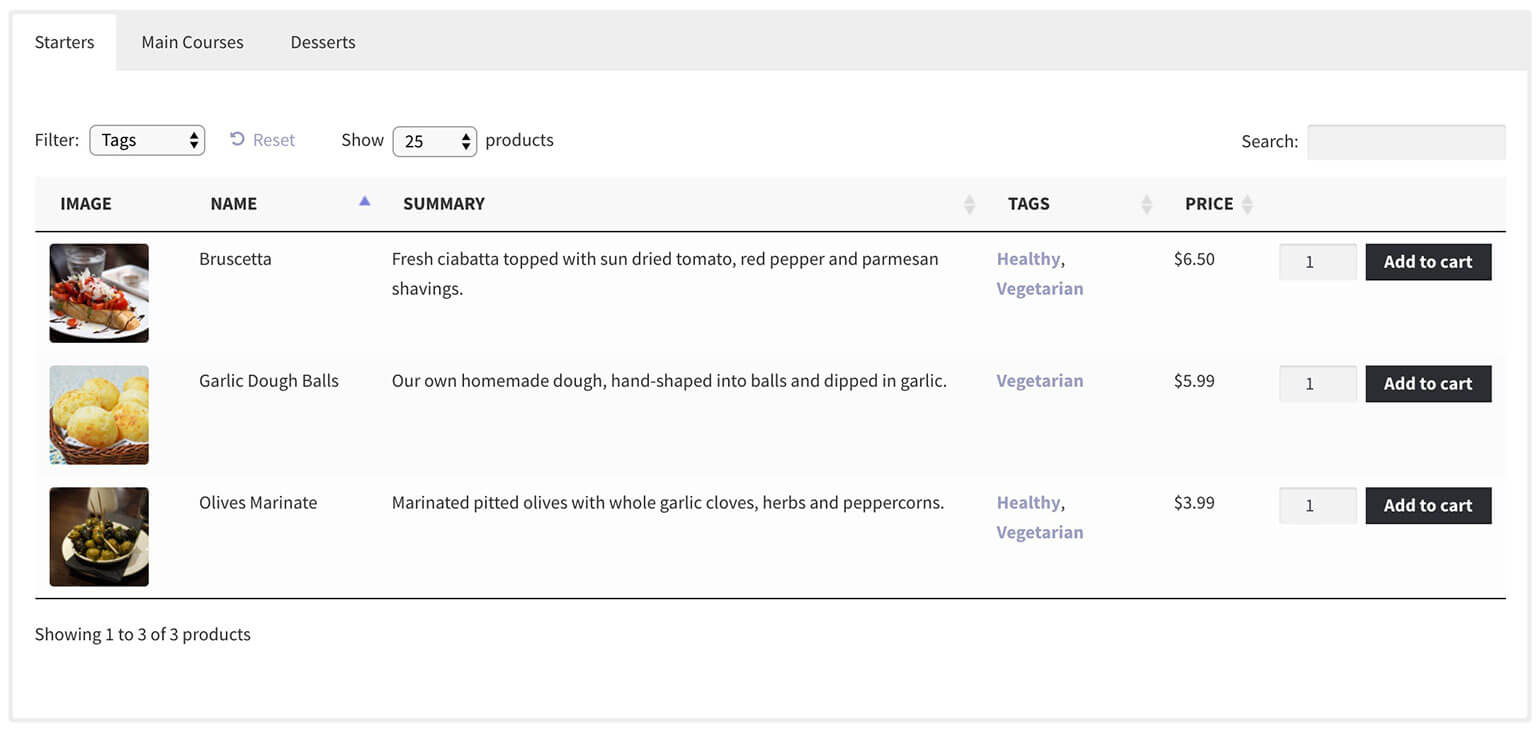
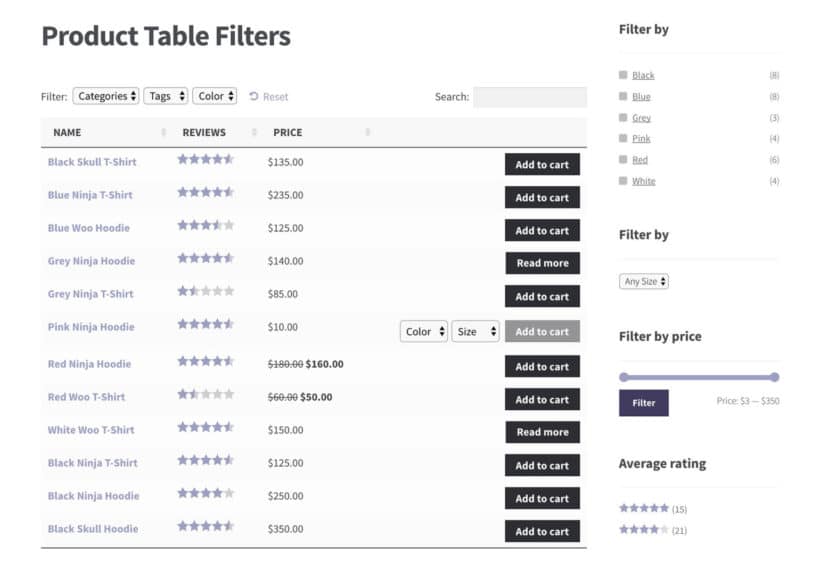
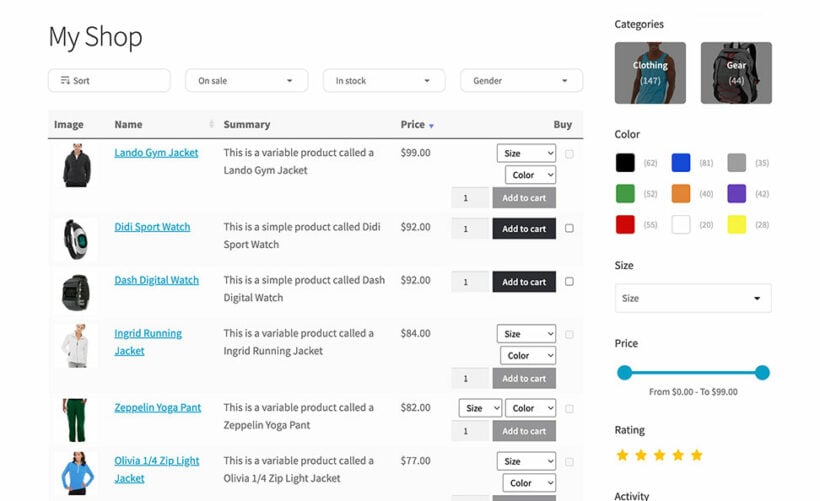
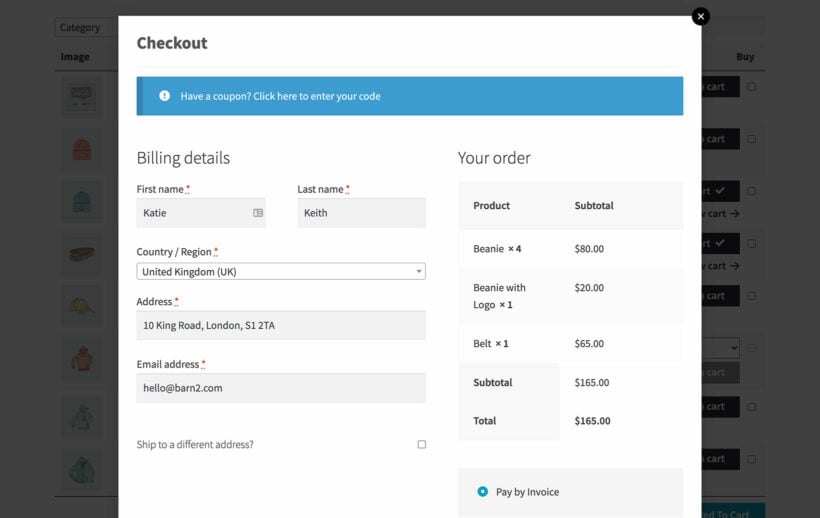
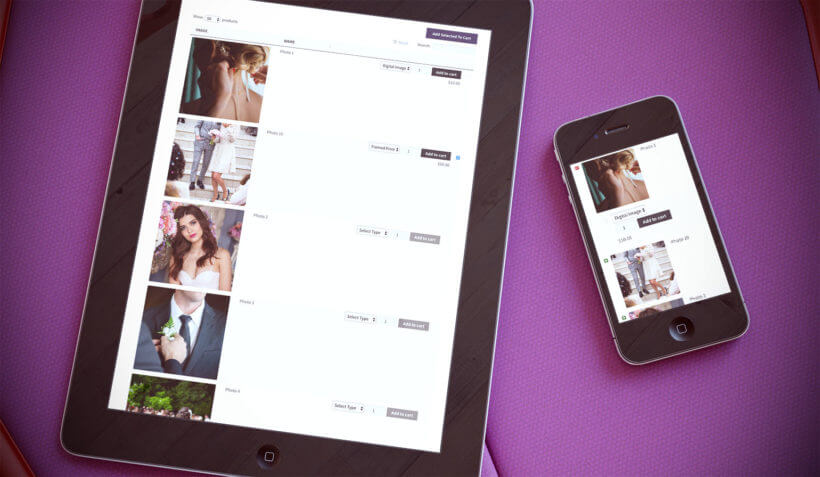 WooCommerce Product Table is responsive and mobile-friendly straight out of the box. Resize your browser to see the table resize before your eyes.

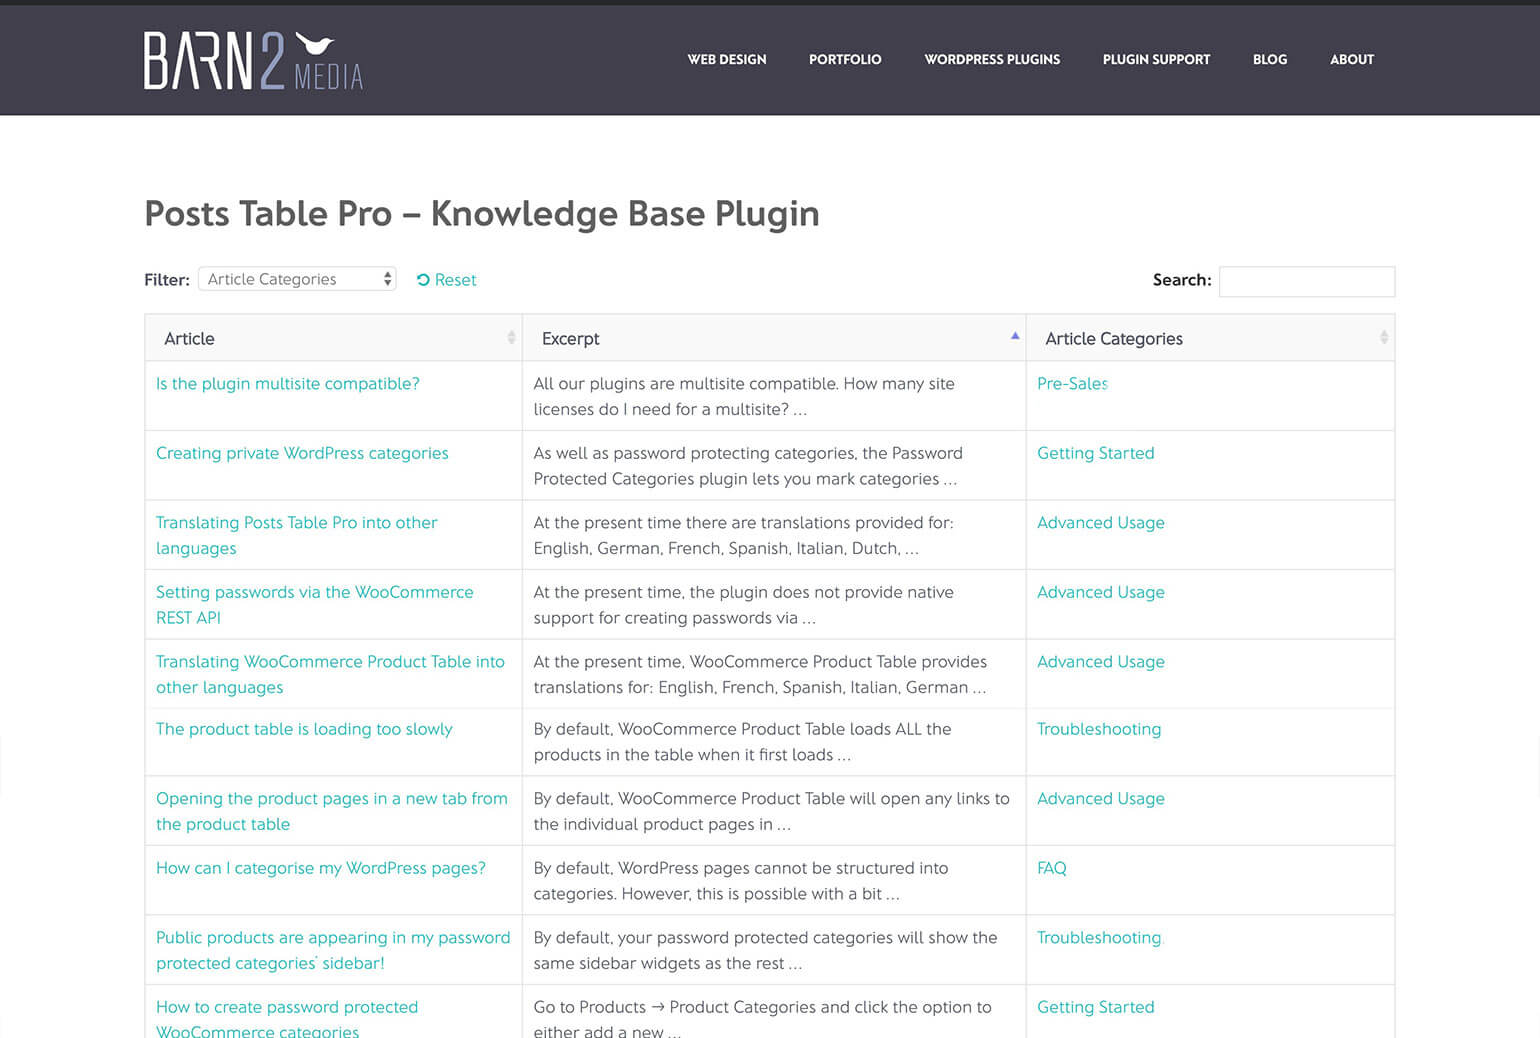
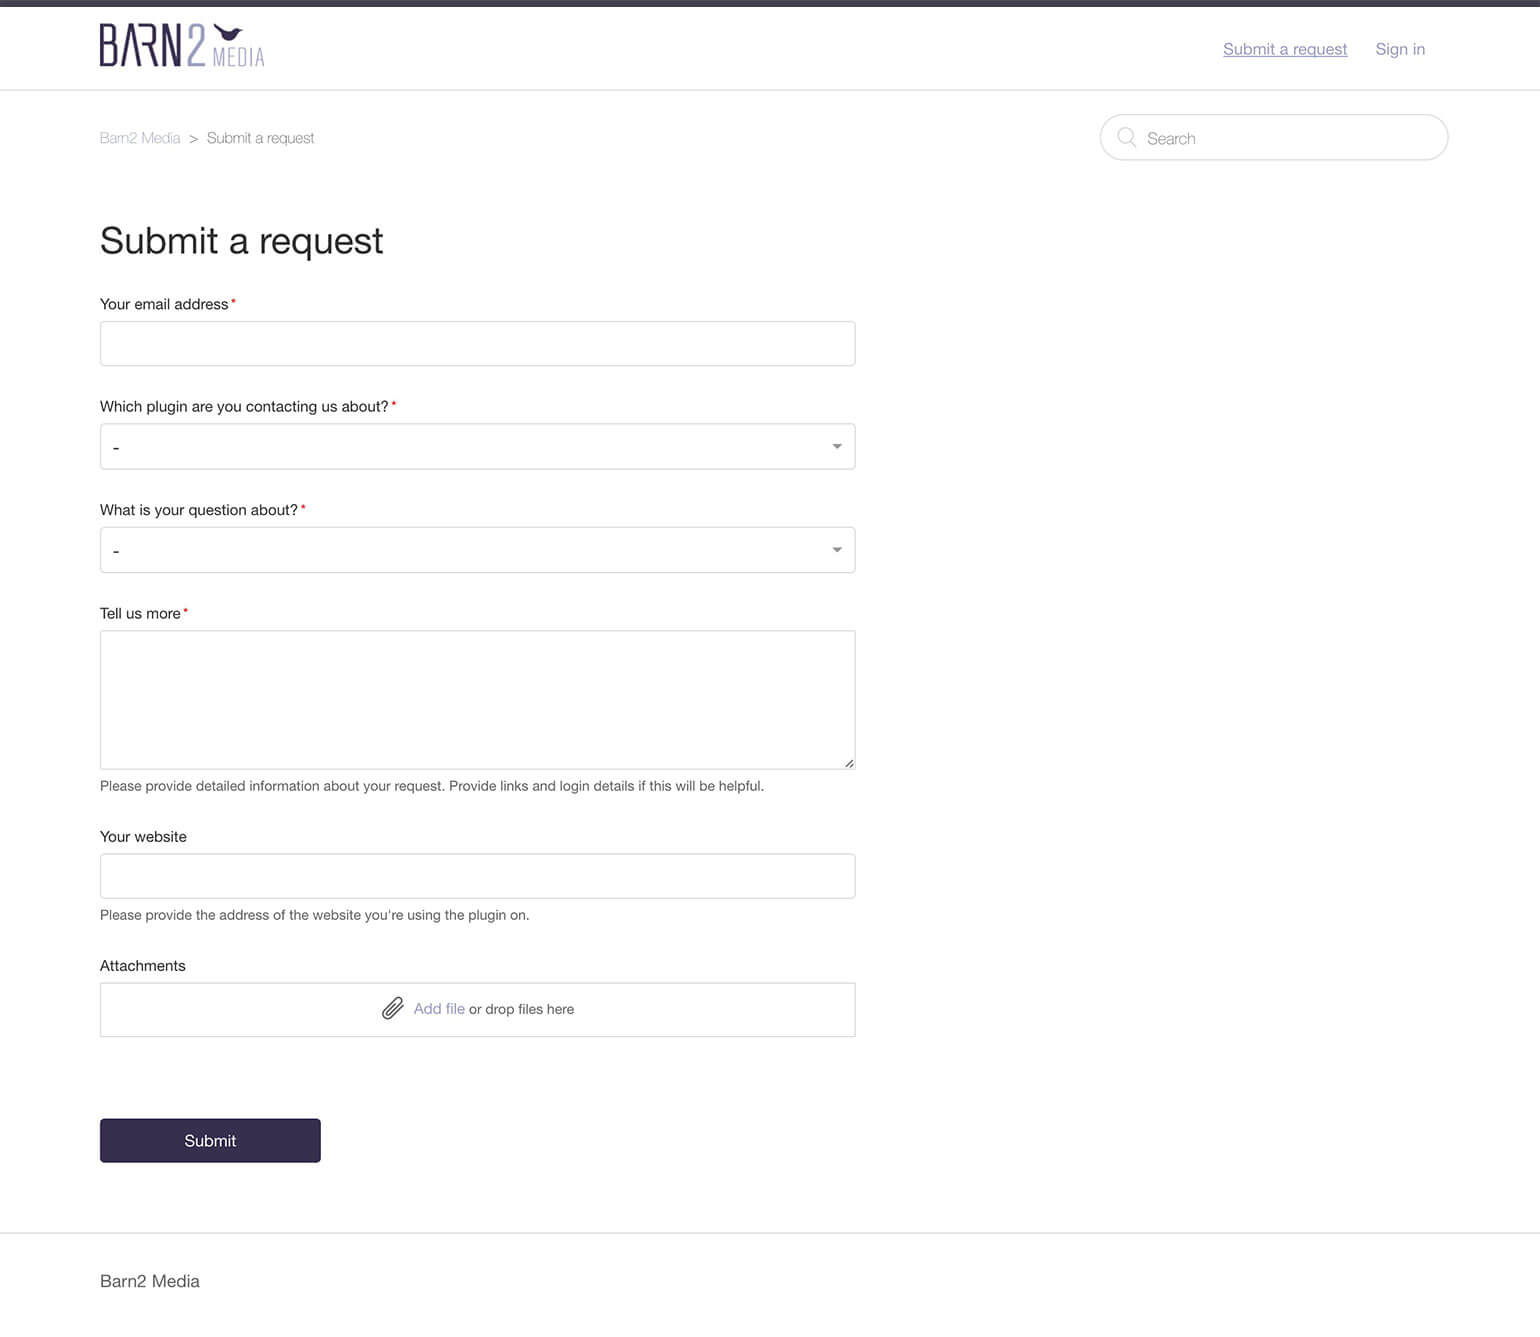


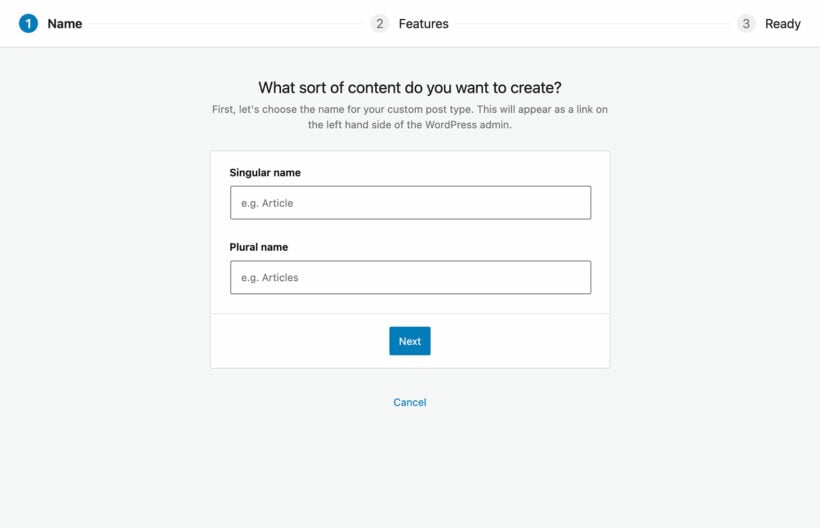
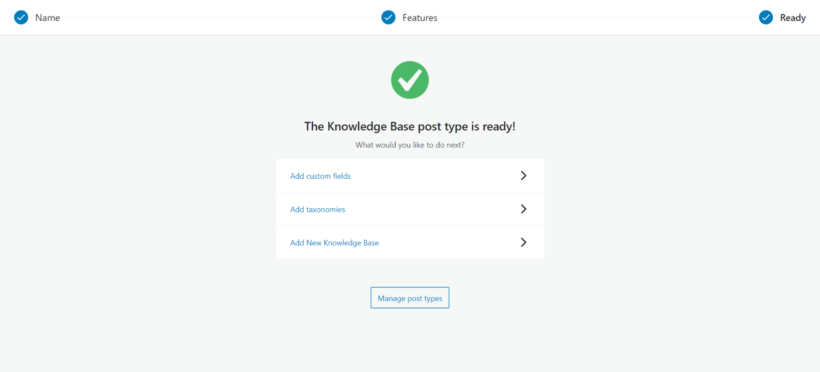
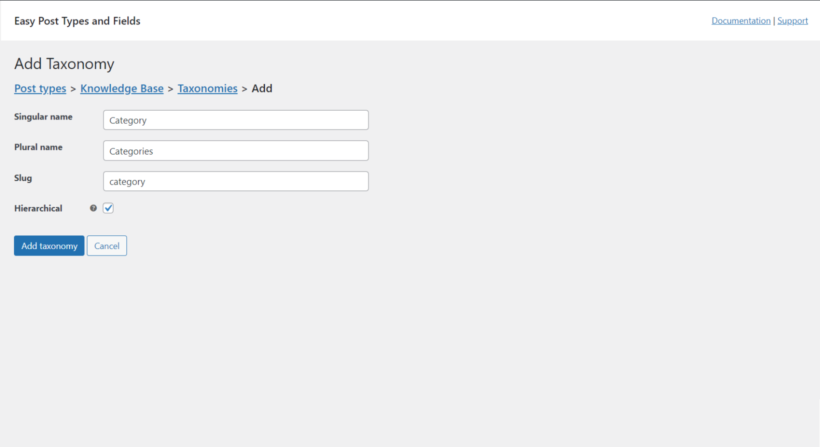
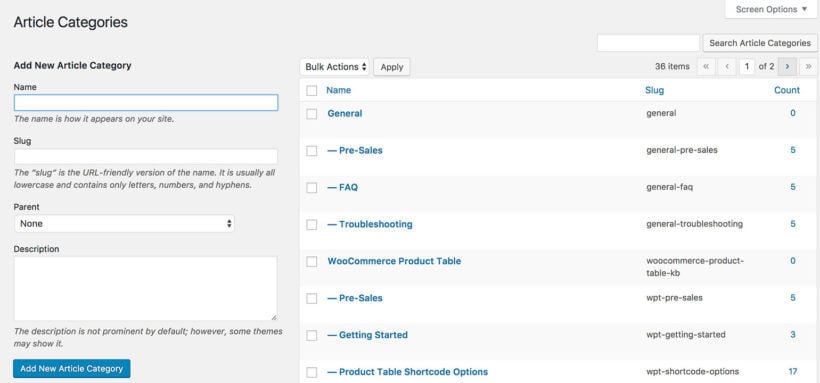
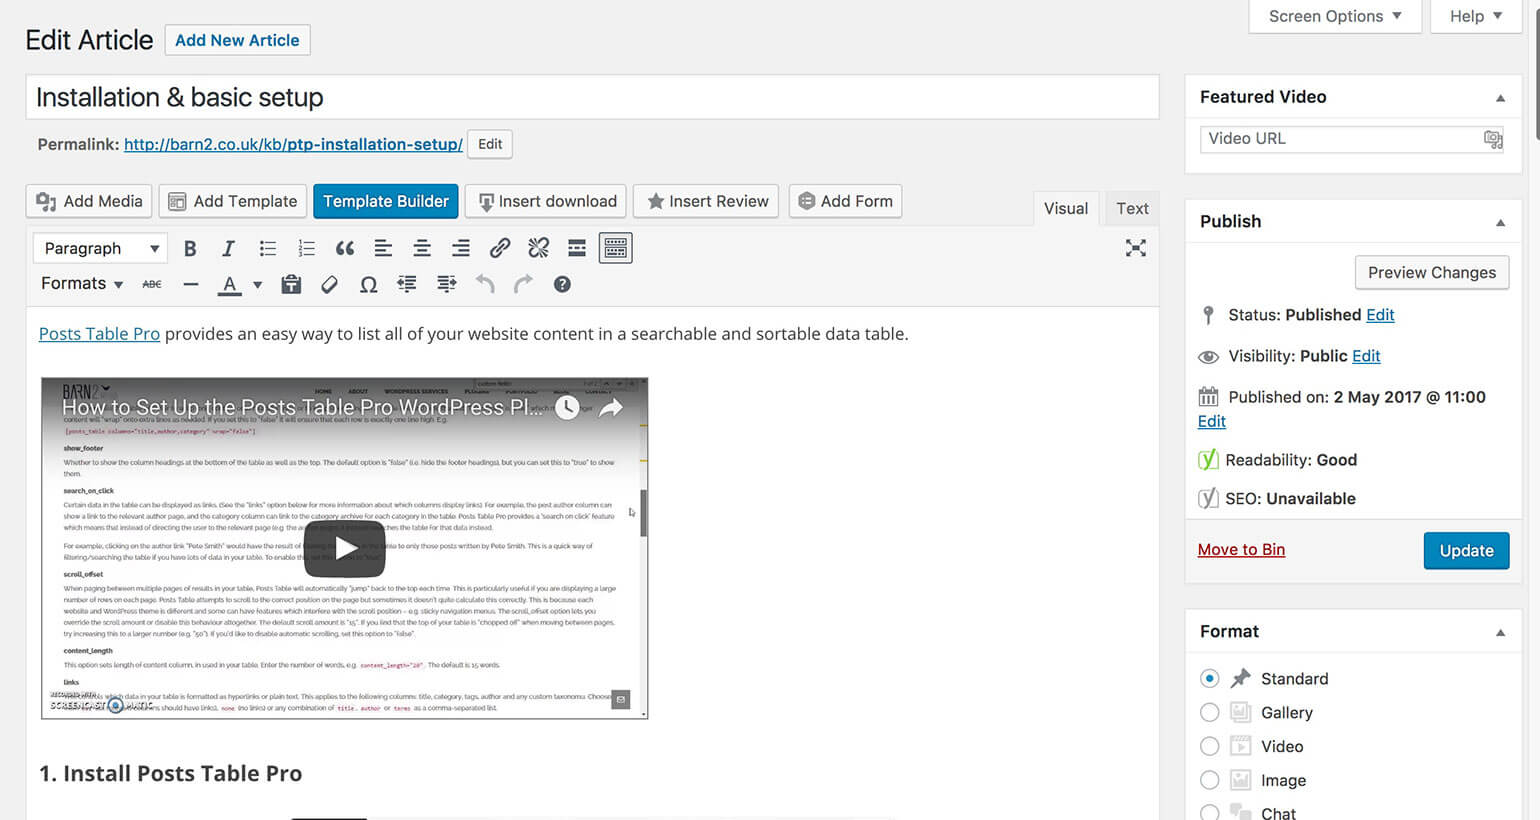
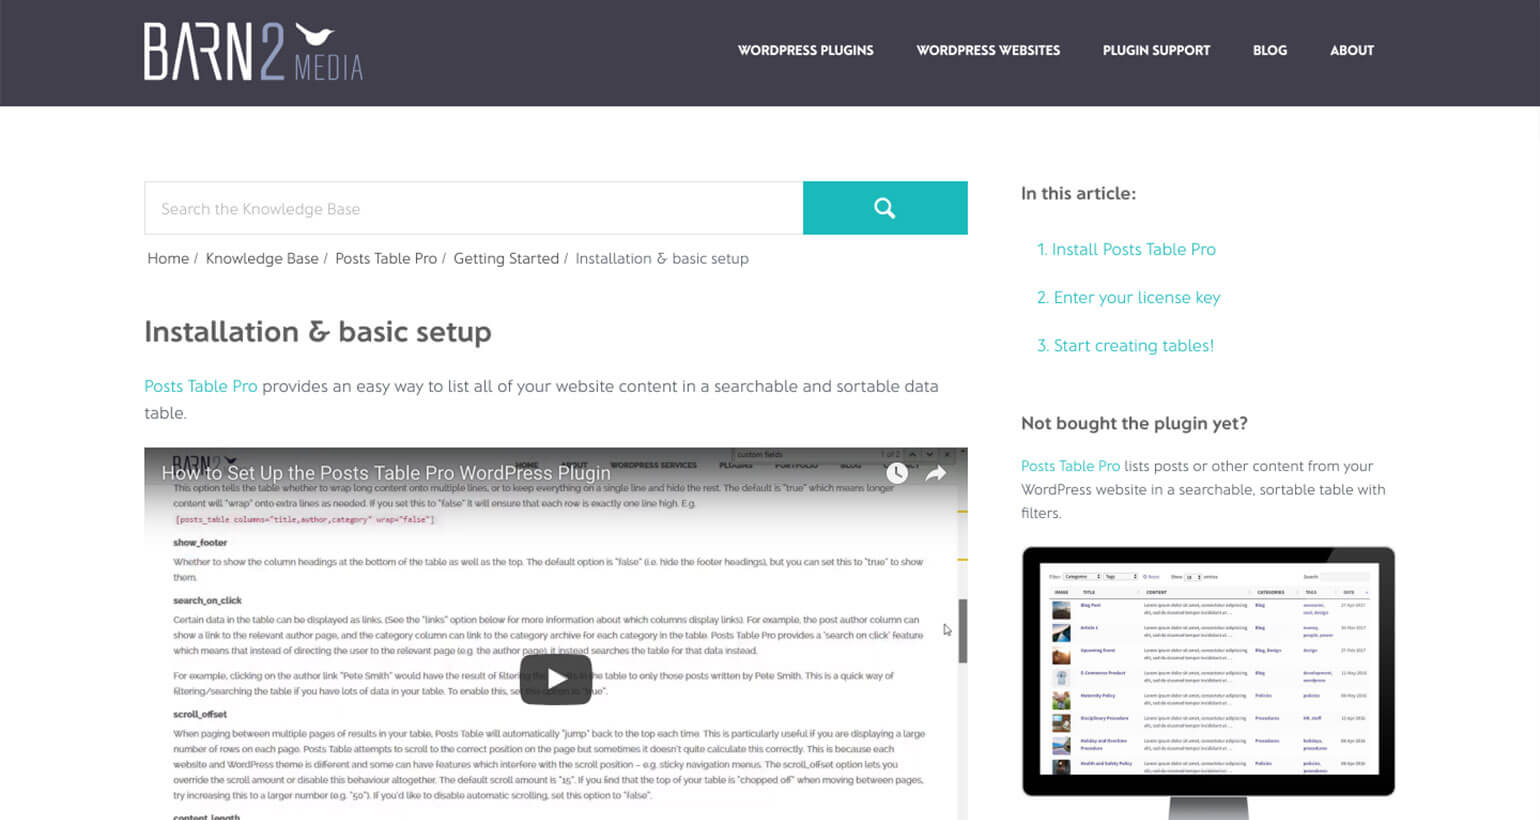
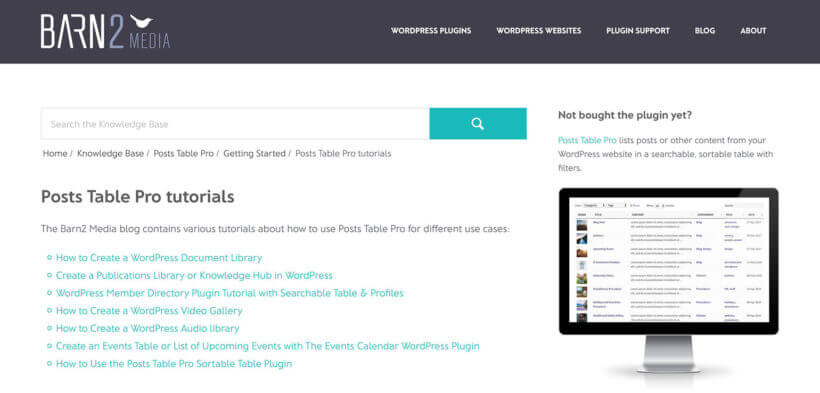
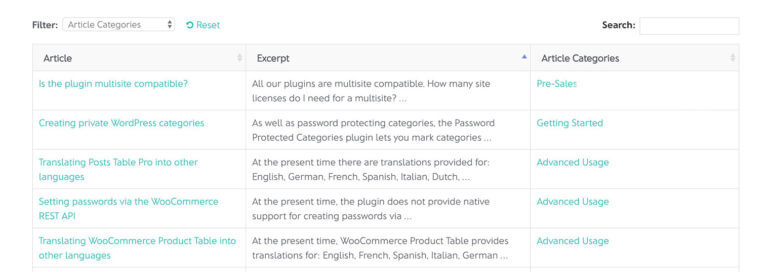
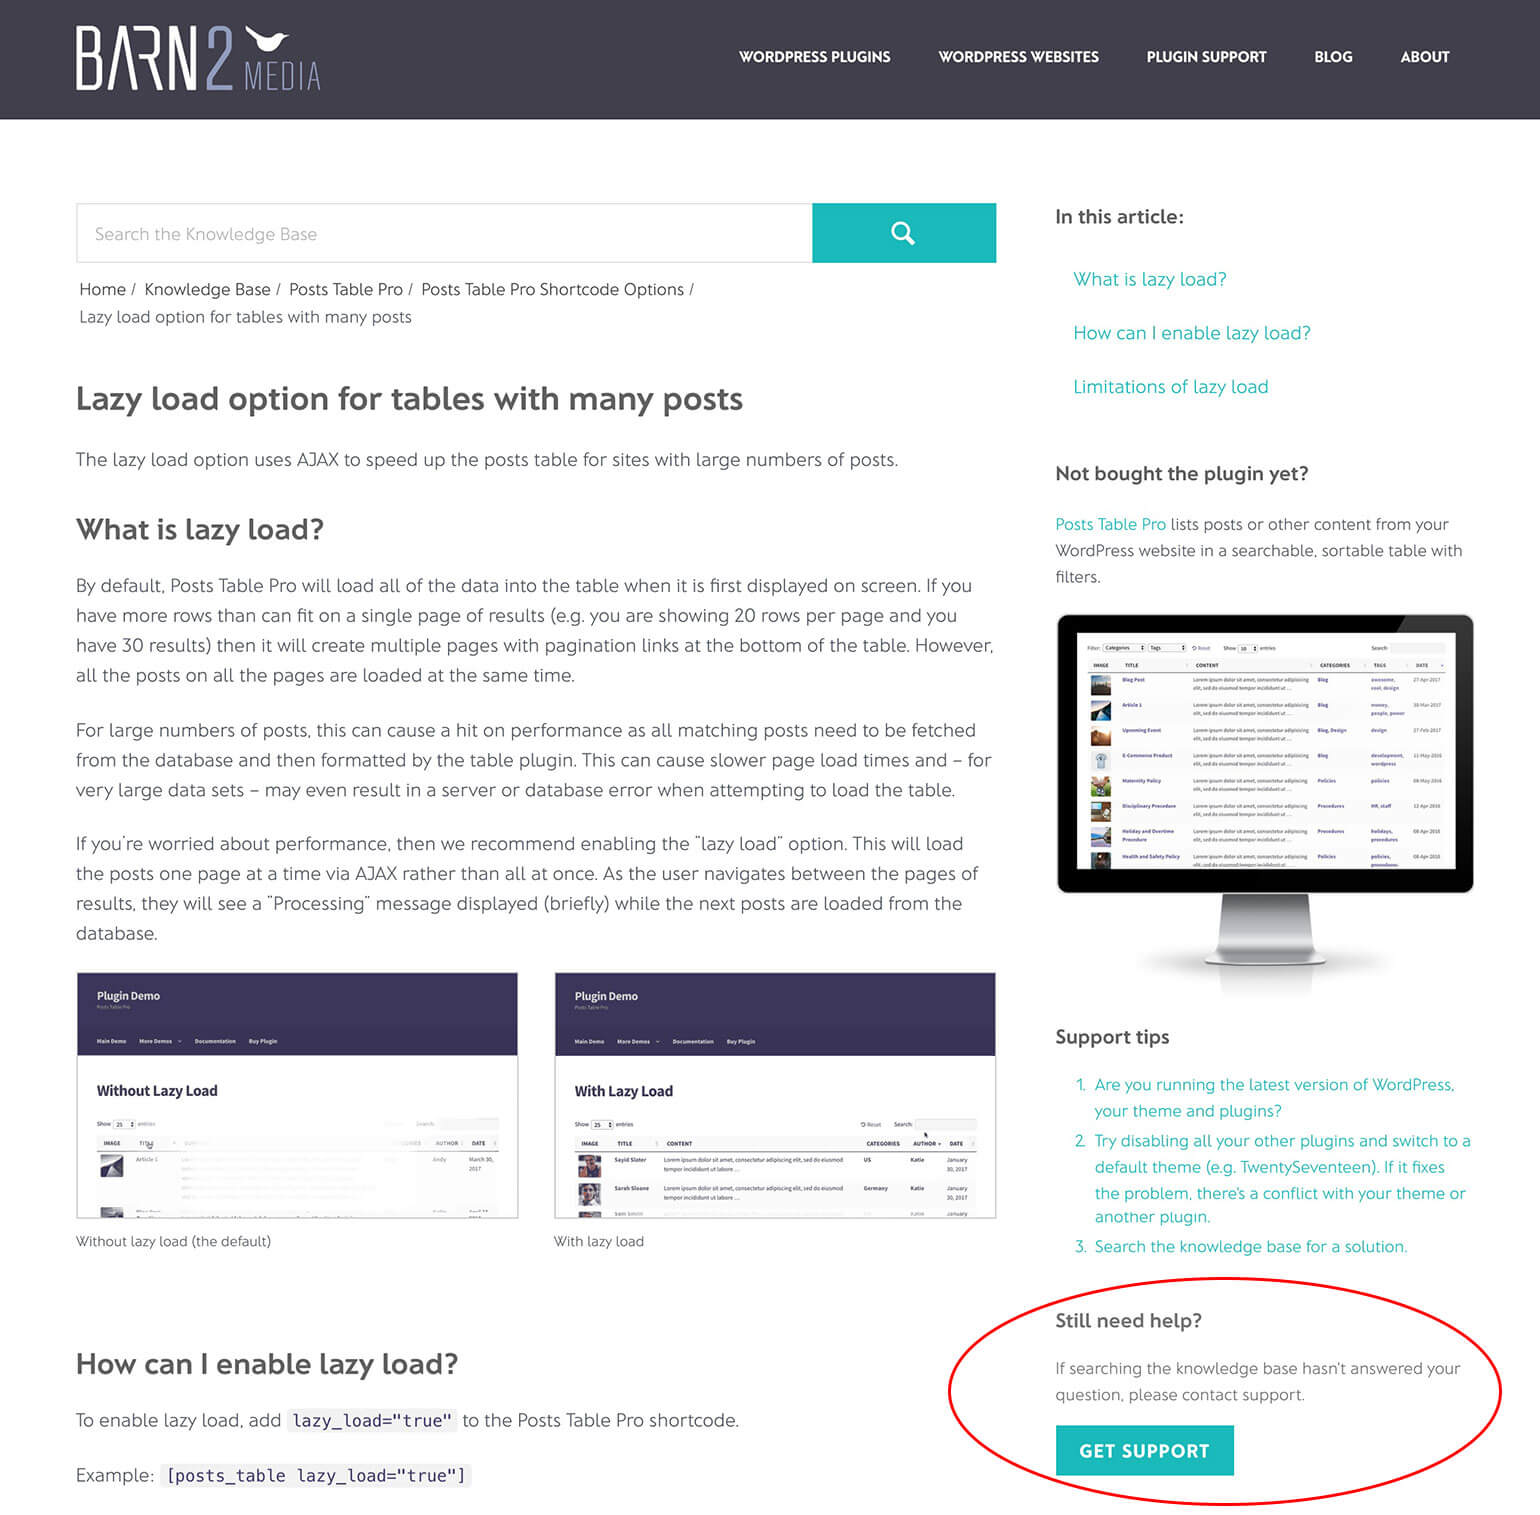
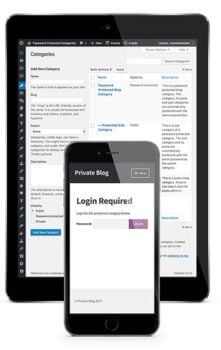 Finally, I'll provide some tips on how to hide your knowledge base from the public view. This is useful if your knowledge base is part of your main website, but you want to restrict the documentation to existing customers only.
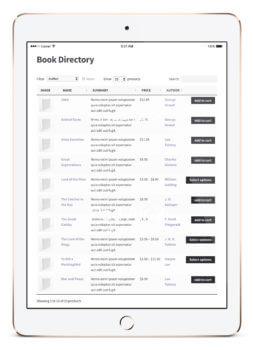 Many WordPress websites sell large numbers of books. A good directory plugin can be used as a WooCommerce bookstore plugin.
 If your WooCommerce directory plugin supports embedded audio players then you can use it as a music or audio directory.
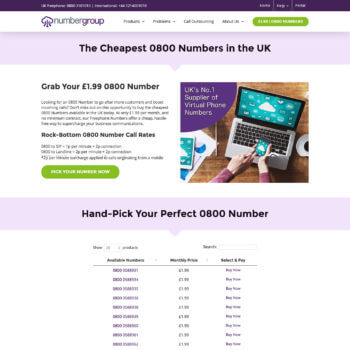
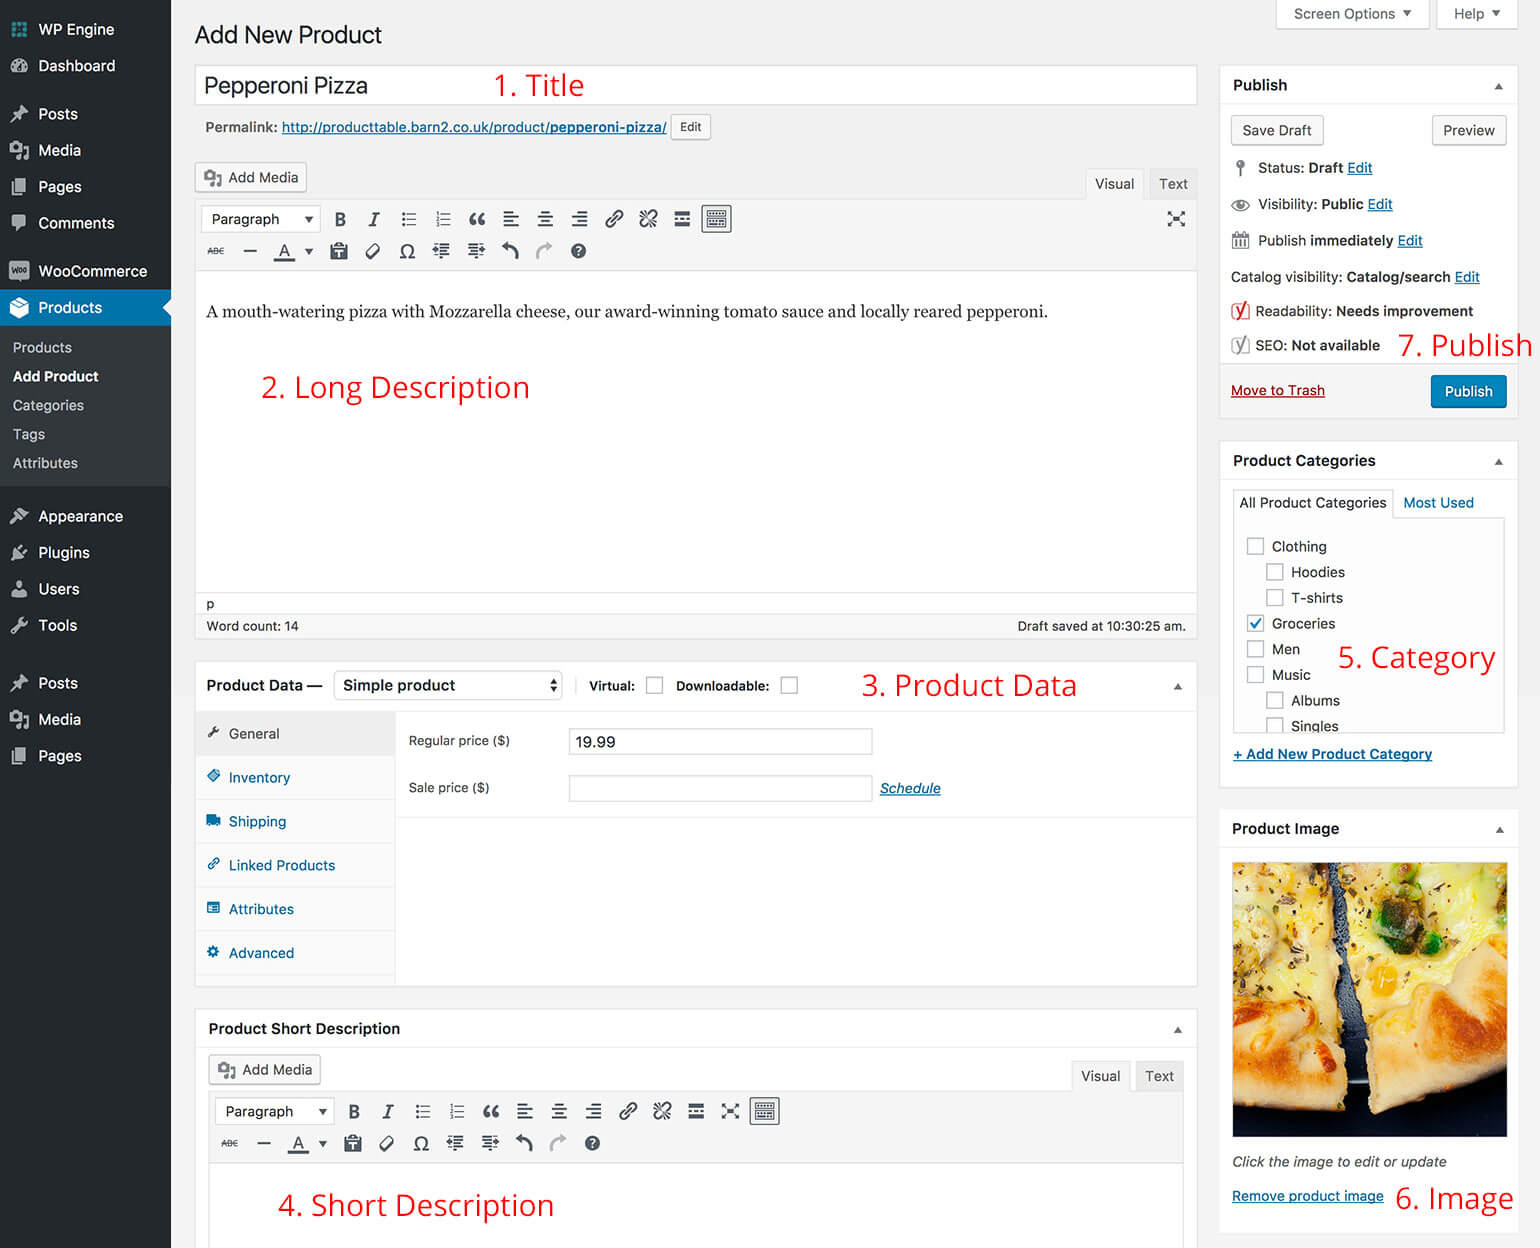

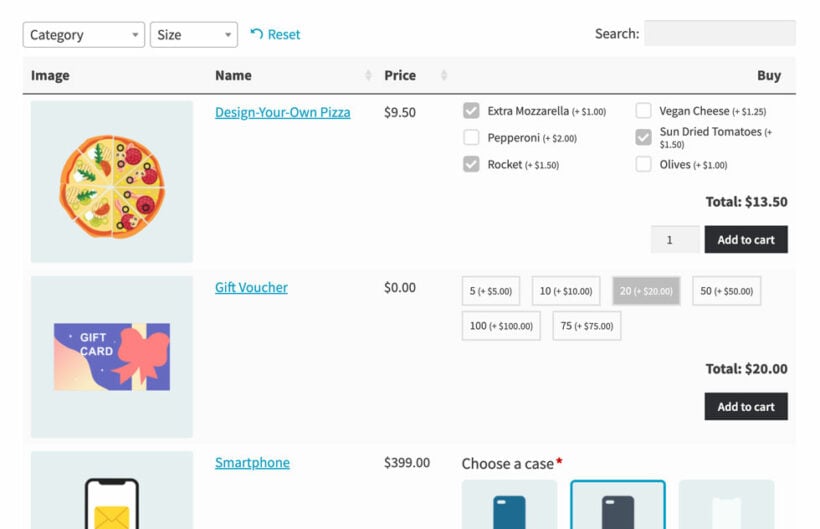

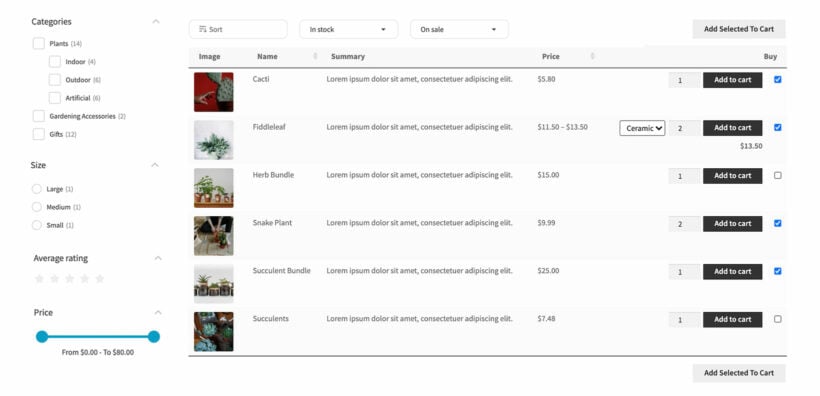


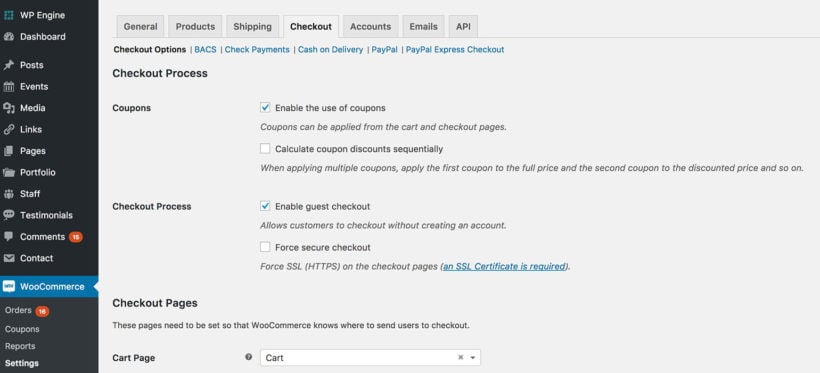
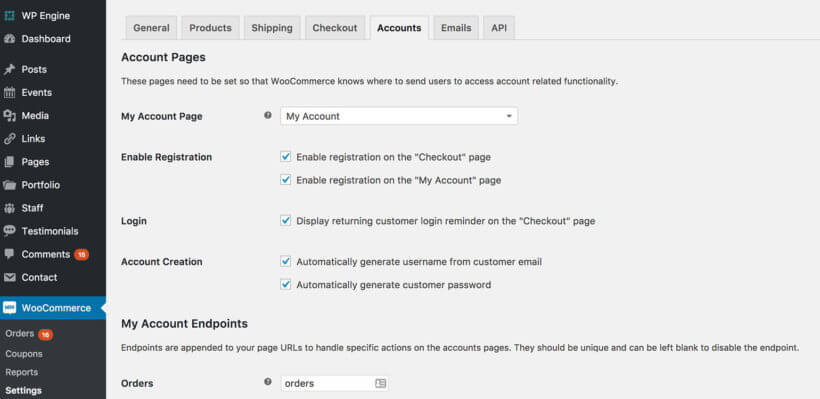
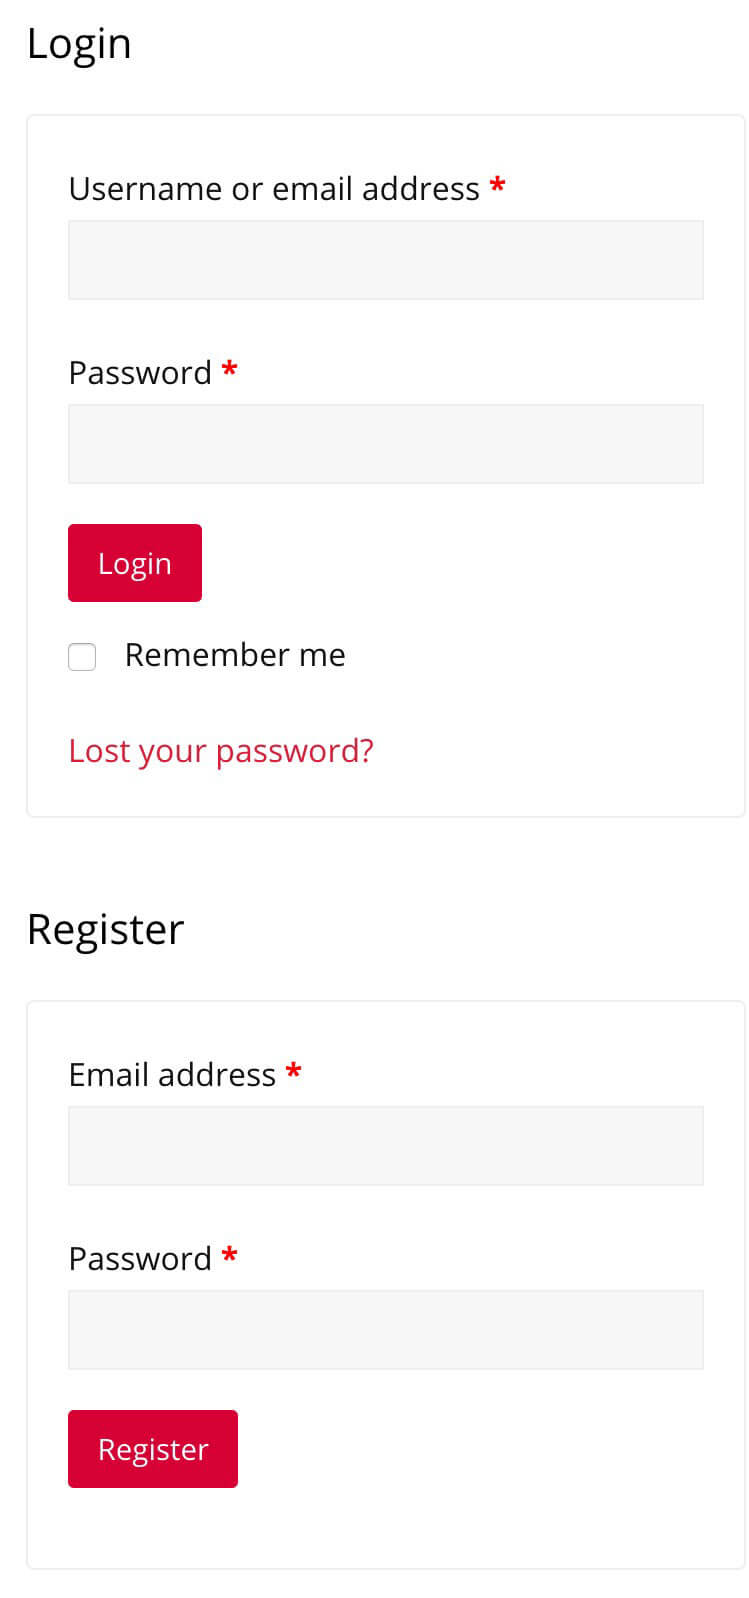
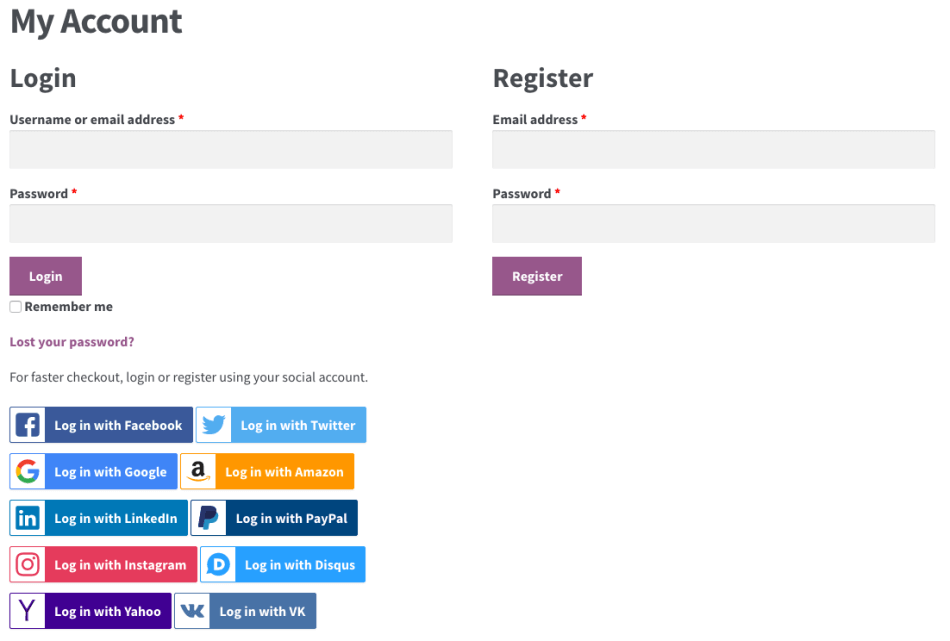
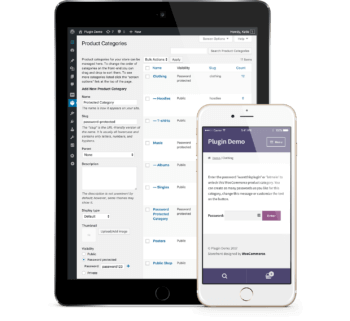 Options 1 and 2 are about letting customers log in to a public WooCommerce store. They might have to log in to purchase, but anyone can browse the store and see the products. You can also create a WooCommerce login system where customers have to log in or enter a password in order to see your products or other store content.
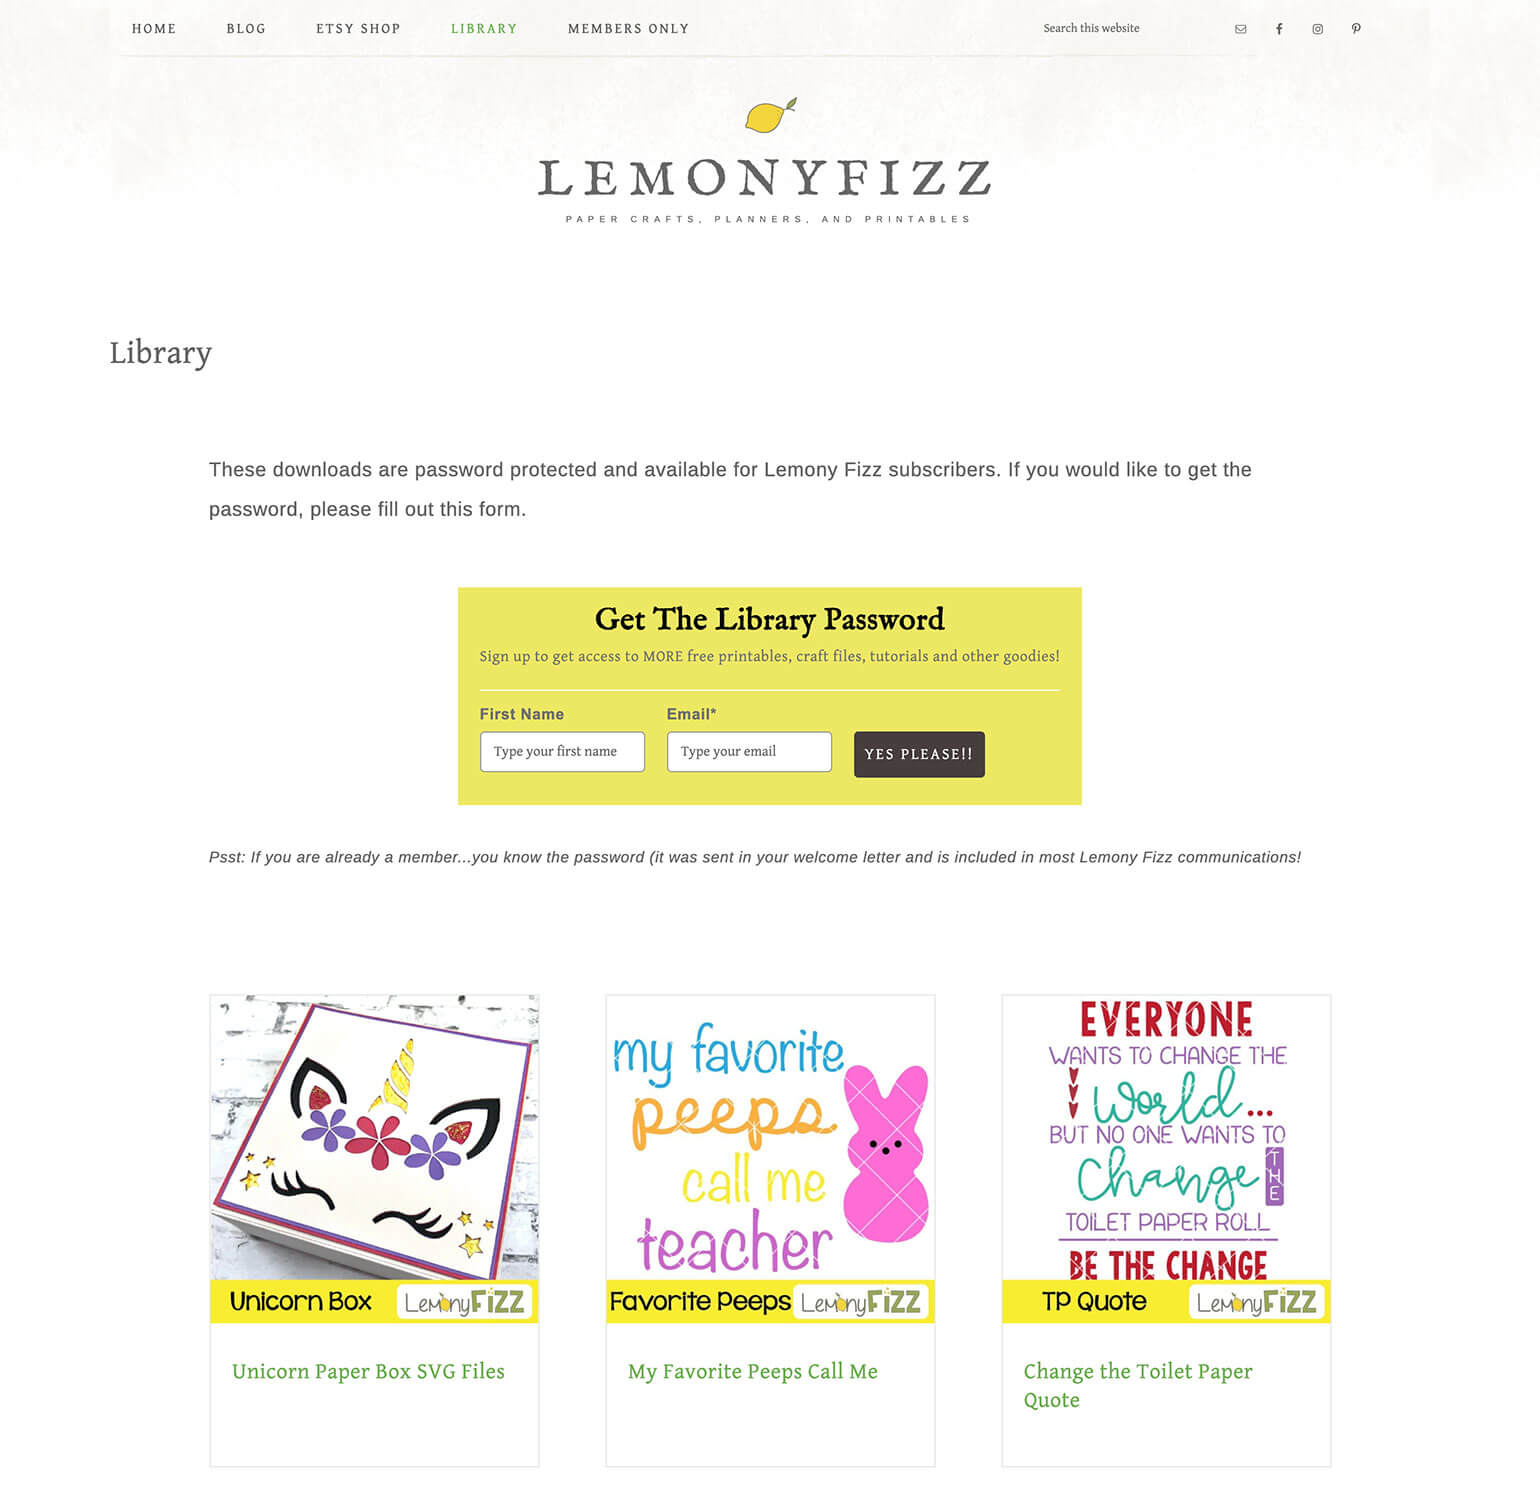

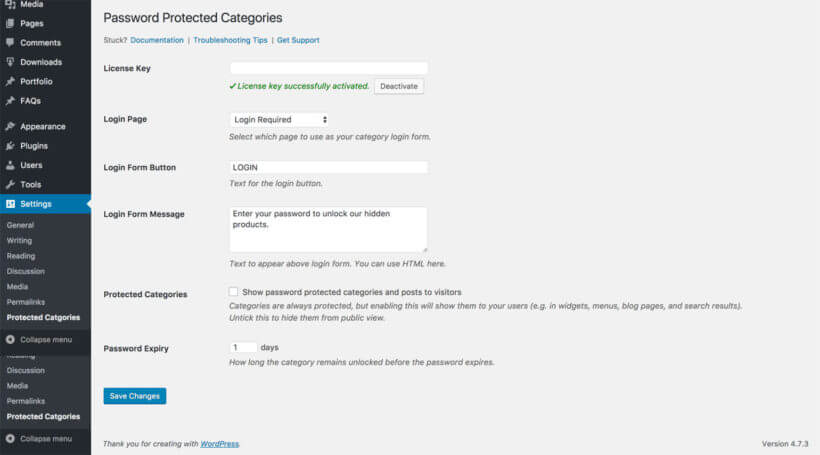
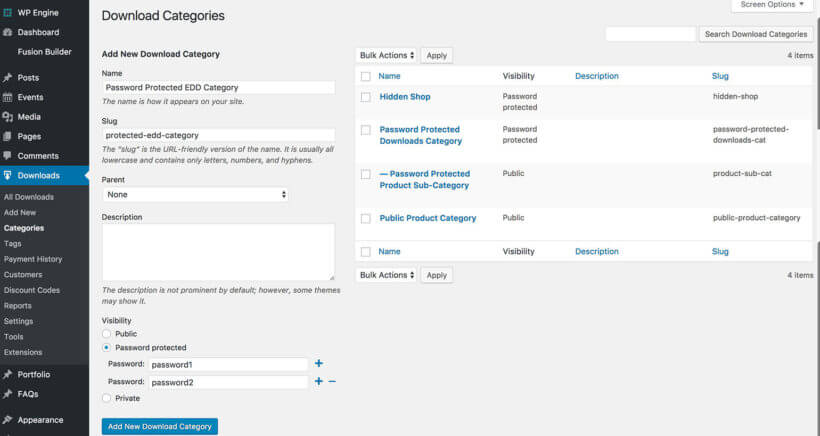
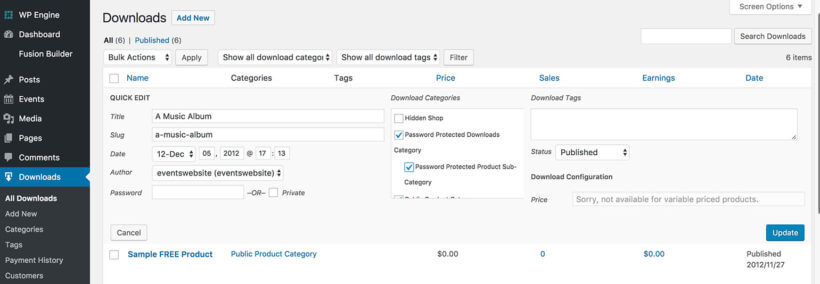
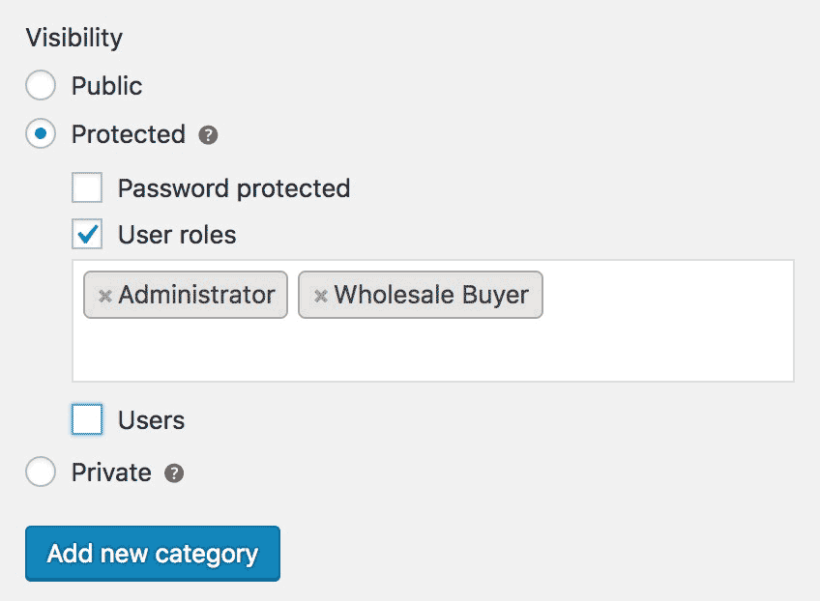

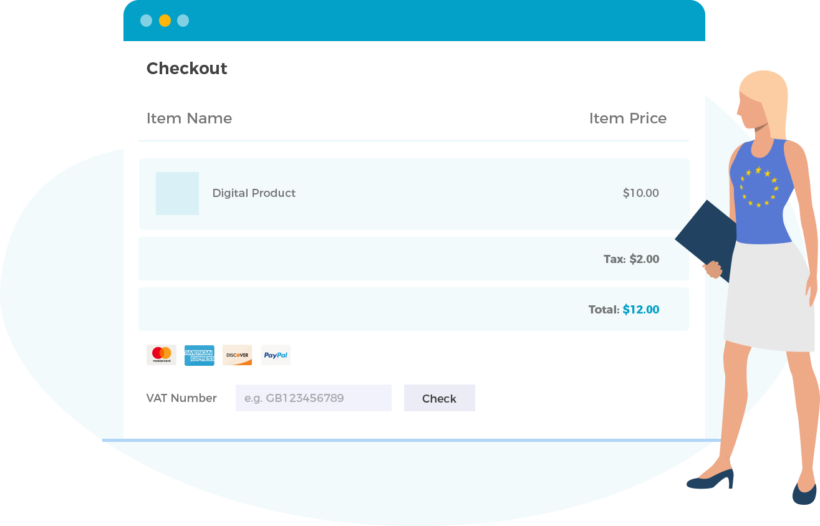

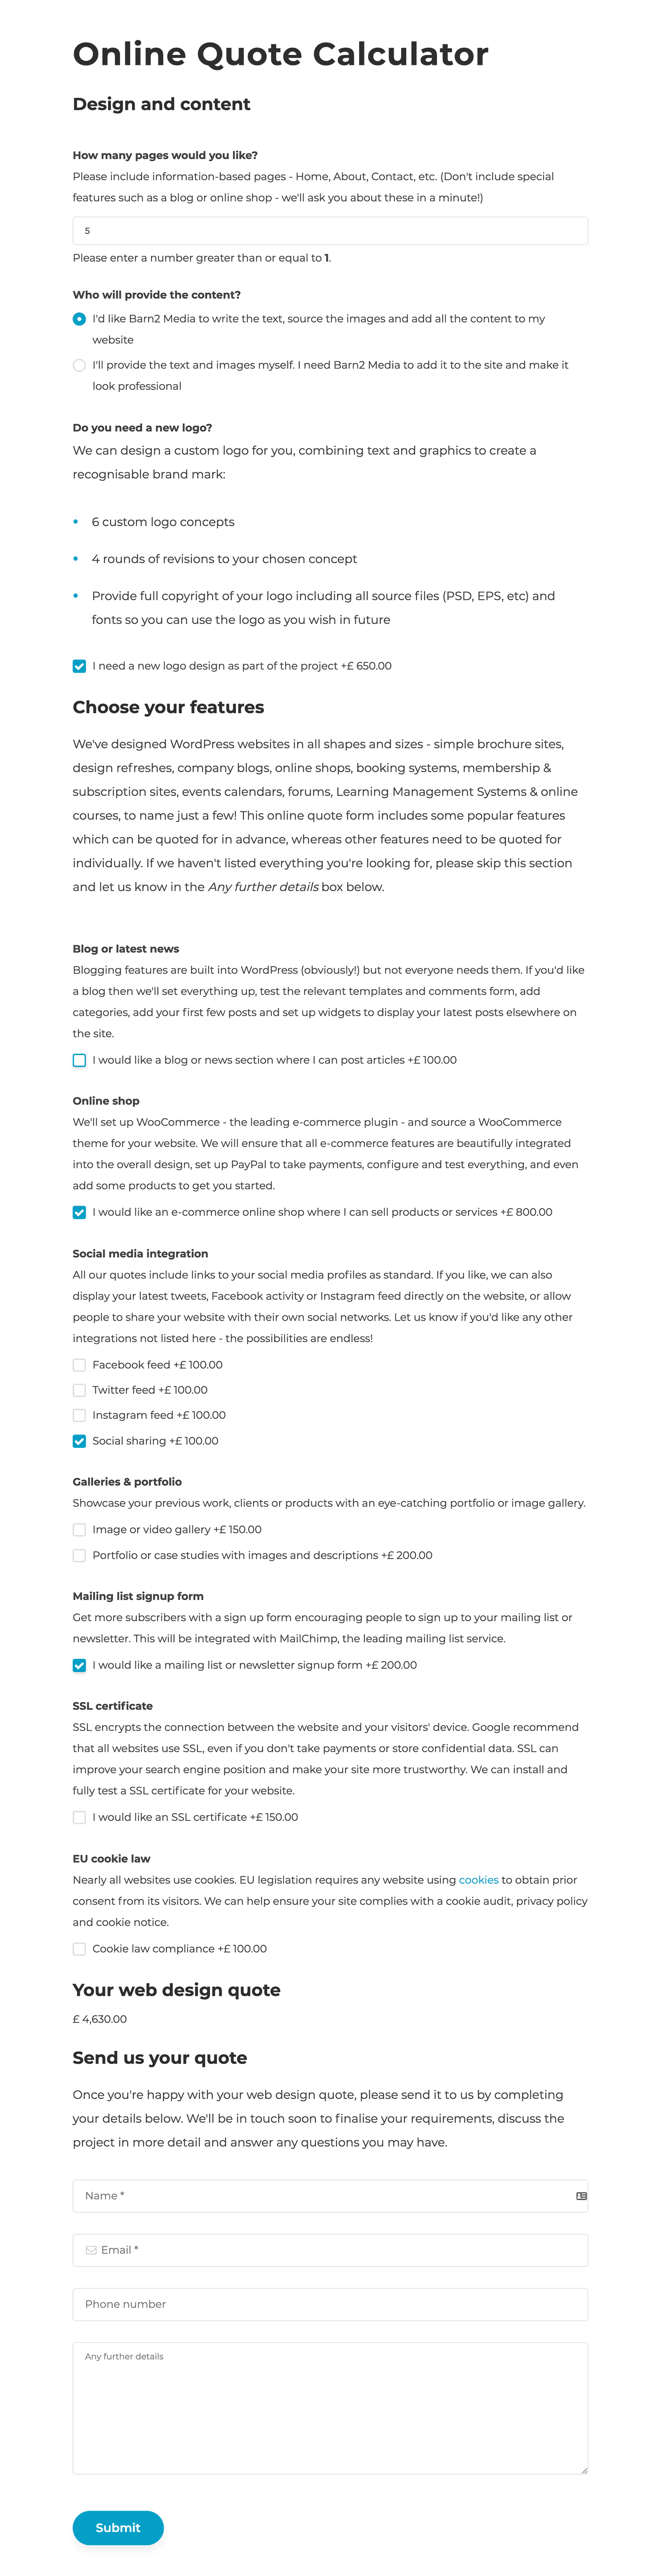
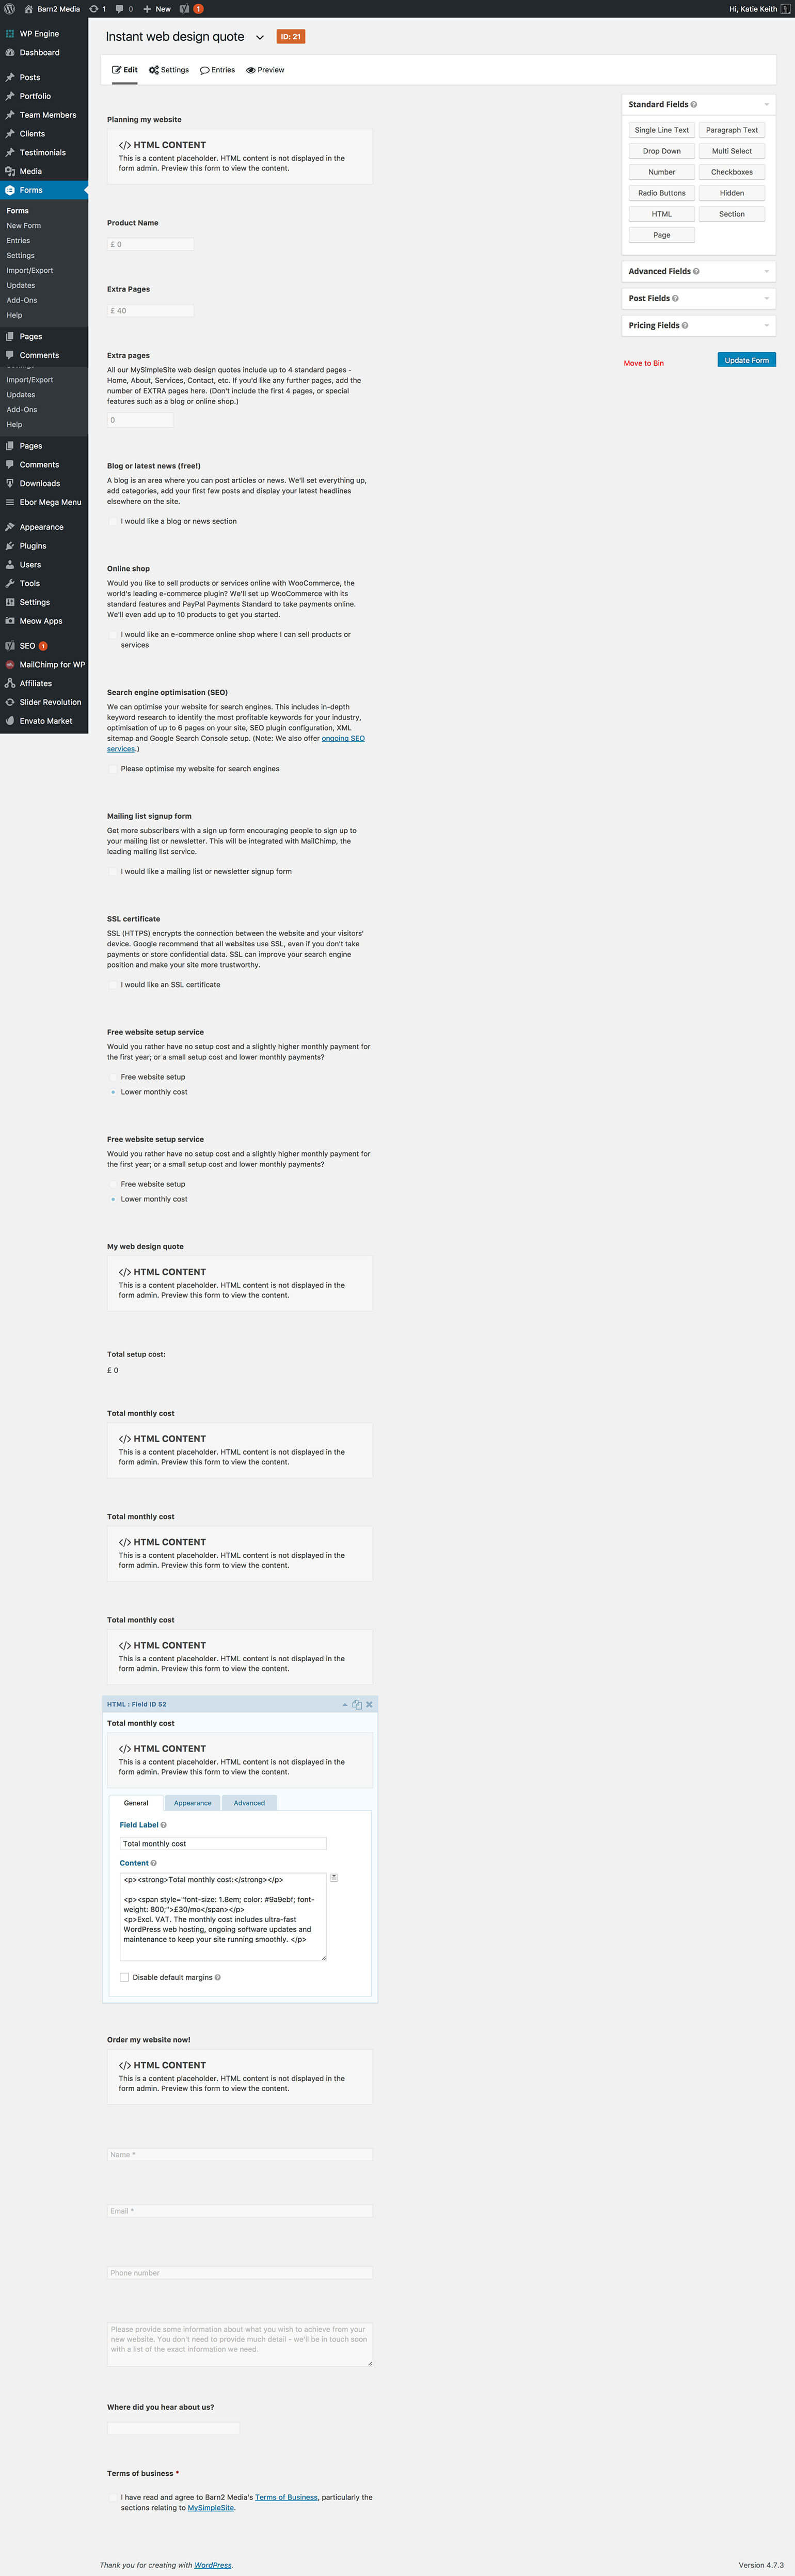


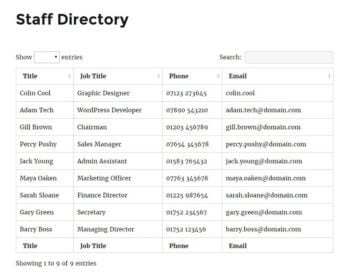