WooCommerce Quick View Pro shortcode

As an online store owner, you might consider adding product quick view to improve search engine visibility, increase conversions, and boost sales.

The easiest way to do this is by using WooCommerce quick view shortcodes to add quick view buttons anywhere on your site.

WooCommerce product shortcodes for WooCommerce Quick View Pro

With this in mind, in this article, we’ll explain how to use a WooCommerce Quick View shortcode to add quick view buttons to on your product pages, normal pages, blog posts, widgets or anywhere else. We’ll also explore three different methods for showing quick view buttons outside of the main shop and category pages.

3 ways to show WooCommerce quick view buttons outside of the main shop page

Using WooCommerce quick view shortcodes to showcase products outside of your shop page and category pages is a great way to simplify the buying process and improve your customers’ shopping experience.

For the purpose of this tutorial, we’ll assume that you already have a WooCommerce store set up with some products added to it. Here, we’ll explore 3 ways to use shortcodes to display products with quick view buttons:

  1. Use the WooCommerce Quick View Pro shortcode to insert quick view buttons
  2. Use WooCommerce quick view shortcodes to display products (with quick view)
  3. Use WooCommerce Product Table to list products in a table (with quick view)

Read about each approach and choose the one that best fits your needs, or use the jump links above to skip directly to each section. You can also implement all three methods on your WordPress site at the same time!


Method 1: Use the WooCommerce Quick View shortcode to add quick view buttons

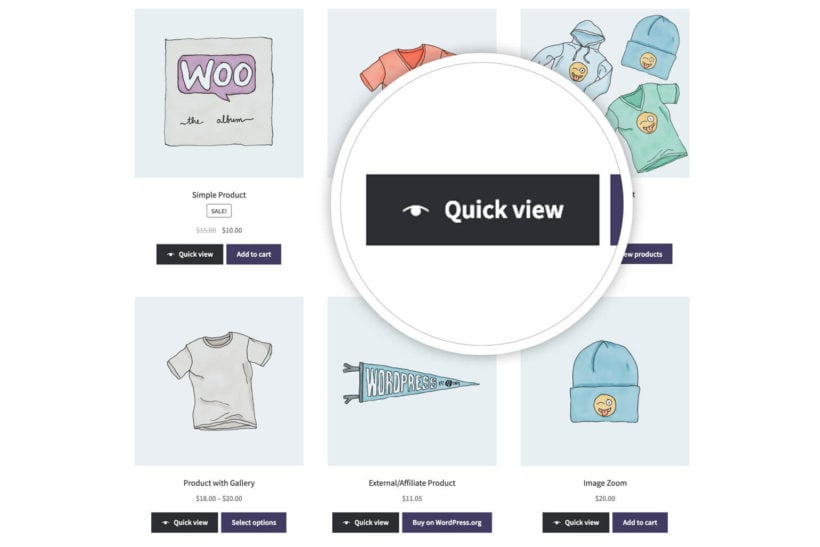
The WooCommerce Quick View Pro plugin comes with a shortcode that you can use to insert quick view buttons anywhere on your site. It adds a simply quick view button for a specific product, with whichever text you'd like to display in the button.

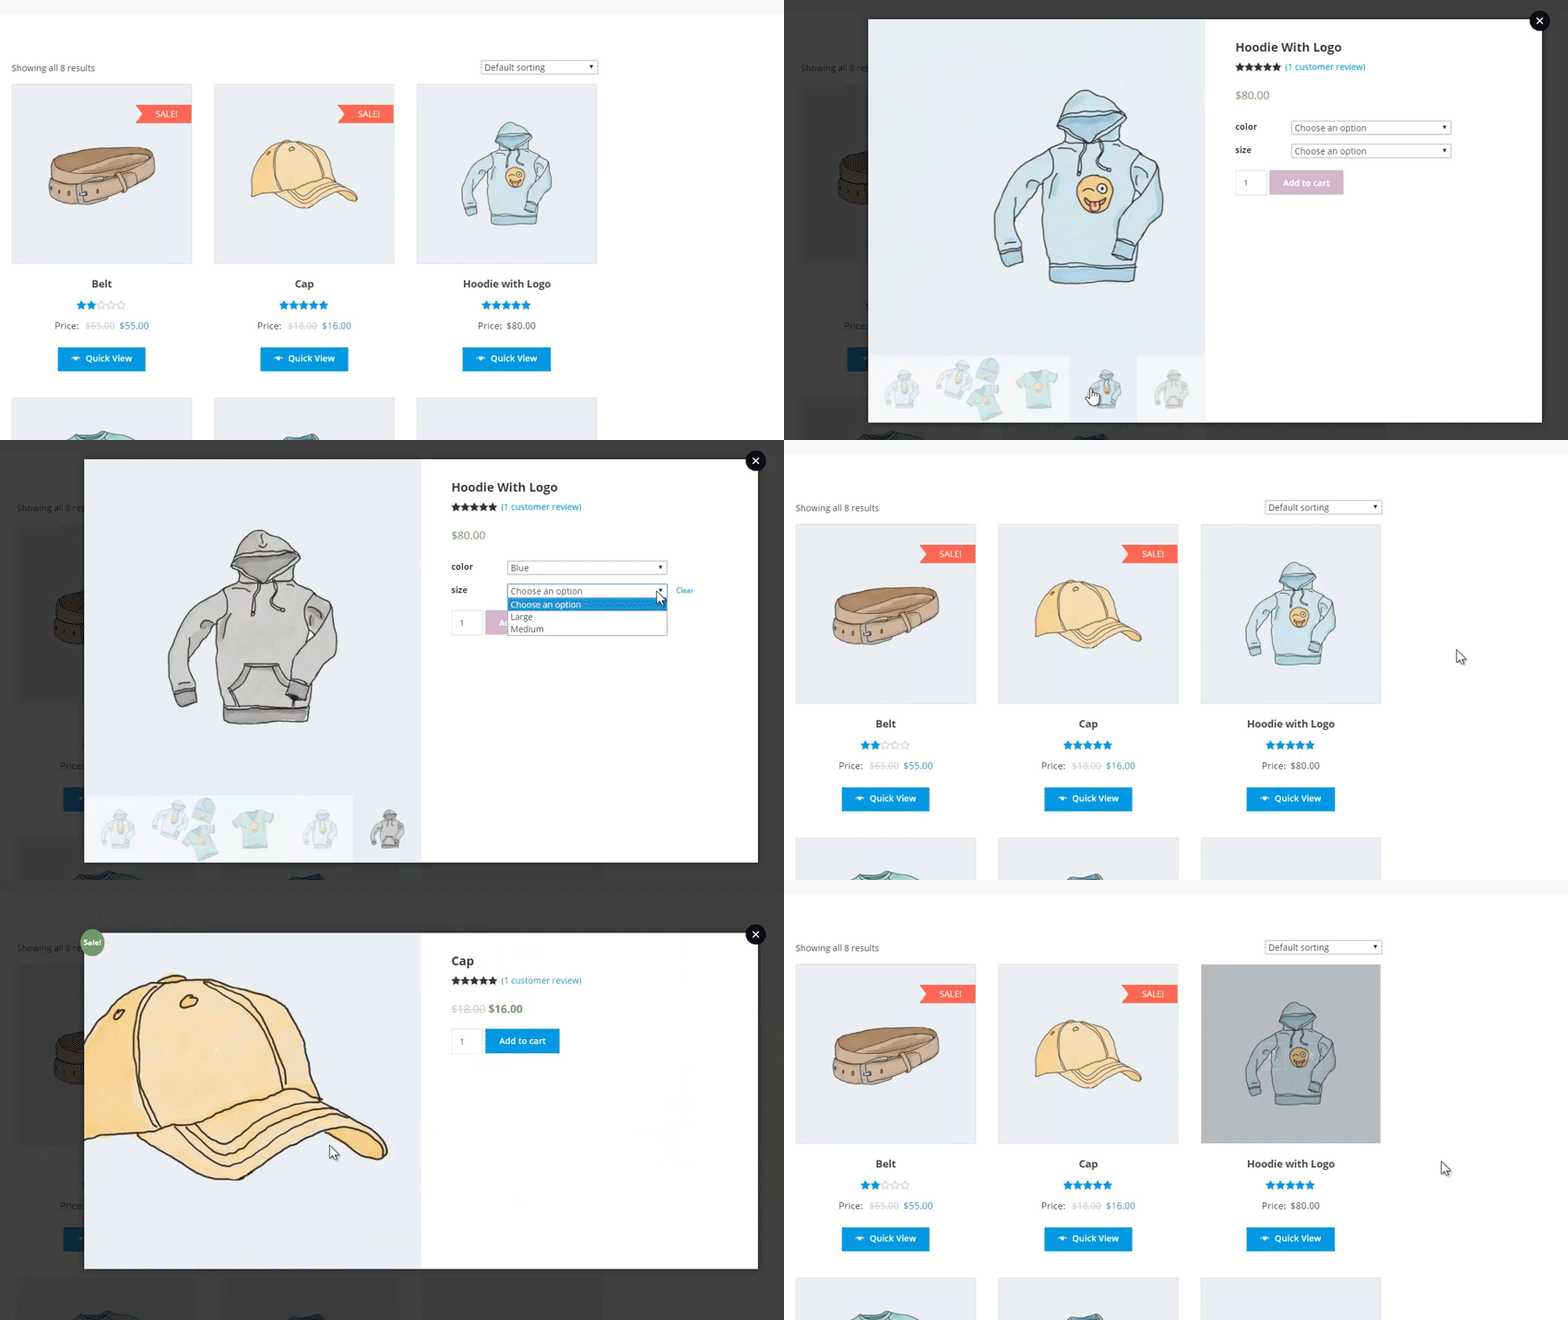
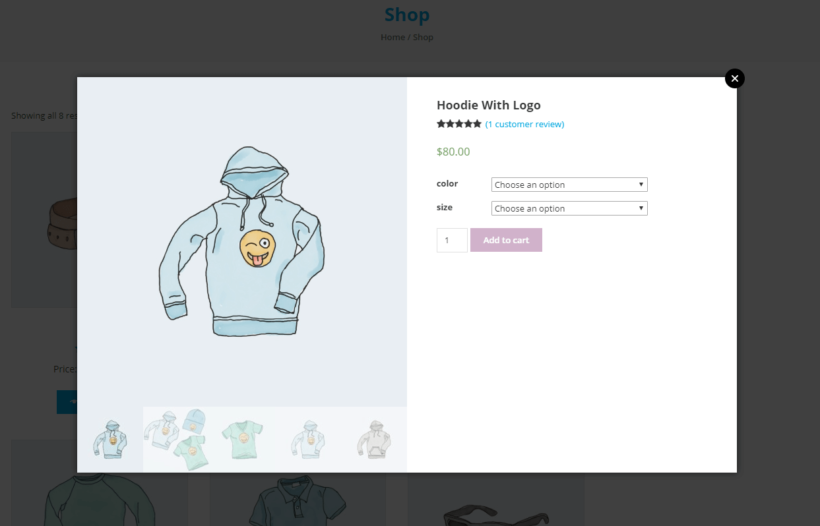
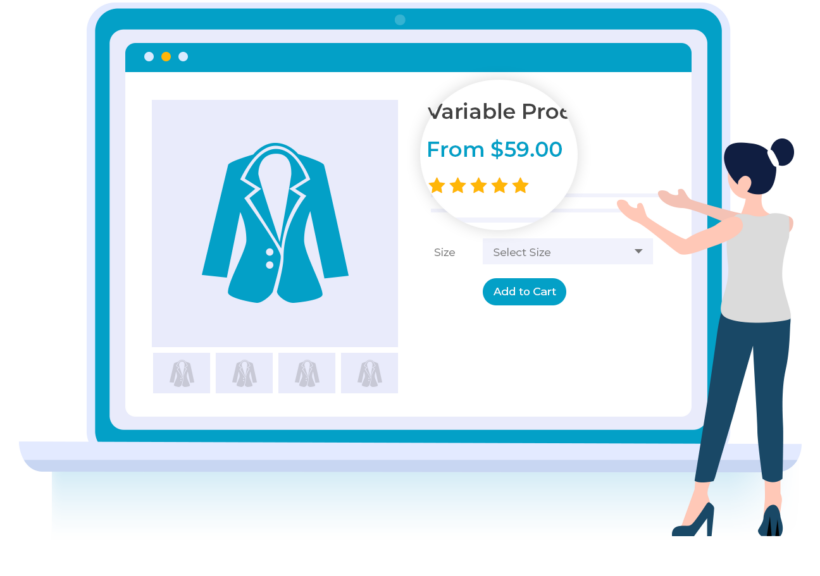
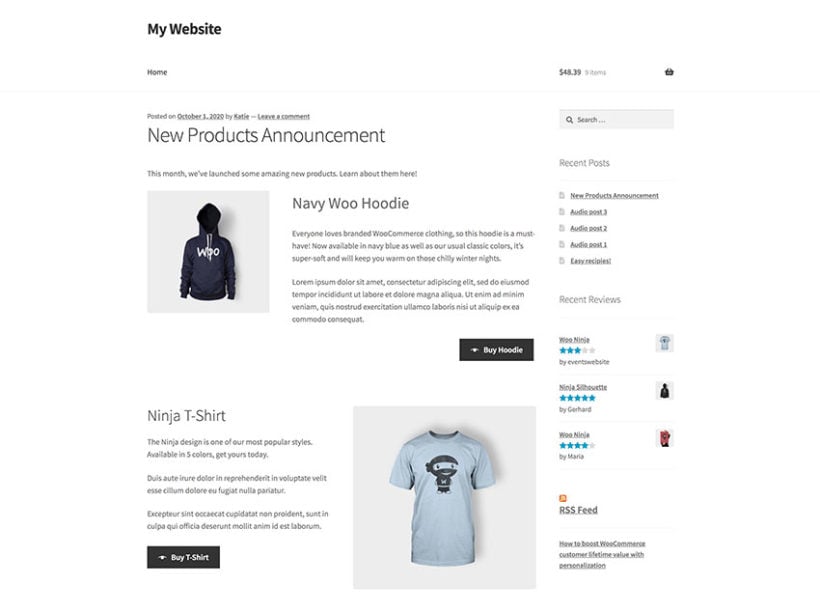
This is perfect for providing a quick way to buy a specific product, for example within a blog post. The customer uses the quick view button to view product details in a lightbox. They can choose quantities and variations, and add the product to the cart - all without leaving the page.
How to set it up

Step 1: Install WooCommerce Quick View Pro

  1. To get started, get the WooCommerce Quick View Pro plugin and install and activate it on your WordPress website.
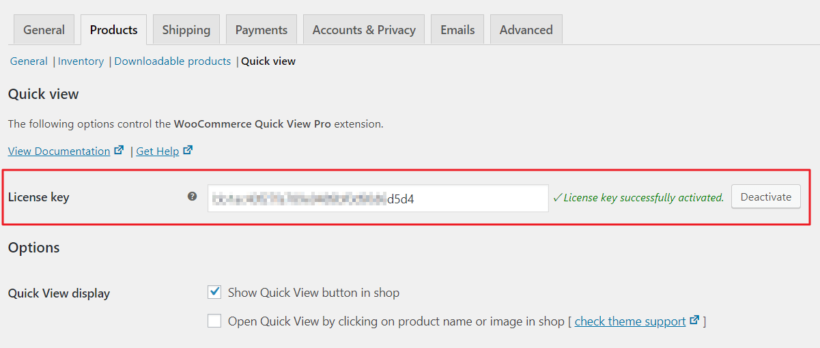
  2. Next, head over to WooCommerceSettingsProductsQuick view to activate the plugin license.
  3. Click the Save Changes button at the bottom of the screen to proceed.

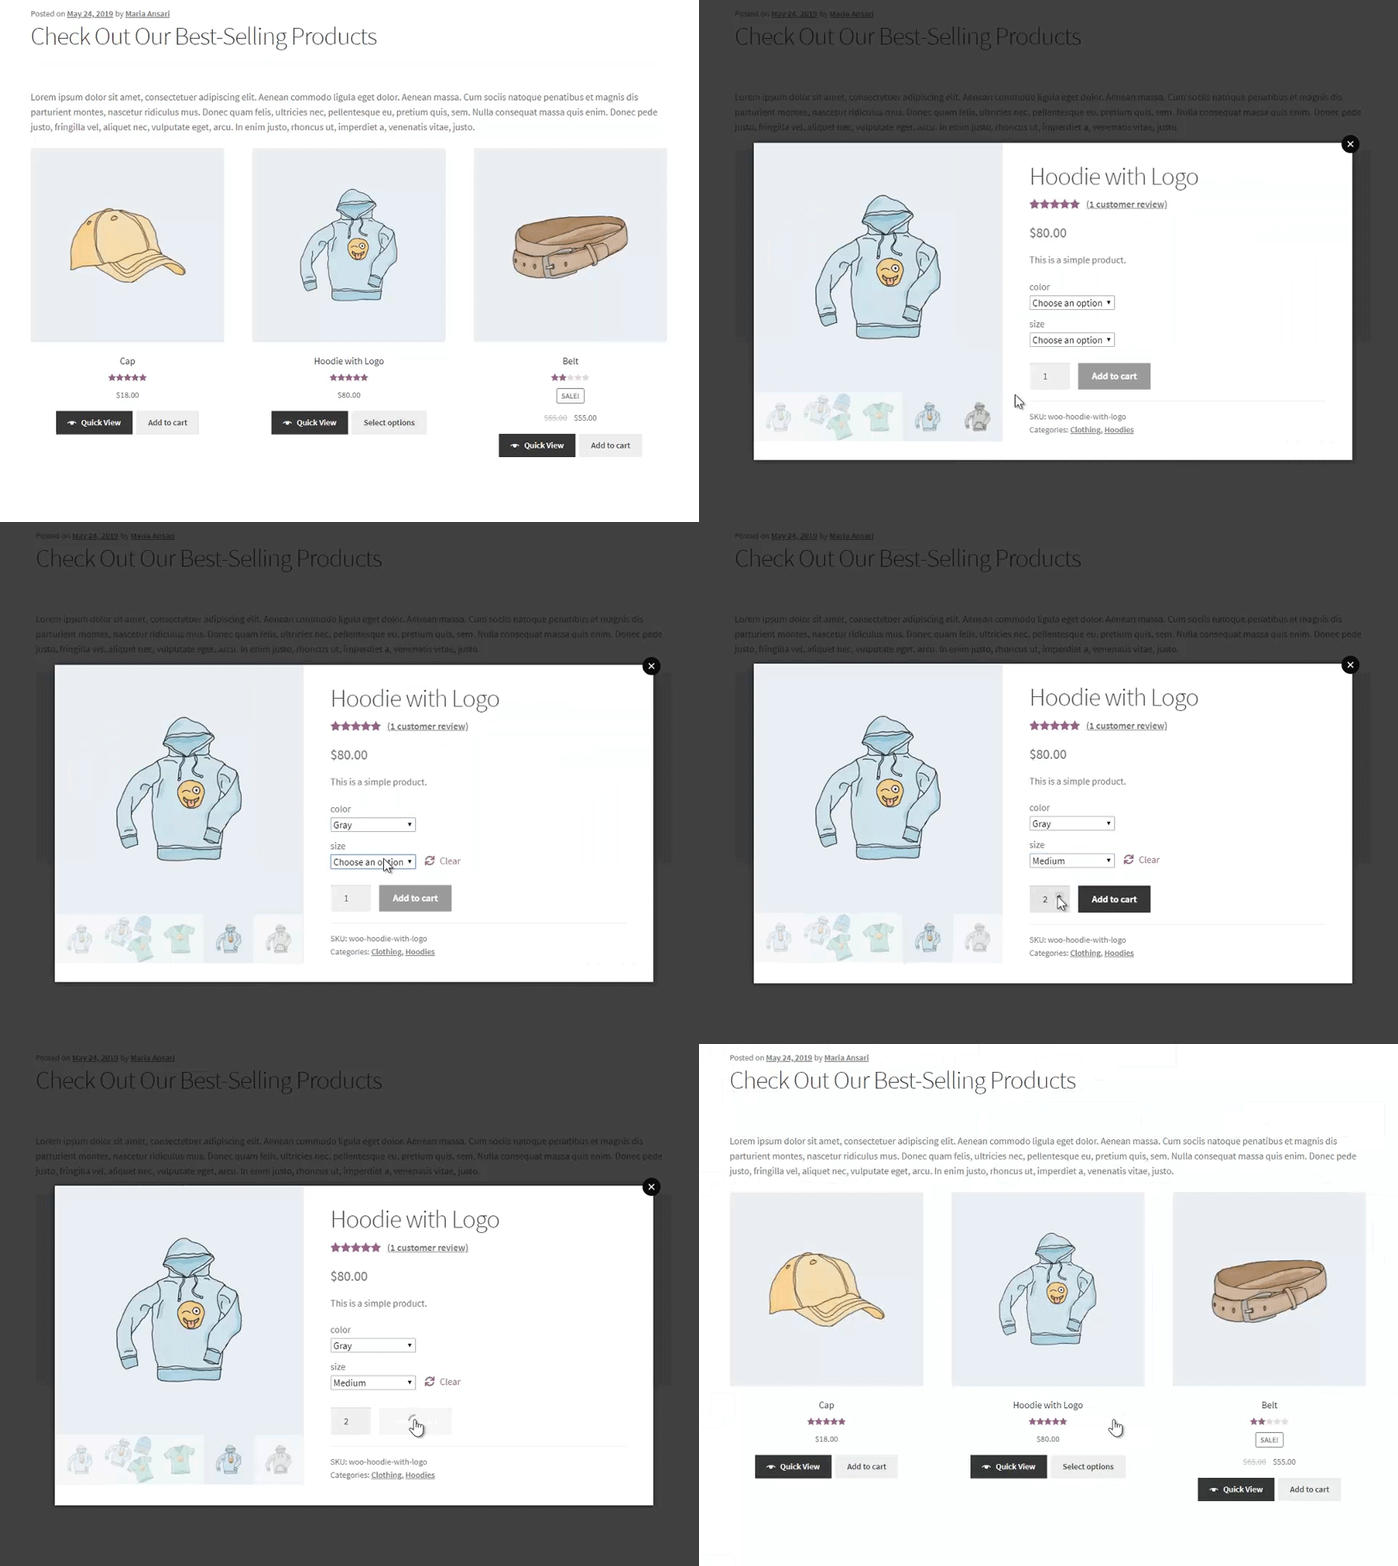
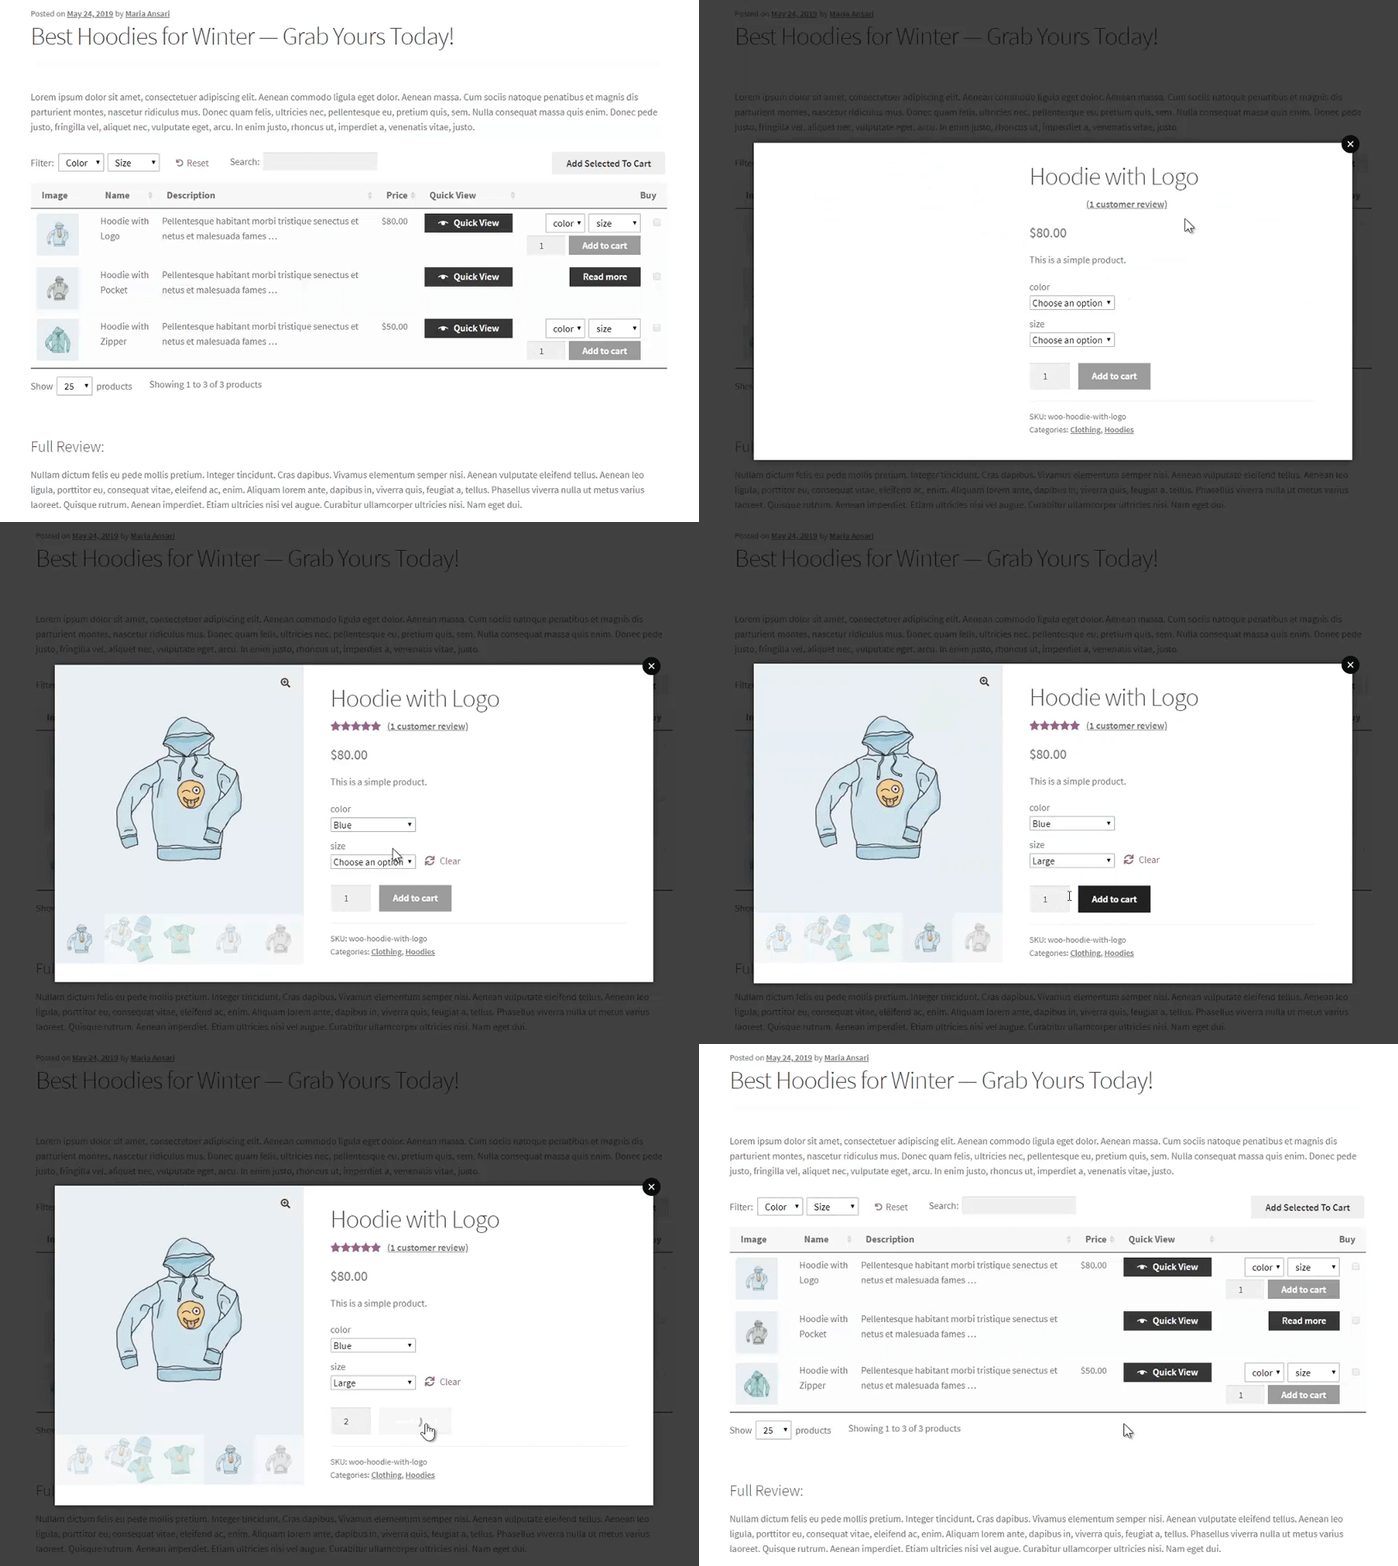
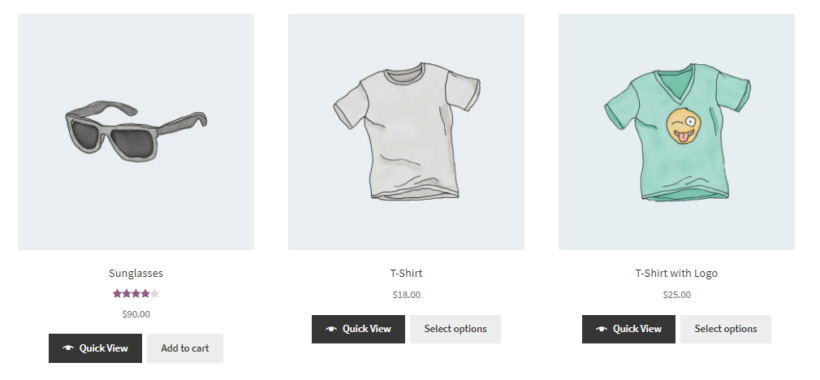
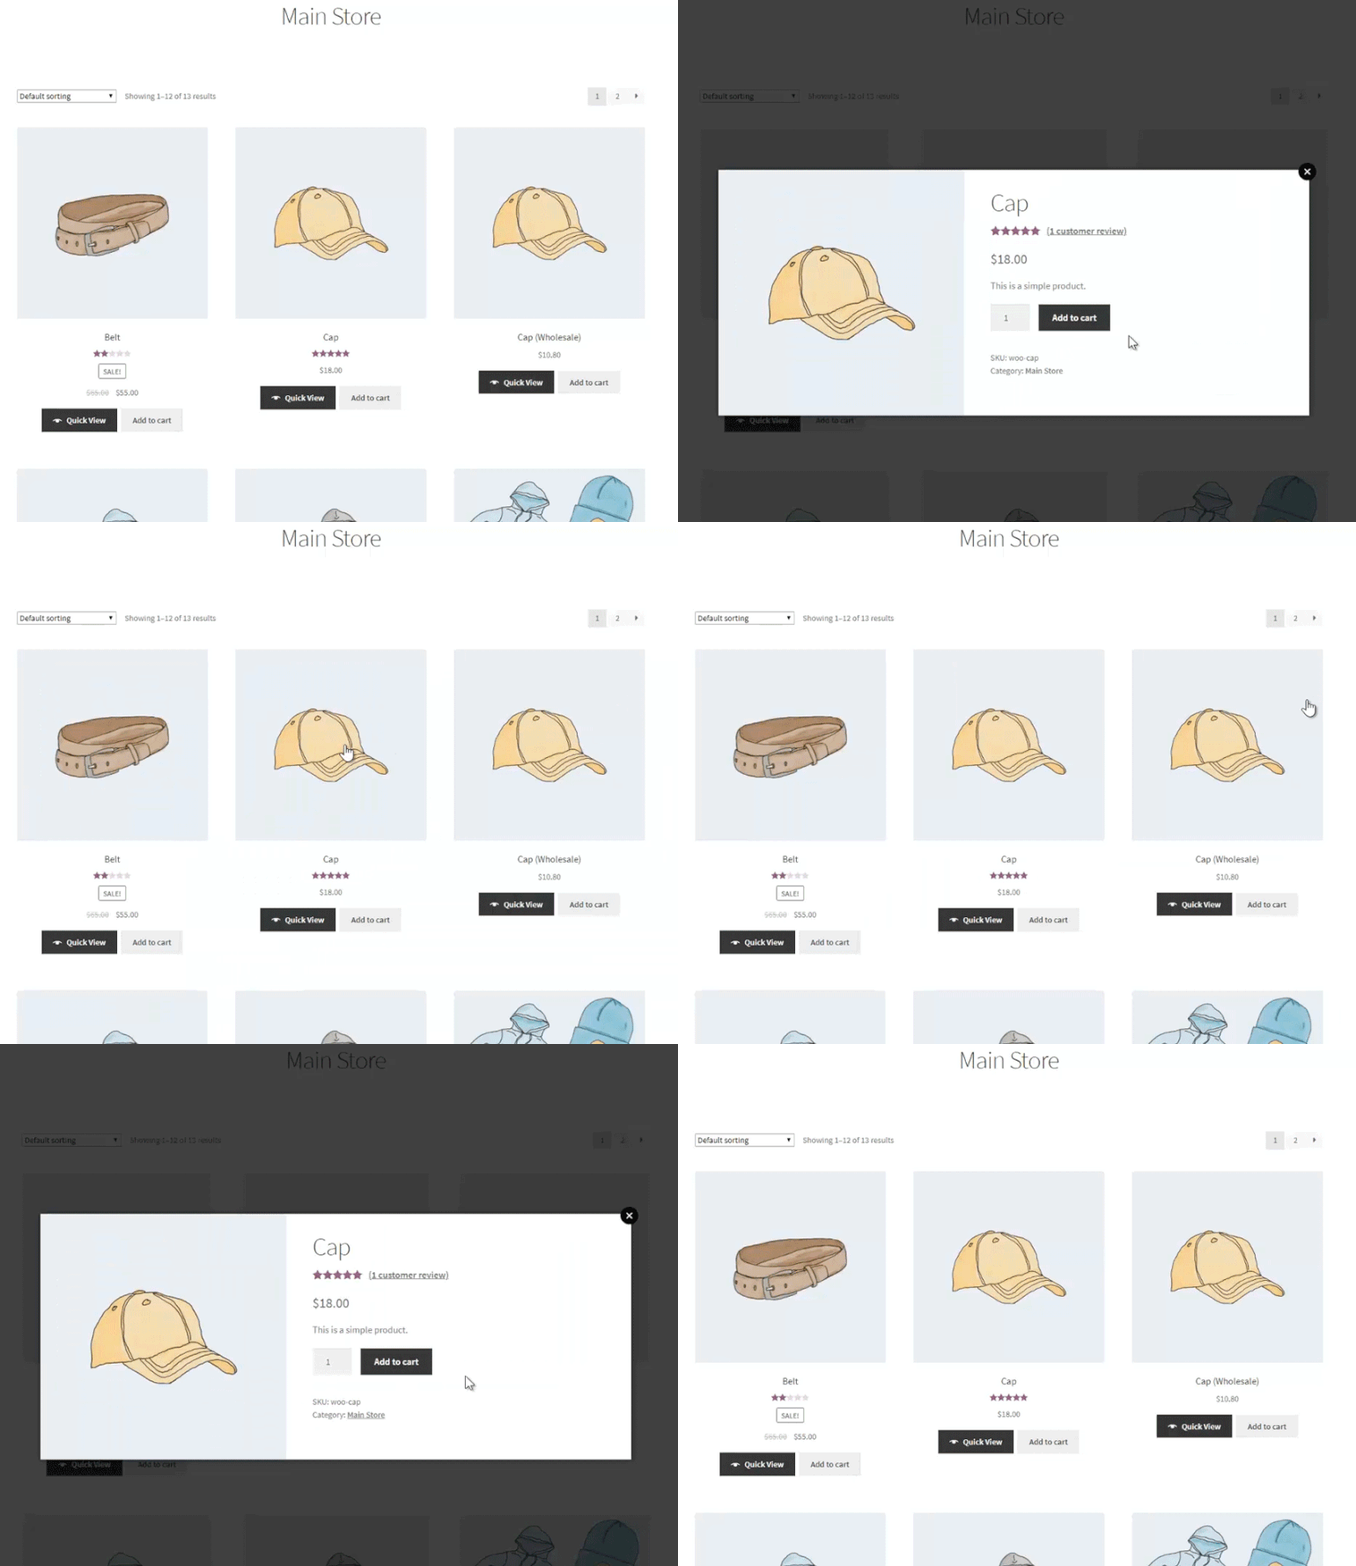
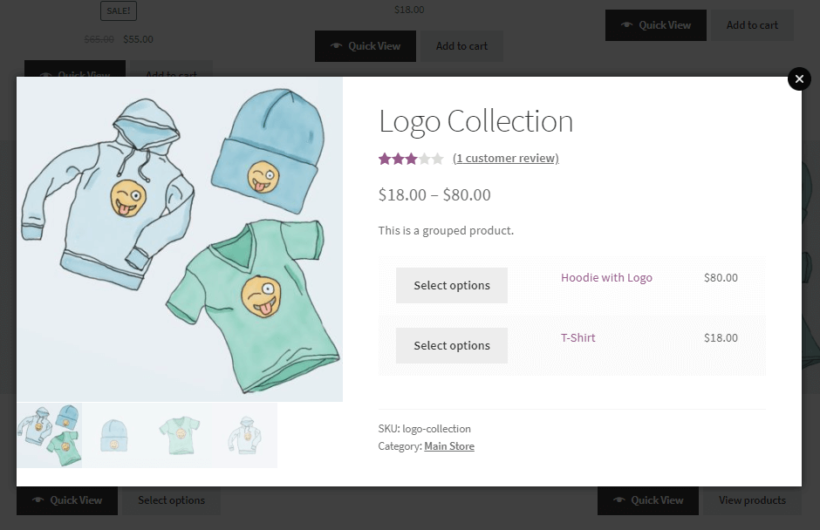
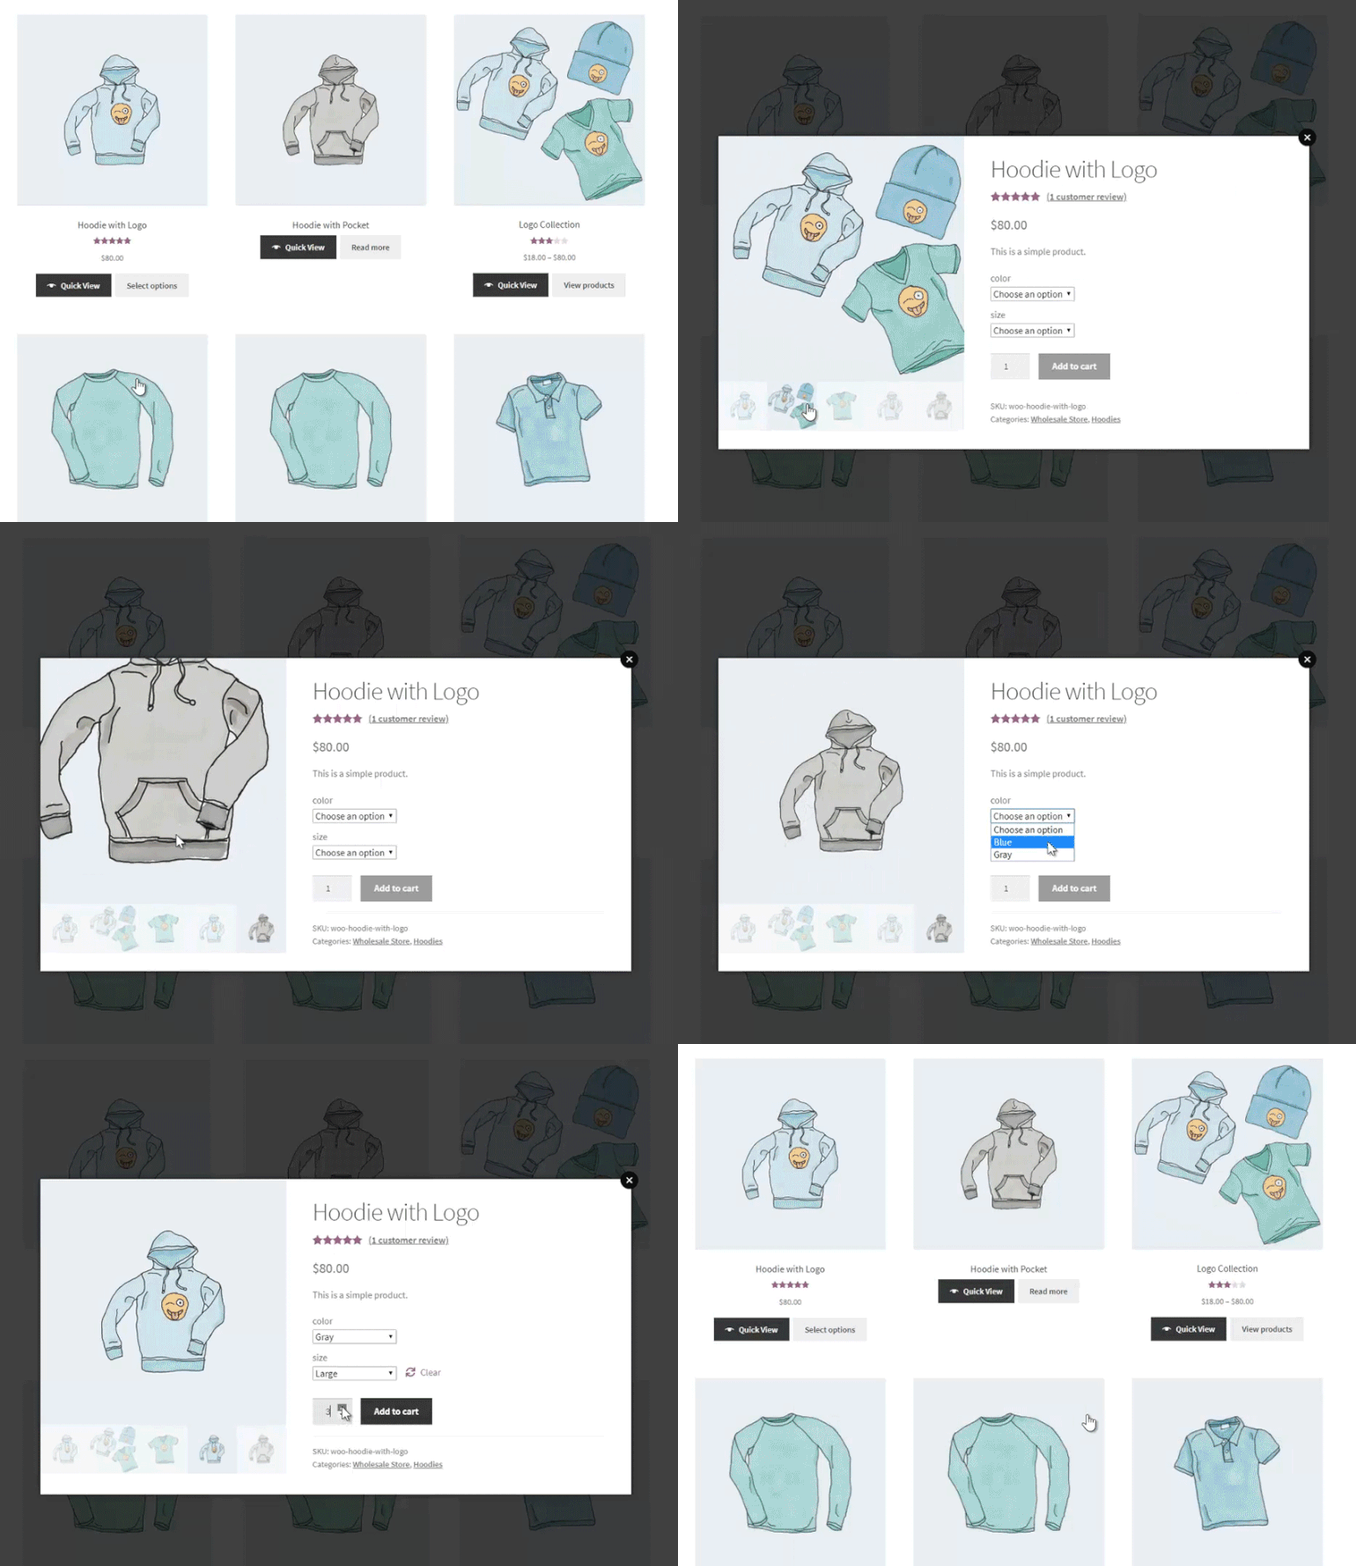
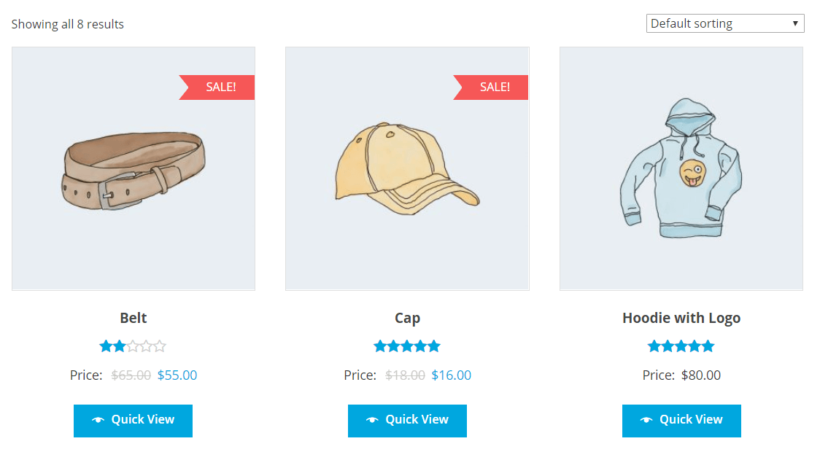
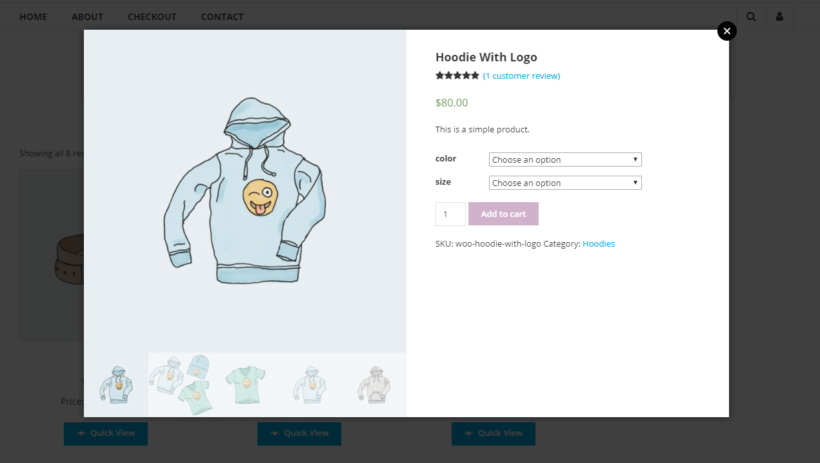
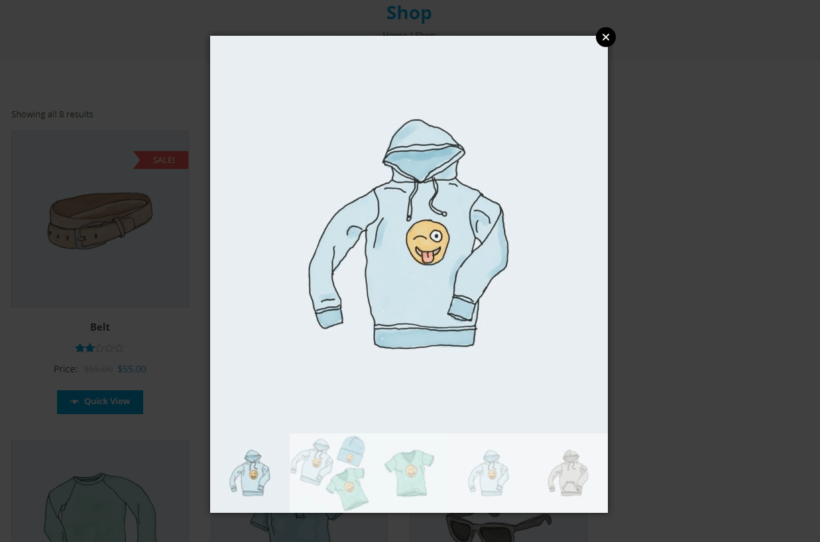
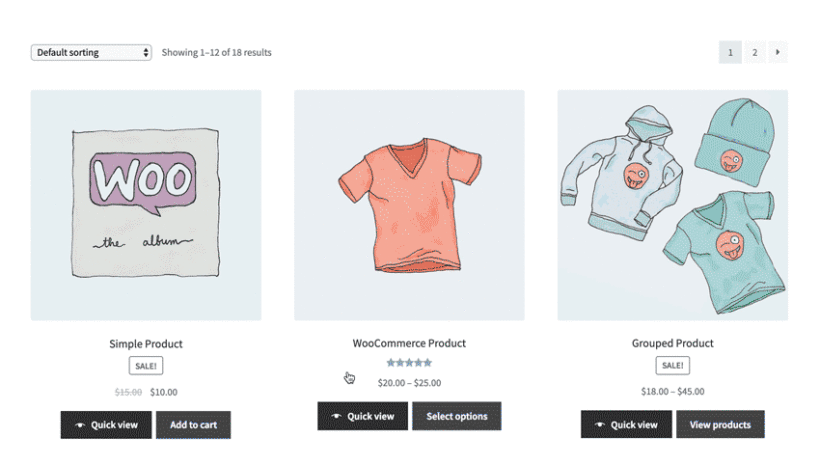
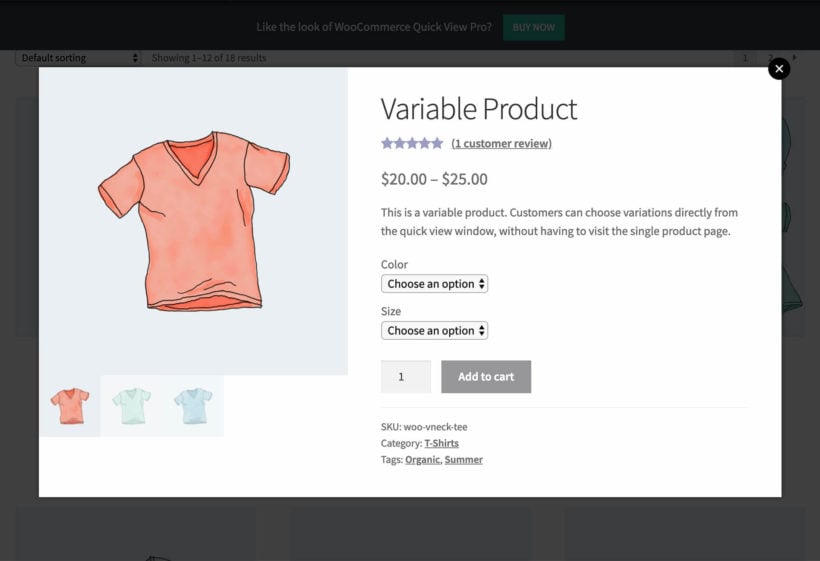
WooCommerce Quick View Pro automatically adds quick view buttons to your main shop page and category pages once you activate it. Whenever a customer clicks on the Quick View button, it will display each product in a quick view lightbox like this:

Default front-end preview of WooCommerce Quick View Pro

However, since we want to add quick view buttons elsewhere on our site, we’ll use the WooCommerce Quick View Pro product shortcode.

Step 2: Add the WooCommerce Quick View Pro shortcode

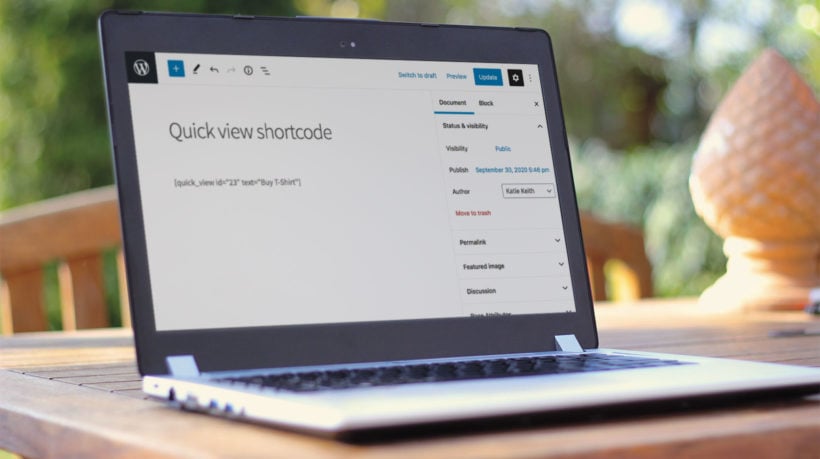
  1. Now, go to the page or post where you want to add a quick view button and add the shortcode [quick_view id="123"] shortcode.
  2. Replace "123" with the ID of the product (you can get this by hovering over a product in the main Products list in the WordPress admin).
  3. The button text will come from the Quick View plugin settings page. You can change this for each individual button by adding the text option to the WooCommerce Quick View Pro shortcode like this: [quick_view id="123" text="Buy Hoodie"]
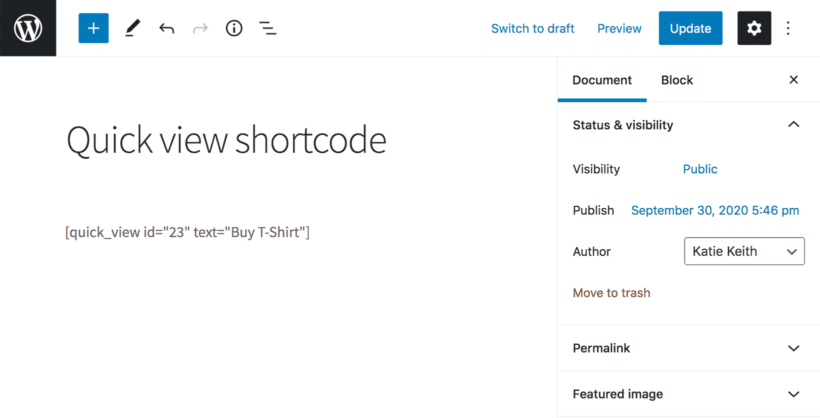
    How to use WooCommerce Quick View Pro shortcode
  4. Repeat steps 1-3 for each quick view button that you'd like to add. For example, if you're writing a blog post about 5 featured products then you would use the shortcode 5 times, each with a different product ID.

Step 3: Choose which product details to display in the quick view lightbox

With WooCommerce Quick View Pro, you can choose which product details to display in the quick view lightbox. Here’s how:

Navigate to the plugin’s settings screen (WooCommerceSettingsProductsQuick view) and scroll down till you reach the Product details section.

List of WooCommerce product details

From there, you can choose to display any combination of product details in the quick view lightbox including:

  • Reviews
  • Price
  • Short description
  • Add to cart button
  • Meta information (like product SKUs and categories)

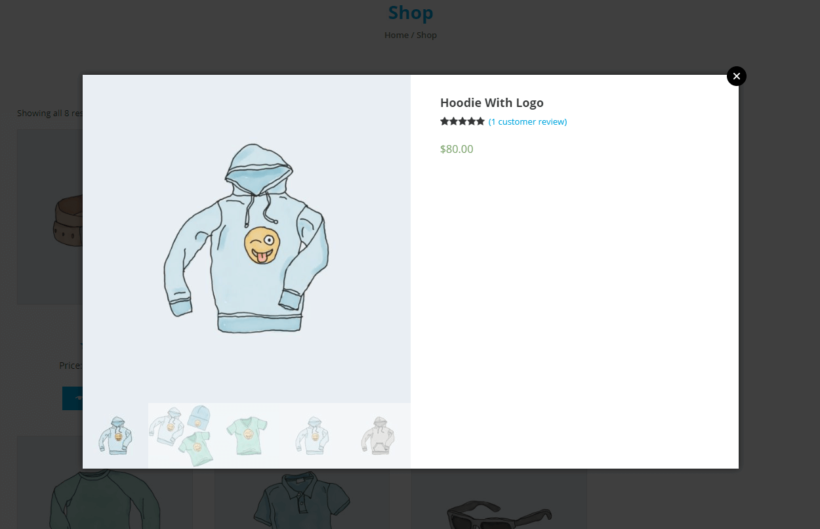
For example, if you only wanted to display the product’s price, variations, and add to cart button, your quick view lightbox would look like this:

Preview of WooCommerce Quick View Pro displaying product details

Method 2: Using shortcodes to add products (with quick view) to any page or post

This method uses shortcodes to display WooCommerce products on product pages or anywhere on your online store.

Unlike method 1, it displays extra information about each product including the featured image, name, price and add to cart button. If you use these shortcodes with WooCommerce Quick View Pro installed, then it will include a quick view button for each product. You can also use this method to list multiple products at once, each with its own quick view button.

How to set it up

First, install WooCommerce Quick View Pro on your site - as described in Method 1, above. Next, you can start listing products using the built-in shortcodes. If you've got the quick view plugin installed, then each shortcode will include quick view buttons as well as the product image, name and add to cart button:

  1. Open the page, post or widget that you want to add the selected product(s) to.
  2. Next, use the [products] shortcode to display products by ID, SKU, categories, or attributes.

The [products] shortcode is pretty flexible, so let’s take a look at some examples:

Example #1: Single product

If you want to showcase a specific product, you can use the product’s ID or SKU with the shortcode:

[products skus="woo-hoodie-with-logo"]

It would look something like this:

Showcasing a single product using WooCommerce product shortcodes

To list multiple products, just add the ID or SKU or multiple products, separated by commas, e.g.: [products skus="woo-hoodie-with-logo,blue-tshirt"]

Example #2: Featured products

If you want to showcase featured products with quick view buttons, you can use this shortcode:

[featured_products per_page="3" columns="3"]

It would look something like this:

Showcasing featured products using WooCommerce product shortcodes

Example #3: Best-selling products

If you want to showcase your best-selling products, you can use this shortcode:

[best_selling_products per_page="3" columns="3"]

It would look something like this:

Showcasing best-selling products using WooCommerce product shortcodes

Example #4: Recent products

If you want to showcase your recent products, you can use this shortcode:

[recent_products per_page="3" columns="3"]

It would look something like this:

Showcasing recent products using WooCommerce product shortcodes

This WooCommerce quick view shortcode makes it easy for users to add products anywhere on their site. This way, whenever a customer lands on your blog post, they can use the Quick View button to launch the quick view lightbox and:

  • View product details – including product name, description, reviews, price, and meta.
  • Select variations and set quantities.
  • View order details and add products to cart.

Further reading: Check out the official documentation for WooCommerce product shortcodes for more ideas! You could, for example, add your top rated products or related products to a blog post.


Method 3: Using WooCommerce Product Table to display products in a table layout on any page or post

By following the step-by-step instructions below, you’ll be able to list WooCommerce products in a table layout (with quick view) in blog posts and pages.

We’ll explain how you can add a product table to a blog post. However, you can follow the same steps to list products anywhere on your online store. For example, you might consider adding a product table shortcode to your WooCommerce checkout page (or WooCommerce cart page) or list sale products on a landing page.

Step #1: Install WooCommerce Quick View Pro and WooCommerce Product Table

To get started, get WooCommerce Quick View Pro and the WooCommerce Product Table plugin and install and activate both to your WordPress website. Next, head over to:

  • WooCommerceSettingsProductsQuick view (for WooCommerce Quick View Pro)
  • WooCommerceSettingsProductsProduct tables (for WooCommerce Product Table)

… to activate the plugin licenses.

Click the Save Changes button at the bottom of the screen to proceed.

Step #2: Configure the product table settings

From the WooCommerce Product Table settings screen, scroll down till you reach the Columns option under Table content. Enter image,name,description,price,quick_view,add-to-cart into the Columns option. Make sure you include a quick_view column.

Check out the complete list of available column options to customize your product table! For example, you might want to include product categories as a column. This way, customers could sort the product table based on product category.

Optionally, you can scroll down to the Quick View Pro section on the same screen to replace all links in the product table with quick view links. All you have to do is tick the Product links checkbox.

Disable product links using WooCommerce Product Table

Click the Save Changes button to continue.

Step #3: Add a product table

Open the page or post where you want to add the product table. Next, use the following shortcode to list products in a table layout:

[product_table]

This will list all your products. You can also edit the shortcode to list specific products only.

WooCommerce Product Table shortcode in text editor

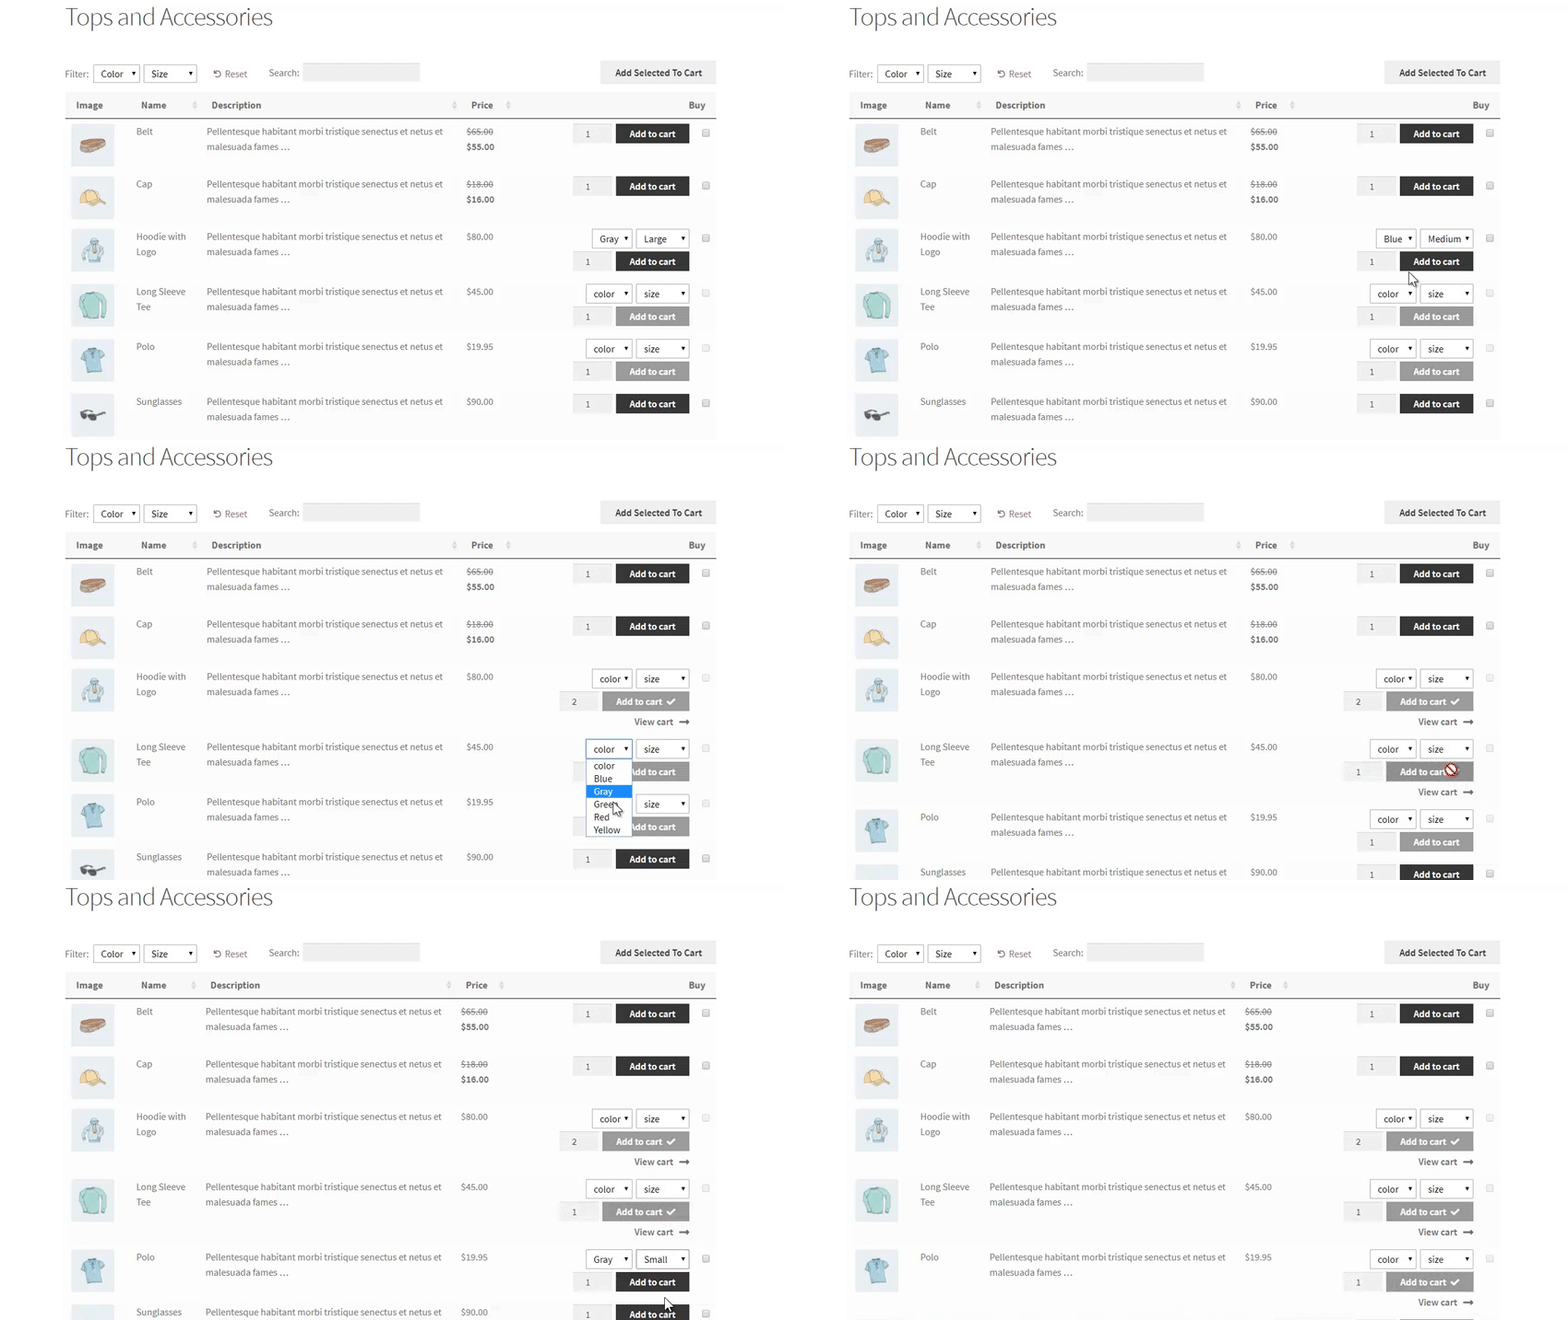
Finally, click the Publish button and preview it on your site’s front-end. It will look something like this:

Preview of the WooCommerce Product Table plugin

Customers can use the filter options above the table to view products based on product attributes such as color or size.

Further reading: For more ideas on how to use WooCommerce Quick View Pro, be sure to check out this in-depth guide!

Where to get the plugin

With a WooCommerce quick view shortcode, you can add featured products anywhere on your site and make it easier for customers to buy from you. Customers can learn about your products, choose variations, set quantities, and add products to cart without leaving the page (or post) they’re on.

Let’s quickly recap the two different options we covered above:

How do you want to use WooCommerce quick view shortcodes in your store? We’d love to hear from you so let us know in the comments section below!


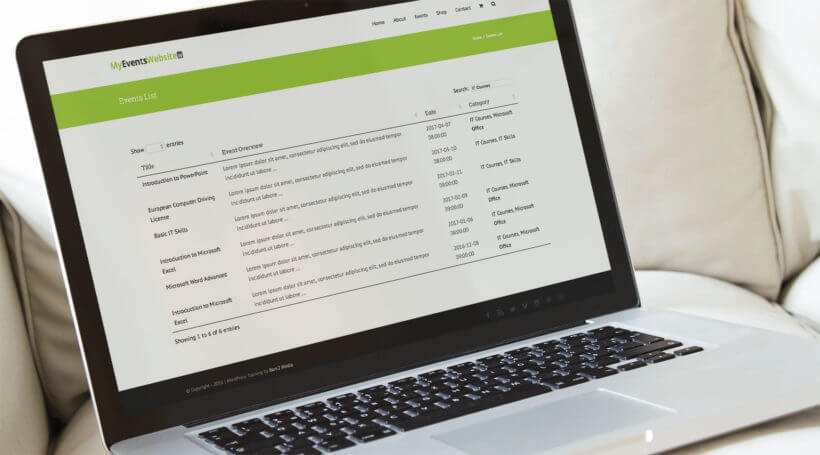
WordPress password protected events table

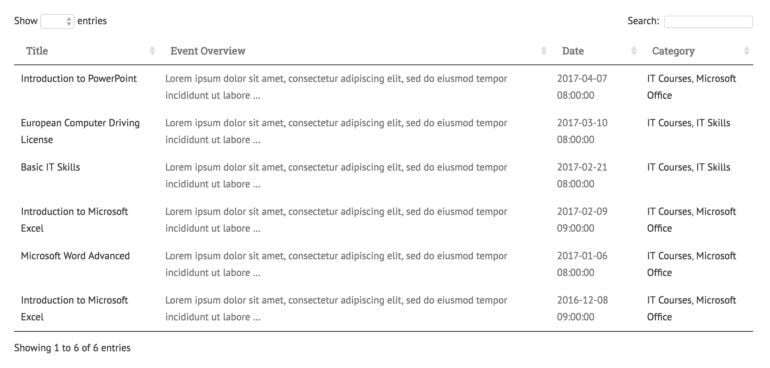
Whether you’re a professional event organizer or need to host a few events every now and then, you need an easy way to be able to share important event details with your site’s visitors. A WordPress event list plugin is a simple way to get started.

While most event plugins (like The Events Calendar, Events Calendar, EventOn, and Event Espresso) are all-in-one solutions that offer neat features like …

  • Online registrations,
  • Integration with Google Maps,
  • Saving events to personal calendars (such as Google Calendar), and
  • Various event management options

… they’re not always the best (or most efficient) option for those looking to create a simple event listing without slowing down their site.

By creating an event list, you’ll be able to share details about upcoming events directly through your WordPress website. This may include the event’s name, venue, date and time, and registration information. To take things up a notch, you can even let prospective attendees make bookings.

With this in mind, in this article, we’ll cover the three best options for a WordPress event list plugin. More specifically, we’ll show you how you can:

Let’s get right to it!

Solution #1: Create an events page using a WordPress event list plugin

If you use your website to sell upcoming events then you probably need an easy way to display them and share important event details with your site’s visitors. However, using a full-fledged WordPress events calendar plugin might not always be the best option. For starters, it could weigh down your site causing increased page loading times.

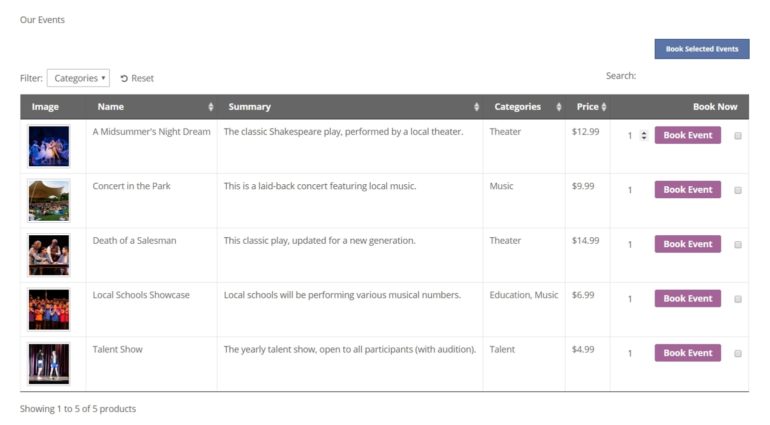
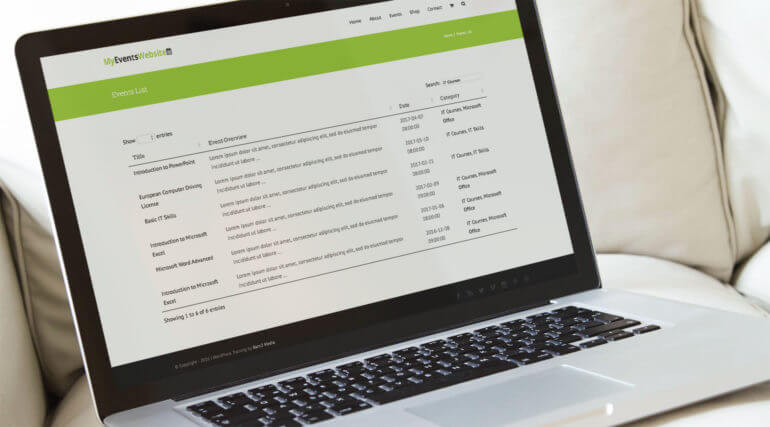
So, if you’re looking for an easy way to create an events page where you can list upcoming events, you can use the lightweight WooCommerce Product Table plugin. The plugin lets you list events in an organized way on your website. You can also use it to sell tickets to your training courses or events.

A fully-customized WooCommerce events page.

The easy way to sell events on your WordPress website

WordPress is an ideal platform to showcase upcoming events, promote them to site visitors, and let prospective attendees purchase event tickets or make reservations online. Paired with WooCommerce, you can create a dedicated event page (as a WooCommerce product) for each event you organize.

However, the default WooCommerce store layout isn’t the best option for selling upcoming events. This is because it requires prospective attendees to navigate to single product pages (or event pages, in this case) in order to view details and add an event to the cart.

Instead, you need a way to display your events in an organized table layout on a single page. This way, you’ll be able to share important information about each event and make it easy for prospective attendees to learn more about them and take action.

You can even make your WordPress event list searchable, sortable, and filterable in order to make it easy for visitors to find what they’re looking for. What’s more is that they’ll be able to compare different events (without navigating to single event pages) and buy tickets for multiple events at once.

Create an events page (without using an events plugin)

The WooCommerce Product Table plugin allows users to create a fully functional, front-end product table to create a WordPress event list. In other words, it works as a lightweight WordPress event list plugin that lets you create event pages and showcase upcoming events in an organized way.

For this, you’ll need a WordPress website with WooCommerce installed on it. Once that’s done, you’ll simply add each event as a WooCommerce product. The reason behind adding events as WooCommerce products is so you’re able to:

  • Create custom fields. You can create custom fields to share details about the event venue, date and time, theme, when tickets go on sale, etc….
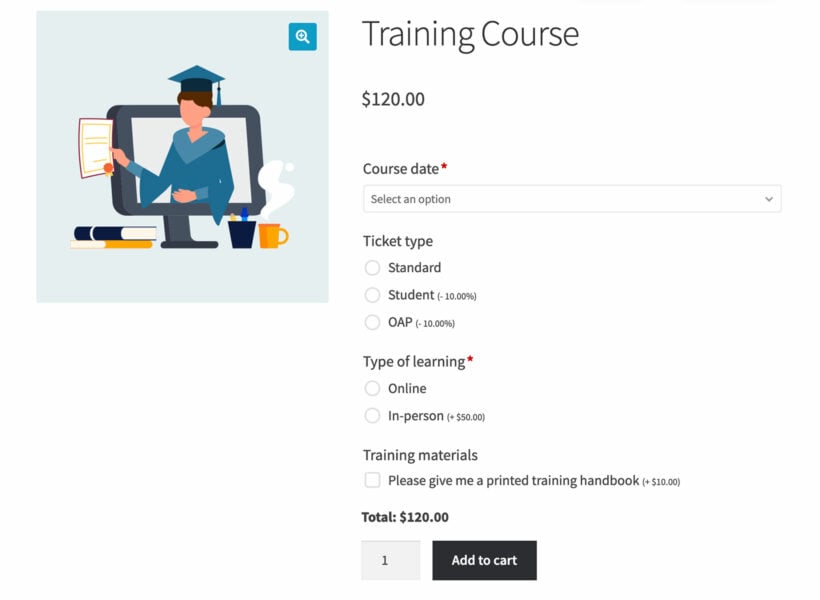
  • Offer variations and add-ons. You can offer different types of tickets (e.g. general admission or VIP pass) or collect information (e.g. dietary requirements) using WooCommerce product add-ons.
Add date picker to WooCommerce product for training course product

So, if you’re looking for an easy-to-use event list WordPress plugin that won’t slow down your site then be sure to check out the full tutorial for step-by-step instructions.

It walks you through a simple, four-step process to create an events page and add a WordPress event list to it. Optionally, you can also choose to add quick view to your event listings to share event galleries. This is an easy way to give prospective attendees a feel for what they can expect while adding visual appeal to your event listings!

Create an events page (using an events plugin)

While WooCommerce Product Table is a simple WordPress event list plugin, you can also use it with a full-blown events plugin if you’re looking for advanced functionality. This way, you could add neat features to your event site such as:

  • Creating an event calendar that displays all upcoming events in a calendar view.
  • Providing iCal download links that attendees can use to save upcoming events to their personal calendars such as Google Calendar.
  • Making it easy to see recurring events. This is a great option for organizations that host seminars, conferences, and meetings.
  • Integrating Google Maps to make it easy for attendees to find the event venue.

The key benefit of this approach is that you’re able to leverage advanced event functionality while being able to use a WordPress event list plugin to showcase upcoming events in a dynamic table layout.

The full tutorial shows you how to set this up using popular WordPress event plugins such as Events Calendar, EventOn, or Event Espresso.


Solution #2: List upcoming events with The Events Calendar plugin

If you’re already using a WordPress event calendar plugin – like The Events Calendar – then you can enhance your event site’s layout by creating a searchable events table to list upcoming events. This method works for both the free plugin or the pro version of The Events Calendar plugin.

Why the default event layouts don’t cut it

As an events manager, you’re probably using a WordPress event plugin (such as The Events Calendar, Events Calendar Pro, or EventOn) to display upcoming events. However, the default event layouts on offer with these plugins have limitations which prevent you from delivering the best possible user experience.

For example, with the Events Calendar plugin, you’re able to list events in a basic list or in an event calendar view. And with Events Calendar Pro, you also get a map view for displaying Google Maps.

While this works fine for organizations that host a handful of events, larger event organizations that have loads of events need a better way to showcase them. Ideally, they need a way to be able to display their WordPress event list in a compact format. One way to achieve the perfect balance between displaying all important event details and showcasing more events per page is by using a WordPress event list plugin to create a compact table view.

WordPress event list plugin to display events in a compact table view

If your event WordPress plugin creates a custom post type for each event you add to it (such as Events Calendar Pro) then you can use Posts Table Pro as a WordPress event list plugin. This way, you’ll be able to display events in an interactive list or table view.

WordPress events table plugin list

Customers can view the events in a table and click through to the single event page to learn more. If you're using the Events Tickets add-ons, then they can also add the event to their cart and book a place.

Here are some of the key benefits of using a WordPress event list plugin to showcase upcoming events in a table view:

  • Lets you display more events (with event details) on the same screen.
  • Allows prospective attendees to sort events to quickly find the type of event they’re looking for.
  • Search for events using the table’s search bar.

With Posts Table Pro, you’ll have full control over the front-end table layout. You can decide which columns to display based on the sorts of events you’re organizing. For example, you could include any combination of the following columns:

  • Event image
  • Event name
  • Brief description (what the event is and who it’s for)
  • Links to single event pages
  • Event categories
  • Ticket prices
  • Add to cart buttons (for selling event tickets) along with options to add multiple tickets to cart

Another neat use case for using a WordPress event list plugin is that you can make it easy for prospective attendees to browse and compare events. When they find the event they’re looking for, they can simply click from the events table to the single event page created by whichever WordPress event plugin you’re using. In other words, it acts as a directory listing of events!

Listing WordPress events in a table layout

If you already have your event website setup, you can use the Posts Table Pro plugin to list all of your events in a front-end table layout.

WordPress event list plugin

The neat thing about this WordPress event list plugin is that it lets you add the compact events table to any page or post on your website. You can even create multiple tables, for example, one table per event category.

Additionally, you can use it to create a standalone event listing (or directory) or as a layer on top of viewing options that are already provided by the WordPress event calendar plugin you’re using.

Be sure to check out our step-by-step tutorial which explains how to list WordPress events in a table and explores various configuration options. You’ll also learn how to include options for taking bookings for events, allowing prospective attendees to purchase event tickets, and listing recurring events from Events Calendar Pro.


Solution #3: Use WooCommerce Bookings to sell bookable events

A WordPress events plugin lists each event separately on your website. If you run the same event on multiple dates, then each date will be listed individually.

This is different from a WordPress bookings plugin, which allows you to sell multiple dates for each event. Each type of event will be listed as a separate product.

The official WooCommerce Bookings extension works seamlessly with WooCommerce, allowing you to add events as bookable products. With this solution, you’ll also be able to add multiple dates for each event, and have a separate booking calendar for each type of event.

Create your bookable products and use WooCommerce Product Table to list them on your website. The booking calendar for each bookable product will appear in the add to cart column of the product table. Attendees can choose a date and add the event to the cart, directly from the main list of events.

Bonus: Selling memberships

If you’re running a membership site, you might consider selling products or event bookings to deliver value to members, diversify your offering, or leverage upselling opportunities. You can extend all the solution discussed above to allow customers to purchase memberships along with WooCommerce products and event bookings.

There are two easy ways of implementing this sort of functionality in WordPress:

If you’re interested in implementing any of these solutions for taking bookings for events, be sure to check out the complete guide! It explains two ways to use WooCommerce to take bookings for both courses and events. You'll also find actionable tips on how to enhance your event site and improve user experience.

Conclusion

WordPress password protected events table
If your organization arranges a handful of simple events throughout the year (or even just one or two), chances are you don’t need all of the advanced functionality on offer with most of the popular event plugins out there.

Instead, you can use a WordPress event list plugin to showcase event listings in a neat and organized way. You can do this by creating a dynamic, front-end table layout. We shared three different solutions for a WordPress event list plugin along with some actionable tips on how to implement them.

Let’s quickly recap the main options available to you:

  • Posts Table Pro If you’re looking to create a simple event listing, we’d recommend using the Post Table Pro plugin. You can choose to integrate it with an all-in-one event management plugin, a calendar plugin (like The Events Calendar) or use it as a standalone plugin.
  • WooCommerce Product Table This is the ideal option for anyone who’s looking to showcase event listings in a simple, dynamic table layout. It also lets you to take bookings for events or courses. This works great for membership sites, training programs, and businesses that need to sell products along with event bookings.

Hopefully, you’re in a good position now to take the next steps.

Which one of these three options are you looking to implement? Do you have any questions on how to pick the right WordPress event list plugin for your specific needs? We’re happy to help so let us know in the comments section below!
Finding the best WooCommerce quick view plugin for your online store can be a daunting task – especially if you’re not sure what to look for. While there are several options out there for WordPress-based websites, we’ve shortlisted some of the best offerings for this comparison.

With this in mind, in this article, we’ll compare YITH WooCommerce Quick View vs Flatsome Quick View vs WooCommerce Quick View Pro by highlighting the standout features on offer with each plugin and evaluation them against a pre-defined criteria.

An example of the WooCommerce Quick View Pro plugin in action

Why do you need a WooCommerce quick view plugin?

A WooCommerce quick view plugin makes it easy for your customers to learn more about your products directly from the main shop page. In fact, there are many reasons why you might consider implementing quick view functionality in your online store.

For instance:

  • Provide quick access to important product details such as the product’s image, descriptions, pricing, reviews, and specifications.
  • Make it easy for customers to select product variations, set quantity, and add products to their shopping cart. In other words, customers can add products to cart without having to leave the main shop page.
  • Allows users to simplify the buying user flow and deliver enhanced customer shopping experiences.

By using a quick view WooCommerce plugin to add quick view functionality to your online store, you won’t have to worry about editing any of your website’s (or theme’s) core files – such as the functions.php file. In addition to this, you’ll be able to customize the quick view modal window from the plugin’s settings screen instead of having to mess around with CSS files.

Features to look for in a WooCommerce quick view plugin

Here are some of the main features you should look for in a quick view WooCommerce plugin:

  • Ease of use How easy is it to set up the WooCommerce quick view plugin? Are there many settings options that you need to configure?
  • Launching the quick view lightboxHow will customers launch the quick view lightbox e.g. on hover or on click? Do customers click the product name (and image) or a dedicated button to launch the quick view lightbox?
  • Quick view lightbox contentWhat sort of content can you add to the WooCommerce quick view lightbox? Does the plugin let you decide which details to include and which ones to leave out? Can customers add products to cart using the quick view lightbox?
  • Customization options How customizable is the quick view lightbox plugin in terms of design and layout? What sorts of customization options are available to you?

By now you should have a pretty good understanding of what a WooCommerce quick view plugin is, why you might consider adding one to your online store, and what features to look for. Next, we’ll compare some of the best WooCommerce quick view plugin solutions to help you pick the right option for your online store.

Choosing the right WooCommerce quick view plugin

Though there are certainly other quick view plugins out there (such as WooCommerce Quick View Ultimate), we’ll compare YITH WooCommerce Quick View vs Flatsome Quick View vs WooCommerce Quick View Pro against the evaluation criteria we established in the previous section to help you choose the best offering for your website.

Specifically, we’ll cover:

  1. Ease of use
  2. Launching the quick view lightbox
  3. Quick view lightbox content
  4. Customization options

Factor #1: Ease of use

One of the first things you’ll need to consider is how easy the plugin is to use and get started with. Ideally, you want a quick view lightbox plugin that works seamlessly out of the box without requiring you to mess around with too many configuration options.

WooCommerce Quick View Pro

The WooCommerce Quick View Pro plugin is incredibly easy to get started with. Once you install and activate it to your site, a Quick View button will be added directly below each product image. Once a customer clicks on the button, it will launch quick view in a product lightbox.

One of the standout features on offer with WooCommerce Quick View Pro is that it essentially creates a lightbox with quick view functionality. This is great for displaying product add-ons, variations, attributes, and additional product details. So, if you want to let customers be able to view products and product details in a popup window (product lightbox) with quick view functionality then WooCommerce Quick View Pro is worth considering.

This quick view plugin has plenty of settings and configuration options, which we'll discuss in a minute. However, you can keep it simple and activate the default options in seconds.

WooCommerce Quick View Pro default preview with quick view buttons

Since WooCommerce Quick View Pro is developed by Barn2 Media, you can rest assured that you're using a reputable quick view plugin and expect to receive high-quality support directly from the developers.

YITH WooCommerce Quick View

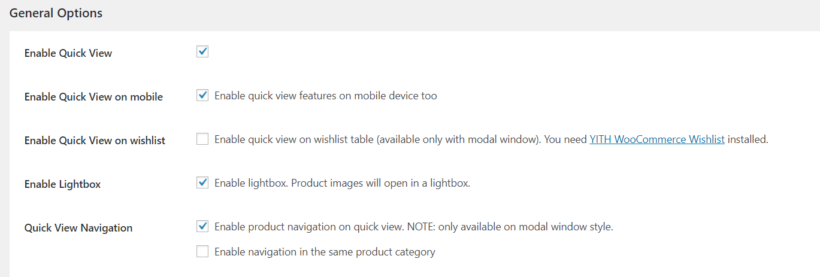
The YITH WooCommerce Quick View premium plugin automatically enables quick view functionality on your online store once you activate it. You’re able to enable quick view functionality on mobile and wishlists.

YITH WooCommerce Quick View general settings

It’s also important to note that YITH Quick View separates quick view functionality and lightbox functionality. What this means is that, if you want to have quick view show up in the lightbox, you’ll also have to make sure that the Enable Lightbox option is ticked.

The plugin’s settings let you set general options for the plugin which include how customers interact with it on the front-end and it’s overall look and feel. In addition to this, you’re also able to configure the quick view button options and decide which product details to display.

Flatsome Quick View

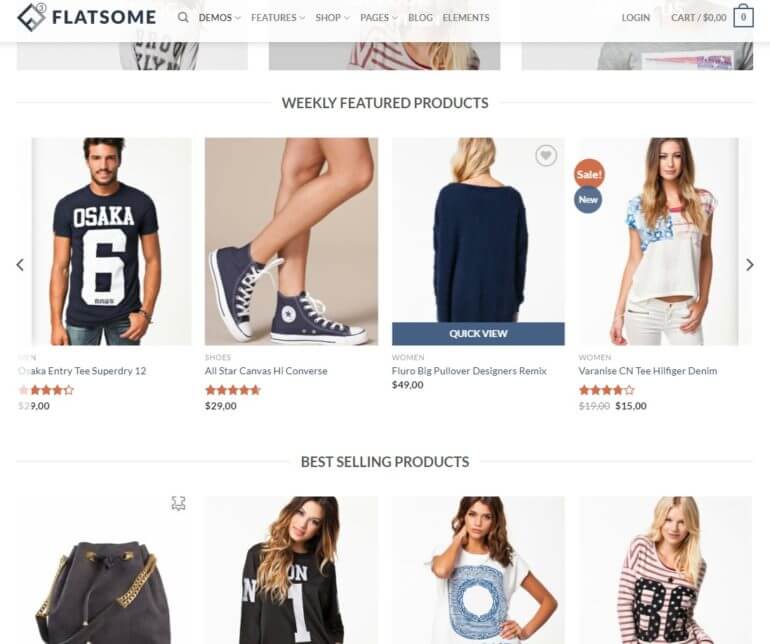
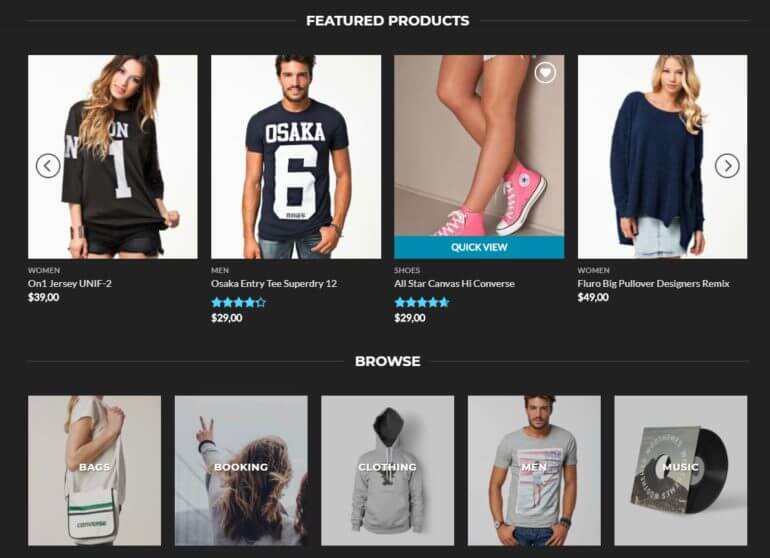
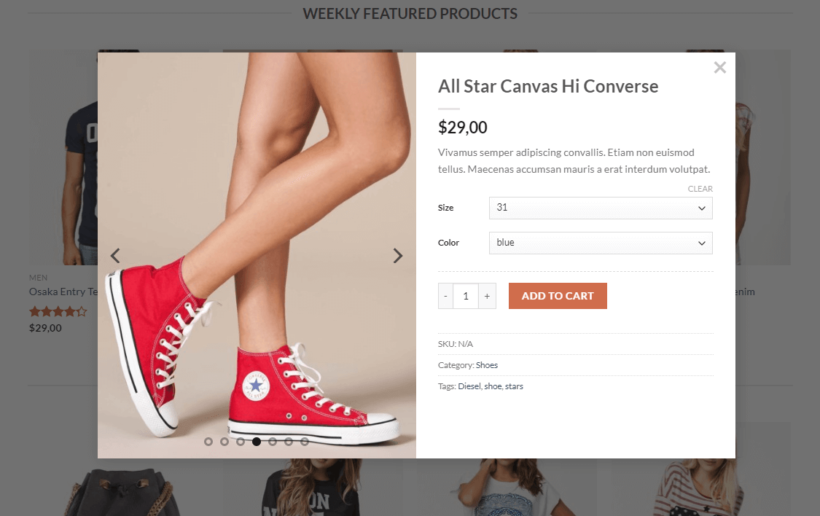
The Flatsome theme comes with a number of built-in features and extensions – including Flatsome Quick View – that enhance how WooCommerce products appear on your online store’s front-end. It might look something like this:

Flatsome Quick View default preview on hover

Flatsome’s Quick View functionality is enabled out of the box. What this means is that once you have the theme installed and activated to your site, your main shop page should have quick view functionality enabled automatically.

The big downside of Flatsome quick view is that it only works if you're using the Flatsome theme. This means that it doesn't function as a standalone WooCommerce quick view plugin. It's just for people who are already using Flatsome.

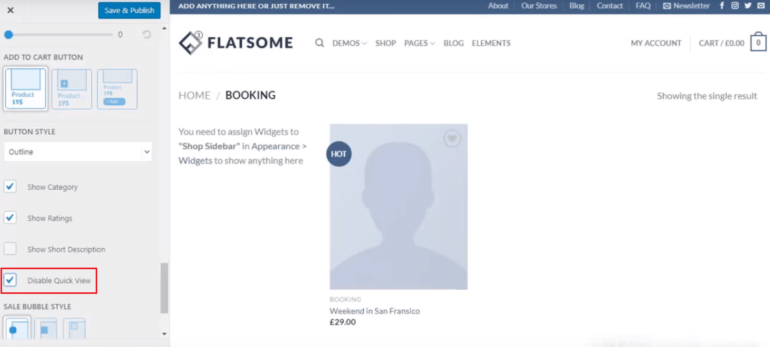
With Flatsome, you only have the option to disable quick view functionality. You can do this by going into the Theme Options section and navigating to the Shop/Category Page settings.

Disable the Flatsome Quick View feature

Verdict: WooCommerce Quick View Pro is the easiest to get started with!

Factor #2: Launching the quick view lightbox

It’s also important to consider how customers will launch the quick view lightbox since it directly affects the user experience your site delivers.

WooCommerce Quick View Pro

WooCommerce Quick View Pro gives users the option to decide how customers can launch the quick view lightbox. You can choose to:

  • Display a Quick View button in the main shop page and category pages.
  • Let customers open quick view by clicking on the product image.
  • Let customers open quick view by clicking on the product name.

This makes for a more intuitive and user-friendly option. The key benefit here is that customers can browse your entire shop and view product details without having to navigate to the single product page.

Launching product quick view lightbox by clicking on the product name, image, and quick view button.

Enabling the option to open quick view by clicking on the product name or image will automatically disable links to the single product page. Additionally, if you’re looking for a way to disable links to single product pages, you could simply replace them with quick view links.

YITH WooCommerce Quick View

With YITH WooCommerce Quick View, customers will have to click the quick view button in order to view products in quick view mode. You can choose to display the quick view button:

  • After the Add to cart
  • Inside the product image.
  • Display an icon after the Add to cart button.
  • Display an icon inside the product image.

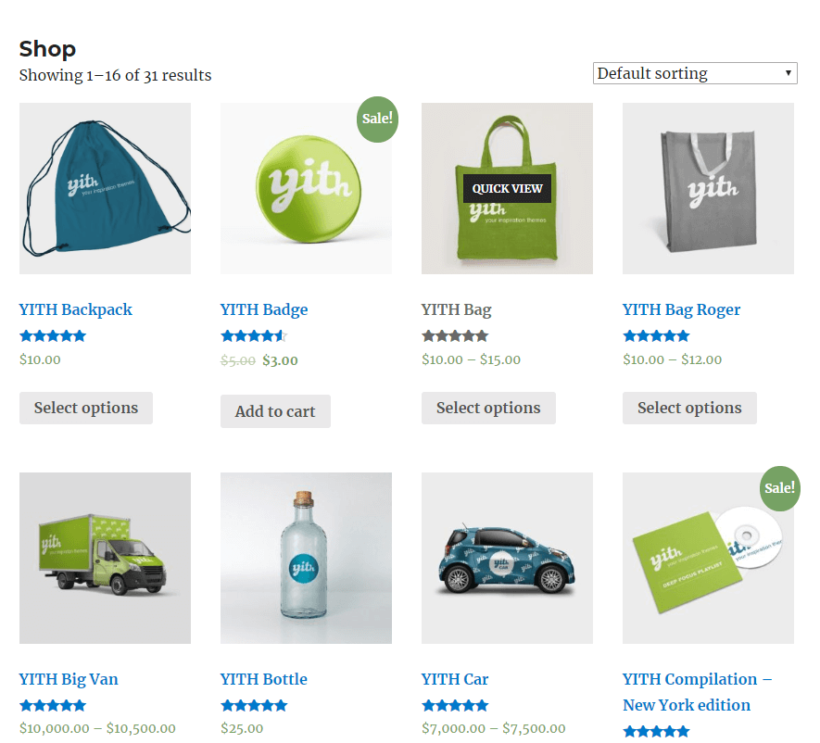
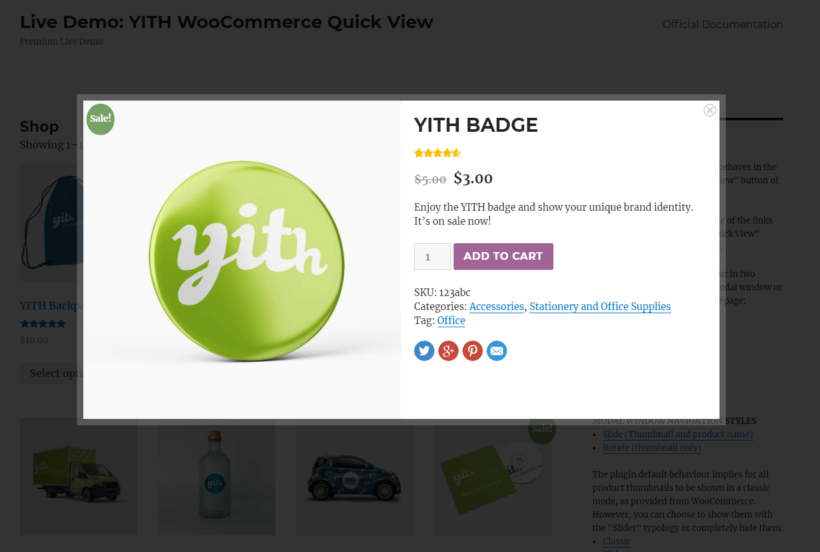
For example, if you wanted to display the quick view button inside the product image, it might look something like this:

YITH WooCommerce Quick View with quick view button inside product image

However, you’re not able to replace the product’s image link or product name with quick view. What this means is that customers will be redirected to the single product page if they click the product image or product name – this doesn’t always deliver an intuitive user experience.

Flatsome Quick View

Quick view functionality is baked into the Flatsome theme. In other words, you don’t have the option to change how customers interact with it.

Flatsome Quick View with quick view button on hover

Out of the box, Flatsome Quick View appears when customers hover over the product image – regardless of which template or demo you’re using.

Verdict: WooCommerce Quick View Pro gives you the best functionality options, and is therefore my choice. You can even use it with Flatsome theme - simply install WooCommerce Quick View Pro, and disable the Flatsome quick view in the Customizer.

Factor #3: Quick view lightbox content

The idea behind integrating quick view functionality into your WooCommerce-based online store is so customers are able to quickly learn more about your products. For this reason, it’s important to consider what sort of information and content you can display in the quick view lightbox.

WooCommerce Quick View Pro

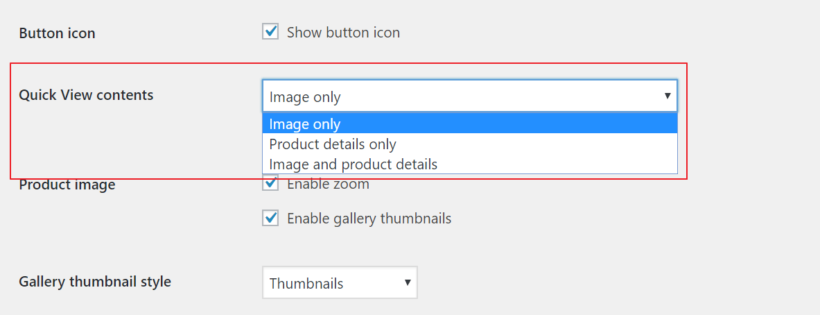
WooCommerce Quick View Pro gives users the option to choose which product details they’d like to display in the quick view lightbox. In addition to this, the WooCommerce Quick View Pro plugin lets users decide whether they want to display image only, product details only, or both image and product details.

WooCommerce Quick View Pro with purchasing options in lightbox quick view

You can choose to display any combination of details from:

  • Reviews
  • Price
  • Short description
  • Add to cart button
  • Meta information

In the case of image only or both image and product details, the lightbox will also display the product name, image, and full product gallery. You have full control over what information to display in the quick view lightbox.

YITH WooCommerce Quick View

YITH WooCommerce Quick View allows users to configure both Content Options and Share Options from the plugin’s settings screen. You’re able to select which elements you’d like to show in the quick view lightbox including product image, name, rating, price, excerpt, add to cart, and meta.

YITH WooCommerce Quick View lightbox contents

In addition to this, you can also choose to show share links for products. For example, you might consider displaying social share buttons to let customers share your product with their friends and followers on Facebook, Twitter, or Pinterest.

Flatsome Quick View

Flatsome Quick View is a pre-configured feature which means you have limited options when it comes to deciding which content to display in the quick view lightbox.

Flatsome Quick View lightbox contents

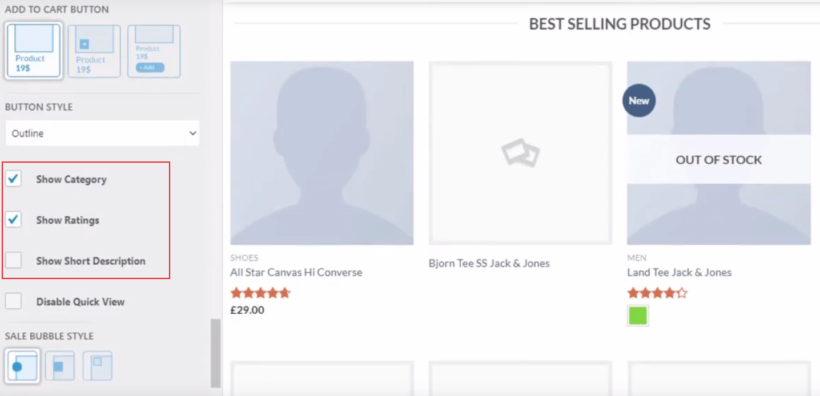
Out of the box, the feature displays product image, name, price, description, purchasing options, and meta. You can choose to show or hide the product category, ratings, and description.

Flatsome Quick View lightbox content settings

Verdict: WooCommerce Quick View Pro has by far the most options for what to display in your lightbox, and this will be a deciding factor for many.

Factor #4: Customization options

Ideally, your quick view lightbox plugin should let you customize the front-end preview so that it fits your brand and allows you to deliver the best possible user experience. In the context of quick view functionality, this typically means evaluating the button design and layout options available to you.

WooCommerce Quick View Pro

Aside from setting a custom button label and choosing to show or hide the button icon, WooCommerce Quick View Pro gives users several layout customization options.

Displaying image and product details in a quick view lightbox with WooCommerce Quick View Pro

With WooCommerce Quick View Pro, users can choose between three different layout options:

  • Images onlyThis is great for image-centric products where the customer might be more interested in viewing the product image (with zoom!) and image gallery as opposed to product details. This is great for anyone selling photography, icon packs, or graphic design vectors.
  • Product details only If you’re selling products that need the focus to be on product details and specifications – such as hardware goods or computer parts – then you can choose to display product details only.
  • Images and product detailsThis is great for when you need to display both product images (with zoom functionality) and product details. For example, if you’re selling clothes then customers might want to see the product image, gallery, and available variations.

With WooCommerce Quick View Pro, you’re also able to decide which gallery thumbnail style to go with. You can choose between clickable Thumbnails and Bullets. Finally, you can also enable image zoom to let customers preview products properly when they hover over the product image in the quick view lightbox.

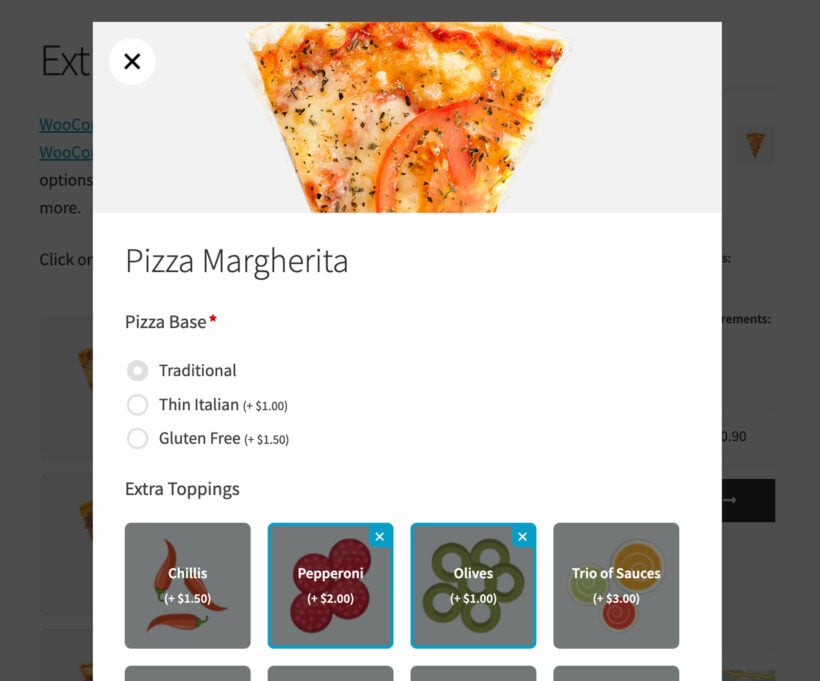
Note: WooCommerce Quick View Pro is the only quick view plugin to integrate with Product Options and WooCommerce Product Table.

WooCommerce restaurant order form with extra options
Using WooCommerce Quick View Pro with the Product Options plugin

YITH WooCommerce Quick View

YITH WooCommerce Quick View allows users to choose between displaying a quick view button or a quick view icon. In addition to this, users can also set a custom button label and decide where they’d like to position it i.e. after the add to cart button or inside the product image.

Customization options available with YITH WooCommerce Quick View

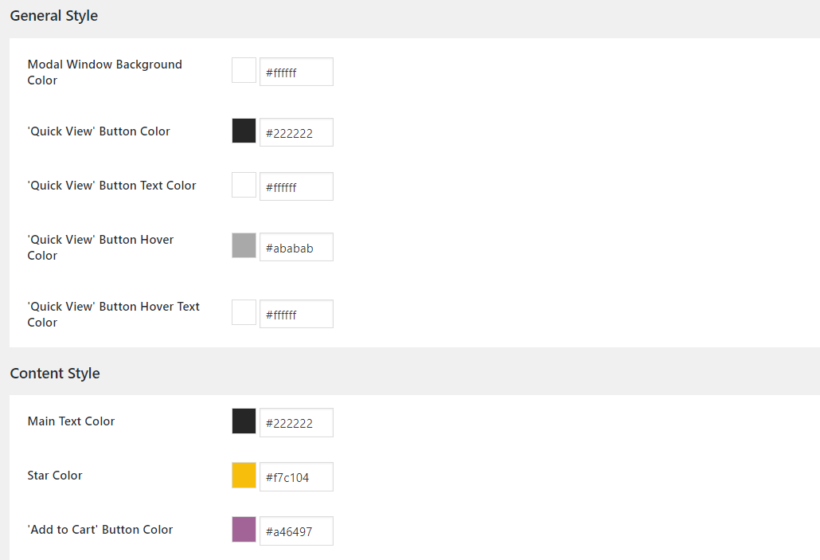
Users are able to set colors for just about every element of the quick view lightbox from the plugin’s settings screen. For example, you can change the modal window background color or the add to cart button color to match your brand.

Aside from this, YITH WooCommerce Quick View lightbox doesn't offer many customization options or alternative layouts. You can customize the styling, but not the layout. For example, you can't use the YITH quick view to show a product image lightbox without text, or text-only.

Flatsome Quick View

Flatsome Quick View doesn’t give users the option to customize the quick view functionality. In fact, the only configuration options available are to show or hide the product category, ratings, and description in the quick view lightbox or disable quick view entirely. That said, if you absolutely must change the look and feel of your Flatsome Quick View, you’d have to do so using custom CSS.

Verdict: WooCommerce Quick View Pro offers a fully customizable experience.

Conclusion

With the right WooCommerce quick view plugin, you’ll be able to deliver enhanced user experiences by making it easy for customers to learn about your products and add products to cart without having to visit the single product page.

Let's quickly recap the main features you should look for in a WooCommerce quick view plugin:

  • How easy is it to set up the plugin and get started?
  • What are the options available to you for launching the quick view lightbox?
  • How much control do you have over the quick view lightbox content?
  • How customizable is the plugin in terms of design and layout?

WooCommerce Quick View Pro fits the criteria to a tee. It's incredibly easy to get started with (all you have to do is activate the plugin!) and gives you several options to decide how customers will launch the quick view lightbox. In addition to this, you'll be able to decide exactly what content to display in the quick view lightbox. Finally, you're also able to choose from three different pre-built layout options.

You can use WooCommerce Quick View Pro with any theme. For example, if you prefer it to the Flatsome quick view then you can simply disable the quick view option in Flatsome and use WooCommerce Quick View Pro instead.

We compared some of the best WooCommerce quick view plugin solutions and, hopefully, you’re in a good position now to make informed decision.

What are some of the features you look for in a WooCommerce quick view plugin? Let us know in the comments section below.

When it comes to ecommerce, customers like to be able to find what they're looking for and make purchases quickly. One effective way to improve navigation and organization is to display products by category on the WooCommerce shop page.

If you're wondering "How do I show my categories on the shop page in WooCommerce"? then you've come to the right place.

The free WooCommerce plugin makes it easy to organize your product catalog by structuring it into categories and subcategories. However, the built-in methods for displaying products by category are less helpful. Luckily, there are plenty of more effective ways to show categories on the WooCommerce shop page which will make it easier for customers to find what they're looking for.

In this article, I'll show you:

  • How to create and manage WooCommerce product categories.
  • 2 ways to display categories on the shop page in WooCommerce - both using the built-in settings and the WooCommerce Product Table plugin.
  • How to add WooCommerce category filters to the shop page with the WooCommerce Product Filters plugin.
WooCommerce Product Table Filters Category Shop Page
A WooCommerce shop page order form with category filters

Let's get started!

Creating and managing WooCommerce categories

Categories in WordPress group together similar content, like posts, pages, and products. This makes it easier for visitors to navigate your site by searching a particular category.

Better navigation can significantly increase sales for online stores. Studies show that customers are more likely to leave a store without buying if they can't find what they want. That's why it's crucial to display categories on your WooCommerce shop page.

You can see an example of this on Wavelength Electronics' shop page where each category's products are listed in separate tables:

A product table on Wavelength Electronics.

Also, by adding search, sort, and filters to your product catalog, customers can easily find what they want without scrolling through long pages.

Ecommerce stores can improve their product category displays by organizing products for easier navigation, improving the shopping experience, and increasing conversions. The Product Table plugin allows stores to tailor these displays to specific customer needs, enhancing usability and sales.

Katie KeithFounder & CEO

How to create product categories in WooCommerce

It's simple to create WooCommerce product categories:

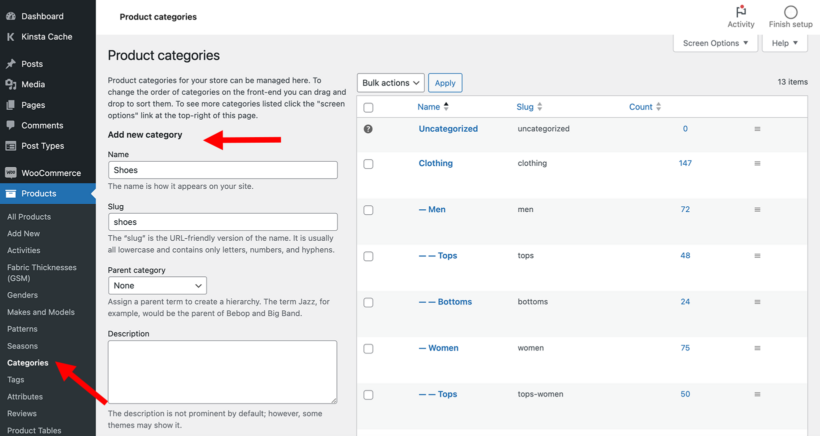
  1. Go to Products → Categories in the WordPress admin.
  2. Click 'Add New'.
  3. Add the category name, description etc. as needed.
How to create WooCommerce product categories

Adding subcategories and organizing your product hierarchy

If you have more than a few categories, then you can use WooCommerce subcategories to organize your site even further. Look more closely at the above screenshot, and you'll notice 2 ways to manage subcategories:

  • Use the 'Parent category' dropdown on the 'Add new category' form to create subcategories in WooCommerce. For example, if you wanted to create a 'High heels' subcategory then you would choose 'Shoes' as the parent category.
  • The category tree on the right shows the current WooCommerce category hierarchy. In the screenshot, you can see a 3-tier category structure. Top level 'Clothing' category has 'Men' and 'Women' subcategories. In addition, the 'Men' category has subcategories such as 'Tops' and 'Bottoms'.

WooCommerce supports an unlimited number of category levels. This means that you can create category structures which are as simple or as complex as you like. I recommend writing a list of your desired categories before you start creating them. Think about the best way to structure them for the most effective category management which will make things easier for customers.

Basic methods for displaying categories on your WooCommerce shop page

How to show categories with WooCommerce's default settings

Used alone without any extra plugins, WooCommerce provides a couple of ways to display categories on the shop page.

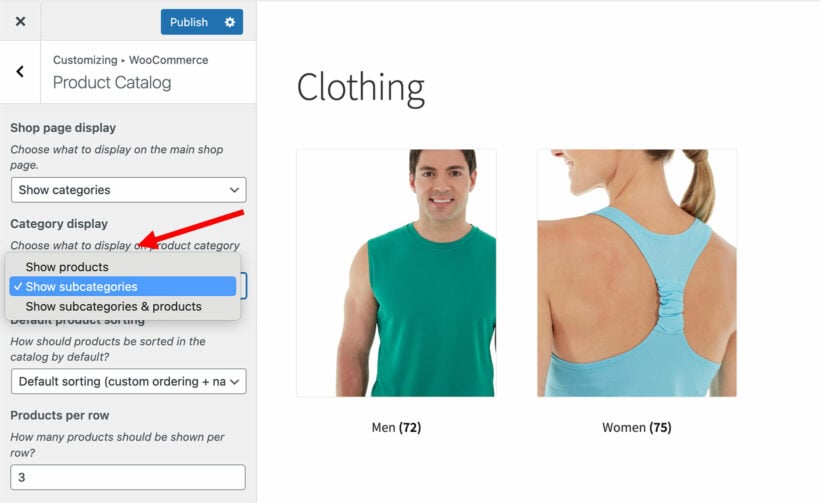
To to display products by category in WooCommerce simply find the setting by going to Appearance → Customize → WooCommerce → Product Catalog → Shop page display. Then change the dropdown selection to show categories, or categories plus products.

It's not possible to show subcategories on the shop page. However, you can set it up so that clicking on a category will display the subcategories. Do this using the Category display → Show subcategories setting in the WordPress Customizer:

Add subcategories to WooCommerce shop page

The product category widget

WooCommerce also provides a basic 'Product categories' widget which links to all your categories:

WooCommerce product category widget

Add this widget at Appearance → Widgets or in the full site editor, depending on your theme. Please note that this is not a category filter widget - you need the WooCommerce Product Filters plugin for that, which I'll tell you about in a minute. This widget is just a basic list of links to each category archive page.

Using blocks and shortcodes to display categories on any page

Want to show categories away from the shop page? You can do this using either WooCommerce blocks or shortcodes, depending on whether you're using the block editor.

This approach is especially useful for users who prefer working in the visual editor and want to see how the category layouts will look as they build the page.

There’s a choice of 2 blocks you can use to display categories on any page:

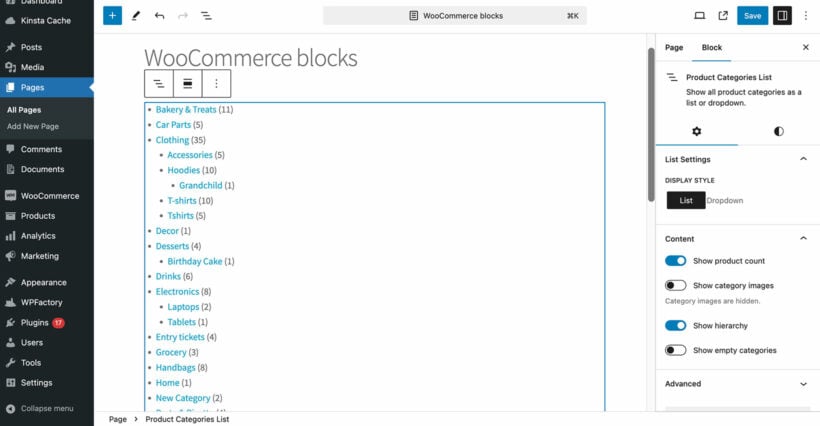
Product Categories List block

The Product Categories List Gutenberg block creates a basic list of categories. It's similar to the WooCommerce Product Categories widget shown above, but has a few extra settings. You can show or hide the product count, category images, subcategory hierarchy, and empty categories. As with the widget, this looks like a filter but it's not - it's just a list of categories with links to the category archive pages.

Product Categories List Gutenberg block

Product Category block

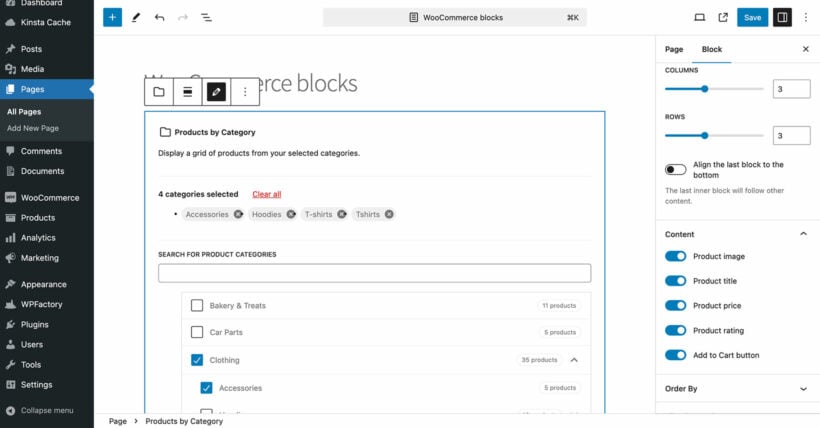
The Product Category Gutenberg block lists products by category. It's pretty flexible and you can choose which products and subcategories to display, and what product data to show for each product. However, it doesn't change the layout in a way that would improve conversions.

WooCommerce products by category block
How to add the Product Category block:
  1. Edit the page where you want to display product categories

  2. Click the ‘+’ icon to add a new block

  3. Search for Products by Category and select it

  4. Choose the categories you want to display from the checkbox list

  5. Use the block settings panel to customize:

    • Layout options - Set the number of columns

    • Content display - Choose which product information to show (title, price, etc.)

    • Ordering of products - Control how the products are sorted

This makes it easy to visually control how your category-based product displays look - without touching any code.

WooCommerce category shortcodes

Sites not using the block editor can use shortcodes instead:

  • [product_category category="clothing"] lists products from a specific category.
  • [product_categories] lists your WooCommerce categories or subcategories.

These look just like the WooCommerce category blocks, but you add them via a shortcode instead. For a full list of the options available to customize the shortcodes, check out our complete guide to WooCommerce shortcodes.

How to retrieve and display product categories with code

For store owners with development knowledge or access to a developer, using custom code to retrieve and display product categories offers greater flexibility and control over the layout and functionality.

You can use the WooCommerce function get_terms() to fetch product categories and then display them anywhere on your site. Here's a simple example you can add to your theme’s functions.php file or a custom plugin:

function custom_display_product_categories() {
	$args               = array(
		'taxonomy'   => 'product_cat',
		'orderby'    => 'name',
		'order'      => 'ASC',
		'hide_empty' => false,
	);
	$product_categories = get_terms( $args );

	if ( ! empty( $product_categories ) && ! is_wp_error( $product_categories ) ) {
		echo '<ul class="custom-product-categories">';

		foreach ( $product_categories as $category ) {
			$category_link = get_term_link( $category );
			echo '<li>';
			echo '<a href="' . esc_url( $category_link ) . '">' . esc_html( $category->name ) . '</a>';
			echo '</li>';
		}
		echo '</ul>';
	}
}

To display the list of product categories on a page or template file, simply call the function:

custom_display_product_categories();

This will output a basic list of product category links. From here, you can style the output with custom CSS to match your theme’s design.

Advanced techniques for displaying WooCommerce categories

So far, I've shown you how to use WooCommerce to display categories on shop pages without any extra plugins. That will get you part of the way there, but it's pretty limited because:

  • The options in the Customizer let you choose whether to show categories on the shop page, but doesn't improve the display or layout of your products.
  • It's not possible to see WooCommerce subcategories on the same page as categories.
  • The WooCommerce category lists aren't real filters and just link to all the category and subcategory pages.

Next, I'll share advanced techniques for displaying categories on the shop page more effectively. This includes:

  • Adding conversion-optimized one-page order forms to the WooCommerce shop page, complete with category information.
  • Displaying eye-catching AJAX-powered category filters to the shop page, styled either as checkboxes, dropdowns, radio buttons, clickable category images, and more.

How to show more product information in the category display

The problem with the default WooCommerce store layout is that it doesn't display much information about your products. It's just a basic grid.

This means that it doesn't even display what category each product is in. As a result, you have to restructure your store by category, for example by displaying categories first and products underneath 🙃

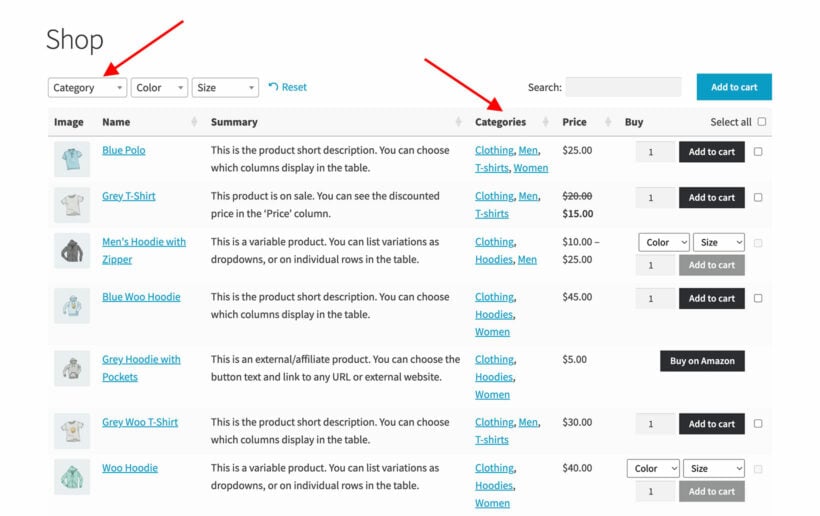
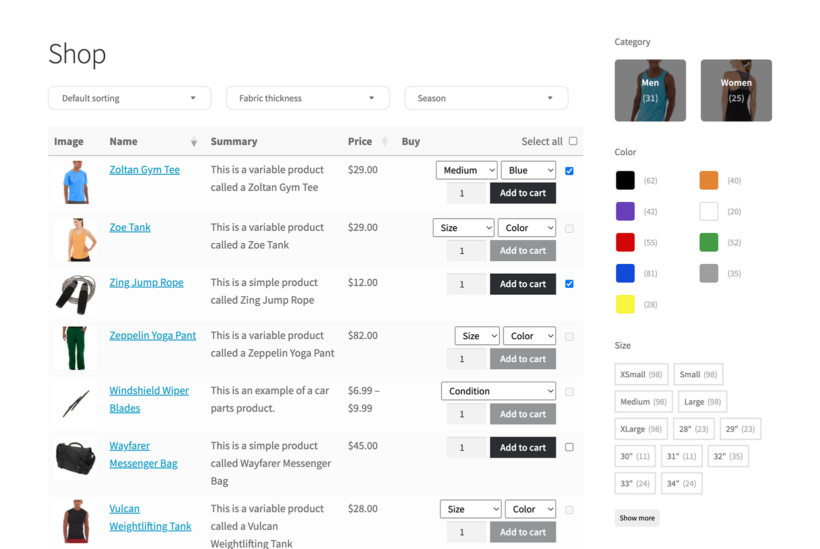
Instead, it makes more sense to list products as usual, while providing clear information about their category and the ability to filter by category. You can do this with the WooCommerce Product Table plugin, which displays products with category information on the shop page like this:

WooCommerce Product Table with categories displayed on shop page

Customers can click the category filter dropdown to filter the shop page by category. The categories and subcategories in the dropdown are listed in a logical, hierarchical way.

Alternatively, customers can click a category in the 'Categories' column to instantly filter by that category.

As you can see from the screenshot, this way of displaying categories on the WooCommerce shop page makes much more efficient use of page. More products are visible per page, and it's easy to see which category each one belongs to. It's just as easy to find products by category.

And even more importantly, customers can select quantities and variations directly on the shop page, which isn't possible with default WooCommerce. They can then click the multi-add to cart checkboxes to quickly add to their basket.

Best Woocommerce product table
Great plugin with endless possibilities of customization, not to mention the outstanding support.

How to display categories on the shop page with WooCommerce Product Table

First, I'll provide brief instructions on displaying categories on the main shop page. After that, I'll show you how to display products by category in order to create a separate table for each category.

  1. Purchase WooCommerce Product Table and install it on your WordPress site.
  2. Go to Products → Product Tables → Add New.
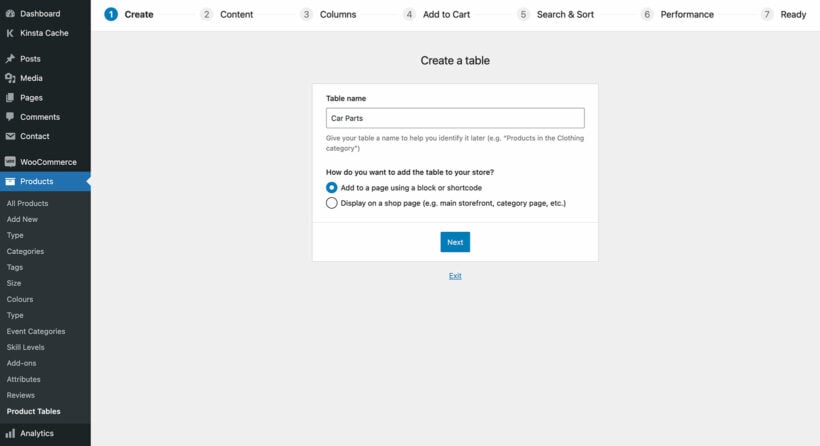
  3. On the 'Create' page, name your table and select "Display on a shop page (e.g. main storefront, category page, etc.)".
    Create page of table builder
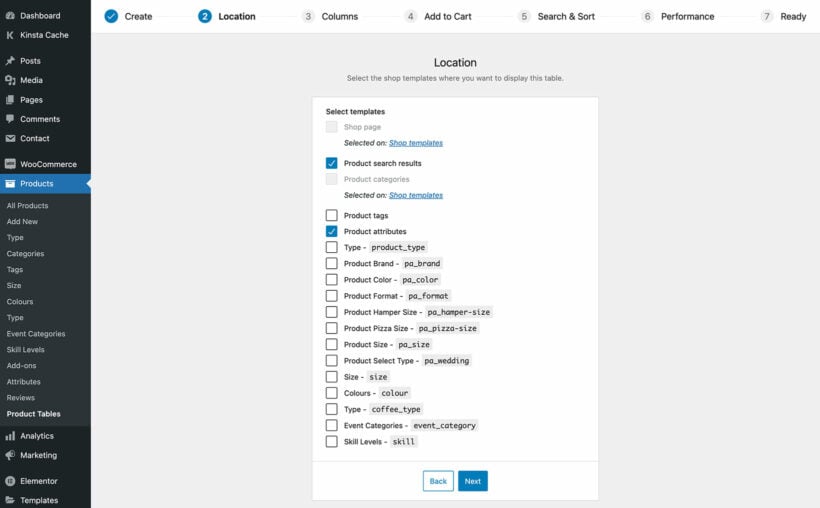
  4. You can then enable the table on the WooCommerce shop page, or other template pages such as your category archives. I recommend ticking all the boxes:
    Shop templates page of table builder
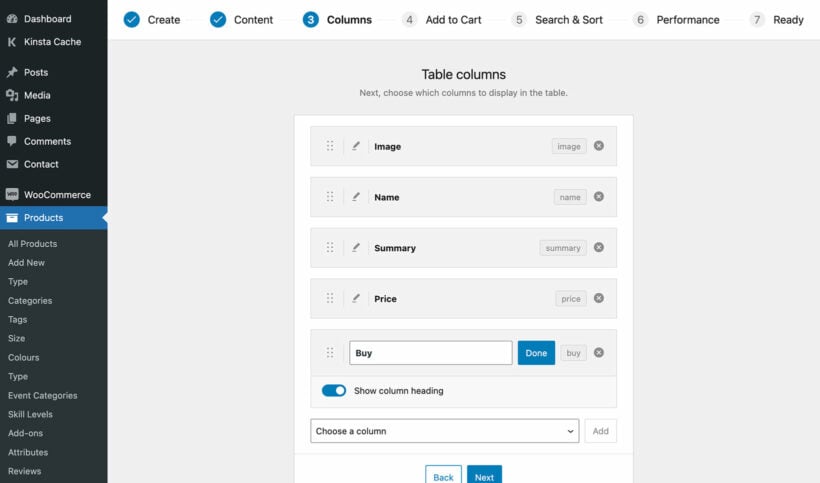
  5. Choose which columns of product data to include in the list.
    WPT table builder columns
  6. Set up the other options as required, for example by customizing the add to cart column and choosing how to sort the products.
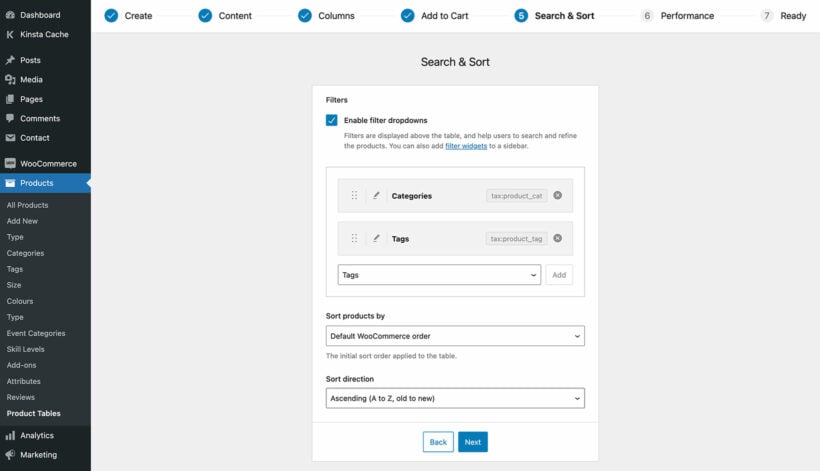
  7. Enable a category filter on the 'Search & Sort' page:
    WooCommerce Product Table builder filter dropdowns

How to list products from a specific category

Above, you learned how to list products with their categories on the shop page, and on your main category pages.

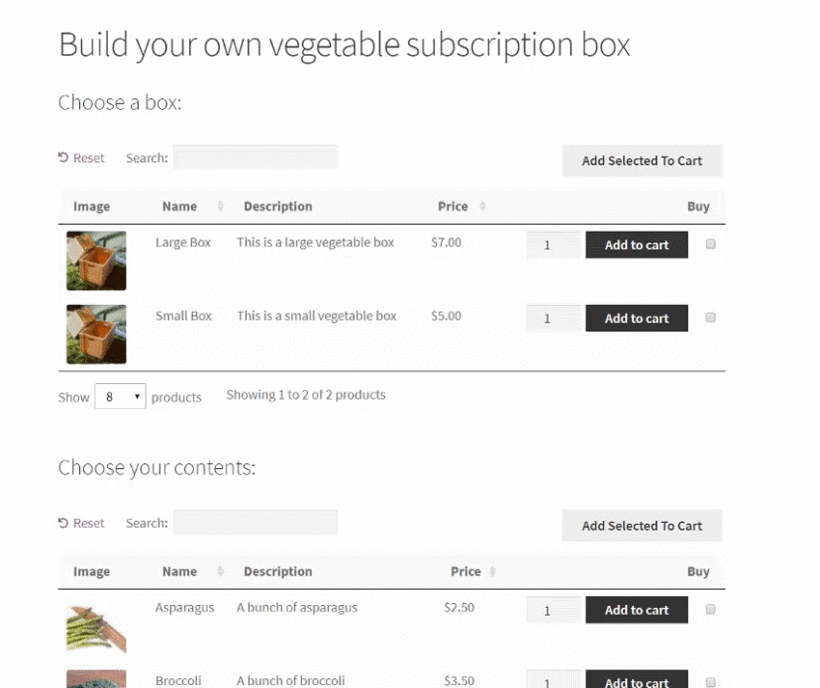
Alternatively, you can use WooCommerce Product Table to create tables listing displaying by category and insert them onto any page on your site. This "WooCommerce get products by category" method retrieves all the products in a specific category and shows them in a table. Check out the Product Table plugin documentation for more specific category display options. For example, you can use this technique to create order forms structured into multiple sections like this build your own gift box website:

Build your own vegetable subscription box

The instructions for this are mostly the same as above. The only differences are:

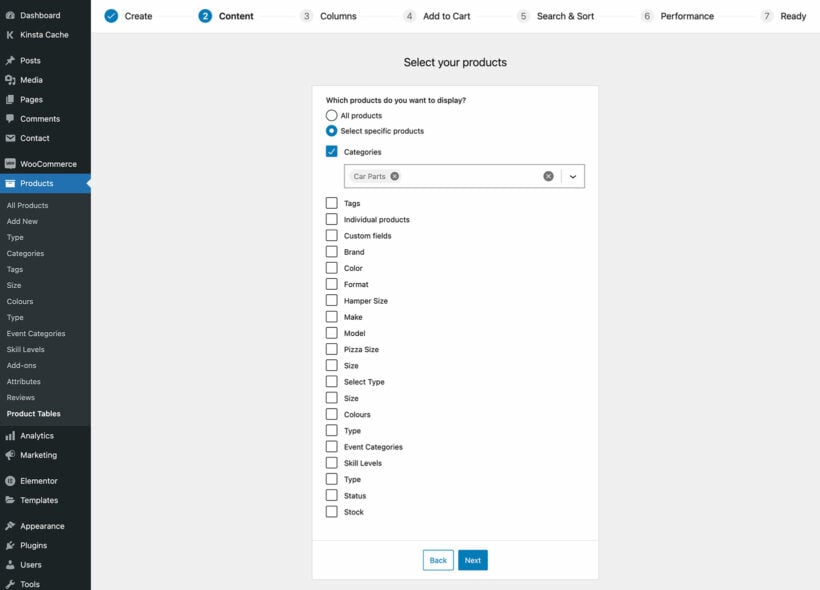
  1. On the first page of the table builder at Products → Product Tables, select "Add to a page using a block or shortcode". On the next page, you can then choose which categories (or subcategories) display products from.
    Select products page of table builder so you can display categories on shop page
  2. The last page will give you a WooCommerce shortcode that you can use to add the list of products displayed by category to a page. If you're not using the WordPress block editor, then copy this to the clipboard.
  3. Lastly, create a new page and either add a 'Product Table' block (selecting the name of the table you created) or add the shortcode. This will display products by category on the page.

You can repeat the above steps to list products from different categories in different tables. To save time, go to the main list of tables at Products → Product Tables and duplicate an existing table. You can then edit it and change which category of products is displayed, leaving the other settings the same as required.

How to display category filters on the WooCommerce shop page

In the previous section , I showed you how to display a simple category filter dropdown above the product table. That's better than nothing, but the WooCommerce Product Filters takes this to the next level 🚀

The WooCommerce Product Filters plugin adds professional-level filters to your ecommerce store. Use it if:

  • You don't want to use the product table layout shown above, but still want to add category filters to WooCommerce.
  • You want more visually eye-catching category filters, such as clickable category images or checkbox filters.

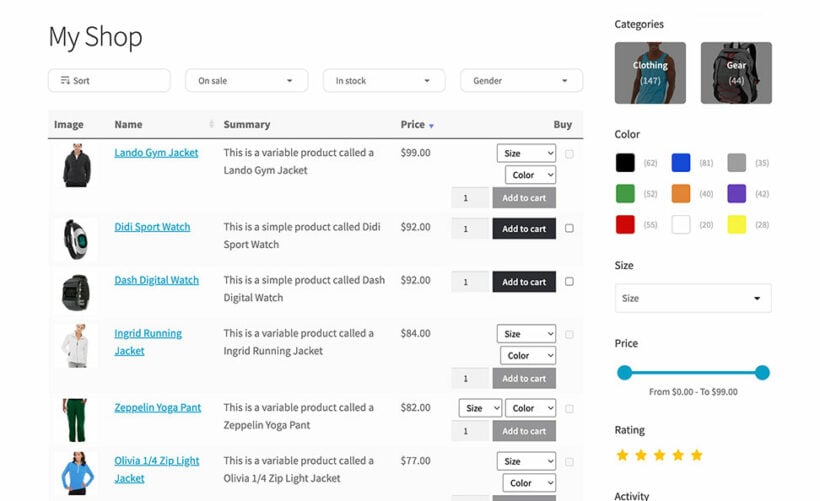
For example, this store uses WooCommerce Product Table to display products, with WooCommerce Product Filters to add clickable category image filters:

WooCommerce Product Table with Filters, displaying woocommerce categories on shop page

Get started: Display categories on the WooCommerce shop page

I hope this article has answered the question "How do I show my categories on the shop page in WooCommerce"?

In this article, you've learned how to display WooCommerce categories on the shop page using the built-in methods. We've also looked at how you can get better results by displaying categories in more advanced ways:

Do you have any questions about the WooCommerce product category list? Let us know in the comments below!

FAQ

How can I display WooCommerce product category names?

All of the methods discussed above will display product category names along with other data. If you just want to list category names with no other information, then you should use either the Product Categories widget or block. These are part of WooCommerce off the shelf, and display a simple hierarchical list of category names.

How can I show subcategories on the WooCommerce category page?

When you go to Appearance → Customizer → WooCommerce → Product Catalog, there's an option to show subcategories on category pages. Alternatively, you can show both WooCommerce subcategories and products. This displays subcategories as big thumbnails at the top, with individual products below.

Alternatively, use the WooCommerce Product Table plugin to list all products on the shop page with a 'Categories' column plus filter dropdown. These will both include subcategories and mean fewer clicks for the user.

How can I display a whole category of WooCommerce products?

There are 2 ways to do this, both of which I've provided instructions for above:

  • Use a block or shortcode to display all the products from the selected category.
  • Use WooCommerce Product Table to create a table listing products from one category only.

Create a WooCommerce audio store in under an hour

Creating a WooCommerce audio store doesn't have to be complicated. With the right plugins, you can have a music store up and running in under an hour - without hiring a programmer to help you out.

So if you're looking to sell audiobooks, samples of music, audio language learning materials, or even karaoke music, you're in the right place.

In this post, I will guide beginners through the step-by-step process of creating their own WooCommerce audio library. By following the instructions provided, you can easily build a user-friendly audio library for your online store, without the need for advanced technical skills.

In this post, I take you step-by-step through the process of building your very own WooCommerce audio library. The end result will be a fully operational WooCommerce audio store.

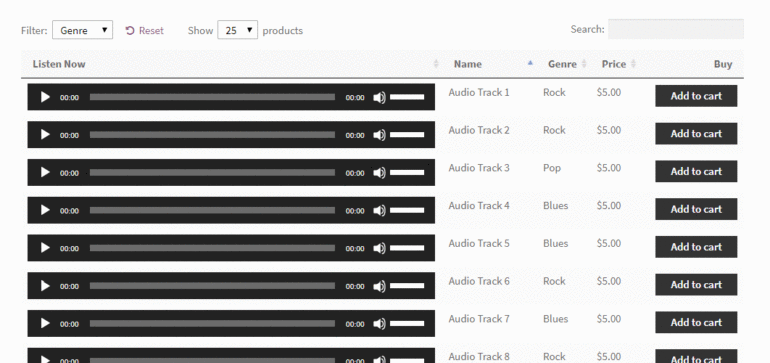
Here's the kind of final effect that we're going for:

audio store

What you need to get started building your WooCommerce audio store

Before we start, I'm going to assume that you already have the following:

  • An operational WordPress site
  • WooCommerce installed on that website
  • Any WordPress theme (with or without a page builder such as Elementor)

There's also the third element - our WooCommerce Product Table plugin. Let me show you how to get your hands on it, install it, and use it to build your WooCommerce audio store.

But before that...

Okay, I should probably address one small thing before I discuss how to use the plugin.

That thing is, "Why do you even need a WooCommerce music store?"

The short answer is that it's going to make selling audio files more effective for you, and more convenient for user experience. We've previously published a tutorial about how to create a WordPress audio library with embedded audio players. That focuses on how to display audio and music for everyone to view in the front end, but it doesn't let you sell them. That's what I'm going to tell you about today.

A WooCommerce audio store is powered by an e-commerce plugin. As well as embedded WooCommerce audio previews, it has purchasable download files.

What will my WooCommerce music store look like?

You can use WooCommerce on its own to sell audio files. However, it displays them in a really unhelpful way. You can sell audio files online more effectively by showcasing your catalog of audio tracks in a list or table. That's why you need the WooCommerce Product Table audio plugin store too. 

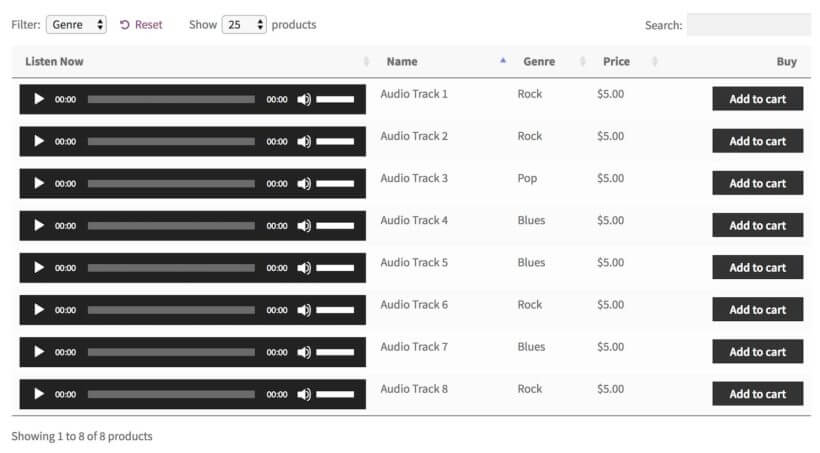
Your finished WooCommerce music store might look something like this:

WooCommerce audio store table
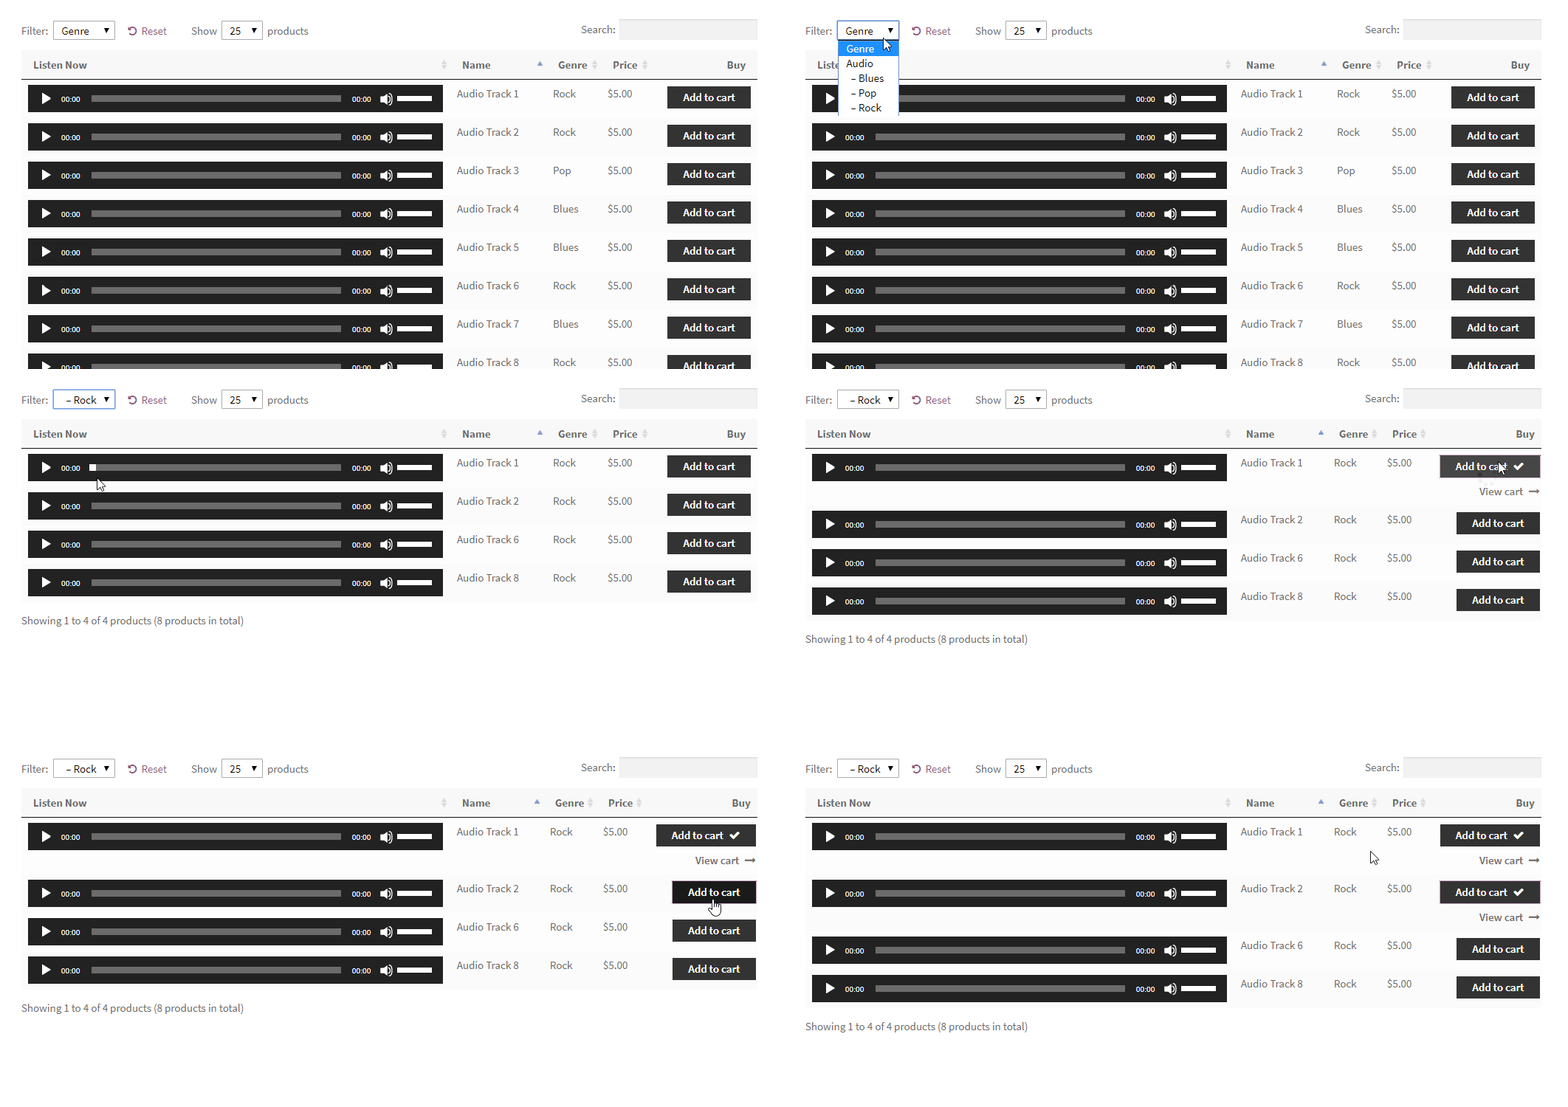
  • With this type of WooCommerce music store, the reader/buyer can listen to a number of audio files one after the other without having to navigate to separate product pages - each for one audio file. This might be the full audio file so that people can listen without being able to download it (as they have to buy the product to actually download it!). Or it might be a short sample or snippet to convince them to buy the full version.
  • The buyer can click the "add to cart" buttons directly next to the tracks that they like. This lets them purchase and download items from the music store WordPress. Again, no need to navigate anywhere else.

Keep reading to see examples of WooCommerce music stores in action, and then learn how to set it up on your own site!

Examples of music you can sell online with WooCommerce

WooCommerce Product Table lets you create a WooCommerce music store selling literally any type of music online. Here are some examples:

  • Any audio file format MP3, WAV, and much more. Choose the most appropriate format for your music products, and sell them online with WooCommerce.
  • Any audio or music genre You can sell original audio (audiobooks, foreign language lessons, singles, albums, podcasts, recorded lectures) or stock footage (corporate or relaxing background music, karaoke backing tracks, royalty-free music, samples, sound effects).

Before I show you how to set up your WooCommerce audio store, let's look at some case studies. You can also see our demo of an audio store in action.

Case study #1 - A WooCommerce audio store for Nico Backing Tracks

WooCommerce music store plugin
Nico composes and sells background music tracks through his Woo audio store – Nico Backing Tracks. Nico's customers need to be able to listen to snippets of tracks before purchasing so he needed audio players embedded into the product list.

That's why Nico lists his backing tracks in a WooCommerce music store powered by our WooCommerce Product Table plugin.

Customers can sort the audio store by price, reviews, or track name. There's no clicking from one page to another to listen to tracks and add them to the cart. Everything's on one page. Once the customer knows what they want, they just have to add the track to their shopping cart before clicking view cart to choose the payment gateway.

Case study #2 - Music Drop's WooCommerce audio store

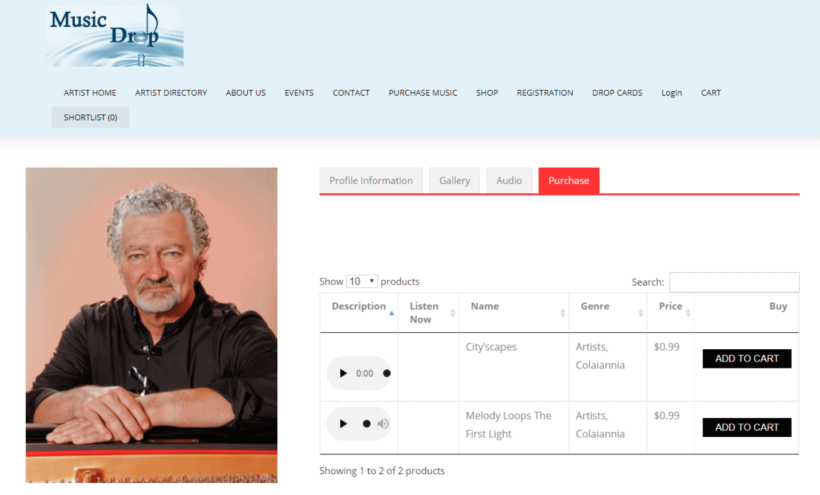
Music Drop is a music platform with a WooCommerce audio store. Set up by Louis Colaiannia, the site's mission is to be a platform where artists can sell their music to music lovers across the world.

Each artist has their own profile with tabs for information, an image gallery, and audio. The purchase tab features a product table listing all the audio tracks by that artist. Customers can sort the WooCommerce music store by price, track name, and genre. Plus, the embedded audio players mean users can listen to the tracks before they add any item to the shopping cart.

Case study #3 - Boom Bap Labs' audio sounds shop

WooCommerce music store library
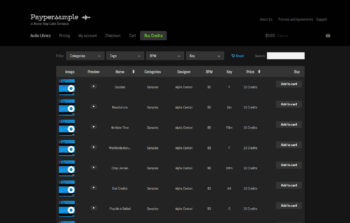
Boom Bap Labs sell individual sounds with WooCommerce audio previews through their sister site called Paypersample.

The audio store is powered by WooCommerce Product Table, making the tracks quick and easy to find.

Each track has a sample track embedded into the table so customers can listen before they buy. To do this they installed the WordPress HTML5 Audio Player.

There are hundreds of tracks to look through, that's why customers benefit from the filter dropdowns and sort options. In a couple of seconds, the customer can filter the table by category, tag, beats per minute, and key.

Read on to find out how to create your own WooCommerce audio store.

How to create a WooCommerce audio store: step-by-step

The great thing about WooCommerce Product Table is that it can be used for all sorts of different types of WooCommerce products, not only audio files. Whether you want to sell physical CDs or digital products, this audio plugin store can do it.

To learn how to set up a WooCommerce music store, either watch the video or read the step-by-step instructions below.

1. Get the WooCommerce audio plugin and install it on your WordPress site

  1. Buy WooCommerce Product Table.
  2. Install and activate it on your site.
  3. The interactive table builder will open, or you can access it later from Products → Product Tables.
  4. Follow the step-by-step process to set up your WooCommerce audio store.

2. Configure your audio store

Pay particular attention to the following options:

Music store columns

WooCommerce Product Table comes with a long list of columns that you can add to the table. You can add and rename columns in the table builder. I recommend these columns for selling audio and music:

  • Description - We're using the main description field of the product to display a live audio embed. This allows the buyer to listen to the track before buying it. Click on the pencil icon for the Description column and rename it to "Listen Now" or similar.
  • Name - The name of the audio track.
  • Categories - It's a good idea to categorize your audio products based on the genre. Use the product category for that, and change the column name to "Genre".
  • Price - The price of each audio product.
  • Buy - The "Add to Cart" button.
WooCommerce audio store columns

Of course, the above settings are just a suggestion. You are free to experiment and pick other columns when building your WooCommerce audio library.

Disable links to the product page

By default, columns like the product name will link to the individual page for each product. I like to disable these for a WooCommerce audio store because customers already have all the information they need to buy. Keeping them on the main audio store page helps to prevent distractions.

You can do this in the advanced settings for each column when you edit an existing table at Products → Product Tables:

Disable column link to product page

Product filters

The table builder also lets you add filter dropdowns above the audio store. WooCommerce music store, it makes sense to enable filtering based on genre.

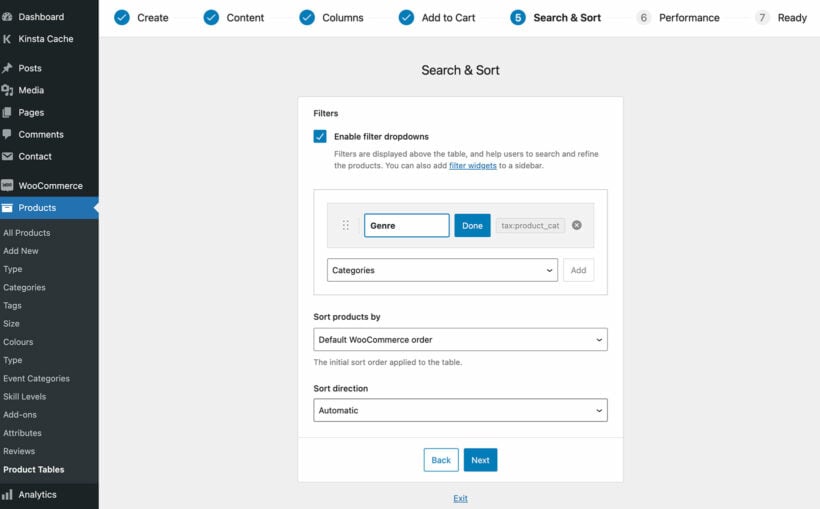
Add a category filter and click the pencil icon to change the name to 'Genre':

WooCommerce music store filter by genre

Plugin settings

To create the ultimate WooCommerce audio store, you also need to go to Products → Product Tables → Settings and enable the 'Shortcodes' option. This ensures that the embedded audio players in the table will work.

Add filter sidebar widgets to the music store

WooCommerce audio table filter widgets

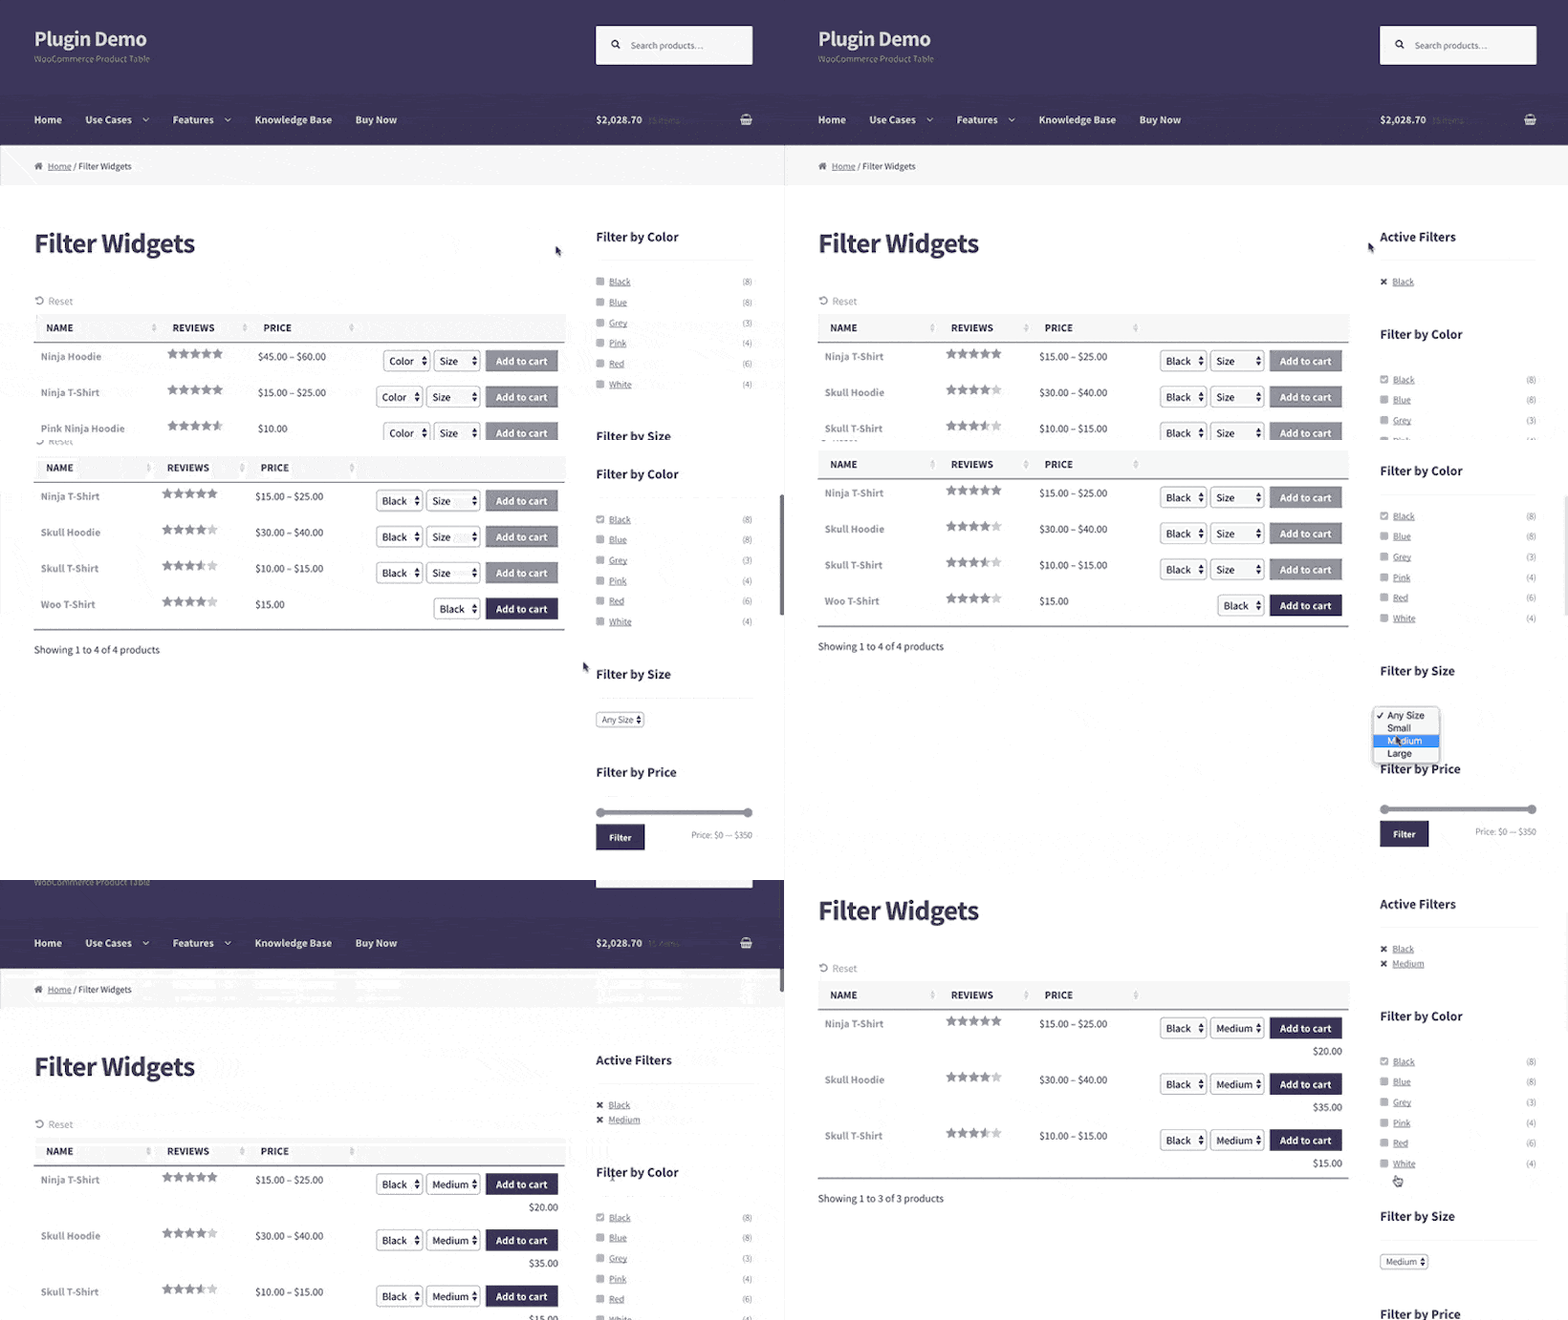
Some WooCommerce audio stores like to allow their users to filter by multiple tags, for example, to find all songs that are 'romantic' and 'classical'. The filter dropdowns above the table only let you select one option at a time (although you can have as many different dropdown lists as you like, for example, so that users can choose a genre, a composer, and so on).

If you'd like people to be able to select multiple items from the same category (e.g. multiple composers) then you can do this using filter widgets. These appear in the page sidebar. Add the options as product attributes, and users can tick as many as they like.

Add advanced filters

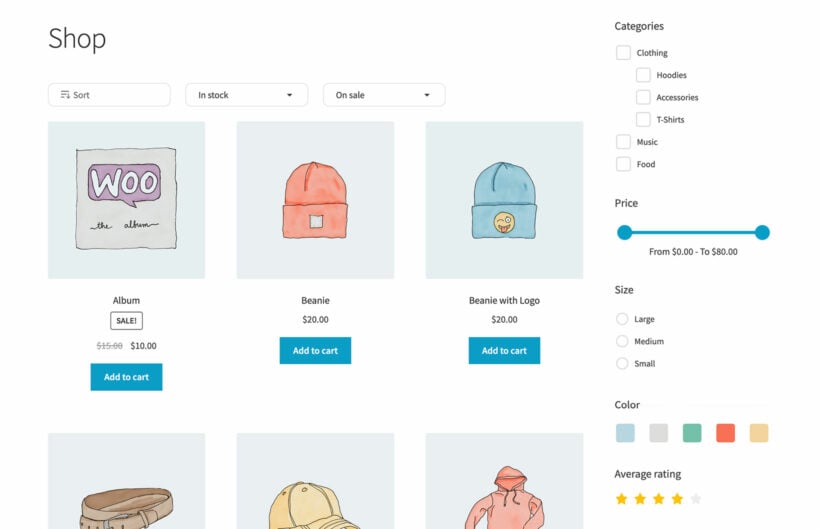
For even more advanced filters, you can also use WooCommerce Product Table with the WooCommerce Product Filters plugin. This has a huge range of filter options that you can tailor to your music store's exact needs.

WooCommerce product filter AJAX plugin

You can add these advanced filters to your default store layout, your WooCommerce Product Table-powered audio store pages, or anywhere else where you sell products.

3. Add products to your WooCommerce audio store

WordPress and WooCommerce make this part very simple. Here's what you do:

  1. Start by going to your Products panel normally, from the WordPress dashboard.
  2. Click on Add New.
  3. Give your audio product a representative name. Keep it brief, though.
  4. Assign the product to a category. As I mentioned earlier, it's a good idea to use categories for genres.
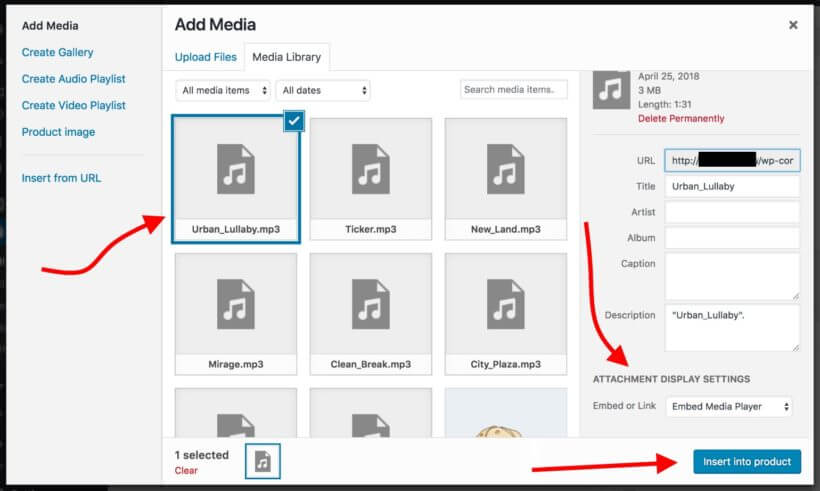
  5. Decide where you want to add the embedded audio player. Most people add it to the main product description or short description. Alternatively, you can add it to a WYSIWYG custom field. Either way, click the Add Media button above the toolbar (or insert a Gutenberg block) and upload or select an audio file from the media library. (Alternatively, insert the file from an external URL if you're web hosting your audio elsewhere.) Where it says, Embed or Link, pick Embed Media Player. Like so:
embed audio
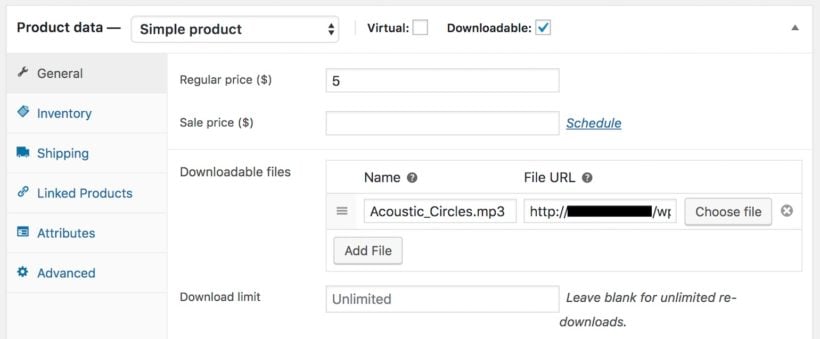
  1. Mark the product as Downloadable, enter its price, and pick the file that the buyer will get access to after completing their purchase. (This will most likely be the exact same audio file you've embedded above.)
downloadable

Repeat this step for each of your WooCommerce audio store's products.

Tip: If you don't like how the default WordPress audio player shortcode looks, don't worry. Keep reading to learn about other audio player plugins you can use in your WooCommerce audio library.

4. Add your WooCommerce audio store library to any page or post

So far you've configured the WooCommerce plugin and added audio tracks to the product catalog. Next, you just need to show this WooCommerce audio store module to your buyers.

This is very simple to do. Just edit any page or post, and use one of these methods to insert the audio store:

  • Insert the 'Product Table' Gutenberg block and select your table.
  • Add the table's shortcode. You can find this at Products → Product Tables.

When you publish the page or post, this shortcode will be converted into a live WooCommerce audio store table containing all your products with embedded audio tracks.

Depending on the options you chose on the audio table plugin settings page, your buyers can navigate the table easily, listen to any of the tracks or sort it by any column. They can also add audio tracks to the cart, and filter the entire table to only display tracks of a given genre.

audio store
The WooCommerce music store plugin in action

Bonus tip #1 - Show audio previews in a quick view lightbox

WooCommerce Quick View audio plugin

So far, you've learned how to list your WooCommerce audio store products in a table layout with a column containing embedded WooCommerce music players. If you prefer, you can provide the audio samples in a quick view lightbox instead of directly in the product list.

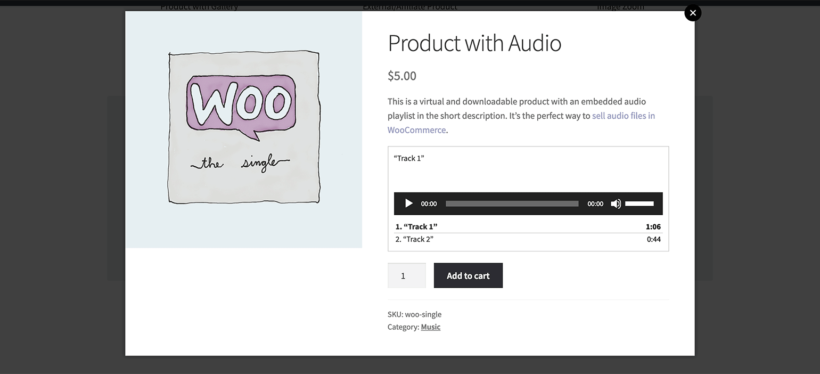
You can achieve this by installing the WooCommerce Quick View Pro plugin. This adds 'Quick View' links or buttons to your product tables, or to the default store layout if you prefer. Customers can open the quick view for a product and listen to the WooCommerce music player from a lightbox popup.

To set it up, simply install the plugin and add the embedded audio players or playlists to the product's short description. This will appear as a music player for WooCommerce in the quick view popup.

Bonus tip #2 - Boost conversions with faster checkout mechanism

For any ecommerce store, cart abandonment is a big issue. One of the primary reasons for cart abandonment is the long and complex checkout process. For this, having a simplified and quick checkout set up on your store can greatly increase conversions and bring down the cart abandonment rate.

Display extra product option fields in mini cart WooCommerce

The WooCommerce Fast Cart plugin is specifically designed for this purpose. The plugin features an intuitive one-page checkout mechanism that lets customers complete the checkout process without leaving the page at all. They can review their orders, add their mailing details, and complete the payment on the same page.

To set it up, simply install and activate the WooCommerce Fast Cart plugin on your WordPress website. Configure plugin settings for your store, and that's it. The plugin will begin working independently and help customers easily place orders on your WooCommerce store.

Enhance your WooCommerce audio library with other audio plugins

In the instructions above, I explained how to add music players for WooCommerce audio store using the basic audio shortcode that comes with WordPress. If you don't like how this looks, then you can embed your audio files using third-party audio plugins instead.

There are lots of audio plugins available. We particularly love:

  • The free or premium version of Presto Player, which adds easy-to-use yet attractive video players that look fantastic in WooCommerce Product Table:
    Presto Player Posts Table Pro audio player
  • The free
    WordPress compact audio player plugin
    Compact WP Audio Player plugin because it's so incredibly simple. It lets you add a circular play icon that customers can click on to listen to tracks directly in the WooCommerce audio library. This takes up less space than the default WordPress audio player and looks really neat.

The plugin author has packed a lot into this small audio plugin, as it has the main controls you need. While you're playing an embedded audio track, the icon turns to a pause button so that you can stop and resume as needed.

To add a compact WooCommerce music player to any of the fields in your WooCommerce audio store, simply install the plugin. The only other step is to add the shortcode [sc_embed_player fileurl="URL OF THE MP3 FILE"] to the field where you want to display the customizable audio player for each product. This will display correctly in WooCommerce Product Table.

Create a WooCommerce audio store with free downloads

So far, we've talked about how to create an audio library with add-to-cart buttons. This is ideal if you want to sell your audio products. But what if that's not what you want?

Fortunately, you can also use this WooCommerce audio plugin to provide free downloads. There are several ways to do this:

Option 1 - Create free audio products

Create a download product and set the price to 0. Users can add the free download to the cart in the usual way, and complete the WooCommerce checkout without having to pay. WooCommerce will then send them a secure link to the free download via email.

Option 2 - Add direct download links to the audio library

Alternatively, you can add a direct link to the download to the short description, long description, or a custom field. You can style this as a button if you like, or leave it as plain link text. Call it something like 'DOWNLOAD NOW'.

People can click to download the file to their computer immediately, bypassing the cart and checkout. For instructions on how to add a link or button to the audio library table, please see the knowledge base.

Can I create a WooCommerce audio store without free audio snippets?

Absolutely. You don't have to include audio players with the full track or a short sample snippet.

Instead, you can just list the other columns without an embedded audio player. Or alternatively, add an image (watermarked if required) as the main product image and add an 'image' column to your product table. This will show the image instead of an audio player. The customer will receive an email with the actual audio file after purchasing.

Can I sell non-downloadable audio tracks?

So far, I've assumed that you want people to receive a link to download the full audio file after purchasing. If you don't want people to be able to download the audio - for example for copyright reasons - then that's fine too.

Here's a nice simple way for you to sell audio products, without making them available for download. Customers can only listen to them on a hidden page on your online store.

This is how to set it up:

  1. Create a new page and use the 'Add Media' button to upload the audio file. WordPress will automatically convert this into an embedded audio player that you can listen to on the page, but which can't be downloaded.
  2. Password protects the page where you've added the audio player. This is easy to do - just click 'Edit' next to the 'Visibility' option in the 'Public' section of the Add/Edit Page screen.
  3. Add the audio track as a 'Virtual' WooCommerce product.
  4. Now, install Woo's official Follow Ups plugin. Use it to create an email that will be sent to customers after they purchase this specific product. The email should contain a link to the password-protected page where you have embedded the non-downloadable audio track. It should also contain the password so that they can unlock the hidden page.

Repeat this process for each audio product.

Go the extra mile and sell entire audio playlists

With the following setup, you can not only sell individual audio tracks but also entire playlists.

To do that, you first need to create some new products. The process starts normally by going to Products → Add New and naming your new audio playlist product accordingly.

Next, click on the Add Media button, but this time instead of adding an individual audio file, click on Create Audio Playlist and pick the tracks that should go into the playlist. When you're done, click on Insert audio playlist.

create playlist

Lastly, mark the product as Downloadable, and assign all the files that the buyer should be able to download once they complete the purchase.

This is what the playlist looks like for the buyer:

playlist to buy

Your turn!

Now you know how to create a fully functional WooCommerce audio store with the WooCommerce Product Table plugin! The best thing is that the whole process can be carried out in less than an hour (reading this tutorial included). If you have lots of products then you might need longer to add them all, but an hour should be realistic to set up the basic WooCommerce audio store.

Get this WooCommerce audio plugin today and begin your adventure with it:

Best WordPress restaurant themes

Looking for the perfect WordPress restaurant themes for your restaurant, bar, or cafe? For hungry people searching online, your website is going to be their first experience with your food, so you want it to be perfect.

To help you create that awesome online experience, we've collected 25+ of the best WordPress restaurant themes.

But before we dig into those themes, let's quickly run over the most important elements that a restaurant website needs in 2025 and beyond. This will help you to think about what you want and pick the right theme...

What do WordPress restaurant themes need in 2025?

To pick the best WordPress restaurant theme and give your food the attention it deserves, you'll want to pay attention to some specific aesthetic and technical considerations. This will help you choose a theme that you can customize to meet your needs and also that will give your visitors a great user experience:

  • HTML food menu - nowadays, most people (~72%) search for restaurants on their smartphones, so a slow-loading, hard-to-read PDF menu just isn't going to cut it. You want a theme with a quick-loading HTML menu that looks great on all devices.
  • Responsive design - beyond an HTML menu, you'll also just generally want to choose a theme that will look great on all devices. Again, this is because a lot of hungry people are searching for restaurants on their smartphones.
  • Location information - look for a theme that makes it easy to display your address and contact information. An integrated map tool can also be helpful.
  • Reservations - if you use a WordPress restaurant plugin, make sure your theme can accommodate that. Or, you can always create your own reservation form.
  • Full-width homepage and parallax scrolling - these design elements make a great option for restaurant websites as they give you a chance to show off lots of pictures of your food.

WooCommerce online ordering

Some themes also include a WooCommerce integration to help you create an online food ordering system. However, a better approach for most situations is to create your own online ordering system using WooCommerce and WooCommerce Restaurant Ordering.

WooCommerce Restaurant Ordering works with all WordPress restaurant themes and will help you create a convenient ordering system like this:

WooCommerce restaurant plugin

25+ best WordPress restaurant themes

Astra

WordPress restaurant theme Astra

Details

Astra is the world’s most popular WordPress theme (except for the Twenty Twenty series you get with the installation). Installed over 1.7 million times, with over 5,600 five star reviews, it’s a very flexible theme.

Astra comes with over 230 Starter Templates, several of which are designed for restaurants and other food businesses. Each is lightweight, fast, fully responsive and SEO-friendly. They are fully compatible with major drag and drop page builders too.

Astra is fully compatible with most WordPress plugins, so you could add an online store, downloadable menus, table booking and any feature you like.

Qi

Qode QI theme restaurant demos

Details | Demos

The Qi theme for Elementor is an excellent choice for creating restaurant websites. This theme is specifically designed to cater to the unique needs of restaurant websites, with a range of features and customization options that make it easy to create a professional and visually appealing website for your restaurant.

One of the standout features of the Qi theme is its selection of 16 pre-built restaurant demos, which provide a quick and easy way to create a stunning website for your restaurant. These demos are designed to showcase the various aspects of a restaurant website, including menus, food and drink options, events, and more. They are also fully customizable, so you can easily modify them to suit your specific needs.

Fully customizable

Alternatively, if you prefer to create your own design, the Qi theme for Elementor also provides a range of customization options that make it easy to create a unique and personalized website for your restaurant. With its drag and drop page builder, you can easily add and arrange elements on your website, such as images, text, and buttons, and customize them with a range of styling options. You can also take advantage of the theme's built-in design elements, such as sliders, galleries, and video backgrounds, to create a dynamic and engaging website.

Overall, the Qi theme for Elementor is the perfect choice for creating restaurant websites. Its selection of pre-built restaurant demos and customization options make it easy to create a professional and visually appealing website that showcases your restaurant's unique style and offerings.

Rosa 2

Rosa 2 WordPress restaurant theme

Details

Rosa 2 is the improved version of Rosa 1, the best-selling restaurant WordPress theme with more than 13,000 customers all over the world. It is also the first theme within this industry built on top of Gutenberg, the latest WordPress's editor. This means that the entire experience is far better: from how you create content to how you showcase it to your audience.

Rosa 2 comes with multiple hero areas that you can use to grab attention with ease with full-bleed images or videos and a smooth parallax scrolling effect. On top of that, you have access to a customization tool that helps you achieve visual coherence across your website due to the predefined color and font palettes.

Another feature that brings real value within this premium WordPress theme is the integration with WooCommerce, the popular plugin that helps you set up an online store. You can launch an online food ordering system to develop new revenue streams and keep your business up and running.

All in all, Rosa 2 fits well for various culinary businesses: bistros, tavernas, fine-dining venues, pizza houses, and more.

Grand

Grand

Details | Demo

Grand is a customizable WordPress recipe theme from ThemeGoods that lets you choose from a variety of different pre-built demo sites. Currently, it has 7+ different demo sites for everything from Asian to Italian food, with more demos on the way.

No matter which demo site you choose, you'll get a range of flexible food menu styles, complete with an option to add variations to menu items. For example, you can add different sizes for a pizza.

You can also accept reservations via a custom form or OpenTable integration, as well as create your own food delivery ordering system with the WooCommerce integration.

Korina

Korina

Details | Demo

Korina is a gorgeous WordPress restaurant theme with a bold full-screen slideshow at the top of the page that helps you showcase your food or restaurant aesthetic.

To show off your food, Korina comes with a built-in HTML menu management system that lets you add new menu items as their own custom post type (just like you'd create a blog post).

To make Korina your own, you'll get tons of header variations, unlimited color schemes, typography options (including Google Fonts), social media support, and more.

Resca

Resca

Details | Demo

Resca is a flexible WordPress restaurant theme from ThimPress that comes packed with features to help your restaurant business be successful.

With Resca, you'll get a built-in table booking system via your own form or OpenTable, a tabbed food menu interface, upcoming events list, and email opt-in form via Mailchimp.

Everything is responsive out of the box and Resca also comes bundled with the Slider Revolution plugin to help you create gorgeous slideshows. You'll also get a detailed theme options panel to customize your theme, cross-browser support, and a great-looking food blog layout.

ComeEat - Modern Elementor WordPress Theme for RestaurantsWordPress restaurant theme ComeEat

Details | Demo

Are you looking for an extraordinary modern restaurant web design? Then, go for ComeEat, a theme with present-day design and robust functionality.

With this theme, you’ll be able to uncover all the unique features of your place and dishes. Showcase a professional menu with appealing images of the dishes served at your place. You’re bound to enjoy the process of customizing your future website with content-intense JetElements widgets and Elementor builder. With JetMenu, you’re encouraged to create modern MegaMenu panels that enhance the usability of your site. JetThemeCore is yet another powerful plugin for beautifying your site’s pages.

While it doesn't come with a built-in restaurant order system, you can easily add one using our tutorial.

Arabusta - Coffee Shop WordPress ThemeWordPress coffee theme

Details | Demo

Do you want your coffee house/cafe website to look both fresh and delicate? Then, embrace Arabusta - an unparalleled WordPress design featuring amazing pastel backgrounds and conversion-optimized storytelling pages.

With this design, you get access to a large collection of premium Cherry and Jet plugins. For example, use TM Timeline and TM Event Calendar to inform users about the upcoming events. Contact Form 7 will help you stay in touch with your site’s guests. Demonstrate your mouth-watering photo gallery with the TM Photo Gallery plugin. This template is friendly in relation to the newbies in site creation. Thanks to the Elementor page builder, you’re more than welcome to completely avoid customizing the theme’s code.

Delicio

Delicio

Details | Demo

As the demo site headline above informs you, Delicio makes a great option for both restaurants and coffee shops.

It comes with built-in sections to help you highlight your food menu, team members, location (on Google Maps), contact form, testimonials, and more. You'll be able to customize exactly how all these elements are arranged using a simple drag-and-drop system.

Delicio also integrates with the free Restaurant Reservations plugin to let you accept bookings directly through your website. And if you want to accept online orders, it also integrates with WooCommerce and the WooCommerce Restaurant Ordering plugin.

Delicio theme uses Woocommerce Restaurant Ordering plugin by Barn2
The WooCommerce Restaurant Ordering plugin with the Delicio theme

Neve

Neve restaurant theme

Details | Demo

Neve is a lightweight, responsive WordPress theme that comes with a ton of demo sites for different uses, including dedicated demos to help you create a restaurant website or cafe website.

If you go with the restaurant demo, which is available for free, you'll be able to showcase your location on Google Maps, include a great-looking HTML restaurant menu, and accept reservations via a custom form.

If you value performance and page load times, this one is a good option.

Litmus - Creative Restaurant/Multipurpose WordPress ThemeLitmus WordPress restaurant theme

Details | Demo

Litmus is a multipurpose theme with an exceptionally powerful restaurant skin. With this theme, you get access to 3 ready-made website designs. One of them would be ideal for a creative agency/startup, the second suits for a restaurant, and the third is built for an e-store (clothes, accessories, etc.).

Litmus includes a large number of pre-built pages. With the Restaurant skin, you get such much-needed niche pages as Menu Archive, All Menu List, Menu Details, About Us, etc. Moreover, Litmus is very cool when it comes to customization. This theme includes King Composer (otherwise worth $119) and Revolution Slider. Finally, this theme also features Make a Reservation and Order forms.

This WordPress restaurant theme is fully compatible with WooCommerce. It's the perfect base for building the WooCommerce restaurant ordering system described in this tutorial.

Plantables - Organic Food/Vegetarian WordPress ThemeWordPress vegetarian restaurant theme

Details | Demo

On a lookout for the hottest theme for your vegetarian restaurant? You can’t miss on Plantables, one of the latest and most advanced themes for meat-free eateries.

The theme is mobile-friendly, cross-browser compatible and performance-optimized. Despite featuring hi-res imagery and rich media content, your website will load in less than 4 seconds, pleasing you with a low bounce rate. P

lantables brings you a number of ready-made forms, such as search, contact and subscription form, as well as the newsletter subscription box. What’s more, the theme incorporates MailChimp for managing the lists of your subscribers and keeping in touch with them.

Finally, to empower online booking of tables at your place, Plantables includes the handy online table reservation functionality. It doesn't come with a food ordering system, but you can quickly add this by installing the free WooCommerce plugin and following this tutorial.

Osteria

Osteria

Details | Demo

Osteria is another beautiful WordPress restaurant theme from Pixelgrade. It offers a lot of similarities to the Rosa theme above, just with a different aesthetic.

You'll still get a great-looking HTML restaurant menu system, along with options to feature specific menu items to draw attention to them. You can also integrate with WooCommerce to create an online ordering system and let visitors create reservations directly through your website.

And it's all wrapped up with an eye-catching parallax effect, lots of style options, SEO-friendly code, and fast page load speeds.

Dina

Dina

Details | Demo

Dina is a great theme for a restaurant, bar, or bistro.

It ships with a modern look that's built with the Elementor page builder plugin, which means you can customize all the demo content using a simple drag-and-drop system.

It includes a great-looking collapsible food menu system to showcase the different categories of your culinary creations. You can also accept reservations through a built-in form or OpenTable integration.

In total, Dina offers 7 different homepage demos for you to choose from, lots of styling options and Google Fonts support, 9 different food menu layouts, and an option to add a video to the background of your homepage.

Linguini

Linguini

Details | Demo

Linguini is a multipurpose WordPress restaurant theme that makes a great option for a restaurant, cafe, bistro, pub, winery, bar, or anything else related to food. It comes with 3 pre-built demo sites and you can pick the one that works best for you.

Like any good WordPress restaurant themes, it comes with a built-in HTML food menu system and a tool to help you accept reservations.

Linguini goes one step further, though, and also includes a built-in events calendar feature. So if you host a lot of live events at your restaurant, that's a reason you might want to choose this theme.

You'll also get a live theme customizer, dedicated shortcodes, 6 custom widgets, multiple page templates, and more.

LaFood - Italian Cuisine Restaurant WordPress ThemeLaFood WP Restaurant Theme

Details | Demo

Fresh and minimalist, LaFood combines mouthwatering imagery and refreshing mint color accents. What’s more, the abundance of white space is what makes your content stand out and makes the theme really uncluttered.

Thanks to the employment of Bootstrap 3 framework, the layout of LaFood stays mobile-centered and equally temps site visitors from home PCs and on the go. Moreover, the theme’s setup wizard is simplified to its core and lets you run LaFood installation with sample data within 5 minutes or less.

It’s worth mentioning that the theme is also e-commerce ready. You can run a store on the pages of your website with the help of Ecwid, one of the most comprehensive e-commerce plugins out there. Alternatively, you can use it as the foundation for a WooCommerce restaurant ordering website.

Bistro

Bistro

Details | Demo

Bistro is a child theme for the popular Storefront WooCommerce theme that you can easily adapt to creating a restaurant website or other food-related website. Because it's already built for WooCommerce, Bistro will make it super easy to create your own WooCommerce restaurant ordering system.

To add your food menu, you can find plenty of free plugins or use a drag-and-drop page builder plugin like Elementor or Visual Composer.

Bistro is also super lightweight and performance-friendly, which means your restaurant site will load wicked fast.

Betasso - Trendy Barbeque/Fire-cooking Restaurant WordPress ThemeWordPress Barbecue theme

Details | Demo

Are you after one of the juiciest meat-infused designs that make the mouth of your clients water? The Betasso WordPress restaurant theme is ultimately tempting and seducing to visit your place with its hard-to-miss-on imagery.

The theme developers sprinkled the pages of Betasso with additional content elements, all shipped within Jet Plugins. You can apply these elements and control their appearance within the drag-n-drop interface of Elementor.

Among the nice bonuses, you get all the imagery included to the Sample Data free of charge. Moreover, this theme encourages you to run an e-store on your website pages. Ecwid will be a reliable solution that you can integrate within 5 minutes for this purpose. Or if you want a more purpose-built restaurant ordering system, then you can do this by adding WooCommerce.

Sushiland - Asian Cuisine WordPress ThemeSushi WordPress restaurant theme

Details | Demo

Are you searching for a modern and innovative theme for a stylish Asian restaurant? Then, Sushiland definitely deserves your attention.

This theme incorporates appealing thematic imagery and best handwritten fonts to craft the unique vibe of your online presence. However, if you feel that this is not what you need, you’re more than welcome to employ any of 500+ pre-built Google Fonts.

Sushiland theme comes equipped with a thick pack of pre-made pages. Using them, you get a chance to showcase your professional team in the best light, feature testimonials of your satisfied visitors and power an exemplary gallery of your dishes and premises.

Piquant

Piquant

Details | Demo

Piquant is a beautiful restaurant WordPress theme that comes with 6 different homepage designs that you can import with a single click. The demos focus on specific niches, like bars, BBQ joints, a pizzeria, health food cafes, and more.

You can also choose from a variety of menu page layouts and further customize your content using the built-in WPBakery Page Builder WordPress plugin.

Other helpful features include a detailed theme options panel, tons of custom shortcodes, compatibility with WPML for translations, and multiple page layouts.

Yummies - Bakery/Sweetshop WordPress ThemeYummies WordPress restaurant theme

Details | Demo

It’s hard to argue that Yummies is one of the most appealing recently released WordPress restaurant themes. The pages of this theme break and compromise the standards of the commonplace grid layouts to create your unique online presence with its own vibe and mood.

This theme allows you to fully present your business and its advantages. Use additional content elements provided with Jet Plugins to ensure the one-of-a-kind appealing display of your team, services, testimonials, products and more.

Newbies may rejoice as this theme is Elementor-friendly and supports editing the site in WYSIWYG mode. Finally, thanks to the simple yet feature-rich Ecwid extension, you can easily transform your website into a highly convenient and usable e-store. Or if you prefer, then you can install WooCommerce online store plugin and add a one-page food order form for your bakery items.

Deli

Deli

Details | Demo

Like Bistro, Deli is another child theme for the WooCommerce Storefront theme. It also offers a lightweight approach that works great as a cafe theme or organic WordPress restaurant theme. You can also use it for a generic food business website.

It offers a deep WooCommerce integration by default, and you can easily add a restaurant menu and reservation system using some free plugins.

Patisserie - Cakes/Sweets Shop WordPress Theme

WordPress cake theme


Details | Demo

Patisserie is a delectable pastel-colored template that marries your website into the fresh web design trends of this spring.

This WYSIWYG-friendly theme doesn’t make you face a steep learning curve when you’re on the way to finish your project. Elementor builder makes editing the design of your site’s blocks a comprehensive process controlled with drag-n-drop and straightforward settings. Thanks to more than 25 modules that come on board of Patisserie, you’ve got a chance to power call-to-action buttons, accordion blocks, interactive counters, unconventional product showcases, and other site elements in a few clicks. Moreover, Patisserie offers you rich media integration, allowing you to embed YouTube videos, audio podcasts and media galleries to your website.

Sydney Pro

Sydney

Details | Demo

Sydney Pro is a multipurpose WordPress business theme that comes with 4 different pre-built demo sites. One of those demo sites is - you guessed it - a WordPress restaurant theme.

It has a great one-page design that includes a tabbed menu interface, space for a full-width gallery of food pictures, testimonials from happy eaters, a news and events listing, and a built-in email subscribe form.

You can also accept reservations via your own form or a third-party service like OpenTable.

Dine

Dine

Details | Demo

Dine is a customizable WordPress restaurant theme. It comes with multiple demo sites built with the popular WPBakery Page Builder plugin. That means you'll be able to customize your site and menu using a simple drag-and-drop interface.

For diners browsing on the go, the mobile version of Dine includes a user-friendly off-canvas menu. This displays navigation menu items better on smartphones.

Of course, Dine also comes with the essentials like a table reservation system. It has gorgeous menu layouts, WooCommerce store support to let people order food online, and more. You also get an option to feature certain menu items. This is a great way to draw attention to your most popular (and profitable) dishes.

Add online food ordering to your WordPress restaurant website

WooCommerce Restaurant Ordering cropped

More and more restaurants are needing to take food orders online. For example, perhaps you're running a takeaway restaurant. Or perhaps you need a way for customers to pre-order their food choices. Either way, you can use any of the themes in this roundup with the front-end WooCommerce restaurant ordering system described in our tutorial:

The WooCommerce Restaurant Ordering plugin fully supports product variations and product add-ons on your restaurant order form, which lets you create functional menus for online food delivery. For example, you can let visitors pick the size of a pizza with a drop-down. They can also use checkboxes to select toppings. Or, you can create a simple product for straightforward menu items.

You can also display product images for each food item, use product categories to divide menu items, and more.

Get started with your favorite WordPress restaurant themes

That wraps up our collection of the 25+ best WordPress restaurant themes for all kinds of eateries.

Remember to consider mobile experience when you choose a theme for your WordPress restaurant website. After all, it's easy to forget when you browse theme demos on a desktop computer! But remember - almost three-quarters of people use a smartphone to initiate a Google search in the food and beverage industry. As a result, your site's mobile experience is paramount.

Don't forget online ordering!

Finally, don't feel like you have to find a theme that does absolutely everything. It's fine to rely on plugins for some features.

For example, even though some of these themes include built-in online ordering features, you'd probably be better off creating your own online restaurant ordering system with WooCommerce Restaurant Ordering.

Do you have any questions about how to choose the best theme for your restaurant? Ask away in the comments!

If you’re running an online business selling courses or information products, you’ll want to build some private areas where only your customers or subscribers can access premium content and digital product files. Password and membership protection prove useful in these cases.

However, there is a serious loophole in these protection methods that often result in your digital product files being leaked out.

In this article, we’re going to show you two easy ways to protect both your WordPress content and digital products without any technical knowledge.

Why you should protect WordPress media files

Did you know that even though your website content is protected with a password or membership plugin, the media attachments embedded in those pages are still accessible to anyone who has direct links to those files?

That's because password and membership plugins don’t protect your file uploads - they're designed to protect content instead, such as pages, posts or products. As a consequence, if someone shares these file URLs on other forums and social platforms, others will be able to access them without having to purchase membership or log into your website.

Even worse, Google and other search engines could potentially index these private documents, videos, and images. So people can just find and access them directly through some simple search with the right keywords.

If you're selling courses or digital products then this puts you at risk of losing all your efforts, digital product files, and a lot of money...

2 ways to protect WordPress media attachments

We've discovered two plugins that make it easy to protect your WordPress media files. You can use either of them with plugins such as Password Protected Categories and WooCommerce Protected Categories which let you restrict access to your WordPress pages, posts and custom post types to specific users or roles. They add an extra layer of security by restricting access to the media files which are linked to from your protected pages/posts/products/etc.

The two plugins are:

  • Download Monitor (DLM) - This plugin adds an additional layer of protection for your digital files. Either upload new files to WordPress and protect them one-by-one, or choose which existing files to protect.
  • Prevent Direct Access (PDA) Gold - Similarly, this plugin provides many different ways to protect your WordPress media files. You can protect new file uploads automatically or on the fly under the WordPress media library. Alternatively, you can protect some specific files when editing a page or post. Instead of protecting each file individually, you can select and protect multiple files simultaneously using WordPress bulk actions under Media list view.

Plugin 1: Download Monitor

Download Monitor (DLM) makes it easy to protect your WordPress media library files. To illustrate how it works, let's imagine that you've used the following plugins to create a private WordPress document library:

WordPress document library plugin
A searchable directory of downloadable files using the Document Library Pro plugin

That's a great solution, but doesn't actually protect the underlying WordPress media files - i.e. the documents that are linked to from the library. It's unlikely that unauthorised people will find them because they're only linked to from the private document library pages. However, if one user publicly shares the link to a document then they could potentially share it more widely.

If you're concerned about this then the solution is to add the Download Monitor plugin to the mix.

Securing digital files

With Download Monitor installed, let's look at how to secure our digital files. While we're using Document Library Pro and Password Protected Categories as an example, you can also use it alongside other membership plugins which restrict access to WordPress content.

For example, we've added a document using Document Manager Pro. From the 'Edit Document' screen in the WordPress admin, we've chosen to add a file upload as below:

WordPress Download Monitor plugin

Adding a file for download, and you'll see the media library modal with a new addition:

Protect WordPress media library file

Clicking on the Protect button protects the file. Then we can publish our new document. Our digital file is now protected, thanks to DLM.

More features of DLM

Download Monitor (DLM) also offers hotlink protection. For example, if you have a member who wants to make a name for themselves by sharing a link to your digital files, then hotlink protection will check the referrer. The plugin will redirect the user to your homepage unless the download request has come from your site.

Hotlink protection is available in the free version of Download Monitor and is an invaluable deterrent for those looking to benefit by stealing and sharing your work.

An additional bonus of DLM is the reporting feature. You can enable/disable reports in the back end of your website; see below for an example report:

WordPress report download stats

The reporting feature gives you an overview of downloads, filterable by date. Another helpful feature is user reporting:

User reporting

DLM offers an extension that gives even more insight into reports called Enhanced Metrics. This extension provides even more information, such as failed/completed downloads, active users and downloads, and more.

As you can see, it builds on plugins like Document Library Pro and Password Protected Categories to give you extra protection. As an added bonus, you get built-in reporting on who is accessing your downloadable files.


Plugin 2: Prevent Direct Access

Prevent Direct Access (PDA) Gold is an alternative plugin for restricting access to your WordPress Media Library files. Like Download Monitor, it works with WordPress protection plugins like Password Protected Categories and WooCommerce Protected Categories. Simply use it to restrict access to your media files using the same type of protection that you're using for your pages, posts, and other content.

File Access Permission

Protect WordPress files

File access permission
File Access Permission (FAP) allows you to select certain user roles who can access your private protected files directly. There is global FAP which applies the permissions to all files by default. What’s more, you can set individual FAP with their Access Restriction extension. In other words, you can make different files accessible to different user roles.

While most of the options are self-explanatory, you may wonder when to use the "Anyone" and "No one" options:

  • Anyone option allows everyone to access your private files while stopping Google or other search engines from indexing them. This comes in useful when you want those files to be directly accessed through your website links and not through search results.
  • No one option literally stops everyone from accessing your protected files directly through their file URLs. In return, PDA Gold plugin gives you the power to create as many private download links as needed. This helps you share your protected files with some specific groups of users. And at the same time, you can track and restrict its usage by time or click.

How to protect both WordPress content and file attachments

The most bulletproof way to secure your WordPress content is to protect both your content and media attachments altogether.

Password Protected Categories - and it's e-commerce version WooCommerce Protected Categories - is one of the best WordPress password protection plugins. Both plugins allow you to protect an entire category including its sub-categories and all posts/products under that category, with a single password. You can also restrict entire categories so that only specific logged-in users or roles can access them.

Now, let’s learn how to integrate Prevent Direct Access Gold with Password Protected Categories and WooCommerce Protected Categories. It's the perfect combination to protect both WordPress categories and media file attachments on these posts/products.

Using Prevent Direct Access with Protected Categories

Follow these simple steps to protect any type of WordPress category. This could be a post category, page category, WooCommerce product category, or a category/custom taxonomy for any other custom post type.

You can protect as many categories as you’d like to while leaving the rest accessible to the public:

  1. Visibility options in WooCommerce Protected Categories plugin.
    Go to the 'Add/Edit Category' page.
  2. Add a new category or edit an existing one.
  3. Under the ‘Visibility’ section above the ‘Add New Category’ button, select ‘Protected’.
  4. Set a password and/or select user roles or specific users who can access the post/product.
  5. In the WordPress Media Library List view, protect your attachment file and then click on ‘Configure File Protection’.
  6. Select the ‘File Access Permission’ tab and choose the same user roles as per step 4.

Where to get the plugins

Password Protected Categories and WooCommerce Protected Categories are the top WordPress security plugins. They work seamlessly with both Download Monitor and Prevent Direct Access Gold. It's the perfect way to protect both your content and WordPress private files to specific user roles.

Now, you can not only protect your private attachment files against Google and unwanted users. Simply by logging into their user account, your visitors can unlock both your attachments and protected media library files, as well as content.

Do you have any questions on how to password protect your website content and attachment files in WordPress? Please let us know in the comments section below.

Improving your online store’s interface and user flow is one of the easiest ways to increase conversions. Think of it this way: when a customer lands on your site, you want them to be able to find the products they’re looking for as quickly as possible. Right?

With a WooCommerce product lightbox plugin, you can make it easier for visitors to learn more about your products, select available options, and add them to their shopping cart. You can do just that – and much more – with the WooCommerce Quick View Pro plugin! It’s the easiest way to let customers open product images, galleries, details, and purchasing options in a WooCommerce image lightbox view.

WooCommerce Product Lightbox created using WooCommerce Quick View Pro

In this article, I’ll show you exactly how to use a WooCommerce product lightbox plugin to implement quick view functionality in your WooCommerce store. I’ll also explain how you can take things a step further and display products in a table layout. By the time you’re done reading this article, you’ll have a clear idea of how to let shoppers open products in a WooCommerce image lightbox quick view box.

Let’s get started!

Why you need a WooCommerce product lightbox plugin

If you have a WooCommerce store then normally, the only way to learn more about each product is to visit an individual page for that product. Having a WooCommerce product lightbox plugin installed on your online store gives you the option to:

  • Let customers open WooCommerce product image popups (including galleries) and product details in a lightbox.
  • Allow customers to select available product options and add products to their cart.

The quick view WooCommerce image lightbox settings can be configured to display information like:

  • The product image.
  • Full product gallery (if available).
  • Short product description.
  • Product variations and attributes.
  • Quantity picker.
  • Add to Cart buttons.
  • Additional product information including price, reviews, categories, tags, and SKU.

Now that we have a clear understanding of why you might want to use a WooCommerce product lightbox plugin on your online store, let’s take a look at how the WooCommerce Quick View Pro plugin lets you do just that.

Introducing the WooCommerce Quick View Pro plugin

WooCommerce Quick View Pro is a product lightbox plugin that makes it easy to add quick view functionality to any Woo-powered store.

You can use it to add Quick View buttons directly to your main shop page or category pages. The plugin also integrates seamlessly with WooCommerce Product Table for products that are best presented in a table layout – more on this later.

With the WooCommerce Quick View Pro plugin, you’re able to:

  • Let customers open products in a lightboxWhen a customer clicks on the product or Quick View button, it will launch a quick view lightbox containing the WooCommerce product image popup. Customers can then hover over the image for a smooth zoom effect.
  • Show the entire product gallery in the lightboxYou can also choose to display the entire product gallery in the lightbox. Customers can slide between different images in the gallery and view them with an image zoom effect.
  • Display product details and purchase options in a lightbox The plugin also gives online store owners the option to display product details (such as product description, price, and reviews) in the quick view lightbox along with purchase options (such as quantity picker and Add to Cart button).

WC Quick View Pro acts as a WordPress lightbox plugin allowing customers to open products in a lightbox.

For more ideas on how to use a WooCommerce product lightbox plugin on your own online store, be sure to check out some example use cases!

How to create a WooCommerce product lightbox using WooCommerce Quick View Pro

In this section, I’ll show you how you can use the WooCommerce Quick View Pro plugin to let customers:

  • Open images (including the full photo gallery) in a product lightbox.
  • View product details and purchasing options in a lightbox.

For the purpose of this step-by-step tutorial, I’ll assume you already have a Woo-powered ecommerce stores with some products added to it.

Step #1: Install and activate WooCommerce Quick View Pro

The first thing you need to do is get the WooCommerce Quick View Pro plugin and install and activate it on your WP website. Once that’s done, you need to activate the plugin license key through WooCommerce lightbox settings. Here’s how:

Head over to WooCommerce -> Settings -> Products -> Quick view from the admin panel and find the License key option.

WooCommerce Quick View Pro license key

Enter your license key (that you received in the email upon purchase) and click the Save changes button to proceed.

By default, the plugin adds Quick View buttons to the main shop page and category pages on your online store. Here’s an example of what it looks like:

Main shop page in WooCommerce with Quick View links

You’ll notice that the WooCommerce lightbox plugin displays the product’s description, image gallery, price, reviews, and metadata in the lightbox view.

Default WooCommerce product lightbox view

Next, I’ll show you how to customize what is displayed in the WooCommerce product lightbox.

Step #2: Choose how customers open the WooCommerce product lightbox

Navigate to WooCommerce -> Settings -> Products -> Quick view from the WP dashboard and scroll down till you reach the Options section.

WooCommerce Quick View Pro settings screen

You can choose to lets customers open the WooCommerce product lightbox by:

  • Using the Quick View button that’s positioned directly under each product.
  • Clicking on the product’s name or WooCommerce product image popup.

If you decide to go with the first option (i.e. using the Quick View button), you can also change the button text and turn the button icon on or off.

Pro tip: By default, clicking on the product’s name or image will direct customers to the single product page. If you’d like to disable this option, make sure the Open from product name/image checkbox is ticked.

Step #3: Display the product image (and full product gallery) in the product lightbox

The WooCommerce Quick View Pro plugin lets you choose what information you’d like to display in the product lightbox. First, I’ll show you how the controls for displaying the product image (along with the full WooCommerce product gallery lightbox) in the WooCommerce product lightbox.

Start off by using the Quick View contents option to decide whether you want the image only, product details only, or both image and product details to appear in the product lightbox.

WooCommerce Quick View Pro settings screen quick view contents

If you decide to go with Image only, your WooCommerce product lightbox might look something like this:

WooCommerce product lightbox displaying image only

However, if you’d like to display both images (with full WooCommerce product gallery ligthbox) and product details, make sure to select the Image and product details option from the dropdown menu.

Step #4: Choose which product details to display in the WooCommerce product lightbox

If you decided to go with the Image and product details option in Step #3, you can use the Product details option to select which product details appear in the quick view lightbox. The available options you can pick from include:

  • Reviews
  • Price
  • Short description
  • Add to Cart button
  • Meta information (such as categories and SKUs)

For example, if you wanted to display only the reviews and prices for your products, your WooCommerce product lightbox might look something like this:

WooCommerce product lightbox displaying images, reviews, and price

And if you wanted to allow customers to be able to add products to their cart directly from the quick view lightbox, you would select the Show add to cart button option. It would look something like this:

WooCommerce product lightbox displaying images, reviews, price, and add to cart

Use WooCommerce Quick View Pro with product tables

The WooCommerce Quick View Pro plugin integrates seamlessly with WooCommerce Product Table. This makes it possible for you to list products in an interactive table layout complete with Quick View buttons.

Get WooCommerce Product Table

Whenever a customer browses through your product listings, they’ll be able to open up the product image (and full WooCommerce product gallery lightbox) in a WooCommerce product lightbox directly from the table.

Depending on your configuration WooCommerce lightbox settings, customers can open the product lightbox by clicking on the Quick View buttons or by clicking on the product name (or image).

WooCommerce product table with lightbox

When both plugins are installed and activated, you’ll see a Quick View Pro option added to the WooCommerce Product Table settings screen. By ticking the Product links checkbox, all of the product links that appear in your table layout will open the product lightbox instead of directing customers to single product pages.

What this means is that customers can:

  • Click on the product name (or image) or Quick View buttons to open the product lightbox.
  • View product details – such as reviews, price, and metadata – in the lightbox without having to navigate to the single product page.
  • Add products to their cart directly from the product lightbox.

The WooCommerce lightbox plugin replaces links to the single product page with product lightboxes. As a result, customers can get information directly from the table. This is much better than having to navigate to a single product page.


Where to get the plugin

Adding WooCommerce product lightbox views to your online store is a great way to let customers:

  • view product images and galleries,
  • product details, and
  • purchase options

... without requiring them to visit the single product page.

With WooCommerce Quick View Pro, you’re able to add this functionality to your main shop page and category pages simply by installing the WooCommerce lightbox plugin. And if you’ve created product lists using WooCommerce Product Table, you can add flexible product quick view boxes to the table in just a few minutes.

Do you have any questions about how to use a WooCommerce product lightbox plugin with your online store? We’re happy to help so let us know in the comments below!
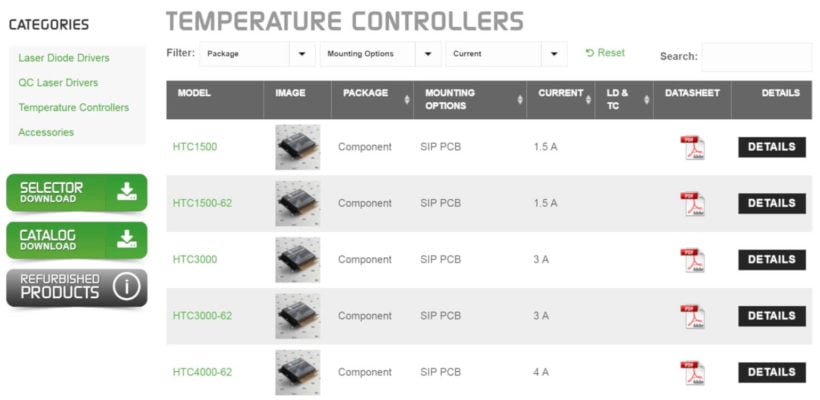
Displaying WooCommerce product variations in a table layout using WooCommerce Product Table

WooCommerce product variations can be a pain to set up. However, you can make your life much easier by installing the best WooCommerce product variations plugins. We've tried and tested the best so that you don't have to!
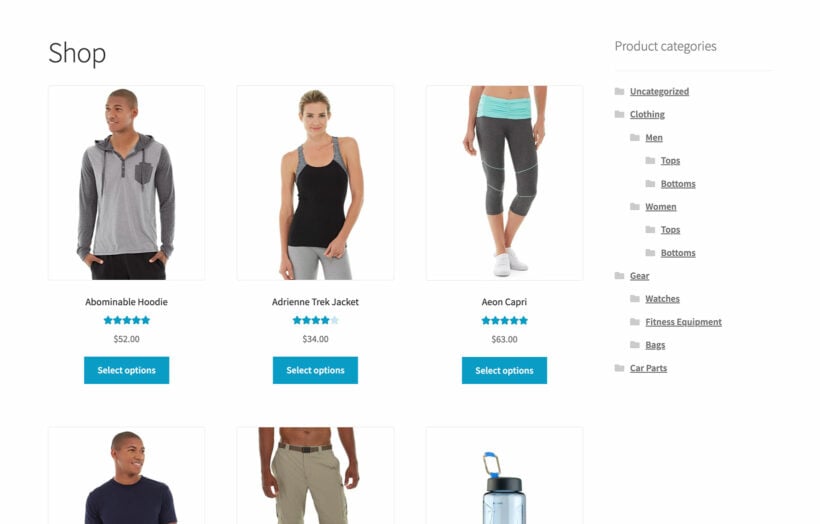
As an online store owner, you might want to offer multiple variations of the same product. For example, you might want to sell a notebook in different colors, a cake with toppings of your choosing, a table in different types of wood etc.

In this article, we’re going to learn how to set up product variations, understand the limitations of WooCommerce, and explore a viable way to:

  • Let merchants add and edit variations more quickly and easily.
  • Let customers view and select product variations from other parts of your shop - not just on the single product page.
  • Change the way that variable product prices are displayed.
  • Show and hide variations using conditional logic.
  • Use extra product options as an alternative to WooCommerce product variations.

We will also explore the best WooCommerce product variations plugins and understand what each one has to offer.

But first, I'll show you how to set up product variations in the first place.

How to set up product variations in WooCommerce

You probably already know that WooCommerce is one of the best (and easiest) ways to create an e-commerce site using WordPress. It lets you add all of your products to your store and creates an individual product page for each of them.

For each product you add to your online store, WooCommerce gives you the option to add product variations. WooCommerce products have variations whenever they come in multiple options. For example, this may include, sizes, colors, patterns, flavors, toppings, or materials – depending on the types of products you’re selling.

In order to set this up, we’ll be using attributes and variations. Let's first understand the difference between them. 

Product attributes vs variations

  • Product attributes are essentially details about the product like weight, size, color etc. They give the customer a better understanding of the product before purchase.
  • Product variations on the other hand are actual choices that you’re offering the customer between variations of the same product. 

Let’s understand with an example:

WooCommerce Quick View Demo

Here, the product variations are the color and size that a customer can choose. The product attributes are details like the category, description, SKU etc. 

With that in mind, let’s look at how to set up product variations in WooCommerce using the example of a stationery store.

Step 1: Create your product attributes

  1. The easiest way to create product attributes is by navigating to Products → Attributes and adding an attribute. Let’s say you’re selling a notebook in multiple colors and with ruled/unruled options. You could set up attributes with the name “Color” and “Line” and then click “Add Attribute”.The WooCommerce Product Attributes section.
  2. Next you’ll need to click on “Configure Terms” to add details about the variations. You could add terms like “yellow”, “green” and “black” for the Color attribute and terms like “ruled” and “unruled” for the Line attribute.
  3. You can set up as many attributes as you’d like in the same way.

Step 2: Assign attributes to your products

Once your attributes are created, you need to allot them to their respective products. Open your Product and navigate to “Product Data”. Click on the drop down menu next to it (it is set to “simple product” by default). Here you need to choose “Variable product”.

The Product Data section of a WooCommerce product.

Now click on “Attributes” from the right side menu and add your attributes one by one.Adding a product attribute in WooCommerce.

You can see the terms that you added in the previous step listed under “Values”. Make sure to select both “Visible on the product page” and “Used for variations”.

Customizing a product attribute in WooCommerce.

Step 3: Create your variations

  1. Now click on “Variation” from the left side menu. Select “Add Variation” from the dropdown menu and click on “Go”.
  2. Now all you have to do is choose your attributes and configure settings like price, size, weight, SKU etc - as per your preference.Adding a variation in WooCommerce.
  3. Hit “Save Changes” once you’re done. You can then create as many variations as you’d like.

2 problems with product variations

Problem #1: Difficult to edit multiple variations at once

If you follow the instructions above, you'll see that the process is absolutely fine for adding one variation.

But what if you want to add lots of variations to a product? That's when it starts to get really time-consuming.

Problem #2: Limit ways to display variations to customers

Although WooCommerce lets customers view and select product variations on the single product page, that's the only place you can display them. And the only option is to display them as variation dropdown lists (e.g. one dropdown for Size and one for Color). This isn’t the best possible solution for most store owners.

Here are a few reasons why:

  • Product variations aren’t as prominent as they can be.
  • Comparing the variations on offer with different products is difficult.
  • Customers have to navigate to the individual product page to be able to view the available variations.
  • Dropdown lists don't offer great visual experience for selling most types of product variations.

The good news is that you can easily address these problems by adding a WooCommerce product variations display plugin. Keep reading for our selection of the best.

The best WooCommerce plugins to display product variations

As we saw earlier, the other problem with WooCommerce product variations is the limited way in which they are displayed.

Unfortunately, WooCommerce's default single product page isn't always the best option for displaying product variations. Let's explore the best WooCommerce product variations plugins to present product variations to customers.

Manage variations more easily and display them in a bulk variation order form

WooCommerce Bulk Variations table

To speed up the process of creating multiple variations, simply install the WooCommerce Bulk Variations plugin. This handy plugin adds some extra features which allow you to filter the list of variations and apply bulk actions to them:

  1. Install WooCommerce Bulk Variations.
  2. Open the 'Variations' tab on the 'Edit Product' screen.
  3. You will see a new 'Filters' bar above the list of variations. Use this to select all the variations that you want to edit at once.
  4. Next, use the bulk actions dropdown above the filter bar (which normally says 'Add variation') to select a bulk action. For example, you can bulk-edit variation prices or set the same image for all the selected variations.
bulk edit woocommerce variation prices with woocommerce bulk variations plugin

In this screenshot, we have used WooCommerce Bulk Variations to select all variations with a 'Blue' attribute. We have then quickly changed the variation price for all the blue items only.

This is much faster than setting prices and other data for each variation individually. You can do the same with other types of variation data, such as adding variation images in bulk.

Why WooCommerce Bulk Variations is perfect for displaying product variations

The WooCommerce Bulk Variations plugin is great for displaying product variations for clothing and apparel, wholesale products, and products that are typically sold in large volumes. It’s also the perfect choice for products that don’t require images but may have several variations such as sweets and candies.

Using the WooCommerce Bulk Variations plugin, you can replace the single product page with either a bulk ordering grid or a simple price matrix. This is a great way to boost product variation visibility in your online store and make it easier for customers to buy more from you.

Instead of using dropdowns to select the correct product variation and adding items to their cart one at a time, customers can simply choose how much of each product variation they’d like to purchase, set the quantity, and add them to their cart in one go.

The key benefit here is that customers don’t have to spend time adding variations to their shopping cart one at a time. This is the most intuitive way to sell variable products in WooCommerce.

Bonus: WooCommerce Bulk Variations is the only plugin in the market that enables you to display bulk variations with 3+ attributes in the grid, instead of just 2!
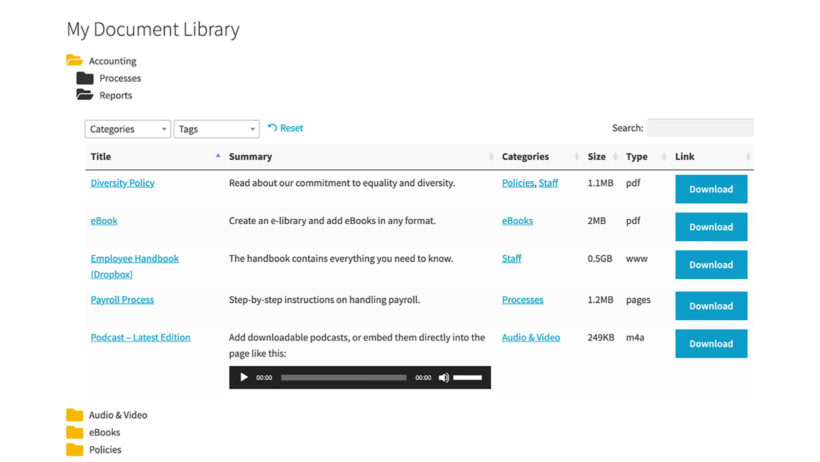
Replace the variation dropdown with checkboxes, color/image swatches, and more

WooCommerce extra add-on fields with images, swatches and text field
Using product options instead of variations gives you a much wider choice of styles

If you're looking for a complete alternative to WooCommerce product variations, then it's worth considering a totally different way to set them up. The WooCommerce Product Options plugin offers an interesting alternative.

Instead of using variable products, you add the choices as product options. These are managed using a completely different interface, which is much faster to use than variations. That's because you don't to enter prices, images etc. for every possible combination of options (as you do with variations). Instead, you add each option individually and the plugin calculates the pricing etc.

To help you to visualize this, here's a screenshot of adding product options in the WordPress admin:

WooCommerce Product Options Extra Add-Ons

You can add a wide range of option styles, different price calculation options, and even use conditional logic to show and hide options depending on the user's selections. That's a real bonus because WooCommerce doesn't offer conditional logic for variations.

And in the front end, you can choose many more ways to display options than you get with variants. As well as dropdowns, you can display options as checkboxes, clickable images, text fields, file uploads, and more.

List variations in a product table on your main shop pages

WooCommerce Product Table lets you list variable products in a searchable, sortable, and filterable table layout.

Customers are able to view and select the exact product and variations they’re looking for using its extensive filtering options. In this way, it can be used as a WooCommerce product variations plugin.

The WooCommerce Product Table plugin enables you to:

  1. List variable products on your main shop page, category pages or any other page in your online store.
  2. List variable products in two different formats in your table layout. You can choose to display them as either:
    • Dropdowns in the Add to Cart column (perfect for businesses that sell clothes, shoes, or food)
WooCommerce product variations dropdown plugin
    • Separate rows in the product table layout (perfect for businesses selling spare parts or large products like furniture or mattresses)
WooCommerce variations table plugin

Creating product tables with proper variable products enables customers to view and select variations from any of the pages you choose to display the variation on instead of having to navigate to the individual product pages. This significantly improves the user experience your site delivers.

WooCommerce Product Table an ideal solution for creating product catalogs, restaurant menus, order forms, and wholesale stores.

Save time by bulk editing product variations

Setary filter by attribute and change stock in bulk edit spreadsheet

The Setary bulk editing app can save you a huge amount of time if you have large numbers of variations to update. Normally in WooCommerce, you have to edit each product separately in order to add or edit variations. The WooCommerce Bulk Variations plugin which I mentioned above adds better bulk editing to the 'Edit Product' screen, but you can still only edit variations for one product at a time. Setary takes this a step further.

It works by displaying all your products and variations in a spreadsheet. You can quickly filter the variations and update them, either inline or using a bulk edit form.

Let customers select variations from a quick view lightbox

WooCommerce Quick View Pro

WooCommerce Quick View Pro is a different type of WooCommerce variations plugin. It lets you present product variations in a lightbox view. In addition to the variations, you can also display product images and galleries, details, and purchasing options.

Customers are able to open the lightbox either by clicking on the product's name (or image) or by using the Quick View button. If you choose to enable the option to launch the lightbox by clicking on the product name or image, links to the single product page will automatically be disabled.

The WooCommerce Quick View Pro plugin is ideal for variable products that are best presented with images and galleries e.g. fashion items, food, and tech products. It's also perfect for products that don't require images, but have multiple variations.

Either way, the plugin lets you replace the single product page with a lightbox. What this means is that you can display the information customers need to make a buying decision and choose variations directly in the quick view lightbox. So, instead of clicking through to the single product page, customers can select product variations and make a purchase directly from the main shop page or category pages. There's no need to visit a separate page for each product.

What information can I display about my variations?

With the WooCommerce Quick View Pro plugin, you can display the following information in the lightbox:

  • Product name
  • Product image (and full gallery)
  • Reviews
  • Price
  • Quantity selector
  • Product variation dropdowns
  • Add to cart button (including variation dropdowns and quantity picker)
  • Product details (such as SKUs and categories)

Change the variation price format

WooCommerce-Variation-PricesAnother limitation of WooCommerce product variations is that if your variations have different prices, then they are always displayed as a range. For example: "$50 - $100."

That's pretty basic and doesn't give you any flexibility. The solution is to install the WooCommerce Variation Prices plugin. This gives you total control over how to display and format variable product prices in your store. For example, you might set the price to display as "From $50" or list all the individual variation prices.

Alternative WooCommerce product variation plugins

Now you know how to add product variations in WooCommerce. You've learned how to choose the best WooCommerce variation product plugins to manage and display your variable products. You also know how to add variations in the WordPress admin, with bulk actions to save you time.

Of course, there are other ways to customize WooCommerce product variations too. Here's a selection of some other options that are worth looking at.

Other plugins to consider

  1. Variation Swatches for WooCommerce: This plugin is dedicated to making attributes and variations easy to use and customize. It can be used to display products with multiple variations using neat, professional color swatches, instead of the regular dropdown box. This significantly improves the UI experience for your customers and reduces the amount of effort needed to place an order.Variation Swatches for WooCommerce
  2. YITH Woocommerce Color And Label Variations: Similar to the previous plugin, YITHs Woocommerce Color And Label Variations plugin enables you to display icons, labels and images instead of the default product variation dropboxes. The free version lets you customize the color, label and image product attributes whereas the premium version gives you further options like customizing entrance animation, creating individual image galleries for product attributes etc.
  3. WooCommerce Better Variations: This plugin aims at making ordering (especially in bulk) easier for customers by displaying product variations in a grid. It particularly focuses on making sure out-of-stock products are styled optimally and accurately.
  4. Product Variations Swatches for WooCommerce: Using this plugin, you can display product attributes in different types of swatches - Colors, Buttons, Images, Variation Images or Radio. You can even customize the details of the swatch design like the name, height, width, font size, padding, mobile mode size color, box-shadow effect, hover style etc.
  5. Variation Images Gallery for WooCommerce: This plugin allows users to showcase unlimited additionalimages as galleries for each product variation. It is particularly useful for stores which are selling apparel or food. It allows your site visitors to zoom into images and enables them to visualize your variation product easily. 

The best WooCommerce product variation plugins

In conclusion, it's a shame that WooCommerce on its own doesn't do a better job of managing and displaying variations. Fortunately, there are lots of fantastic WooCommerce variation plugins which can solve this. Use the one that fixes your specific pain-points with variations:

  • Bulk Variations - For adding and editing variations more easily.
  • Product Options - Display variations in a wide range of flexible styles such as checkboxes, color swatches and clickable images.
  • Setary - For bulk editing variations across multiple products from a time-saving spreadsheet.
  • Product Table and Quick View - For displaying variations away from the single product page.
  • Variation Prices - To customize the way that variation prices are displayed.

What else would you like to be able to do with your variable products? Let us know in the comments below.