Update to version 1.6 of WooCommerce Private Store.
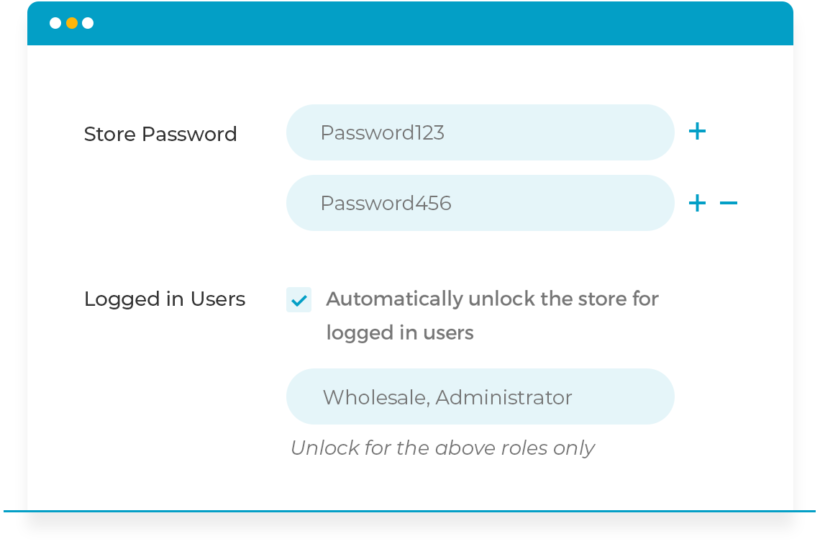
Go to the plugin settings page at WooCommerce > Settings > Private Store.
Enable the 'Logged In Users' option and select one or more rows in the new option that appears underneath.
We recommend doing this if your WordPress site allows user registration for purposes other than the private store. For example, if people can create a 'Subscriber' account in order to comment on your blog, then you can exclude Subscribers from the private store and just make it available to Customers. If you have custom user roles such as 'Wholesale' then you can also select these.
Whichever WooCommerce user roles you select, we also recommend selecting 'Administrator' and 'Store Manager' so that you can easily access the store while you're working on it.
Where to get the plugin
If you're already using WooCommerce Private Store, then you can update to version 1.6 from the WordPress Dashboard.
If you don't already have it, get WooCommerce Private Store today. You can download the latest version of the plugin from the order confirmation page, and you'll also receive it by email. That way, you can get it set up straight away.
WooCommerce Product Table is perfect for creating a simple product list or quick order form. Keep reading to discover 2 easy ways to allow your users to edit the products in the table directly from the front end of your website, or from a user-friendly spreadsheet view. At the end, you'll know how to create the ultimate WooCommerce product front end editor.
Used alone, WooCommerce Product Table is a great way to list products. However, the table is for displaying public information which isn't editable from the front end.
We've previously told you how your users can submit products to your WooCommerce store and display them in a product table. Since then, lots of you have requested a way to allow your staff or customers to edit the products in the table from the front end, without having to access the WordPress admin. If you want to allow users to edit products from the table, then you need to follow this tutorial. We will show you how to create an editable frontend table for your WooCommerce store using either of these tools:
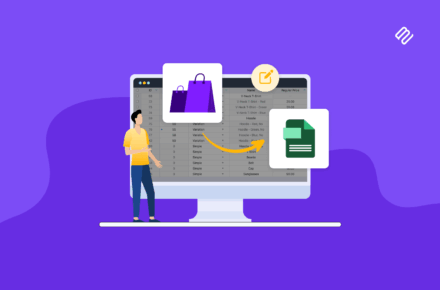
Setary is a user-friendly spreadsheet app for WooCommerce. It makes it easy for customers to update products and variations, either directly in the spreadsheet or by using bulk edit forms.
WP Sheet Editor is a WordPress plugin which allows WordPress users to edit the products in the table directly from the front end of your website.
Why do I need a WooCommerce front end editor?
Normally, you can only edit WooCommerce products via the WordPress back end. This involves visiting multiple product pages and can be time-consuming if you have lots of changes to make. A front end spreadsheet-style editor significantly speeds up your product and inventory management.
A WooCommerce product front end editor can help with many different scenarios. For example:
Your employees might need to edit products, but you don't want to let them loose in the WordPress back end. Instead, keep it simple by providing a front end product editor that only a specific user role can access.
If you're creating a WooCommerce multi-vendor marketplace then you can list each vendor's products in a different table or order form. You can then add a front end editor to allow your vendors to edit their own products without having to use the WordPress admin.
Perhaps you allow users to upload their own products to your store. Add a WooCommerce front end editor so that each user can edit their own products, but not anyone else's.
Keep reading to learn how to use WooCommerce Product Table to create non-editable order forms so that customers can buy products more quickly. After that, I'll show you how to integrate a front end or spreadsheet-style editor to your store so that relevant people can edit products outside of the WordPress admin.
1. Create the product table
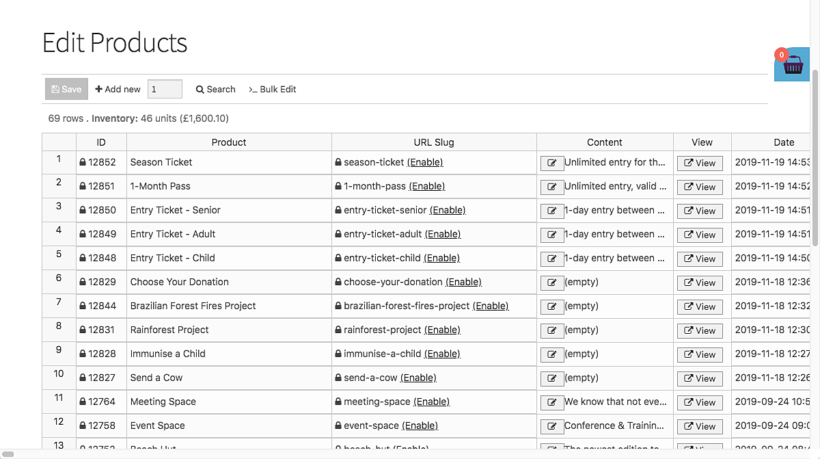
The first step is to list some or all of your products in a product table view. This is the view that your customers will see when they visit your store. Later, you'll learn how to add an 'Edit' button which will take logged in users to the WooCommerce product front end editor (depending on their role).
The plugin knowledge base is hugely comprehensive. It includes instructions on everything you need, including which columns to include in the table, how to add filters to help people to find products more easily, how to display product variations, and more.
You can either create a table containing all your products, or you can create tables listing specific products (e.g. products from a specific brand or vendor only).
2. Install a front editor or spreadsheet plugin
For this section, you have a choice of 2 plugins to choose from:
Setary - the user-friendly spreadsheet app for WooCommerce. No WordPress logins required.
WP Sheet Editor - the WordPress plugin which adds a front end spreadsheet editor to your site, which is only accessible to certain user roles.
2a. The Setary bulk editing spreadsheet app
I love Setary because it's just so easy to set up. As you can see by how short the following instructions are, it's far easier to configure than WP Sheet Editor!
Follow the onscreen prompts to install the Setary helper plugin on your WordPress site.
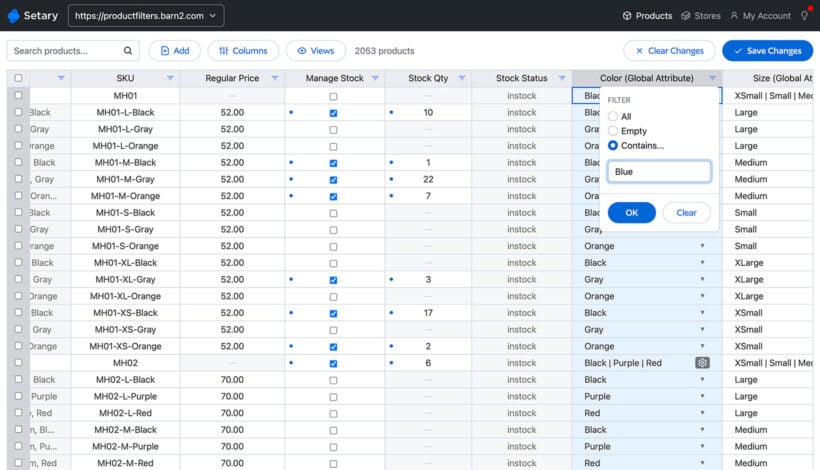
Next, the Setary app will open with all your products and variations listed in the spreadsheet.
Use the 'Columns' option to choose which columns to include.
Use the advanced filters and search box to select specific products to edit.
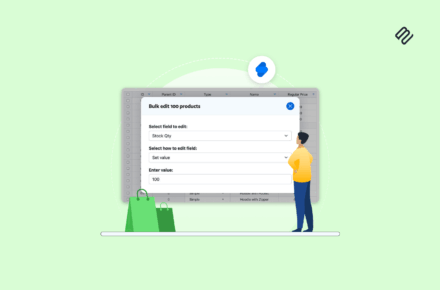
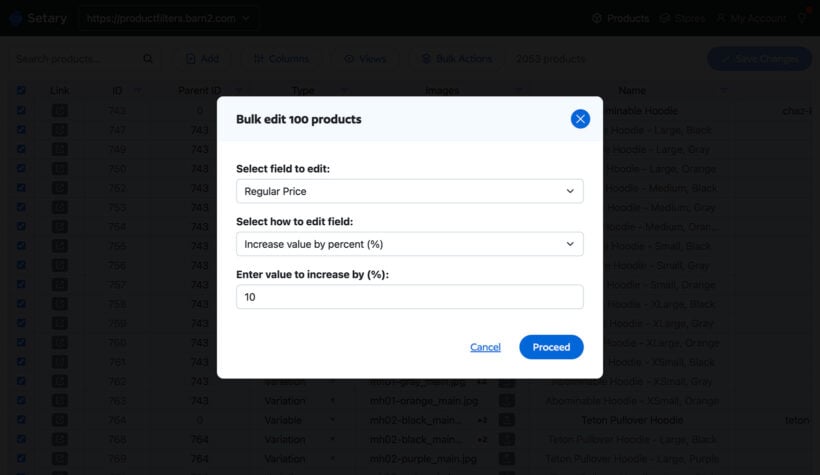
Select multiple products and use the 'Bulk Actions' button to apply quick bulk actions via a form.
You can also use the 'Views' option to save time by saving your favorite filter combinations for future access.
2b. WP Sheet Editor's frontend editor plugin
WP Sheet Editor is a collection of plugins that provide an easy-to-use front end table editor for any information that is stored in the WordPress database - including WooCommerce products. Their Universal Frontend Editor plugin creates a spreadsheet-style WooCommerce front end editor for the products in your table.
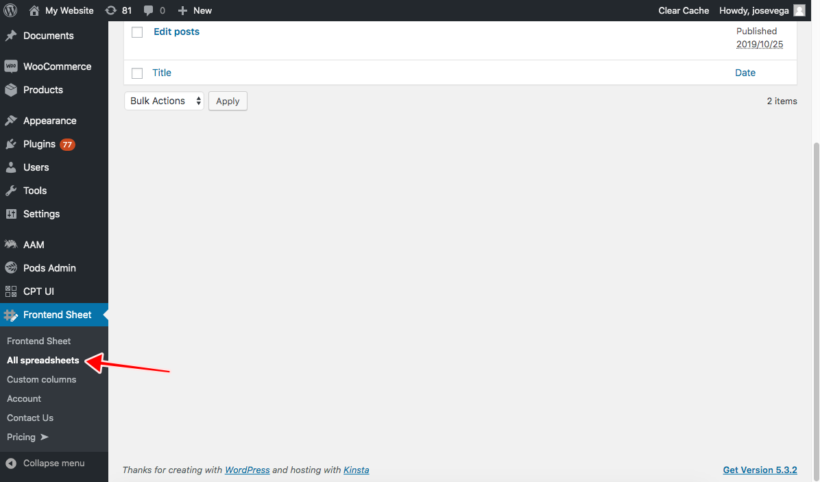
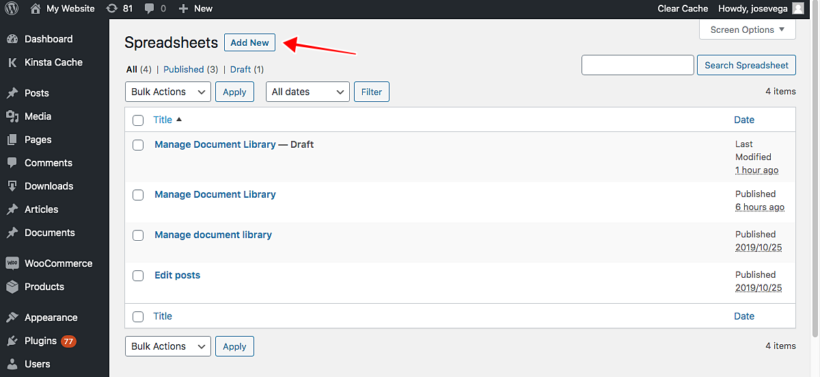
In the WordPress admin, go to Frontend Sheet → All Spreadsheets:
Once there, click on Add New to create a new table editor for your WooCommerce products:
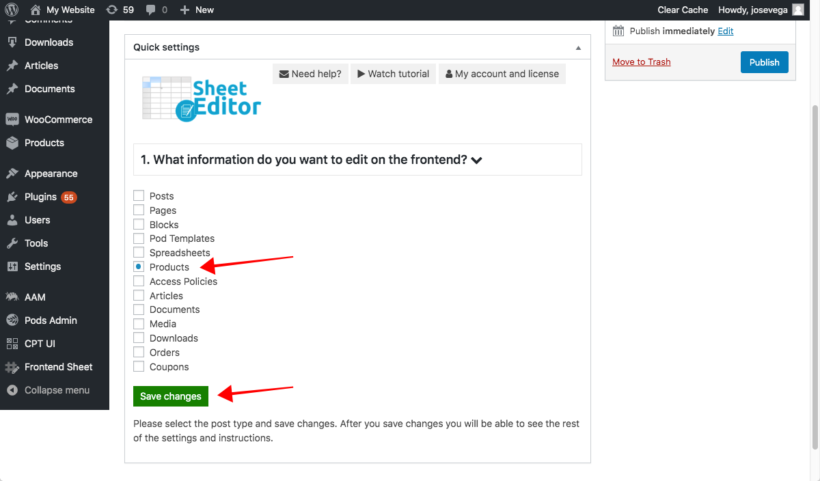
Now you need to enter the editor title. This title is private and is only used for identifying the editors in the backend. You may call it something like Manage Products.
Then, select the post type you want to edit with it. In this case, you need to select Products. Next, click Save changes:
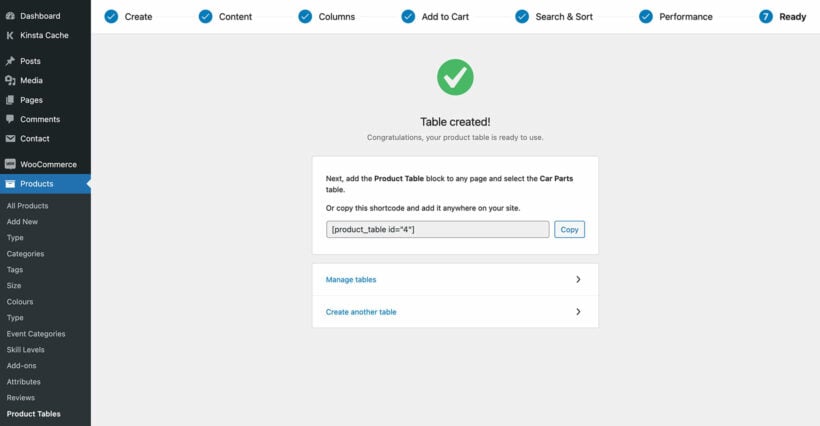
After that, you'll see that the plugin will generate a shortcode - copy this for later.
Next, you need to decide which tools to include in the WooCommerce frontend editor. Think about what you want people to be able to edit from the front end, and only include tools they actually need. In the settings for your spreadsheet, select which tools to show on the Primary toolbar and the Secondary toolbar of the editor:
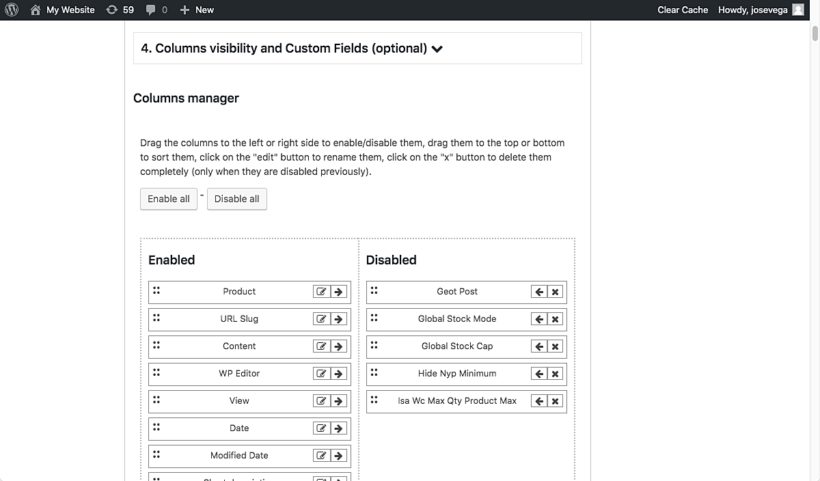
After selecting the tools that will appear on the toolbar, you need to select the columns you'll display on the spreadsheet-style inline product editor. The list of columns automatically detects all the fields that are available for your products. This includes fields added by other plugins, such as YITH WooCommerce subscriptions, Advanced Custom Fields, all the WooCommerce extensions, etc. So you can easily enable, disable, sort, or rename any field.
You can create multiple editors for different users based on their needs. For example, you might add one editor with full columns for shop managers, and a simple editor with fewer columns for employees. I generally recommend having the same columns in your public-facing product table and the front end editor. That way, users will see the information in the same format as they switch between the main product table and the spreadsheet editor views.
Once you're done configuring the frontend editor, click on Publish to finish.
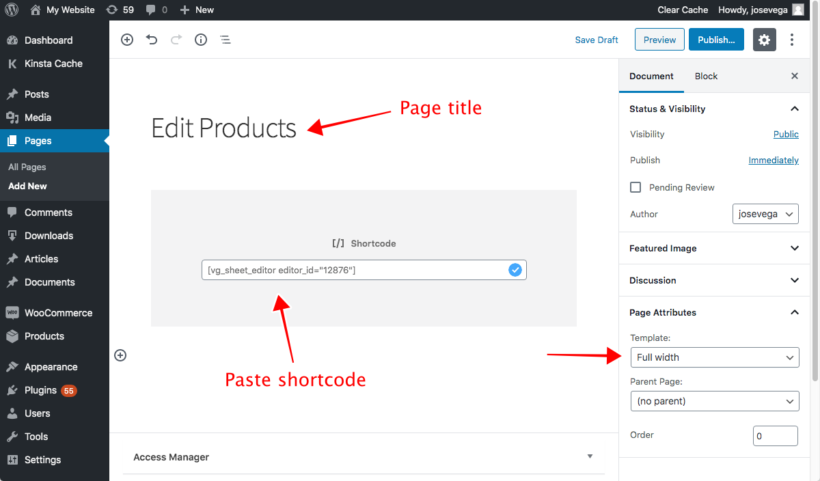
Finally, we need to create a page and add the WooCommerce product front end editor to it. To do this, copy the shortcode from step 6, above. Now go to Pages → Add New to create a new page for the frontend editor:
Once here, just enter the page title (we'll call it Edit Products), paste the shortcode in the page content, and select a Full width page template (if your theme has one). Finally, click on Publish.
Note. If you have a marketplace with multiple vendors, the frontend editor integrates with Dokan, WooCommerce Frontend Manager, and WooCommerce Marketplace. The integration works like this:
Vendors will view and edit products created by them only.
The editor settings have the option to display a button inside the marketplace dashboard. This allows vendors to launch the inline spreadsheet editor from their own dashboards, as well as by using the other methods discussed in this tutorial.
Now, it's time to integrate the new frontend editor with the public-facing product table that you created in Step 1.
3. Add an 'Edit' link to the product table
In Step 1, we used WooCommerce Product Table to list products in a public-facing table view. In step 2, we set up either the Setary or WP Sheet Editor spreadsheet-style editors.
Now, we need to add an 'Edit' link so that people can get from the table view to the front end product editor.
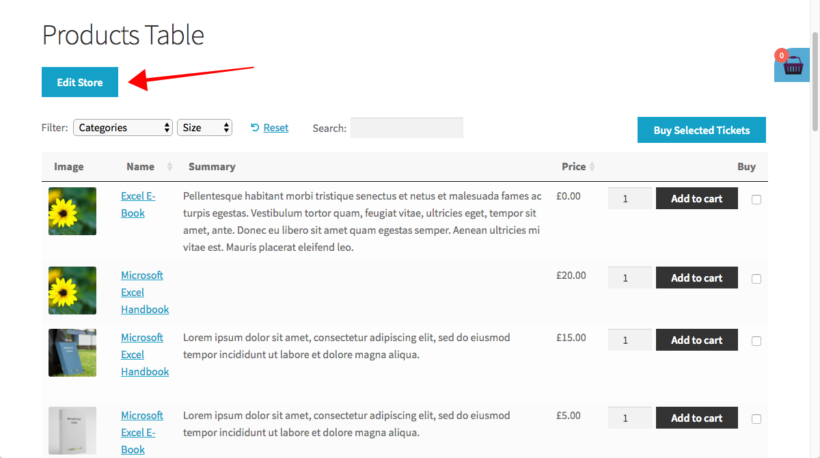
To do this, we'll add a button titled Edit store above the product table so that users can log in to start editing products right there.
Go to the page where you used WooCommerce Product Table to add a product table, and add a new link or button. This should either link to the Setary app, or the page where you added the WP Sheet Editor shortcode.
Finally, Update the page to add the button to it.
Optional - Hide the 'Edit' link from normal customers
You might want everyone to be able to see the 'Edit' link, as it provides a simple way for guests to log into their account before editing the products in the table. Alternatively, you can hide it from public view so that only certain logged in users see it.
There are a few options for hiding the edit link:
Instead of adding an 'Edit' link to the same page as your product table, you can give certain users a direct link to the page containing the frontend product editor.
You can add the edit link to a more subtle location such as the footer.
Or if you prefer, you can install the Advanced Access Manager plugin. This plugin comes with shortcodes which you can use to make the button visible to users with a specific role, and hidden from everyone else. This is a neat compromise because you can still add the Edit link above your product table, but only the appropriate people can see it.
4. Test out the WooCommerce product front end editor
After these steps, users will be able to see the Edit Store button above the product table.
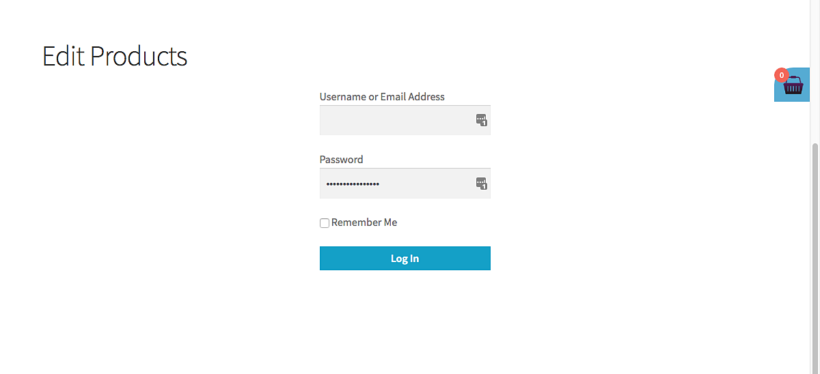
And when they hit that button, they will be asked to log in to start editing the products. For Setary, they will have to log into the Setary app. For WP Front End editor, it will be your WordPress login page:
After they log in, users will be able to use the frontend editor:
5. Who can use the WooCommerce frontend editor?
Only logged in users with the correct permissions can see the WooCommerce frontend editor, so you don't need to worry about customers accidentally accessing it.
For Setary, you must be logged into the Setary app. You can give access to whichever of your colleagues and/or clients need to edit products. It doesn't matter whether or not they have WordPress admin logins.
For WP Sheet Editor, the WooCommerce products frontend editor is available only for logged-in users. Logged out users or guests will see a login form when they click the 'Edit' button. It uses the default permissions from WordPress, so the products can be edited by these roles:
editor
administrator
shop manager
any user role that has the "edit_products" capability
You can create new user roles with the free user role editor plugin and assign it with the "product" capabilities. This is helpful if you want to allow users to edit products without having permission for anything else.
Just want users to edit their own products?
If you've set up your site to allow users to upload their own products, then you might want them to be able to edit these products but not anyone else's. This isn't possible with Setary, so if you need this then you should use a different tool instead. Here are some options:
WP Sheet Editor has an option to allow users to add new products to the table, as well as existing existing ones. If you use this to accept front end product submissions, then each user will automatically only be able to edit their own products in future.
If you're using Dokan, WooCommerce Frontend Manager or WooCommerce Marketplace, then logged in product vendors can only view and edit their own products.
Setary - add and edit products via a spreadsheet editor with bulk edit forms so that users with Setary access can edit the products in the table.
Universal Frontend Editor - creates a spreadsheet editor so that logged in users with the correct role can edit the products in the table.
Get the plugins today, and then follow this tutorial to set it all up!
If you want to turn one-time customers into repeat customers, a WooCommerce reorder plugin might be just what you need. It makes it easy for your customers to reorder products they've already purchased, which increases the chances of them making another purchase from your store.
This is essential because the chances of a customer returning to your ecommerce store become higher as customers make more purchases. The likelihood of a shopper making another purchase is only 27% after their first purchase, but if you can get them to check out again and make a second purchase, it jumps to 45% that they'll make a third purchase.
Additionally, on average, 41% of a store's revenue comes from just 8% of its customers, so these repeat customers are incredibly valuable.
In this post, you'll learn how to use a WooCommerce reorder plugin to encourage shoppers to order again by simplifying the process for them.
Note - we recognize that "reorder" can mean two different things. If you're looking for a post on how to rearrange WooCommerce products, we also briefly cover that (though it's not our main focus) - you can click here to skip to that section.
The best WooCommerce reorder plugin
A good WooCommerce reorder plugin benefits your store in a few different ways:
It makes it easier for customers to find products they've already purchased when they come back to your store. This creates a better user experience.
It offers a subtle reminder for customers to repurchase, which can lead to more sales. It's a bit like upselling, but for products that shoppers have already ordered.
You can showcase price differences, like making sure they see a sale on a product they've already purchased.
This WooCommerce re-order plugin lets you display your WooCommerce products in a flexible table layout. You can control exactly what information displays in the table and how it's ordered.
While WooCommerce Product Table lets you display any of your WooCommerce products, one of its filter options lets you display only products that the current user has purchased.
This is what lets you use it as a WooCommerce re-order plugin.
You can then display these products anywhere on your site. You could:
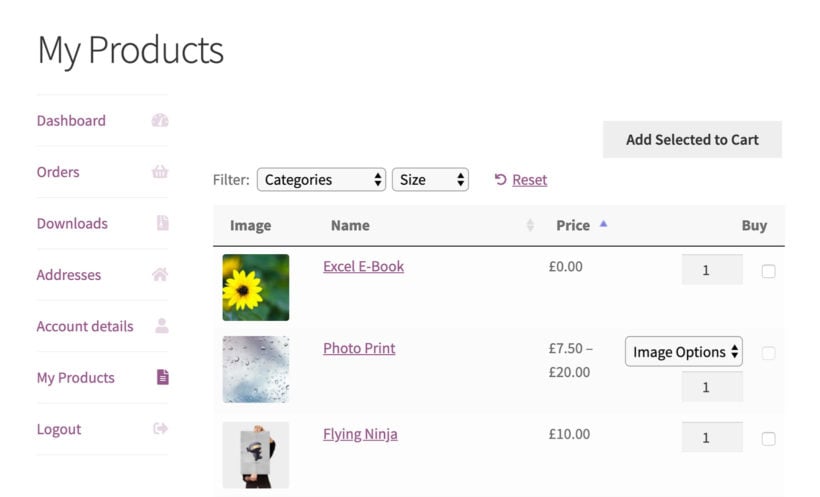
Add a "My Products" section to the existing WooCommerce Account page. This is the same page that lists WooCommerce orders.
Create a dedicated "Reorder Products" page for logged-in users if you want to really promote repeat orders.
Create a public page that displays all your products to anonymous shoppers and a user's products to logged-in users. You can rank this in Google, which is a nice benefit.
How to set up the WooCommerce reorder plugin
There are two steps to setting up the WooCommerce reorder plugin:
Configure your table layout on the backend and generate shortcode This is the same for all scenarios.
Add your table layout to the front-end of your site This depends on where you want to display your reorder products table.
1. Configure your table layout and generate shortcode
To get started, install and activate the WooCommerce Product Table plugin. Activating it will launch the table builder. Use it to create your first table of products to reorder.
You should go through all of the settings, but the most important options to consider are:
Columns - controls the information that appears for each product.
Add to cart column - controls the reorder button and how the add to cart process functions. For example, you can set up one-click add to cart or use checkboxes.
Sort and filter - these let you add filters and search boxes.
Copy the shortcode from the final page of the table builder:
2. Add table to front-end of store
Now, you need to add the shortcode to the front-end of your store where you want it to display. There are a few different places that you can add it, depending on who you want to see the product table. Whichever of the locations discussed below you decide to use, add the table to the page using the shortcode you copied a minute ago.
The original shortcode will look something like [product_table id="1"]
Edit it to tell it to only list products that the current user has previously ordered:
[product_table id="1" user_products="true"]
The user_products parameter tells the plugin to only display products that a user has previously purchased.
My Account page
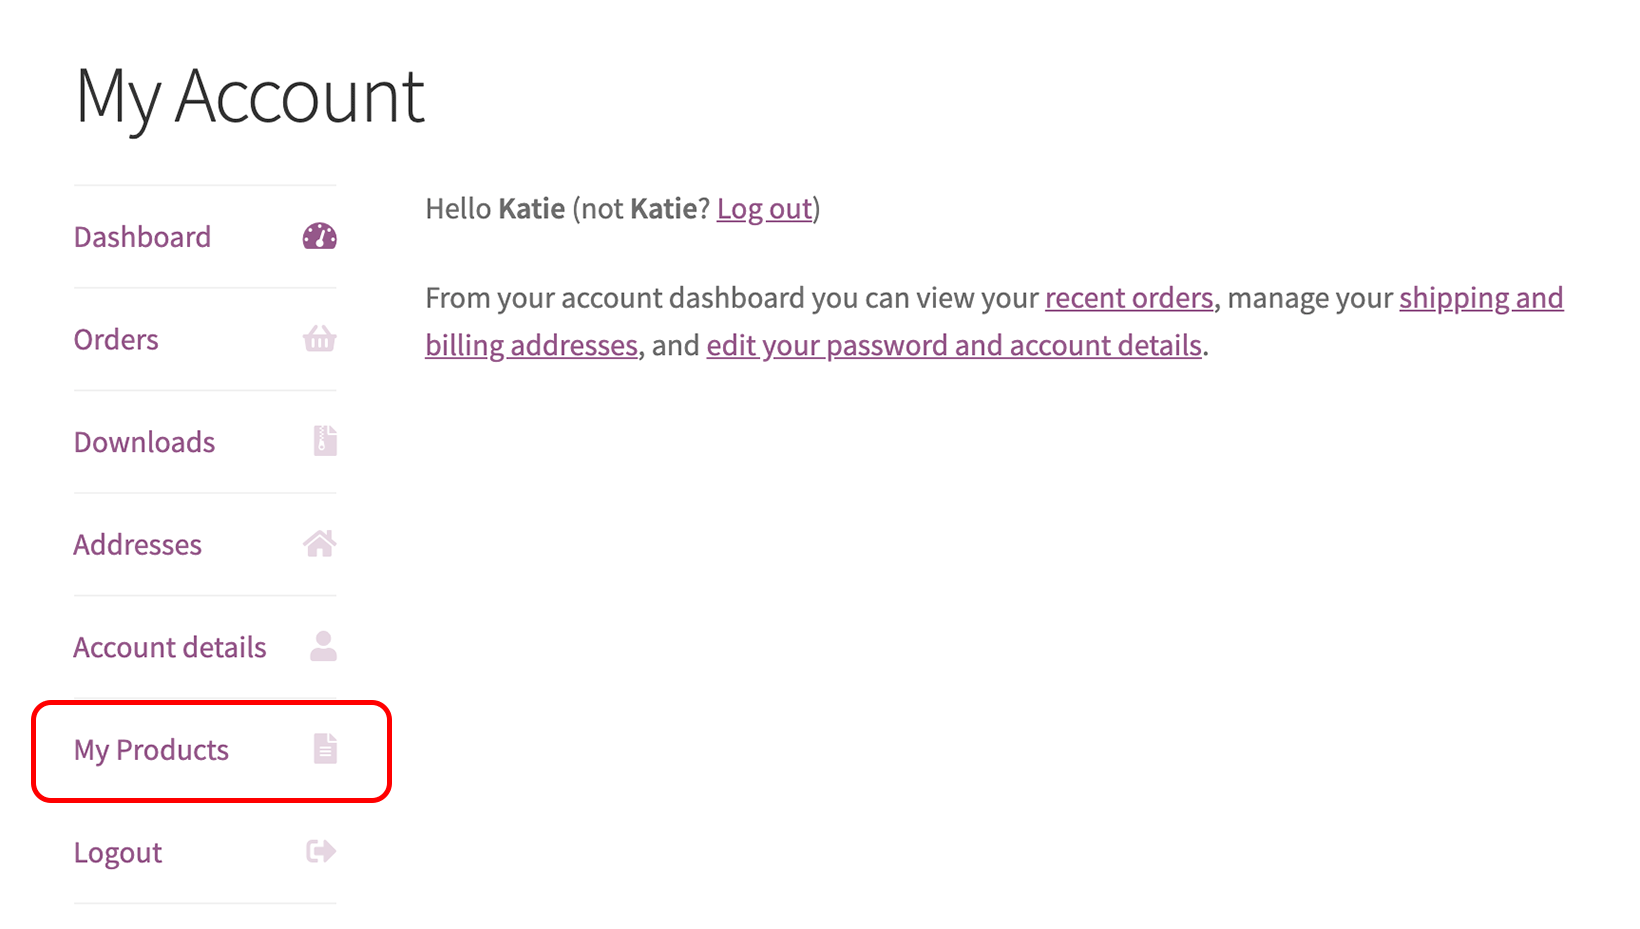
To add the WooCommerce reorder plugin to the existing My Account page, you can use the free SysBasics Customize My Account for WooCommerce plugin. It lets you add a new tab to the My Account area where you can display the reorder shortcode.
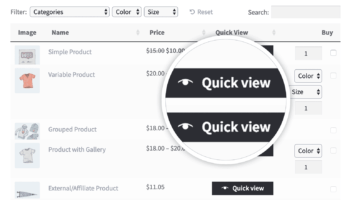
If you want to show more detail about each product, like its add-ons or a lengthier description, you can use the WooCommerce Quick View Pro plugin to add product quick view to your WooCommerce reorder plugin. When you use both plugins together, a 'Quick View' column appears in the list of WooCommerce Product Table columns when you create the table.
Get started with a WooCommerce reorder plugin today
Repeat customers are the lifeblood of your ecommerce store, so you want to make it as easy as possible for customers to reorder the products that you already know they love.
WooCommerce Product Table lets you list a shopper's previously ordered products in a flexible table layout. You can then display these products anywhere on your site to promote repeat orders.
Bonus: How to rearrange products with WooCommerce Product Table
While we've focused on helping shoppers reorder products, it can also be useful to change the order of products which, as we mentioned before, is another interpretation of a WooCommerce re-order plugin.
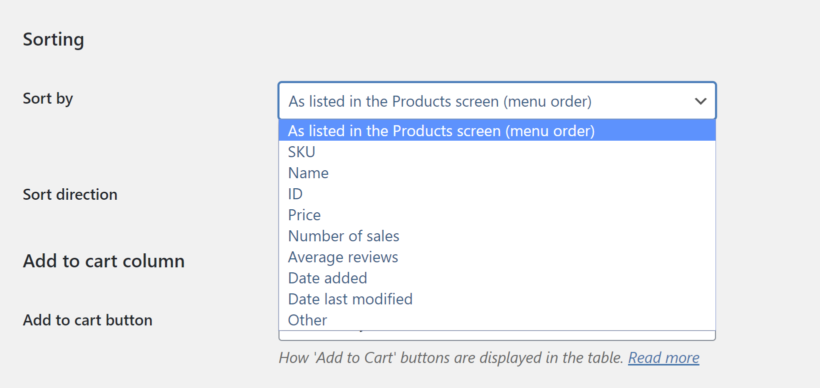
First off, you can control the default sorting for your products, which lets you rearrange your products by any criteria and choose the sort order/default product sorting:
For example, if you wanted to feature a specific set of products at the top, you could assign a "Featured" tag to those products and then create a table specifically dedicated to just the featured products using the following shortcode:
[product_table tag="featured"]
You can also create any other arrangement that works for your store.
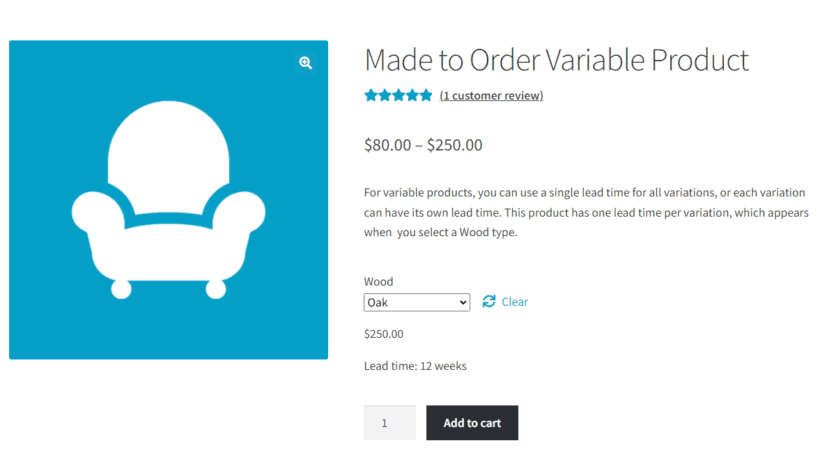
In response to popular demand, we've added a new feature to our WooCommerce Lead Time plugin. Now you can display a separate lead time for each product variation.
Until now, WooCommerce Lead Time let you display a global lead time for all your products, or a different waiting time per product. Variable products would show the same lead time for all variations. Lots of you have asked for a way to show a different handling time per variation, and we're delighted to have given you what you wanted!
Existing customers can update to version 1.1 from the WordPress Dashboard. If you haven't bought WooCommerce Lead Time yet, get it now:
How to add variation lead times in WooCommerce
Once you've installed the latest version of WooCommerce Lead Time, you can start adding individual product variation lead times:
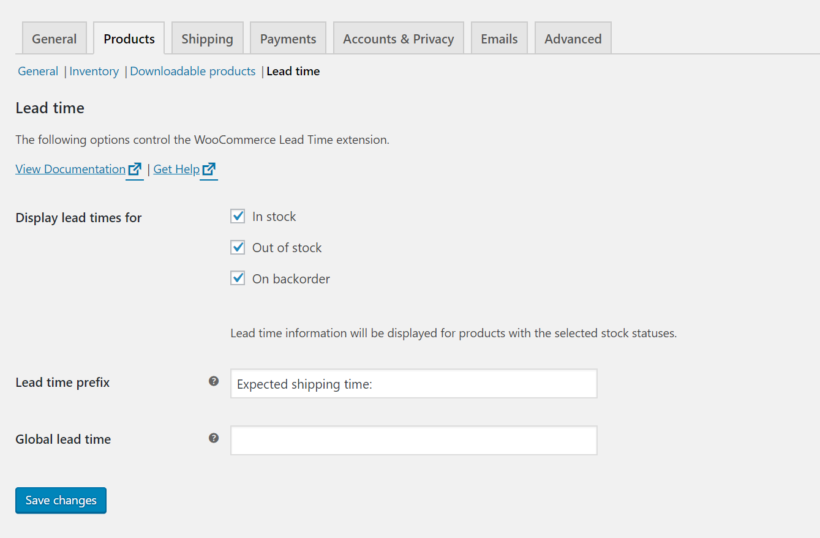
If you want to display some general text before the individual variation lead times, add this on the plugin settings page at WooCommerce → Settings → Products → Lead Times. For example, if you add "Lead time:" then this text will appear before the lead time for each product or variation.
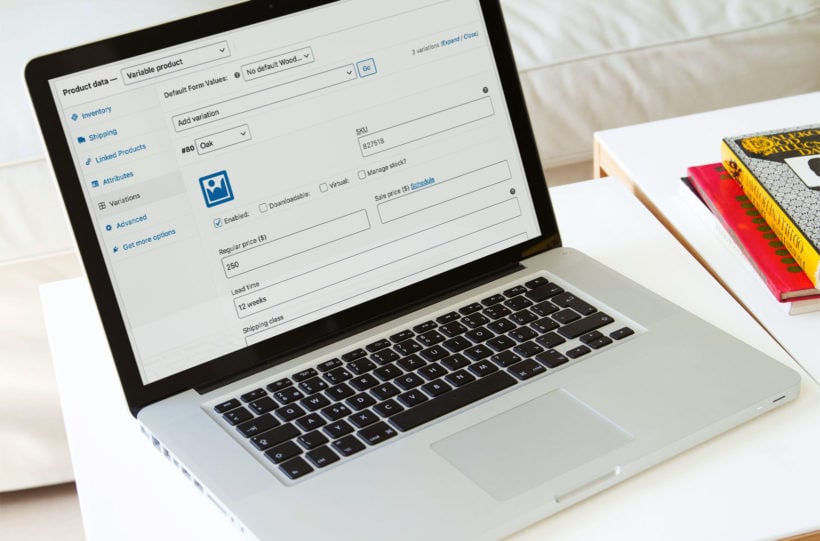
Go to the 'Edit Product' screen for any variable product.
Scroll down to the 'Product Data' section and open the 'Variations' tab.
Click to edit a variation and you will see a lead time field.
Enter the variation lead time, e.g. "5 days".
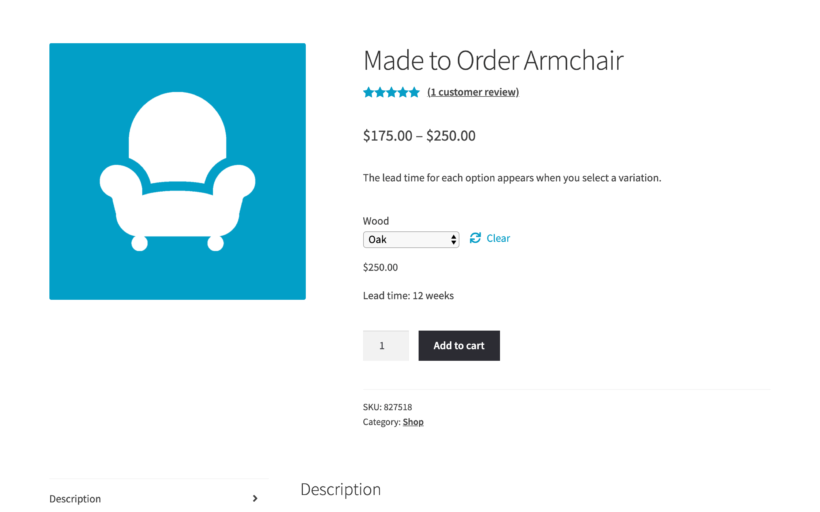
How customers see the variation lead time in the front end
When a customer views the variable product and selects a variation, the lead time will appear above the add to cart column:
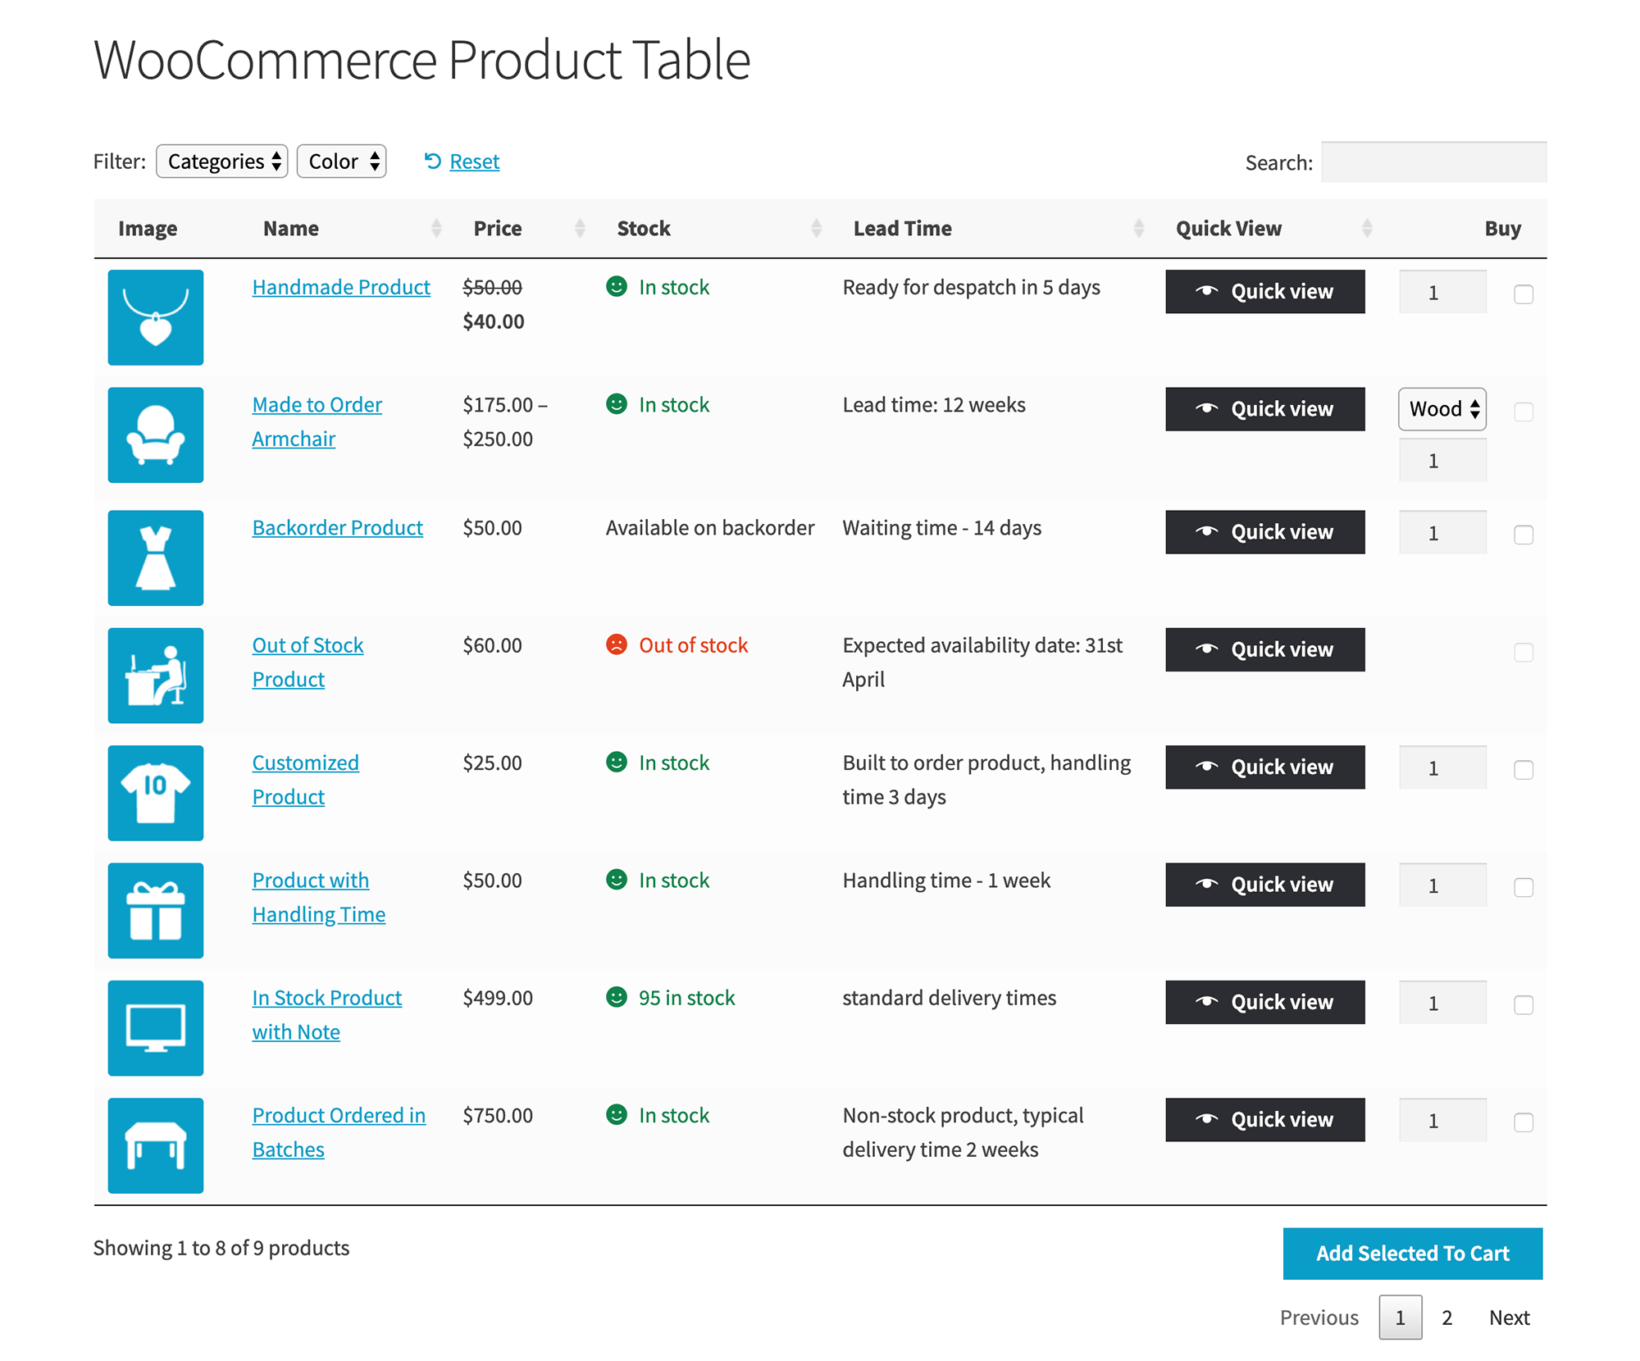
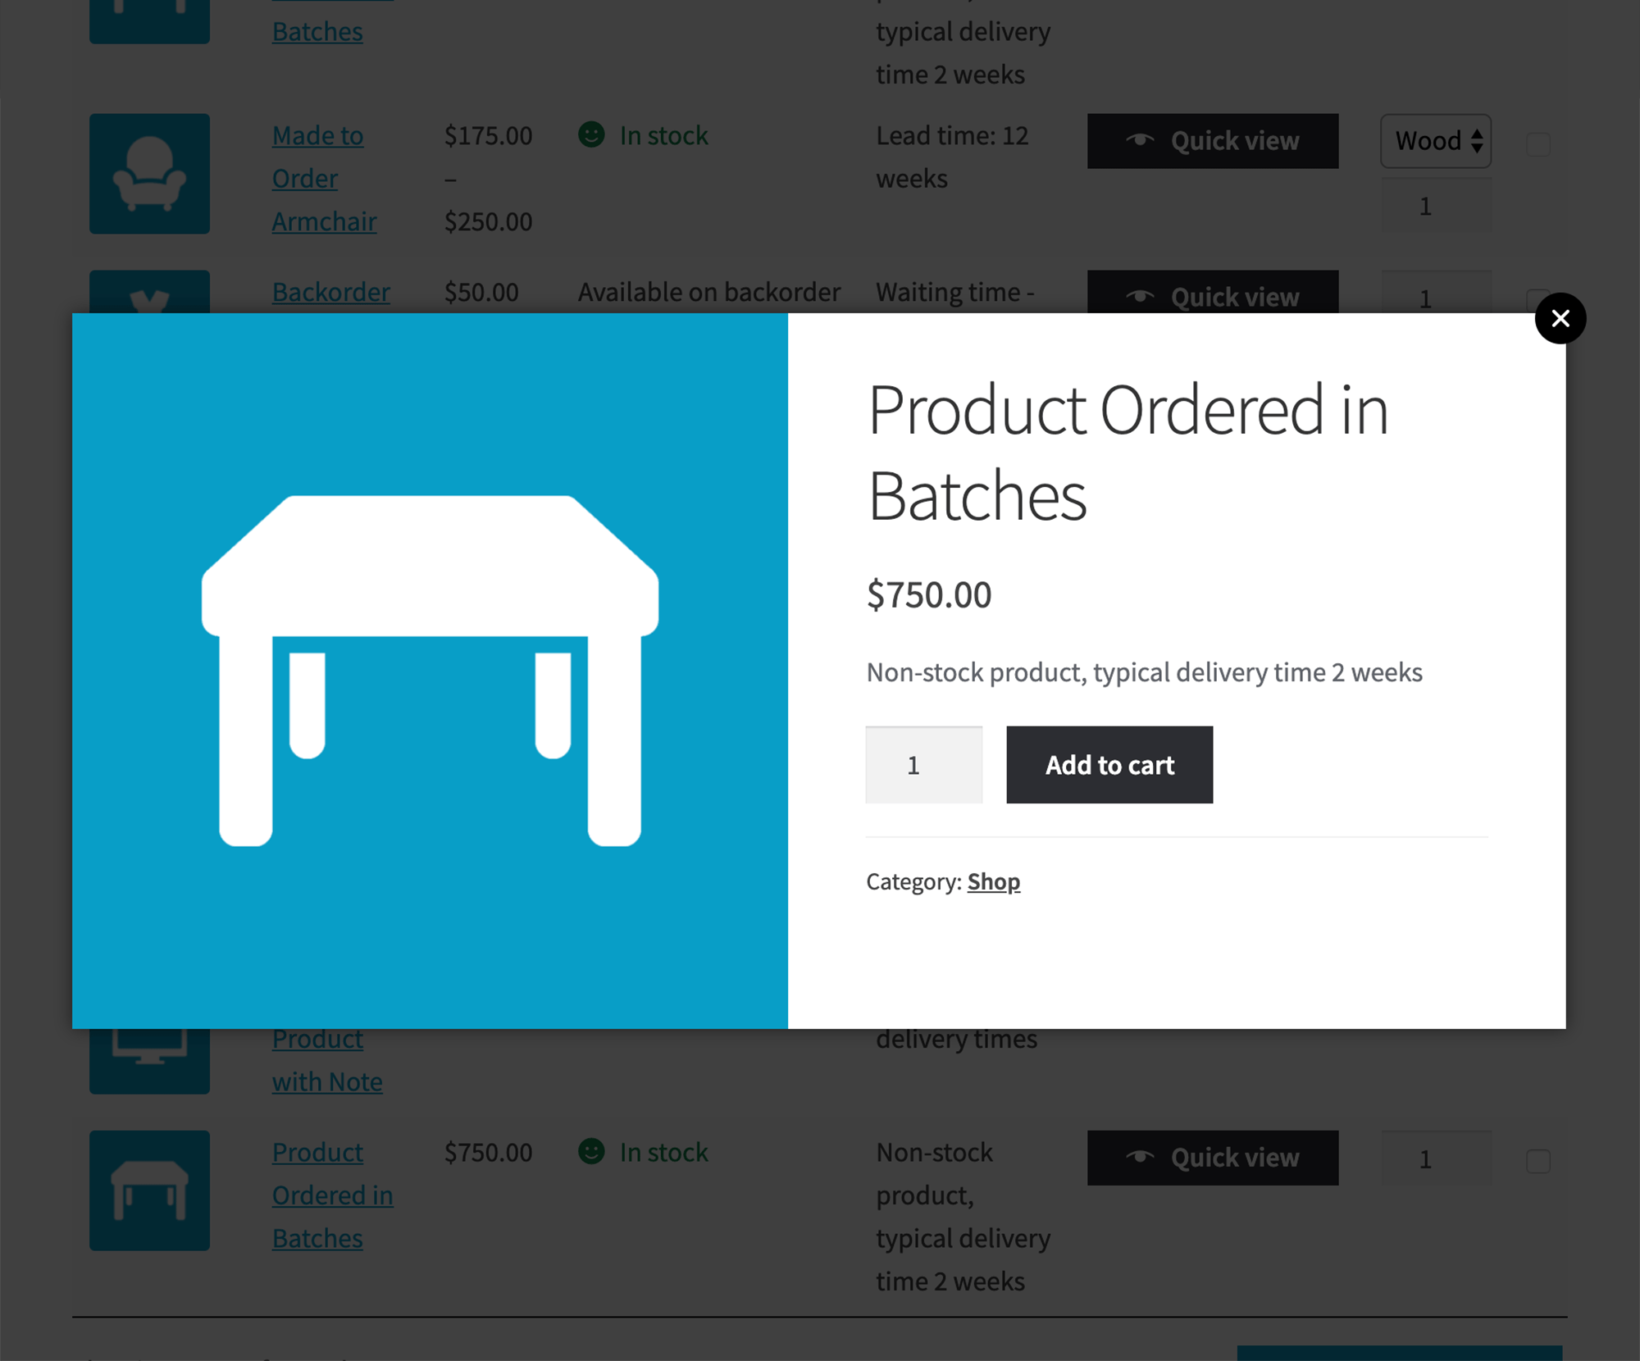
Where else can I display the lead time for each variation?
If you use WooCommerce Lead Time with our other plugins such as WooCommerce Product Table or WooCommerce Quick View Pro then the variation lead times appear in the product table or quick view lightbox. This is a neat way to show lead times outside of the single product page.
How to get the new feature
If you're already using WooCommerce Lead Time, simply head to Dashboard → Updates in the WordPress admin and update to the new version from there. If you haven't got the plugin yet, buy it now:
When you run a WooCommerce store, your main goal is to get more people to purchase your products. Creating a WooCommerce sales funnel helps you accomplish that.
See, when new visitor lands on your WooCommerce store, they may or may not be ready to make a purchase right away. Some visitors know exactly what they want and have their credit card to hand, while others are just testing the waters to see what their options are, and it might be their first interaction with your brand.
A WooCommerce sales funnel helps you do two things:
Connect with visitors at their current spot on the "user journey" (more on this term later).
Move visitors through this journey to eventually convert them into being a customer (and then, hopefully, a repeat customer).
In this post, you'll learn more about what the ecommerce user journey is and why it matters to your store. Then, we'll finish with some actionable tips on how to apply your newfound knowledge to build a successful WooCommerce sales funnel that gets you more sales.
Understanding the ecommerce store user journey
In order to create an effective ecommerce marketing funnel, you first need to understand the ecommerce user journey.
The user journey details a predictable path that your customers will take, starting from never having heard of your brand and eventually finishing with them purchasing your product.
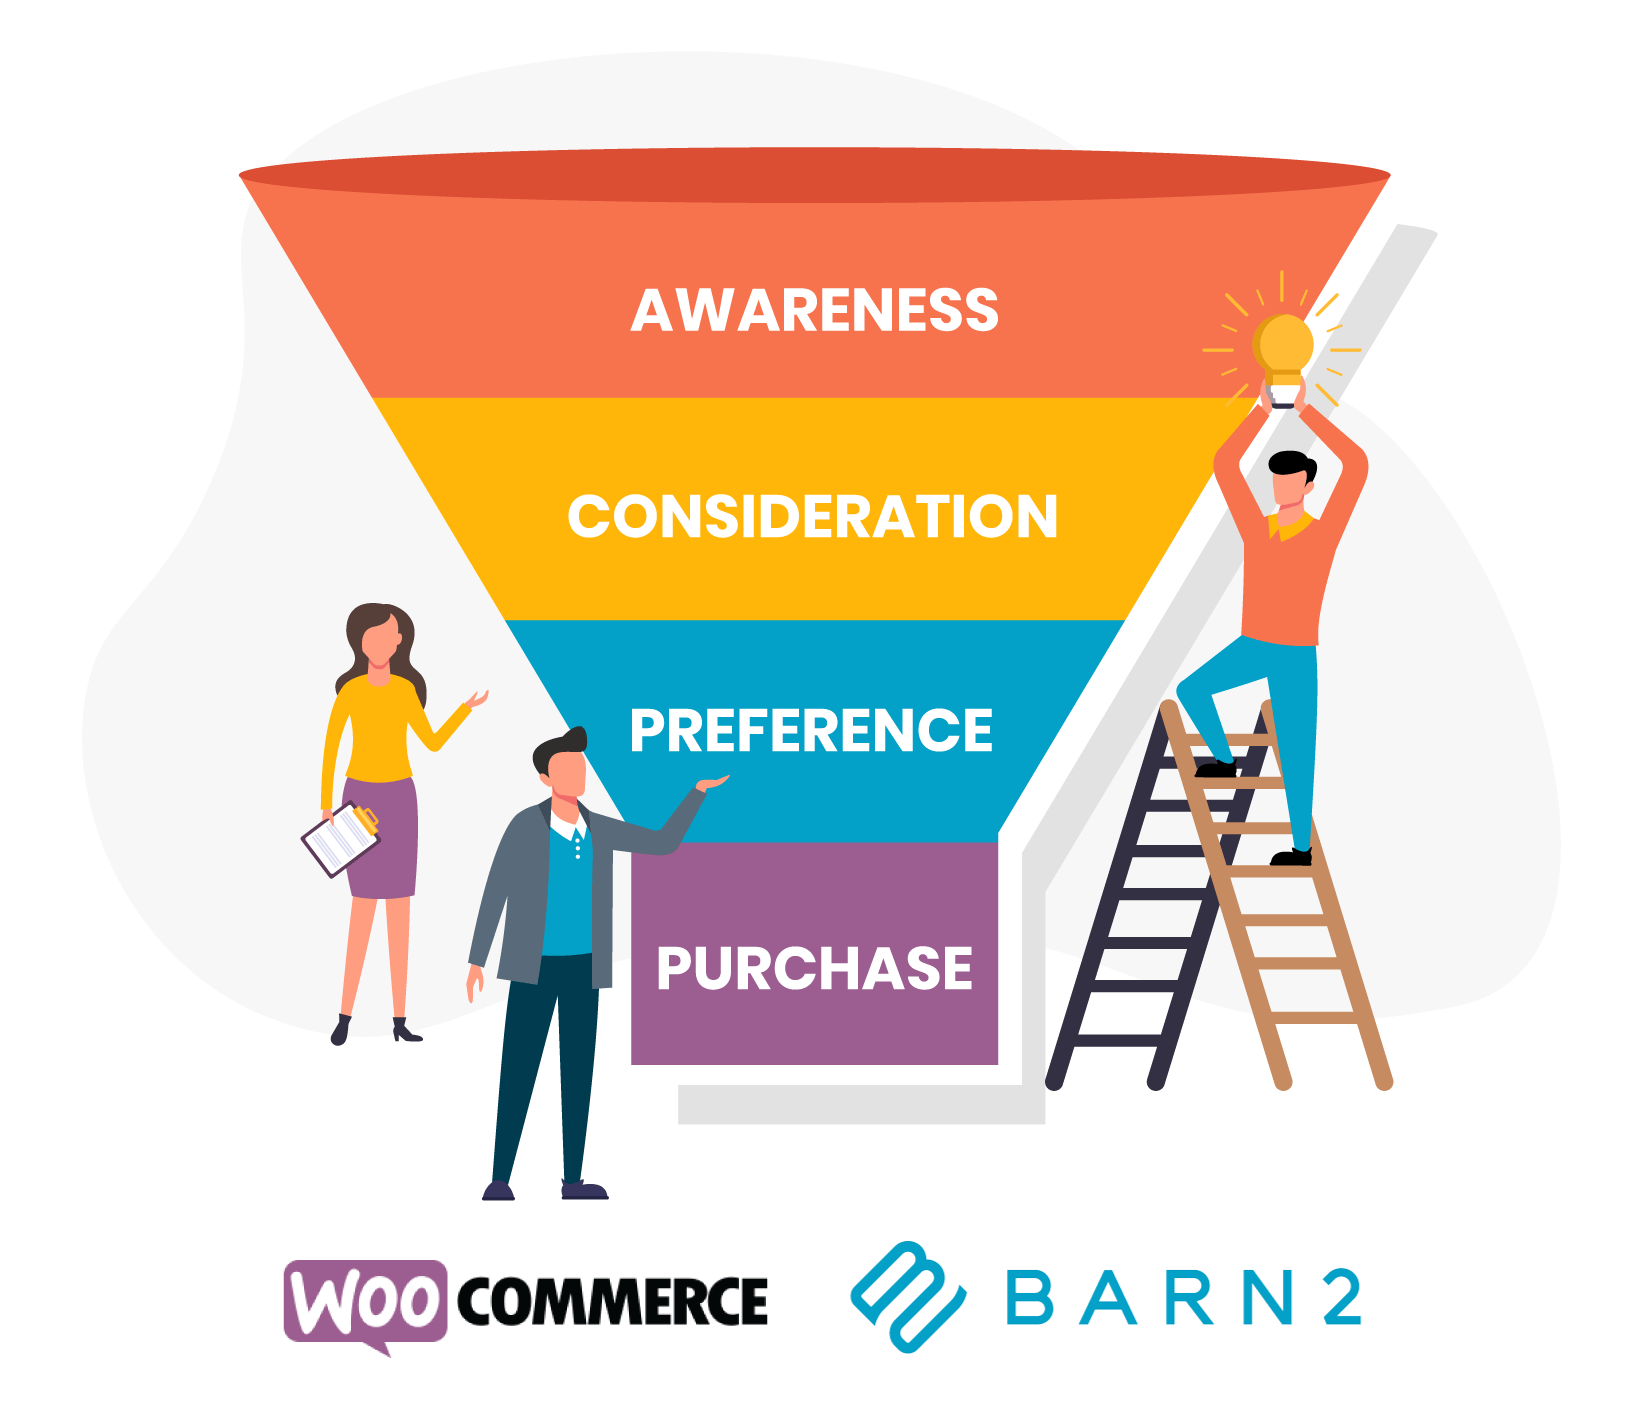
There are four stages in the customer journey:
Awareness Users have discovered your brand but they don't know very much about what you offer.
Consideration Users are digging into your products and considering exactly what you have to offer.
Preference Once users know what you have, they'll do their research to pick the best option. For example, reading reviews and comparing product details.
Purchase If a customer has made it this far, all you need to do is make it easy for them to purchase...and then keep them coming back for more.
Examples of users at different stages of the journey
To better illustrate the user journey on your online store, let's look at a real example of how it might look for a customer to move through the WooCommerce sales funnel.
In this case, it will be John.
John is looking for a new straight razor for shaving. He's still a little unsure of whether he wants a straight razor or if he should just stick with the cartridges he gets from the store, though.
Awareness
The awareness stage typically starts with a customer finding you through one of your marketing channels.
For example:
Content that you've ranked in Google via search engine optimization (SEO)
Social media posts
Ads that you're running (Facebook, Google, etc.)
At this stage, John is just looking for his options - in fact, he's not even 100% sure a straight razor is right for him.
To help him make his decision, John searches Google for "straight razor vs regular razor" and finds a comparison page on your site.
Now, even though he's not on a product page, John is aware of your brand.
Consideration
After reading through your comparison, John decides that he does want a straight razor. And, since he's already on your store, he decides to hop over to your product pages to see what types of razors you offer.
John isn't ready to buy yet - but he's a lot closer than he was when he made that first Google search.
Preference
After browsing your shop, John found a few straight razors that he likes and within his budget.
Now, to make sure they're right for him, John is going to do some more detailed research into each product, like reading the reviews and looking more closely at product details.
Purchase
After he read the reviews, John is totally convinced that your blue straight razor is the right product for him.
But he also might need some other products, like shaving cream and a brush. Magically, your store suggests those products to John, and he adds them to his cart.
To finish things out, John just wants it to be as easy as possible to complete his purchase.
How to move users through your WooCommerce sales funnel
Now that you understand the customer journey on your store, the next step is to structure your store so that it most effectively moves shoppers from the awareness stage to the purchase stage.
This is your WooCommerce sales funnel.
It draws in shoppers at various stages and then moves them through to eventually convince them to make a purchase.
Here's how to structure your store and what content to offer to most effectively move users through the WooCommerce sales funnel.
1. Create awareness with targeted content and advertisements
To attract users in the awareness stage, you don't want to create content that's overly focused on your own products.
Instead, aim for educational content in your blog and social media strategies. Users aren't even aware of your brand yet, so you're not going to accomplish much by trying to sell right away.
You can use this top-of-the-funnel content to simply attract customers who might be interested in what you have to offer. Once you get them on your site, the rest of your funnel will draw them in and move towards more sales-focused content.
If you have a marketing budget, you can also create awareness with paid advertisements via services like Google Ads and Facebook Ads.
Thanks to the targeting features in these ad platforms, you can only display your ads to people who are interested in what you have to offer.
2. Make it easy for shoppers to browse your products (consideration)
In the consideration/interest phase, people are now more open to learning about your brand and products.
This is where you can start being a little more aggressive in promoting your products, though you should be aware that shoppers aren't ready to make their purchases quite yet, so they aren't ready for a "buy now" approach.
Here, you just want to make it as easy as possible for people to learn about your brand and products on your store's front-end.
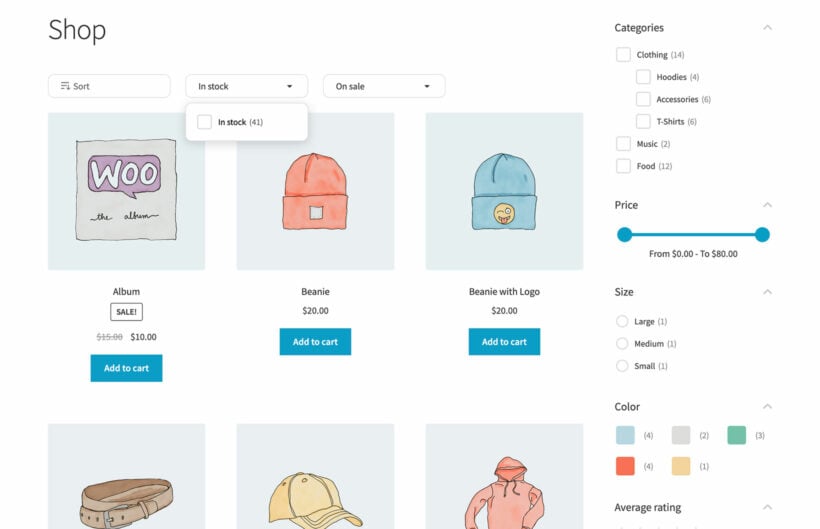
For example, you need to ensure that your shop page offers search and filter options so that shoppers can find the products they're interested in.
To make it easier for people to browse all your products, you can use the WooCommerce Product Table plugin to create a table layout of your products. A table layout lets you show more details about each product in less space. And it also gives shoppers the ability to search and filter your entire product catalog without needing to reload the page:
You also want to make it easy for people to learn about your brand. To accomplish that, you can create a dedicated "About Us" landing page and other educational content around your brand. If you're not sure how to build a styled page, you can use a page builder WordPress plugin like Elementor, Divi, or Beaver Builder.
Of course, even if shoppers are interested in your products, they might leave your store before moving on to the next stage in the journey. To bring those people back to your site and keep moving them through your WooCommerce sales funnel, this is a great spot to run retargeting ads on platforms like Google and Facebook.
Helping customers to find products
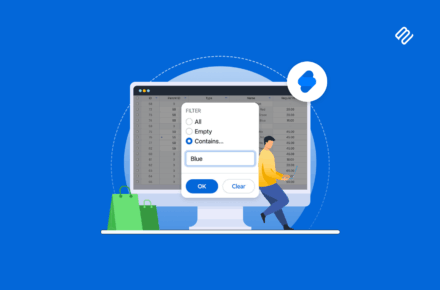
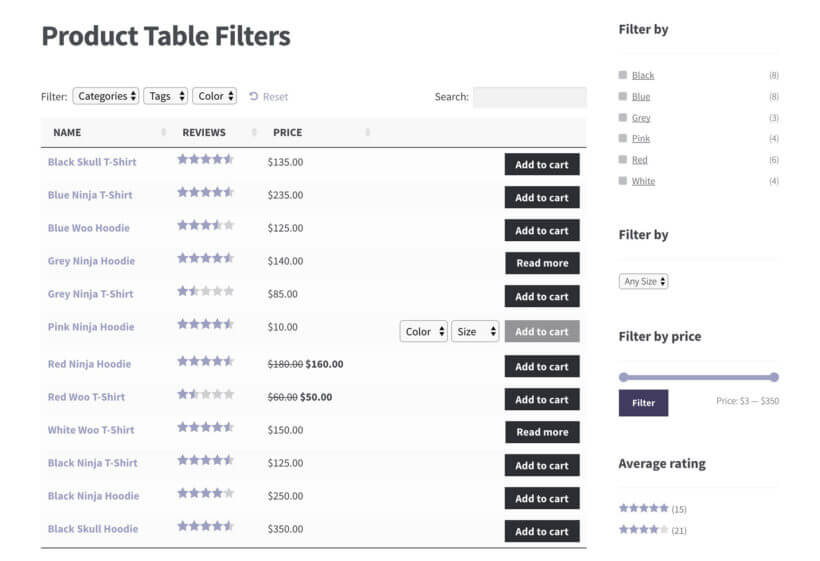
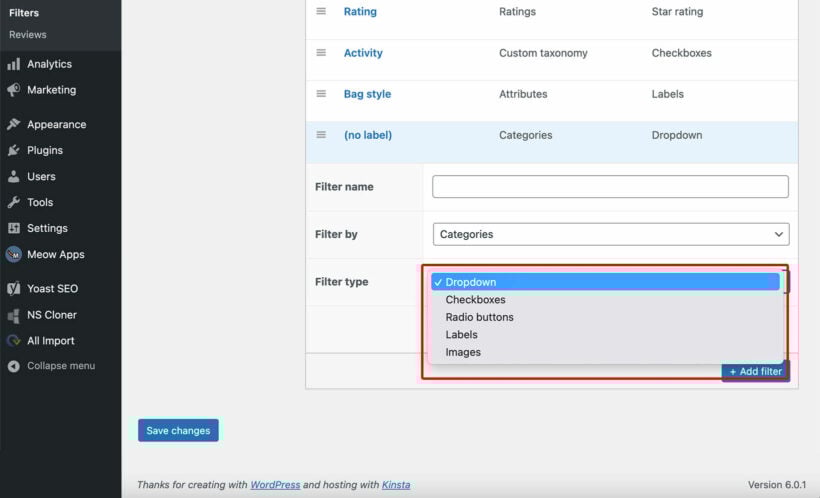
Navigation also plays an important role in a customer's journey. If you have various types of products in your store, adding product filters to your products page can make store navigation much easier. This can easily be done with the WooCommerce Product Filters plugin. The plugin allows you to add advanced AJAX-based filters on your store's product pages and let your customers narrow their search by simply selecting filter options.
You can add filter dropdowns, radio buttons, check boxes, color swatches, range sliders, and even images. The filters are fully responsive and come with a customizable minimal design layout. If you have a large store, adding filters can greatly boost conversions on your website.
3. Help users decide with reviews and details (preference)
If you've done your job right in the consideration stage, shoppers have now settled on some specific products.
In this stage of the WooCommerce sales funnel, you want to make it as easy as possible for shoppers to compare products and read reviews.
To help users understand products, make sure to include detailed descriptions, along with applicable information like:
Product dimensions and weight
Size guides
Information on materials
Colors
Etc.
If you're using WooCommerce Product Table, you can include this information directly in your product table, which makes it easy for users to compare products and saves them from having to navigate to a separate page for each product they're interested in. You can also include variable products and list all of the variations.
This is also where you want to showcase customer review ratings.
If you need more space to display detailed product descriptions and customer review ratings, you can use the WooCommerce Quick View Pro plugin to add a product quick view button to your store.
When a shopper has found a product they're interested in, they can click the button to view more details in a popup without needing to leave the page.
WooCommerce Quick View Pro also integrates with the WooCommerce Product Table plugin, which lets you combine both approaches.
4. Make it easy for shoppers to purchase (and increase the order value)
By making it easy for the shopper to see key product details and reviews, they should be ready to make their purchase.
Now, you have two goals:
Make it as easy as possible for them to check out to avoid shopping cart abandonment.
Encourage them to increase their order value, either by increasing the quantity of the item they're purchasing or purchasing additional products.
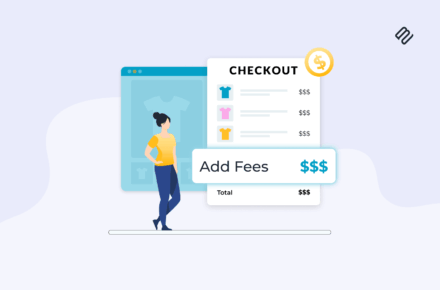
For the first goal, you need to simplify the checkout process. WooCommerce's default checkout process involves multiple steps and pages. This often leads to users abandoning the cart.
To improve this, you can use the WooCommerce Fast Cart plugin. It comes with a one-page cart and checkout form that is super easy to set up.
You can choose between popup and slide-in cart and checkout display and let customers place orders from a single page. If you want to see WooCommerce Fast Cart in action, you can see the demo here.
To set up one-page checkout, install WooCommerce Fast Cart on your website and activate it. Go to the plugin settings page and configure the settings to make it work as per your preference. Once done, the fast cart will take over the default checkout process and let people check out more swiftly.
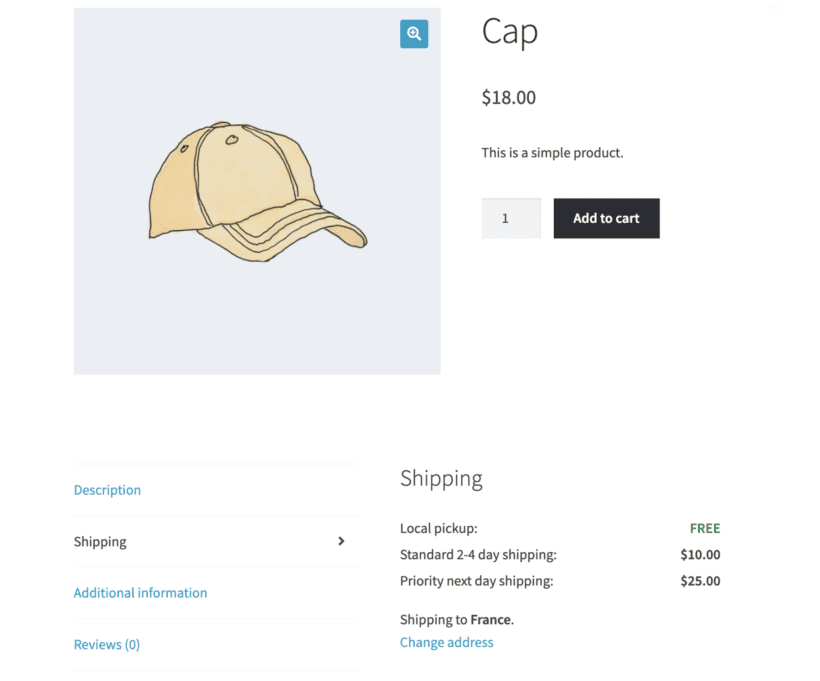
Further, clearly state shipping and return details, as those are two big causes of shopping cart abandonment. You'll also want to offer popular payment gateways like Stripe and PayPal, as the lack of good payment options is another big cart abandonment factor.
Encourage shoppers to buy more products
To encourage larger average order value numbers, there are a few strategies that you can employ.
First, consider revenue-boosting tactics like upselling and order bumps:
Upsell Upgrade the customer to a higher-value product (downsells are the opposite, and also make sense sometimes).
Order bumpEncourage add-ons to the product a shopper is purchasing.
WooCommerce itself comes with options to display related products on the product page (upsells) and cart (cross-sells). To set up WooCommerce upsells and cross-sells, you can follow this guide. If you plan to use WooCommerce Fast Cart, you can enable cross-sells in the plugin settings in just a few seconds. Once enabled, the cross sells sections will show up under the cart review section in the fast cart popup.
For more advanced upselling, we recommend pairing Fast Cart with a dedicated funnel builder. FunnelKit Funnel Builder and Upsell Funnel Builder by WPSwings both add order bump offers at the checkout and one-click post-purchase upsells. Customers can accept extra offers without re-entering payment details, which is a proven way to increase average order value.
Encourage shoppers to purchase bigger quantities
Second, consider encouraging shoppers to purchase higher quantities. The WooCommerce Quantity Manager plugin lets you subtly encourage this behavior by changing the default quantity for some or all of your products.
With this plugin, you can add advanced quantity rules to nudge people toward buying larger quantities. You can also add a minimum order quantity for your products to increase the cart value. While this can be a good idea for increasing average order value, you need to clearly think about your strategy here. In some scenarios, increasing the minimum order value can even drive away customers.
Be sure you are setting a reasonable default order value and setting the minimum quantity to a fair limit. If you want to see these features in action, check out the demo.
Don't forget email marketing!
Finally, don't forget about post-purchase engagement. To turn one-time customers into repeat customers, you can send regular emails and use retargeting ads to bring them back for more purchases in the future.
There are various reliable lead generation and email marketing services out there. For collecting emails on your WordPress website, you can use the MailOptin lead generation tool. It comes with various options for customization so you can make it match your store's design. For email marketing, we recommend using MailChimp. It is one of the most popular and reliable email automation systems in the market.
Create your WooCommerce sales funnel today
Creating an optimized WooCommerce sales funnel is a game-changer for boosting your online store's conversion rate.
To optimize your WooCommerce sales funnel and increase conversions, you'll want to structure your store so that it reaches users in each stage of the buying journey.
You can create awareness with educational content and targeted ads.
Then, to help move shoppers from consideration to preference to purchase, you can use WooCommerce plugins like WooCommerce Product Table to create an optimized shopping experience that makes it easy for shoppers to research and compare your products:
If you're looking to enhance your WooCommerce store and provide a seamless shopping experience for your customers, you're in the right place. In this easy-to-follow tutorial, we will discover a plugin that can adds an instant WooCommerce AJAX search box to your store, plus other controls such as AJAX product filters. This makes product discovery a breeze for your customers.
The search box that comes with WooCommerce is pretty basic. A WooCommerce AJAX search plugin adds a more advanced search, with no page reloads.
In this comprehensive guide, we'll go beyond the basics of setting up a WooCommerce AJAX search. You'll learn how to use the WooCommerce Product Table plugin to list products in a quick order form view, complete with AJAX search box. We'll also show you how to add AJAX-powered product filters with the WooCommerce Product Filters plugin. This makes it even easier for your customers to narrow down their product search. That way, they can find exactly what they're looking for without any hassle.
The end result will look something like this:
Or if you want advanced filters to speed up the process of finding products, then it might look more like this:
Either way, keep reading to learn how to add WooCommerce AJAX search and filtering to your online store.
What is WooCommerce AJAX search?
First, we need to understand what WooCommerce AJAX search means. After all, "AJAX" is a very technical term!
There are a few simple ways you can use AJAX to make it easier for customers to find the products they’re looking for:
Product searching is when a customer enters a relevant keyword in a search bar to find a particular product title. The keyword is typically matched against the product name, product short description, SKU lookup, or something similar.
Product sorting lets customers change the order in which your WooCommerce products are listed. Search results are re-ordered based on product sort attributes such as relevance, date added, price low-high (or high-low), average buyer rating, or other product data.
Product filtering helps narrow down the number of search results based on selected attributes such as product categories, tags, or other data.
Of course, the best methods for your WooCommerce store would depend on the type of products you sell. Many store owners prefer to go for a combination of all three. This way, customers can search for the products they’re looking for and then sort or filter them by different parameters, making their shopping experience more efficient and enjoyable with one of the best WordPress search plugins available on the market.
WooCommerce needs AJAX-based product search options because they create a more user-friendly, interactive search experience. If searching, sorting and filtering are powered by AJAX, then it means that it happens instantly without reloading the page. This improves the customer’s experience with your online store and makes for a more intuitive buying user flow.
Why most WooCommerce stores need AJAX-based product search
If you have more than about 15 products, then your customers will expect quick and easy ways for them to narrow down the list.
Here are some of the main benefits of offering AJAX search, sort and filter in WooCommerce:
Help customers find products faster WooCommerce AJAX search and sort allow customers to find products faster and quickly narrow down the product catalog. For example, if you sell all sorts of clothing, customers can search for t-shirts only. And once they have a WooCommerce AJAX search result of all t-shirts, they can sort products by price.
Improve e-commerce store navigation WooCommerce AJAX search and sort options make it easier for customers to browse through the more relevant results of products. In other words, they see the products they’re most interested in purchasing. For example, this could be products that fit their budget or specific requirements (such as red t-shirts).
Increase salesWhen customers can find products faster and more easily, they’re more likely to make a purchase. Put simply, the WooCommerce AJAX search and sort options help customers make quick buying decisions.
Should you offer search and sort options?
For most online stores, having WooCommerce AJAX search and sort options is essential. Here are a few ideas about who should offer search and sort options in WooCommerce:
Large product catalogBrowsing stores with large product catalogs isn’t user-friendly. WooCommerce AJAX search and sort options enable customers to easily find what they’re looking for in your online store. They can choose to view only the products they’re interested in buying.
Sell products at different price pointsIf you sell products at different price points, you can give your customers the customization option to sort by price – either low-to-high or high-to-low. Customers can simply sort products by price which helps them quickly find what they want based on their budget.
Sell a wide variety of productsStores that sell all sorts of products can make it easy for their customers to sort products by category or type. For example, customers might want to view only boots or sandals. You can give them the option to sort by product type or let them search for a type of product.
Some examples
As we have seen, the search function on an e-commerce website is crucial for customers to find the products they want quickly and efficiently. A WooCommerce AJAX search plugin offers several features that can improve the search experience for customers, leading to increased sales and customer satisfaction.
Here are two case studies of how WooCommerce AJAX search has improved shopping for customers of two different types of online store.
Instant search results for an online clothing store
An online clothing store was experiencing a high bounce rate on its website, particularly on the search results page. They realized that customers were not finding what they were looking for quickly enough, which led to frustration and a poor user experience. To address, this they installed the WooCommerce AJAX search plugin.
By implementing the instant WooCommerce AJAX search results feature, customers were now able to see real-time results as they typed in their search queries. This helped customers find what they were looking for much faster and reduced the time spent searching. As a result, the clothing store's bounce rate decreased, and they saw an increase in sales.
Autocomplete suggestions for a bookstore
A bookstore was struggling to keep up with the number of books they had in their inventory, which made it difficult for customers to find what they were looking for. They decided to implement the WooCommerce AJAX search plugin to help customers find books faster.
By using the autocomplete suggestion feature, customers were provided with relevant suggestions as they typed in their search queries. This not only helped customers find what they were looking for but also helped reduce typing errors. In addition, they implemented the WooCommerce search by SKU, which enabled customers to search for books using their SKU lookup numbers.
Now that you know how you can benefit by offering live search and sorting options on your store, let’s take a closer look at the default WooCommerce AJAX search features and their limitations.
Does WooCommerce have AJAX search?
In a word, no.
There are several major problems with the product search which comes with WooCommerce itself:
No live AJAX search - The default WooCommerce search doesn’t offer live search options. What this means is it won’t display search results as you enter letters in the search field. You have to click the search button to start searching for products. Considering most online shoppers are accustomed to live search (think search engines, Amazon, and eBay), you need to offer WooCommerce AJAX search and sort options for your own online store. The easiest way to do this is by using a WooCommerce AJAX search plugin.
It's limited to complete word searching - WooCommerce’s default search function lets you search only after you’ve entered the full words in the search box. Once you enter the full search query, the search results are displayed on a separate page. While this might be suitable for blogs or business sites, it certainly doesn’t deliver the best user experience for WooCommerce stores. What this means in the context of WooCommerce is that your customers can only find a product by entering the full product name. The good news is that WooCommerce store search can work with multiple word order patterns. So, for instance, if you’re searching for a product called floral print dress and you type in dress floral print, the WooCommerce store search will return the correct word order pattern i.e. floral print dress.
No SKU search - Many customers like to find specific products by entering their unique ID - the SKU. However, customers are unable to perform advanced woo search by variable product SKU. With SKU lookup functionality, they could easily find a specific product by its unique SKU code. This is especially helpful for WooCommerce wholesale stores.
Keep reading to discover a plugin which solves all these problems, and more 😀
Introducing WooCommerce Product Table: the best AJAX search plugin
When customers are searching through large numbers of products, they need an AJAX search which displays results in an easy-to-read layout. On its own, WooCommerce isn't great at that! The solution is to install the WooCommerce Product Table plugin.
WooCommerce Product Table is much more than just a WooCommerce AJAX search plugin. It actually transforms the layout of your products, as well as adding an instant AJAX-powered search box.
How it works
The WooCommerce Product Table plugin lists your products in a quick one-page order form for faster shopping. It comes with several AJAX-based product search options right out of the box:
Instant AJAX keyword product searchCustomers can enter a keyword in the search box above the product table and quickly view matching results in the table. The product table is instantly updated through the AJAX search for WooCommerce as they’re typing.
AJAX filter dropdownsYou have the option to add any number of filter dropdown lists above the product table. Customers can use these options to instantly filter products by categories, tags, attributions, variations, or custom taxonomies. Thanks to AJAX search for WooCommerce, these filters update displays in the product table without reloading the page.
Filter widgetsWooCommerce Product Table also gives you access to its basic filter widgets that are built into the WooCommerce core. You can add price filters to specify a price range, checkbox filters for product attributes, or average ratings.
Column sortingWooCommerce Product Table lets you create AJAX-based sortable columns. Customers can click on a column heading to order by that column.
Having a robust WooCommerce search AJAX plugin allows you to deliver better product browsing experiences. This makes it easier for customers to quickly find what they’re looking for.
And once they've used the various search features, they can view the results in a product table. This makes it much easier for them to make product comparisons and make fast buying decisions.
What else can the search plugin do?
WooCommerce Product Table gives you complete control over which products you want to include allowing you to list hundreds (or even thousands) of products. You can display any information you want in columns including product images, descriptions, prices, videos, custom fields, taxonomies, SKUs, and product attributes and variations.
WooCommerce Product Table uses AJAX which means that:
It displays search results in the product table rather than on a separate page.
Results are displayed without a page refresh so it’s super fast.
It also features a live search results option similar to what you get with search engines like Google or marketplaces like Amazon. In other words, it displays results as you type the keywords or search query in the search box. This search form sort of implementation makes for an intuitive user experience.
You can add product tables to pages, posts, and custom post types. You can add a search box anywhere to your site. It's also worth mentioning that WooCommerce Product Table is 100% WPML compatible. And, it works with your page builder plugin templates (e.g. Elementor).
The styling of the product table will automatically match your theme. You don't need to mess around with custom CSS (unless you want to!).
How to set add AJAX search, sort and filter to WooCommerce
Having a robust search and sort option for your online store is essential. And the easiest way to get started is by using a powerful WooCommerce AJAX search plugin. Below we’ll discuss how you can add the search and sort options to your WooCommerce site.
For this tutorial, we’ll assume you already have a WooCommerce store set up with some products added to it.
Step 1: Install WooCommerce Product Table
To get started, grab a copy of the WooCommerce Product Table plugin. You’ll find the license key for it in the confirmation email you receive along with the plugin’s zipped file.
Next, navigate to Plugins → Add New from the WordPress admin panel and upload the plugin’s zipped file to your WordPress site. Click the Activate button to continue.
Step 2: Create a product table
The first time you activate the plugin, the product table builder will launch. To open it later on, just go to Products → Product Tables → Add New.
Go through each step of the table builder to create your product list, complete with WooCommerce AJAX search:
The first step asks you to choose how you will add the tables with search box to your site. The options are:
Enable on shop page templates - Choose this if you want the table layout with the AJAX search at the top to appear on your main shop pages, such as the storefront and categories.
Manually via a block or shortcode - Choose this if you want to create a separate page containing the product table with AJAX search box, without affecting your main shop pages.
Page 2 depends on which option you selected above. You can either choose which WooCommerce templates to enable the table view on, or select which products/categories/etc. to include.
Next, it's time to decide which columns of product data to display. Choose columns that’ll make it easier for your customers to:
Find the products they’re looking e.g. product name and SKU.
Find out everything they need to know to make a purchase decision e.g. product description, price, and ratings.
The next few pages are self-explanatory and let you control details such as whether to add filter dropdowns above the table. I recommend doing this because they will work alongside your WooCommerce AJAX search box to make it even easier for customers to find products. You can also change the default sort order of the table. (Remember that customers can then re-sort the table by clicking on the column headers.)
You don't need to do anything to add an AJAX search box because WooCommerce Product Table adds this automatically.
Step 3: Add the product table with AJAX search to a page
If you chose to enable the table view on your shop templates, then you can skip this step. Alternatively, follow these steps to add the table to a page:
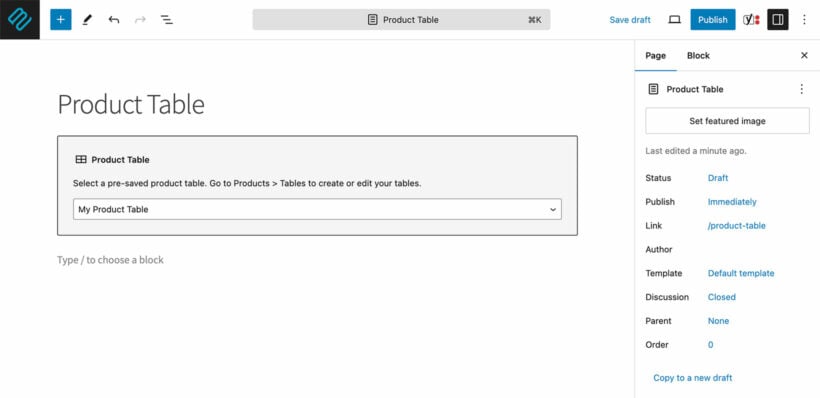
If you're using the WordPress block editor, insert the 'Product Table' block and select your table. If not, then copy the shortcode from the 'Ready' page of the table builder and add this to the page.
View your page! You will see a product table, complete with your chosen settings and a WooCommerce AJAX search box above:
Supercharge your AJAX product filters
While WooCommerce Product Table adds a live AJAX search box to your product lists, its filters are a bit basic. For the best possible results, you can supercharge your product table filters with the WooCommerce Product Filter plugin.
WooCommerce Product Filters is a powerful tool that allows you to add advanced filtering options to your product table, such as dropdowns, clickable color swatches, checkboxes, and range sliders. This gives your customers more options to refine their search and find the products they are looking for quickly and easily.
By using WooCommerce Product Filters in combination with WooCommerce Product Table, you can create a seamless user experience that allows customers to search, filter, and sort through your products with ease. The two plugins complement each other perfectly, allowing you to provide a comprehensive product search and browsing experience for your customers.
How to add AJAX filters to your WooCommerce search
To get started, simply install and activate WooCommerce Product Filters - either alone or alongside WooCommerce Product Table. You can then add your desired filters to your product table using the drag-and-drop interface in the WooCommerce Product Filters settings.
With these powerful plugins working together, you can provide a seamless and efficient browsing experience for your customers, making it easier for them to find and purchase the products they are looking for on your WooCommerce store.
Check out this
quick guide to WooCommerce Product Table’s search term option for more information.
Bonus: Supercharge the WooCommerce search logic
The AJAX search added by the WooCommerce Product Table plugin does an exact match search. Customers can enter 3 or more letters and the instant search will take place, live.
If lots of customers use the search on your store, then it's a good idea to extend it using the SearchWP plugin. This adds lots more features to your AJAX search box, including:
Control the exact logic of the search functionality.
View search analytics, and use the data to make improvements such as adding synonyms for common misspellings.
Bonus: Add a standalone WooCommerce product search box anywhere on your site
So far, we've looked at how to add an instant AJAX search For WooCommerce above a product table. It's also possible to add a search box as a standalone element, for example on the homepage, or in your header or sidebar.
To do this, you need to use the 'Product Search' widget that comes with WooCommerce itself. This adds a custom search box wherever you add the widget.
Once you've done that, use these instructions to add the product table layout to the search results page.
Bonus: List products based on a specific search term
You can also use the WooCommerce Product Table plugin to create pre-searched product tables using a shortcode option. This is a neat feature that lets you display search results on your online store without requiring the user to do it manually.
Create your table via Products → Product Tables → Add New as described above.
Copy the shortcode from the final page of the table builder.
Paste it into a page, and add the search term parameter. Replace "sandals" in my example shortcode with the term that you wish to pre-search for: [product_table id="1" search_term="sandals"]
This is useful if you blog about specific products or want to offer discounts and need a way to automatically display those results using your WooCommerce AJAX search plugin.
Check out this quick guide to WooCommerce Product Table’s search term option for more information.
Set up your WooCommerce AJAX search plugin today
By using a robust WooCommerce search plugin, you can improve store navigation, help customers quickly find products, and boost sales on your website. It’s a great way to increase conversions while delivering an enhanced shopping experience.
Automatically generate a WooCommerce AJAX search results page.
Let customers quickly find what they’re looking for using a dynamic site search form with search, sort, and filter options, including WooCommerce search by SKU.
Make it easy for customers to learn more about your products by including as many columns as you’d like.
Do you agree that adding search and sort features to your online store will improve your customers’ shopping experience? Let us know by commenting below!
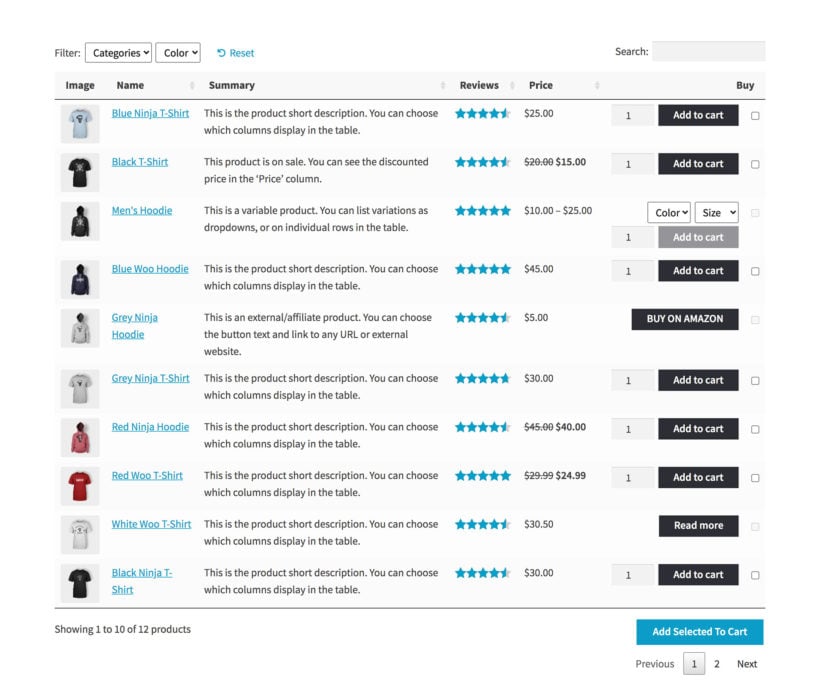
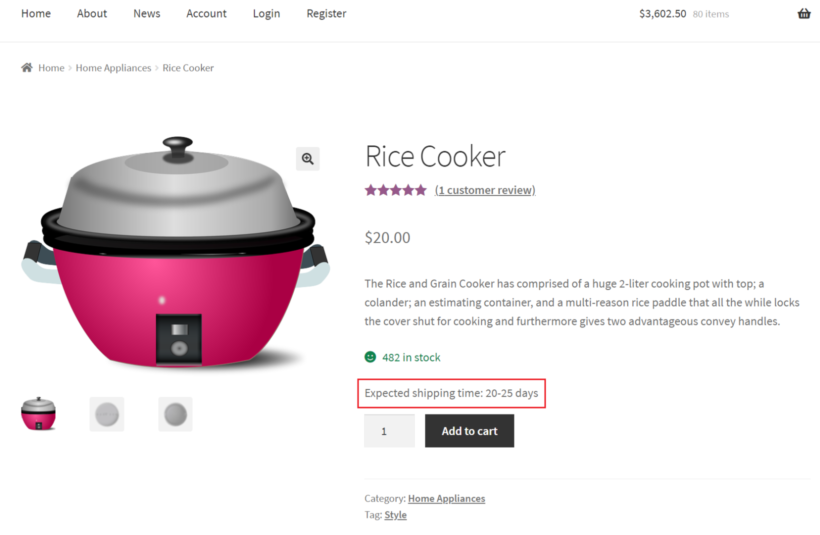
'Displaying a short WooCommerce product description on your store’s main shop page and category pages makes it easy for customers to make a quick buying decision. It lets them know what the product is and encourages them to learn more.
The only problem is that the WooCommerce product descriptions you write only display the short description - and also the main long description - on the single product page. There's no option to add a WooCommerce short description to your main shop page, product category pages, or elsewhere on your site. You can't display the main description away from product pages either.
Fortunately, there are plugins which allow you to show short descriptions directly on your WooCommerce store’s main shop page.
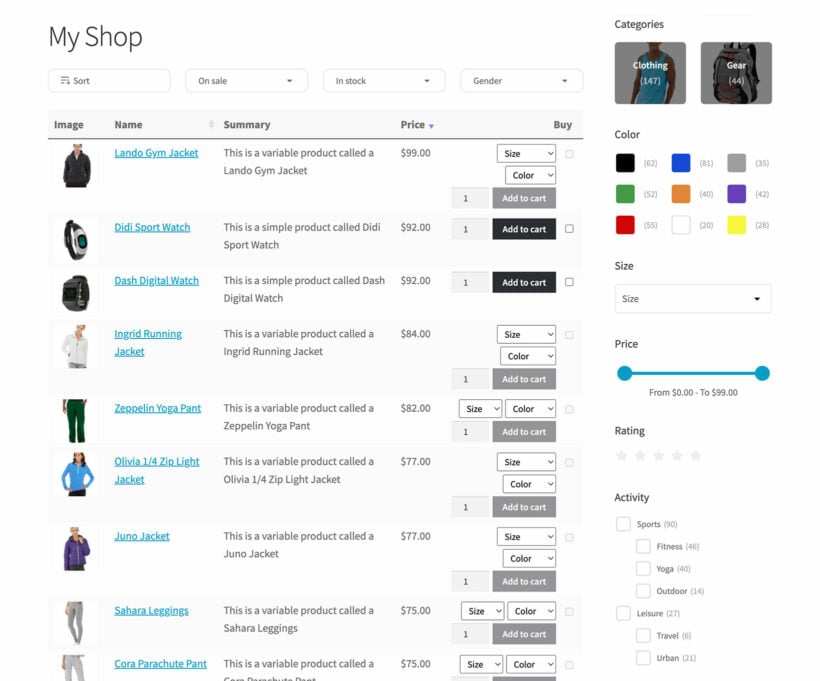
A product table with the WooCommerce short description displayed on the shop page
In this post, I’ll show you two ways to customize and display a WooCommerce product short description on your main shop page, category pages, and archive pages. You'll also learn how to display the product long description anywhere on your site in a WooCommerce product description table, or in a quick view lightbox.
Before we begin, let’s quickly step through some reasons why you might consider doing this in the first place.
Understanding the importance of short product descriptions in WooCommerce
While a picture tells a thousand words, images on their own aren't enough to convince customers to buy. They also need to read a summary of the product.
WooCommerce short descriptions are essential to quickly introducing customers to a product they may wish to buy. They only take a few seconds to read, and are short enough to whet the customer's appetite and make them want to learn more. That's why they're an important part of driving sales.
Of course, WooCommerce also has long descriptions (also known as full product descriptions). However, the customer won't jump straight into reading full descriptions. After all, they need a reason to invest this much time in a product they're considering.
The product short description bridges the gap between looking at images and reading the long description. It gives just enough information to convince shoppers to delve deeper.
Short product descriptions boost your SEO
Short product descriptions on your Shop and Category pages play a vital role in improving your store’s SEO. When these descriptions are visible, they provide search engines with additional context about the products you’re offering. This extra content helps search engines better understand the relevance of your pages, which can improve your rankings for related keywords.
Additionally, short descriptions enhance the user experience by quickly giving visitors an overview of your products. This makes it easier for them to decide whether to click through or make a purchase, reducing bounce rates and increasing engagement—both of which are positive signals for search engine algorithms.
Is there a shortcode for product descriptions in WooCommerce?
Yes, you can use the shortcode [product_short_description id="YOUR_PRODUCT_ID"] to display a product's short description anywhere on your site. Replace YOUR_PRODUCT_ID with the product’s actual ID, and the shortcode will pull the description dynamically. It’s a simple way to reuse content.
Where is the WooCommerce short description displayed?
WooCommerce itself only displays the short product description on the single product page. Depending on your WordPress theme, the summary typically appears underneath the product name and price, and above the quantity picker and add to cart button.
This is a sensible location for a product page short description because it appears 'above the fold' and is easier to see. In contrast, the long description appears lower down the page in a tabbed section, which also includes additional tabs like Reviews and Additional Information.
However, there's a problem with this.
The problem
While the short description has an important role on individual product pages, it's completely absent from all other parts of your store.
That's right - it simply doesn't appear anywhere else. No product summary is displayed on the shop page, product category pages, or anywhere else. As a result, customers are forced to click through to the single product page to read the short description. But why would they do this when you haven't provided them with enough information to click through? 🙃
The solution is to install a plugin which displays the WooCommerce short description on your shop and category pages. We'll get to this next.
Two plugins to help you display the WooCommerce short or long description
Normally in WooCommerce, the main shop and category pages display very limited information about each product. This typically includes the product image, average star rating, price, title, and an add to cart button.
It's much better to allow customers to view the product’s short description - and maybe even the long description - directly on the main shop page. This helps them make a faster buying decision since all they have to do is find what they’re looking for and add it to the cart. They don't get lost by having to compare products across multiple pages.
Luckily, there's a choice of two WooCommerce show short description on shop page plugins. Both work in different ways, so read about both and choose the one that best fits how you want to display the short description.
1. Create quick WooCommerce order forms which include the short description
One way to display extra product information on the shop and category pages is by using WooCommerce Product Table. This plugin lets you list all of your products – along with important product data – in a neat, front-end WooCommerce product description table. It allows your customers to see more information at a glance.
You can control exactly what information shows up in your table. This includes:
A 'Summary' column dedicated to each product's short description.
A long description column containing the WooCommerce long product description. This is the main description that normally appears on the single product page.
The product excerpt.
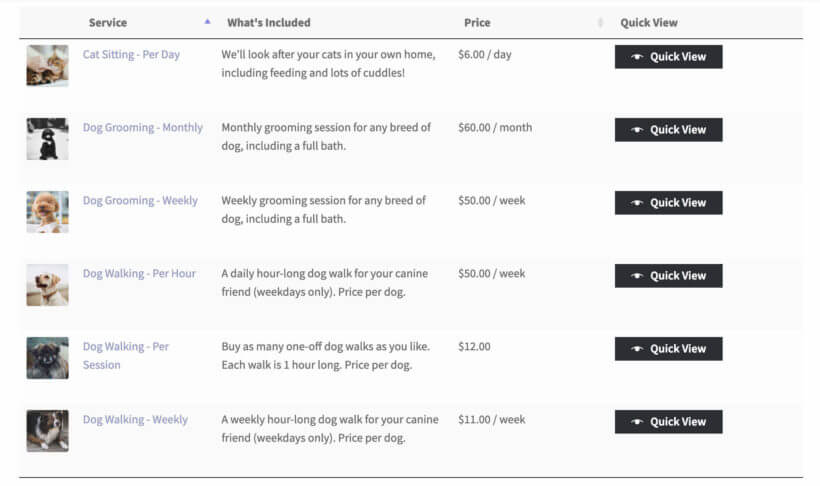
2. Use product quick view
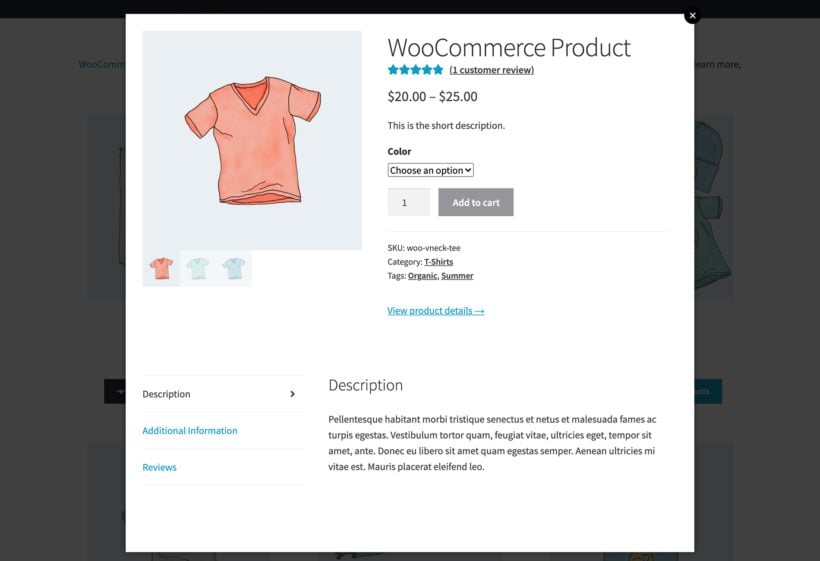
Another way to show extra product information on the shop or category pages is by using the WooCommerce Quick View Pro plugin. Instead of adding the short and/or long description on the actual shop page, it adds a button that shoppers can click to open a lightbox with more product details. This allows them to read the short description in a lightbox without ever leaving the shop page.
Essentially, WooCommerce Quick View Pro displays the essential information from the single product page within a lightbox, removing the need to visit separate product pages. This makes for much faster shopping because customers remain on the same page at all times.
Which plugin should I use to display the short description?
Here's my advice on which plugin to choose for different scenarios:
Do you like the idea of the quick one-page order forms in the screenshots above? Do you want the WooCommerce short description displayed directly on the shop page along with other product data? If so, then you need WooCommerce Product Table.
Would you prefer to keep your existing shop page layout, but add quick view buttons so that customers can read the short description in a lightbox? If so, then you need WooCommerce Quick View Pro.
Are you struggling to choose? If you'd like a product table containing the short description PLUS lightboxes containing other details such as the main description, then you can use both plugins together 🚀
Next, I'll show you how to set up each plugin to display the short description outside of product pages.
How to show the WooCommerce short description on shop and category pages
Here, we’ll show you how you can customize and display a short WooCommerce product description or main description on the shop and category pages.
The plugin table wizard will then open automatically. Use this to set up the plugin.
2. Create your first table
Choose where to insert the table
First, you need to choose how you will add the table containing the product summary to your site. Both options are easy, but the easiest way to add the WooCommerce short description to the shop page is to enable it on your shop page templates. That way, it will automatically appear on all your main shop pages without you needing to manually add it anywhere.
There are lots of helpful settings for things like filters, bulk add to cart, and more. But if you want to display the product short description or long description, the setting you most have to pay attention to is the Columns option.
Here, you can define the exact columns that will display in the WooCommerce product description table, including your short description.
Product table columns, including a short description summary column
The full length of the short description will always appear in the WooCommerce product description table. However, you'll find a 'Description length' option on the plugin settings page at Products → Product Tables → Settings. If you've included a column for the long product description, then you can either show it in full or automatically truncate it here.
Feel free to browse the other settings because you might find something else that can help you to display the product summary more effectively.
3. Displaying the WooCommerce short description on additional pages
Above, I showed you how to tick which store templates (e.g. the shop and category templates) to display the product table layout on.
In addition, you can use a WooCommerce product short description shortcode to add tables containing the summary column to other pages. To do this, you need to select the manual option on the first page of the table builder. You can then set up the table to display all products, or specific ones (e.g. from a certain category).
You can then insert a 'Product Table' block if you're using the WordPress block editor. If you use a different page builder like Elementor or Divi, then copy the shortcode from the last step of the table builder (e.g. it might be [product_table id="1_].
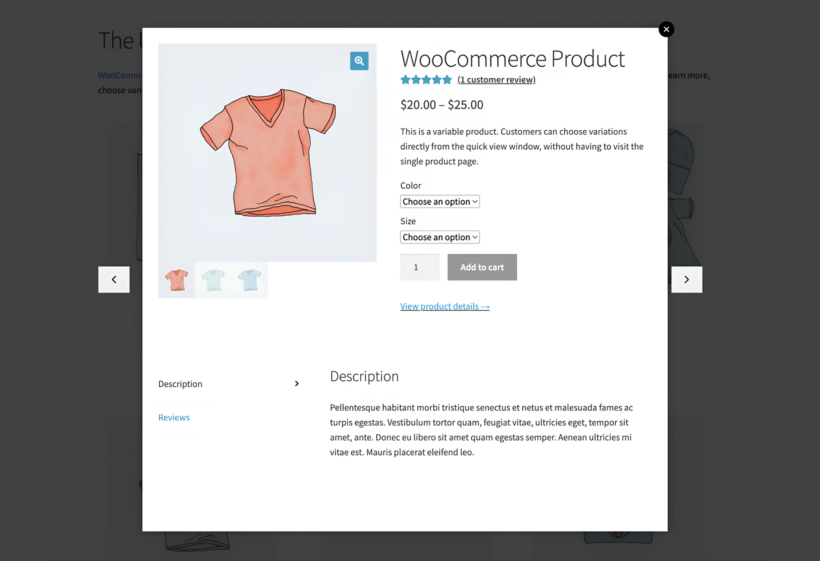
Method #2: Add a quick view lightbox that includes short and/or long description
For Method #2, we'll show you how to set up the WooCommerce Quick View Pro plugin to add a quick view lightbox button to your shop and archive pages. This can include the product short description or the long description:
A quick view lightbox containing the WooCommerce short and long descriptions
You can also use the quick view lightbox to let customers:
View full product galleries.
View additional information (such as a WooCommerce short description).
Choose product variations.
Add products to cart.
Here’s what you need to do to add it to your WooCommerce product table:
Use the plugin setup wizard to activate your license key and select what product information you want to display in the quick view lightbox. Remember to enable the short description and/or long description for your products.
That's it! You'll have product quick view buttons on your shop and category pages. When a shopper clicks it, they'll see the product short description, long description and other details in the lightbox.
Combine both methods
If you want to use both the product table layout and product quick view, you can integrate WooCommerce Product Table with WooCommerce Quick View Pro.
If you have both plugins active on your site, you can add a new Quick View column to your product table to include the quick view button.
Here's an example of what it will look like:
Adding product descriptions to WooCommerce emails
WooCommerce email templates can also benefit from product descriptions. You can integrate your short descriptions into order confirmation emails and promotional campaigns by modifying the email template files. This helps maintain consistent product messaging across all customer touch points.
To add product descriptions, you’ll need to override the default WooCommerce email templates. Start by copying the email template file you want to customize (e.g., customer-completed-order.php) from the WooCommerce plugin folder (wp-content/plugins/woocommerce/templates/emails/) into your theme’s WooCommerce email folder (wp-content/themes/your-theme/woocommerce/emails/). Then, use WooCommerce hooks like woocommerce_order_item_meta_start to insert the short description below each product name in the email.
This strategy not only keeps your emails informative but also encourages customers to revisit their orders and explore more about your products. It’s especially helpful for promotional campaigns, as it lets you highlight key product benefits directly in the email, enhancing engagement and driving additional sales.
Add WooCommerce product descriptions to improve the user flow
In this article, you've learned all about the short description and why it's a good idea to display it outside of individual product pages.
There are two excellent ways to do this:
Use the WooCommerce Product Table plugin to transform your store layout into quick one-page order forms, complete with short descriptions.
Alternatively (or as well!), use WooCommerce Quick View Pro to add quick view lightboxes containing the short and/or long description.
Do you think that displaying a WooCommerce short description on the main shop page will impact your conversion rate? Or is it better to include the full long description? Let us know by commenting below!
Starting an online business can be a daunting task, especially for those who are just getting started. However, setting up a WooCommerce dropshipping store is an excellent option for solopreneurs who want to start selling online without investing a lot of money upfront. It enables entrepreneurs to quickly reach out to customers, establish their brand, and efficiently handle customer orders.
In this tutorial, we'll guide you through the process of setting up your WooCommerce dropshipping store. We'll provide you with a step-by-step approach to creating a store with product delivery and lead times.
We'll also share the 8 best dropshipping plugins for WooCommerce and provide valuable insights on how to select the best products and suppliers for your store. With our easy-to-follow guide, you'll be well on your way to creating a profitable online store that can help you achieve your business goals.
Let's put everything into context before we begin.
What is dropshipping?
Dropshipping is a business model where retailers sell products without holding inventory. Retailers act as middlemen between suppliers and customers. When customers place orders, suppliers ship products directly to customers on the retailer's behalf.
This model has several benefits. It requires lower startup costs than traditional retail. Entrepreneurs can launch ecommerce businesses quickly. Store owners focus on marketing and customer service instead of inventory management. Retailers offer diverse products without physical storage constraints.
How dropshipping works
Amazon, eBay, and WooCommerce are the main dropshipping channels. Setting up a WooCommerce dropshipping store in WordPress is straightforward. Most features work through WordPress plugins and extensions. The process follows these steps:
Set up a WordPress dropshipping website. Stock it with products that fit your niche.
Use marketing channels like Facebook Ads and inbound marketing. Promote products through product images.
Send notifications to suppliers when customers purchase products. Handle payment processing and collect customer details. Maintain transparent return and refund policies.
Suppliers pack and ship products to customers via ePacket. Send customers tracking information and delivery estimates.
Import products from suppliers. Add customer shipping addresses to packages.
Dropshipping requires strategic marketing to attract customers and increase sales. Success doesn't happen overnight. Different dropshippers have different needs. Some use AliExpress integration plugins for Chinese suppliers. Others choose services like Spocket for faster US and European delivery times.
Basic tools for creating a WooCommerce dropshipping store:
Creating a dropshipping store requires two basic steps. First, find products and reliable suppliers. Second, set up your ecommerce store.
#1: Dropshipping products and suppliers
Starting requires finding quality products to sell through WooCommerce dropshipping.
The products. Find trending, in-demand products in your niche. Ensure your target market wants these products. Avoid oversaturated markets. Dropshipping works for print-on-demand, physical products, and more.
A reliable supplier. Find suppliers who deliver products reliably and timely. Choose suppliers with excellent after-sales service.
Suppliers play crucial roles in order fulfillment. Select suppliers who deliver top-notch service consistently.
#2: An ecommerce store
After identifying products and suppliers, start setting up your ecommerce store.
Some businesses use marketplaces like Amazon and eBay. However, marketplaces have intense competition. Creating your own store offers distinct advantages:
Differentiate your products with branding.Your dedicated platform eliminates direct competition. Build unique brand identity without marketplace restrictions.
Email marketing.Build customer email lists. Use lists for promotions and repeat sales.
Full control over your store.Avoid account suspension risks. Choose payment options that suit customers. Set your own pricing rules. Accept credit cards, PayPal, or Stripe.
WordPress with WooCommerce: The perfect dropshipping platform
WooCommerce is a popular, hassle-free selling platform built on WordPress. WordPress powers 34.7% of all websites. WordPress's flexible content management system adapts to any website needs, including dropshipping stores.
Setting up involves using the WooCommerce plugin. Add products, process payments, and manage shipping easily.
WooCommerce provides essential ecommerce functionality. Combine it with specialized plugins for complete dropshipping features:
WooCommerce Dropshipping or WooCommerce Multiple Email RecipientsUse WooCommerce Dropshipping for complete solutions with product importing and inventory management. Choose WooCommerce Multiple Email Recipients for simple dropshipper notifications.
WooCommerce Lead TimeDisplay expected waiting times on product pages. Customers appreciate transparency about delivery times.
How to select products and suppliers
Selecting the right products is crucial for ecommerce success. Choose products with demand and reasonable profit margins. Source from reliable suppliers.
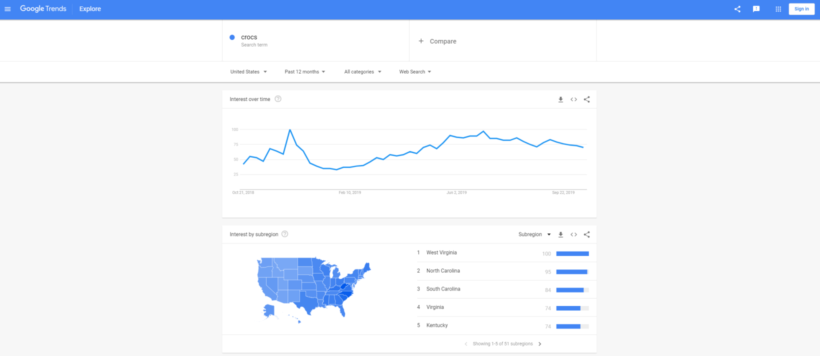
Consider your target audience's needs. Select products that provide value. Use market research to identify popular products and trends. Tools like Google Trends, Amazon Best Sellers, and social media reveal opportunities.
Consider price points and profit margins carefully. Ensure competitive pricing while maintaining profitability. Choose suppliers who deliver quality products reliably. Avoid shipping delays and quality issues.
Finding good products for dropshipping
Successful stores focus on specific niches. Here's how to identify your perfect niche.
Find products with sufficient market demand. Avoid excessive competition. Set prices that ensure reasonable profits per sale.
Start with niches you understand. Familiarity helps you navigate online selling quickly.
Coming up with ideas for dropshipping products
Use these strategies to find profitable products:
Browse eBay and Amazon. Mine ideas quickly. Identify products fitting your niche. Amazon handles over half of online product searches.
Google helps find unlisted suppliers. Discover suppliers without significant online presence. Gain competitive advantages over other sellers.
How to pick the right supplier
Verify suppliers can fulfill orders reliably and timely.
Avoid suppliers charging monthly upfront fees. Reliable suppliers charge per-order fees. Good suppliers provide product samples.
Calculate total shipping duration carefully. Faster shipping increases customer satisfaction.
Ensure suppliers communicate easily. Long-term relationships require good communication. After selecting suppliers, build your WooCommerce dropshipping store.
The 8 best dropshipping plugins for WooCommerce
Choosing the right plugin is essential for automating your dropshipping business. Here are the top WooCommerce dropshipping plugins to streamline your operations.
I recommend the WooCommerce Dropshipping plugin if you need a complete store management tool you manage your dropshipping store. It's more flexible than dropshipping platform alternatives like WooDropship or DropshipMe.
It lets you automatically send notifications to suppliers when a customer places an order for one of their products. In addition to this, the WooCommerce Dropshipping plugin lets you easily import inventory for each supplier and gives you the option to assign inventory to specific suppliers. This way you can import, say, AliExpress products into your store easily.
This makes it easy to manage multiple suppliers through WooCommerce dropshipping. So, for example, if you found a supplier through AliExpress dropshipping and another one through Google, you could easily dropship products from both. It makes it easy to automate the entire dropshipping management process.
2. WooCommerce Multiple Email Recipients - A simpler alternative
If you don't need all the features of WooCommerce Dropshipping and simply need a way to notify the appropriate dropshipper of new orders, then you might prefer WooCommerce Multiple Email Recipients. This simple but effective plugin lets you specify which email address will receive notification of new orders.
You can add different dropshippers to receive order notifications for each product and/or category. This makes it much simpler to set up than other WooCommerce dropshipping plugins. It's perfect for stores wanting basic dropshipper notifications without extra functionality.
3. AliDropship
AliDropship specializes in AliExpress integration. Import products directly from AliExpress with one click. The plugin handles pricing markup automatically. It includes SEO optimization features and social media integration. Built-in themes optimize for conversions. Ideal for beginners starting with Chinese suppliers.
4. Spocket
Spocket focuses on US and European suppliers for faster shipping. Products ship within 2-5 days to most destinations. The platform vets all suppliers for quality. Real-time inventory updates prevent overselling. Branded invoicing maintains professional appearance. Best for targeting Western markets with quick delivery expectations.
5. WooDropship
WooDropship connects with multiple supplier networks including AliExpress, Amazon, and eBay. Automated order fulfillment saves time. The plugin tracks inventory across suppliers. Bulk product imports speed up store setup. Advanced filtering helps find profitable products. Suitable for diversified product catalogs.
6. Modalyst
Modalyst offers curated suppliers with premium products. Focus on fashion, beauty, and home decor niches. Suppliers ship from US and Europe primarily. The platform handles returns automatically. Real-time syncing keeps prices current. Excellent for boutique and branded dropshipping stores.
7. DSers
DSers automates AliExpress dropshipping for WooCommerce stores. The plugin bulk processes orders with one click. Advanced product research tools find winning products. Automatic price and stock updates prevent overselling. Multiple supplier management streamlines operations. DSers offers free and paid plans starting at $19.90/month. Perfect for stores focused on AliExpress suppliers wanting Oberlo-like functionality.
8. Dropified
Dropified automates product imports from 50+ suppliers. One-click order fulfillment streamlines operations. The plugin finds better prices automatically. Profit dashboards track performance. Integration with print-on-demand services expands options. Great for scaling established stores.
9. Sell The Trend
Sell The Trend combines product discovery with supplier sourcing and automation in one platform. Users can identify trending products using real market data, then import them and fulfill orders automatically. Real-time inventory sync helps prevent overselling, while built-in supplier access simplifies sourcing. Best for sellers who want data-driven product selection with streamlined operations.
How to display lead times for dropshipping products
Dropshipping lead times vary by supplier location and product type. Publishing lead times builds customer trust. Most AliExpress suppliers ship from China with longer delivery times, so customers need to be aware of this before they order.
WooCommerce doesn't display shipping estimates by default. WooCommerce Lead Time shows product shipping times clearly. Customers see delivery dates before purchasing. This transparency improves shopping experiences and reduces support queries.
Key features of WooCommerce Lead Time:
Inform customers about product availability and waiting times
Set lead times for specific stock statuses
Add static text or dynamic countdowns to restock dates
Configure lead times per product, category, or globally
Fixed markup on costAdd percentage or dollar amounts to product costs. Example: $20 product with 10% markup equals $22. Alternatively, add fixed $5 markup to all products.
Tiered markup on costVary markups based on product values. Charge 40% markup on sub-$15 items. Apply 10% markup on $500+ products. Balance profitability across price ranges.
Higher prices don't guarantee higher profits. Find pricing models fitting your product types. Balance competitiveness with profitability for sustainable growth.
Create your own WooCommerce dropshipping store today
Setting up a dropshipping business in 2026 offers lucrative opportunities for entrepreneurs. The low-risk, high-reward model suits solopreneurs and small businesses perfectly.
We've covered finding products and suppliers, setting up your store, and selecting the best plugins for automation. The tools and strategies shared position you for dropshipping success.
The dropshipping landscape presents unprecedented opportunities for WooCommerce store owners. With improved supplier networks, faster shipping options, and sophisticated automation plugins, entrepreneurs can build profitable businesses with minimal upfront investment. The key is choosing the right niche, reliable suppliers, and tools that automate repetitive tasks while maintaining excellent customer experiences.
What products will you dropship through your online business? Share your plans in the comments below.
Sometimes, customers want a way to view the products they already ordered. A 'WooCommerce display all products purchased by user' plugin does exactly this. Keep reading to learn which plugin to use, and how to set it up to display the current user's previously ordered products.
There are lots of reasons to list products that the user has already bought:
Display purchased products on the My Account pageYou may wish to use a WooCommerce display all products purchased by user plugin to display their previous products in one place.
Quick re-order tableList the user's previous products in a quick one-page order form, so they can quickly find and select items to re-order.
List favorite productsMost customers who make repeat purchases have favorite items that they buy multiple times. Make it easier for loyal customers to find and re-purchase their regular and related products in your ecommerce store.
A WooCommerce Account page listing all products purchased by the current user
Displaying purchased items in this way offers benefits such as customer loyalty, enhanced satisfaction, and targeted product recommendations. This personalized shopping experience fosters loyalty, saves time, and allows for effective cross-selling, encouraging repeat sales and customer satisfaction. Keep reading to learn how to use WooCommerce to display purchased items only.
The easy way to display products previously ordered by user
WooCommerce Product Table is a flexible plugin which lists products in a convenient one-page order form. It has a little-known feature which allows you to display all products purchased by the current user. As a result, you can use it to enhance the overall customer experience for each user by showcasing their past purchases - either on the Account page or an another page of your website.
An order form to display all products purchased by user
When you activate this feature, the WooCommerce recently purchased products plugin works like this:
Depending on how you set it up, customers can either log in to their WooCommerce account or view a dynamic 'My Previous Products' page which shows different products depending on the user. The shop page would include a WooCommerce Product Table listing all products previously ordered by that user.
If the user has never ordered any products from your WooCommerce store, then they will see a customizable message saying that there are no products in the table.
Why this is different from listing previous orders
The WooCommerce Account page already lists previous WooCommerce orders like this:
As you can see, the default list of orders doesn't make it easy for customers to repeat an order or re-order products. You can click on an order to view more information in your online store. From there, you can click through to the single product page to re-order each product. That's a lot of clicks if you want to re-order products you have previously purchased!
Without using a WooCommerce get products from order plugin like WooCommerce Product Table, it's difficult to identify the specific order that includes the product you wish to reorder.
WooCommerce Product Table automatically displays a comprehensive list of products that the currently logged-in user has previously purchased. Its 'display all products purchased by user' feature lists all products ever purchased by the customer. Each product is listed only once, regardless of the number of times the user has made the purchase.
As a result, shoppers can easily browse through a list of previously ordered products. The table contains search, sorting, and filtering options to quickly locate items they wish to reorder. By selecting their desired products and adding them to the cart, they can smoothly proceed to the WooCommerce cart before completing the checkout process as usual.
Next, I'll tell you how to set it up on your own WordPress website which can display all products purchased by user. The order history is generated automatically, making it surprisingly easy to set up!
Why it's different from a WooCommerce Repeat Orders plugin
You might have read about WooCommerce reorder plugins. These simply add an 'Order Again' button to the list of orders in the WooCommerce Account. They're different from the method described in this tutorial because instead of duplicating a previous order, WooCommerce Product Table displays products previously purchased by the user who is currently logged in.
The customer doesn't have to remember which order their previous products related to. They just need to use the search, sort, and filter functions to quickly find their favorite products. Then, they simply add them to the checkout page and create a brand-new order.
Now you understand the importance of allowing existing customers to reorder their previous products using the WooCommerce get products from order feature. Next, we'll get into the most important part of this tutorial - how to set it up.
How to display products previously ordered by current logged in user
First, I'm going to tell you how to show products previously ordered by the current user on any page. Afterward, we'll look at specific places on your site where you might want to display this list. For example, you can add a 'My Products' section to the WooCommerce Account page, or create a hidden page that only logged in users can see.
The product table builder will open automatically.
2. Create a product table
Use the table builder to choose how you want your product tables to work.
To optimize the display of previously purchased products in WooCommerce, consider implementing the following recommended settings for the WooCommerce display all products purchased by user feature:
Add the table manually - The first page lets you choose whether to add the table to a page manually or to enable it on your shop page templates. Since we're listing products ordered by the current user, you need to add it to a page manually. You don't want it to take over your main shop pages (although you can do that too if you like)!
Choose your columns - To list a customer's order history, I recommend keeping your columns simple. Just display factual customer data about each product, such as a thumbnail image, name, and price. Everything is optional, e.g. if you can list products without images if you prefer. Don't include more general information such as the description, as the user is already familiar with the product. You should almost certainly include a Buy column because this allows users to re-order the product directly from the list.
Quantity inputs - You should generally tick this box because it allows users to select a quantity before adding it to the cart.
Add to cart button - If you're creating a quick re-order form then I generally recommend selecting the 'Checkbox' option. This adds multi-select tick boxes instead of standalone add-to-cart buttons for each product.
Product variations - It's normally best to select the 'Dropdown' option so that users can choose variations from the list of previously ordered products. Alternatively, choose 'Separate' to list each variation on its own row.
Keep going...
Search filters - If some customers have previously ordered a large number of products, then add filter dropdowns to make the products easier to find. You can even help customers to find specific products more easily by adding a search box and filters. This is essential for users with a large order WooCommerce customer history. (Tip: The WooCommerce recently purchased products plugin also comes with filter widgets.)
Lazy load - Since you don't know how many products each user has WooCommerce customers order history, there's a chance that some of them might list large numbers of products. Enable the lazy load option to avoid any performance problems for larger tables.
3. Use a shortcode to display previous products
Now, we get to the fun bit! It's time to list products ordered by the current logged in user. We'll do this by adding a simple WooCommerce shortcode to any page on your WordPress website.
The final page of the table builder gives you a shortcode similar to this: [product_table id="1"]
To display the user's previously ordered products, you need to add user_products="true" to the shortcode like this:
[product_table id="1" user_products="true"]
Add the shortcode wherever you want to display the previously ordered products.
View the page. As a logged in user with a WooCommerce customer history of previous orders, you will find all your purchased products elegantly listed in a user-friendly table layout with the WooCommerce display all products purchased by user:
Remember that when you test the page, you'll be seeing the previous products for your own admin-level user account. If you haven't placed any previous test orders then nothing will be listed here! Each user will see the products that they personally have ordered in the past, based on their own order history.
4. Decide where to put the list of previous products
Having effectively retrieved a list of products previously ordered by the current user using the WooCommerce get products from order functionality, it is now essential to determine how this seamlessly integrates within the overall structure of your ecommerce website. How will logged in users find their products?
Option 1: List previously ordered products on the Account page
The WooCommerce account page is the most obvious place to list the user's previously ordered products. For example, you can add a 'My Products' tab to the Account area.
Go to WooCommerce → My Account and add a new endpoint or tab named 'My Products'.
Paste the product table shortcode from earlier into the tab content area.
Save the tab.
This adds a new link to the WooCommerce My Account page. The tab will be called 'My Products'. When users log in and click the tab, they will see the list of products they previously purchased:
Add a 'My Products' tab to the Account page
The product table listing previous products appears there
Option 2: List previously ordered products on a hidden page
Alternatively, you might want to structure the list of previously ordered products outside of the Account area. To do this, you need another method for restricting the page so that only logged in users can see it.
Keeping the page away from the Account area gives you slightly more flexibility. For example, it makes it easier to choose a different page layout and add filter widgets to the sidebar, as you're not restricted by the layout of the account page.
Click '+ New Condition Group' and select 'Pages'. Click in the 'All Pages' box that appears below.
Select the page where you've added the shortcode to list the current user's previous products.
Now go to the 'Members' tab and select the 'Logged-in' role. (Or, if you prefer, select the 'Customer' role so that only logged in customers can see the page.)
Use the 'Options' tab to choose what happens if a guest or logged out user tries to access that page for any reason - for example, because they have bookmarked it.
Click the blue 'Create' button.
Now, only logged in users with the role you selected will be able to access the page where you've added the product table shortcode. Each logged in user will only see the products that they have previously purchased.
Add the hidden page to the menu
Of course, your users need an easy way to find the list of products they have previously purchased. You can do this by adding a menu link that only logged in users can see:
Go to Appearance → Menus.
Select the page from the list of Pages on the left, and click 'Add to Menu'.
Click on the little arrow in the menu on the right. This will open up extra options for that menu item.
Use the 'Access Levels' option to select which user role(s) can see the menu link.
Option 3: List previous products on a public page
Alternatively, you might want to list previously ordered products for logged in users, and all products for logged out users. For example, this is an excellent option if you want to display each user's favorite products on the homepage - but don't want new customers to see a blank table.
To do this, you need to combine WooCommerce Product Table with another plugin - Advanced Access Manager (AAM). AAM comes with some handy shortcodes that let you display different product tables to guests and logged in users.
To use the two WooCommerce plugins together, simply install them and then paste the following shortcodes onto a page:
This conditional statement will list all products for guests, logged out users, and non-customer user roles (e.g. people who have subscribed to your blog but not bought a product). Logged in users will see a table listing the products they have previously ordered.
Can I display order information in the table?
WooCommerce Product Table is all about listing products so that the customer can re-order them. You can display any type of information about the products, such as the image, name, short or long description, price, categories, tags, attributes, and much more. However, it's not possible to display order information alongside each product, such as the date the product was last ordered.
This is because orders are stored as a separate post type in WooCommerce. Even though you're listing products previously ordered by the current user, the order information is not stored against these products in the WordPress database.
To access their WooCommerce customers order history, they can conveniently navigate to the WooCommerce Account page, where they can explore their complete WooCommerce customer history with ease. This works nicely alongside the list of previously purchased products.
Can I show previously ordered variations?
When you use WooCommerce Product Table to display products that the user has previously purchased, this includes variable products. If the user previously ordered a product variation, then this product - along with its variations - will appear in the table.
For example, the following screenshot shows what it might look like if the current user had previously ordered 3 variable products. As you can see, all variations for each product (not just the ones that you have previously purchased) are listed as dropdowns next to the add to cart button. The user can select whichever variations they want to buy, and add them to the cart.
In this example, the first and third products have no default variations, so the variation dropdowns are not pre-selected. The second product has a default variation of Black Small, which is selected by default. You can set default variations on the 'Edit Product' screen.
Bonus tips
Choose which types of product to include
So far, we've assumed that you want to list ALL products that the current user has ever ordered. If you prefer, you can have more control over which products to include.
WooCommerce Product Table comes with lots of options for displaying specific products only. In addition to setting it to only show products ordered by the current user, you can choose to list products from a specific category, tag, search keywords, and much more.
For example, you might like to create multiple tables listing items that the user has ordered from a specific category. If you sell clothing and jewelry, then the 'My Products' page might include one product table listing purchased products from the clothing category; and another product table from the jewelry category. If you stock a wide range of items, then this can be more intuitive for your customers.
Customize the message for users with no previous orders
If a user with no previous orders sees the product table, then they will see message notifications. By default, it looks like this:
I recommend customizing this message to make it more relevant to previous products. For example, you could change it to: "You haven't ordered any products yet! Place your first order, and then your products will appear here."
You can do this on the plugin settings page at Products → Product Tables → Settings.
Use quick view to speed up re-ordering
You have full control over which columns of product data to include in the table. Customers can choose quantities and variations from the add to cart column of the table, achieving true one-page ordering in your ecommerce platform.
However, there are situations where you might want to show more information, or if you have too many variations to fit into the product table. If that applies to you, then quick view is the solution.
The WooCommerce Product Table plugin is designed to work alongside its sister plugin, WooCommerce Quick View Pro. Use them together to add quick view buttons to the table. To do this, select 'Quick view' from the list of product table columns. (This only appears when both plugins are active.)
Shoppers click on the quick view buttons to view more product information in a popup lightbox. Depending on which settings you choose, this might include the full product image gallery, short description, and add to cart options with variation dropdowns.
Review: How Pete Griffith lists his customer's favorite products
Before we close, let's look at a real user of WooCommerce Product Table. Pete Griffith uses the WooCommerce recently purchased products plugin to allow repeat customers to order their favorite products more easily each week:
This plugin was almost exactly what my customers were asking me to do to make ordering products on a weekly basis much more convenient. Instead of having to wade through our entire catalog of products, they can have a customized order form of only the products they order on a regular basis. They can still access the other products, if their needs change, of course, but this is much more user friendly for them (and me) than the default shopping method on WooCommerce.
I had a question for the developer when setting it up, and was amazed at the speed of their response, the depth of understanding of my issue and the amount of time they must have spent in researching the answer. This is the second plugin we've purchased from them and it is because of Katie's blog articles that we knew about it and how we could use it to solve our problem. Her articles are written from the user's point-of-view and give working solutions to some real-world problems that WooCommerce users face.
My wish list for future improvement: Add the ability to limit the variable products to selected varieties. I have one popular product with 50+ flavors, but most of my regular customers only order a few of the flavors on a weekly basis. Having all 50+ flavors is not ideal, and while I've devised a sort of workaround for some clients, it would be best if the plugin could handle this itself (each variety has its own product id, so implementing the shortcode would be simple for me or any other WC user if they do add this feature down the road).
Highly recommend this plugin and this developer's other products.
Where to get the WooCommerce re-order plugin
WooCommerce Product Table is an ideal solution to display all products purchased by the current user. This powerful tool enables the display of specific products based on the past orders of the logged-in user.
This can significantly enhance the login experience for existing customers by providing swift access to a comprehensive list of previously ordered products. Customers can effortlessly select the desired items for reordering, swiftly adding their favorite products to the cart with just a few clicks.
And the result for you as the store owner? Improved customer loyalty and retention, leading to more repeat sales for you 😀