WooCommerce product table view on a desktop monitorI'm excited to announce that our new WordPress plugin, WooCommerce Product Table, is now available. It provides a WooCommerce product table view to display your products in an interactive list or table. Grid layouts are an increasingly popular way to list products and now you can do it too!

We've developed this plugin in response to demand from uses of our Post Table Pro plugin. They have enjoyed using the general table view to display products, but wanted WooCommerce-specific features integrated into the table such as 'Add to Cart' buttons.

GET THE PLUGIN VIEW DEMO

What is a WooCommerce product table view?

WooCommerce product table view with image, name, price and add to cart columns
WooCommerce is the world's leading e-commerce platform, according to the latest e-commerce usage stats for 2017.

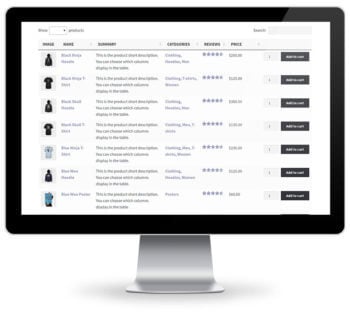
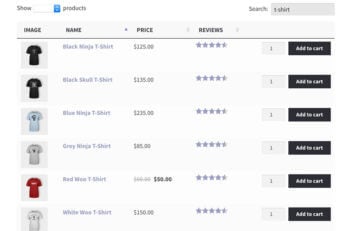
Most WooCommerce websites have standard category layouts which list products in a grid format. There's usually 3 or 4 products per row with large images, the title, price and except underneath, and then an Add to Cart button. This takes up a lot of space.

Lots of WooCommerce store owners need a more compact product table view. A table lets them list more product per page so that customers can easily choose products and add to the cart, without scrolling through many pages.

The WooCommerce Product Table plugin provides a table view to list your products.

How flexible is the WooCommerce product table?

The product table view is incredibly flexible. You create your WooCommerce product table by adding a shortcode to any page or post. The default shortcode works well and you can use the knowledge base to configure it to suit your exact needs.

  • You can choose which columns display in the table. Nearly all the data that is stored about WooCommerce products can be used as a column in the table view. This includes title, short description, long description, price, tags, product categories, product featured image, etc. You can even add a quantity selector and Add to Cart button to the table view. It's also possible to display extra product data such as custom fields and taxonomies.
  • You can display all your products in the WooCommerce table view, or display products from a specific category only.
  • There are links to the product titles so that people can click through to the single product page and buy from there. Or you can disable these links and let people add to the cart straight from the table (or both!).
  • You can control how the product table view behaves, such as ordering the products by any column when it first loads. You can choose how many rows are displayed per page.
  • Customers can click on a column header to sort by that column. They can use the search box or click on a product category to filter the table.
  • You can add filter dropdowns above the table, making it easy for customers to narrow the list of products and find what they need.

Read the knowledge base for a full list of everything you can do with the WooCommerce Protect Table View plugin.

Who is the plugin for?

WooCommerce product table filtered to t-shirts with prices and add to cart buttonsWooCommerce Product Table is for any website owner who wants a more compact way to display WooCommerce products.

We've been amazed by how many users of our existing Posts Table Pro plugin have used it to create a WooCommerce table view. They use it for many different purposes, and the new dedicated WooCommerce version makes it suitable for many more use cases.

Here are some examples of websites that need a WooCommerce table view:

Use case: Wholesale or trade area

A lot of WooCommerce websites have a trade store, or a hidden trade area alongside a public online store. Wholesale stores tend to be less visual and more information-based than public online shops, so a table view is perfect.

You can use WooCommerce Product Table to list all your trade products. Your distributors can scroll down the list, add multiple products to the cart and make a purchase without having to click through to the individual product pages. This provides a much more functional way of shopping online which is perfect for trade stores.

Tip: If you want to create a private WooCommerce wholesale area, here are 2 ways that you can do it:

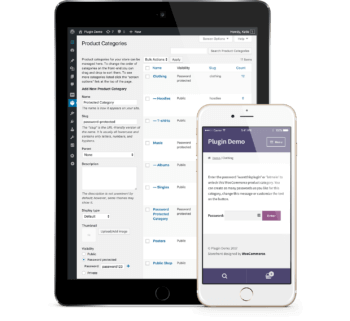
  1. Check out our WooCommerce Password Protected Categories plugin. This lets you create a WooCommerce category for your wholesale or trade distributors and password protect it. We've even created a tutorial on How to Create a WooCommerce Wholesale or Trade Area with video.
  2. Use WooCommerce Product Table to add a table view of your wholesale products to a standard WordPress page. You can then password protect this page using the 'Visibility' settings at the top right of the Add/Edit Page screen, or use a membership plugin to create a unique login for each trade user.

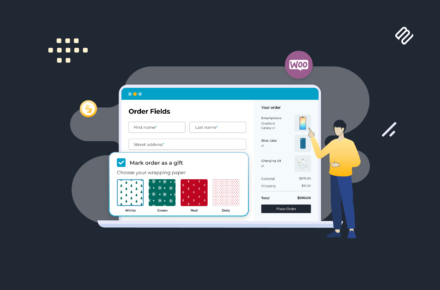
Use case: Bulk WooCommerce order form

WooCommerce Product Table is better than all the other WooCommerce order form plugins on the market. It lists your products in a flexible one-page order form with searching, sorting and filters. Your customers can buy products directly from the order form.

One page product table order form shown on a monitor

Use case: WooCommerce product catalogue

WooCommerce websites with large numbers of products often provide a catalogue view listing all their products. This displays everything in one place without forcing customers to scroll through many different pages. Learn how to use the plugin to create a WooCommerce product catalogue or directory listings.

Use case: Online takeaway restaurant

Restaurant order form on a laptop with add to cart buttonsTakeaway restaurants often display their entire menu on a single page. Customers can choose all the dishes they want to order for delivery. They can add everything from the cart without being taken to a separate page for each option.

WooCommerce Product Table is perfect for an online food ordering system. It lists each item on the menu within an interactive table view. To get your customers' mouths watering, you can make the table more visual by displaying an image of each dish.

Use case: WooCommerce photography website

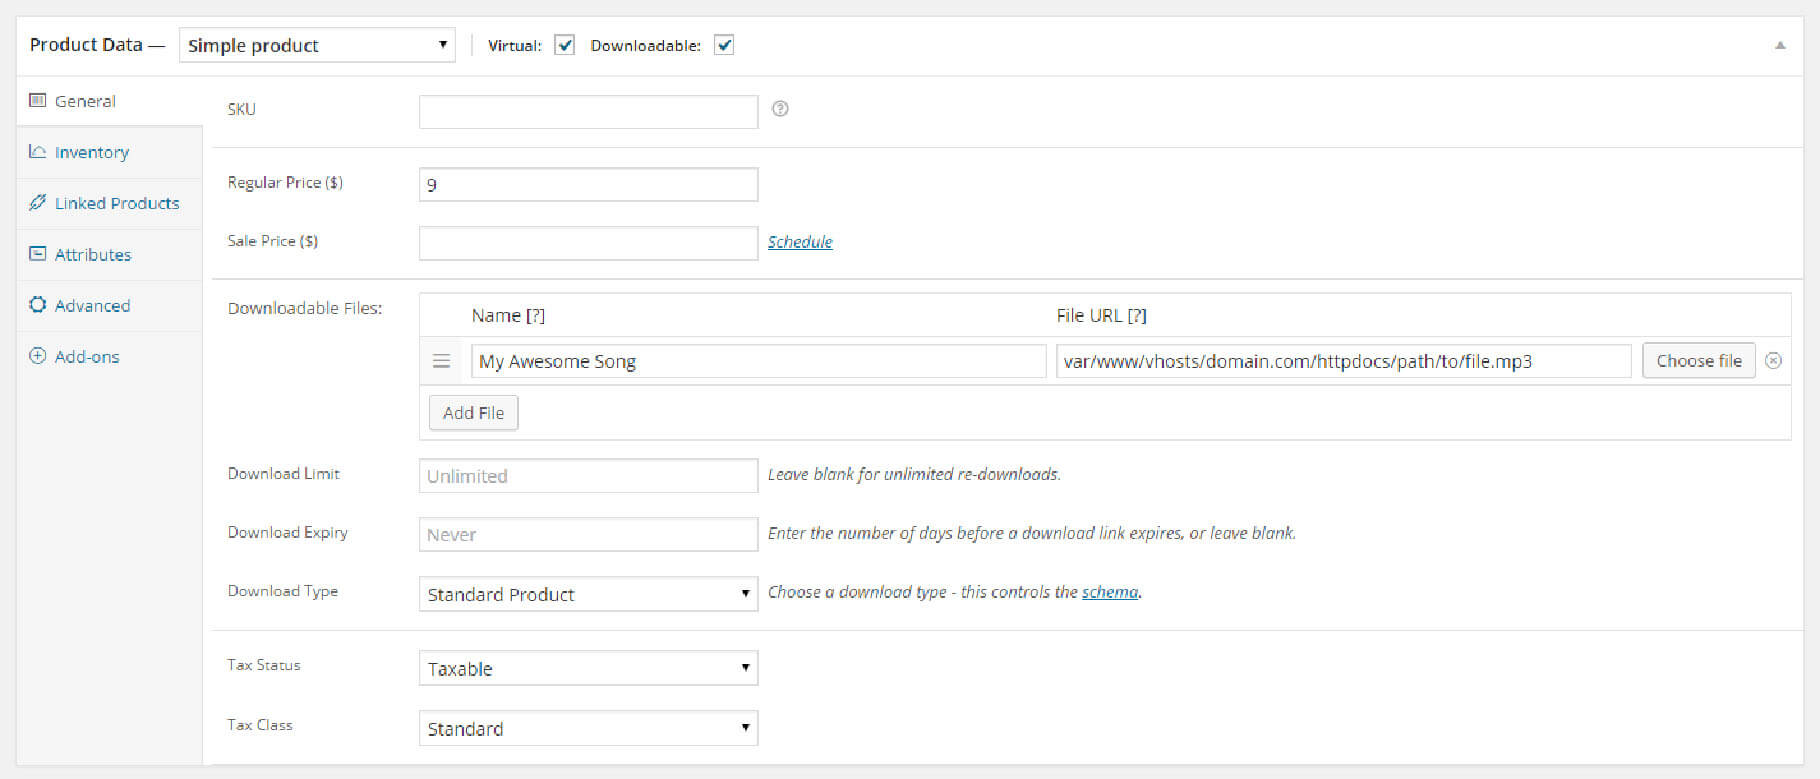
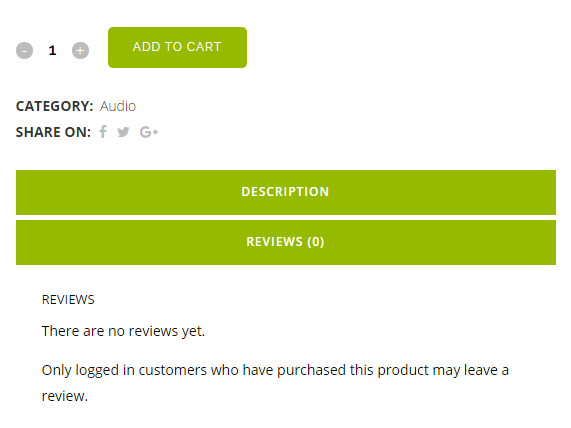
WooCommerce Product Table supports images, image galleries and embedded audio and video. Customers can view small or large product images, watch video and listen to audio/music directly from the product table view. It's an ideal way for photographers to display their image for sale.

Use case: 'Build a box' WooCommerce product configurator

You can also use WooCommerce Product Table to list multiple items which customers can select in order to create a custom product bundle unique to them. This is perfect for 'build a box' type websites, such as build-a-hamper or to customize a meat or vegetable box for home delivery.

Where can I get the plugin?

You can buy WooCommerce Product Table on our website. And if you like it, sign up as an affiliate and we'll reward you with 30% from all your referrals!

GET THE PLUGIN VIEW DEMO

Barn2 banner for building a WooCommerce event booking websiteBuild a Course & Event Bookings Website with WordPress - our new online course - is now available on Udemy. It teaches you how to design a WooCommerce Event Booking website by combining the best WordPress course booking plugins, without needing any technical expertise.

At the end of this article, I will share a coupon code to give you 50% discount for the course.

TAKE THE COURSE

Why we've written a WooCommerce Event Booking online course

Over the years, I have worked with many clients to build a WordPress event booking website. Most of our clients sell training courses but we have designed websites that let people register for all sorts of event. Our blog post about how to use WooCommerce to create a course or event booking website is one of the most popular on our website.

This has given us lots of experience of the different ways to develop a course and events website. We've tried and tested most of the WordPress course booking plugins, as well as customise existing plugins and build bespoke systems to meet more unique requirements.

This has allowed us to develop a unique formula for the best way to build an events site. It's based on The Events Calendar, a free WordPress plugin by Modern Tribe. Used alone, The Events Calendar lets you display your courses and events on a WordPress website. However it comes with a range of extensions which can be mixed and matched to create different types of events site. You can display events as a simple list or on a calendar. At the other end of the scale, you can integrate with the world's leading e-commerce plugin to create a complete WooCommerce event booking website.

Used correctly, these plugins are a fantastic way to build a course or events booking website without having to write any code. However you need to understand how the plugins work and the best way to use them. I've written this online course to help people to use our formula to design their own events website.

Build a Course & Event Bookings Website with WordPress - Promo video

Course content

The course covers the complete process for building a WooCommerce events site from start to finish, including:

  • Introduction to the different types of events website
  • Overview of The Events Calendar suite of plugins and WooCommerce, to help you select the right plugins for your needs
  • Detailed guidance on how to set up the free version of The Events Calendar
  • Detailed instructions on using the free Event Tickets plugin to take registration for free events
  • Comprehensive instructions on how to use the paid Event Tickets Plus plugin with WooCommerce to take paid bookings for your courses and events
  • Tips on making more money from your website, including upselling your events alongside other types of products
  • Tips on driving more traffic to your events pages
  • I'll share our bullet-proof process for testing and troubleshooting your events site
  • Finally, I'll share Barn2 Media's go-live checklist to get your events site off to a successful start

Coupon code - 50% discount

To celebrate the launch of our new online course, I'm giving our readers a coupon code to sign up for just $18 (usual price $35).

You can sign up for the course and get the discount via this link: https://www.udemy.com/course-event-bookings-website-wordpress/?couponCode=HALFPRICE. The first few lectures are available for free so you can "try before you buy".

I look forward to seeing you on the course and would love to hear your feedback!

TAKE THE COURSE

Product reviews tab noting only customers who bought the product can leave a reviewOne of our WordPress clients recently noticed that someone had added reviews for a product they had not purchased. The website was using the WooCommerce plugin.

WooCommerce is the world leading e-commerce platform and has a hidden away setting that fixes this problem. I'm sharing this in case anyone else finds it useful.

These tips apply whether you use our full WordPress web design service, our affordable WooCommerce web design services (MySimpleSite and MySimpleStore) or another agency.

By default, anyone can leave a product review on a WooCommerce website. The plugin doesn't check who is leaving the review or whether they have actually purchased the product.

This is sometimes beneficial. For example if your products are also available for sale elsewhere then you're likely to get more reviews if you let people review them who didn't purchase directly on your website.

However some store owners have a problem with reviews from people who haven't purchased the product at all - for example non-buyers who just like the look of a product, or malicious reviews from competitors. (This is a separate issue to spam reviews, which can be dealt with using an anti-spam plugin.) Irrelevant reviews like this will make your genuine reviews less credible and can damage your sales if they are negative.

How to prevent non-buyers from reviewing your WooCommerce products

WooCommerce review settings set to only allow reviews from verified ownersTo set up your website so that only verified buyers can review your products, log into the WordPress admin and go to WooCommerce > Settings > Products.

You'll see a tick box called 'Only allow reviews fro "verified owners". If you tick this box, only logged in users who have purchased the product will be able to leave a review.

Non-buyers will see a note saying "Only logged in customers who have purchased this product may leave a review". Problem solved!

You can read more about WooCommerce settings in the official documentation.

We have created a video tutorial explaining how to use our WordPress password protect plugin to protect a WooCommerce category. The plugin lets you add password protections to a category and its products, or restrict it to specific logged in users or roles. Watch this alongside reading the knowledge base.

Password protected WooCommerce category with a login form
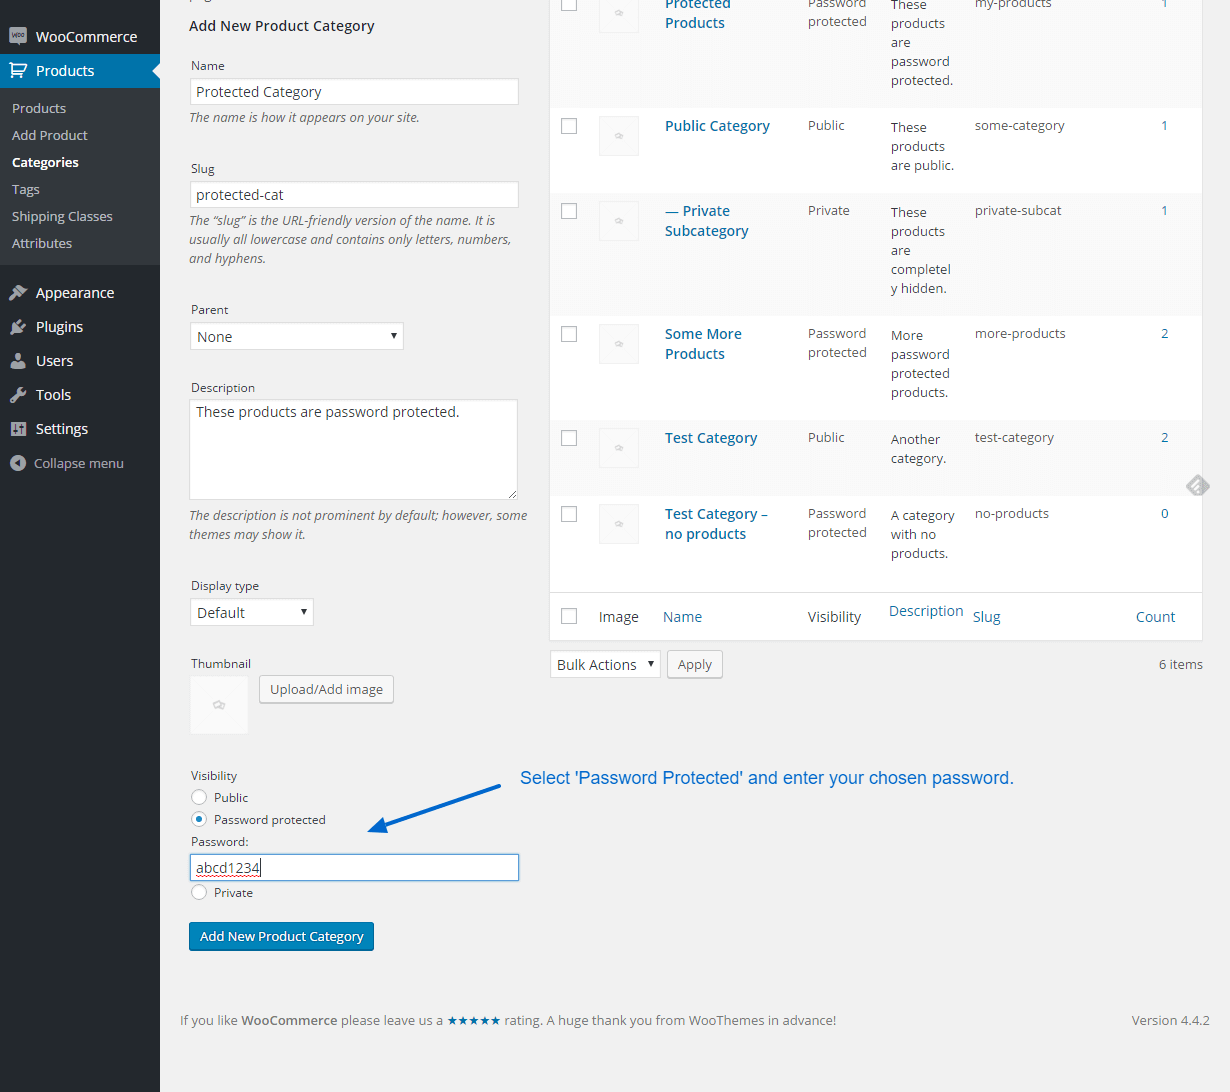
The tutorial tells you how to create a WooCommerce password protected category and private category in WooCommerce. It also explains the logic behind the plugin and how once you have protected a category, it will automatically protect all its products and any sub-categories too.
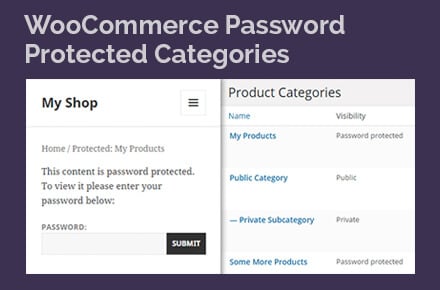
Here's a written tutorial for those of you who don't like videos:

Written transcript of WooCommerce Password Protect Category video

Before we learn how to password protect a WooCommerce category, you need to get the plugin on our website. Download the file and install it in the usual way for a WordPress plugin (Plugins → Add New → Upload), and also add the license key from your confirmation email.

Once you've got that all set up, you should have WooCommerce and WooCommerce Protected Categories installed on your website. You need both these plugins in order for WooCommerce Password Protect Category to work.

How to password protect a category in WooCommerce

Next go to Products → Categories in the WordPress admin. This is the usual page where you can create a WooCommerce category. If you've got an existing website then you probably have categories on the right already - that's fine. The process for creating a WooCommerce password protected category is exactly the same whether it's a new category or an existing one.

Let's great a new category. In the 'Add New Category' section on the left, add the following:

  • Category name - e.g. 'Clothes'
  • Slug - this is the last part of the category URL, e.g. 'clothes'

If you scroll down, you'll see that there's a new section at the bottom called 'Visibility'. This is what the WooCommerce Password Protect Categories plugin has added and it's not there by default in WooCommerce.

To password protect a WooCommerce category, you simply tick the 'Protected' option and enter a password, which can be anything you like. You can also set the category to only be visible to certain logged in users or user roles. Then click 'Add New Product Category'.

Click the plus (+) icon to add multiple passwords for a category. This lets you give different passwords to different customers.

This will add your new category in the list of categories on the right. In the 'Visibility' column, you can see that it is labelled 'Password protected'.

You can also restrict categories to specific users or entire roles. That way, they can automatically see the hidden content as soon as they log into their account. They don't need to enter a separate password.

Password protect sub-categories

You can also add sub-categories. If you have a sub-category, it will automatically share the same password. You don't need to password protect it - it just happens automatically.

Let's do this now and create a new category called 'Shoes'. I'm going to select the Parent as 'Clothes', and mark it as Public as I don't need to password protect it. Because this is a child category of a password protected category, it will be password protected even though it doesn't have its own password.

The great thing about that is that if you give your customers a password for the parent category, they can use it to access any of the products in that category, the child category page and any of the products in the child category. Customers only need to enter the password once and that whole area of the website will be unlocked for them.

That's much better than password protecting each individual product, which would be a nightmare for the customer because they'd have to enter the password for every single product they want to view. Not ideal!

If you want to create more complex structures for a password protected category, you can add other protected categories with their own password. For example, you might have a 'Furniture' WooCommerce category which is separate from the 'Clothes' category. You would add a different password to protect the Furniture category. That will work alongside the Clothes category and each will have a completely different password to protect it. If you give the customers who buy your clothes the password for the Clothes category, they will be able to access the Shoes category because it's a child category of Clothes. However they cannot access the Furniture category which is protected separately.

This is a good way to lock down lots of different types of WooCommerce store. For example you might use a password to protect a Trade section of your WooCommerce website and give the password to your trade distributors. You could give them each their own category and their own password. Or whatever the use case for you.

WooCommerce Password Protected Category settings

There are various settings for the WooCommerce Password Protect plugin in WooCommerce → Settings → Products → Protected Categories. These let you control how your protected WooCommerce categories appear on the main Shop page and in navigation menus and widgets. You can also customize the text on the password entry page.

Wrapping up our WooCommerce password protect tutorial

So that's how you set up the plugin and password protect a WooCommerce category. Give the password to your customers and they can buy from the protected categories.

For more information, check out our tutorials on how to hide a whole WooCommerce store and make it private, and how to use it as a WooCommerce wholesale plugin. If you want to protect an entire store, it's also worth looking at our dedicated private shop WooCommerce plugin.

Or sign up as an affiliate and earn 30% commission for recommending the plugin!

In response to popular demand, we have launched a new WordPress plugin called WooCommerce Password Protected Categories. It's the only plugin which lets you password protect categories in WooCommerce. It's even possible to create a WooCommerce wholesale site or hide a whole WooCommerce store!

Note: Since launching this plugin, we have added extra functionality and renamed it 'WooCommerce Protected Categories'. You can still password protect product categories, but you can also restrict categories to specific roles or even individual users. This makes it the most complete WooCommerce category protection plugin on the market.

Why password protect WooCommerce categories?

WooCommerce Password Protected Categories showing a password prompt and category visibility listThere are several reasons why you might want to password protect a category or create WooCommerce private products. Here are some popular examples:

Most WooCommerce websites are entirely available to the public. However with nearly 2 million websites using WooCommerce in 2017, there are also lots of stores that need protected, private or hidden areas.

Related tutorial: How to create WooCommerce private products.

What does WooCommerce Password Protected Categories do?

WooCommerce product categories admin showing password-protected categories set up with WooCommerce Password Protected CategoriesWooCommerce Protected Categories adds a password protection option to the WooCommerce Categories page (WooCommerce → Categories in the WordPress admin). It works in the same way as the password protection for pages and posts. You choose a password, and visitors must enter this password in order to access the category page.

Each WooCommerce product category can have one password. Alternatively, you can create multiple passwords for each category. This is useful if you want to create unique passwords for each category, for example.

The great thing about this plugin is that the password automatically protects all the products within the category you have protected. It also protects any sub-categories. This lets you divided up the protected area of your e-commerce store, creating a more complex navigation structure with as many products and sub-categories as you like - all protected by a single password.

The plugin also lets you mark categories as Private, so that only logged in Administrators and Editors can view them. Or if you prefer, you can restrict categories to specific logged in user accounts or user roles. These are all great ways to create WooCommerce private products within a single category.

What did people do before this plugin was released?

Previously, people wanting to create a hidden area for private products within a WooCommerce online shop would use one of the following methods.

Password protect or private WooCommerce products

You can password protect individual WooCommerce products in the same way as you can protect a standard WordPress post or page. You can also create individual WooCommerce private products. Do this via the 'Visibility' option in the 'Publish' section at the top right of the Add/Edit Product screen.

A password protected product will still appear on your main Shop page and category pages. If someone clicks on it then they will be prompted to enter a password before they can view the product.

With this option, you have to individually password protect every product that you need to hide. Or mark the product as private.

With password protected products, your customers will have to enter a password for every single product. Not very user-friendly.

With WooCommerce private products, they appear to logged in users with the correct privileges but it's a bit disjointed.

The WooCommerce Protected Categories plugin offers a more sophisticated solution because it includes a setting allowing you to hide products within private or password protected categories from the main Shop page. You can also hide private or password protected categories from your main list of categories. This means that people will only be able to find your protected products or categories if they have the link. (Or if they're logged in, with WooCommerce product categories.) This lets you have a private area of your WooCommerce shop without cluttering up your public shop pages.

Once a visitor has entered the password for a category, they will be able to view all the products within that category - and also within any sub-categories - without entering any further passwords. This is much more user-friendly than protecting each individual product.

Display products on a private or password protected page

Illustration of a tablet with a password field and padlock for private productsWooCommerce has lots of built-in shortcodes which can be used to display products within a page. Some themes also have options for displaying WooCommerce private products or categories on a standard page.

You can use this to create a standard page in WordPress and password protect it in the usual way or mark it as private. You can then insert the required products onto the page.

The problem with this option is that it's not very secure as there are various other ways that people can find your products. The 'hidden' products will still be visible on your main WooCommerce Shop page which lists all your products - and people can guess the address of this page even if you haven't added any links to it.

If your hidden products are in the same category as publicly available products then visitors will be able to see the hidden products on the category page. There are probably other loopholes, too.

Restrict content using a membership plugin

For a more fully featured solution, you can create a complete membership site using a WooCommerce membership plugin such as WooCommerce Memberships or Groups (with the Groups for WooCommerce add-on). With a membership plugin, each of your users will have their own login details - as opposed to a shared password for each category.

This is a good option if your users will have access to other protected content, for example a wider members area. It's also good if any of your WooCommerce categories are particularly sensitive and a shared password isn't secure enough. However it can be overkill if your requirements are more straightforward than this. WooCommerce-compatible membership plugins are also more expensive. And it's a pain to have to spend your time helping members who are having problems logging in (yes I know WordPress has a 'Lost Password' feature, but owners of membership sites still receive constant enquiries about this.)

If you really want each user to have a separate login then you can create private categories instead of a whole membership plugin. This will automatically unlock your private categories to logged in users depending on their role. It's much easier than a full membership solution.

If you need to create a private area of your shop then the WooCommerce Protected Categories plugin is a great option. It's quick and easy to set up, and automatically protects all the products within your private or password protected categories. Simple!

Create a WooCommerce age restricted store

Password Protected Categories is ideal as a WooCommerce age verification plugin. You can use a password protected category to require customers to verify their age before they can view the age restricted products within.

Is it easy to use?

Absolutely, you can literally create WooCommerce private products within a minute or two. You can read the full plugin documentation here. We've also provided a detailed video tutorial on using the password protection plugin and marking products as private.

Where can I get the WooCommerce private products plugin?

So you'd like to password protect your WooCommerce categories or make them private! You can buy the plugin from here. It's much cheaper than setting up a full membership solution and we hope it is useful for making WooCommerce private and protected.

Or if you'd rather protect your entire shop, check out our WooCommerce Private Store plugin instead.

We've also created an opportunity to earn money from recommending the plugin. Sign up to our WordPress affiliate scheme and get 30% commission for WordPress plugin sales on our site.

Diagram of PayPal Adaptive Payments splitting one payment between two receiversOne of our WooCommerce clients recently asked us to set up her WordPress online shop to automatically pay a profit share to her business partner.

Most WordPress e-commerce websites accept payments to a single source only. Typically, a WooCommerce store will integrate with a single PayPal account, to which all payments received via the website are sent. This client wanted a percentage commission or profit share to be automatically paid to a second PayPal account for specific products only.

WordPress plugins for WooCommerce profit share or commission

We initially thought that this would involve some bespoke WordPress development work involving WooCommerce and the PayPal API. However we found several WordPress plugins that met the requirements exactly. I guess that's not surprising given that 2,500+ WooCommerce add-ons are available in 2017.

These plugins work using a feature called PayPal Adaptive Payments. It lets you split a PayPal payment (e.g. from a WooCommerce product order) to multiple recipients.

There are 3 main WordPress plugins for using PayPal to pay a profit share or commission from your WooCommerce orders:

All of these plugins do largely the same thing. They all integrate PayPal Adaptive Payments with WooCommerce. They all split PayPal payments to multiple recipients using a choice of methods. These are Chained Payments, Parallel Payments or Standard Simple Payments. (Read the plugin documentation for definitions, as it's quite complicated.)

Although all 3 plugins looked fine and had quite good reviews, we chose the official WooCommerce extension. This is because it's safer to purchase plugins from a single company. WooThemes developed both WooCommerce itself and the PayPal Adaptive Payments plugin, so if we had any problems then they would have to take responsibility and couldn't blame the other developer. This is always a possibility when you combine plugins by multiple developers. Price-wise, the official plugin was the middle of the 3 options.

Our solution

We purchased the PayPal Adaptive Payments plugin and read the documentation, which was quite complex. Chained Payments was the best method for our client as it allows the commission to be automatically sent to our client's business partner without the customer knowing that this is happening.

We set up the plugin to work with WooCommerce products in a specific category only. The customer would pay via PayPal. It would look like their PayPal payment was going a single recipient. But behind the scenes, a 'Chained Payment' effect would kick in. A percentage of the payment was sent to our client's PayPal account and a different percentage was sent to her business partner. Perfect!

What's the catch?

The only downside is that PayPal Adaptive Payments are complicated. The fact that there's a plugin available doesn't make it easy to set up. We had to do a lot of fairly technical work to set everything up correctly. This included creating a PayPal App and submitting it to PayPal for approval. There were also several hoops to jump through such as providing PayPal with details of our client's business plan. (Because they wanted to check the payments were being used suitably.)

If you have a WordPress website and want Adaptive Payments, you'll probably need a WordPress web developer or agency to set it up. It's a great option if you want to automate more complex payment arrangements with PayPal.

WooCommerce shipping settings tab for the Flat Rate per State, Country, Region plugin
WooCommerce is great and is the best plugin for most WordPress e-commerce websites. However its shipping options can be quite limited.

On the face of it, WooCommerce offers a good choice of delivery and shipping options - flat rate, free shipping, international flat rate, local delivery and local pickup.

Unfortunately this isn't as good as it looks for two reasons:

  • A lot of WordPress online shops need more granular control over their shipping rates - particularly if they ship to multiple countries or regions with different postage costs.
  • As it comes, WooCommerce only shows customers the shipping cost - or even whether you will ship to their country - on the checkout page. That's a disaster for WooCommerce stores that ship internationally! Customers get incredibly frustrated to add products to their cart and then discover that you either don't ship to their country, or that the shipping cost is too high.

Fortunately, there's an excellent solution to each of these problems:

  • Solution 1 - A lot of people add more flexible international shipping costs by using YITH's Product Shipping plugin.
  • Solution 2 - The WooCommerce Shipping Calculator plugin lets customers check whether you ship to their country, and calculate the cost, directly on the product page. This is a super-simple way to avoid the frustration of getting bad news on the checkout. Either use it on its own or with YITH's plugin.

How to set up Flat Rate per State/Country/Region for WooCommerce

  1. Find the 'Flat Rate per State/Country/Region for WooCommerce 'plugin in the WordPress plugin repository. (Plugins → Add New in the WordPress admin for your website). Install and activate it as usual.
  2. Go to WooCommerce → Settings → Shipping in the WordPress admin. You will see that the plugin has added a new link to the right hand side of the list of shipping options: Flat Rate per State/Country/Region.
  3. Ignore all the information about which countries belong to different regions - you probably don't need this. Scroll down to the actual plugin settings and set up the plugin as required. It's pretty self-explanatory and you can hover over the question mark icons for an explanation of each option.

Note: If you use this plugin then it will control ALL your shipping options, replacing WooCommerce's built-in Flat Rate and International Flat Rate options. This means that you need to disable Flat Rate and International Flat Rate and use the 'Flat Rate per State/Country/Region' section to add ALL your postage costs, including your domestic shipping rate and the overseas shipping. If you forget to disable the other shipping options then they will appear as alternate shipping methods in the checkout.

Settings panel for setting flat shipping rates per state, country and regionAn example of how to use the plugin

Although setting up this WooCommerce shipping plugin is fairly self-explanatory, here's a screenshot showing how to set it up to achieve the following scenario:

  • Shipping cost of $6.95 per order for the United States only (this example assumes that the website is based in the US).
  • Shipping cost of $15.00 for Canada.
  • Shipping cost of $22.50 for the rest of the world.

But what about shipping to individual countries within the UK?

TheFlat Rate per State/Country/Region for WooCommerce plugin is ideal for setting separate shipping rates for each country or region. However there are times when you want to break down your shipping zones further. For example you might want to charge different postage for England, Scotland and Wales - which WooCommerce treats as a single country (United Kingdom).

Since writing this post, WooCommerce has introduced shipping zones into its core plugin. This gives extra shipping options without needing any further plugins, so it's worth experimenting with. I've written a separate post about how to charge different shipping rates for each UK country.

Let customers calculate international shipping costs on the product page

WooCommerce product page Shipping tab listing delivery rates customers can review before adding to cart

So far, you've learned how to solve the problem of not being able to add fine-grained shipping costs per country. The second problem was how to let customers check international shipping costs without having to add products to their cart first.

You can easily solve this by installing the WooCommerce Shipping Calculator plugin. This handy plugin adds a domestic or international shipping calculator to your chosen location on the product page. That way, customers can enter their country and see the shipping cost straight away. As a result, they can make an informed decision on whether to add it to their cart.

It's your turn

We've looked at two of the best WooCommerce shipping plugins:

I'd love to hear how you use them to improve how you charge for shipping per country. Please share your experiences in the comments below.

One of our WooCommerce clients recently asked how to prevent duplicate usernames. She wanted to know what would happen if a new customer creates an account on her WordPress e-commerce online shop and tries to add a username that is already in use.

WooCommerce has features built in to prevent duplicate usernames. Since so many websites use WooCommerce, I will describe the options to help anyone else who is worried about this.

Create username based on the user's email address

WooCommerce account settings with automatically generate username from customer email
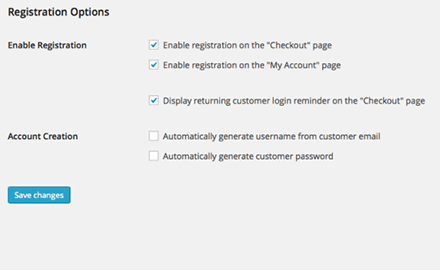
If you log into the WordPress admin and go to WooCommerce > Settings > Account, you can scroll down to a section called Registration Options. This allows you to tick a box called 'Automatically generate username from customer email'.

If you tick this box then when a customer creates an account during checkout, they will automatically be given a username based on the first part of their email address. Their username is not their actual email address, as most people assume. Instead, their username is the part of their email address which appears before the @. For example if my email is [email protected] then my username will be 'info'.

As you can see from this example, a lot of automatically generated usernames won't be very unique - how many people have info@ email addresses?! WooCommerce detects duplicate usernames and avoids the problem by adding a number after any duplicates. For example if I create an account when there is already a user called 'info' then my username will be 'info1'.

Many WooCommerce website owners aren't keen on this option because a lot of people like to choose their username to make it easy to remember. Fortunately there is another option.

Allow WooCommerce customers to choose a username

You can untick the 'Automatically generate username from customer email' box in WooCommerce > Settings > Account > Registration Options. This adds a field to your checkout page prompting customers to choose their own email address.

If a customer enters an email address that has already been chosen, WooCommerce will prevent any duplicate usernames. Instead of adding a number after the username, an error message will appear after you click the 'Submit' button. This prompts the customer to choose a different email address.

Which option is best?

As always, there are pros and cons of each option.

Some WordPress website owners like the convenience of automatically generating usernames. This is attractive because it's one less field for the customer to fill in. Research into what makes an effective online form has reliably shown that the more information the customer is asked to enter, the less likely they are to complete the process. This is a big deal on a WooCommerce website as store owners need to prevent abandoned carts and checkouts.

But for overall user-friendliness, it's nice for customers to be able to choose a username that will be easy for them to remember in future.

The decision largely depends on the purpose of your customer accounts. If customers will have little reason to log into their account in future then it's best to automatically generate their username as this speeds up the checkout process. If you want to encourage repeat business, or if customers will be logging in for many different purposes (e.g. if you offer online courses or a membership area) then they're more likely to want an easy-to-remember username. Think about your customers and choose the best option for them.

WooCommerce logo above a shopping basket of parcels

In this guest post from Edward Jones, we learn how to sell digital products using WooCommerce.

Online stores are no longer confined to selling physical products only, and have expanded their reach to include digital products such as music, images, ebooks and software.

eStores allow you to reach out and deliver products to customers the instant they make payment, whereas selling physical products often means losing a significant share of your sales – paying shipping, manufacturing and distribution costs. This is where selling digital products are significantly more profitable for merchants.

Put simply, selling digital products saves store owners from going through the hassle of shipping products, resulting in greater profit margins.

What's more?

You don't have to worry about maintaining your inventory or running-out-of-stock with digital products, as they mainly comprise of files stored on your web server. This means you're selling the same files time and again. Moreover, digital products don't require customization of any kind. In contrast, physical products often require you to change their color, size or any other attribute.

The agenda of this post isn't about convincing you that digital products are a lot better compared to physical products. My purpose is to tell you that WooCommerce has made it easier to sell digital products through WordPress e-commerce web designs. WooCommerce is the world's most widely used e-commerce platform and is definitely a winner.

To be more specific, this post will help you learn how to set up WooCommerce pages in your WordPress site for selling digital products.

Step-by-step guide: Setting up WooCommerce to sell digital products

Step 1: WooCommerce Plugin Installation and Settings Configuration

In order to sell digital products via WooCommerce, you'll first have to install and activate the WooCommerce plugin.

Once the plugin has been activated, create the WooCommerce pages. Next, configure the plugin settings for digital products that you want to sell from your WordPress website. To do this, log into your WordPress admin panel and navigate to 'WooCommerce >> Settings'. From there you'll be able to see an option 'Configure WooCommerce Settings for Digital Products' - click on it and update the following settings:

  • General settings tab – Limit the downloadable items purchase quantity to 1
  • Inventory settings tab – Disable stock management
  • Shipping settings tab – Disable shipping
  • Payment Gateways settings tab – Disable the payment options: 'Direct Bank Transfer' and 'Cheque Payment'. Enable the PayPal payment option and enter your PayPal email address
  • Emails settings tab – Configure your order notification settings and customize your chosen WooCommerce email templates

Step 2: Product categories creation

It's best to set up your product categories prior to adding products. You can do this via 'Products >> Categories' in the WordPress admin.

Step 3: Adding digital products

In the third step, you will need to add your digital products (that you need to make available for download). To do this, go to 'Products → Add Product' (as shown in the screenshot below).

WooCommerce Products menu with Add Product highlightedClicking on the “Add Product” option will redirect you to the product creation form. Fill in the below fields:

  • Title
  • Long description
  • Short description
  • Select the product category
  • Set a featured image
  • Insert additional thumbnail images (if necessary)
  • Price

In order to make your digital products downloadable, scroll down to the 'Product Data' section and do the following:

  1. Go to Product Data and choose the 'Simple Product' option from the drop-down
  2. Check both the 'Virtual' and 'Downloadable' check-boxes, as shown in the below screenshot:

WooCommerce product data panel with Virtual and Downloadable checkboxes tickedNext, assign a value to the 'Regular Price' field. From the 'Downloadable Files' path, click on the 'Upload a File' option and copy the Link URL. Click on the Save changes button, then paste the URL of the digital product you've just uploaded into the 'File Path' field.

If required, you can choose to set an expiration date for the product download link. This will stop the products from getting downloaded after the link expires.

Step 4: Eliminate the sidebar on the cart and checkout pages

You might want to get rid of the sidebar on your Cart and Checkout WooCommerce pages. For this purpose, simply make the WooCommerce pages full width by using the following steps:

  1. Open your WordPress admin panel and go to 'Pages → All Pages'.
  2. Click on 'Edit' in the 'Page Attributes' widget on the right-hand-side of your screen, and you’ll see a Template drop-down. From the drop-down choose “Full Width” and update the page. This will eliminate the sidebar for that page.

Understanding the order process

So, now that you have carried out the most crucial steps of setting up your WooCommerce pages selling your digital products, you might be interested to know how a digital product order is processed. Let's take a look at the order process:

When a customer makes payment via PayPal, any one of the following things can happen:

  • If all the items (or products) in the order are downloadable and virtual, then the order will complete
  • Or else, the order will continue processing till the time you change it

After completion of the order, or when the 'Grant access to downloadable products after payment' option is enabled, the user who has purchased the products will:

  • Be given permission to download the purchased products
  • Receive the download links for the purchased products on the order received page
  • Receive email notification that contains the download links
  • Be able to see the download links, once they are logged into their ‘My Account’ page.

Get more sales with WooCommerce Product Tables

Your store can be reasonably successful if you set it up with the built-in layouts that come with WooCommerce and your theme. For greater success, it's worth doing some work to optimise your WooCommerce conversion rate. This is especially helpful for online shops that sell products like electronics, where customers spend a lot of time reading the features and specifications of each product.

The WooCommerce Product Table plugin gives you lots of flexibility about how to display your products. It lists products in a table and you can choose from dozens of options about how to present the table and what data to include. This can help to increase your sales and make your store more successful.

Wrapping up

Apart from setting up any standard website or blogs, there are so many things that you can do with WordPress. In this post, we have discussed about how you can easily sell digital products through your WordPress e-commerce website, thanks to the WooCommerce plugin. Hopefully reading this will help you learn about the basics on how you can sell digital products by setting up WooCommerce pages.

About the author

Edward Jones is a WordPress developer who keeps sharing his experience through his insightful blogs. Currently, he is employed with OSSMedia Ltd. - A Web Development Company. He holds an impressive amount of expertise in major CMS platforms including Drupal, WordPress, Joomla and Magento. You can go through his write-ups for gathering a greater insight into the popular CMSs available today. You can get in touch with Edward via Twitter and Google+.