How to connect WooCommerce to your CRM & email marketing platform

If you run a WooCommerce ecommerce store that uses email marketing platforms or CRM, it can be beneficial to integrate these platforms with your store.
Email marketing involves sending educational and promotional emails to targeted lists of subscribers. This could include newsletters with product updates, educational content showing how best to use your products, or sales and discount offers.
Many email marketing software and CRMs (Customer Relationship Management software) include marketing automation that automates sending targeted emails based on customer behaviors and actions. For example, when a customer makes a purchase, it will add them to a particular email list. This then triggers the post-purchase email sequence.
Integrating your WooCommerce store with your CRM can help you segment your audience more effectively based on their shopping behavior. This, in turn, enables you to send tailored email campaigns to your customers that can nurture your leads and boost conversions.
In this article, you'll learn how to integrate your WooCommerce store with popular CRM and email marketing software using the FuseWP plugin. You'll discover how to synchronize your customer information with your email list or audience, map custom fields, and assign tags based on the products they purchase.
Installing FuseWP and integrating it with your CRM
To get started, download and install the FuseWP plugin on your WooCommerce website.
Connect your CRM or email marketing software to FuseWP by clicking on FuseWP in your WordPress admin area. It will display a list of supported integrations.
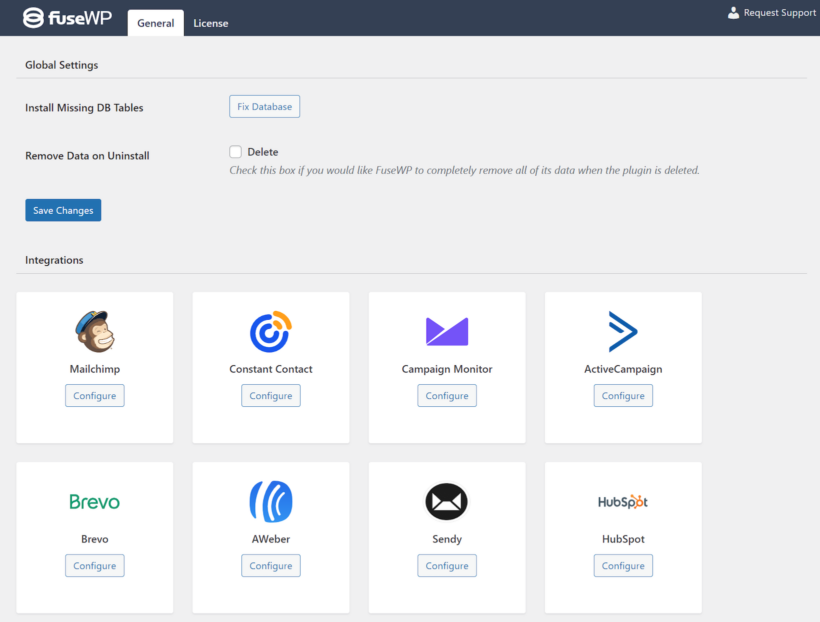
FuseWP integrates with popular email marketing platforms, including Mailchimp, ActiveCampaign, Klaviyo, Constant Contact, Campaign Monitor, HubSpot, AWeber, ConvertKit, Brevo, Sendy, and Flodesk.
Follow the guide below to learn how to connect FuseWP to Mailchimp. You can use the same steps to connect other supported CRM and email marketing platforms.
- Click "Configure" next to Mailchimp.

- This will open a popup where you need to click the "Connect to Mailchimp" button.

- You'll be redirected to authorize FuseWP to access your Mailchimp account. Log in if prompted and grant FuseWP the requested permissions to access your Mailchimp account.

- Once authorized, you'll be redirected back to your WordPress site.
Once you establish the connection, you can add sync rules to automate the data flow in WooCommerce, WooCommerce Memberships, and WooCommerce Subscriptions into your CRM system.
Adding WooCommerce customers to CRM after checkout
The FuseWP plugin allows for real-time syncing of customers to your email marketing software and CRM based on their purchased products, as well as the categories and tags they purchased from
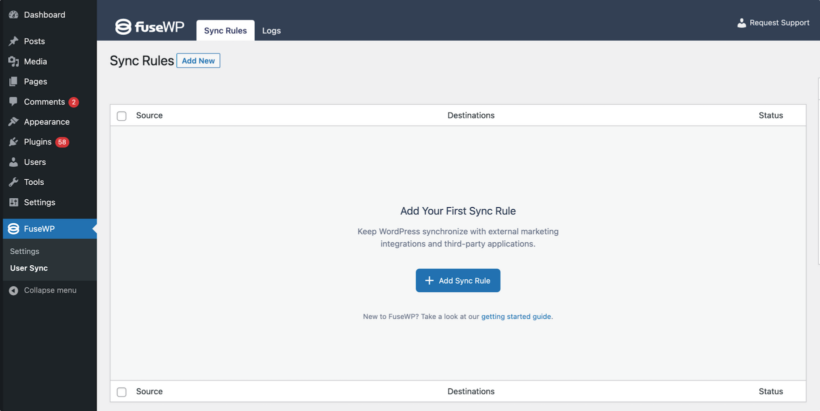
To create a new rule, go to FuseWP → User Sync and click the Add Sync Rule button.
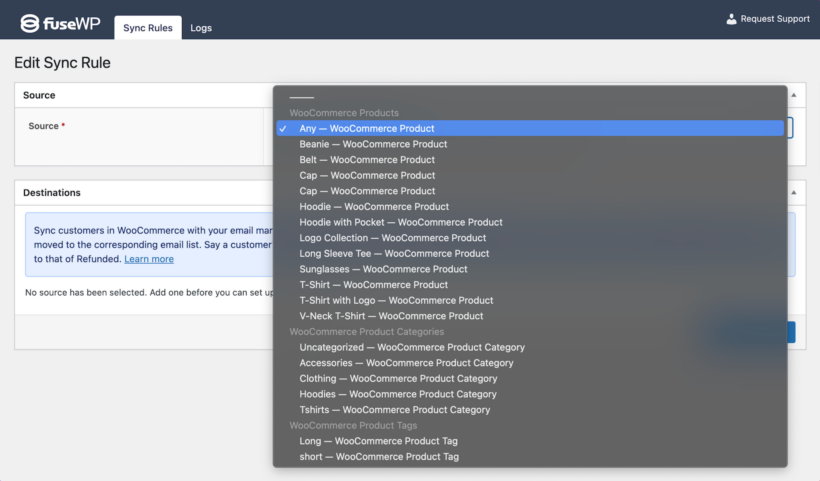
Select a data source, which can be a product, category, or tag. If a product is selected, customers who purchase that product will be synced to your email marketing software or CRM. If a category or tag is selected, customers that purchase any product from the selected category or tag will be synced to your CRM list or segment as defined in the destination metabox.
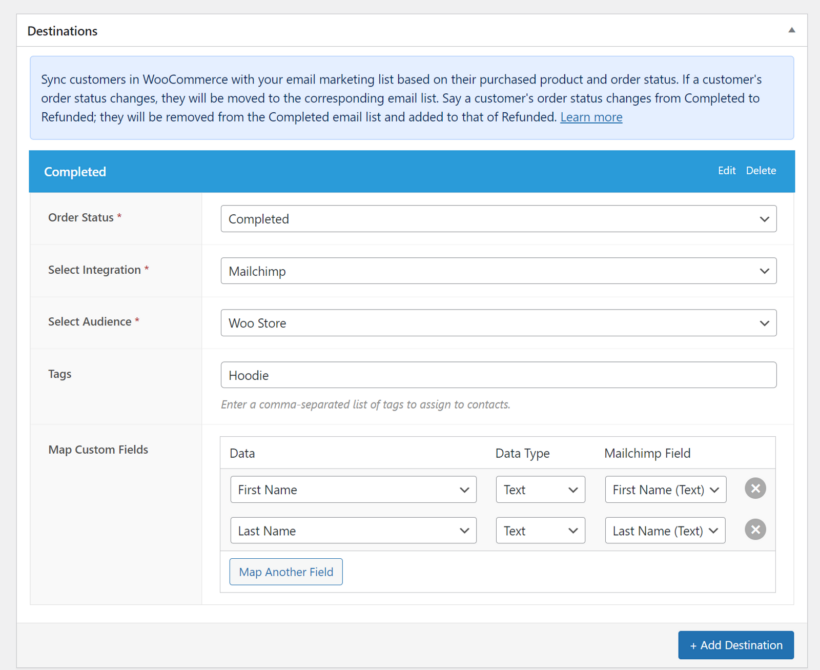
Next, we'll need to configure the destination. For each order status like Completed or Refunded, you can define the list to add or remove customers from.
To do so, click the “Add Destination button” and add different order statuses of the selected WooCommerce product. Select your CRM or email marketing software for each order status as integration, and specify which list to add them to. Additionally, you can define which tags to assign to subscribers.
You also have the option to map custom fields. This ensures your customer data in WooCommerce are correctly synced to the corresponding fields in your CRM. You can sync various data including customer name, billing address, shipping details, and more.
Once completed, repeat the steps to add destinations for other order statuses you desire, such as Canceled, Refunded, and Failed.
Finally, save your changes to activate the sync rule.
Adding members in WooCommerce Memberships to your CRM
FuseWP also integrates with the WooCommerce Memberships plugin so that you can sync member data to your CRM based on their subscribed membership plan and membership status. This ensures your marketing platform always has the latest information on members of your membership website.
Also, if a user’s membership status changes, FuseWP will move them to the corresponding email list. For example, say a user’s membership status changes from Active to Cancelled. It will remove them from the Active email list and add them to Cancelled.
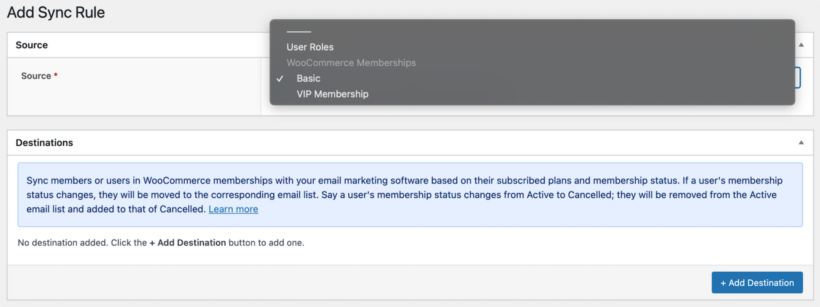
To create a new sync rule, click the Add New button and select a specific membership plan as the source.
For each membership status, we need to define the appropriate list or segment to add members to in your connected CRM or email marketing platform.
In the screenshot below, members who subscribe to the “VIP Membership” plan with an active subscription will be added to Mailchimp and the Test List. If their subscription is ever canceled, they will be unsubscribed/removed from the Active membership status email list and subscribed/added to that of Cancelled.
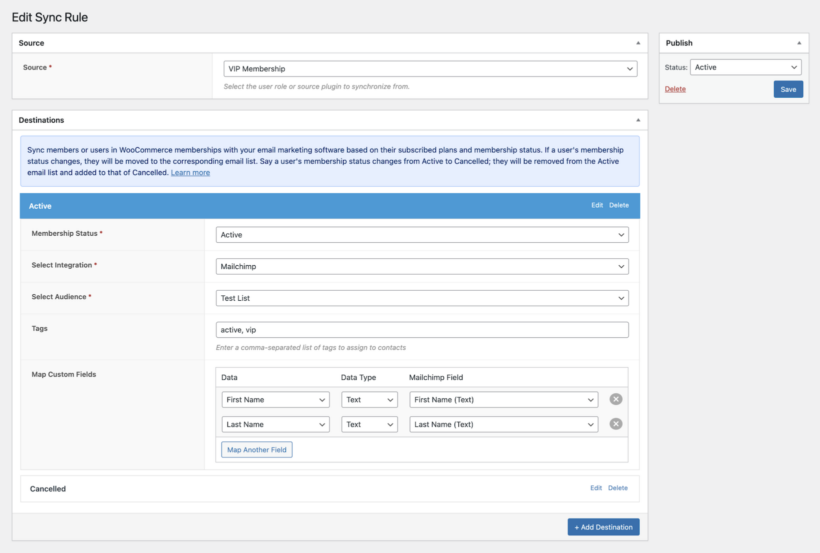
Just like WooCommerce, you can also map custom fields for WooCommerce Memberships.
Adding members in WooCommerce Subscriptions to your CRM
In addition to WooCommerce and WooCommerce Memberships, FuseWP also works with stores that use the WooCommerce Subscriptions extension.
This feature enables you to maintain accurate subscriber data across all platforms. It also lets you create targeted campaigns based on the subscription lifecycle.
Creating a sync rule for WooCommerce Subscriptions is similar to the methods mentioned above.
Go to FuseWP → User Sync and click the Add New button. Then, select a specific subscription product as the source.
The Destinations metabox is where we configure the different subscription statuses of the selected subscription product and their respective CRM and email marketing integrations.
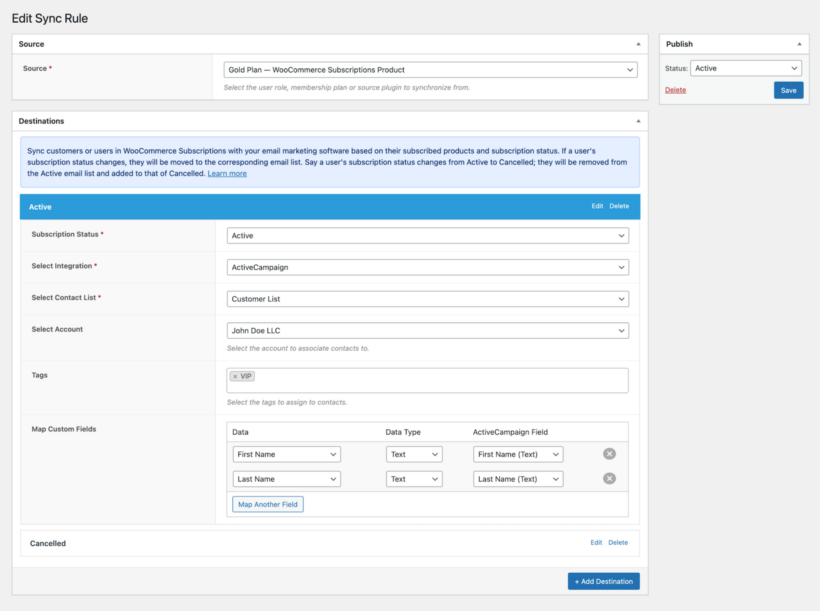
In the screenshot above, if a customer subscribes to the "Gold Plan" WooCommerce subscription product and has an active subscription, FuseWP will add them ActiveCampaign's Customer List and assign the "VIP" tag. However, if they cancel their subscription, it will remove them from the Active subscription status list and add them to the Cancelled list.
Salesforce Integration for WooCommerce by WP Swings
The Salesforce Integration for WooCommerce plugin by WP Swings is the powerful solution for store owners who rely on Salesforce to manage their CRM, sales, or marketing operations. This powerful plugin allows you to automatically sync WooCommerce orders, customers, and products directly with your Salesforce account saving time and reducing manual effort. With support for both standard and custom Salesforce objects, it offers advanced field mapping so you can control exactly how your WooCommerce data appears in Salesforce.
You can also schedule regular syncs, perform bulk data transfers, and track everything through detailed activity logs and error reporting. Ideal for medium to large stores, this plugin ensures that your inventory, customer data, and sales records are always in sync with your Salesforce ecosystem helping you make smarter, data-driven decisions without switching between platforms.
Integrate WooCommerce with your CRM and email marketing today
Connecting your WooCommerce store with your CRM or email marketing platform enables you to collect valuable customer data. You can segment your customers, and create targeted campaigns that boost engagement and encourage repeat purchases.
Additionally, it allows you to track your campaign performance and optimize your marketing strategy. In short, this integration is a smart move for any ecommerce business looking to grow and succeed.
While there’s no direct integration available, FuseWP makes it easy to connect WooCommerce to your preferred CRM. That way, you can sync customer data based on their purchased product, the category and tag they bought from, their active membership plan, and subscription status.
Get the FuseWP plugin today to automate the segmentation of WooCommerce customers in your CRM.
4 Comments
HI,
I am looking for a post of wordpress developer
AND intersted to be part of your company
Looking forward for a positive response
Thanks and Regards
Anwar
Hi Anwar,
Thank you for your interest in joining our team at Barn2! We're always looking for talented individuals to contribute to our success.
To explore the exciting career opportunities we currently have available, please visit our careers page here: https://barn2.com/careers/#jobs
We encourage you to review the positions listed and see if any match your skills and experience.
Cheers!
Hi,
I am WordPress specialist and looking forward to work with your team.
Regards,
Anwar
Hi Anwar, thank you for your interest in working with our team. We are currently not recruiting but you can always check our Careers page for opportunities available here at Barn2 Plugins. Cheers!