Private WordPress site

Do you want to keep your WordPress site private and visible only to you? Perhaps you want to maintain private journals on your website. Or do you want to create private sections within your WordPress website to restrict access to these sections?

WordPress makes creating and managing a membership website easy. But, what if you want to create a private website? It is possible to have a completely private website or have some areas private within an otherwise public site.

This can be useful when you want to:

  • Maintain private journals
  • Run school departments
  • Sell exclusive products
  • Organize invite-only events
  • Manage membership sites, etc

In this post, we'll show you 5 ways to make a WordPress website private. We’ll cover how to make the whole website private or just specific parts of it. We’ll also look into the benefits of making your website private. You can easily put it into practice by following the step-by-step instructions.

If you're wondering how to make my private site, not just for customers, but search engines too, then this article is for you.

WooCommerce Protected Categories to disable WooCommerce demo

First, let’s look at why you would want to make your whole website private or restrict access to specific parts of it.

Who needs a private WordPress site?

A private website lets you protect your content from part of or the whole public. It gives you control over who can access your posts or pages. You get to choose the criteria to be met before a user can access your website; it could be: using a password, creating and logging into an account, or through memberships. It might be as simple as creating a WordPress private page which only certain registered users can see.

The following scenarios highlight when you should consider making your website private.

To run a membership or affiliate marketing website

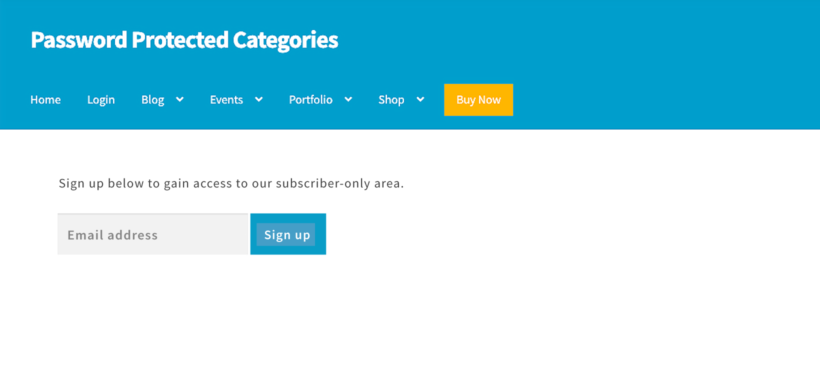
Making your website private would be a great way to run a website that allows members-only content. Gating content to which only members have access provides additional value. When running an affiliate marketing website, you would want it to be private so that only affiliates have access to it with a custom login page. This will provide a reliable platform to track the progress of your affiliates.

Centralized members login page

To organize invite-only events

Invite-only events facilitate reaching the right audience and accurately predicting the attendance for that event. Making a private website facilitates organizing these events, ensuring only the invited participants will be allowed to attend.

To maintain private journals or diaries

If you have a website, specifically for your personal journals or diaries, you wouldn’t want anyone else accessing them to maintain your privacy. To ensure this, you need to make the website completely private.

To maintain departmental data

If you run a departmental website in a school, you need to make sure that data and media from the department is only accessible to the members of that department. Typically, this is used by schools, such as Harvard to run exclusive WordPress blogs for students belonging to specific departments.

To run a WordPress private blog

You might make a WordPress blog private when you offer paid content. In this way, your reader will have to become a subscriber at a fee to access your private posts or tutorials. A private blog will enable you to make sure that only those who have subscribed, have access.

WordPress private blog category.

From these use cases, you can see that some people need a completely private website and others just need to make parts of it private. Keep reading to learn how you can do both.

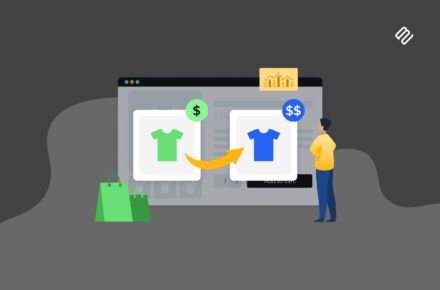
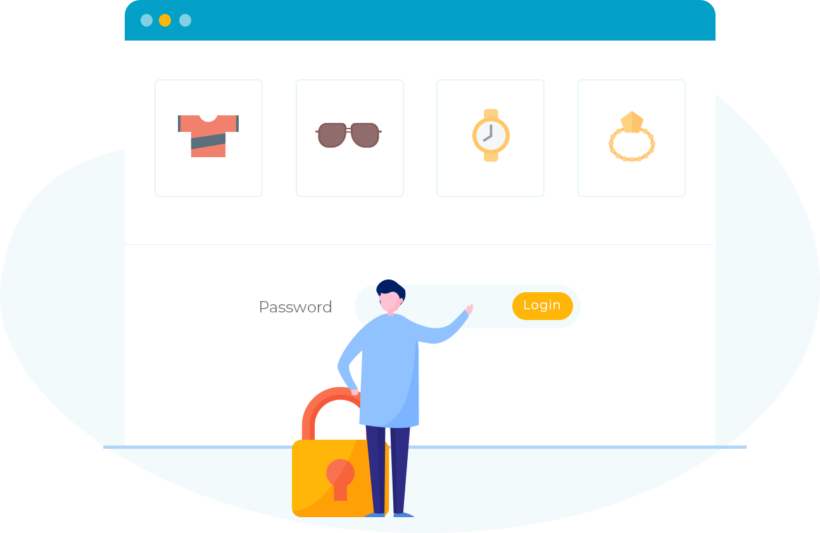
To create private areas of an ecommerce shop

Lots of WordPress ecommerce stores also need ways to make parts of their shop private. For example, you might be creating a WooCommerce wholesale area or private members-only shop.

When you do this, you generally only want to make the shop parts of your WordPress site private - not the whole of WordPress. As a result, we recommend that you read our guide to making WooCommerce private instead.

What are the benefits of restricting access and making your WordPress website private?

Restricting access to your WordPress website and making it private can have several benefits, such as:

  • Improved security: By limiting access to your website, you reduce the risk of unauthorized access, hacking attempts, and spam. This is especially important if you run an e-commerce store or collect sensitive information from your visitors.
  • Increased exclusivity: Making your website private can make it more exclusive and increase its perceived value. This can help you attract a specific audience and build a strong community around your content.
  • Better control over your content: If you create content that you want to keep exclusive, such as premium articles, courses, or videos, restricting access to your website is essential. This allows you to protect your intellectual property and monetize your content more effectively.
  • Improved user experience: Restricting access to certain parts of your website can help you deliver a more personalized and relevant user experience. For example, you can create a private forum or membership area where users can interact and share information.
  • Compliance with regulations: Depending on your industry and location, you may be required to restrict access to certain parts of your website to comply with privacy or data protection regulations.

As you can see, making your WordPress site private can help you protect your content, improve security, and create a more exclusive and personalized user experience.

Next, I'll show you the best ways to make WordPress private. First, we'll look at ways to add content restrictions to specific parts of your site without locking down the whole website. This gives you more control over which users can access which area of your WordPress site. Afterwards, we'll look at the best ways to make an entire WordPress site private.

2 ways to make part of a WordPress site private

In this section, we’re going to cover how to make specific parts of a WordPress site private. I'll show you how to do everything step-by-step. There are 2 ways that you can do this:

  • Via the features available in WordPress.
  • Using a plugin.

1. How to restrict access to a a specific page or individual post in WordPress

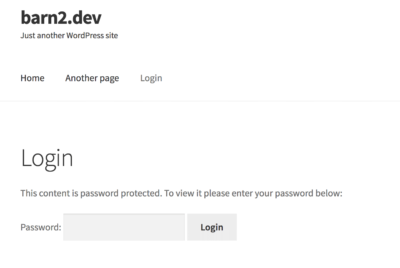
First, let’s talk about the content restriction functionality available in WordPress itself. You can password-protect to make a WordPress private page or post, or make them private to administrators and site editors.

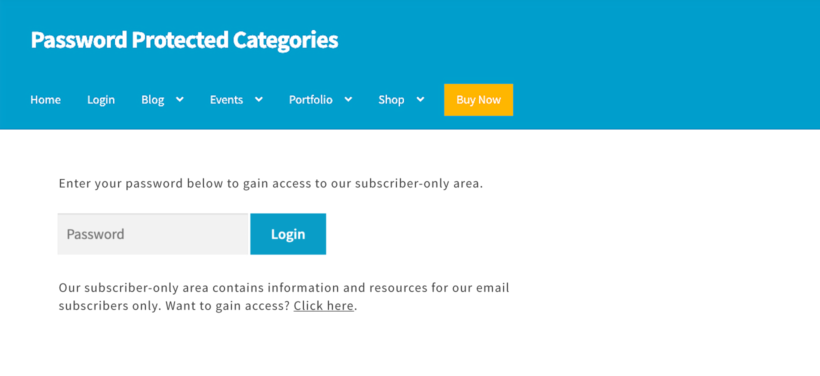
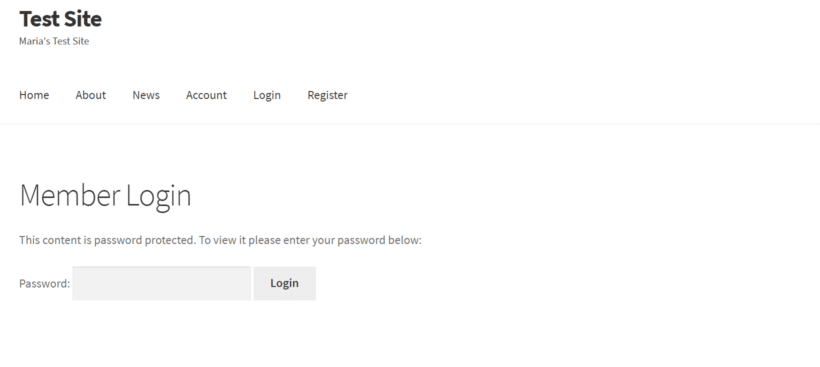
Note: When we talk about a WordPress private page in this context, it's not really private. WordPress' password protection functionality doesn't do that. Instead, the password protected page remains visible to everyone and you're prompted to enter a password to view it. If that's not what you want, skip to the next section where we talk about the Password Protected Categories plugin instead.

To do this:

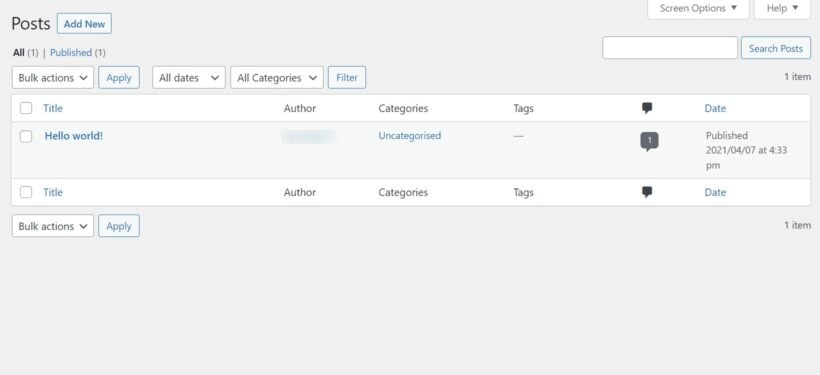
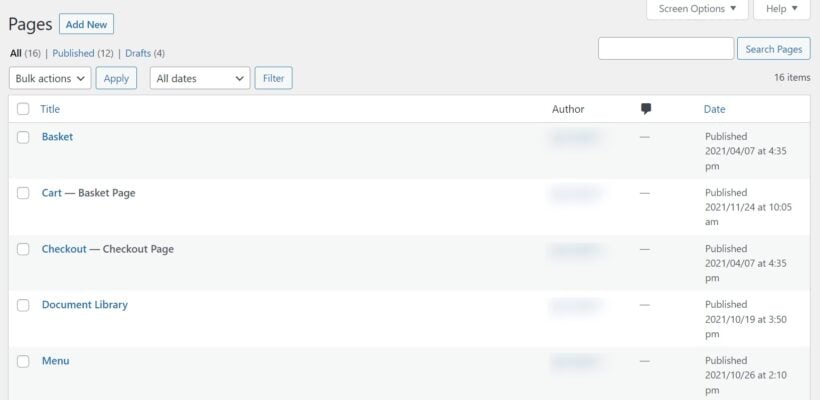
  1. Go to the pages or posts page on your WordPress admin dashboard.
  2. Hover on the specific page or individual post you intend to restrict.
  3. Next, click on Edit below the WordPress page title.
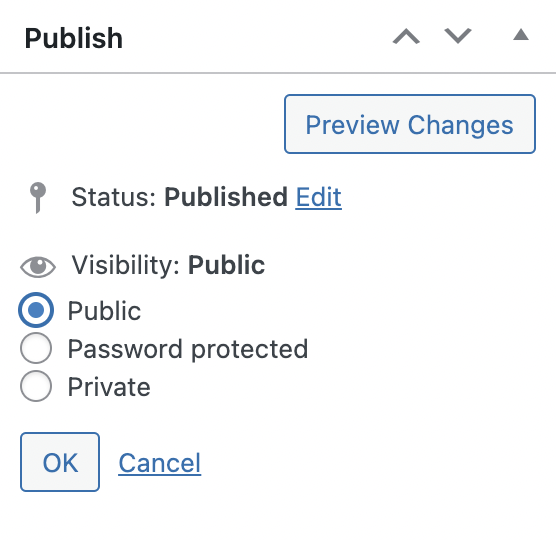
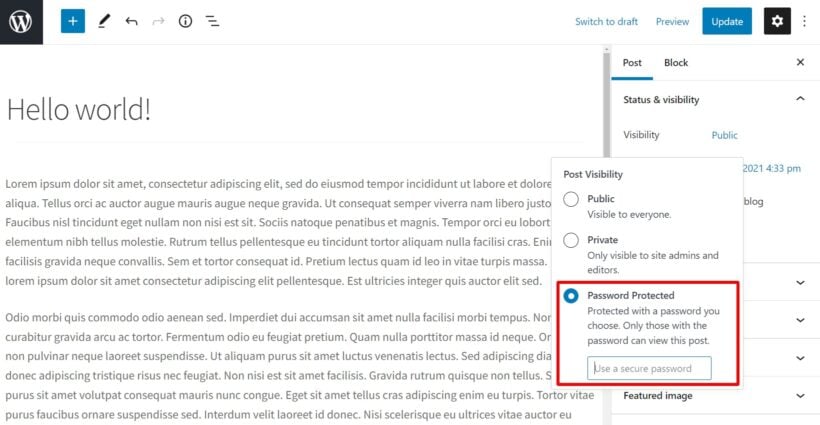
  4. Once the Block Editor opens, go to the sidebar on the right. Click on the Status and Visibility menu to open it, then click on the Visibility settings.
  5. Click on the word Public. From the window that opens, you can choose to select the Private option. This will limit access to site Administrators and Editors.
    WordPress post private
  6. If you’d prefer to password-protect your WordPress page, click on Password-Protected. Now set a password for that post and click on Update (or Publish, if it’s a brand new page). You can then share the password with whoever you want to give access to.
password protect post WordPress

This method is effective but it has a lot of drawbacks.

Disadvantages of using standard WordPress features to protect individual pages and posts

This method has the following disadvantages:

  • It’s tedious – You have to protect each individual page or post.
  • WordPress private pages and posts have limited visibility - Only admins and editors have access. The rest of your registered users (and guests), for example, subscribers, can’t access it.
  • It’s bad for user experience - As I mentioned earlier, with password protection, a "WordPress private page" isn't actually hidden or made private. Instead, it appears on your site as normal and people are prompted to enter a password when they click on the page/post. In addition, users have to enter a password for each private page/post they want to access - even if you use the same password for them all.
  • Higher risk for errors – There’s always the risk of an error occurring. This requires the user to be an expert in the WordPress backend to move past the error.

There’s a need for a solution that does not present these problems. All of these problems can be easily avoided when you use the Password Protected Categories private site plugin.

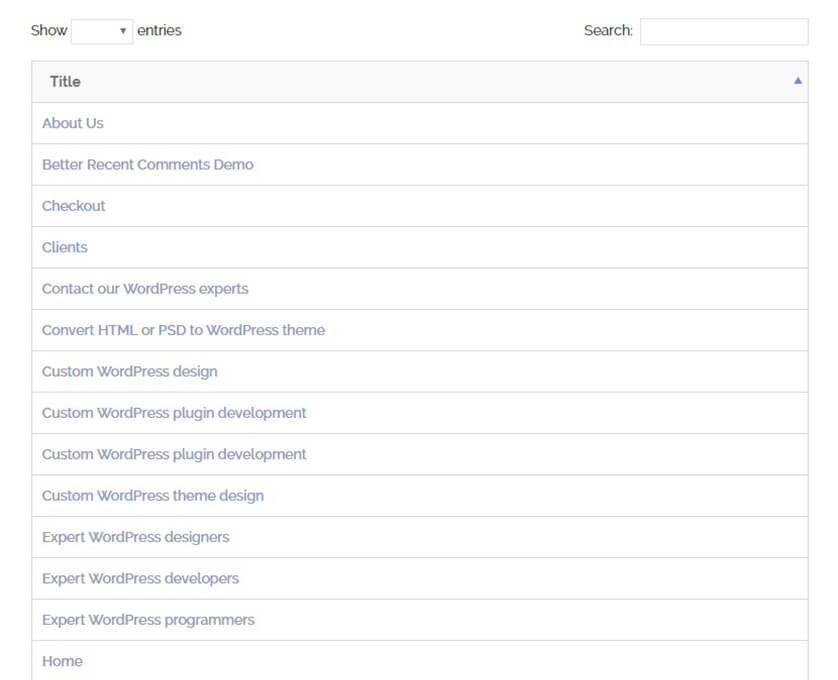
2. How to restrict access to content in WordPress using a plugin

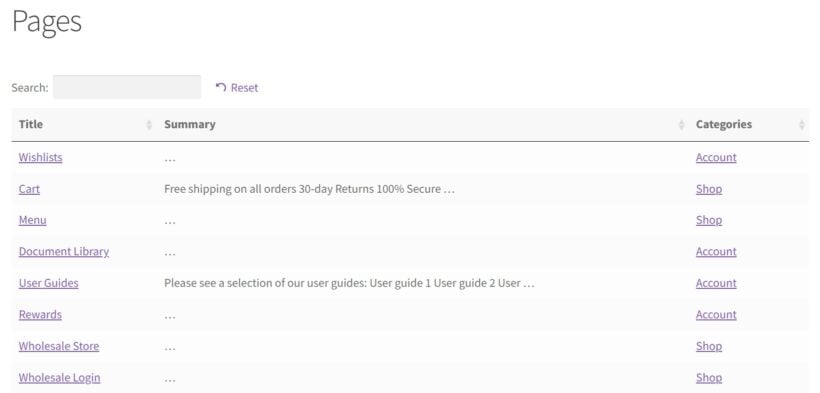
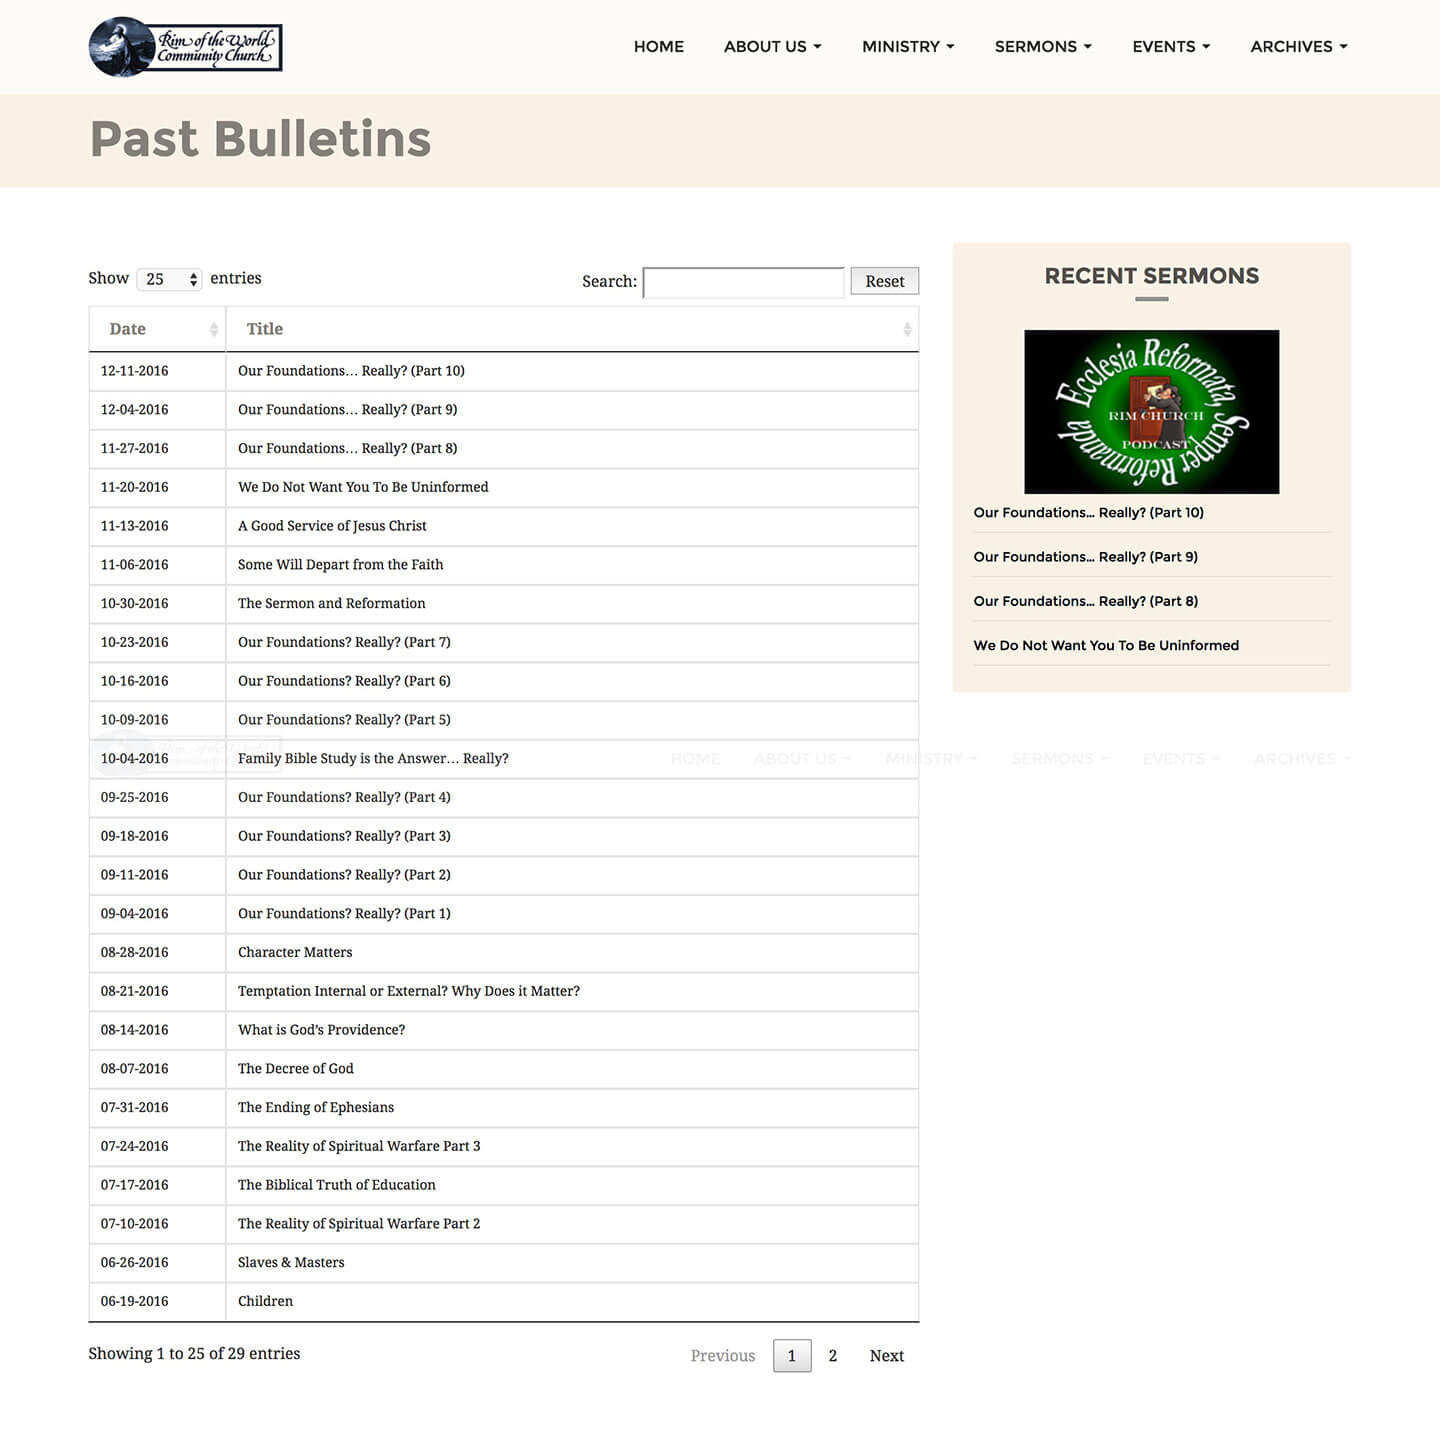
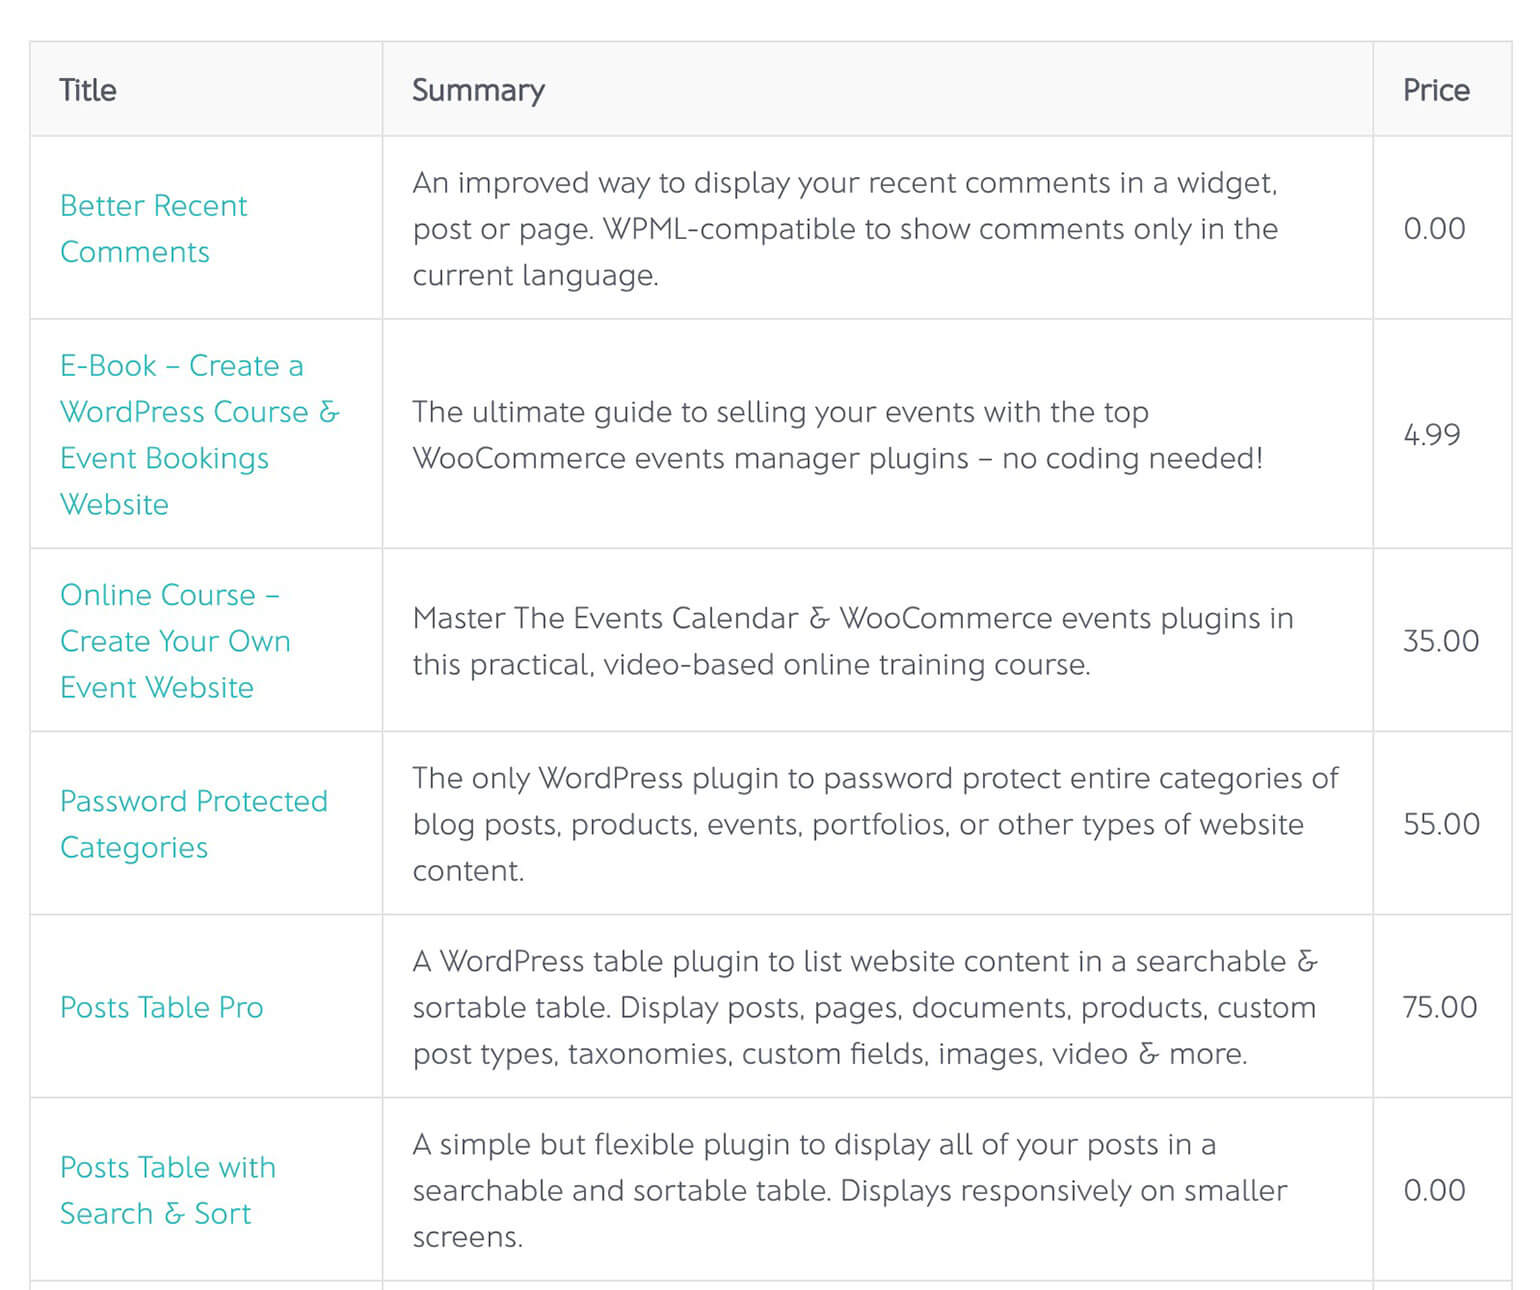
Password Protected Categories is a plugin that allows you to create private areas within your WordPress site. It presents an easy way to lock down whole categories of private blog posts, products, events, portfolios, and more. It can hide any type of category, taxonomy, or pages if you have enabled categories for them. This allows site access to only specific users, roles, or persons.

Let’s walk you through what makes this plugin the best and how to use it to restrict site access.

What makes this plugin the best?

  • It allows you to protect custom post types – When you allow reviews on your website or you have members’ portfolios, Password Protected categories enable you to impose a password block on this information. You can also restrict areas of your site by giving permissions to specific registered users or roles. Choose how long each IP address will have access to the private content before having to re-enter the password.
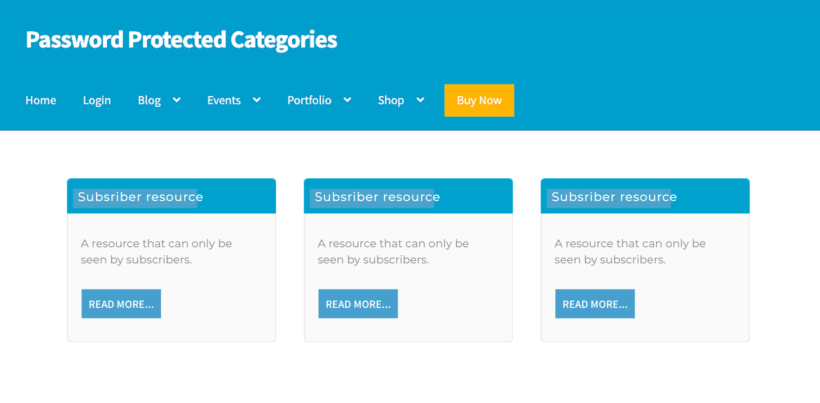
  • Password Protected Categories has an option to actually hide the private content from the front end, instead of just making people enter a password when they try to view it. The rest of the website will remain public.
  • It allows you to create members-only/restricted websites without writing any PHP code. Use whichever plugin you like (or just WordPress itself) to add user registration to your site. Once members have joined, the Password Protected Categories plugin takes care of the content restrictions and permissions.
  • The plugin isn't just about restricting site access to categories and their private pages and posts. It also hides navigation menu links and widget links to the hidden content.
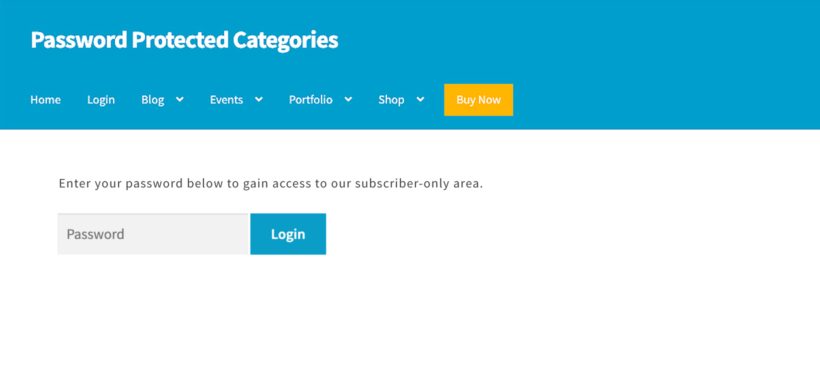
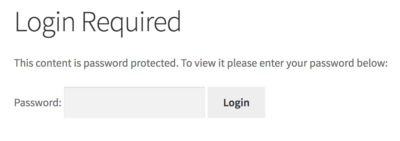
  • Works with all WordPress themes. For example, the login pages will look great with your theme and site design.
  • Highly rated customer support. Customer care staff are regularly available to walk you through installation and configuration, step-by-step.
private WordPress site setup

How to use this plugin to restrict access to your website

First, you need to install and activate the plugin.

  1. Start by purchasing Password Protected Categories from the Barn2 site and proceed to download the files and get the license key.
  2. On your WordPress dashboard go to PluginsAdd new. Select the upload option and upload the plugin, then activate it.
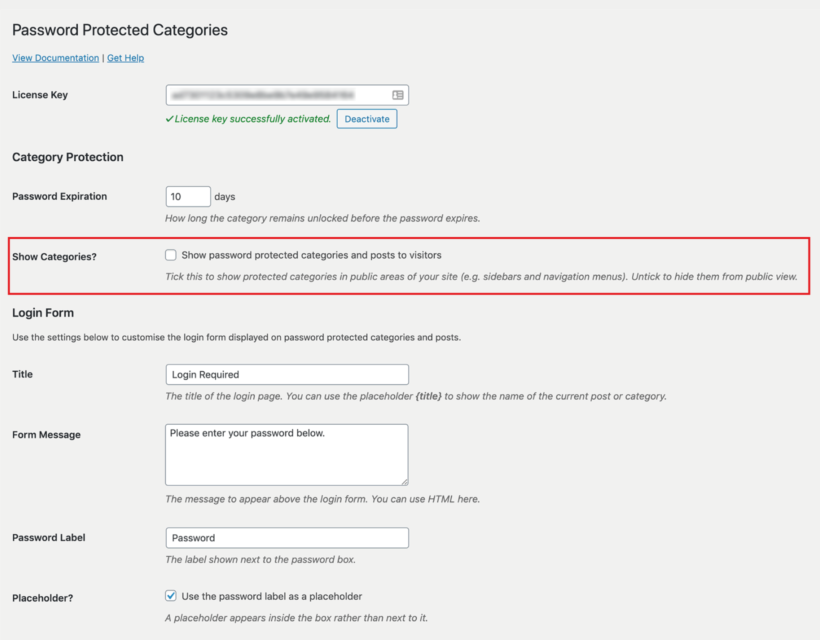
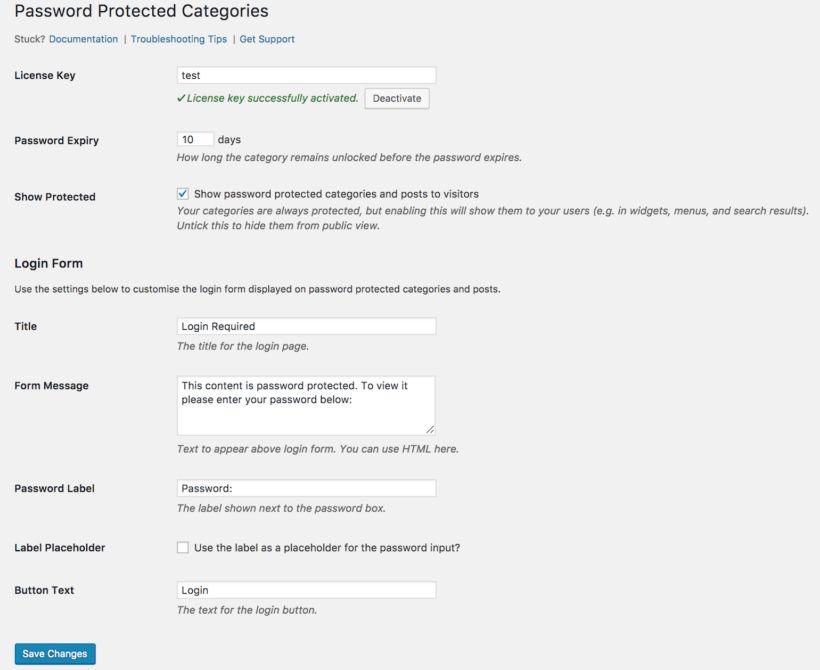
  3. Next, go to SettingsProtected categories and paste your license key and click on Save changes. You should see “License key successfully activated” below the license key.

You can protect any type of site content using this plugin, provided you can assign it a category or custom taxonomy. It follows the same standard procedure.

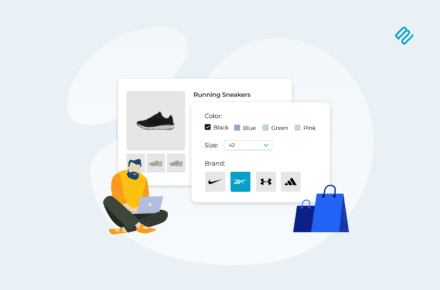
In this example, we’re going to show you how to create an invite-only event using Password Protected Categories. You can choose to restrict access to this event and give content restriction permissions based on:

  • User roles.
  • User restriction.
  • People with the password.

To set this up, take the following steps:

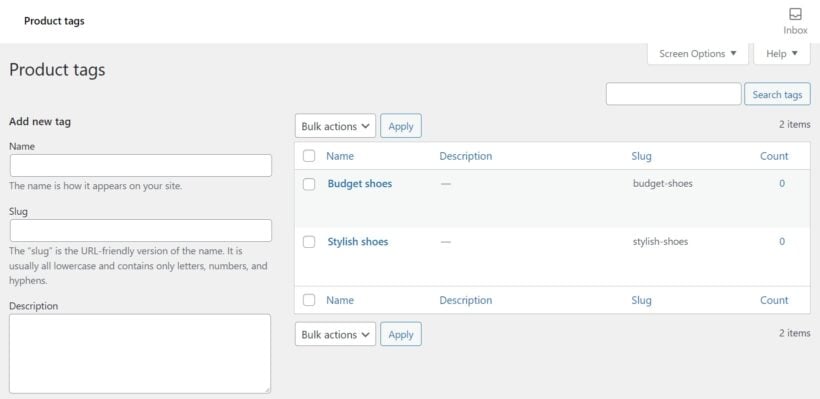
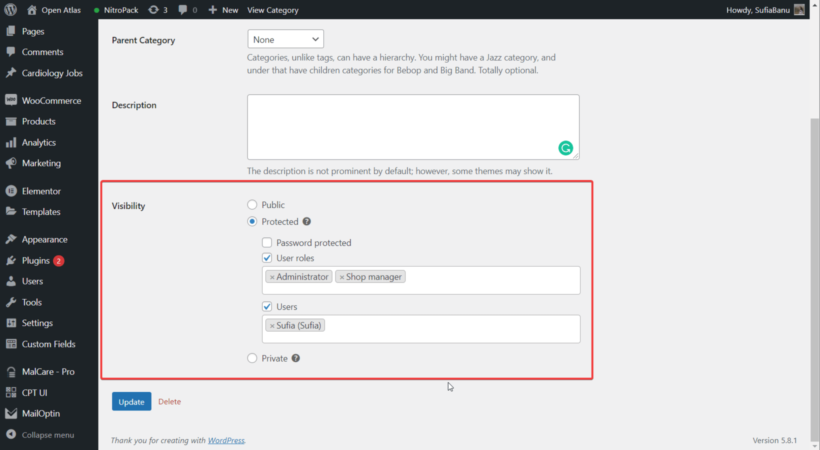
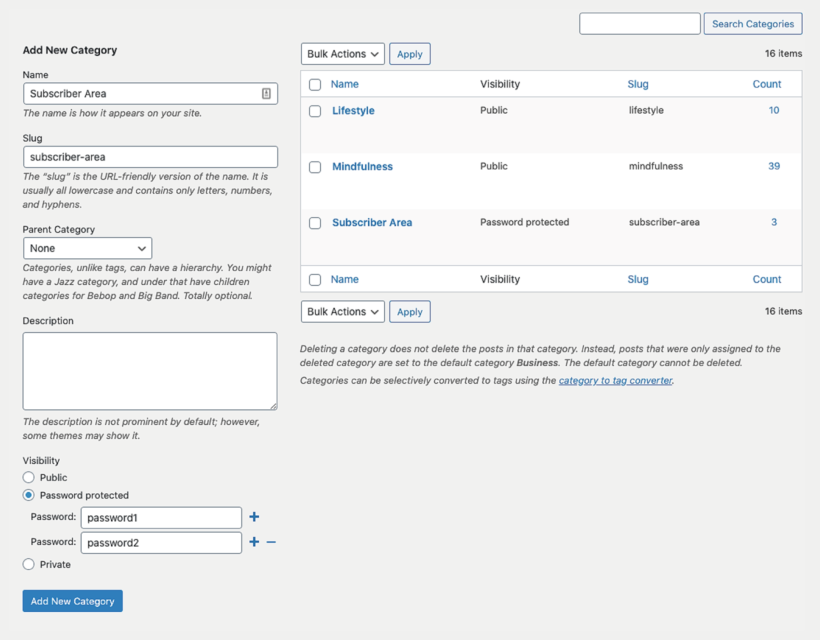
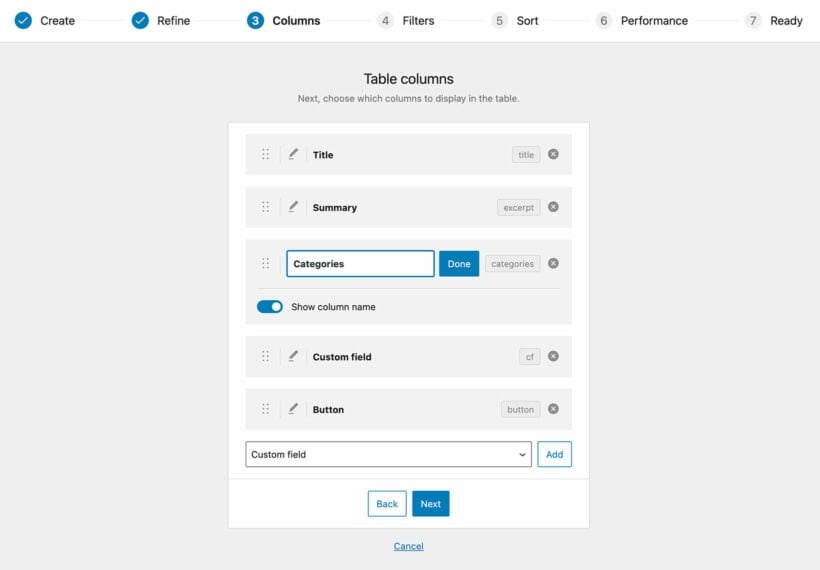
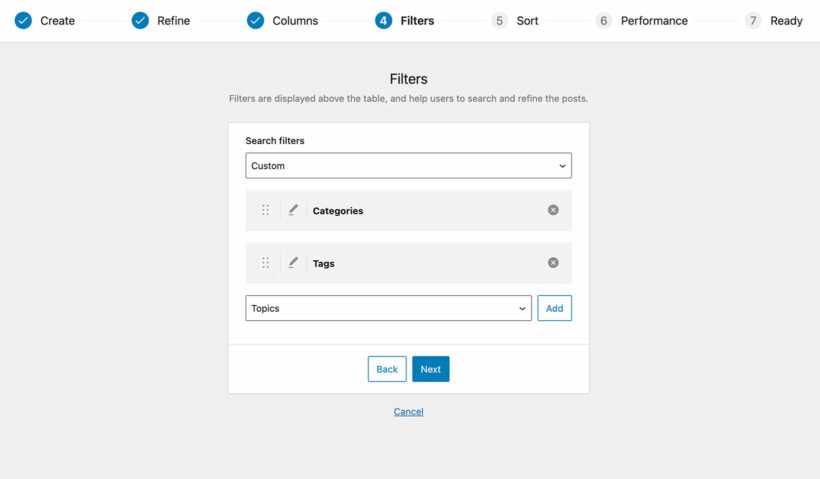
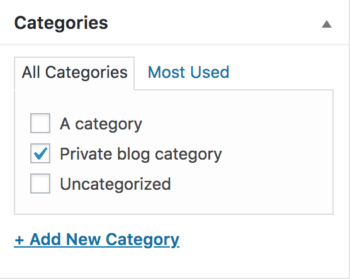
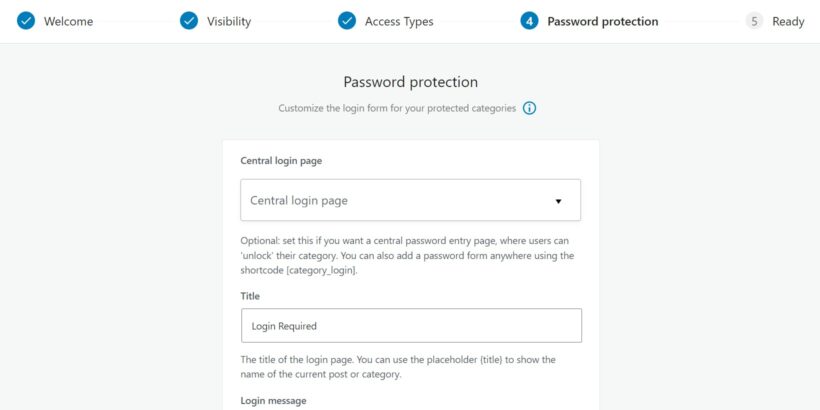
  1. Start by creating a category or editing an existing category. You could name it ‘invite-only event’. You will notice that this WordPress private page is identical to the event creation page except there is an added visibility option.
  2. In the Visibility settings, select the Protected option.
    private WordPress site category
  3. If you want the event to only be attended by People with the password select the Password-protected checkbox and add a password. Anyone with a password can attend, it doesn’t matter whether they are users on your website or not.
    password protect category WordPress
  4. If you want the event to be accessible based on user roles, select the user role checkbox. Once you've done that, define the user roles you wish to invite in the roles dropdown.
    password protect user role WordPress
  5. If you want the event to be attended by specific users only for example specific contributors and subscribers, select the Users option and specify them.
    protect category user WordPress
  6. Click on Add new category to finish.
  7. Create the invite-only event or edit an existing one and assign this category to it. That’s it.

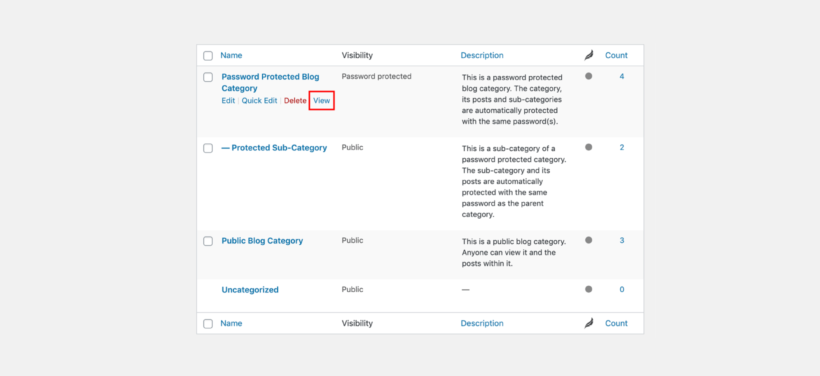
Once you create a parent category, the sub-categories automatically inherit the password-protection you set for the parent.

We have been looking at how you can make a website partially private, but what if you want to make your whole website private? Keep reading to find out how.

How can you restrict access to your blog?

WordPress private blog

As you've probably gathered by now, the Password Protected Categories is perfect for many different purposes. One of its most popular uses is to create a private or partly private blog. As a result, I'll give you a more detail about this before we move on to the next way to make WordPress private.

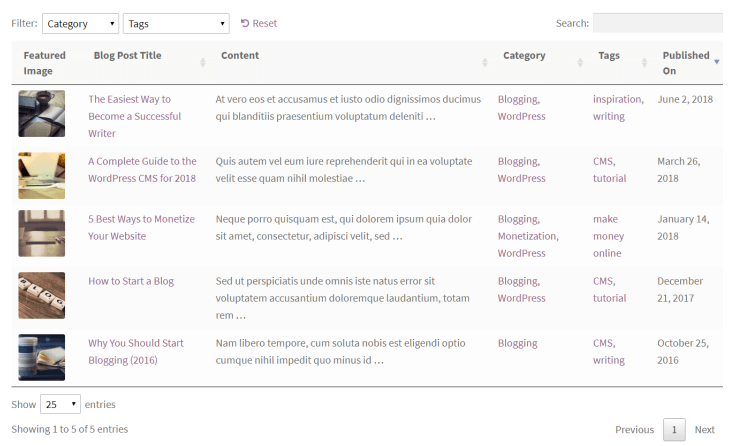
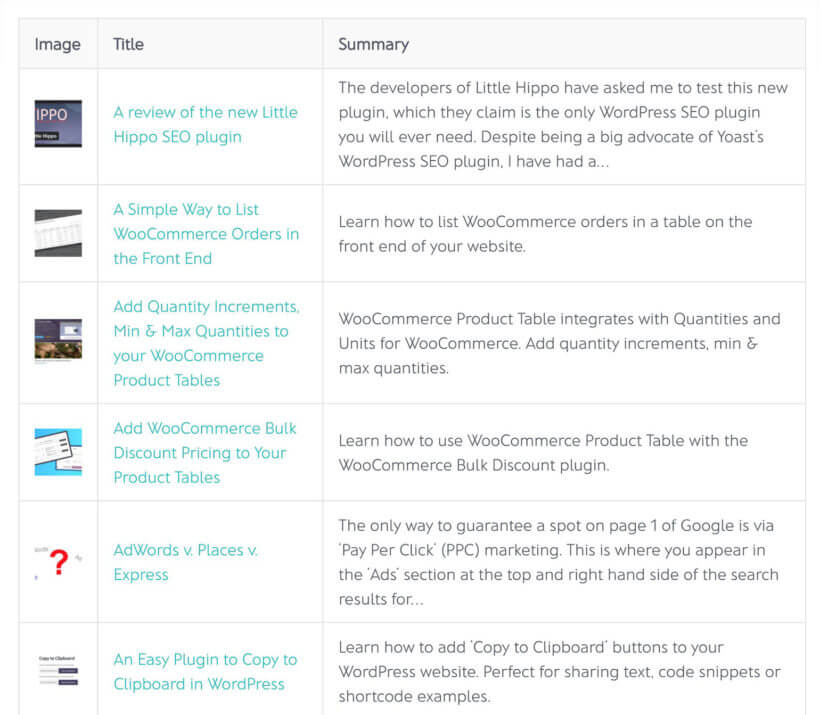
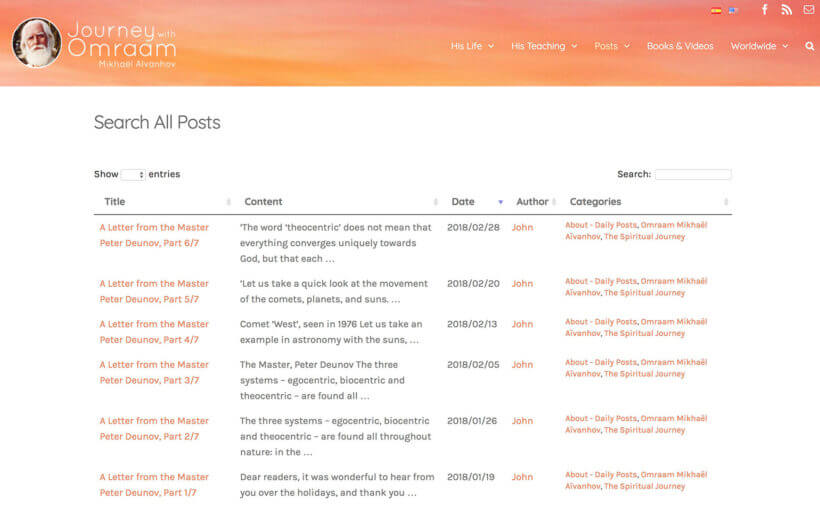
By creating password-protected categories and assigning posts to them, you can restrict access to specific parts of your blog. For example, you could create a private category for personal blog posts that you only want to share with close friends and family. Alternatively, you could create a private category for premium content that is only accessible to paying members.

Here's another example. If you are running a blog related to your business or industry, you may want to have some public content available to attract new visitors and customers, while reserving other content for a private audience. This could include premium articles, research reports, or case studies that only paying customers can access. By creating a private category and restricting access using the Password Protected Categories plugin, you can ensure that only authorized users can view the private posts.

On the other hand, if you are running a personal blog and only want to share certain posts with a select group of people, such as your family or friends, you could create a private category for these posts and share the password only with the people you want to grant access. This allows you to maintain your privacy while still sharing some content with a limited audience.

Whether you need to create a completely private blog or a partly private one, the Password Protected Categories plugin can help by restricting access to specific categories and posts. This ensures that your content is only accessible to authorized users. It therefore creates a more exclusive and personalized user experience for your visitors.

3 ways to create a 100% private WordPress site

This section is for you if you're looking for instructions on how to make WordPress site private.

If your entire site contains highly sensitive information, for example, personal journals, making all of it private is a must. In this way, there is zero public access to your site content and you get to specifically choose who can access it. WordPress doesn’t enable you to do this by default, but there are methods you can explore.

With WordPress private site plugins, you don't have any fine-grained control. Your site's entire front end is either disabled or available for everyone to view. If that's what you want, then the following plugins will help. Otherwise, use a plugin with more flexible functionality like Password Protected Categories.

1. Password Protected plugin

password protected plugin WordPress

Password Protected is a free plugin that provides a very simple way to quickly protect your WordPress website with a single password. It provides an option to allow users to access feeds and admins and logged-in users to log in without the password.

If you want to know how to make a WordPress site private then this is the easiest option. All you have to do is install and activate it the way you would do for any other WordPress plugin. You also need to enable it on the settings page, enter the password, and define access roles that can bypass the password. This is the simplest way to make your website 100% private.

2. .htaccess protection

The .htaccess file can be used to secure all the files on your website. It is dependent on your hosting service provider. It is one of the most powerful tools to protect your website, but also the least user-friendly. You’ll need to add PHP code to protect the .htaccess file. You will also need some knowledge of Apache commands. So if you’re not tech-savvy then I don't recommend this method to make WordPress site private.

To learn how to create a private WordPress site using this method, check out this guide to the .htaccess file.

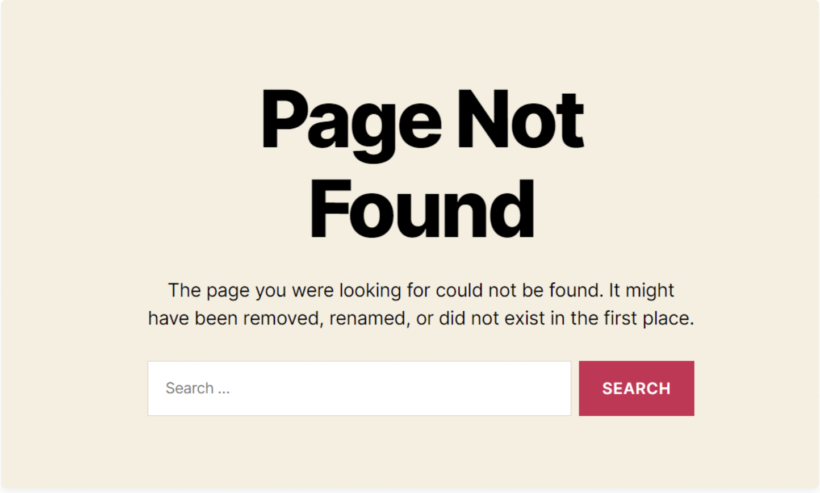
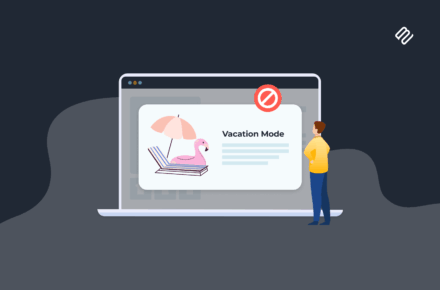
3. Maintenance mode plugin (Coming soon plugin)

Maintenance mode plugin

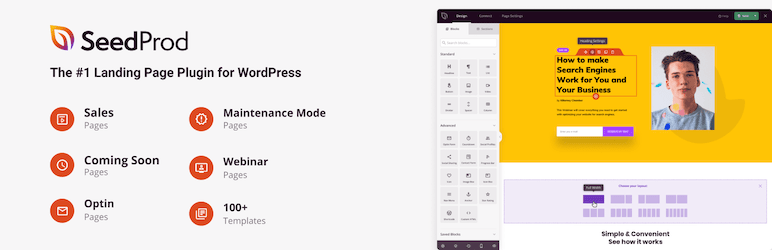
This plugin allows you to create a Coming Soon page, Maintenance mode page, landing pages, and Custom 404 pages. A coming soon/maintenance mode page enables you to continue to privately build your website while the visitors see the ‘Coming Soon’ or ‘Maintenance Mode’ page. This helps in building anticipation for when the website will be available for public use.

You can display a portion of the information on your services to users. You get to have an audience even before your website is not yet live with the coming soon page. The maintenance mode page keeps your audience at bay, informing them that your services will be back shortly.

Create a WordPress private site today

Password Protected Categories cropped

In this post, you’ve discovered 5 methods for how to make a WordPress website private. When you want to make parts of your website private while the rest of it remains public in the front end, you can use:

  • Standard WordPress features to change the visibility settings of your individual posts or pages. (Not recommended.)
  • The Password Protected Categories plugin to protect your categories and taxonomies then assign posts, events, pages, etc. to these protected categories.
When you want to create a 100% private WordPress site, you can use:
  • Password Protected plugin – a free plugin that lets quickly protect your WordPress website with a single password.
  • .htaccess protection – a very secure method of protecting the .htaccess file. It is not user-friendly since it requires some knowledge of coding.
  • Maintenance mode/coming soon plugin – to allow you to work on your website in private while visitors see a ‘Coming Soon’ or ‘Maintenance Mode’ page.

Password Protected Categories allows you to easily protect any category or taxonomy, hiding private content from public view. It saves precious time and effort while making it easy for you to customize access to parts of your website.

Click here to get started with Password Protected Categories and ensure that your website’s private content remains private.

How to Use Categories and Tags for Pages in WordPress

Did you know categories and tags in WordPress can be used for pages as well as posts? Creating WordPress page categories allows you to organize your website’s content making it easy for users to navigate through it. You can then display pages by category, restrict access to them, and lots of other fun stuff.

Categories and tags can be used to organize and sort your WordPress pages and content to improve your website's navigation structure. However, in a default WordPress website, you can’t add categories to pages - you can only add them to posts. Watch this video or read on for a clever solution.

So, in this article, we’re going to show you how to:

  • Easily create WordPress page categories and tags.
  • List WordPress pages by category.
  • Allow users to find pages by category using easy on-page filters.
  • Create private WordPress page categories so that only authorized users can see and access them.

Yep, it's 4 WordPress tutorials in one! But first, let’s look at the difference between pages and posts in WordPress.

What is the difference between posts and pages?

A lot of people wonder about WordPress pages vs posts. After all, they seem similar but are actually designed for different purposes.

WordPress pages are similar to posts and can be created in the same way. Pages are made for static content such as the About Us page, FAQ pages, Terms of use, etc. Posts, on the other hand, are made for dynamic content such as blog posts, think pieces, news articles, etc.

posts WordPress

Posts are archived by WordPress since the authors and the time of publication are relevant. This is why the tag and category options are available for posts. They enable users to easily find the information they are looking for within the WordPress archive page. Pages on the other hand do not have tags and category options.

pages in WordPress

WordPress categories vs tags

It's also worth explaining the difference between WordPress categories vs tags.

When creating content, two important tools for organizing your content are categories and tags in WordPress. While they may seem similar at first, there are some key differences between them.

Categories are used to organize content into broad topics or themes. They are hierarchical in nature, meaning that you can create parent and child categories to create a logical structure for your content. For example, if you're a good blogger, you might create categories such as "Recipes," "Restaurants," and "Cooking Tips." You could then create child categories under "Recipes" such as "Vegetarian" or "Desserts." Categories are typically displayed on your WordPress site as a list of links, making it easy for users to navigate to related content.

Tags, on the other hand, are used to provide more specific details about the content. They are non-hierarchical and allow you to add keywords or phrases to describe your content in more detail. For example, if you have a blog post about a vegan dessert recipe, you might use tags such as "vegan," "dessert," and "recipe." Tags in WordPress are typically displayed as a cloud or a list of links, allowing users to easily find related content.

The main difference between categories and tags is the level of specificity they provide. Categories are used to group content into broad topics, while tags provide more specific details about the content. Categories are hierarchical, while tags are not. Another difference is how they are displayed on your website, with categories typically being displayed as a list and tags as a cloud or a list of links.

Do I want page categories or tags?

It's important to use both WordPress categories and tags effectively to help users find related content on your website. Categories provide a broad structure for your content, while tags allow you to provide more specific details. When creating content, consider which category it belongs to and which tags would be most relevant. By using WordPress categories and tags effectively, you can create a more organized and user-friendly website that is easy to navigate and explore.

It sounds like adding categories and tags in WordPress to pages would be valuable to both your site and the users. However, WordPress doesn't have categories or tags for pages! Let's look at why next, and then how you can add them anyway.

Why doesn't WordPress have page categories?

In the WordPress Dashboard, navigate to the 'Posts' section. Sure enough, you'll see a 'Categories' section in there.

Now go to the 'Pages' section. Where's the 'Categories' section?

That's right, page categories don't exist in WordPress.

While WordPress offers many useful features to create and organize content, one limitation that users often face is the inability to categorize pages.

Unlike posts, which can be assigned to WordPress categories and tags, pages are designed to be static and hierarchical in nature. They are typically used for content that doesn't change frequently, such as "About Us" or "Contact Us" pages. Pages also serve as a foundation for organizing the structure of a website, with the parent-child relationship between pages used to create menus and submenus.

So, why are there no WordPress page categories?

The answer lies in the fundamental differences between posts and pages. Posts are designed to be time-sensitive and organized by categories and tags to make it easier for readers to find specific content. Pages, on the other hand, are not designed for frequent updates. They're not intended to be displayed in a list format, making categories less relevant.

Another reason why categorizing pages is not a built-in feature of WordPress is that it could potentially confuse users and complicate the structure of a website. If pages were to be categorized like posts, it could lead to a cluttered and confusing hierarchy, making it difficult for users to find what they are looking for.

But I want to categorize my WordPress pages!

In my opinion, there are lots of valid reasons to create WordPress categories. It all depends on how you're using pages, and how you're structuring your content.

Fortunately, there are easy solutions to this limitation in WordPress. These are no-code solutions and beginner friendly. You don't need to edit any PHP or edit the functions.php file.

One option is to use custom taxonomies, which allow you to create new WordPress categories and tags for your pages. This requires some technical knowledge, but there are plugins available that can simplify the process. I'll tell you about the best plugins for creating WordPress page categories in a minute.

Benefits of using page categories and tags in WordPress

They improve your SEO

Using categories and tags to sort your WordPress website content helps to drive organic traffic to your site. Tags resemble the keywords that users perform searches with. When they use these keywords, search engines (mainly Google) are more likely to direct them to your website. This will boost your overall domain authority and Google SERPs ranking.

They improve user experience

Sorting your content makes it more easily accessible and readers can easily navigate through it. They will be able to find the content they are looking for much faster, which reduces bounce rates and improves reader satisfaction. It is also more likely to increase conversions for the clicks that your WordPress website is receiving.

Now that you have seen the importance of tags and categories for your pages, when you should use them?

When should you use categories, tags, or custom taxonomies?

Categories in WordPress are used to broadly group related pages. Suppose you sell shoes in a WooCommerce shop, you could have the following categories: men’s shoes, women’s shoes, etc. Within these categories, it is advisable to have sub-categories (for example men’s sneakers), as categories tend to have a hierarchical structure.

product categories WordPress

Tags on the other hand have no hierarchical structure. They label particular topics within a page. For this reason, it’s common to find multiple tags on a single page. In the above example, you can add tags such as ‘stylish shoes’, ‘budget shoes’, etc. Tags may cut across different categories and sub-categories.

product tags WordPress

There is another option to create custom taxonomies when you want to group pages in multiple ways, for example, category and department. In a nutshell, use categories for organizing your pages into logical groups and tags to label a particular topic within a page (no hierarchical structure). Finally, use custom taxonomy if you intend to group pages in multiple ways.

The next step after knowing when to use categories and tags for your pages is knowing how you can enable them for your pages.

The best plugin to enable categories and tags for WordPress pages

Easy post types and fields plugin

The easiest way to enable categories and tags for your WordPress pages is by using a plugin. We recommend using the free Easy Post Types and Fields plugin for this. This free plugin from wordpress.org lets you quickly add categories and tags to your WordPress pages. While it's designed for adding and editing custom post types, it works perfectly for pages too. After all, pages are a WordPress custom post type!

It's an excellent way to categorize pages because it can do everything you need, including:

  • Creating page categories
  • Enabling tags for pages in WordPress
  • Creating additional custom taxonomies so that you can group pages in multiple ways, as needed. For example, you might want to do this to group pages by extra data such as 'Year', in addition to having page categories.

Once you've created WordPress page categories, I will show you how to list pages based on these categories, tags, and taxonomies. I'll also explain how to allow users to filter by category when viewing a list of posts, and how to restrict access to specific categories.

How to enable categories, tags, and taxonomies for WordPress pages

  1. In the WordPress Dashboard, go to Plugins → Add New.
  2. Search for 'Easy Post Types and Fields' and install the plugin from Barn2 which appears in the results.
  3. Go to the 'Post Types' section in the WordPress Dashboard and click on the 'Other Post Types' tab.
  4. Find 'Pages' in the list of post types on your site, and click the 'Taxonomies' button.
  5. Now add a singular and plural name for your page categories. These will only be used in the WordPress admin. For the 'Slug', I recommend adding something specific to pages to distinguish it from other types of categories on your WordPress site. Make sure you tick the 'Hierarchical' box - this lets you create sub-categories of pages in a nested parent-child structure.
    WordPress page categories plugin
  6. Now click the 'Add taxonomy' button to finish enabling WordPress page categories.

How to add a tags section for WordPress pages

You can also use the instructions above to enable WordPress page tags. The only difference is that this time, you should not tick the 'Hierarchical' box.

Once you've added a category called something like 'Page tags', the tags section will appear on the right-hand side of the Edit Page screen. It will look exactly like WordPress tags for posts, which are part of WordPress itself.

If you've wondered how to use tags in WordPress, you just click on the tags which appear here or add new ones. You can also manage them centrally using the tags link which appears on the left of the WordPress admin. (This is under the menu for your post type - so in this case, it appears under the 'Pages' link in the Dashboard.)

How to add WordPress taxonomies to pages

Need to create taxonomies to group pages in even more ways? Just follow the instructions for creating WordPress page categories to create additional custom taxonomies for your pages.

Assign them to the correct pages

Once you enable categories, tags, and custom taxonomies for your WordPress pages, all you have to do is to go to the pages tab to assign your pages to them as needed. Click on the Edit button when you hover on the page title, and select the category/tag/taxonomy you would with the content to belong to. You can also use the Quick Edit button which offers a faster way of doing this.

Add as many categories as you want. You can also add any number of tags and WordPress taxonomy terms. There's no limit.

After organizing your content into categories/tags/taxonomies you would want this information displayed centrally on the front end where the users of your website can easily access it.

How to display categories and tags on your website

Posts Table Pro blog posts in table layout with renamed columns and filters
Use the Posts Table Pro to list pages, with columns and filters for categories and tags

Since WordPress pages don’t have categories/tags/custom taxonomies by default, your theme probably won’t display them on the front end. This can be easily fixed by installing the Post Table Pro plugin. It's an excellent alternative to archive pages, and much more flexible.

Post Tables Pro lets you:

  • Display categories and tags in a table for your users to navigate through your website’s content. Instead of adding your data manually, the table is generated automatically displaying a list of your site's pages.
  • Either list all pages and let people filter by category or tag, or use a shortcode to list pages from a specific category or tag.

Step-by-step tutorial - How to list WordPress pages in a searchable, filterable table with categories and tags

  1. Upon installation of the plugin, an automatic setup wizard will be launched to assist you in creating your first table. However, if you are already familiar with the plugin or would like to get started immediately, you can create new tables at any time by navigating to Post Tables → Add New.
  2. Start by giving your table a name and selecting the post type you wish to display. If you do not yet have a content type, you can create one using the free Easy Post Types and Fields plugin.
  3. Next, select the posts or pages you would like to include in the table. The available options will vary based on the post type you selected in the previous step. For instance, if you chose a post with custom taxonomy, the relevant taxonomies will be listed for you to select.
  4. Customize your table to suit your preferences. You can determine which columns to display and in what order. To add a new column, choose the column type from the dropdown menu and click "Add". You can also reorder columns by dragging and dropping the sort icon or column heading.
  5. Filters appear as dropdowns above the table, and you can add as many as you like. It is important to note that available filter options will vary depending on the post type selected on the first page.
  6. Enable lazy loading to improve the table's performance, even when containing hundreds or thousands of items.
  7. Choose how to sort the table. You can set the default sorting option and the sort direction.
  8. Finally, the wizard will confirm that you have finished creating your table and provide instructions for inserting it onto your site.

How do you choose the posts that appear in the table?

There are plenty of ways to select which posts to include in your table with Posts Table Pro. You have the flexibility to display posts based on various criteria such as category, tag, post type, status, custom taxonomy term, custom field, or date (year, month, or day).

Moreover, you can choose to hide specific posts from the table by their ID and exclude particular categories. The most commonly used options are readily available in the table builder when you create a new table. If you need more advanced options, they are also accessible in the shortcode. You can find full instructions for all the page shortcode options here.

page categories in a table WordPress

To display the table on your WordPress site, you can either use the 'Post Table' block in the Gutenberg editor or copy the shortcode from the table builder and paste it anywhere on your site. This gives you the flexibility to place the table on any page regardless of its content.

How to restrict access to specific WordPress page categories or taxonomies

By now, you know how to create WordPress page categories. You also know how to list pages in a searchable table with their new categories.

Finally, I'm going to show you how to hide pages based on categories and taxonomies. This lets you restrict access to specific page categories or taxonomies to a given set of users.

Protecting your categories and taxonomies lets you grant controlled access to your website’s content. The Password Protected Categories plugin allows you to create private areas in your website by hiding categories and taxonomies from users who do not have access.

3 page restriction options

The Password Protected Categories plugin comes with 3 types of protection for your WordPress page categories and taxonomies:

  • Password protection - only people who know the password can access the category or its pages.
  • Role protection - logged-in users with the correct role can access the category.
  • User protection - only specific logged-in users can access the category.

You can use Password Protected Categories to protect new categories or existing ones. Everything on the edit/add new category page remains standard. The only change is that the plugin adds a visibility section where you can assign a password to a page category or custom taxonomy.

Under the visibility section, you will need to select the checkbox for one of the protection options. Either enter a password and/or select the roles and users who will have access. All pages assigned to this category will be protected.

password protected categories - user roles & users option

If you have assigned a password to the parent category, you do not need to do the same for the sub-categories. Because sub-categories inherit the password protection of their parent category. Password Protected Categories only lets you protect hierarchical taxonomies. So you would need to use categories or custom taxonomies instead of tags.

How do page categories affect my SEO?

Before we finish, let's talk a little about the impact of page categories on SEO (search engine optimization). Essentially, the advice about this is the same as for optimizing WordPress post categories.

WordPress page categories can have a significant impact on your website's SEO efforts. By using categories effectively, you can make it easier for search engines to crawl and index your content, which can lead to higher rankings and more traffic.

One important factor to consider when using categories for SEO is the use of the "noindex" tag. This tag can be added to a category page to tell search engines not to index that page. This can be useful if you have a category page that doesn't add any value to your site or could be seen as duplicate content.

Another important factor is the use of permalinks. Permalinks are the permanent URLs for your pages and posts. By default, WordPress uses a format that includes numbers. However, you can change this to include the post or page name. This can be more SEO-friendly. Using descriptive permalinks that include the page category can help search engines understand the content of your page.

Using an SEO plugin like Yoast SEO can also help you optimize your page categories for search engines. Yoast SEO allows you to add meta descriptions, title tags, and other important SEO elements to your category pages. This can help improve your visibility in search results and drive more traffic to your site.

Should I worry about duplicate content when adding page categories?

Finally, it's important to avoid duplicate content when using page categories. Duplicate content can occur when you have multiple pages with the same content, such as when you have multiple pages with the same category. To avoid this, make sure each category page has unique content and is not duplicating content from other pages on your site. This can help ensure that each page is unique and valuable to both users and search engines.

You can always use the canonical URL feature in your SEO plugin to avoid duplicate content issues with page categories. This involves marking which version of a page or category is the most important, so the search engines ignore any duplicates which point to it.

It’s time to organize your WordPress pages

Adding categories and tags to your WordPress pages allows you to organize your content for your users to easily navigate through it. WordPress does not allow you to categorize and tag pages by default. Fortunately, these plugins allow you to do this:

The end result? A perfectly categorized and displayed set of WordPress pages, which your users will find a pleasure to navigate.

WordPress Private Pages for Subscribers

'As a website owner or blogger, one of the things you might want to do is create private pages in WordPress. These pages can either act as a private blog, useful resources exclusively for subscribers, or something entirely different.

One thing’s for sure, by using WordPress to create subscriber-only content, you’ll be able to:

  • Attract more signups 
  • Encourage website re-visits and 
  • Reward the loyal subscribers on your email list

The use cases of a WordPress Private Page

  • To run membership sites /exclusive communities and forums: Exclusive content can be made private with access only for community members. It is typically used by affiliate marketers, course creators and even brands that offer premium membership for exclusive offers.
  • For internal departmental use: Organisations like schools, universities and companies use private pages to store and maintain internal documents, coursework, sensitive information, private blogs etc.
  • For content that is a work-in-progress: A WordPress Private page is perfect for work that needs tweaks. It can be used when multiple people are designing or brainstorming together (like a product launch page), or for content that simply isn't ready yet.

By the end of this article, you’ll walk away knowing how to create private pages for your email subscribers and for specific user roles in WordPress. The best part? We’ll show you how to have it up and running in a matter of minutes using the WordPress plugin, Password Protected Categories.

Creating a WordPress private page for subscribers 

How it works

From the user's perspective, here’s how your WordPress subscriber only content will work:

  1. A site visitor signs up to your email list to gain access to your subscriber-only area.
  2. Once they’ve signed up, they’ll receive a welcome email which contains a URL and password to gain them access.
  3. They click the URL which takes them to a landing page. This page contains a simple form asking them to input a password.
  4. Once the password is entered and they click ‘Login’, they’ll have access to your subscribers only area.
  5. This subscribers area will contain resources, private articles and more in the form of either posts or pages within WordPress.

This tutorial contains step-by-step instructions for each of these stages, so continue reading to start creating WordPress subscriber-only content.

How to create WordPress private pages for your email subscribers

So let’s get to it. In this section, we’ll outline how to create your WordPress private pages in just 5 simple steps.

Note: This tutorial presumes you have an existing WordPress site set up.

Step 1: Install Password Protected Categories

To get started, get Password Protected Categories plugin from the Barn2 store: https://barn2.com/wordpress-plugins/password-protected-categories

Then follow these steps:

  1. Go to PluginsAdd NewUpload Plugin.
  2. Choose the zip file you downloaded, upload, and then click Activate.
  3. Once activated, you’ll need to enter your licence key.
License key activation for Password Protected Categories WordPress plugin

Now that we have Password Protected Categories installed, we can move onto creating our private pages.

Step 2: Create your subscriber only categories

At this stage, you’ll want to decide if you’d like to have your private WordPress subscriber only content as pages or posts. If you’d like to have it as pages, you’ll need to install a free plugin to allow them to be categorized, as WordPress doesn't provide page categories by default. This guide will help you set it up.

Next, you’ll want to create the category page that’ll have all the subscriber-only pages or posts inside it. This will act as your private subscriber-only landing page.

  1. Go to Posts or PagesCategories.
  2. In the Add New Category section, give your new private subscriber area/category a name, slug and description (optional).
  3. Scroll down to the Visibility section and click the Password protected checkbox.
  4. Here you can add one or more passwords for your protected subscriber area. This will protect the category page and all the pages/posts inside it so that subscribers must enter the password to unlock them. 
  5. Click Add New Category and your new password-protected category will appear on the right-hand side of your screen with your other categories.
Steps to create private category page using the Password Protected Categories plugin

Step 3: Create your subscriber login page

The login page will act as a password protected barrier stopping non-subscribers from accessing the private content. Essentially, it contains a simple form field that requires the visitor to fill in with a password and click ‘login’ to gain access.

subscriber-only login

This step can be as simple or complicated as you’d like depending on your skill level. You can either:

  1. Link directly to the category page. This can be added to your navigation menu, website footer, or welcome email you send to new subscribers. You can find the link by going to: 

    1. Posts or PagesCategories.
    2. Hover over your password-protected category and click View.
    3. Copy the URL of this page.
password protected category page link
  1. Create a subscriber area login page. This technique works well if you want to add extra information to your page or if you’re creating separate password-protected categories for different types of subscribers. 

    1. Go to PagesAdd New.
    2. Give your page a name.
    3. Paste the shortcode [category_login] into the page text area.
    4. Then, add whatever extra content you desire to the page, click Publish and you’re done.
Creating a private page for subscribers login

Step 4: Create your WordPress private pages/posts

Now the category that hosts your private pages/posts has been created, it’s time to create the pages/posts themselves. This involves using WordPress to make pages visible to subscribers only. Again, the Password Protected Categories plugin makes this easy. 

This part is pretty straightforward and depending on how much content you want to add, will only take a minute:

  1. Go to Pages or PostsAdd New.
  2. Add your page/post content as you wish. This could be anything from private articles to downloadable resources, videos, pdfs and more.
  3. In the Document section on the right-hand side of your screen, scroll down to the Categories section.
  4. Check the new password-protected category you created earlier.
  5. Once ready, click Publish and your new page or post will be added to your password-protected page.
Create and publish private page

By default, Password Protected Categories hides these posts or pages from the public-facing areas of your site (e.g. widgets and navigation menus). If you’d like them to appear there, you can do so in the Password Protected Categories settings. Just go to SettingsProtected Categories. Scroll down to the Category Protection section and tick the checkbox next to Show protected categories? That way, people will see the login page if they try to access any WordPress subscriber only content.

show private pages in WordPress

Step 5: Tell your subscribers

Now that you’ve created your private pages for subscribers in WordPress, it’s time to tell them about it. You’ll want to tell existing subscribers and have a way to incentivise new blog visitors to sign up too. Here’s how to do both.

Tell your existing subscribers

To tell your existing email subscribers, you’ll simply need to send them an email with a link to your newly created protected area. Within this email, you’ll want to add the page link and password so your subscribers can gain access to the hidden content. 

Incentivise new blog visitors to sign up

To encourage new blog visitors to sign up and gain access to the WordPress subscriber only content, you’ll want to add an email signup form to your website.

MailChimp email signup

We recommend MailChimp. You can use this to send notifications of your new private blog articles and resources to your subscribers. Find out how with our tutorial below, which includes instructions on how to:

Now that you have MailChimp up and running, you’ll need to create a welcome email. This will be sent to all new subscribers and will contain both the link to your subscriber-only area and the password.

To do this, open up your MailChimp dashboard and do the following:

  1. In your MailChimp account dashboard, click the Automate drop-down menu and click Email.
  2. Then, click the Subscriber Activity tab and click Welcome new subscribers.
MailChimp welcome email
  1. In the Single email tab, enter a campaign name (this is just the name of your welcome email) and click the drop-down menu to choose your audience (previously called ‘list’ in MailChimp). If you need help with setting up your audience, read our tutorial here
  2. Once ready, click Begin.
  3. Next, you’ll be able to add your welcome email content. Make sure to add the URL of your private subscriber area and the password. 
  4. Once happy, click Start Sending and your new email subscribers will automatically be sent this new email once they sign up.
MailChimp new subscriber email settings

Creating WordPress private pages based on
user roles

You won’t need any plugins for this, you can use default WordPress to make pages accessible only to the admin and editor user roles. Here’s how: 

  • Go to the Page settings on your WordPress Admin dashboard.
  • Navigate to “Visibility” in the Publish section located on the top right corner of the page and click on “Edit”.
  • A dropdown list will open with “Public” selected by default. Choose “Private” and click on “OK”.

 Editing visibility from WP admin dashboard

  • This page is now accessible only to those with the admin and editor user roles. Site visitors and those with other user roles, will be shown a simple “Page Not Found” message since they do not have the right permissions.

That’s it, you can now set up a private subscriber-only area and make pages private to admin and editor user roles. With a private subscriber-only area or private blog up and running, you’ll be able to encourage more email signups, automate sending out private content (including new product offers) and add new pages/posts within a matter of minutes.

Make this setup quick and risk-free with Password Protected Categories.

WordPress post table blog index

'If you run a successful WordPress blog – or are planning on building one – chances are you post a lot of content. While dedicated readers may check out every new article as soon as it's live, you’ll want a way to draw everyone's attention to the posts you want them to see.

A WordPress post table is the perfect way to do just that. It enables you to list some or all of your blog posts in an attractive, organized tabular grid format.

You can provide key information about each article to encourage clicks. You can make it easy for readers to search and filter the table for specific content.

In this guide, we’ll explain exactly what a WordPress posts table is and what you can do with it. Then we’ll show you how to set one up easily, using the Posts Table Pro plugin. Let’s get right to it!

What a WordPress post table is (and why it’s so useful)

Most blogs rely on search fields and sidebar menus to help readers find the posts they’re looking for. These features are a good start, of course. However, they often require visitors to sort through pages of search results or complex archives. This isn't a good way for readers to find information about a particular topic.

A WordPress post table plugin provides a better way to organize and display your blog posts:

A Posts Table Pro demo.

As you can see, this is an organized list of blog posts presented in a table format. A post table provides a lot of key benefits. For instance, you can:

  • Display all your posts, one or more specific categories, or a carefully curated collection.
  • Choose exactly what information will appear in the table, so you can peak visitors’ interest effectively.
  • Enable readers to search through, sort and filter the table at will, in order to find what they want quickly.

What’s more, a WordPress post table plugin offers an attractive way to show off your content. It doesn't even need to take the place of any other part your blog, since you can add it to any page. Instead, you can use it as an additional way to navigate your blog, like a WordPress post index.

Let’s look at how to create a table of blog posts for your own WordPress site.

Case study - WordPress post table for Journey with Omraam blog

WordPress post index page plugin

The inspiration for our Posts Table Pro plugin originally came from one of our web design clients, Journey with Omraam. They wanted a WordPress post table to use as an index for their growing blog.

The solution was a table layout allowing users to search and sort all their blog posts. The post table includes various information to encourage users to click through to read each post. There are columns for post title, content, publish date, author and a filterable list of categories. The search box above the table lets users search for blog posts with any keyword.

See the Journey with Omraam post index in action.

As you can see, adding a post table made Journey with Omraam's blog much more user-friendly. Next, I'll share how you can make your own blog easier to navigate too.

How to create a compelling WordPress posts table for your blog (in 3 steps)

WordPress is a powerful platform, which enables even complete beginners do many things easily. Unfortunately, creating a fully-featured table of any sort is not one of them. While you could put together a table by hand using code or a manual entry table plugin, the result is likely to be underwhelming. It would also take you a lot of time, as you'd have to add each blog post to the table by hand.

Instead, let me introduce you to the Posts Table Pro plugin:

This dynamic table plugin helps you build an attractive and feature-rich WordPress post table in minutes. Your blog posts are automatically displayed in a searchable table layout with filters - no manual data entry. Plus, you can customize your posts table to look and work just the way you want.

In the following walkthrough, I'll show you how to use this WordPress plugin, and offer some tips for creating the perfect posts table.

Check out the Posts Table Pro demo!

Step 1: Install and activate Posts Table Pro

The very first thing you’ll need to do (if you haven’t already) is purchase the Posts Table Pro plugin.

When you do this, you’ll be provided with a few things. The most important will be a zipped folder containing the plugin itself, and a license key for activating it. Make sure you save both somewhere safe.

Upload the plugin to your WordPress admin by going to Plugins → Add New → Upload Plugin, selecting the zip file, and activating it. The setup wizard will then guide you in a step-by-step process to create your first table.

Activating the Posts Table Pro plugin.

Step 2: Configure your WordPress post table settings

Technically, you could skip this step and jump straight to adding a WordPress posts table to your site. This would generate a table using the plugin’s default settings. However, you’ll probably want to customize your post table at least a little, to better match your vision.

Upon the plugin's initial installation, an automatic setup wizard will launch, providing a step-by-step guide to creating your first table. After creating the table, you can customize its appearance. Additionally, you have the option to generate new tables anytime by going to Post Tables → Add New.

Select an exclusive name for the table that will only be used internally and appear on the list of tables in the WordPress admin. Afterward, select the post type you wish to showcase. If you haven't created a content type yet, you can quickly generate one using the free Easy Post Types and Fields plugin.

Choose what type of content to display

Customize columns in WordPress table plugin

This is a vital setting since it’s what lets you customize which information appears in your post table. You can add a column by choosing the type of column from the dropdown menu and clicking 'Add'. The added columns appear in the list of columns above, and you can reorder them by dragging and dropping the sort icon on the left or the column title.

You’ll find a list of all the column options in the Posts Table Pro documentation. At the least, we’d suggest displaying each post’s title, category, date, and featured image. You may also want to include the name of the author, as well as either the content or excerpt column (although using both might be confusing to readers).

Customize search and filter settings

WordPress table builder plugin with filters

You can incorporate filters into your table to assist users in refining their selections. Keep your target audience in mind while considering which filters would be most beneficial. Filters appear as dropdown menus above the table, and you can add as many as you require.

The filter options available are determined by the post type selected on the first page. For example, typical blog posts can be filtered by categories and tags, in addition to any custom taxonomies added.

Choose how to sort the table

Change sort order WordPress table

You have the ability to personalize the sorting options for your table by selecting the default sorting option and sort direction. This gives you control over the sequence in which the table is presented to your users.

Step 3: Add your WordPress post table to a page

It’s finally time to add a WordPress post table to your website. Technically, you can place it on any page, post, or custom post type. However, we recommend using a brand new page, so your table will be front and center. Alternatively, you may want to embed it on your home page.

Upon completing the creation of your table with the Post Table Pro plugin, the setup wizard will verify that you have finished and furnish you with directions for presenting the table on your WordPress site. You have two options for showcasing the table:

  • Using the 'Post Table' block in the Gutenberg editor or
  • Copying the shortcode from the table builder and pasting it anywhere on your site. This gives you the flexibility to position the table on any page, regardless of its content.

Here's an example of what your table layout might look like:

An example of a WordPress post table.

You’ll see your WordPress posts table, configured using all the settings you chose in the previous step. If there’s anything you want to modify, you can go back to the settings page and do so. Any changes you save will automatically be applied to your table via the shortcode, so you won’t have to recreate it.

That’s it! Your WordPress post table is fully functional and ready to go. Now, all you have to do is make sure it’s prominently placed and/or linked to your blog, so readers can start benefiting from it right away.

Where to get the plugin

Once you have a lot of content on your blog, you’ll probably start wondering if there are better ways to organize and display it. A WordPress post table is one of the best ways to make a blog easier to navigate. It’s simple to set up, yet robust when it comes to functionality.

As we’ve shown, the Posts Table Pro plugin makes showing off your content this way easy. All you have to do is:

  1. Install and activate Posts Table Pro.
  2. Configure your WordPress post table settings.
  3. Add your WordPress posts table to a page.

Do you have any questions about how to configure your WordPress post table? Ask us anything in the comments section below!

Image credit: pxhere.

WordPress archive plugin

When your website or blog has been going for a while, you’ll probably need to list posts on an archive page. Maybe you want to list WordPress posts from a specific day, month, year, author, category, tag, or something else. That’s when you need a WordPress archive plugin.

The best WordPress archive plugins provide a quick and easy way for your users to find previous posts or articles on your site.

Keep reading to learn how to use the Posts Table Pro plugin to create various types of archive listing posts on any WordPress website:

  • Build a WordPress date archive - either listing daily posts, monthly posts, or yearly.
  • Make an author archive page automatically listing blog posts by a specific user.
  • Create a category archive.
  • List posts in an archive along with extra post metadata such as featured image, date, excerpt, content, and author.
  • Create a responsive jQuery WordPress table-based archive with extras such as a search box and filters.
  • Structure your archive page by adding collapsible accordions or toggles, or list posts under multiple tabs (e.g. with a separate tab for each month).
  • Create a WordPress archive for normal blog posts or any custom post type.
  • Turn any page on your site into a WordPress archive page, or create a custom archive template.

Related Tutorial: How to Create a WordPress A-Z Index Listing.

The problem with WordPress archives

WordPress itself comes with an archive widget listing all the months. Users can click on a month to view the posts from that month. Your theme will also come with a category, tag, and author archive template.

The problem with these is that each of these archive pages uses the same layout as your main blog page. That’s not really what archives are for.

I believe that archives are a way for people to easily find older content on your site. For example, they might use an archive page to find posts from a specific date, category or tag. The default blog layout isn’t really suitable for archived posts. This is because there are so many of them and it’s hard to find what you want.

Instead, you need a WordPress archive plugin that lists posts in an easy-to-find format, with extra data about each one. That’s where Posts Table Pro comes in!

Posts Table Pro - the best WordPress archive plugin

WordPress archive plugin

Posts Table Pro is a WordPress table plugin ideal for creating any type of website archive. It groups and lists WordPress posts based on day, month, year, category, tag, author, and more.

By using Posts Table Pro as your WordPress archive plugin, you can create user-friendly archive pages that quickly direct users to the content they’re looking for. You can add extra post metadata in the table such as the featured image, categories, tags, date, author, and even custom fields and taxonomies.

Posts Table Pro

As well as structuring the archive in an easy-to-navigate way, you can add extra navigation elements to help users to find posts more quickly. For example, they can click on any column to sort the archived posts. They can click on dropdown lists above the table to filter the archive based on data such as category, tag, or author. There’s even a handy keyword search above the list of posts.

All of this helps people to navigate the WordPress archive and find what they want more quickly. Once they find posts they’re interested in, the extra data makes them more likely to click through compared to a basic archive that only lists post titles. It’s a great way to improve user engagement and reduce bounce rates.

Ok, so now you know why Posts Table Pro is the best WordPress archive plugin. Below, I’ll tell you how to set it up to create different types of post-archive pages. Alternatively, you can watch us setting up a WordPress archive in this video:

Build a date archive listing daily posts, monthly posts, or yearly

WordPress date archive pluginThe most obvious type of WordPress archive page is probably a WordPress date archive. There are several ways to do this:

  • It could be a daily archive listing all posts that were published on a specific date. Single-day archives are ideal for news websites that publish many posts or articles per day.
  • A WordPress monthly archive lists all posts from a specific month. This is useful for blogs that publish posts regularly but not necessarily every day.
  • Alternatively, a WordPress yearly archive is an annual archive listing all posts published in a specific year. Personally, I think that annual archives are over-used on WordPress websites. Unless you publish very rarely, there’s no point listing all posts from a specific year because there will be too many. However, this is an option if it suits your blog.

To create a WordPress date archive listing posts by day, month, or year, first get Posts Table Pro and install it on your website. Follow the steps below to create your table:

  1. Use the instructions in the confirmation email to install and activate the plugin.
  2. After activation, the Posts Table Pro setup wizard will automatically open and guide you through entering your license key.
  3. Upon installing the Post Table Pro plugin, an automatic setup wizard will guide you through the process of creating your first table. Alternatively, you can navigate to Post Tables → Add New to create a new table at any time.
  4. Give your table a name and then choose the post type you wish to display. If you don't have a content type, it will guide you to create one using the free Easy Post Types and Fields plugin.
  5. Select the posts or pages you would like to include in the table.
  6. Customize your table to suit your preferences. You can determine which columns to display and in what order. In this case, add the date as a column. To add a new column, choose the column type from the dropdown menu and click "Add". You can also reorder columns by dragging and dropping the sort icon or column heading.
  7. Filters appear as dropdowns above the table, and you can add as many as you like. Available filter options will vary depending on the post type selected on the first page.
  8. Enable lazy loading to improve the table's performance, even when containing hundreds or thousands of items.
  9. Choose how to sort the table. You can set the default sorting option and the sort direction
  10. After you have finished creating your table using the Post Table Pro plugin, the setup wizard will confirm that you're done and offer instructions on how to add the table to your WordPress site. You can either use the "Post Table" block in the Gutenberg editor or copy the shortcode from the table builder and paste it anywhere on your site.

How to create a weekly post archive

Posts Table Pro doesn’t have the option to list posts by week. However, you can create a WordPress weekly archive by combining the day, month, and year options to list all 7 days from a specific week.

For example, the example shortcode above will list all posts published in the first week of January 2018.

How to create WordPress archive posts by month

To create WordPress archive posts by month using Posts Table Pro, follow these steps:

  1. Install and activate the Posts Table Pro plugin on your WordPress site.
  2. Create a new page or edit an existing one where you want to display the archive.
  3. Add the following shortcode to the page where you want to display the archive: [posts_table columns="title,date" date_format="F, Y" sort_by="date" sort_order="desc"][no_shortcodes]
  4. Save or update the page.
  5. View the page to see the archive of posts listed by month.

The above shortcode will display a table with the columns for the post title and date, sorted by the date in descending order. The 'date_format=”F, Y”' parameter tells the plugin to group the posts by month. Finally, 'posts_per_page="-1"' displays all posts on a single page. You can customize the shortcode parameters as needed to suit your requirements.

How to create an annual archive

To create an annual archive using the Posts Table Pro plugin in WordPress, follow these steps:

  1. Install and activate the Posts Table Pro plugin.
  2. Create a new page or edit an existing page where you want to display the annual archive.
  3. Insert the following shortcode into the page: [no_shortcodes][posts_table columns="title,date" date_format="Y" sort_by="date" sort_order="desc" ][no_shortcodes]
  4. Save or update the page.
  5. Visit the page to see the annual archive of posts displayed in a table format, with columns for the post date, title, and content.

This shortcode will display a table with all posts from the current year, grouped by month. Each row will display the post date, title, and content. You can customize the columns and date format to fit your needs.

Make an author archive page

Posts Table Pro also comes with an ‘author’ option. This makes it easy to create a WordPress author archive page. It will automatically list blog posts published by a specific user.

To create an author archive, install Posts Table Pro and add the following shortcode to the page:

[no_shortcodes][posts_table author="katie"]

This author archive shortcode will list all posts by the user ‘katie’. Replace my username with the username of the author for whom you’re creating an archive page.

Do this for each of the authors on your site. You can either list multiple authors’ posts in a single archive template by adding a comma between each one (e.g. author="katie,andy"). Or you can add the shortcode multiple times, each listing posted by a different author.

Create a category archive

By now, you should be getting the hang of this. You can use the ‘category’ option in this WordPress archive plugin to create a category archive listing posts from a specific category.

To list category posts in this way, add the following shortcode anywhere on your website:

[posts_table category="articles"]

Replace ‘articles’ with either the slug or ID for your category (but don’t use the category name). Use multiple shortcodes to create as many WordPress category archives as you like, each listing posts from a different category.

Build a WordPress tag archive

Categories are one way of structuring your blog posts - tags are another. Posts Table Pro makes it equally easy to create tag archives, listing posts with a specific tag in the table layout.

This shortcode will list posts all with the tag ‘food’:

[posts_table tag="food"]

Replace ‘food’ with the slug of the tag that you want to list in the archive.

List posts in an archive along with extra post metadata such as featured image, date, excerpt, content, and author

So far, we’ve just listed WordPress posts in an archive using the default column options. These are post ID, title, content, excerpt, image, date, author, categories, tags, status, or any custom field or taxonomy.

However, the great thing about Posts Table Pro is that you can list whatever data you like on your WordPress post archives. The archive plugin supports various different columns, including standard post metadata such as categories, tags, publish date, and author.

There are also lots of extra column options such as post-featured images, which add a nice visual element to the archive. If you’ve used custom fields or taxonomies to store extra data about your posts, you can also include these as archive columns. And if you’ve added multimedia content to your posts such as embedded audio, video players, or playlists, you can show these directly on the WordPress archive page too.

Think about which data will best encourage your users to click on a post to read it in full. Use this to decide which columns to add to the archive.

The following shortcode will create an annual archive of all blog posts from the year 2018. It has columns for image, post title, categories, author, and date:

[posts_table year="2018" columns="image,title,categories,author,date”]

Use the archive plugin knowledge base to learn which columns are available and how to add them to your WordPress archive page.

Create a responsive jQuery WordPress table-based archive with extras such as a search box and filters

Sortable posts table with filterPosts Table Pro is built on the popular jQuery DataTables plugin, which creates mobile-responsive HTML tables. It has many of the fantastic features that come with DataTables, such as a keyword search above the table, sortable columns, and filters.

The column sorting and search box will appear in your WordPress archives by default. You can choose whether to add filters for categories, tags, authors, or even a custom taxonomy. For example, this Posts Table Pro shortcode will create an archive of all posts. There are filters for categories, tags, and author, so users can quickly narrow down the list to find the posts they want:

[posts_table filters="categories,tags,author"]

You can add one or more filters above the post list archive, so add the ones that will be useful for your visitors.

Structure your archive page

example of wordpress a-z listing tabs

To keep things simple, you can list WordPress posts on an archive page containing a single table. To jazz things up a bit, you can add multiple tables to the page - each containing an archive of different posts. (E.g. a separate table of posts by each author, or a table for each month.)

Alternatively, you can create a more advanced archive layout by dividing up the archive page using tabs, accordions, or toggles.

A tabbed layout adds tabs across the top of the WordPress archive page. For example, you might add a tab for each month or year. Users can click on a tab to view a separate archive listing posts for that specific month/year.

In contrast, a toggle or accordion adds an expandable and collapsible content box. If you add multiple toggles or accordions, then they are listed vertically on top of each other. Again, users can click on one to view the list of posts within.

Tabs and accordions are neat ways to break up long archive pages. If you want to use them, the first step is to look at your theme to see if it comes pre-build with a tab or accordion feature. If not, then I recommend using the free Shortcodes Ultimate plugin to add your tabs and accordions. (That’s what I used to create the above screenshot.)

Related: Create an A-Z alphabetical index page in WordPress.

Create a WordPress archive for blog posts or any custom post type

WordPress document library plugin

So far, I’ve assumed that you’re creating an archive listing normal WordPress blog posts. By this, I mean the posts which are listed in the ‘Posts’ section of the WordPress Dashboard.

If you want to create a WordPress archive to list other types of content, that’s fine too! Posts Table Pro supports any custom post type. This means that you can create an archive of portfolio posts, events, case studies, products, articles, and much more. Just select the relevant post type on the plugin settings page.

Turn any page on your site into a WordPress archive page, or create a custom archive template

You can use the instructions I’ve provided so far to add table-based WordPress archives to any page or post on your site. It works on normal WordPress pages and posts, and also in the text element of any page builders plugin such as Visual Composer, Divi Builder, Beaver Builder, or Elementor. If you like, you can also add the Posts Table Pro shortcode to a Text widget (although I’m not sure why you’d want to do this!).

But what if you want to automatically use the table layout for your default archive templates, such as the built-in WordPress author archive, category archive, or tag archive pages?

This is possible, but it’s slightly more technical because you have to modify the archive templates build into your theme. The archive plugin WordPress knowledge base includes instructions on how to do this.

Note: These instructions will replace all your category and archive page layouts with the tabular Posts Table Pro layout. If you just want to use the post table layout on certain parts of your site then you’ll need to do some extra customization. This is a developer-level task and if you don’t know how to do it, then we recommend posting a job on Codeable. This is a good place to find a tried and tested WordPress expert with the right skills.

Does it work with the WordPress archive widget?

WordPress itself comes with a built-in archive widget which you can add to a sidebar anywhere on your site. This lists all the months when you have published posts. Users can click on this to view a monthly archive listing all posts from that month.

When someone clicks on a month in the WordPress archive widget, this will load the category archive template built into your theme. To show the tabular archive layout on this page, you need to add the Posts Table Pro shortcode directly to a custom archive template. Use the instructions above to do this.

Adding the table archive layout directly to a custom archive template is a good way to save time. For example, if you create monthly date archives by adding shortcodes directly to a page then you need to edit the page each month to add a shortcode for the latest month. By adding this directly to your template files, it will happen automatically.

How to remove archives in WordPress

To remove the archive in WordPress, you can either disable or remove the archive page. Here are the steps on how to remove archives in WordPress:

Disable Archive:

  1. Go to Appearance → Customize → Theme Options → Archives.
  2. Turn off the option for "Display Archives".

Remove Archive Page:

  1. Go to Pages → All Pages.
  2. Find the archive and click on "Trash" to delete it.
  3. You can also permanently delete the page by going to Trash and selecting "Delete Permanently".

It's important to note that removing the archive page may impact your site's SEO and user experience. If you're not sure if you want to remove the archive, it's best to consult with a developer or SEO expert first.

Other archive plugin options

In this tutorial, I’ve explained the most important features of using Posts Table Pro as an archive plugin WordPress. It also has dozens of other features that I haven’t mentioned. For example:

  • By default, your archive templates are sorted by date in reverse chronological order. You can change the sort order to anything you like. (E.g. order by title, author, custom field, reverse the sort order, etc.)
  • You can embed audio and video directly in the archive page table, for example, to create a WordPress audio archive library or video post archive.
  • 4 styles of pagination buttons to break up long post archives into multiple tables. Users can click the page numbers or previous/next buttons to navigate through the archive.
  • Lazy load option to speed up larger post archives

Case studies - 2 churches who used Posts Table Pro to create date-based newsletter archives

Rim of the World Church and Christendom Media both used Posts Table Pro to create a date-based archive of their past publications.  previous newsletter bulletins.

Rim of the World keeps it simple, with a newsletter archive page listing the title and date of each bulletin. Christendom Media list articles from an academic journal, with columns for the author as well title and date.

Both archives list WordPress posts in chronological order, with the most recent first. Users can sort by any column and use the keyword search box to find specific posts.

Using the WordPress archive plugin on your own site

As you can see, Posts Table Pro is easily the most flexible WordPress archive plugin out there. I hope this tutorial has given you everything you need to create archive pages for your own blog. If you think I’ve missed anything, please let me know in the comments below.

Get the plugin today and start creating archives of your blog posts or other content types. Whether you need to create a WordPress date archive, author archive, category archive, tag archive, or something else, it only takes a few minutes to set up. The end result will be professional WordPress archive pages that make it much easier for your users to find and engage with your posts.

A good WordPress table of contents plugin can do a lot for your website, and in ways that are probably a bit outside of what you might be expecting.

This sounds perhaps a bit mysterious at this point, but I'm going to explain everything in just a minute.

In short, if you've been on the lookout for a great WordPress table of contents plugin then your search is basically over. In this post, I'm going to show you why Posts Table Pro is the ultimate such plugin, how to use it, and in which unusual ways it can help you make your whole site more reader-friendly.

Posts Table Pro: the best table of contents plugin

Posts Table Pro lets you create an easy table of contents for your entire website. And "entire" is the keyword here.

An example of what that might look like:

WordPress Table of Contents Plugin
  • What you can see in this particular example is a list of posts belonging to a given category. This can be customized (more on this in a minute).

So what sets this plugin apart from its competitors?

Most WordPress TOC plugins focus on creating a set of jump links within an individual blog post.

Posts Table Pro does something else.

In simple terms, it hooks up to your site's database and allows you to build a whole site table of contents. This can consist of any number and any combination of WordPress posts, pages, custom post types, taxonomies, custom fields or any other content type you might have on the site.

But there's more:

  • Posts Table Pro is a user-friendly and simple TOC plugin that works through easy shortcodes, which means that you can include your table of contents in any post or page.
  • The structure of your table of contents is fully customizable, and the overall styling is inherited from your current theme. No CSS code snippets required.
  • You can present your table of contents as a single-column list, or as a multi-column table that's sortable, paginated (to prevent scrolling), and offering you a number of side features.
  • You can add a search field to help the reader find any given entry in the TOC.
  • The reader can filter through the website table of contents via a handy dropdown list.
  • Everything is fully responsive and mobile-friendly.
  • It can improve your website's SEO in search engines like Google.
  • Posts Table Pro is compatible with WordPress themes as well as page builders like Elementor.

Here's how to use Posts Table Pro step by step:

How to start using this WordPress table of contents plugin

There are just two simple steps:

Step #1: Install Posts Table Pro

First, here's where you can get the plugin:

After you finalize the purchase, you will be able to download the ZIP containing the plugin. You will also get your personal license key.

Next:

  • Log in to your WordPress dashboard, and go to Plugins → Add New.
  • Click on the Upload Plugin button at the top of the page.
  • Select the ZIP file of the plugin and follow the on-screen instructions to install and activate the plugin.
  • Afterward, the setup wizard for Posts Table Pro will launch on its own and guide you to create your first table.

Step #2 Customizing your table of content

If you're looking to create a minimal table of contents for your document or project, you've come to the right place. A table of contents can be a helpful tool to guide your readers through the content and structure of your work. However, sometimes a simple and minimal approach is preferred. To create a minimalist table of contents, follow the steps below.

  1. You can create a table of contents in the setup wizard when you first activate the plugin, or by going to Posts Tables → Add New.
  2. Next, you need to provide a name and select the post type to display (in this case, "posts"). It's important to point out that Posts Table Pro also allows you to display a table of contents for your custom posts, whatever those might be. For example, let's say you have created a custom post type called "books". You can display a table of contents featuring all posts of that type by selecting the custom post type "books". Or if you want to make a table of content for a series of posts, add the custom post type 'series name'.
  3. Select which posts or pages to add to your table.
  4. Add columns such as the title.
  5. You can add filters to the table for users to easily find what they're looking for, such as article categories and titles.
    content filtering
  6. Set the default sorting option and the sort direction.
  7. If you have a lot of data, you can enable lazy loading to improve the table's performance.
  8. Then choose how to sort your table, setting the default sorting option and the sort direction that you prefer.

With Posts Table Pro, you can choose specific posts, pages, custom content types, and even WooCommerce products that you want to feature in your table of contents. This helps you deliver a better user experience.

Displaying a table of contents for custom posts

Once you've successfully created your table with the Post Table Pro plugin, the setup wizard will let you know that you've completed the process and give you clear instructions on how to insert the table onto your WordPress site. The plugin offers several options for adding the table to your site, depending on your preference.

You can choose to use the "Post Table" block in the Gutenberg editor to directly add the table to your page. Alternatively, you can copy the shortcode from the table builder and paste it onto any page on your site. This gives you the freedom to place the table wherever you want, regardless of the content on the page.

5. Creating an index of your website content

An index is kind of like a table of contents, only a much bigger one, and lists your articles in alphabetical order.

An example:

WordPress index plugin example

You can create something like that with Posts Table Pro as well. Here's how.

6. Listing ALL your website content in a single TOC

Granted, taking all your content and listing it inside a single table of contents is a bit extreme. However, it can be useful. Two scenarios:

  • Instead of creating a sitemap by hand (through HTML), you can generate it automatically with Posts Table Pro. Plus it's going to be searchable and much easier to navigate than a standard sitemap would be.
  • You can take this "mega TOC" and put it on a page published privately (meaning that only the logged-in users can see it). This can be a useful resource for your internal editorial team. That's because using such a TOC to find specific pieces of content on the site is going to be much quicker than going to the WordPress dashboard.

Just remember to choose the custom post types in refine tab of the table builder. You can always choose more than two post types.

Where to get the plugin

To learn all the ins and outs of the WordPress plugin and master structuring your shortcode to get the exact effect you desire, check out Posts Table Pro's official reference file here.


This sums up how to use Posts Table Pro - the best WordPress table of contents plugin out there for bloggers. If you have any questions at all, feel free to submit them below.

WordPress list posts from category plugin

WordPress comes with some fantastic layouts for listing blog posts, such as the main blog page and category archives. But what if you want to list WordPress posts elsewhere on your website?

Maybe you want to list posts from a specific category? Perhaps you want to list WordPress posts by author, tag, or something else. Maybe you want to list other types of WordPress content such as pages or custom post types. Well, you've come to the right place!

I'm going to show you how to use Posts Table Pro to list blog posts or other information in a flexible table layout. This WordPress post list plugin lets you choose which columns to include in the table. You can also choose which posts to list based on their category, tag, date, author and more. And even better - it all happens automatically. It's time to stop listing posts manually by hand! 

Case study #1 - How we listed tutorials on our own website

First off, I'll tell you that I created this post to 'scratch my own itch'. Previously, I've been wasting time by manually listing the tutorials for each of our WordPress plugins in our knowledge base. Every time I'd publish a post about how to use one of our plugins, I'd edit the relevant article in the knowledge base and manually add it to the list. Lots of people do this, but it was particularly stupid for me because here at Barn2, we have a WordPress post list plugin to fix exactly this problem!

As a result, I spent about 10 minutes today using Posts Table Pro to replace the manual lists of posts in 5 articles from our knowledge base. It literally only took 10 minutes to list WordPress posts in 5 separate tables because Posts Table Pro does it all for you.

See it in action on our list of Posts Table Pro tutorials here!

Below, I will share exactly how I did. Then you can put it into practice and use the same method to list WordPress posts on your own website based on their category, tag, or whatever you like.

But first I'll share another case study of how one our plugin customers achieved the same on their own website.

Case study #2 - Journey with Omraam blog post index

WordPress post index page plugin

Journey with Omraam is a global community that continues to spread the teachings of the spiritual master Omraam Mikhaël Aïvanhov.

The website is regularly updated with fresh content. All posts have been added to the Search All Posts page as a list of WordPress posts, and there are many, many posts – more than 700. So an easy way to sort through the list of posts was essential, that's exactly why our WordPress post list plugin powers the page.

Each and every blog post is listed in the table along with its title, first line of the post, author and date it was published. Visitors can browse the content in three ways. They can sort the table by the column headers. They could filter the list by selecting a category. Or, they can use the keyword search box. Either way will quickly help them find what they're looking for.

Read on to find out how you, too, can list WordPress posts on your website.

Introducing Posts Table Pro - a plugin to list WordPress posts, pages & other content

Dynamic WordPress table plugin Posts Table Pro

As you can see, there are lots of ways to display posts using different content views - whether this is a post grid or list for WordPress. The Posts Table Pro plugin creates a grid-based table layout, with each post listed as a separate row in the table. This builds on the content views that come with WordPress and your theme.

Posts Table Pro lets you list WordPress posts or other content types such as normal pages or any custom post type. You can use it to list literally any post type on your website, including portfolios, documents, products, events, articles, news, tutorials, etc.

Once you've decided what type of content to list using this WordPress plugin, there are lots of ways to choose what type of WordPress posts to display. Here's a summary of them all. Afterwards, I'll tell you how to set it up.

List all posts in a table

At its very simplest, you can use Posts Table Pro to list all posts in a table layout. The optional lazy load setting ensures fast load times, even if you're listing hundreds or many thousands of posts.

You can either list the post names only, in a one-column table. Alternatively, you can add extra columns to show information such as content, excerpt, featured image, author, or date.

List posts by category

You can list WordPress posts by category, listing content from one or more specific categories. Simply enter the name or ID of the category you wish to list the posts from.

This is a great option if you want to list posts from a particular category outside of the category archive pages that come with WordPress itself. Check out our separate article on how to list category posts.

READ INSTRUCTIONS →

Display posts with a specific tag

As well as category, you can list WordPress posts by tag. Create a table containing posts that are tagged with 1 or more specific terms.

For example, if you have a WordPress recipe blog for foodies, then you can create tables listing posts that are tagged with 'healthy' or 'vegan'.

READ INSTRUCTIONS →

List WordPress posts by author

It's also possible to list WP posts by author - for example, if you want to create different lists of posts based on the user who created them. This is useful if you want to list posts by a specific author outside of the built-in author archive pages.

READ INSTRUCTIONS →

Create a date-based list of posts by month, year or day

List WP posts by month, year, day, or any combination of these date options. This adds more flexibility than simply using the date archives that come with WordPress itself.

You don't just have to list all your posts in reverse date order. Instead, you can create separate pages listing posts from a specific day or month. This is ideal for blogs that post regularly, WordPress newspaper websites, and similar sites.

READ INSTRUCTIONS →

List WP posts by ID

For even more fine-grained control, the plugin lets you list pages or posts based on their specific database ID. For example, this might be useful if you want to manually add a list of related posts to a WordPress blog post. Use the ID of each post to hand pick which related posts to include in the table, and add them anywhere within your post.

READ INSTRUCTIONS →

List posts by custom field or taxonomy

If that's not enough, you can also use custom fields or a custom taxonomy to list posts in even more weird and wonderful ways!

Custom fields and taxonomies are a wonderful way of extending the information that you store about your WordPress posts and other content. If you feel the fields that come with WordPress itself don't quite your needs, just use a free plugin to create custom fields and/or taxonomies. You can then use the Posts Table Pro plugin to list posts based on specific data.

READ INSTRUCTIONS →

List posts, pages or any custom post type

Posts Table Pro can list any type of post in WordPress, including custom post types. This is useful if you need to list something other than blog posts. For example, you might be creating lists of events, documents, portfolio projects, products, or something else.

We've got a separate tutorial on how to list WordPress custom post types in a table.

READ INSTRUCTIONS →

Exclude posts from the list by ID or category

There are also exclude and exclude category options, which are handy if you need to exclude specific posts from the list. I'm always surprised at how often I list posts and then realise that there are a couple that I want to exclude. This is sometimes easier than choosing which posts to include, depending on how many you want to hide.

READ INSTRUCTIONS →

List posts anywhere in WordPress

You can choose whether to list WordPress posts on a page, in a blog post, or to automatically use the table layout in your category archive template or in the WordPress search results page. This makes Posts Table Pro incredibly flexible. You simply add a shortcode anywhere on your site, edit it to state what you want to include, and it will appear automatically on the front end. 

READ INSTRUCTIONS →

What else can it do?

As well as providing flexibility in which WordPress posts or other content to list, the plugin lets you choose which columns to include in the post list table.

Some people use Posts Table Pro to create a very simple list of WordPress posts. If this is what you want, then you can create a table that just has a title column listing the post name. Others use it to add extra information, which helps to encourage people to click on the posts and read more. For example, you can list posts with their featured image, plus other post data such as title, content, excerpt, author, date, etc. If you've added custom fields or taxonomies to your WordPress post list then you can include those too.

Posts Table Pro also makes it easier for people to find posts based on data such as category, tag or author. Each column in the table is sortable, and you can add extra controls such as search box and filters. You can allow customers to filter by post tag, category, or any custom taxonomies you've created such as Topic or Year.

You can also control the order in which posts are listed. For example, you can list WordPress posts alphabetically or in date order. This is much more flexible than the default post list on the main blog page.

Feel free to check out the full list of plugin options here. I've just focussed on the main ones for creating a WordPress posts list.

How to list WordPress posts on a page with Posts Table Pro

To learn how to create a WordPress post list table for your own website, either watch this video tutorial or read the written instructions below:

  1. Before you start, you should have a WordPress website already set up with various posts that you want to list.
  2. Get the Posts Table Pro plugin and install it on your website.
  3. Download the zip file from the link in your order confirmation email and upload it to your WordPress admin by going to Plugins → Add New → Upload Plugin, then click Activate. The Posts Table Pro setup wizard will then initiate automatically.
  4. Upon installation, the automatic setup wizard will guide you in creating your first table or you can create new tables anytime via Post Tables → Add New.
  5. Give your table a name and select the post type to display.
  6. Select the posts or pages to include in the table, and customize columns and order by dragging and dropping or adding new columns. For instance, you can add columns for categories, tags, post dates, and authors.
  7. Add filters. You can add as many as you like. Filters will appear as a dropdown above your table.
  8. Enable lazy loading for better performance with large tables.
  9. Next, choose the default sorting option and direction.
  10. Next, go to the page where you want to list WordPress posts, pages, or other content. (Note: This can be an existing page or a new page. It doesn't matter if the page uses the standard WordPress editor or a page builder plugin such as Visual Composer. If you don't want to list posts on a page, you can use a post or widget instead.)
  11. After completing the table using Post Table Pro, you can display it on your WordPress site by using the 'Post Table' block in the Gutenberg editor or copying the shortcode from the table builder and pasting it anywhere on your site. This offers you the flexibility to place the table on any page.

And this is how my WordPress post list table looks on the front end:

List WordPress posts plugin

Take action: List WordPress posts with Post Table Pro today 🚀

By now, you should have all the information you need to start automatically listing posts and pages on your own website. Whether you want to list posts by category, author, date, or anything else, you can do it with Posts Table Pro.

Get Posts Table Pro today and stop wasting time writing manual lists straight away!

WordPress private blog.

Do you want to collaborate on private projects within a workplace team? Perhaps you want to restrict content to paid subscribers, or give specific access to site subscribers/bloggers with password protection? Or you might want to share photos and updates among family and friends. You may even need to distribute online training to bloggers, for example.

You can do all this and more with a WordPress private blog plugin.

With the right tools, it's surprisingly simple to create a WordPress private blog. In this guide, I'll show you how to protect your blog content in just a few minutes by changing its visibility.

We'll first start with the "why", and show you some example use cases of private blogs, and then get into the "how" of doing this on your own blog – including advanced features such as a convenient user login page. By the end of this blog, you'll be totally prepared to create private posts yourself.

You'll learn to create password protected and private blog posts using the popular plugin, Password Protected Categories.

You can get a head start by getting the plugin right away, or continue reading for the "why" and then the "how". Let's make a start.

Why create a WordPress private blog?

A WordPress private blog allows you to protect some or all of your posts. You can also choose how users access this protected content: either using a password, or by logging into their WordPress user account..

It's a good idea to take some time to consider whether, for your particular blog, you want to protect some of your private pages or all of them, and how you want users to access your content.

Popular uses of a private WordPress blog plugin

With that in mind, let's look at some of the most popular uses of a WordPress private blog plugin:

  • Subscription blogs If you offer paid or tiered content, a WordPress private blog plugin is ideal. You might even choose to keep some of your posts public while protecting others in order to entice new subscribers.
  • Community building A completely hidden blog is a great place to share news and updates exclusively within your community.
  • Membership levels Do you run an organization or club with different membership levels? With a private blog, you can choose which posts are visible to which members.
  • Client areas You can share content with specific types of clients, or even create special areas within your private blog for individual clients.
  • Workplace communicationCommunicate important, private news and updates to your staff members. Or create a space to collaborate on private projects within a workplace team.
  • Personal blog Create a private blog that's hidden from search engines and share it with only the people you choose.
  • Training Offer online training either within a workplace or to subscribers – you can even include videos. If it's for paid subscribers, you could also offer teaser training videos to encourage signups.

Whichever usage you want, the process is identical. You might even choose a use case we haven't thought of! That's absolutely fine: the process is exactly the same, whatever you want to use your private blog for.

In the next section, I'll show you how to do this in practice: protect some of your blog posts, while keeping others public. Alternatively, if you're interested in protecting your entire WordPress site, you can skip ahead. For both, we'll show you how to setup convenient login pages for your visitors, clients, and/or customers to smoothly access your content.

How to protect some (but not all) of your blog posts

If you want to keep some of your blog posts public while keeping others visible, you can change the visibility of selected blog categories. This lets you create a private site area within your blog, which only specific users will be able to view. For example, you might want to keep paid content hidden while offering teaser blog posts, or have some areas of your blog only viewable by certain clients.

Changing blog category visibility isn't possible using the core WordPress software, so you'll need the plugin Password Protected Categories.

Password Protected Categories adds a visibility option to blog categories. This makes it easy to change the visibility of categories between Public, User role protected, and restricted to individual user accounts , just as you can with individual posts. It's better than protecting individual posts because it actually hides them from your main blog page. Users can enter a single password to unlock the whole private WordPress blog instead of having to enter a password for each post.

Get Password Protected Categories

Using this plugin you can:

  • Either password protect blog categories so only people with the correct password will be able to view posts in protected categories. You can create as many passwords as you need without having to add lots of users who could potentially make unwanted changes to your website.
  • Or restrict blog categories to specific logged in users or roles so that only certain people can see them.

Firstly, buy the Password Protected Categories plugin. To upload the plugin file, go to PluginsAdd New and click Upload Plugin. Choose the plugin file from your computer and click Open. Click Install Now then Activate Plugin.

Once activated, head to SettingsProtected Categories and enter your license key:

Password protected blog categories settings.

Let readers register for private blog access

You can let your readers self-register for private blog access by using the Profile Builder or Theme My Login plugin. Both plugins create an attractive front end registration form (plus login page). Install the plugin, and activate.

The plugin automatically generates a set of login pages, which you can find under Pages in the WordPress dashboard. You're now able to send readers to the Register page, where they can self-register for access to your private blog. Use the TML icon on the bottom left of the WordPress Dashboard, and then click Enable user moderation to ensure you have full control over who can register for your site.

You can use this capability in conjunction with with Password Protected Categories' user role protection. The registration form will give users access to the role that has access to the protected categories. This gives you a full suite of private blog capabilities.

Read on for more details on how to edit blog category visibility. You have two options: set blog categories to be password protected (below), or restrict blog categories based on user or role (click to skip to this).

Option 1: Set blog categories to password protected

A password protected blog is a great choice if you have more than a couple of people who'll be reading your private blog posts. It's also good if you don't want each person to have an individual user account on your website, as all they need is the password.

To password protect blog categories, you can create new blog categories and set their visibility to Password protected or you can edit the visibility of existing blog categories.

To create a new blog category, in your WordPress Dashboard, go to PostsCategories. Write the category name and slug. Scroll down to the Visibility section, select Password Protected. Type your password and click Add New Category:

WordPress private blog category.

Password protect the blog category

To categorize a blog post as password protected, go to the Edit Post screen and check the box next to the password protected category:

Make post category private.

To edit the visibility of existing categories go to PostsCategories and hover over the category you want to change. Click Edit, scroll down to the Visibility section and select Password Protected. Type your password and click Update.

When enabled, a single password protects and unlocks an entire category. You can protect as many categories as you need and create as many passwords as you like for each. For example, you might like to create a password for each of your users. That way, if you no longer want a user to access the content, you can just delete the password to revoke access. To view password protected content, users need to enter a password to view all content in that particular category:

Private post category.
[/image_border]

To alter the login form message, or how long a category remains unlocked before a password needs to be reentered, head to Settings → Protected Categories.

Option 2: Create user or role restricted blog categories

This option is perfect if you have blog content that you only want certain users to access when logged into the WordPress Admin. 

To user or role restrict a blog category, you can either create new blog categories or edit the visibility of existing blog categories.

To create a new blog category: in your WordPress Dashboard, go to PostsCategories. Write the new category name and slug. Scroll down to the Visibility section, select Protected, select the users and/or roles who require access, and click Add New Category.

To edit the visibility of existing categories, go to PostsCategories and hover over the category you want to change. Again, change the blog category visibility settings as required.

Only those users with the correct user account or role access will be able to view the private blog categories, and only when they're logged in.

How to make an entire WordPress blog private

Rather than making select blog categories private, you might like to create a standalone WordPress private blog that's only visible to specific users. This is useful for workplace communication, or personal blogs for example. Again, it's easy to do using the plugin, Password Protected Categories. The first step is creating private parent and sub-categories for your blog. The second step is to create a login page so users can login to gain access to your blog.

Step 1. Create private blog parent and sub categories

To recap how to install the plugin: buy the Password Protected Categories plugin and upload the plugin file, by going to PluginsAdd New and click Upload Plugin. Choose the plugin file from your computer and click Open. Click Install Now then Activate Plugin

Once activated, head to SettingsProtected Categories and enter your license key.

There are two ways you could create an entirely private blog. One way would be to set the visibility of all your blog categories to either Private or Password protected. A much slicker way is to create a parent blog category with sub categories. In this case, users will be able to unlock the entire WordPress private blog, including all the sub categories, with one password. This means you have an entirely private blog, which is as easy to navigate as a public blog.

First, you'll need to create the parent blog category. In your WordPress Dashboard, go to PostsCategories. Write the category name and slug. Scroll down to the Visibility section, select Password Protected. Type your password and click Add New Category:

Add parent category.

Next, you'll create a sub category. Write the category name and slug. Then under the section Parent, click the dropdown and select the parent category you just created. Scroll down and click Add New Category:

Password protect sub category.

Note, you don't need to change the visibility of the sub category as, thanks to the plugin, it will already be password protected and only visible to users who have entered the parent category password.

You can create as many additional sub categories as you like - think of these like the categories of a public blog.

Step 2. Set up blog login

Head to SettingsProtected Categories. You'll see the option Show Protected. This doesn't affect the visibility of post content on your site. However it does affect whether your post categories and any blog titles within those categories are public.

Whether you check this box or not, dictates how users can login to your blog. If you keep blog categories and titles public, users are prompted to login when they try to view any protected content. If you uncheck this box, you'll need to provide a centralized login page so users can login and be directed to the your blog. Read on to find out how these two options work:

Option 1: Keep blog categories and titles public

If you want people to be prompted to login when they try to access a post or category in your WordPress private blog, head to SettingsProtected Categories and ensure the Show Protected box is checked. Remember, they won't be able to view the content of the posts unless logged in – only the information such as post titles and categories.

When you select this option, your protected content will, however, be visible to RSS readers. If you don't want entire posts to show in an RSS feed, head to Settings Reading. Next to the option For each article in a feed, show, select Summary. This ensures only a summary or excerpt appears in RSS feeds.

Option 2 (recommended): Create a centralized category login page

To make it even easier for users to login and view your blog, create a centralized login page for your WordPress private blog.

First, uncheck the box next to Show Protected. Your blog is now completely inaccessible on your website.

Next, you need to create a login page. Head to PagesAdd New. Call the page something like 'Login To My Blog' and in the content area add the shortcode [category_login]

If you preview the page, you'll see your centralized category login page. Here users can login to view your blog.

Centralized category login.

To change the message that appears above the login box, head to SettingsProtected Categories. Here you can edit the Form message. Alternatively, you can override the message by adding message="a different message" to the shortcode.

For example:
[category_login message="Log in to read the blog!"]

You may wish to also add a link to the registration page we created earlier.

Hit Publish. You'll most likely want to add this login page to your menu so it's easy for users to access. To do this, head to AppearanceMenus, select the page and click Add to Menu then Save Menu.

Users get automatically redirected to the correct category page when they enter the correct password on the login page.

You're now set up with a private blog, complete with convenient login page for your users.

Easily make a WordPress private blog

Whether you're building a subscription blog, community or membership site, need to communicate with your team or clients, or have any of the other WordPress private blog plugin use cases we outlined earlier, this WordPress tutorial has shown you all you need to know to create a private space for your content.

We've looked at why you might want to create a private blog, and then how to do it. We've shown you how to use Password Protected Categories to make any part of your blog private, to achieve any of the use cases outlined above. You can get the plugin in order to put this into practice.

Interested in making other parts of your blog password protected? Read our Password Protect WordPress guide to learn how to make the rest of your site, or even your WooCommerce store, private.

And, of course, let us know in the comments below if you have any questions about making your particular blog a private one. Thanks for reading!

Lots of website owners need index pages on their WordPress site, or a blog post index listing articles in alphabetical order. Surprisingly, there is no good WordPress index plugin available for listing your website content. Today, I'll show you how to use the Posts Table Pro WordPress table plugin to create index pages, posts, or even custom post types.

Using the Post Table Pro WordPress table plugin is a great solution if you're looking for a way to organize your WordPress site. It also makes it easier for visitors to find the content they need. With this plugin, you can create a searchable and sortable index that lists all your web pages or blog posts.

Your WordPress index plugin or WP index can be customized to display only page/post names or additional information by adding extra columns. Your finished WordPress index plugin pages will look something like this:

WordPress index plugin example

We'll take a closer look at how to use Posts Table Pro, and how you can customize it to fit your specific needs. We'll cover everything from creating a WordPress index and adding custom post types to configuring filters and making it searchable. If you're a blogger, freelancer, or business owner, read on to learn how to use Posts Table Pro to create a powerful and user-friendly index WordPress site.

See a WordPress site index in action on our demo page.

What makes a good WordPress index plugin?

First, let's look at what an index actually is. Then we can think about the best way to create a WordPress index.

The definition of an index is:

  1. "(in a nonfiction book, monograph, etc.) a more or less detailed alphabetical listing of names, places, and topics along with the numbers of the pages on which they are mentioned or discussed, usually included in or constituting the back matter.
  2. a sequential arrangement of material, especially in alphabetical or numerical order."

A WordPress site index plugin should list content such as pages, posts, or other content types in an alphabetical listing. Moreover, the plugin should let you include other material from the site contents in the index, such as tags, categories, authors, or even custom fields and taxonomy terms.

A WordPress index plugin can list any content type alphabetically. If you store events or date-based articles in WordPress, the plugin can also list content by date.

You may also like: How to create an alphabetical index with a WordPress A-Z plugin.

Posts Table Pro - The perfect WordPress index plugin

When it comes to finding a WordPress index plugin, you may find that the options are limited. A quick Google search or any other search engine will reveal that there aren't many plugins available to choose from, which can be frustrating.

Even more frustrating is that many of the available options don't really provide the functionality you'd expect from an index plugin. Some of the plugins available focus more on displaying site contents in a grid layout with thumbnail images, rather than creating a list layout as you would expect from an index. Other plugins may be outdated, with no updates in years, which can be a major warning sign when it comes to compatibility with the latest WordPress versions.

Fortunately, with Posts Table Pro, you can create an index that lists your website pages or blog posts in a clear and organized way, with the added ability to include custom post types. It has all the features you'd expect from an index plugin:

  • Alphabetical index of WordPress blog posts

    Create an index of WordPress pages, blog posts, or any custom post type (e.g. e-commerce products, events, documents, portfolio case studies, testimonials, etc.).

  • The index items are listed in a table layout with whichever columns of information you choose to include.
  • There are multiple sorting options, including alphabetical or date-based sorting.
  • You can either index all your WordPress site content, or just create an index for a specific post type, category, tag, or similar.
  • Users can search, sort, and filter the index to find the content they're looking for.

Get Posts Table Pro

To better understand how the WordPress index plugin works, let's take a look at a real-life case study. Imagine you have a website with a large amount of content, including blog posts, products, and other custom post types. As your content library grows, it becomes increasingly difficult for your visitors to find what they're looking for.

In addition to creating an index of blog posts and pages, you can also use this plugin to list other custom post types on your website. For example, if you have a WooCommerce store, you can use Posts Table Pro to create a searchable index of your products.

Other potential use cases for a WordPress index plugin include creating an index of resources such as eBooks or whitepapers or creating a directory of staff or team members. Check out other use cases and case studies below. Once you've identified the use case that best fits your website, you can use Posts Table Pro to create a customizable index page with various display options. You can even add filters to the index, such as categories or tags.

Case study - Index of blog posts for Journey With Omraam

WordPress index plugin to list blog posts

Journey with Omraam wanted to create a WordPress index plugin page listing all their site's blog posts. You can see this on their 'Search All Posts' page.

The blog posts are listed in a table layout with columns for the post title, content, post date, author, and categories. Users can quickly find a specific article by using the keyword search box or clicking on a category to filter the index for that category. They can then click on the title to read the full post.

Use case - WordPress site table of contents

Most WordPress table of contents plugins don't actually list all the pages from your website, which is what you'd expect. Instead, they create an internal table of contents to aid navigation within an individual post. They're a good way to break up long articles because they add jump links to the various sections of the post. However, they're not used for creating an index listing all your site's pages!

You can use Posts Table Pro to list all the pages on your WordPress site in an alphabetical table of contents or index. Choose your columns, add any extras such as a search box or dropdown filters, and it's an ideal way to help people navigate your website. It's far better than an HTML sitemap plugin because there are extra features such as search and filters, plus you can add extra data about each page instead of just the title.

Next, we'll get to the practical part of this beginners' tutorial. I'll show you exactly how to set up Posts Table Pro as the best WordPress index plugin.

How to create an index of WordPress posts, pages, or custom posts

First, purchase the Posts Table Pro, you will receive a confirmation email containing a download link and a license key. Download the plugin from the link provided in the email and save the zip file to your computer.

To install the plugin on your WordPress site, navigate to the Plugins section in your WordPress admin panel, click on "Add New", and then choose the "Upload Plugin" option. Select the zip file containing the plugin, and click on "Activate" once the installation is complete. Once the plugin is activated, a setup wizard will appear, which will take you through a step-by-step process to create your first table. You can also create new tables any time by navigating to Post Tables → Add New.

Configuring your WordPress site index

Ok, so far you've learned how to use a WordPress index plugin to create index listing pages, posts, or custom post types. Next, I'll talk you through the steps to configure your index.

Choose which columns to include in the index table

To create a table in WordPress, first, give your table a name for internal use that will appear in the list of tables in the WordPress admin. Then, choose the post type you want to display. In this case, choose 'pages'. Next, select which pages you want to include in your index.

To customize the columns of your index in WordPress, you can select which columns to add and in what order. Since we're creating an index for your pages, you may want to include details such as post id, title, content, excerpt, image, date, author, categories, tags, status, or any custom field.

To add a column, choose the column type from the dropdown menu and click "Add." The added columns will appear in the list of columns above, and you can rearrange them by dragging and dropping the sort icon or column title. You can also rename a column by clicking the pencil icon, or hide the column name completely using the toggle. If you want to remove a column, simply click the X icon next to it.

Add filters to the index page

To refine user selections in your index, you can add filters that cater to your target audience. Consider what your visitors would find most useful. For instance, you may require filters by author, category, and date.

Filters appear as dropdown menus above the table and you can add as many as you need!

How to sort your WordPress index in numerical order

Posts Table Pro doesn't have the option to index site content in number order. However, you can do this by adding the numbers in a format that will also make sense in alphabetical order.

Let's assume that you want to create a numerical WordPress index content based on a column containing numbers 1, 2, 5, 10, 11, 22, and 29. Added in a single-digit format, the numbers will be listed wrongly as 1, 10, 11, 2, 22, 29, and 5. That's because they're in alphabetical order.

Sorting a WordPress index in date order

You can set the default sorting option and the sort direction for your index. This provides you with greater control over the order in which your index is displayed to your users.

Sorting options help to organize data into a logical sequence that is easy for users to understand. You can sort data in ascending or descending order, depending on your preference. By selecting the default sorting option, you can decide which column to sort the table data by, and how it should be sorted.

Display your index page

After you have finished creating your table with the Post Table Pro plugin, the setup wizard will verify that you have completed it and offer guidance on how to insert the table onto your WordPress site. You can either use the "Post Table" block in the Gutenberg editor or simply copy the shortcode from the table builder and paste it wherever you wish on your site. This gives you the flexibility to place the table on any page, regardless of its content.

Create a WooCommerce index listing E-commerce products

Posts Table Pro works and lets you create a product WordPress index page for practically all WordPress e-commerce plugins. This includes Easy Digital Downloads, WP eCommerce, and others. That's because all these e-commerce plugins store their products as a custom new post type.

Follow the above step-by-step tutorial to create an index of products for any WordPress E-commerce plugin.

You may also like: Learn how to use Posts Table Pro to list Easy Digital Downloads products.

It also works for WooCommerce. However, if you need an index WordPress of WooCommerce products then you're better off with our other WordPress index page plugin, WooCommerce Product Table.

The instructions for creating an index WordPress with WooCommerce Product Table are very similar to Posts Table Pro. The difference is that it has extra support for WooCommerce, such as add-to-cart buttons and reviews. So I'd recommend that for a WooCommerce index plugin instead.

WOOCOMMERCE PRODUCT TABLE

Next steps

Posts Table Pro can help you create index pages for your website content easily. Unlike other dedicated index plugins, it offers greater flexibility, customization, and sophistication. This plugin lists custom post types, allowing you to create a tailored content index for your site.

If you're looking to improve your user experience and speed up your content indexing process. It also offers your visitors a more organized and structured way to navigate through your site, Posts Table Pro is the ideal solution for you. So why wait? Get it today and start creating index pages of your own website content.