Product table columns
The WooCommerce Product Table WordPress plugin lists your products in a table, with columns of information about each product. You can use the 'Columns' option to choose which columns to include in the table.
Available columns
The available columns are: SKU, ID, name, description, summary, date, date modified, categories, tags, image, reviews, stock, weight, dimensions, author, price, buy, and button. You can also add columns for any product attribute, custom field or custom taxonomy term. In addition, you can create combined columns which merge one or more columns into a single column.
- The SKU and Name columns are self-explanatory. The id column is the product ID, assigned by WordPress when you create the product.
- The Description column will show the full product description, shown under the “Description” tab on the product page. The description is truncated to 15 words but you can customise this using the Description Length option on the settings page.
- The Summary column will display the product short description entered on the Edit Product screen. This is normally displayed on your product page just before the price and add to cart button. The summary column will display an excerpt from the main product description if the short description isn't available.
- The Date column will display the date that the product was added to your store (i.e. when it was published).
- The Date Modified column will display the date that the product was last updated.
- The Categories and Tags columns display the list of categories/tags that the product is in. You can use the Links option to control whether clicking on these columns will filter the table by that category/tag or link to the relevant archive page.
- Attribute columns list a specific attribute. For example, if you add a 'Color' attribute column then it will list all the color attributes for each product. We recommend adding your attributes globally under Products → Attributes and then selecting them for each product. This is because global attributes are easier to use for multiple products, and you can only have filter dropdowns for global attributes.
- The Image column will display the main product image. (Tip: You can change the image size on the 'Edit Table' page.)
- The Reviews column will display the average star rating out of 5 for each product, based on previous customer reviews.
- The Stock column will show the current stock level for the product. There are various settings in WooCommerce which control how the stock level is displayed (see WooCommerce → Settings→ Products → Inventory), and the contents of this column will change based on these settings.
- The Weight and Dimensions columns will display the relevant data as entered for each product under the Shipping tab.
- The Author column displays the username of the WordPress user who added the product.
- The Price column will display the current product price. If there are variations for the product then the price is displayed as a range – e.g. "$2.99 – 5.99". If the product is currently on sale, then the sale price is shown with the original price crossed out next to it.
- The Buy column will display the Add to Cart button for that product, plus quantities and/or variations depending on your table settings.
- The Button column will display a button in the table which links to the product detail page.
- Custom field columns display data that you have entered into custom fields.
- Custom taxonomy columns display data that is stored in custom taxonomies.
- The Quick View column adds 'Quick View' buttons to the product table. This column is only available if you are also using our WooCommerce Quick View Pro plugin. You can rename the buttons and add or remove an icon on the Quick View Pro plugin settings page. (Learn more about using the two plugins together.)
- The Lead Time column adds a column containing the lead time for each product. This column is only available if you are also using our WooCommerce Lead Time plugin. You can set a lead time globally or for individual products, and you can choose what text appears before the lead time (e.g. 'waiting time', 'processing time', etc.).
- The Discount Content column is only available if you're also using our WooCommerce Discount Manager plugin. It displays the Product page content field for each discount.
- If you're using WooCommerce Product Table with YITH's Request a Quote plugin then you can display a 'Request a Quote' button for each product by adding a
request_quotecolumn.
Custom field columns
Custom fields are an opportunity to include other types of content in the table. You can use them to store various data such as links, buttons, icons and shortcodes from other plugins. If you haven't created your custom fields yet, please see this article.
If you created the custom field using either Easy Post Types and Fields or Advanced Custom Fields then all your custom fields will appear in the list of columns. For other custom field plugins, you should add the custom field column as follows:
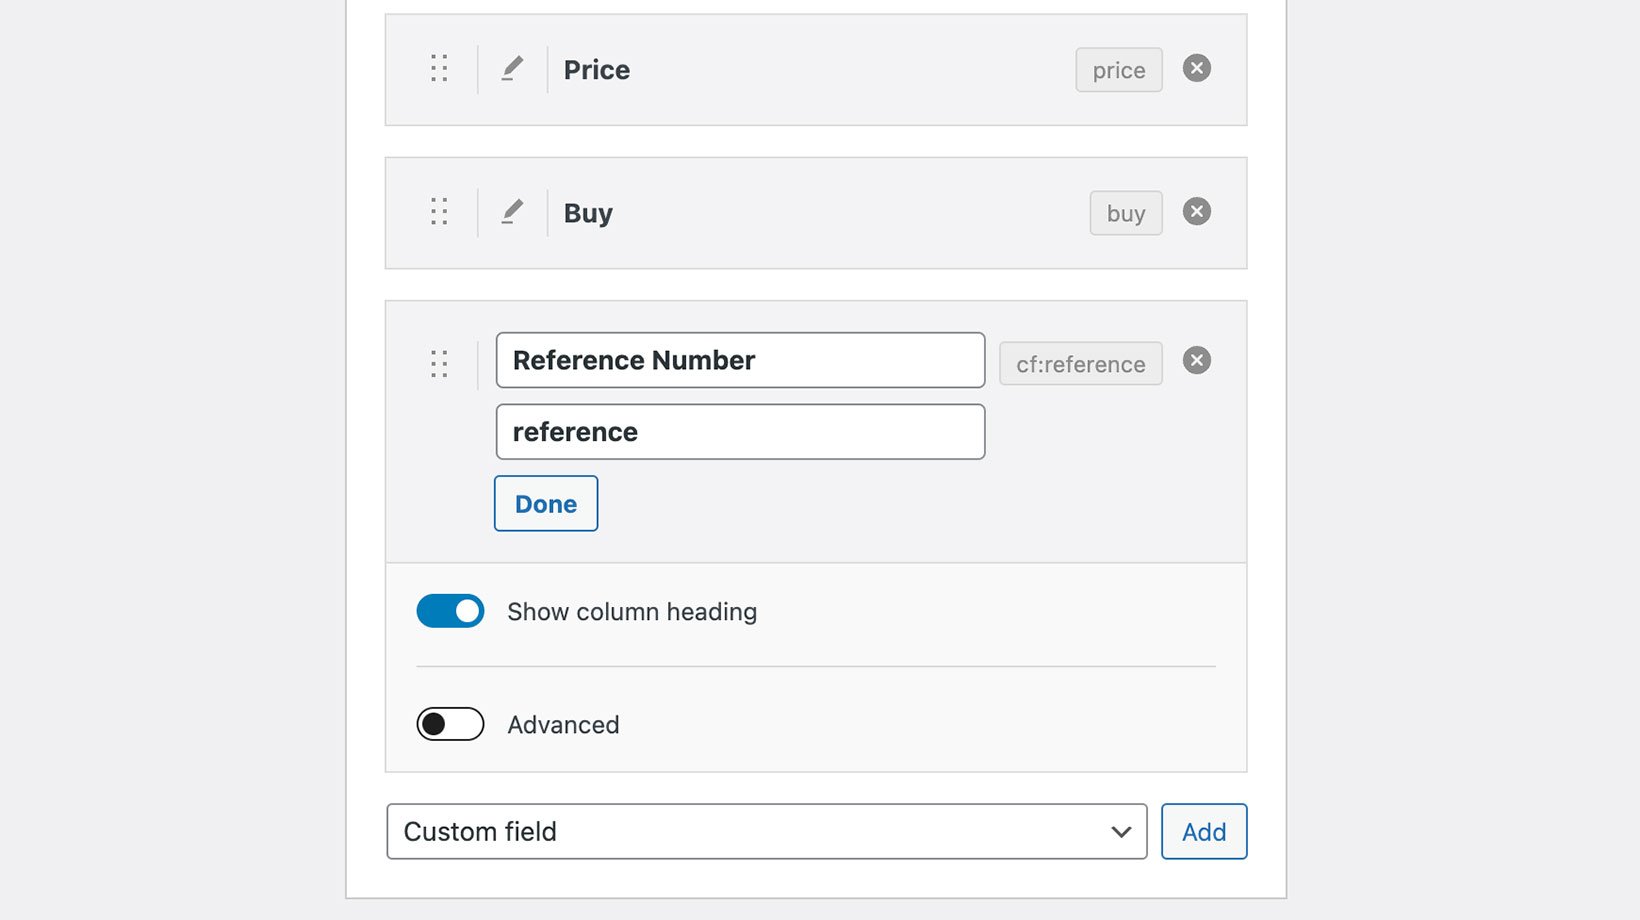
- Select 'Custom field' from the list of columns.
- Enter the name of the custom field (you can get this from the settings in your custom field plugin), for example "reference" if you are creating a "Reference" column.
- The column name will then change to match the name of the custom field. You can change this to anything you like.
Tip: If you want the table to display shortcodes that you have added to a custom field, then you will need to enable the shortcodes option.
ACF repeater fields
If you're using Advanced Custom Fields Pro repeater fields, you can create a column using the name of the parent repeater field. This column will list the content of all the repeater fields for that product, separated by commas. It is not possible to display repeater sub-fields as separate columns in the table.
ACF group fields
Please see our separate article on how to display sub-fields which are part of an ACF group field.
Custom taxonomy columns
Custom taxonomies are a good way to store extra data about your products. Use them instead of custom fields if you want to use them to group and filter products, as custom fields are more suitable for storing unique data about each product.
If you want to create a custom taxonomy, we recommend using the free Easy Post Types and Fields plugin. The plugin is perfect for creating and managing custom WordPress taxonomies, fields, and post types. If you want a step-by-step guide for the same, check out this guide: Creating custom taxonomies in WordPress.
Once you have added custom taxonomies to the 'Products' post type, you can select them as products in the table.
Total sales column
WooCommerce has a custom field called total_sales which stores the total number of sales for each product. You can display this as a column in the table by using cf:total_sales in the columns option.
For example:
[product_table columns="name,summary,cf:total_sales,price,buy"]
Sale price column
By default, the sale price for your WooCommerce products will appear in the main 'price' column. The usual price will be crossed out and the sale price will be shown.
If you like, you can also display the sale price in its own column. The sale price in WooCommerce is a custom field called cf:_sale_price. This means that you can display the sale price as a custom field column (see instructions above). For example, your shortcode might be: [product_table columns="name,cf:_sale_price,buy"]

Product table with 'Price' column showing the main price crossed out with sale price; plus separate sale price custom field column
Combined columns
The "Combined column" type allows you to merge one or more columns into a single column. For example, the 'Details' column in this screenshot combines the product name, summary and categories columns into one:

To create a combined column, select 'Combined column' from the list of columns. You can then select all the columns that you wish to appear inside it.

Notes and tips:
- By default, the combined column will have a label of "Combined column". We recommend either changing this to something more relevant to your store, or disabling the 'Show column heading' option in the Advanced settings for the combined column.
- You can optionally add a label which will appear before the content of each sub-column followed by a colon - e.g. "Name: Hoodie". If the content of your sub-columns is self-explanatory then you don't need to add a label.
- Some sub-columns have an option to be clickable - for example, the 'Name' column can link to the single product page.
- Each sub-column has a 'New Line' toggle. Enable this if you want to add a paragraph break above the previous sub-column.
Creating custom columns
Developers can use custom columns to display data programmatically which is not available as one of the standard table columns.
Choosing your own column headings
When adding columns using the table builder, you can click the pencil icon to customize or hide the column heading.
How to hide a column
You can easily hide columns simply by removing them from the list of columns in the table. This will remove the column from the table.
If you wish to hide a column on specific devices only (e.g. mobiles or tablets), please see the responsive visibility option which allows you to do this.