Editing product tables
WooCommerce Product Table comes with a table builder which makes it quick and easy to create new tables. Once you have created one or more tables, you can edit them using a separate 'Edit' screen. This brings all the options from the table builder onto one page.
The 'Edit table' screen
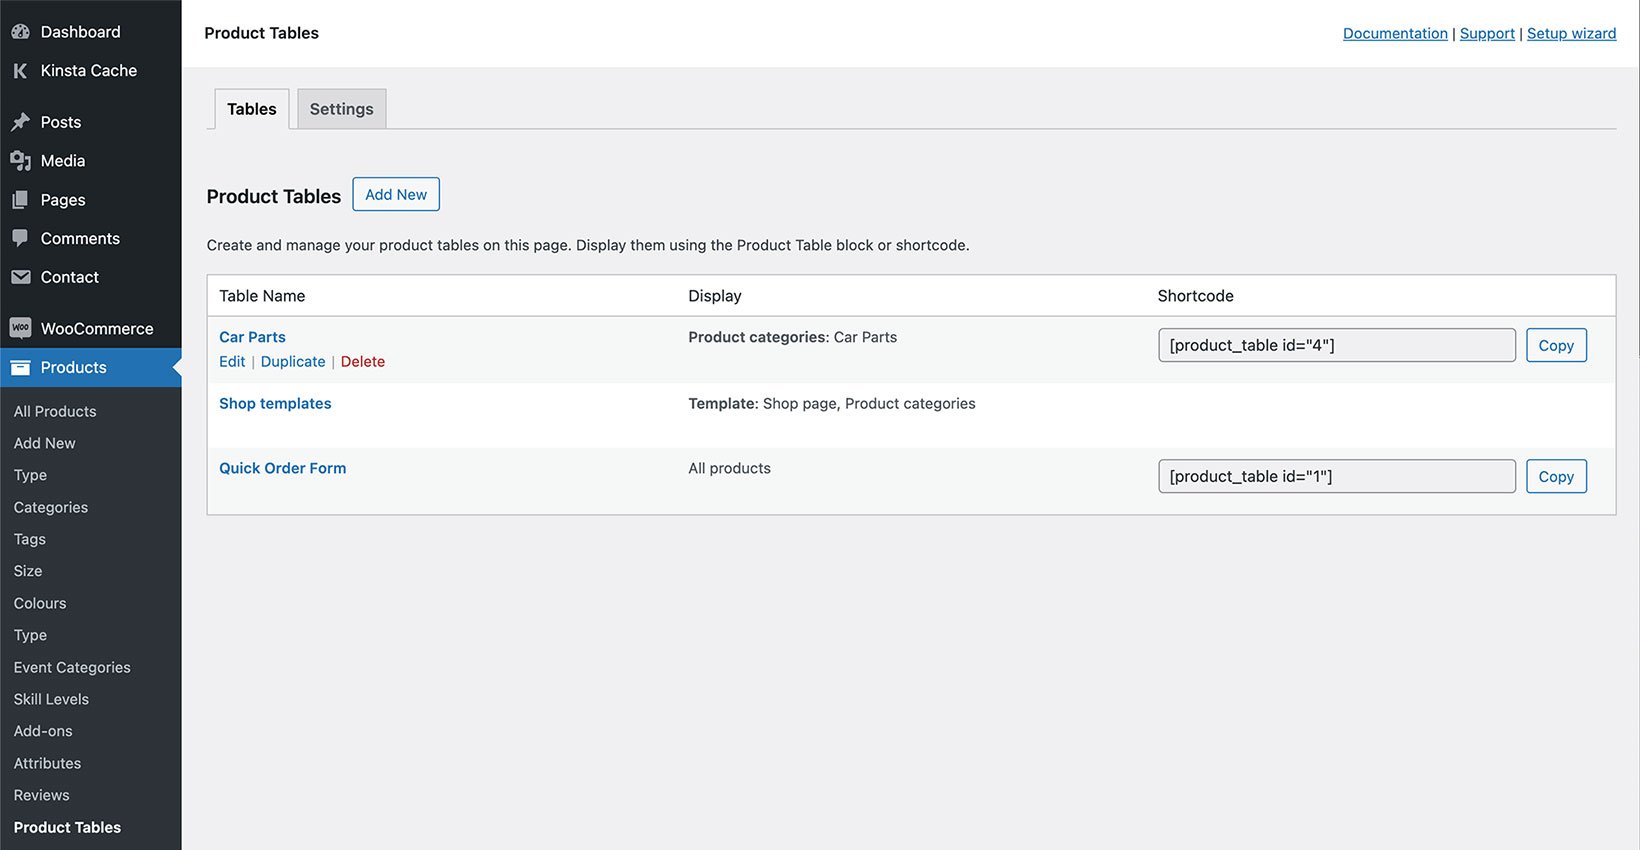
To edit a table, go to Products → Product Tables where you will see a list of all your tables:

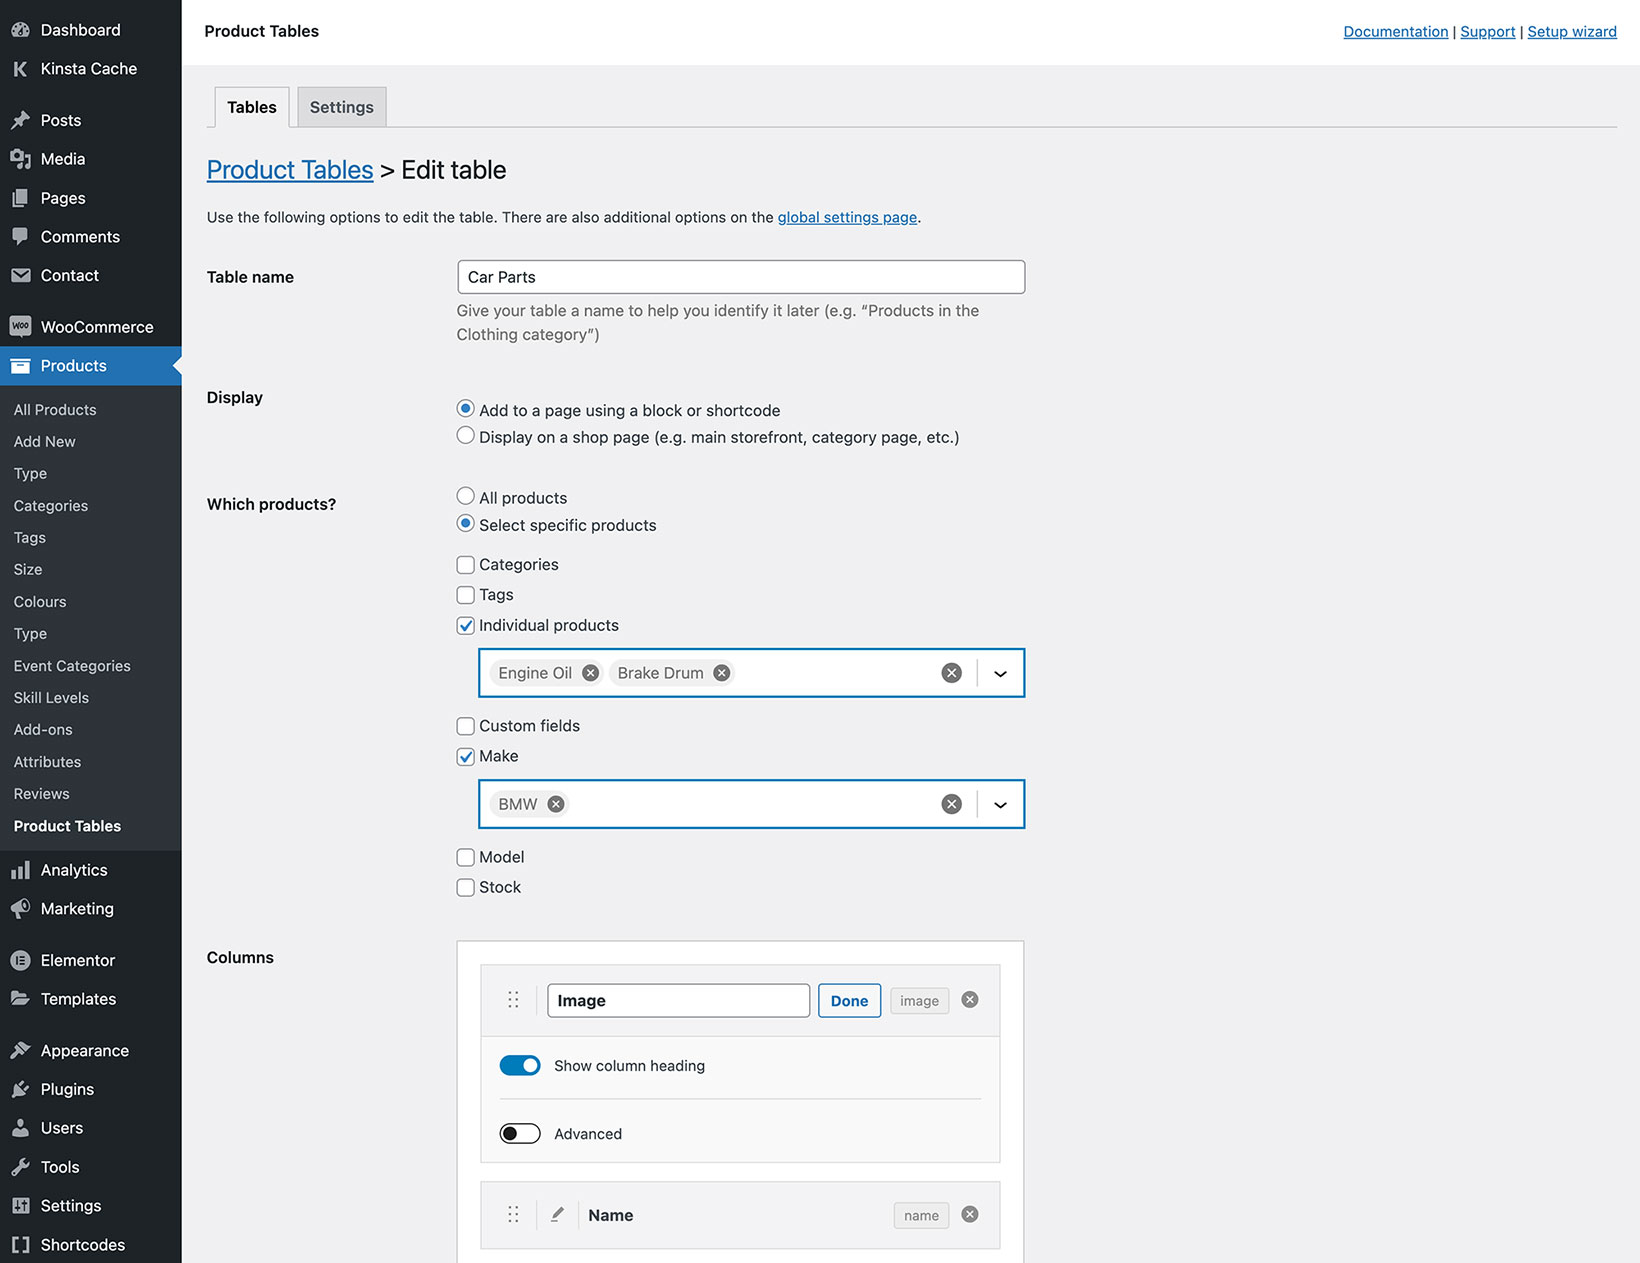
Hover over a table and click the 'Edit' link which appears. This will open the 'Edit table' screen:

Link to the product page
You can optionally enable links for the following columns: sku, name, categories, tags, attributes, any custom taxonomy, and image. By default, all of these columns are clickable and you can disable the links for each column as needed.
Link behavior:
- The SKU, ID, and name columns link to the single product page.
- By default, clicking on the 'Image' column will open that image in a lightbox. You can change this to link it to the single product page instead.
- Clicking on the categories, attributes, tags or taxonomy columns will filter the table by that value. You can change this behavior to link them to the relevant archive page instead.
Advanced column options
To view these options, click the pencil icon for any column and then enable the 'Advanced' toggle:
Show column heading
Enable or disable this toggle depending on whether you want to display a label in the column heading.
Column type
This allows you to choose the type of column for custom field or taxonomy or attribute columns:
- Text - This is the default and means that the column will be sorted alphabetically.
- Date - Use this if you are displaying dates in the table, for example within a custom field. This means that the column will be sorted by date.
- Number - Select this if you will be displaying numbers in the column and wish to sort the column numerically instead of alphabetically.
Width
WooCommerce Product Table automatically sizes the columns for the best fit. You can override this behavior and control the column widths manually by entering one of the following values for each column as needed:
- % - Enter the percentage of the table width that the column should take up. If you enter this for all columns then the total must be 100.
- px - Enter the number of pixels wide that the column should be. If you enter this for all columns then the total must be the same or less than the total available space. Generally, we recommend using the percentage option because it gives more reliable results on different screen sizes.
Responsive visibility
Select from the dropdown to control which devices the column will be visible on.
Responsive priority
Setting a priority level for each column is useful when displaying the table on smaller screen sizes (mobiles, tablets, etc.) or when you have too many columns to fit. When the screen size gets too small, the plugin will collapse certain columns down so they are no longer visible, and a "+" icon will appear at the left of each row. This allows the user to expand the row to show its full contents.
Enter priorities to control the order in which columns are "collapsed" on smaller screens. The lower the number, the higher priority that column has. For example, a column with a priority of "1" would have the highest priority and be collapsed last.
Product limit
Enter a whole number to specify the maximum number of products that can appear in the table. The default is 500 products. (Not applicable if you're using the lazy load option.)
Warning: Setting a product limit is useful for displaying a limited number of products - for example, if you order products by popularity and set the product limit to 5 then the table will list your 5 most popular products. You can also use the product limit to increase the maximum number of products in the table beyond 500, but this could cause performance issues depending on the speed of your service. As an alternative, we recommend activating lazy load so that only one page of products are loaded at a time - this allows you to include as many products you like on each page of the table without having to worry about performance.
Image size
Use this to control the size of the product image if you have included the 'Image' column in the table.
The default image size is 70x70 pixels. Enter a width × height value in pixels or any standard WordPress image size such as thumbnail, medium, large, etc.
If you specify only one number, this is used for both the width and height. You can include px after the number or omit it - so image_size="70px" is the same as image_size="70".
Need more options?
WooCommerce Product Table also contains a number of options which can only be controlled globally or directly in the shortcode. You can access these on the plugin settings page.