Creating product tables using a shortcode
The easiest way to create a product table is to use the table builder. If you prefer, then you can create tables directly in a shortcode.
There are 2 ways to do this:
- Use shortcode options to extend a pre-built tableYou can use the table builder to create a table (via Products → Product Tables → Add New) and then use the shortcode for the table (e.g.
[product_table id="1"]) to insert it into your site. If you include theidparameter in the shortcode then the options from the table builder will be used, unless you override them with other shortcode options. (For example, you might have selected columns in the table builder and then override this by adding thecolumnsshortcode option.) - Create tables directly in a shortcodeIf you use the
[product_table]shortcode without theidparameter then it will generate a new table from scratch, which is not linked to a pre-built table.
The 50+ shortcode options can be used in either of the above shortcodes.
Shortcode options
Columns
Standard columns
[product_table columns="sku/id/name/description/summary/date/date_modified/categories/tags/image/reviews/stock/weight/dimensions/author/price/buy/button"]
Add a comma between each column to create a table with multiple columns, e.g.: "columns="image,name,description,buy"
Attribute columns
Use [product_table att:<attribute name>], replacing <attribute name> with the attribute “slug” from Products → Attributes.
Here’s an example with columns for the attributes color and size:
[product_table columns="name,att:color,att:size,buy"]
Custom field columns
Use [product_table columns="name,cf:<field name>"], replacing <field name> with the name of the custom field (e.g. "reference_number").
If you're using Toolset to create your custom fields, then you need a slightly different syntax to display them in the product table. Toolset adds wpcf- to the start of the custom field name, so if you create a custom field called 'link' (for example) then the correct syntax will be wpcf-link. This means that if you want to create a product table with columns for name and a custom field called 'link' then you would need to add it as follows:
[product_table columns="name,cf:wpcf-link"]
Custom taxonomy columns
Use [product_table columns="name,tax:<taxonomy slug>"], replacing <taxonomy slug> with the slug of the custom taxonomy you wish to display.
For example: [product_table columns="name,description,tax:document_type"].
You can find the taxonomy slug by going to the WordPress admin and finding the page which lists the taxonomy terms. For example, WooCommerce product categories are edited under the Products → Categories menu. On that page, the URL at the top of the screen shows "…edit-tags.php?taxonomy=product_cat…." The 'product_cat' part after the equals (=) is the taxonomy slug you need to use.
Combined columns
To merge multiple columns into a single columns, list the column names in brackets. To set a name for each sub-column, add a semi-colon after the column name followed by the label (you should still use commas to separate normal, non-combined columns).
For example, the shortcode [product_table columns="image,(name;categories:Cat:,tags:Tag:;SKU):Combined Heading,price,buy:blank"] will create the following columns:
- Image
- Combined column with a heading of "Combined Heading", consisting of:
- Name
- Categories (with the label "Cat")
- Tags (with the label "Tag")
- SKU
- Price
- Add to cart column with no heading
Columns added by other plugins
Some additional columns also become available when you use WooCommerce Product Table with certain other plugins:
- WooCommerce Quick View Pro -
quick_view. This adds quick view buttons to the table. - WooCommerce Discount Manager -
discount_content. This displays the Product page content field for each discount. - WooCommerce Lead Time -
lead_time. - YITH's Request a Quote plugin -
request_quote. This displays a 'Request a Quote' button for each product.
Choosing your own column headings
You can set custom column headings by adding a : (colon) after the column name. For example:
- The default heading for the product name is “Name”, but if you wanted the heading “Product Name” instead, you would use:
[product_table columns="name:Product Name,date,price"] - You can rename the 'Buy' column to 'Choose options' like this:
[product_table columns="name,buy:Choose Options"] - You might want to change the capitalization of the column headings, like this:
[product_table columns="name:NAME,buy:ORDER"] - Example using several custom headings:
[product_table columns="name:Item Name, date:Added, cf:field1:Details, price:Cost Per Unit"]
Removing the column heading
If you would like to remove a column heading completely, use the keyword blank after the colon. For example:
columns="name:blank,description,categories,price"will remove the heading from the 'name' column.columns="name,buy:blank"will remove the 'Buy' title from above the add to cart column
You can do this for as many columns as you like.
Customizing column widths
Use one of these shortcodes to override the default column widths and force them to a custom size, either using percentage or pixel values:
[product_table columns="name,description,price" widths="20%,50%,30%"][product_table columns="name,description,date,buy" widths="50px,auto,auto,auto"]
Use the word auto to have the plugin calculate the width automatically. As auto is the default column width when no value is given, the above example can be simplified to:
[product_table columns="name,description,date,buy" widths="50px"]
Links
Use [product_table links="all/none/name/sku/id/image/categories/tags/attributes/terms/<other-column-name>"] to control which columns of the table are clickable. If you want multiple columns to be clickable then separate them with a comma.
It also supports the following advanced options, for example if you want to add links to a specific custom taxonomy column without linking your other taxonomy columns:
- tax:my-custom-taxonomy
- att:any-attribute
- tax:product_cat (categories)
- tax:product_tag (tags)
- tax:pa_brand (att:brand) or any other attribute
Image lightbox
Use [product_table lightbox="false"] to disable the image lightbox which opens when you click on an image.
Search on click
By default, clicking on items in the categories, tags, attributes or taxonomy columns in the table will search (i.e. filter) the table by that term. This is a quick way of filtering the table if you have lots of products.
Use [product_table search_on_click="false"] to disable this and link the column to the relevant archive page instead.
Add to cart
Quantities
Use [product_table columns="name,price,buy" quantities="true/false"] to show or hide the quantity picker in the Buy column.
Variations
Use [product_table variations="dropdown/separate"] to choose whether to display variations as dropdowns or on separate rows of the table.
Type of add to cart button
Use [product_table cart_button="button/checkbox/button_checkbox"] to choose what type of add to cart buttons to include in the 'Buy' column of the table.
Multi add to cart location
Use [product_table add_selected_button="top/bottom/both"] to control the location of the multi add to cart button which appears when your table contains add to cart checkboxes. The default option is top, which displays the button above the table.
Show or hide the quantity picker
Use [product_table quantities="true/false"] to show or hide the quantity picker in the 'Buy' column of the table.
AJAX add to cart
Use [product_table ajax_cart="true/false"] to enable or disable AJAX add to cart functionality in the table.
Choosing which products appear in the table
Use the following shortcode options to choose which products appear in the table. For each one, you should enter the category/tag slug or database ID in a comma separated list.
[product_table category="courses,books"]to list products from one or more categories:- You can list categories by ID or slug.
- If you are using numeric category slugs (e.g. "123" and "456") then you need to add numeric_terms="true" to the shortcode , e.g.:
[product_table category="courses,books" numeric_terms="true"]
[product_table tag="cool,awesome,good"]to list products with one or more product tags.[product_table cf="color:blue,make:audi"]to list products with a specific custom field value. Use the format cf="<field name>:<field value>".[product_table term="product_type:coats,shoes"]to list products with specific taxonomy terms:- Use the format term="<taxonomy slug>:<term slug or ID>".
- It is not possible to list products from two different taxonomies. For example, the following shortcode will NOT work:
[product_table term="product_type:coats+product_status:trade"]. - If you are using numeric taxonomy terms (e.g. "123" and "456") then you need to add numeric_terms="true" to the shortcode , e.g.:
[product_table term="product_type:coats,shoes"numeric_terms="true"]
[product_table term="pa_color:black"]to list products with a specific attribute value:- Add pa_ before the attribute name, followed by a colon and the attribute term(s).
- Your attributes must be added globally via Products → Attributes.
[product_table year="2016"]to list products published in a certain year. For more fine-grained control, you can combine this with the month or day options, e.g.:product_table year="2015" month="11"][product_table month="11"]to list products published in a certain year. Enter the number of the month rather than its name.[product_table month="4" day="25"]to list products published on a specific day of the month. Enter a number between 1 and 31.[product_table columns="name,price,buy" status="publish/draft/pending/future/private/any"]to list products based on their post status.[product_table stock="instock/outofstock/onbackorder"]to list products based on their stock status.[product_table include="23,45,67,90"]to include certain products based on their ID.[product_table exclude="23,78"]to exclude certain products based on their ID. Note that the include and exclude options are mutually exclusive - if you set one, the other will be ignored.[product_table exclude_category="3,6"]to exclude entire categories of products. You can use category IDs or slugs.[product_table id="1" user_products="true"]to list products previously ordered by the current logged in user.[product_table term="product_visibility:featured"]to list featured products.
Using and/or logic
These options use 'or' logic by default, for example to show products that are either in the courses or books category. Use a + sign instead of a comma to use 'and' logic instead. For example, this shortcode will display products which are in both the courses and books category: [product_table category="courses+books"]
You can’t mix and match commas and pluses in a shortcode – you have to use one or the other.
Finding products
Filters
Use one of the following shortcode options to add filter dropdowns above the product table:
[product_table filters="true/false"]to show any filters that are available based on the columns in the table. For example, if the table contains columns for categories and tags then category and tag filters will appear.[product_table filters="categories/tags/attributes"]to show filters for all categories, tags, and/or attributes. If you want to show multiple filter dropdowns then add a comma between each one.
How to rename the filters
To set a custom name for the filter, add a colon : after the filter name followed by your heading. For example:
categories:Product Categories, att:color:Which Colour?
If you don't set a name for the filter but the filter also appears as a column in the table, then the column name will be used for the filter. If neither of the above apply, then the filter name will be generated automatically.
Custom
Use the Custom option to specify your own filters . This should be a comma-separated list of filters, and the format is similar to the columns option.
You can choose any combination of the following:
categories- The product categories filter.tags- The product tags filter.- Any product attribute - e.g.
att:colorwould display the Color attribute filter (useatt:followed by the attribute slug). attributes- Displays all product attributes, one filter per attribute.- Any taxonomy - e.g.
tax:product_regionwould display a filter for theproduct_regiontaxonomy (usetax:followed by the taxonomy slug).
If you want to set this option for individual tables, you can add the same list to the filters option in the shortcode. E.g. filters="categories,att:size,tax:manufacturer"
Sort options
Sort products by
- Use
[product_tablesort_by="name/id/sku/cf:[field]/price/popularity/reviews/date/date_modified/rand"] - If the table is not using lazy load then you can also sort by
summary/description/categories/tags/stock/date_modified/att:[attribute]
To sort by custom field or attribute, replace [field] or [attribute] above with the actual custom field or attribute name/slug, e.g.: [product_table lazy_load=false sort_by="att:color"]
Sort order
Use [product_table sort_order="asc/desc"] to control the initial sort order of the table.
Search term
Use [product_table search_term="t-shirt"] to pre-filter the table by a specific search term ("t-shirt" in this example).
Table controls
- Search box -
[product_table search_box="true/false"]- Shows or hides the search box above the table. - Reset button -
[product_table reset_button="true/false"]- Shows or hides the reset link above the table. - Products per page control -
[product_table page_length="top/bottom/both/false"]- Shows, hides or repositions the “Show <x> products” drop-down menu. Defaults tobottom. - Product totals -
[product_table totals="top/bottom/both/false"]- Shows, hides or repositions the product totals message (e.g. “50 products”). Defaults tobottom. - Pagination buttons -
[product_table pagination="top/bottom/both/false"]- Shows, hides or repositions the pagination buttons. Defaults tobottom. - Pagination type -
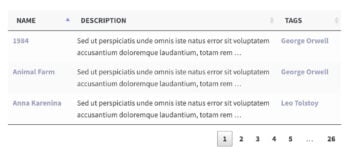
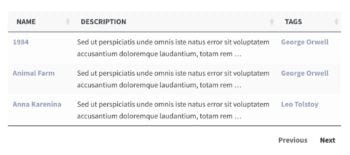
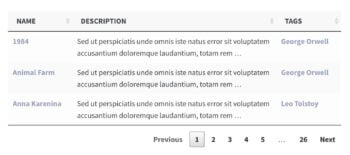
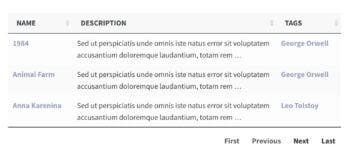
[product_table paging_type="numbers/simple/simple_numbers/full/full_numbers"]- Controls the style of pagination used for the product table. Defaults tonumbers.
- paging_type="numbers" (default)
- paging_type="simple"
- paging_type="simple_numbers"
- paging_type="full"
- paging_type="full_numbers"
- Show footer -
[product_table show_footer="true/false"]- Shows or hides the column headings at the bottom of the table as well as the top. The default isfalse(i.e. hide the footer headings).
Number of products in the table
Products per page
Use [product_table rows_per_page="50"] to control how many products to display on each page of results. The default is 20 rows. Setting it to -1 will show all products on one page.
Product limit
Use [product_table product_limit="750"] to control the maximum number of products displayed in the table. The default is 500 products. If you have more than 500 products and they're not all loading then you need to increase the product limit.
Warning: Setting too large a limit could have a performance impact on your server. If you need to display more products then we recommend using the lazy load option.
Mobile and responsive options
Responsive visibility
Use [product_table responsive_visibility="default,desktop,all,default"] to control when each column is displayed at different screen sizes, and when it is collapsed into the hidden 'child' row (or modal window). Set one choice for each column in your table, in the same order that they are listed in the columns option.
You can use any of the visibility options listed in the DataTables documentation. Here are some of the most useful:
default- Let the table decide when to show the column, using the priorities option if set.mobile- Column will display on mobiles, and is hidden at other screen sizes.tablet- Column will display on tablets, and is hidden at other screen sizes.desktop- Column will display on desktop screen sizes, otherwise hidden.not-desktopormax-tablet-Column will display on mobiles and tablets, but is hidden on desktops.not-mobile- Column will display on desktop and tablets, but is hidden on mobiles.not-tablet- Ccolumn will display on desktop and mobiles, but is hidden on tablets.min-tablet- Ccolumn will display on tablets or desktops, hidden on mobile.all- Force the column to display at all screen sizes where possible.none- Never shown in the main table (only visible when the child row or modal is expanded).
Some notes:
- Do not list column names in the
responsive_visibilityoption. Just list the visibility for each column in the correct order. - The plugin can only display columns that physically fit into each screen size. The
responsive_visibilityoption will be ignored if the columns that are set to visible do not fit on a specific screen size. For example, if you have 20 columns and set them all toallthen some of them will still be hidden. We have coded the plugin this way to prevent it from ever looking broken on any screen size. - This works alongside the
responsive_displayoption, but will override anything set by theprioritiesoption (i.e you can useresponsive_visibilityorpriorities, but don't use both together).
Priorities
Use [product_table priorities="1,4,5,3,2"] to control the order in which columns are "collapsed" on smaller screens when they won't all fit in the available width. Columns with a low number are hidden last.
Responsive display
Use [product_table columns="name,stock,price,buy" responsive_display="child_row/child_row_visible/modal"] to control how the "child rows" are displayed when viewing the table on smaller screen sizes (or when there is too much data to fit in the table). By default, the extra columns are displayed inside a child row which can be shown by clicking the "+" icon at the start of each row.
Warning: The 'checkbox' add to cart button style is not compatible with the modal option.
Responsive control
Use [product_table columns="name,summary,price,buy" responsive_control="inline/column"] to control whether the '+' icon control is displayed inside the first column or within its own separate column. Defaults to inline.
Date options
Date columns
Use [product_table columns="name,cf:custom_date,buy" date_columns="cf:custom_date"] to tell WooCommerce Product Table to treat certain columns as dates.
Date format
Use [product_table columns="name,date,price" date_format="F j, Y"] to control how any date columns are formatted in the product table.
You can set the date format to any valid date/time format string. For example: F j, Y will format the dates in this format: "August 24, 2024"". See the WordPress Codex for more information.
Miscellaneous
Lazy load
Use [product_table lazy_load="true/false"] to enable or disable lazy load.
Caching
Use [product_table cache="true/false"] to enable or disable caching for the table.
Image size
Use one of these shortcodes to change the size of the images in the 'Image' column:
- For a square image 50 by 50 pixels:
[product_table columns="image,name,description" image_size="50"] - For an image 40 pixels wide by 60 pixels high:
[product_table columns="image,name,description" image_size="40x60"] - To use the
mediumimage size:
[product_table columns="image,name,description" image_size="medium"]
Description length
Use [product_table description_length="20"] to control the length of the product description column in the table, based on the number of characters. Set it to -1 to show the full description.
Sticky header
Use [product_table sticky_header="true/false"] to enable or disable the sticky table header.
Hide table header
Use [product_table hide_header="true/false"] to show or hide the header row of the table.
Shortcodes
Use [product_table shortcodes="true/false"] depending on whether you wish to to display content generated by any shortcodes, HTML or other formatting used in the fields that you are displaying in the product table.
No products message
Use [product_table no_products_message="Sorry, no products found"] to choose the text that will display if no products are found when the table first loads.
Note: this option will have no effect if you have set a custom language using the wc_product_table_supported_languages filter.
No products filtered
Use [product_table no_products_filtered_message="Sorry, no products match these search criteria"] to choose the text that will display if no results are found when the user tries to search or filter the table.
Note: this option will have no effect if you have set a custom language using the wc_product_table_supported_languages filter.
Wrap
Use [product_table columns="name,stock,price,buy" wrap="true/false"] to control whether or not content in each row of the table can flow onto multiple lines. The default is true.
Scroll offset
Use [product_table scroll_offset="35"] to set a custom scroll amount for WooCommerce Product Table to jump back to the top of the page when customers move between different pages of the table. This can fix any conflicts with your theme such as if there's a sticky header and the default height isn't working.
Use [product_table scroll_offset="false"] to disable automatic scrolling.
Combining multiple shortcode options
You can combine as many shortcode options as you like. Simply enter a space between each shortcode option.
Some examples:
[product_table columns="name,summary,tags,price,buy"][product_table columns="sku,name,description,tags,price,buy" category="ebooks"][product_table columns="image,name,price,buy" image_size="80x80"][product_table columns="name:Product Name,reviews:Rated,date:Added On,price:Unit Price"]
Where can I use the shortcode?
You can use the [product_table] shortcode to add product tables to any page, product, post or text area on your site. This includes:
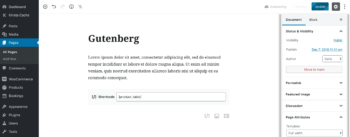
- Pages or posts built using any page builder plugin (e.g. Divi Builder or Elementor), the Classic WordPress editor or the Gutenberg block editor - just add the shortcode to a 'Shortcode', 'Text' or 'Paragraph' block.
- Pages or posts built using the Classic WordPress editor - simply click the 'Insert Product Table' toolbar button (circled in the second image, below).
- The short or long description on the single product page.
- Widgets.
- Template files in your theme, e.g. archive-product.php or single-product.php. (However, the table builder contains options which will automatically output a pre-built product table on your shop, category, tag archives etc. so you shouldn't need to do this for standard templates.)
- Gutenberg Editor
- Classic Editor
