woocommerce product images

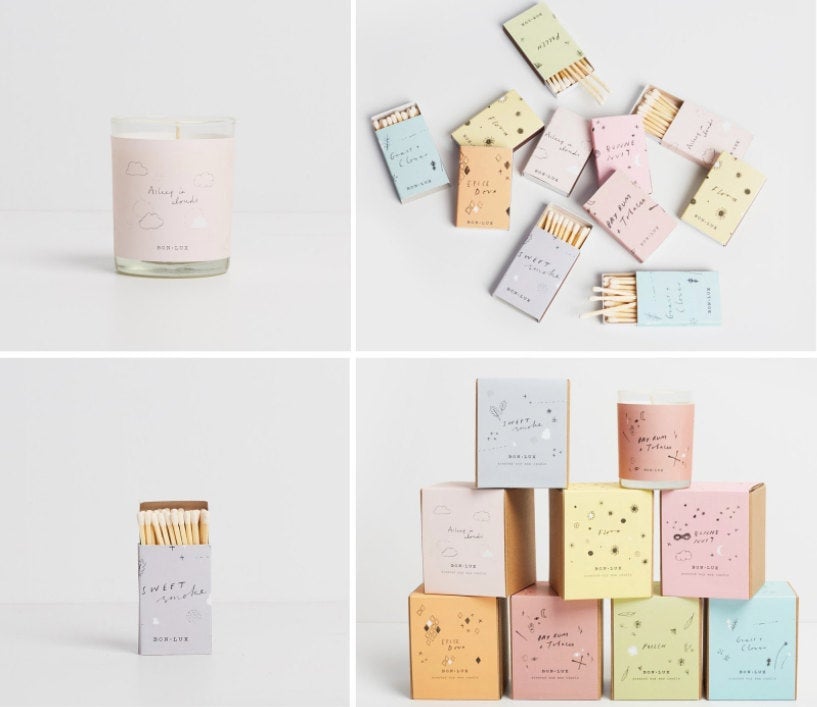
The product images in your WooCommerce store have a major role to play in increasing sales, conversions, and clicks. So when we know how effective they can be on their own, how do we maximize their potential?

While a standard WooCommerce install will help you set up the basics of your store (with a simple product gallery and image settings), you’ll need little help if you’re looking to give your product images a boost.

So in this article, we’ll be discussing the benefits of improving your WooCommerce product images. Then we’ll give you 3 ways you can boost them with the help of some easy-to-use plugins.

These plugins allow you to take control of how your product images are displayed. With an upgraded product gallery, click-saving product lightbox, and image hover effects, you’ll improve customer experience and boost sales at the same time.

The benefits of improving your WooCommerce product images

Improving the product images in your WooCommerce store will have massive benefits for your sales and conversions. Here’s why:

1. It entices your customers to buy your products

It goes without saying that high-quality product images are key when it comes to convincing customers to buy from your store.

While customers browse, it’s often only your product images that will give them the best indication if your product is right for them or not.

In fact, a study from the online marketplace Etsy found product image quality was a decisive factor among 90% of the users when it came to buying.

But what does ‘quality’ mean?

According to Etsy, quality is a combination of the following:

  • An image that’s clear, in focus, and sharp.
  • An image that’s well-lit.
  • A photo that contains enough ‘information’ about the product. In other words, you can see the details, you can see the whole product and the product is the main focus of the image.
  • An image that represents the product well - for example, the colors in the photo shouldn’t be different from the actual product.
woocommerce product images
An example of excellent product photography from Etsy/BON LUX

Of course, these are just the basics. Great product images can be so much more than this.

They can show customers what the product will look like in their hands with lifestyle shots. They can show customers how a product can be used with instructional photos. They can also show different angles, closeups, and more to showcase the product to its full potential.

2. It gives your store a competitive edge

The product images you use play a huge role in making you stand out from other stores. When you go beyond a standard product image on a white background, you’ll be providing your customer with way more visual information.

So by improving your product images, you’ll not only catch the eye of potential customers, but you’ll show them you value your products too. The simple act of improving your product images will immediately show customers you can be trusted and valued as a brand.

Plus, you can give your competitive edge a massive boost by using the techniques we’ll list in the next section.

3. It narrates a story about your brand

It’s said an image can speak a thousand words and this absolutely applies to product images too.

Carefully selected product images for your WooCommerce store tell a story. They inform customers, in a simple image, what the product and your brand are all about. In fact, according to data from BigCommerce, 78% of online shoppers want product images that bring products to life.

By getting creative with your photography, you’ll be able to show customers how your product, fits into their life. In particular, lifestyle photography transforms a product that a customer cannot touch, into one they can see slotting into their life with ease.

So, now we know the benefits of improving the actual product images you use in your WooCommerce store, so let’s give them a major boost with some easy-to-use plugins.

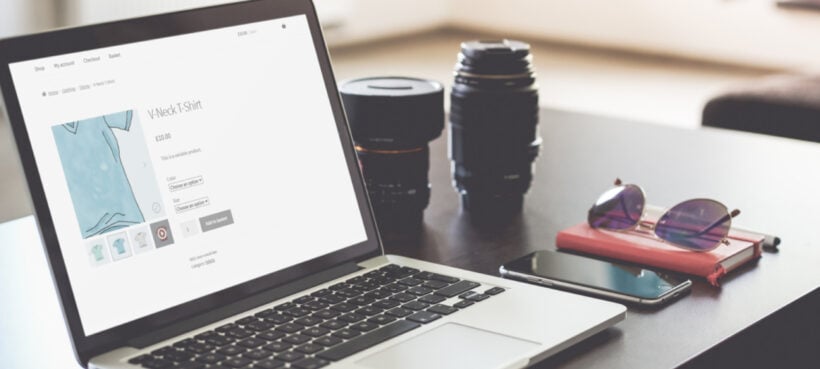
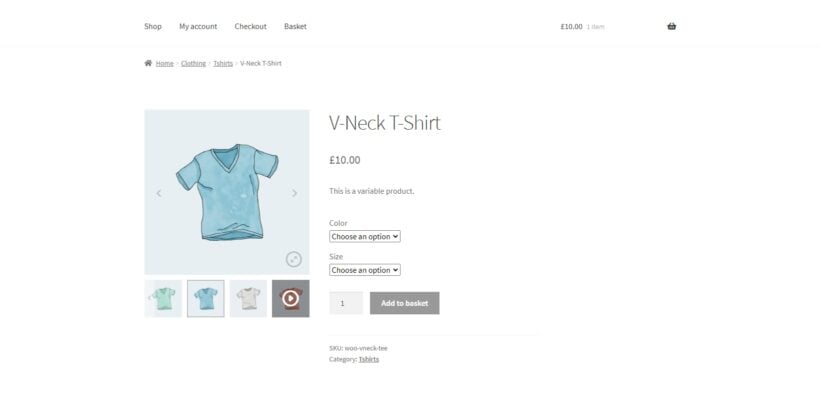
You’ve improved your product images, they’re clear, professional, eye-catching, and very clickable, but what now?

Once you’ve uploaded your product images to your WooCommerce store, they’ll be showcased in the standard WooCommerce product gallery. This is fine if you’re looking to keep things basic, but we’re here to give your product images a boost.

That’s where WooThumbs for WooCommerce comes in.

woothumbs for woocommerce

WooThumbs for WooCommerce allows you to take complete control over the layout and design of your product gallery. It dramatically improves the look and feel of your gallery, as well as improving the customer experience.

As well as customizing the layout of your WooCommerce product gallery, WooThumbs helps you customize your product gallery in two other major ways. We’ll talk about both of these below.

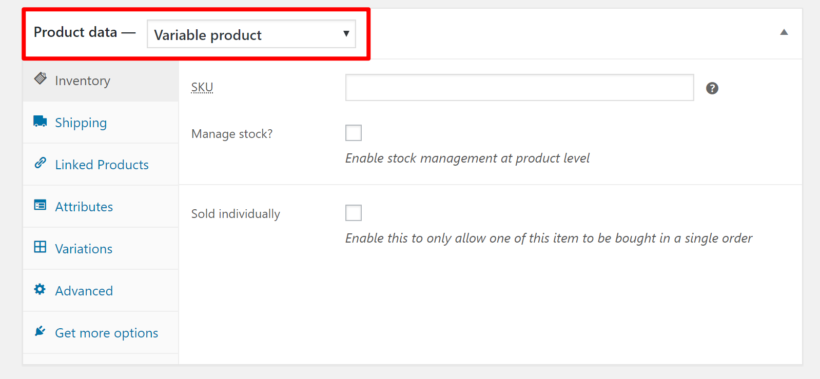
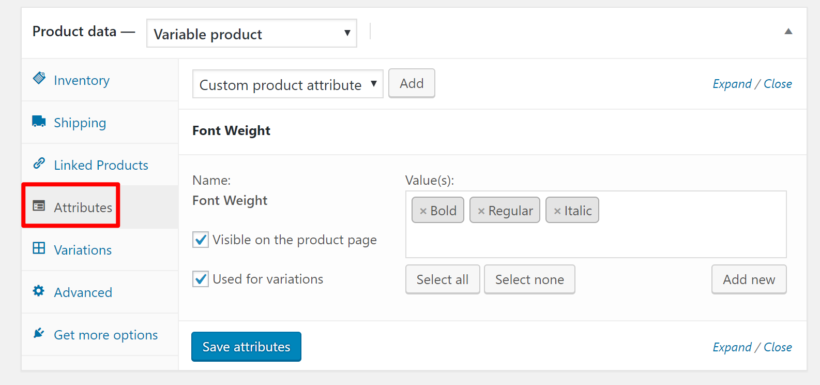
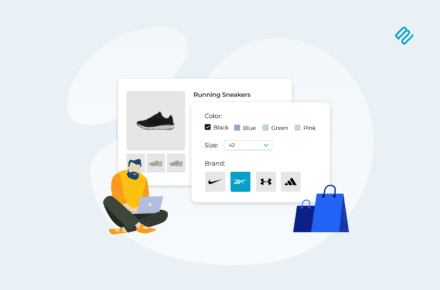
1. It allows you to include additional variation images

In a standard WooCommerce store, you can’t add additional variation images to your products. This can be a problem if you want to, for example, show the different angles, details, or lifestyle shots of your product variations.

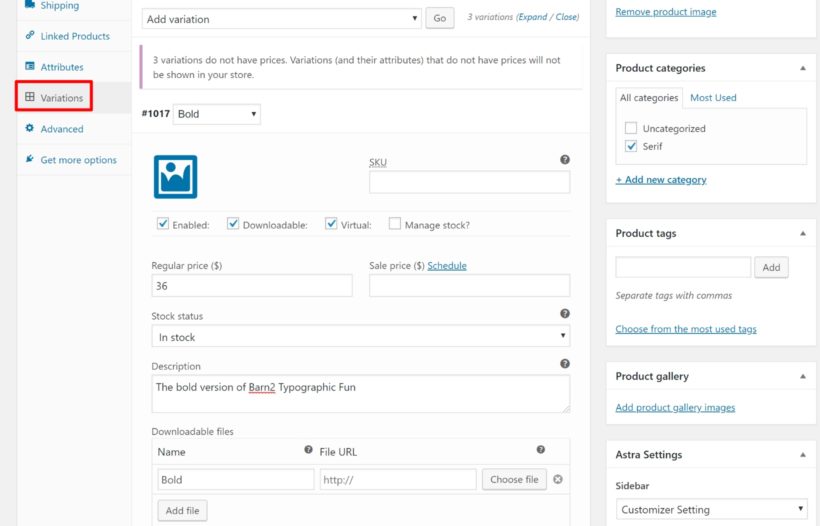
This is where WooThumbs comes in. It allows you to import additional variation images for your product image. Giving you more freedom to show your products from different perspectives.

additional variation images

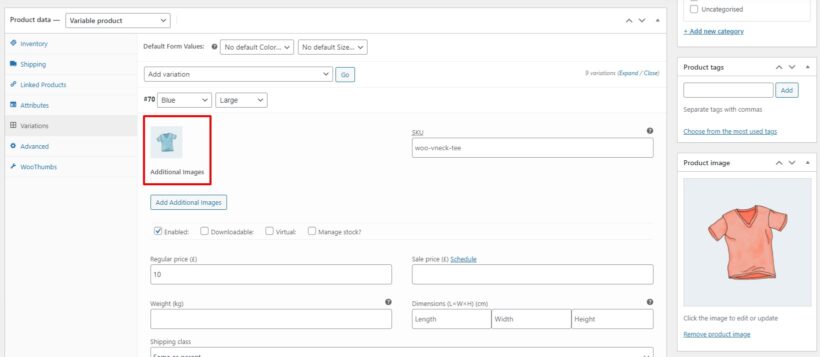
A major benefit of having more variation images is customer satisfaction. Sometimes, to judge the quality of a product, customers want to see the product from different angles. With WooThumbs, customers can see as many variation images as they like. Helping them make a decision.

2. It improves image zoom

Visual cues are a very important factor in generating sales and improving customer experience. Making your WooCommerce product images interactive will help your customers to get a better view of your products.

While a standard WooCommerce store does have image zoom on your product images, it’s hard to customize and could be improved.

woocommerce image zoom

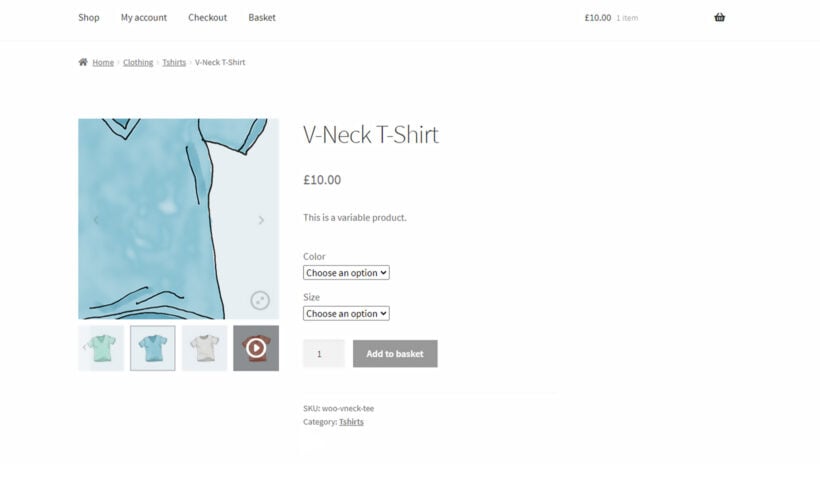
With WooThumbs for WooCommerce, you’re able to specify which type of zoom you’d like to use, including:

  • Inner Zoom - This uses the current image bounds as a frame for the zoomed image. When you hover, the zoomed image will be displayed smoothly on the screen.
  • Outer Zoom - This displays the zoomed image beside the main image, on whichever side you choose in the settings.
  • Follow Zoom - This is a ‘magnifying glass’ style of zoom and will display the zoomed image in a circle or square at the mouse position.

Once selected, you can then customize each of these to suit your specific preferences.

Showcase product images in a lightbox

Now we’ve improved your product image gallery, it’s time to show off your improved product images on the shop and category pages.

When browsing your store, customers will likely click through to many different product pages to find the products they’re looking for. All these clicks can end up tiring the customer out, causing them to leave your store - especially if they’ve not found the item they’re looking for.

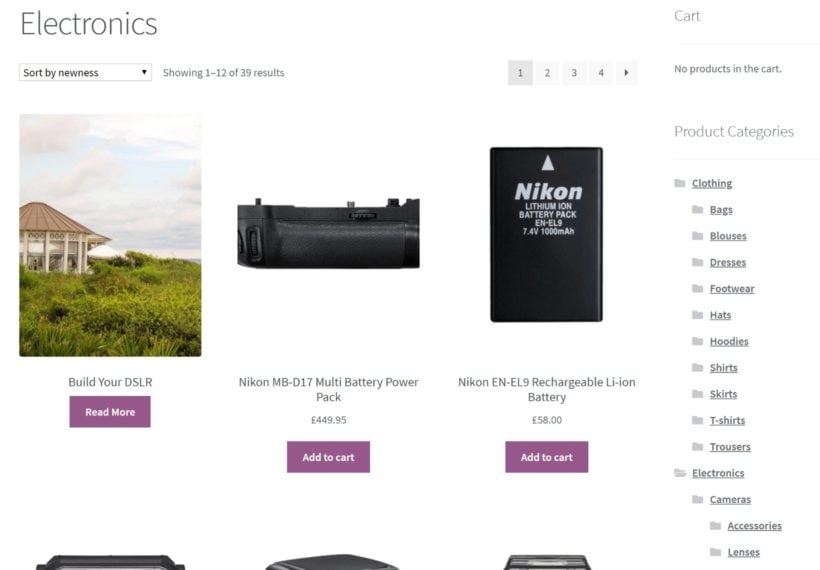
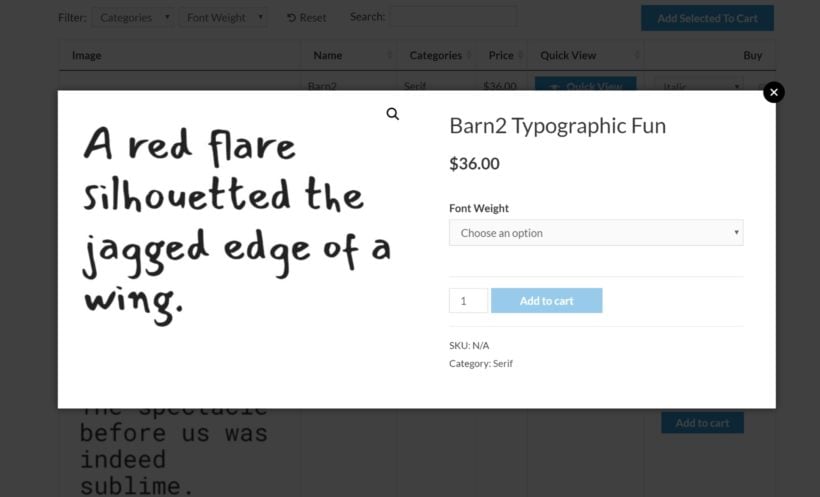
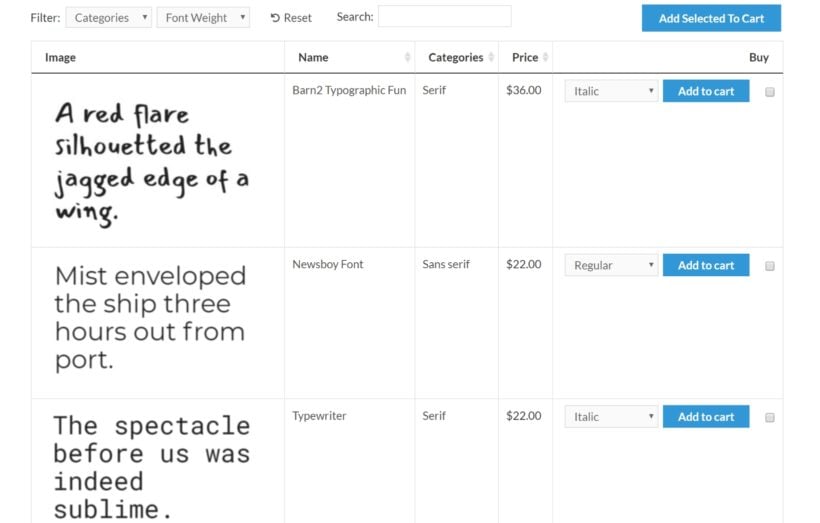
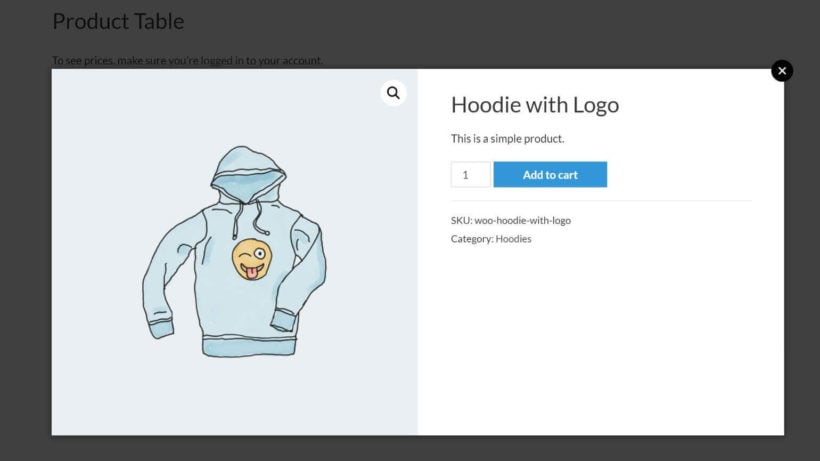
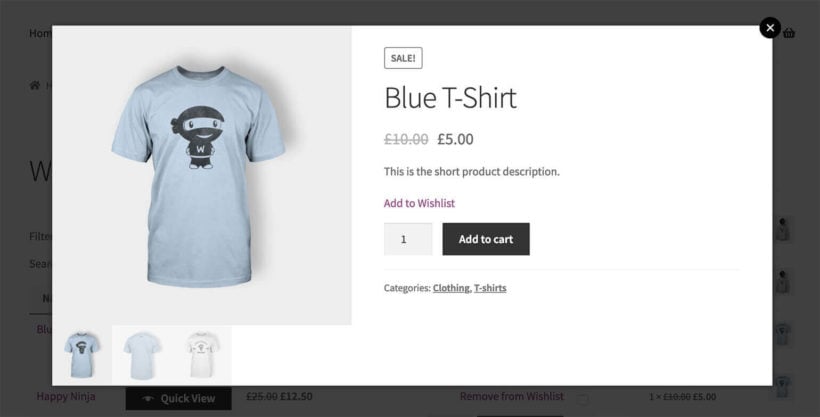
Let’s fix this by giving customers the option to quickly view product information right from the shop and category pages. This can be done with WooCommerce Quick View Pro.

3_WooCommerce_Quick_View_Pro_Lightbox

Quick View Pro allows customers to see product images, information, options and more, in a popup lightbox, all without leaving the shop page.

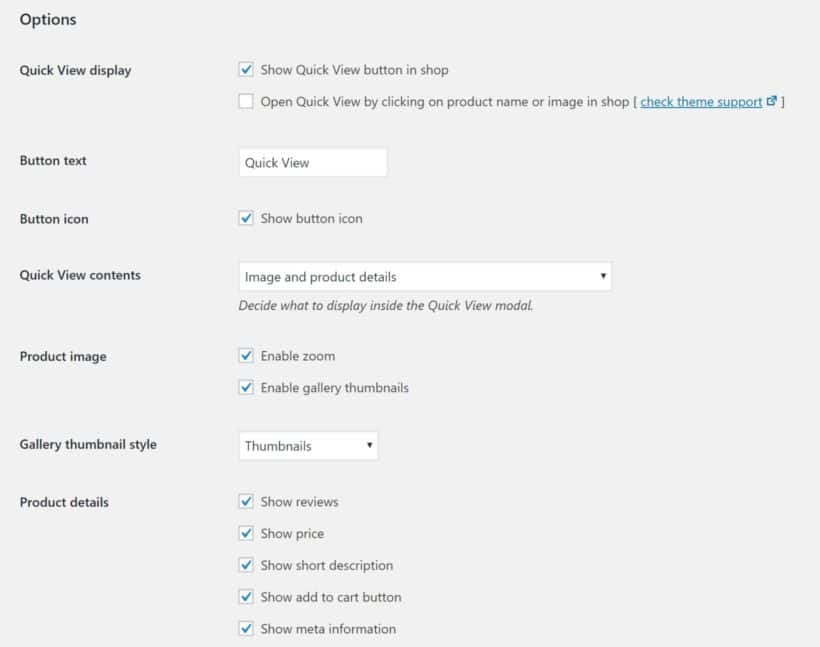
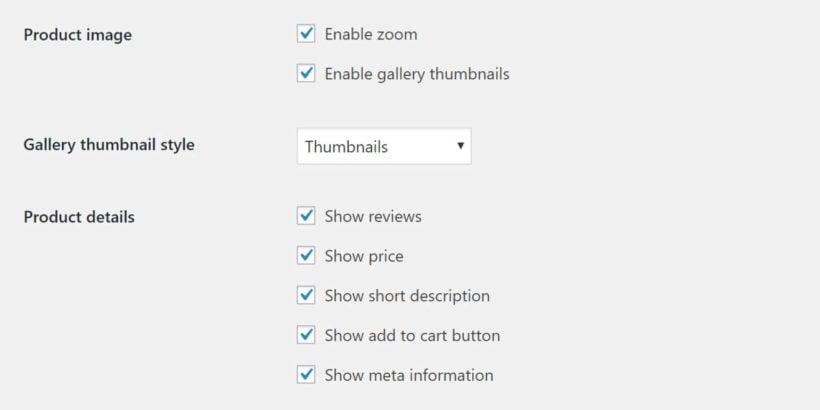
Plus, you’ll be able to completely customize what the customer sees within the lightbox for full control. You’ll be able to:

  • Keep things simple by showing just the product images, description, and buy button.
  • Or give customers a full preview by showing all of this and attributes, meta information, reviews, and more.
Quick view information

With the help of this plugin, your customers can quickly preview items in the product lightbox and add them to the cart. Customers can then quickly return to the product page and continue shopping.

Not only will this save customers clicks, but it will speed up the buying process too. Resulting in more sales and much happier customers.

Change product images on hover

We all know the benefits of an improved product gallery, but what if we could bring those benefits to the shop and category pages of your WooCommerce store?

With Image Swap for WooCommerce in place, you’ll be able to add hover and click image effects to your product images.

image swap for woocommerce

These effects will replicate the benefits of a product gallery but will apply to the images on your shop and category pages. So when customers browse your products, they’ll be able to do any of the following (depending on which you pick):

  • Fade - When a customer hovers or clicks, the next product image will fade in.
  • Slide - Your customers will be able to use arrows on a slider to flick through your product images.
  • Bullets - Similar to above but instead of arrows, they’ll be able to use bullets or dots.
  • Thumbnails - Customers will see smaller thumbnails of your product images below the main image, much like a product gallery.
  • Zoom - Customers will be able to hover over your product images and see a zoomed-in version.
  • Picture-in-Picture - This will show a small version of the next image in the corner of the first image. Once clicked, it will switch the images around.
  • Modal Gallery - This will allow customers to click the product image and see an enlarged version in a modal popup.
  • Enlarge - When hovered over, this image will increase in size, right on the shop/category page.
  • Flip - Once clicked or hovered over, the first product image will flip over to reveal the next.

By using effects like these, you’ll again reduce clicks by showing customers much more visual information and speed up the buying process at the same time.

Upgrade your WooCommerce product images today

With these three plugins in place, you’ll be able to dramatically improve the sales in your store by using the most up-to-date sales-boosting techniques.

Plus, having improved the quality of your product images, you’ll be able to draw even more attention to them by showcasing them to their fullest.

You can try each of these plugins risk-free by clicking the links below:

If you're a graphic designer, learning how to sell fonts online is a great way to generate some passive income from your skills.

There are plenty of font designer marketplaces that will happily sell your fonts for you like MyFonts, Fonts.com, etc...but those resellers will typically take half your sales as a commission and might require that you exclusively sell through them.

WordPress and WooCommerce provide a better way to sell fonts online that cuts out the commission and gives you full control. With the right WooCommerce plugins, you can create a store that's optimized specifically for fonts. You'll get a convenient table layout, complete with font previews and Ajax category filters to help your shoppers find the right font:

Example of table to sell fonts online

In this tutorial, we'll show you how to use WooCommerce Product Table and WooCommerce Quick View Pro to sell print or web fonts online with WooCommerce.

Why WooCommerce Product Table is the best way to sell fonts online

WooCommerce is the world's most popular way to create an eCommerce store and is fully capable of selling both physical and digital products. It makes a great option for a solo font designer, font shop, or type foundry.

However, the default styling of most WooCommerce themes displays products in a more "traditional" eCommerce layout that looks something like this:

Traditional WooCommerce example

Now, that might work great if you're selling physical products. But if you're selling your own fonts, that kind of shop layout...

  • Doesn't display the important information about a font, like how it looks, its different font weights, etc.
  • Wastes space and makes it hard for shoppers to browse all your available fonts.

WooCommerce Product Table is a flexible plugin that fixes those issues by letting you display your fonts in a table layout like you saw above:

Example of table to sell fonts online

This gives you a compact way to help people shop your fonts. Visitors can:

  • See a graphic preview of the font to see kerning, glyphs, ligatures, calligraphy, etc.
  • Choose different weights for each font family from a drop-down.
  • Use checkboxes to add multiple fonts to their carts.
  • Use filters to find specific types of fonts. For example, serif font vs sans serif font, or OpenType fonts.
  • View license options.
  • Plus whatever else fits your business - the plugin gives you full control over what information you display.

Integrate your table layout with product quick view

If you want to display more information about each typeface than the table layout allows, you can add a product quick view button to the table that lets shoppers browse more information in a lightbox.

For example, you could use this product quick view to show:

  • A description of the typeface and its inspiration.
  • More detailed licensing information.
  • More images of your typography in action (or different font weights in action).
  • Font bundles or upsells.
Font product quick view

How to sell fonts online with WooCommerce: Step-by-step

Below, we'll take you step-by-step through how to sell fonts online with WooCommerce and WooCommerce Product Table.

To begin, we'll assume that you already have a fresh WordPress/WooCommerce install. If not, you'll first want to install WooCommerce and complete the setup wizard.

1. Add new fonts as WooCommerce products

To manage your fonts, you'll use the regular WooCommerce product system. The simplest approach is to create one unique WooCommerce product for each new font family that you want to offer. You can then add different font weights or licensing options as product variations within that product.

To do that, go to Products → Add New.

First, enter basic details like the font family name and description. You can also use product categories and tags to add other pertinent information, like whether the font family is serif or sans serif.

You can also add an image to preview how the font looks - the way that Google Fonts handles things is a good starting point:

Add font as WooCommerce product

Next up:

  • Scroll down to the Product data box
  • Choose Variable product from the drop-down (unless you're only selling a single font weight - then you can use simple product)
Choose product type

From there:

  • Go to the Attributes tab and select your attributes (you can set these up by going to Products → Attributes). 
  • Select the Used for variations box.
  • Click Save Attributes.
Add attributes

To finish things out:

  • Go to the Variations tab.
  • Select Create variations from all attributes from the drop-down and click Go.
  • Check the Downloadable and Virtual boxes for each variation.
  • Enter the price. If you want to offer free fonts or other freebies, you can mark it as zero.
  • Upload the font file in whatever format you want to offer.
Configure product variations

Once you've configured all of your variations, publish your product. Then, repeat the same process for all the different font families that you want to offer.

2. Configure WooCommerce Product Table

Once you've added all your font families as WooCommerce products, you're ready to create the front-end interface that you'll use to sell fonts online.

Make sure you've installed and activated the WooCommerce Product Table plugin. Then, go to WooCommerce → Settings → Products → Product tables to configure the plugin.

You can explore all of the plugin's settings, but here are the specific settings you'll definitely want to configure.

First, use the Columns box to configure what information you want to display for each font. A good starting point is:

image,name,category,price,buy

But you can include other information, like custom fields or taxonomies. View all the column options.

Configure columns to sell fonts online

Then, scroll down to the Add to cart column settings and:

  • Choose Button and checkbox from the Add to cart button drop-down. This will allow shoppers to select multiple fonts to add to their cart.
  • Choose how to handle Variations. You can either display each font weight as a separate row in your table. Or, you can display a drop-down next to each font family that lists all of the weights.
Configure add to cart buttons

Displaying variations as separate rows makes it easier for shoppers to purchase multiple font weights, while using the drop-down lets you display more font families in less space.

Finally, go to the Table controls section and configure your Product filters. You can use these to let shoppers filter by font category/tag (e.g. serif vs sans serif) and/or attribute (e.g. font weight):

Configure online font store filters

3. Create your front-end font shop page

Once you've configured WooCommerce Product Table, you can display your front-end font store page by adding the [product_table] shortcode to a regular WordPress page:

Add shortcode to create front-end form to sell fonts online

And once you publish the page, you should see the table that will help you sell fonts online:

Sell fonts online example

You can use various parameters to filter out specific fonts. For example, you could create one table to display fonts from a specific category. Or, you could create a dedicated table to promote your best font, or trendy or popular fonts.

4. Add product quick view button (optional)

If you want to display more information about each font, you can add a product quick view column to your table using the WooCommerce Quick View Pro plugin.

Once you've installed and activated the plugin, you can then go to WooCommerce → Settings → Products → Quick view to configure how the quick view box works:

Configure WooCommerce Quick View Pro

Then, you can add a quick-view column to WooCommerce Product Table to achieve this effect:

Font product quick view

Tips for selling fonts more effectively

Once you've set up your basic online font store, you'll want to consider implementing some more advanced sales tactics to boost your revenue and sell fonts online more effectively.

Sell font bundles

People who purchase fonts online love bundles - there are even entire sites dedicated just to selling font bundles. For example, you could bundle different font weights together or fonts that pair well together.

The WooCommerce Product Bundles plugin lets you bundle together as many fonts as you want. You can then display your bundle options in the product quick view box in your fonts table. The bundles will not display in the table itself - but they will appear in the quick view box if you use WooCommerce Quick View Pro.

Create upsells

Another good option is font upsells, which let you recommend a similar font/bundle in place of the font a shopper is looking at.

You can create font upsells using the built-in Linked Products feature in WooCommerce and display them in your product quick view box.

Launch your WooCommerce font store today

By creating your own WooCommerce store to sell fonts online, you eliminate the middleman and ensure you don't have to give up 50% of your sales as a commission to a third-party font marketplace.

However, if you want to use WooCommerce to sell fonts online, you'll also want to use some extensions to create a more optimized font shopping experience.

WooCommerce Product Table lets you create an optimized, table-based shop layout page to display your fonts. You'll be able to share previews, list pertinent details like font weight and type, and allow shoppers to purchase multiple fonts at the same time.

If you want to display more information about each font, the WooCommerce Product Table plugin integrates with the WooCommerce Quick View Pro plugin to help you add a product quick view button that opens a box with more detailed previews, descriptions, and license terms.

Get started today and create your own WooCommerce store to sell fonts online!

Do you have any questions about how to sell fonts online with WooCommerce and WooCommerce Product Table? Ask away in the comments!

WooCommerce hide price

Looking for a WooCommerce hide price tutorial so that you can hide product prices from some or all of your store's visitors? Hiding prices from public view works great for wholesale stores, catalog sites, and many other situations. But, unfortunately, WooCommerce doesn't include any built-in way to hide product prices.

Don't worry, though! It's definitely doable, and you won't even need to write a line of code to set it up. Yup – you'll be able to hide WooCommerce product prices with no code snippets or editing functions.php!

In this guide, we'll show you how to hide prices in WooCommerce for a few different situations. By the end, you'll be able to completely hide prices for all visitors, conditionally hide prices by user role or logged-in status, plus a few other scenarios! Some visitors will see the price as usual, and others will see the WooCommerce products without price.

When does it make sense to keep prices hidden?

There are a lot of different use cases in which you might need a WooCommerce hide price plugin. Let's run through some situations in which WooCommerce without prices makes sense:

  • Wholesale stores If you have a WooCommerce wholesale store, you probably want to remove the price from retail customers while still letting authenticated wholesale customers see the wholesale price. That way, you can use WooCommerce to show prices only to registered users.
  • CatalogsIf you just want to create a browsable catalog of products, but don't actually want to sell them through your website, you might want to show WooCommerce products without price or add to cart button.
  • Members-only stores Similar to a wholesale store, you could create a members-only WooCommerce store where registered shoppers must login to see prices. You could even combine this with a WordPress membership plugin to charge users to sign up to your store and see the prices.

You can probably come up with your own scenarios where your store can benefit from a WooCommerce hide price plugin, too.

Different ways to hide prices in WooCommerce

In this WooCommerce hide price tutorial, I'm going to share several different methods with you. Read through the options and decide the best way to hide product prices...

Option 1 - Hide prices from logged out users

First, let's look at the most dynamic option. This can conditionally hide WooCommerce product prices from logged in users. Prices appear as normal for logged in users. They simply login to WooCommerce to see prices.

To use WooCommerce to only show prices when logged in, you need the WooCommerce Wholesale Pro plugin. This WooCommerce hide price plugin lets you show/hide prices depending on:

  • Show/hide prices for users who are not logged in.
  • Display different prices and tax information depending on the user's role.

For example, if you're running a wholesale store, this would let you make your product catalog public, but only show prices to people who register for a wholesale seller account.

While the plugin is mostly designed for wholesale stores, you don't have to use it for wholesale. You can just use it to remove the WooCommerce price for guest users so that people must log in to see the price of each product.

How to set it up

Once you install and activate the WooCommerce hide price plugin, go to WooCommerce → Settings → Wholesale. Simply tick the 'Hide price until login' box and save the page. As if by magic, your WooCommerce prices will be hidden from logged out customers.

Now, the price will be hidden to non-logged in users everywhere on your site. This includes the shop page, category pages and single product pages. It also disables the buy buttons from logged out users. If you disable the price in WooCommerce, then they can't make a purchase!

WooCommerce Wholesale Pro integrates perfectly with WooCommerce Product Table. (In fact, you can save money by buying both plugins together as a bundle.) So you could, for example, create a product table that does include a price column, but only displays the price in the column if a user has a certain role or is logged in.

WooCommerce hide price by user role

In addition to hiding price by logged-in status, the same WooCommerce hide price plugin plugin also lets you conditionally hide prices and show different pricing based on a user's role.

For example, if you're running a public and wholesale store, then it works like this:

  • Logged out users are in catalog-mode, where they can't see prices or buy buttons.
  • Logged in users with the default 'customer' role can see your normal product pages.
  • Wholesale roles are shown the correct price for their role.

Clever!

Exploring real-world applications of the WooCommerce Wholesale Pro plugin

The most obvious real-world application of using WooCommerce Wholesale Pro to hide prices from logged out users is for a B2B wholesale store. That's not surprising, given its name 😀. However, that is only one of many ways that you can use this hide price until login plugin.

Even if you're not selling to the trade, there are lots of reasons why you might want to hide prices based on user role. For example:

  • An exclusive members-only purchasing club might display products publicly, while only showing prices to logged in users. That way, the products can still rank in search engines for SEO purposes, while also attracting new members to join. However, they can only be purchased by logged in users.
  • Similarly, you might sell branded products to regular customers only, such as schools, sportswear or workwear. It's fine to display these products in the public areas of your WooCommerce store, for example so that potential customers are more likely to make an enquiry. However, you would want to hide the prices until login by an authorized user.

Once people have logged in to reveal the hidden prices, you can sell to them as usual. For example, this might involve using other plugins to set a minimum order price amount or set product prices based on quantity.

Option 2 - List products in a table without prices

In option 2, we'll learn how to completely eliminate price from the equation for all visitors. For example, you could use this to create a catalog page with a searchable directory of all your products.

For this use case, you'd likely want to:

  • Hide all mention of prices
  • Hide the add to cart button

To set this up, you can use WooCommerce Product Table to create a table view catalog of products. This also has the benefit of adding user-friendly filters and search options to help shoppers browse your catalog.

It's an alternative to the default WooCommerce shop page that you can use to completely replace the shop page. Alternatively, you can use it to list products in addition to the WooCommerce shop page.

The WooCommerce hide price plugin lets you control exactly which columns display in your product table. This makes it easy to remove the product price from WooCommerce, or even remove the add to cart buttons completely.

WooCommerce WooCommerce hide price example
A product table with no price or buy buttons

If you're just looking to create a catalog or table listing and you want to hide the price from all users, WooCommerce Product Table is all you need. Or if you want to remove the price for logged out users only, then you also need the WooCommerce Wholesale Pro plugin from Option 1.

How to create a catalog page with no price or add to cart button

  1. Install WooCommerce Product Table on your WordPress site.
  2. Go to the plugin settings page at WooCommerce → Settings → Products → Product tables.
  3. Activate your license key and enable the options to show product tables on the shop and category pages.
  4. Now view your main WooCommerce shop page. At first, it will look something like this:
Disable price WooCommerce plugin with table layout
A product table before hiding the prices

Of course, you don't want to show the price. To hide it, simply remove the price and add-to-cart columns. You can easily do this on the plugin settings page:

Hide prices WooCommerce plugin with disabled price

Once you remove the price from the WooCommerce table, there will be no more price or add to cart button in your product list:

WooCommerce hide price plugin

Disable links to the single product page

To ensure that visitors can't click through to the single product page (and see the price and add to cart button there), you'll also want to use WooCommerce Product Table's Product links option to disable prices and links to the single product page:

Hide product price WooCommerce plugin disable prices

Option 3 - Create quick view lightboxes without prices

WooCommerce hide price plugin with quick view

Another user-friendly option is to stack WooCommerce Product Table with the WooCommerce Quick View Pro plugin. When a user clicks on a product name, it opens the product quick view box instead of taking them to the single product page.

The benefit of adding product quick view functionality is that customers can view more information each product, without visiting the actual product page. The product page contains product pricing, so you don't want that!

Quick View Pro gives you built-in options to disable the price and add to cart button in WooCommerce. That way, it lets shoppers view more details about your products without exposing the price.

How to add product quick view without prices

  1. Install WooCommerce Quick View Pro on your WordPress site.
  2. Go to the plugin settings page at WooCommerce → Settings → Products → Quick view.
  3. Activate your license key and disable price and 'Show add to cart button' options.
  4. Go back to the WooCommerce Product Table settings page WooCommerce → Settings → Products → Product tables. Add a quick-view column to the product table.
Hide price in WooCommerce quick view

You can also use WooCommerce Quick View Pro with the WooCommerce Wholesale Pro plugin from Option 1. This lets you show prices in the quick view lightbox to logged in users only.

To do this, enable the 'Hide Price Until Login' feature in WooCommerce Wholesale Pro, and enable prices in Quick View. That way, logged out users will see the quick view lightbox without prices. Whereas logged in users will see prices as usual.

Option 4 - Make your whole store or specific categories private

The above solutions assume that you want to hide the prices for otherwise public products. That is, you want everyone to be able to see the product details – you just don't want people to be able to see the prices.

However, that might not always be the case and, depending on your situation, you might actually benefit from a different approach than the WooCommerce hide price plugins above.

For example, if you don't want unauthenticated shoppers to be able to see any part of your products, you might want to:

Or, if you're specifically looking to hide WooCommerce prices to create a wholesale store where wholesale customers can see prices, but retail customers cannot, then you might want to check out our complete guide to creating a WooCommerce wholesale store. This guide will teach you how to offer different prices for retail customers and wholesale customers, rather than completely hiding prices. You can also learn how to set up a price per unit or WooCommerce paywall.

Where to get the plugins

There are lots of reasons why you might want to show a WooCommerce product without price. Learning how to hide prices in WooCommerce gives you more control over who has access to important pricing information. It's an especially great tactic for wholesale stores, though you can also use it for catalog sites, members-only stores, or any other situation where you just don't want product prices to be visible right away.

To recap, there are several WooCommerce hide price plugins to choose from:

  1. Hide prices from logged out usersUse WooCommerce Wholesale Pro to hide prices from logged out visitors.
  2. List products in a table without pricesUse WooCommerce Product Table to list products without prices.
  3. Create quick view lightboxes without pricesUse the WooCommerce Quick View Pro plugin to create product lightboxes without prices.
  4. Make your whole store or specific categories privateUse WooCommerce Private Store or WooCommerce Protected Categories to hide products completely.

To get started, grab your chosen plugin(s) and  start hiding prices in WooCommerce.

Have any questions about how to add WooCommerce hide price functionality to your store? Ask away in the comments!

Build a Successful Brand for Your eCommerce Site

At Barn2, we've used Placeit for many years to produce branded images for our own site and our clients' sites. They have kindly provided this article on how any eCommerce site can build a successful brand.  

Improve your eCommerce page by using helpful tools to upgrade your brand’s image. eCommerce competition is high and rising, so go the extra mile to make your website stand out from others. Think about how much time you really have to catch your website visitors’ attention. What are they looking at?

There are approximately 1.92 billion digital buyers out there waiting to see your eCommerce store. It’s literally never been a better time to open an online store! On the graph below, you can see that more and more people are predicted to buy online in the coming years!

eCommerce branding

“80 percent of people stop doing business with a company because of poor customer experience.” (Oberlo)

Because of this, you want to make sure your user experience is excellent. Let’s start with proper branding for your website. When designing a website you should keep it as clean, consistent, and professional as possible.

“A lot of eCommerce sites pick a template and call it a day. eCommerce is a highly competitive field as is, so, even the smallest edge can help you drive sales.” (5 Ways Design Affects Your eCommerce Site).

From your website layout to your branding all the way down to your images, there is a lot of room to experiment with your design. So let’s get into it.

Catch more flies with honey... & eCommerce branding consistency

Establishing a solid brand through your website and other platforms builds credibility for your business. This eventually results in gaining customer trust. From your website to your social media, brand consistently all the way! Also, make a brand that catches the eye of your visitor at first glance.

BeCommerce Site

If you have no brand at all yet, you can start by developing your own logo. Developing a simple and effective logo can be a surprisingly daunting process, but with Placeit’s Logo Maker you can get a professional logo design in no time.

eCommerce

Impressed? What else can you do for your website using Placeit? Well, read on to find out.

You’ve mastered your WooCommerce skills, branding your eCommerce website won’t be any harder

Now that you’ve got your logo ready and you’ve established your brand’s color palette, you can make all kinds of branding assets for your website. For example, you can add seasonal Ad Banners to promote a certain sale.

Build a Successful Brand

Establish a social media presence too! Branding your business everywhere is kind of the point of a good branding strategy so do not forget about other promotional sites. This will always be the best way to increase your brand’s credibility.

Professional images to build your WooCommerce website

Great news! You can not only build all your branding assets using Placeit but you can also create the images you need to showcase your brand everywhere with professional mockups!

Build a Successful Brand for Your eCommerce Site

Make amazing mockups for your WooCommerce product table

If you're using WooCommerce Product Table to create one-page order forms, then you can showcase each product with real, professional images you don’t even have to take yourself! Using a mockup is really simple. All you have to do is upload your design onto the template and you will get an image in a real-life scenario with your designs on it!

For example, if you're selling t-shirts, clothing or promotional materials then you can use Placeit to superimpose your branding or imagery directly onto photographs. It looks incredibly realistic:

Build a Successful Brand for Your eCommerce Site

Build a Successful Brand for Your eCommerce Site

From t-shirt mockups, print mockups, pillow mockups, and even book mockups, you can find everything you are looking for your store in Placeit! You can also use digital mockups to promote your website everywhere.

Also, mockups are very useful for your quick view plugIn

Build a Successful Brand for Your eCommerce Site

If you're using a WooCommerce Quick View plugin to speed up the buying process, don’t struggle spending hours trying to take good photos of your products. Placeit’s mockups look great even in a quick view lightbox because you always get very high-quality images that look exceptional no matter how much you zoom in!

Build a Successful Brand for Your eCommerce Site

TI Wishlist Plugin Quick View WP

Social media images for your WordPress post tables

If you're using Posts Table Pro to list blog posts or other information in a table, then you need to regularly create new content to keep your audience updated. A solid content strategy can increase your engagement, help you establish brand awareness, and can even help with conversions! By sharing memorable content, you can generate curiosity in the mind of your users. Also, it never hurts to engage with a new audience!

Be creative with your images too! Instead of using generic images for your post tables, make original designs for your brand's posts.

Build a Successful Brand for Your eCommerce Site

Build a Successful Brand for Your eCommerce Site

Consider sharing your business story with a fun video

Share your story, an insight into your brand's culture for your customers. Let them get to know you in order for them to feel an emotional connection with your brand. There are lots of great tools you can use to tell your story. We would encourage you to try making a video about it!

Build a Successful Brand for Your eCommerce Site

Final words

Now that you have the right plugins for your eCommerce shop, it’s time to get the right tools to brand your website effectively. Placeit has tons of amazing online design tools you can use to make your eCommerce website super pro! You can design amazing products for your shop, you can promote your designs easily with mockups and you can use all kinds of amazing promoting tools like videos or banner to get the word out on your newest sale! Let’s get started and succeed with lots of conversions!