WordPress frontend editor table plugin

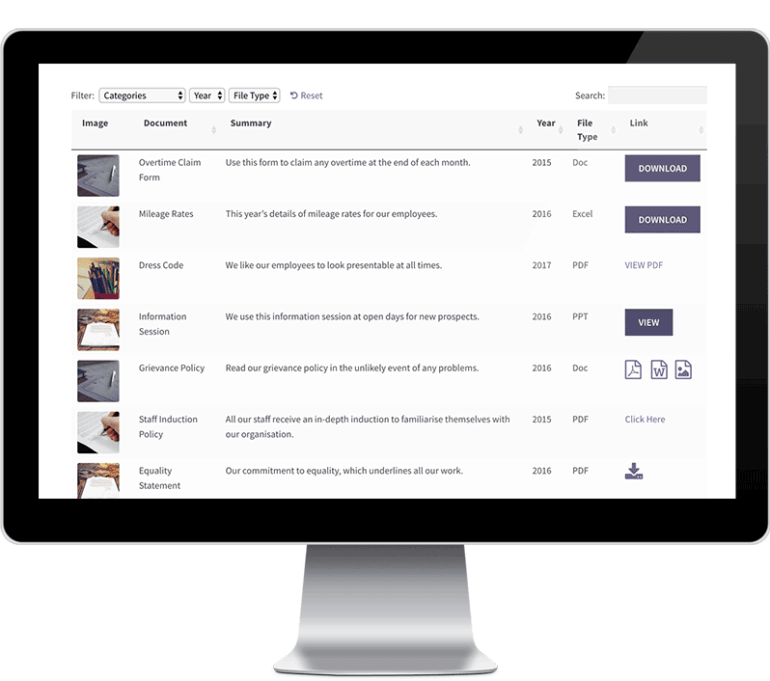
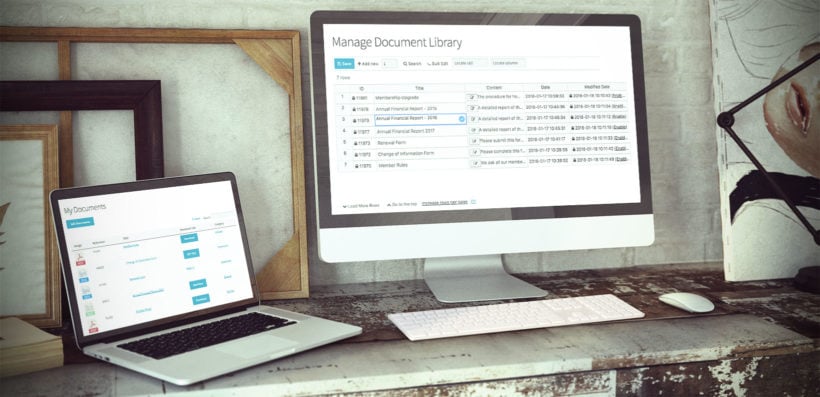
Our Posts Table Pro and Document Library Pro plugins display any type of information from a WordPress website in a searchable table. Our colleagues at WP Sheet Editor have integrated with our plugins to provide a user-friendly way to edit the contents of the table from the front end of your website. Keep reading to learn how to add a frontend editor to your tables.

Posts Table Pro is popular for creating a blog post index, member directory, and more. Document Library Pro is popular for listing documents, publications, or other resources such as audio and video. Both plugins work by taking your posts (or any custom post type) and displaying them in an interactive table on the front end of your website. You can either add the content from the WordPress admin, or you can use it with a forms plugin to allow your users to submit information themselves.

However, until now, there was no way for your colleagues or users to edit the contents of the table directly. Thanks to the developer behind the Universal Frontend Editor plugin, this is now possible by adding a user-friendly front-end editor to your tables. 

Whether you're using our table plugins to list posts, pages, products, documents, articles, courses or something else, keep reading to learn how to let your staff or users edit the contents of the table - all without using the WordPress back end.

1. Create a table using Posts Table Pro or Document Library Pro

Before adding the WordPress frontend editor, you must set up Posts Table Pro or Document Library Pro and use it to start listing information. Get whichever plugin best meets your needs and set it up using the instructions in the 'Getting Started' email. Add some posts/documents and list them in a table on your website.

Once you have done this, you need to follow these simple steps to add a front-end editor to the table(s). This means that your colleagues and/or users can edit information from the WP front end, without having to log into the WordPress admin. I'll tell you how to do that next.

2. Install WP Sheet Editor's Frontend Editor plugin

WP Sheet Editor is a collection of plugins that provide an easy-to-use table editor for any type of WordPress information. It comes with more than 11 plugins for editing posts, pages, custom post types, documents, WooCommerce products, WooCommerce coupons, posts, taxonomies, and more.

In this tutorial, we will use one plugin from WP Sheet Editor: The Frontend Editor plugin. Buy and install the plugin on your WordPress site, and then continue with this tutorial:

Get Universal Frontend Editor

3. Create the frontend editor

Next, it's time to create a new frontend editor. Go to Frontend Sheet → All Spreadsheets.
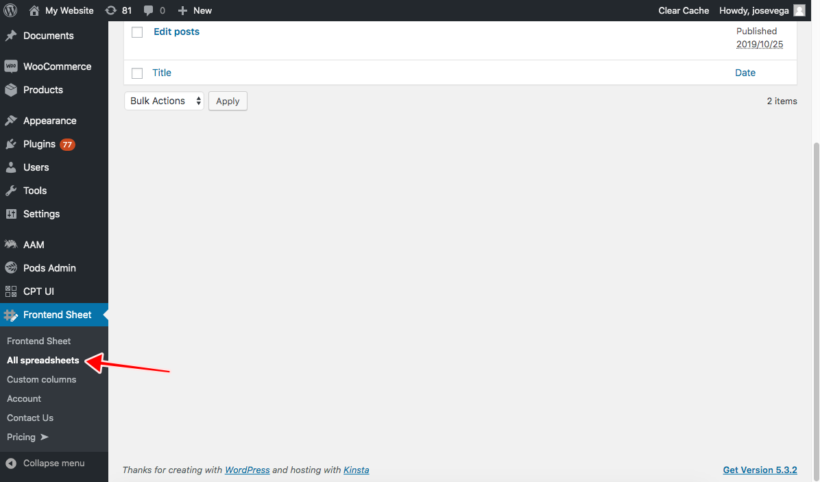
WordPress table front end editor create spreadsheet

After that, click Add new to create a new spreadsheet:
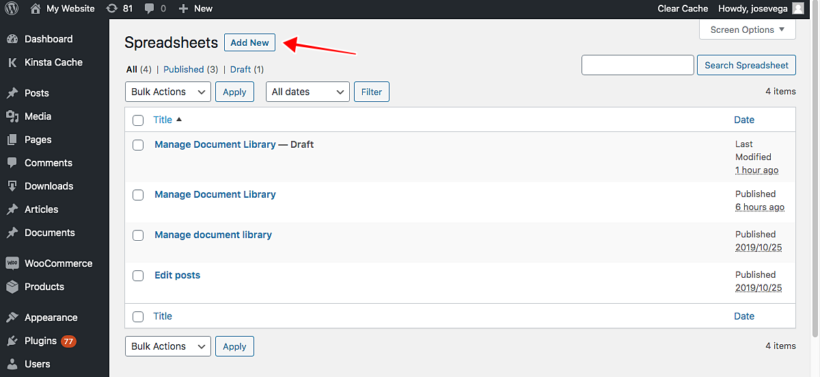
WordPress spreadsheet editor add new

Now you need to add the spreadsheet name. This is private and used for identifying the frontend editors in the WordPress backend. You can use any name. In this example, we'll call it Manage Document Library:
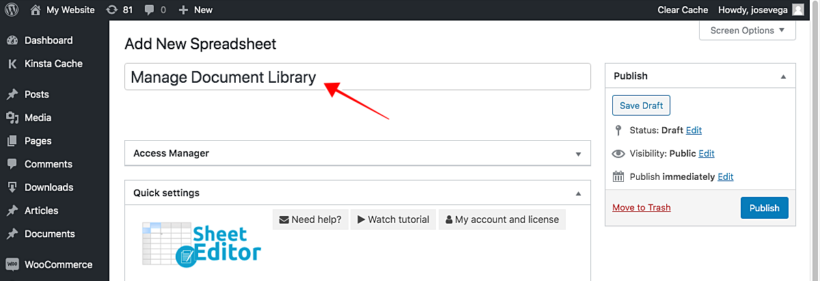
WordPress front end editor table plugin name

Next, you need to select which post type you'll edit using this new frontend editor. Go to the What information do you want to edit on the frontend? section.

Note: If you haven’t created your custom post type yet, then you can easily do so with the free Easy Post Types and Fields plugin. Check out this step-by-step custom post types tutorial

Here you'll see a list of all the post types on your WordPress site. In this case, we need to select Documents and then click on Save changes. You should select whichever post type you're listing in the table. If not, then you can just select posts or pages and use those instead.)
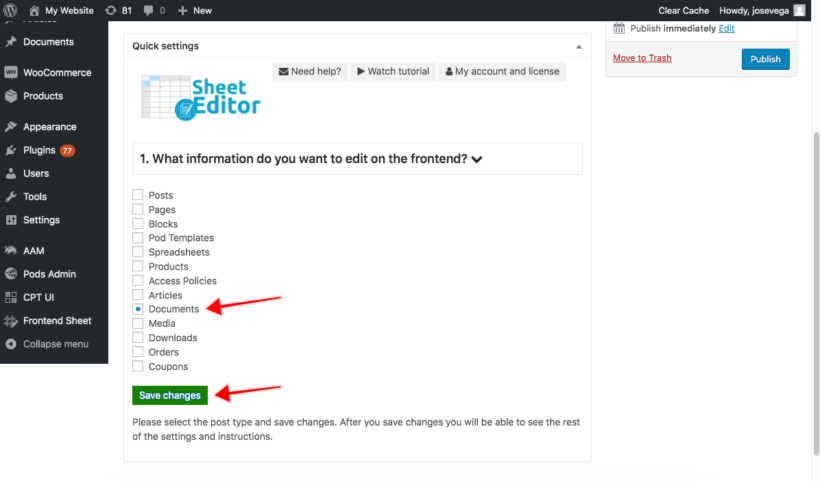
Select WordPress post type for front end editor

After that, a shortcode will appear below. Copy this to your clipboard - you need this for the next step:
WordPress front end editor plugin shortcode

Add the front end editor to a page

Next, you need to create the page where the editor will be displayed. Users will be taken to this page when they click the 'Edit' button above your Posts Table Pro or Document Library Pro table.

Go to Pages → Add New. Once there, add a page title and enter the shortcode in the content. Make sure the page uses a full-width template - this allows plenty of space for the editable table in the frontend.
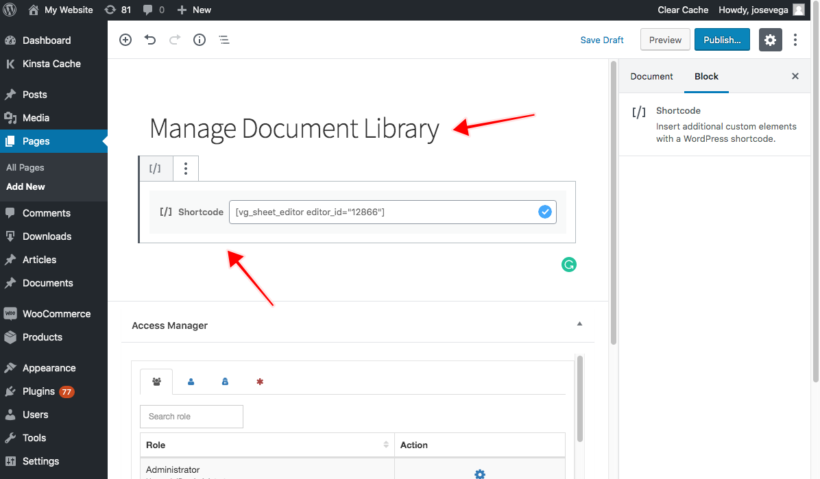
Create WordPress front end editor page for table editing

Next, finish off this page as follows:

  1. Copy the URL of the page - you'll need to link to it in Step 5, later.
  2. Add a link or button back to the page where you've added the Posts Table Pro or Document Library Pro table. That way, users can easily return to the public-facing version of the table after editing the information within it.
  3. You might also want to mark this page as 'noindex' so that people won't access it directly from search results. You can do this using any WordPress SEO plugin such as Yoast.

4. Configure the frontend editor

Once you've created the page with the frontend editor, you can configure the visibility options. This controls who can access it and edit the contents of the table.

a) Select the toolbar tools

Decide which tools to include in the frontend editor. This will depend on how you plan to use it. For example:

  • You can use it for clients to manage information from the WordPress front end editor. In this scenario, they need advanced options for searching and bulk editing.
  • You can use it for employees or normal users to submit information (e.g. document, events or posts) from the front end. In this case, you need simpler options.

In the settings for your spreadsheet, select which tools to show on the Primary toolbar and the Secondary toolbar of the editor:
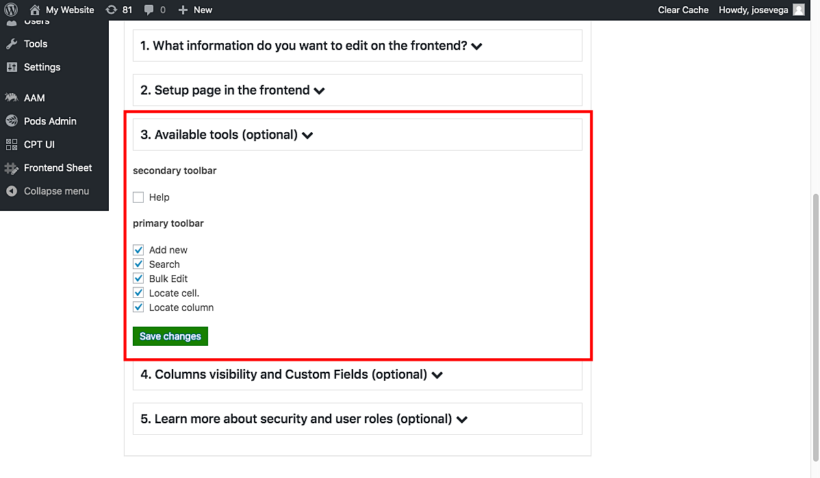
WP frontend editor options

For the Secondary toolbar, you can display the Help options with links to tutorials on how to use the editor.

For the Primary toolbar, you'll be able to show or hide these options:

  • Add new - Users can add new items using the spreadsheet.
  • Search - Users can filter the items by keyword, status, category, tag, modified date, comment count, etc.
  • Bulk Edit - Edit thousands of items in seconds. You deactivate it if you want users to edit items using the cells only.
  • Locate cell - Locate the cell containing a value.
  • Locate column - Locate columns quickly. Useful when you have many columns to avoid scrolling too much. Enter a name and the plugin will find the column.

For a simple editing experience, you can activate the "Search" and "Add new" options and deactivate the rest.

b) Select the columns you want to see on the editor

Use the Columns visibility and Custom Fields section to enable or disable the columns and sort them.

If this frontend editor is for high-level users like clients or employees managing full products or documents, you can let them edit all the fields.

If the frontend editor is for normal users or guests then you can limit the columns. You can just show the document name, content, and link columns.

Generally, you'll probably want to show the same columns that you selected when you set up your WordPress table in Posts Table Pro/Document Library Pro. That will be more intuitive for your users because they will view the main table first, and then click to access the inline spreadsheet editing view. They will therefore expect to see the same columns in both views.

The Columns manager will automatically detect all the fields from the post type (e.g. documents) that you're using for the front-end editor. You can view them in the list and enable, disable, sort, and rename them easily:
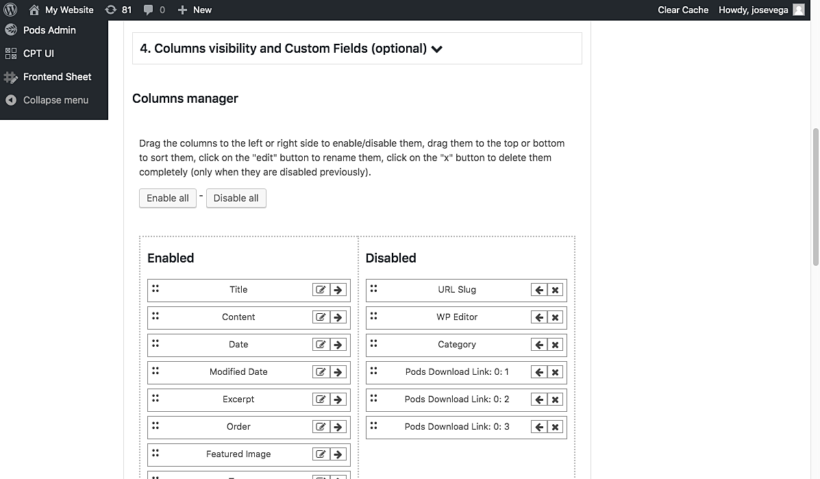
Select columns for WordPress front end editor table

For example, if you're adding front end editing to a WordPress document library, then you might rename the Title column 'Document'. To do this, just click on the Edit button in each column, and you'll see the popup that will allow you to change the column name:
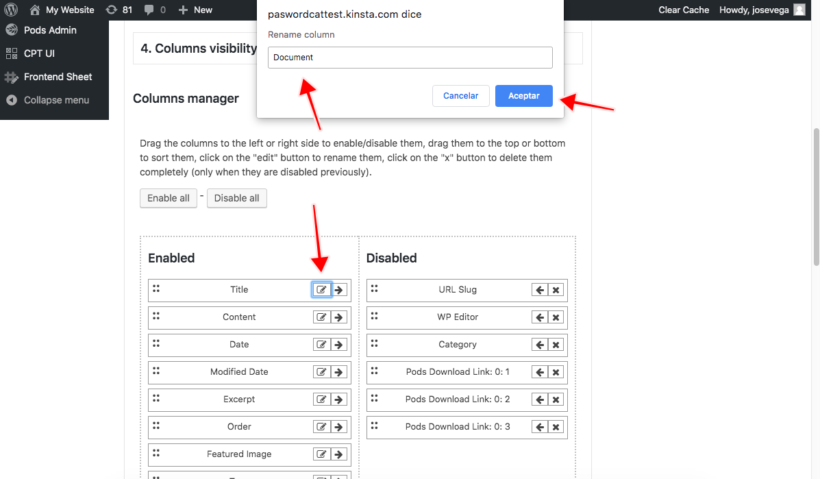
WordPress spreadsheet editor rename columns

If there are any columns that you don't want users to be able to edit, simply don't include these in the frontend editor spreadsheet.

5. Integrate the WordPress frontend editor with the public document library

You can easily integrate the frontend editor with the table that you created using Posts Table Pro or Document Library Pro in Step 1.

Simply add an 'Edit' link above or below the table. This should link to the front end editor page that you created in Step 3.

In this case, we've used the Gutenberg editor to create a button linking to the frontend editor page which we created in Step 3:
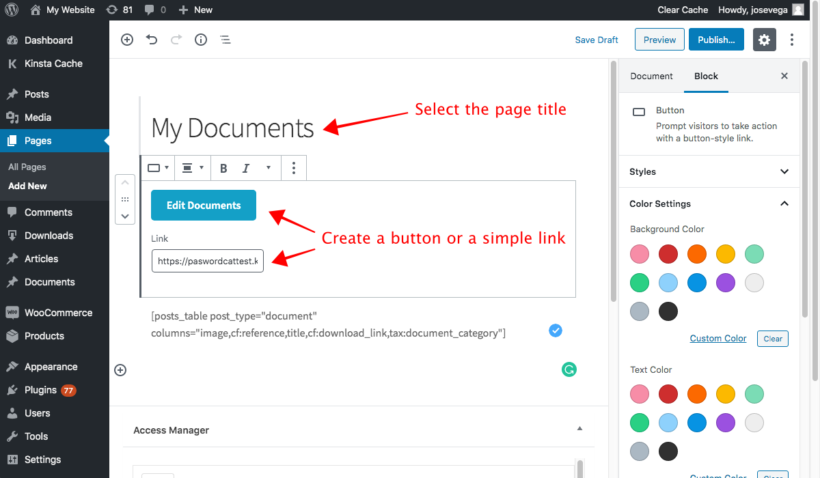
Add WordPress front end editor to Posts Table Pro

Bonus tip - Hide the 'Edit' link from public users

You might want everyone to be able to see the 'Edit' link, as it provides a handy way for guests to log into their account before editing the contents of the table. However, you might want to hide this so that only certain people see it.

There are several ways to do this:

  • Of course, you don't have to include an 'Edit' link on the same page as your Posts Table Pro table. Instead, you can send your editors a direct link to the page where you added the front end inline spreadsheet editor. Alternatively, you can add the link to a more subtle location such as the footer.
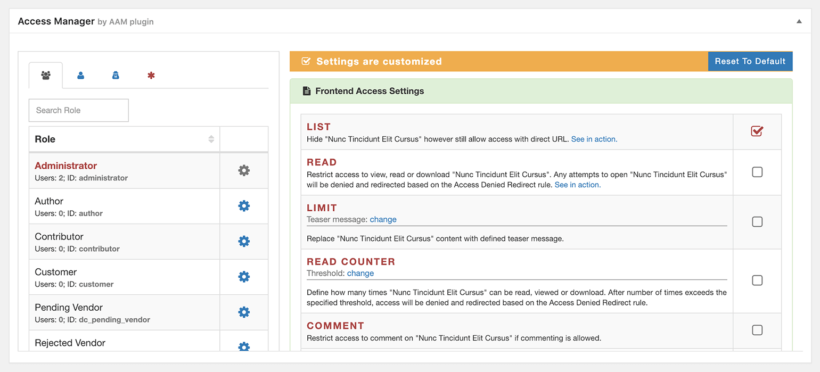
  • You can also install the Advanced Access Manager plugin and use its shortcodes to only show the button to logged in users with a specific role. That way, you can still have an 'Edit' button on the same page as your Posts Table Pro table, but only certain people will see it.

6. Use the frontend editor

When people view the table that you created using Posts Table Pro or Document Library Pro, they will see the button to edit the contents:

Add edit button to WordPress table

When they click on the Edit Documents button, they will be asked to log in in order to see and use the frontend editor (unless they're already logged into their account):
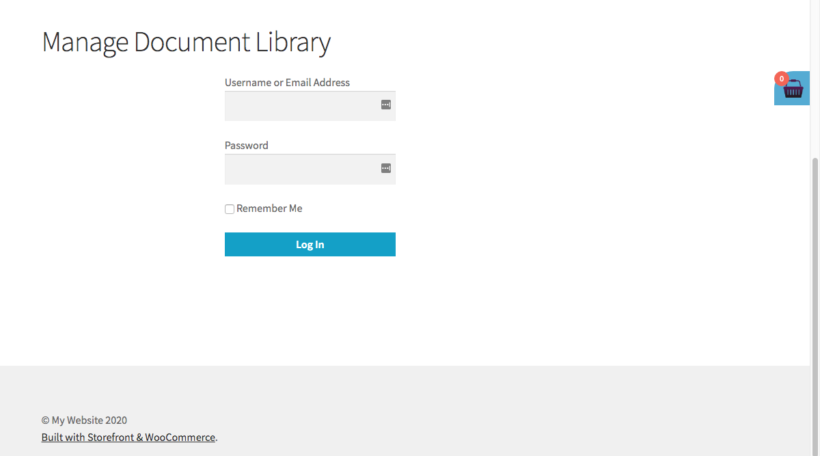
Login to access WordPress front end editor plugin

After they log in, they will see the frontend editor with the tools and columns that you selected. They can quickly edit the information using the spreadsheet interface right on the frontend. No need to access the WordPress backend!
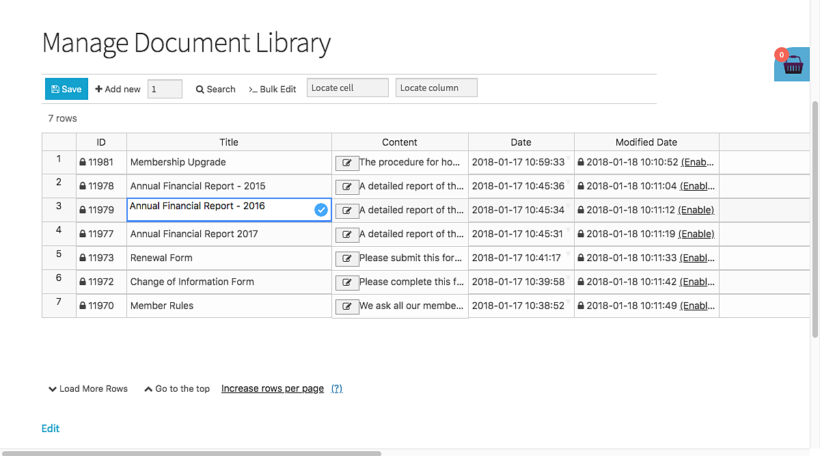
Edit spreadsheet with WP frontend editor

7. Who can use the frontend editor?

The WordPress front end editor is available only for logged in users. Guests will see a login form when they click the 'Edit' button.

The Universal Frontend Editor plugin uses the standard user roles that come with WordPress. When you create accounts for your users, you should choose an appropriate role depending on how much you want them to edit:

  • Subscriber and guest - Not allowed to use the editor.
  • Contributor - Can view and edit their own posts only, but they can't upload images.
  • Author - Can view and edit their own posts only, they can upload images.
  • Editor - Can view and edit all posts and pages.
  • Administrator - Can view and edit everything.

For example, a user with an 'Author' role can use the frontend editor and only edit the posts that they created. This is a good way to allow each user to manage their own information.

Where to get the plugins

You'll need 2 plugins to list information in a table with frontend editing capabilities:

  1. Either Posts Table Pro or Document Library Pro - creates the searchable table that your public visitors will see.
  2. Universal Frontend Editor - creates a spreadsheet-style editor so that logged in users with the correct role can edit the contents of the table.

Get the plugins today, and follow the steps in this tutorial to set it all up!
WPML Compatible PluginWe're pleased to announce that our latest plugin, WooCommerce Quick View Pro, has been officially certified as being compatible with the world's biggest multilingual plugin - WPML.

All our other plugins were already certified as being WPML-compatible, and people have been using them on multilingual websites for several years. We're happy that our WooCommerce Quick View plugin has now received the same recognition.

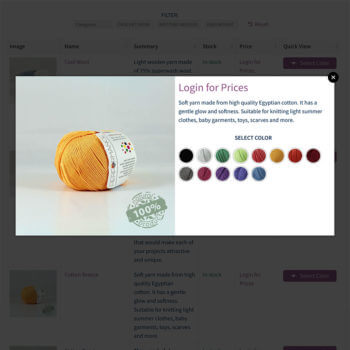
WooCommerce Quick View Pro speeds up the buying process by letting customers view information about each product in a lightbox. It makes it easy to buy without having to visit a separate page for each product.

Note: Since publishing this article, WPML have discontinued their compatibility program. However, you can still use it with WooCommerce Quick View Pro.

How to translate the quick view

If you have a multilingual WooCommerce store, then you can also translate the quick view buttons and the lightbox content. For example, you can view translated product titles, short descriptions, etc. in the lightbox. To do this, you need to use a WordPress multilingual plugin such as WPML.

More information

To learn how to translate the quick view buttons and lightbox, please see our knowledge base article about using WooCommerce Quick View with WPML.

WooCommerce Product Comparison Buttons Plugin

Have you ever wanted to list WooCommerce products in a table with quick product comparison buttons? This article will explain how to do this by combining the WooCommerce Product Table and YITH WooCommerce Compare plugins.

There are lots of reasons to add WooCommerce product comparison buttons to your product tables:

  • If you sell lots of products then customers need an easy way to see them alongside one another.
  • Product comparison buttons are especially important if you sell technical products where customers use factual data to make buying decisions. (E.g. TV's or mobile phones).
  • Maybe you sell visual products such as clothing, and customers need to compare images of each product to choose which they like best.

By combining these two plugins, your customers can view some or all of your products in a space-saving table layout. They can click the WooCommerce product comparison buttons for the items they're interested in. This opens up a neat comparison table, with each product in a separate column. Customers can view the products side by side and add their favorites straight to the cart.

How to add WooCommerce product comparison buttons to your product tables

Before you start, I'm assuming that you have already set up WooCommerce Product Table to list products in a space-saving table view. If not, get the plugin now and set it up according to the instructions in the 'Getting Started' email. Next, come back and follow these instructions:

  1. Go to the WooCommerce Product Table plugin settings page (WooCommerce → Settings → Products → Product Tables) and enable the 'Shortcodes' button. This tells the product comparison buttons to display correctly in the table. Also ensure that the 'lazy load' box is not ticked (see Limitations, below).
  2. Decide which column of the table you want the product comparison buttons to appear in. This needs to be one of the fields on the 'Edit Product' screen. For example, you could use the short or long description, or a custom field.
  3. Use these instructions to choose which columns appear in the product table. Make sure your list of columns include the column where you'll be adding the 'Compare' buttons. These instructions also tell you how to rename the column - for example, you might want to change the column name to 'Compare'.
  4. Go to the 'Edit Product' screen for each product. Add the shortcode [yith_compare_button type="button"] to the field you chose in step 2.

Can I add the shortcode dynamically?

The above instructions are aimed at non-coders and provide an easy way to add a 'Compare' button alongside every product in the table.

If you want an easy way to automatically add the compare button for each product, then I recommend adding the [yith_compare_button type="button"] shortcode as a default value for the custom field that you are displaying in the table. Most custom field plugins, such as Advanced Custom Fields, allow you to add a default value for each product. (Note: If you've added your products before setting up the custom field and default content then you need to edit each product and click 'Update' before the default content will be stored for that product).

Alternatively, if you have developer-level skills, then you can write some custom code to do it for you. If you don't have a developer, then I recommend that you post a job on Codeable. Their pre-approved WordPress experts will send you a quote. Codeable is a fantastic place to find good WordPress developers who specialize in customizing plugins.

Here are some tips to get started with adding the product comparison buttons dynamically:

  • Use the following code or similar to insert the 'Compare' buttons into one of the fields in the product table:
<?php echo do_shortcode('[yith_compare_button product="' . $product_id .' type="button"]' ); ?>

Limitations

Woo Product Table and YITH WooCommerce Compare worked nicely together in our tests. The only limitation is that you can't use the 'Compare' buttons in tables that are loaded using the lazy load method.

To avoid this limitation, simply disable lazy load in the product table.

Where to get the plugins

You can get WooCommerce Product Table from our website, and YITH WooCommerce Compare from the YITH website:

WooCommerce Product Table YITH WC Compare

Further Reading: Increase Your Sales with a WooCommerce Product Comparison Table Plugin

WordPress Favorite Button Plugin

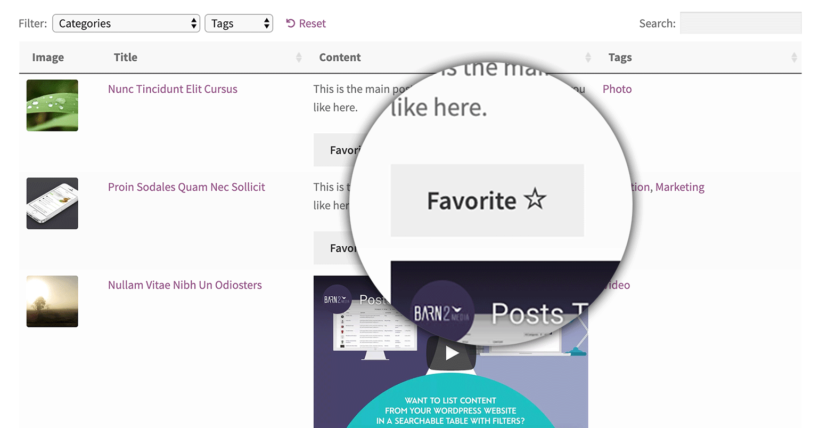
Today I'm going to tell you about a free plugin which adds Favorite buttons to your lists of WordPress posts, documents or custom post types. When used with our Posts Table or Document Library plugin, you can list WordPress content in a searchable table - complete with 'Add to Favorite' buttons.

  • Are you creating a WordPress video gallery and want people to select their favorite videos?
  • Do you have a WordPress blog and want people to choose their favorite posts?
  • Perhaps you're listing events in WordPress and want people to mark the ones they'd like to attend.

Whatever your reason for needing favourite buttons on your website, you can use these instructions to add them to any list of WordPress posts, documents, or any custom post type.

How the favorite buttons work

You can use one of our table plugins to list your WordPress content in a table. Then, you can use the Favorite plugin to add Favorite buttons. Your visitors can select their favorite posts or documents and create a handy shortlist.

When a visitor comes back to your website, they will still be able to see their selections. If they're not logged in then their favorites are stored via browser session or a cookie. If they have an account on your website, then their favorites will appear even if they re-visit from a different browser or device.

How to add Favorite buttons to WordPress

  1. First, use Posts Table Pro or Document Library Pro to list your WordPress posts, documents or any custom post type in a table view. Set up the plugin using the instructions in the knowledge base, with these settings:
    • Columns - include the 'content' column. The favorite button will appear here automatically.
    • Tick the 'Shortcodes' option. This makes sure the button appears in the table correctly.
  2. Now go to Plugins→ Add New in the WP Dashboard.
  3. Search for 'Favorites' and install the plugin by Kyle Phillips.

Now check the page where you've added the table. There will be a 'Favorite' button in the content column for each post or document in the table.

You can also add favorite buttons to other locations

The instructions above tell you how to add favorite buttons to the content/description columns the table. If you'd like to add them elsewhere - for example because you don't want this column in your table - then that's fine. Simply remove the content/description column and add the following shortcode to one of the other fields that you're displaying in the table (e.g. the excerpt or a text or Visual Editor custom field).

[favorite_button]

Where to get the plugins

Use the free Favorite plugin from wordpress.org with whichever Barn2 plugin works with the type of content you're adding:

WooCommerce product restriction plugins

WooCommerce AJAX cart disabled
You can use product tables and quick view with plugins that restrict which products people can buy.

People using our WooCommerce Product Table and WooCommerce Quick View Pro plugins often ask how to add extra restrictions or dependencies to control what their customers can and can't buy.

They want to restrict how many products their customers can buy; restrict quantities; or make products dependent on each other so that you can't buy one without the other. Others want to group products in specific ways, simplifying the buying process.

There are lots of plugins that you can use to add WooCommerce product restrictions to your one-page order form or quick view lightboxes. I'll tell you about them all so that you can choose the right ones for your store.

WooCommerce Force Sells

WooCommerce Force Sells Plugin

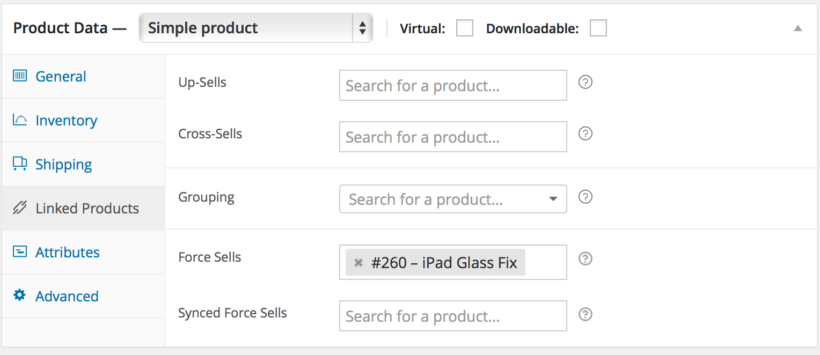
What it does: The official WooCommerce Force Sells extension automatically adds a product to the cart when the customer adds a specific product to their cart. The cost of the hamper will be whatever you have set as the price in WooCommerce.

Example: You're creating a build-your-own product website selling gift hampers. You want to force customers to buy a $50 hamper box when they add hamper contents (e.g. a box of chocolates or bottle of wine) to the cart. You can use the Force Sells plugin to link the products so that whenever you add hamper contents products to the cart, a hamper is added too. The customer will pay the price for each of the hamper contents products they have added. They'll also pay $50 for the hamper product.

Get Force Sells

WooCommerce Chained Products

WooCommerce Chained Products Plugin

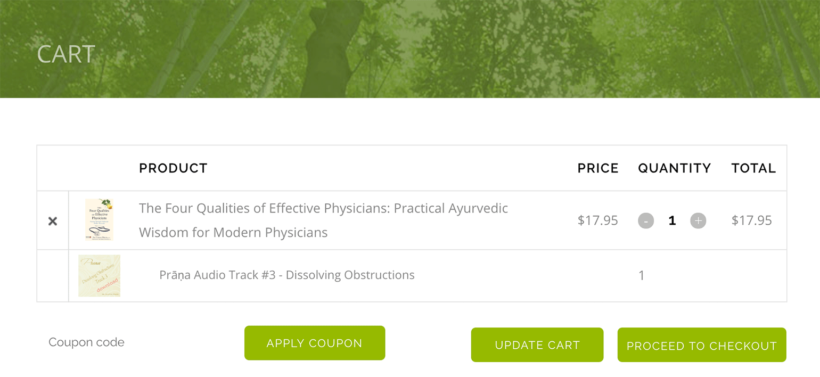
What it does: WooCommerce Chained Products is similar to Force Sells, but the linked product is given away as a gift, and is not chargeable. You can still sell the linked product separately and set a price for it. However, it will be given away free of charge when you use it as a chained product.

Example: The Dr. Claudia Welch website offers a free audio track whenever you add a book. They use WooCommerce Chained Products to automatically add an audio track to the cart (free of charge) whenever you buy a book. To test this out, try adding a book to the cart such as this one - you will see that a free audio track also appears in the cart as a gift. Customers can also buy and pay for the same audio track separately, if they prefer.

Get Chained Products

WooCommerce Product Dependencies

"<yoastmark

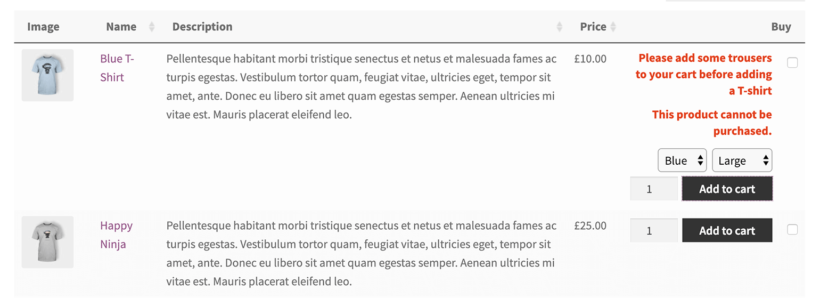
Woo Product Dependencies is a free WordPress plugin that works beautifully with WooCommerce Product Table and Quick View. It lets you create advanced WooCommerce product restrictions using various logical rules. You can restrict a product so that it can only be purchased if the customer has already bought another specific product, and/or has that product in their cart.

Example: You're creating a website selling WooCommerce customizable products, with graduation gowns and hats. You wish to restrict the hat products so that people can only buy them if they purchase a gown at the same time.

Get Product Dependencies

WooCommerce Grouped products

WooCommerce Grouped Products

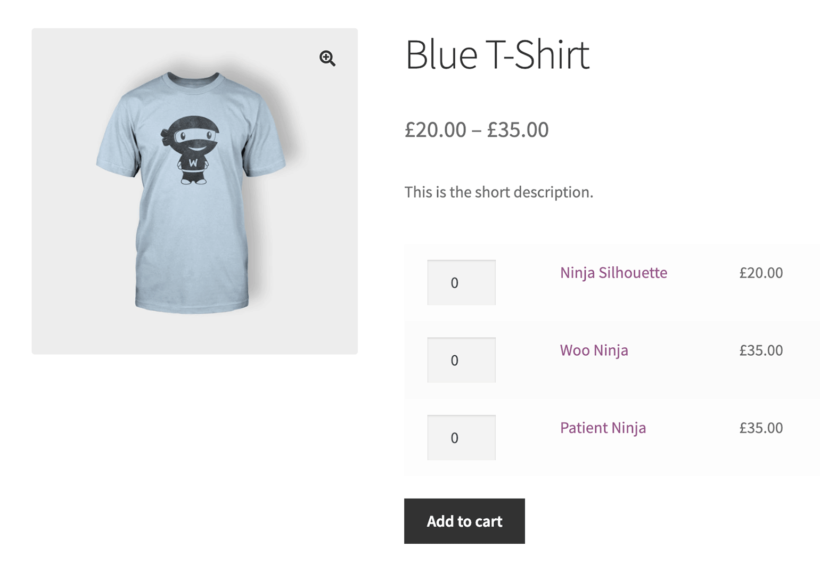
WooCommerce Grouped products are built into WooCommerce itself, and don't require any separate plugins. They offer a simple way to link basic (non-variable) products so that they appear together on the single product page or in a quick view lightbox. Customers can choose which ones to add to the cart, or even add them all at once.

ExampleYou're creating a WooCommerce music store and want to list all the songs from an album as separate products on the album page. To do this, you create a grouped product for the album, add each track as a product within the group, and they will all appear on the single product page. Customers can select one or more tracks and quickly add them to the cart.

Compatibility notes

  • If you wish to list Grouped products using WooCommerce Product Table then you'll need to use one of the options on this page to tag all the products in the group in a way that you can display using WooCommerce Product Table. That way, you can create a product table listing all the products from a specific group.
  • Alternatively, you can just add quick view to your product tables. List your grouped products using WooCommerce Product Table. Customers can click on the quick view links to view the products in the group. Then, they can add them to the cart from the quick view lightbox. WooCommerce Quick View Pro fully supports grouped products, so they will automatically work in the lightbox.

WooCommerce Product Bundles

The official WooCommerce Product Bundles extension lets you group products by offering them as a bundle for a combined price. You can also use it to sell individual products, with recommended products underneath for a discounted price.

The Bundles extension doesn't offer WooCommerce product restrictions in the same way as Force Sells, Chained Products and Dependencies. The bundles are presented as optional.

Example: You're selling bikes in WooCommerce and want to create a bundle where people can purchase the bike along with a helmet and lights for a discounted price.

Please note that Product Bundles doesn't currently integrate with WooCommerce Product Table. If you wish to list products in a table layout then you should use one of the other plugins recommended in this article or use the suggested workarounds in our knowledge base. Alternatively, you can list product bundles in the product table and allow customers to purchase them from a quick view lightbox, where there are no limitations.

Get Product Bundles

WooCommerce Composite Products

WooCommerce Composite Products lists products in a more advanced, more configurable way than product bundles. It lets you create multi-stage product configurators, with each stage containing a selection of products to choose from.

Example: You're selling custom built cars and want to create a configurator where customers choose options such as wheels, colors, internals, storage and extras. This way, they can order composite products in a 5-step process.

Please note that Composite Products doesn't currently integrate with WooCommerce Product Table. If you'd like to list products in a table view then you should use a different plugin from this article or use the suggested workarounds in our knowledge base. You can also list composite products in a table and use WooCommerce Quick View Pro for the actual purchasing, because the quick view lightbox works perfectly with composite products.

Get Composite Products

Minimum and maximum quantities

WooCommerce minimum maximum quantity product table

So far, we've looked at WooCommerce product restrictions that control which products people can buy. Maybe you'd rather restrict product quantities in WooCommerce instead?

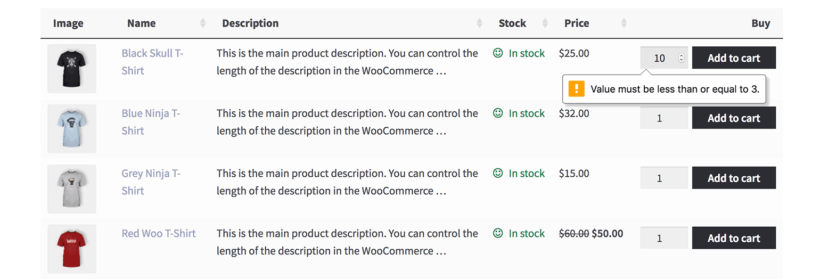
A WooCommerce minimum and/or maximum quantity plugin lets you set rules controlling how many of each product your customers can buy.

ExampleYou're creating a 'build-a-box' website selling custom cosmetics boxes, and want to force customers to buy between 5 and 10 items to go in their box. You can achieve this by setting a minimum quantity of 5 and a maximum quantity of 10.

Recommended plugin: You can set all types of quantity rules with our WooCommerce Quantity Manager plugin. This is designed to work with both WooCommerce Product Table and Quick View Pro. Use it to create global, category, product or variation-level quantity restrictions. For example, you can use it to force customers to purchase 5 products from the 'Box Contents' category.

How to choose a WooCommerce product restrictions plugin

As you can see, there are lots of ways to add restriction rules to your WooCommerce products. Read through the description and examples of each plugin. Then you can choose the one that fits best with the logic you need.

For each Woo restrictions plugin, I've included details of how you can use it with WooCommerce Product Table and WooCommerce Quick View Pro.

WP user specific content plugins

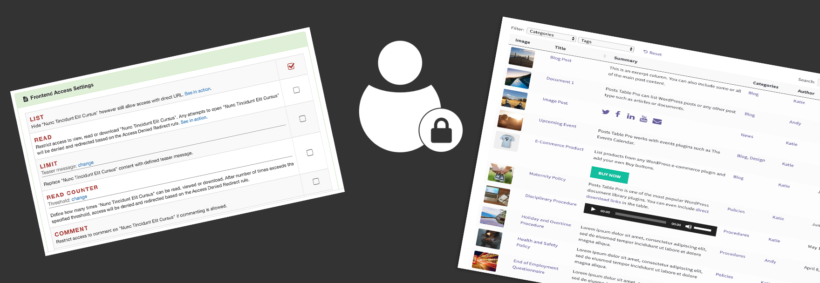
This article explains how to use our table plugins with the Advanced Access Manager plugin. It's perfect for creating tables that show different content to each user - also known as WordPress user specific content.

At Barn2, we create plugins that list content from your WordPress website in a searchable, sortable table. This might be blog posts, pages, documents, or any other post type. Our table plugins are:

But what if you want each user to see different items in the table? Well, that's when you need to use our plugins with Advanced Access Manager.

Keep reading to learn how to create an interactive table with user specific content. I'll also reveal how to hide your entire table so that only certain people can see it.

Why would I want to list WordPress user specific content?

There are lots of reasons why you'd want to create a WordPress table with user-specific content. For example:

You can do all this and more by combining our table plugins with Advanced Access Manager.

Creating user specific content with Advanced Access Manager

Advanced Access Manager has a surprising number of features for a free WordPress plugin. It comes with several ways to control access to WordPress content:

  • Create role-specific content that only specific logged in user roles can see.
  • Protect user-specific content that only named logged in user accounts can access.
  • Choose whether or not visits (i.e. guest users) can see the content.

For each option, you can choose what appears for people without the correct privileges. You can hide the information completely, restrict it so that only people with the direct URL can see it, or display a custom message. You can restrict the ability to add comments, redirect people to another page, or password protect the content. It's even possible to add an expiration date so that the user's access automatically expires at a future date.

How to control access to pages, posts & custom post types

WordPress access control plugin

  1. First, install the free or pro version of the Advanced Access Manager WordPress plugin.
  2. When you add or edit a page, post or custom post type, you'll find a new 'Access Manager' section.
  3. On the left, there are tabs for the different protection options. These let you create user role specific content, user specific content, as well as choosing what happens for guests.
  4. On the right, choose one or more access restriction settings. (More on this in the next section.)

How does it work with Barn2's table plugins?

So far, I've told you how to create WordPress user specific content with Advanced Access Manager. Next, I'll reveal how each restriction option works when you list your WP content in a table with our table plugins:

  • List - Hides user specific content from public areas, while remaining available to anyone with the direct URL. Restricted items are hidden from your tables for unauthorized users. Users with the correct role or login can see them in the table.
  • Read - Lists protected content as usual, but unauthorized users will see an 'Access denied' message when they try to access the page. Content is listed for all users in the table but unauthorized users cannot access the single post page.
  • Limit - Not recommended, as the teaser message will not appear in the table.
  • Read Counter - Restricts how many people can access the restricted content. The restriction only applies when people click on a link in the table to access the single post page. The post/document/product still appears in the table after the limit has been reached.
  • Comment - Restricts who can comment on the single post page.
  • Redirect - Redirects unauthorized users to your chosen URL if they try to access the single page/post/document/product.
  • Password Protected - Password protects the page/post so that only people with the password can access it. It is still listed in the table as usual. Most of the columns in the table will appear for everyone, but information in the content column is hidden. A password login form appears in the content column so that users can enter the password directly into the table and reveal the hidden content.
  • Access Expiration - Choose a date when the content will expire and people can no longer access the single post page.

Combining the access restrictions

You can combine the above options to create more complex rules for your WordPress user specific content.

For example, you can combine the 'List' and 'Password Protected' options to hide information from the table and require a password when someone tries to access the direct URL to the protected content.

Can I show different information in the table columns to different users?

Yes, you can do this with the Advanced Access Manager shortcodes. Create a column in the table as usual (e.g. a custom field column), and add Advanced Access Manager shortcodes to this field. You'll need to add a separate shortcode for each group of users who needs to see different content.

For example, you might be listing ebooks in a table and want to add a 'Register' button for visitors and a 'Download' button for logged in users. You can do this by adding both buttons to a field in your table. Wrap one in a shortcode that is only visible to visitors; and wrap the other in a shortcode that is only visible to logged in users.

If you use this option, make sure you disable the caching option and enable the 'Shortcodes' option on the table plugin settings page. You must also disable the lazy load option in the Barn2 table plugin because the shortcodes only work when lazy load is inactive.

Please note that AAM has a 'Message' option in its shortcodes which lets you specify a message that appears to users without access to the content of the shortcode. This does not work with our table plugins - the column will simply appear blank to unauthorized users, with no message. Instead, you need to add multiple shortcodes - one for each user group.

I want to restrict entire categories, not individual posts

The free version of Advanced Access Manager forces you to create user specific content on a per-post basis. There are a few choices for restricting access to entire categories:

Can I hide my entire table at once?

By now, you've learned how to list posts, pages or custom post types in a table with user specific access restrictions. Each user sees different information in the table - or can access different links from the table - depending on the restrictions.

If you prefer, you can hide the page containing your table instead. Simply use the 'Access Manager' controls at the bottom of the page where you're using our table plugin. This will hide the entire page - including the table - from non-authorized users.

Can I sell access to members-only content?

Yes, the Pro version of WP Advanced Access Manager has this feature. It lets you sell access to exclusive content. You can then restrict certain pages/posts/custom posts so that only people who have purchased access can view it in the table.

Does it work with other WordPress membership plugins?

There are dozens of WordPress membership plugins available, and we can't realistically test with all of them. The other one that we have tested with is Groups, which also works nicely with our table plugins.

With Groups, you have to create a 'group' (hence the name!) and add users to one or more groups. You can then restrict your content so that only logged in users in the correct group can see it. If you're listing content using our table plugins, then users will only see information that their group has access to.

We love Groups, but Advanced Access Manager is a simpler option for many people. This is because it lets you lock down content to specific user roles, so you don't have to bother creating groups and adding users to the correct group.

Do you use Barn2's table plugins with access restrictions?

If you want to add tables to your WordPress site which show different items to different users, then choose one of Barn2's table plugins and use it alongside Advanced Access Manager:

We'd love to hear how you use our table plugins to show different WordPress content to different types of user. Please add your comments below.

WooCommerce color variation swatches plugin

Today, I'm going to tell you how to add variation swatches to your WooCommerce product tables and quick view lightboxes.

Our WooCommerce Product Table plugin offers a choice of ways to list product variations. You can list product variation swatches for WooCommerce as dropdowns in the add to cart column, or you can list each variation on a separate row in the table. It lets you do all of this without having to use HTML or CSS code.

WooCommerce wholesale quick view pluginOn the other hand, our WooCommerce Quick View Pro plugin adds user-friendly buttons to your e-commerce store so that customers can read more and add to the cart from a quick view lightbox instead of having to go to the single product page. This prevents them from needing to visit a separate page for each product and simplifies the user flow.

You can use it with the default WooCommerce store layouts, or with customizable product tables.

But what if you want to make your variations more visual, so that customers can select variations by clicking on different swatch types, for example, a color swatch or image swatch? Now you can do this by using our plugins with the fabulous free WooCommerce Variation Swatches plugin.

Get Product Table Get Quick View Get Variation Swatches

What does the WooCommerce Variation Swatches plugin do?

WooCommerce Variation Swatches offers an image swatch-based way to select product variations. It makes the WooCommerce product variations more eye-catching, so that customers can see exactly what they're getting when they click on a variation.

This free WordPress plugin comes with a choice of options for adding different variation swatch types:

  • You can use it as a WooCommerce color variation plugin, with each option listed as a color swatch for customers to click on.
  • Create unique variation selectors by uploading your own product image or variation image for each variable product. For example, you can upload photos or other variation images to represent each product attribute.
  • Alternatively, you can list each available variation option as a button swatch. The attribute name appears as the button text.

If you're looking for WooCommerce color and label swatches, then this is the perfect WP plugin for you.

How does the variation color picker work in WooCommerce Product Table?

When you list variations using the WooCommerce Product Table plugin, there's an option to list variations as a dropdown in the add to cart column. If you use WooCommerce Product Table with the WooCommerce Variation Swatches plugin, then the color swatches, custom images, or buttons will appear underneath the dropdown for each variation in the table.

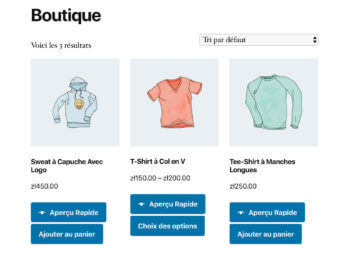
All you have to do is go to Pages → Add New and insert the WooCommerce Product Table shortcode [product_table] to display the product variations. You can also replace the default WooCommerce shop page with the product table. It will look something like this on the front-end:

WooCommerce color picker variations

In this screenshot, you can see a WC product with 2 global attributes - the Color attribute and the Size attribute:

  • The 'color' dropdown has variation color swatches underneath so that customers can click a color instead of using the dropdown.
  • The 'size' dropdown has buttons underneath, making it easier for customers to choose their size.

See it in action on our product table variation swatches demo page!

When you click on a color or size swatch of a variable product, the correct variation is instantly selected in the dropdown i.e. it's an AJAX variation. It works beautifully with the built-in Woo stock control and inventory management. Plus, customers don't have to hover over the image to see the available variations. Out of stock variations are visually crosses out (e.g. 'Large' in the screenshot above), so you can instantly see which combinations are available. The stock indicators update as soon as you select a variation, for example if you select 'Pink' in the above example then Large might be shown as available even though it's out of stock in 'White'.

Once you have selected a variation that is in stock from the shop page, you can add it to the cart and purchase using the WooCommerce checkout.

Does it work with separate variations in the product table?

WooCommerce Product Table also comes with an option to list each variation on its own row in the table. This doesn't work with the variation color swatches plugin because each variation is already separated out onto individual rows. The customer simply needs to use the add to cart buttons to add each variation to the cart, and they don't need to use color swatches or buttons.

How do variation swatches work in WooCommerce Quick View?

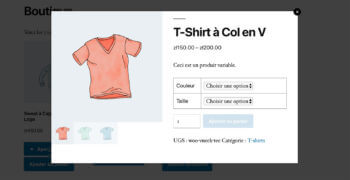
When you use variation swatches and WooCommerce Quick View Pro together, the swatches automatically appear in the quick view lightbox. This replaces the default variation dropdowns, so the customer must click on a swatch button, color or image in order to select the variation. They can click the add to cart button as usual.

Do product tables and quick view work with other variation swatches for WooCommerce plugins?

We have tested with Woo Product Table and Quick View with a few other WooCommerce variation swatches plugins and this is the only one that we have found to work nicely in the product table – no HTML code or CSS styling needed.

We therefore recommend using WooCommerce Product Table with the free or premium versions of WooCommerce Variation Swatches, and not similar plugins from other companies. It's incredibly easy to configure the plugin's global settings and get started with.

It's compatible with WooCommerce themes (like Storefront, Divi, and Flatsome) as well as page builders like Elementor. Plus, your product tables will look great on mobile devices.

WooCommerce Quick View Pro also works with the WooCommerce Variation Swatches plugin by Get Woo Plugins, so you can use it with either of these.

Get Product Table Get Quick View Get Variation Swatches

WooCommerce Product Table Compatibility Program Logo
It's less than 2 weeks since we launched the WooCommerce Product Table Compatibility Program, and 4 WordPress themes have already signed up!

The aim of the program is to help people using WooCommerce Product Table to find compatible themes that work well with the plugin. The plugin is designed to work with any theme, but it's reassuring for people to be able to see them in action together before making a decision. The program also helps theme developers to ensure compatibility with our plugin.

Get WooCommerce Product Table

Jupiter theme

Jupiter compatible plugin

With over 92,000 sales at the time of writing, Jupiter is one of the top selling themes on ThemeForest. It comes with a huge range of modern-looking design options and features. It's fully compatible with WooCommerce.

Get Jupiter

Birch theme

Birch theme

Birch is a design-oriented WooCommerce-react theme that beautifully showcases your images. The homepage has an impressive parallax slider which instantly grabs your customer’s attention.

Get Birch

Nectar theme

Nectar Compatible Theme

Nectar is a striking WooCommerce theme with full width banners and circular imagery. It has a clean and modern design that is ideal for any business or blog.

Get Nectar

Solstice theme

Solstice theme

Solstice is a WooCommerce-compatible WordPress theme with easy-to-use customizable homepage layouts. You can choose multiple header layouts and add dynamic features such as newsletter signups and calls to actions.

Get Solstice

More compatible themes coming soon!

Visit our full list of compatible themes for an up-to-date list of all themes that are officially compatible with WooCommerce Product Table.

Get WooCommerce Product Table

WPML Compatible WordPress PluginsBack in February, we announced that our WooCommerce Product Table plugin has been officially certified as being compatible with top multilingual plugin WPML. I'm pleased to tell you that all our other premium plugins have now been certified as WPML compatible WordPress plugins.

This means that whenever you buy a WordPress plugin from Barn2 Media, there's a simple and reliable way to translate it into other languages.

Note: Since publishing this article, WPML have discontinued their compatibility program. However, you can still use it with our plugins.

What are your WPML compatible WordPress plugins?

All premium plugins developed by Barn2 Media have passed the WPML plugin compatibility program. These are:

We've also tested our free WordPress plugins with WPML, but these are not yet officially certified.

How can I use a Barn2 Media WordPress plugin with WPML?

For each plugin, we've added a page to our knowledge base containing complete instructions on how to use it with WPML.

WPML have also produced a demo site for each plugin. Use these to test drive our WordPress plugins on a real life multilingual site.

Where can I find out more?

We hope this new integration will help you to internationalize your website using our plugins.