If your business or organisation needs help selling online during the COVID-19 crisis, or you're actively helping with the pandemic - e.g. distributing food or medical supplies - then we're offering a free plugin or extended licenses to help you setup as fast as possible.

As millions of people worldwide isolate themselves to restrict the spread of COVID-19, going to the shops is no longer a safe option. Instead, they're forced to buy essential supplies online and have them delivered to their homes.

Many businesses still rely on face-to-face contact. From corner shops, bakeries and local delis, to take away and fast food outlets, many are now feeling a steep drop-off in customer demand. In addition, there may be many outlets such as local pharmacies, chemists, and suppliers of medical items that don't currently operate online but could do so.

To continue trading - and ensure that their customers can receive essential food and medical supplies - many businesses need a fast and simple way to sell online.

WooCommerce bakery order form plugin

Apply for a free plugin

If your business needs to get online quickly in order to provide essential items or services to help with Coronavirus, please get in touch below letting us know what you need. Examples of what we can provide:

  • A free copy of one of our plugins, including WooCommerce Product Table.
  • Extended license options to cover multiple sites under a single license key.

Free/extended licenses will be valid for 4 months until 31st July 2020. If the coronavirus crisis is still ongoing at that point, please get in touch again and we will extend your license.

The free plugin offer has now closed.

Online selling tutorial

The following guidance is aimed at businesses that need to start selling online; and for agencies that are helping businesses to do this. It will tell you:

  1. How to sell your products or services online - don't worry, you don't need any technical expertise. You'll learn how to create a website taking online payments, and have products delivered locally, or by using other delivery services.
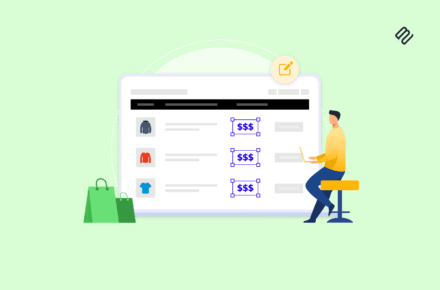
  2. How to list your products in a quick one-page order form, making it really easy for customers to select products and order online.

What you need

To start selling online for the first time you'll need:

  • WordPress - this is a content management system which powers your site and makes it easy to create pages, add images, etc. WordPress is free, but you'll need to pay for a domain name (website address) and web hosting. If you need web hosting, we recommend Kinsta who provide fully-managed WordPress hosting (they host this site). Their Starter plan starts at $30/month and WordPress comes pre-installed so you don't need to do this yourself.
  • WooCommerce - this is a free plugin that turns your website into a fully featured e-commerce store. It lets you add products, set up payment gateways, add shipping options, etc.
  • WordPress theme - this provides the design of your site (i.e. how it looks). I strongly recommend the Storefront theme because it's free, easy to use, and built by the same people as WooCommerce itself. It's clean and simple so ideal for any business wanting selling online.
  • WooCommerce Product Table - this lists your products in a quick one-page order form. Your customers can easily view all your products, select the ones they want, and add them to the cart in one click. It's the perfect way to present products that you have previously sold face-to-face. WooCommerce Product Table is a premium plugin, and we're offering free copies to those helping with the Coronavirus pandemic.

Create your online store

1. Install WordPress and WooCommerce

The first step is to get your overall website set up. Rather than reinventing the wheel, I recommend that you follow WPBeginner's excellent tutorial: WooCommerce Made Simple: A Step-by-Step Tutorial. This covers the overall setup of your store, including payment and delivery options.

When you run the WooCommerce setup wizard as part of this tutorial, you'll have to make some decisions about how you want your online store to work. If you're setting up a quick online store during the coronavirus outbreak, then I recommend the following: 

  • Online payment optionsChoose payment options that will be easy for your customers, such as PayPal - that is the quickest and easiest to set up, both for you and your customers. You can add more than one payment option, so you might also want to enable the 'Cash on delivery' payment gateway when you run the WooCommerce setup wizard. However, consider how you will get cash from your customers while still respecting their need for social isolation and minimal contact.
  • Shipping options WooCommerce lets you add one or more delivery options for your customers to choose from. You can also create shipping zones to restrict the area that you will deliver to - for example, if you're a local business (e.g. a convenience store, grocer or butcher) and will only deliver to certain zip/post code areas. The shipping options are:
    • Flat rate - this is the most common shipping method, and lets you charge a flat amount for each purchase.
    • Free shipping - choose this if you don't plan to charge for shipping. To help your customers and keep your business going during the coronavirus crisis, consider offering free shipping in your local area, and charging for deliveries further afield.
    • Local pickup - you may want to activate this in future, but it's probably not relevant during the coronavirus lock-down.

Once you've finished installing WooCommerce, close WPBeginner's tutorial and return here for step 2.

2. Add your store's inventory

Next, you need to add your inventory as WooCommerce products. This may take a while if you have lots of products (e.g. a convenience store or medical supplies company). However, you'll speed up after the first few.

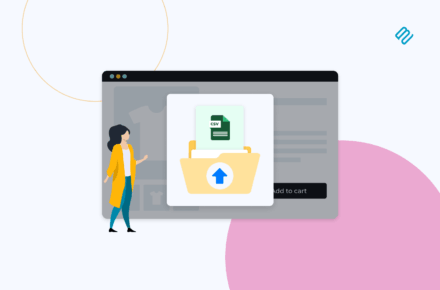
Tip: WooCommerce also has an import tool, so you could use this if you have too many products to add manually.

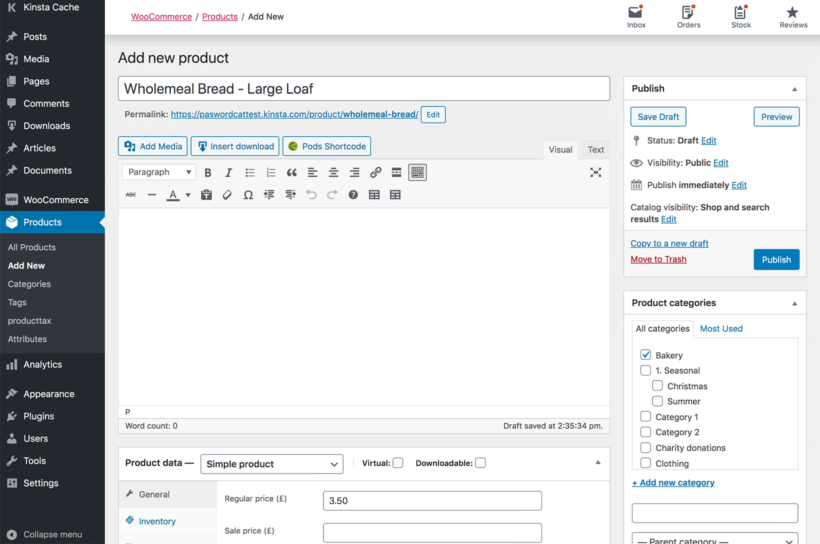
  1. Log into the WordPress admin and click Products → Add New.
  2. Add the product title at the top of the page.
  3. Add a product category on the right hand side of the page.
  4. Scroll down to the Product Data section and add a price.
  5. If you sell different versions of the same product (e.g. a Large and Small loaf of bread), then it's easiest to add each option as a separate product. WooCommerce also comes with variable products and you can use these for the product options if you prefer.
Create Online Bakery

You can add plenty more information about your products, such as description (useful for listing ingredients, allergens etc.), image, etc. However, if you need to quickly start selling online during the coronavirus pandemic, then I suggest keeping it simple. Just add the essential information about each product, and you can always add more later.

 3. Create a quick order form

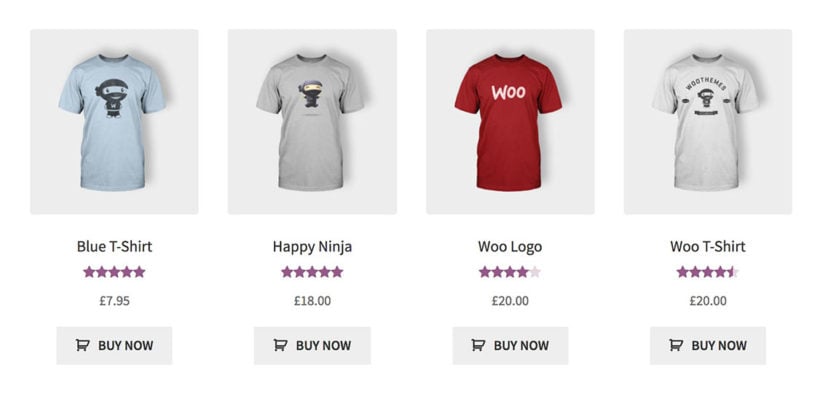
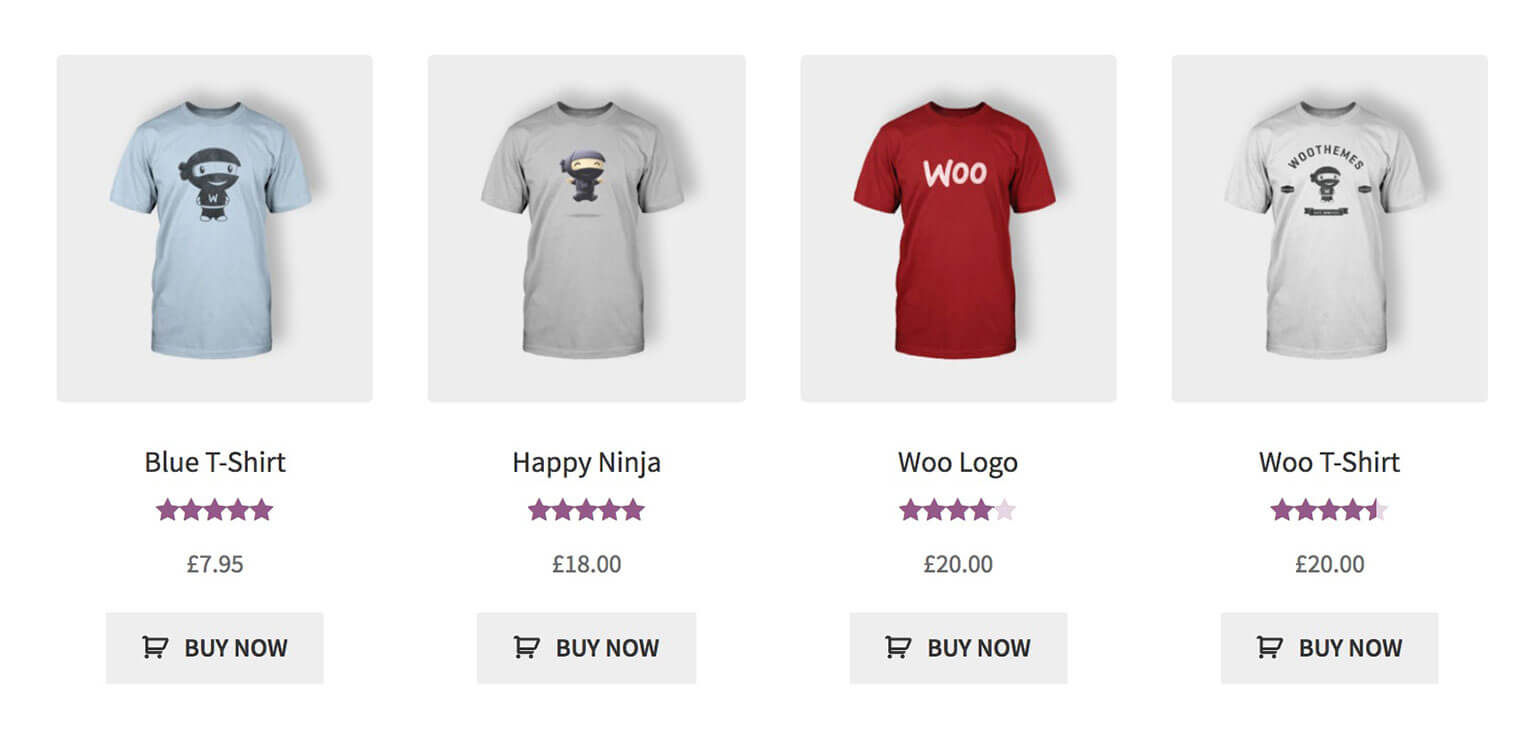
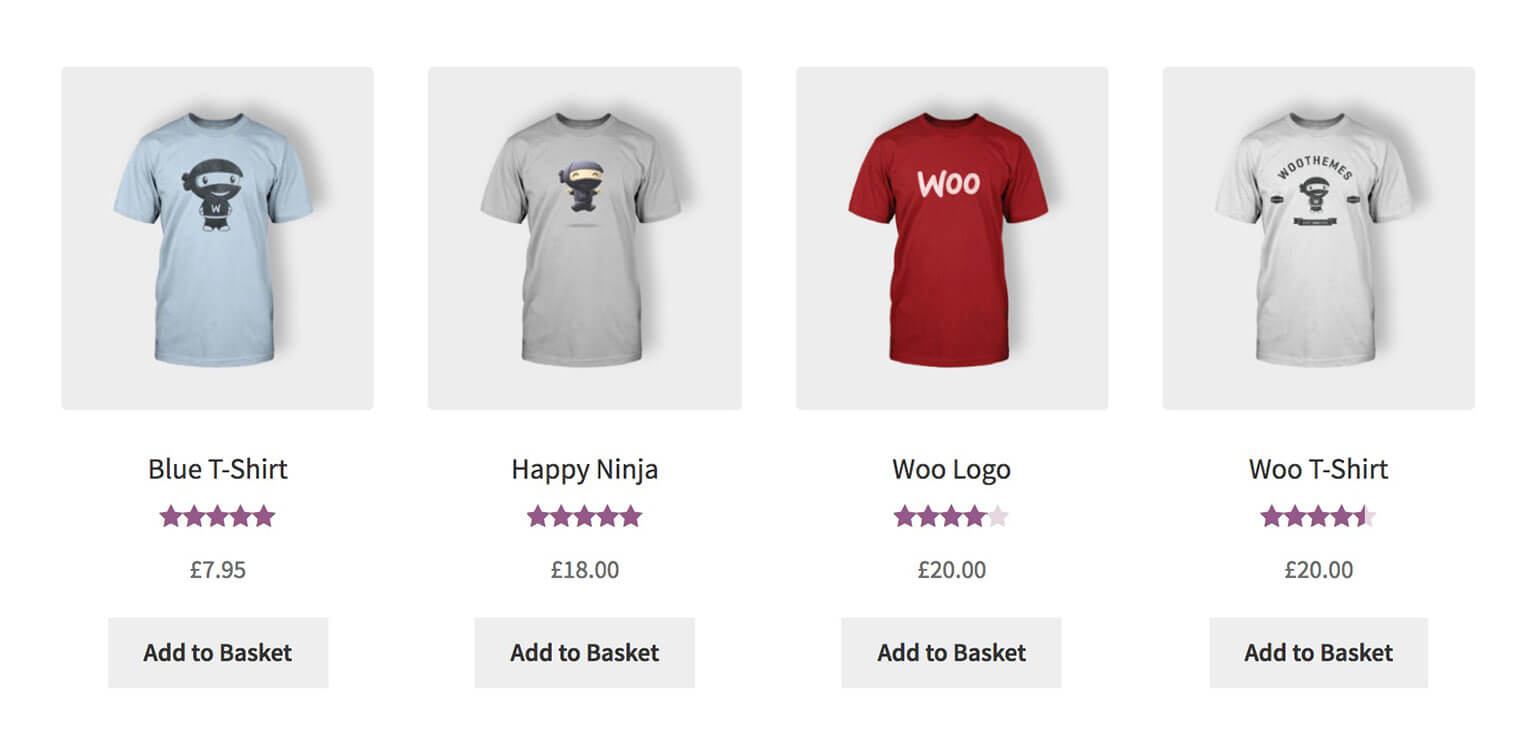
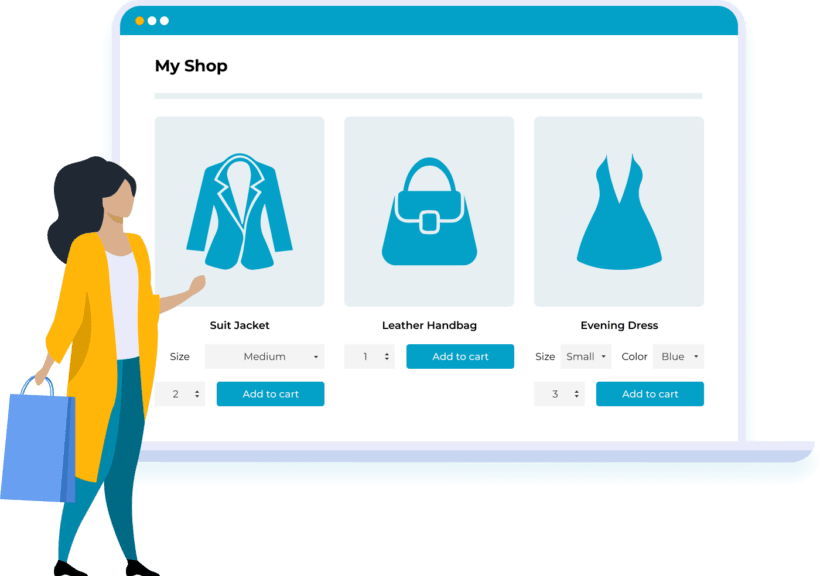
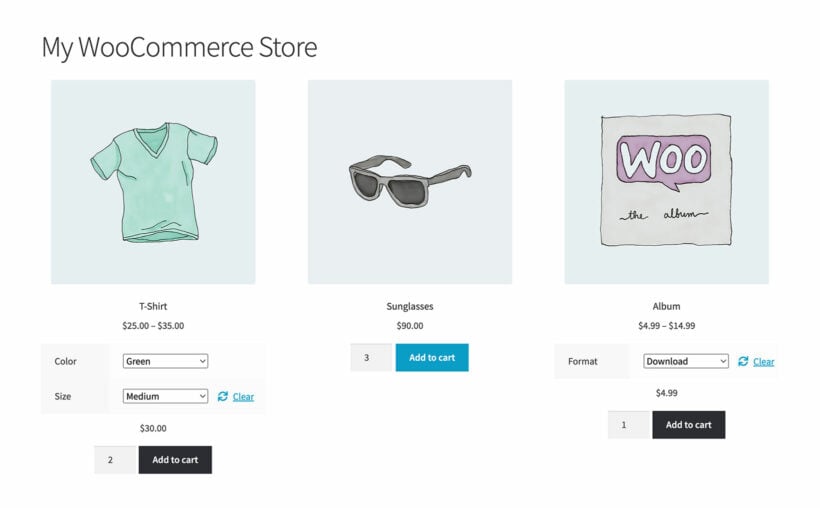
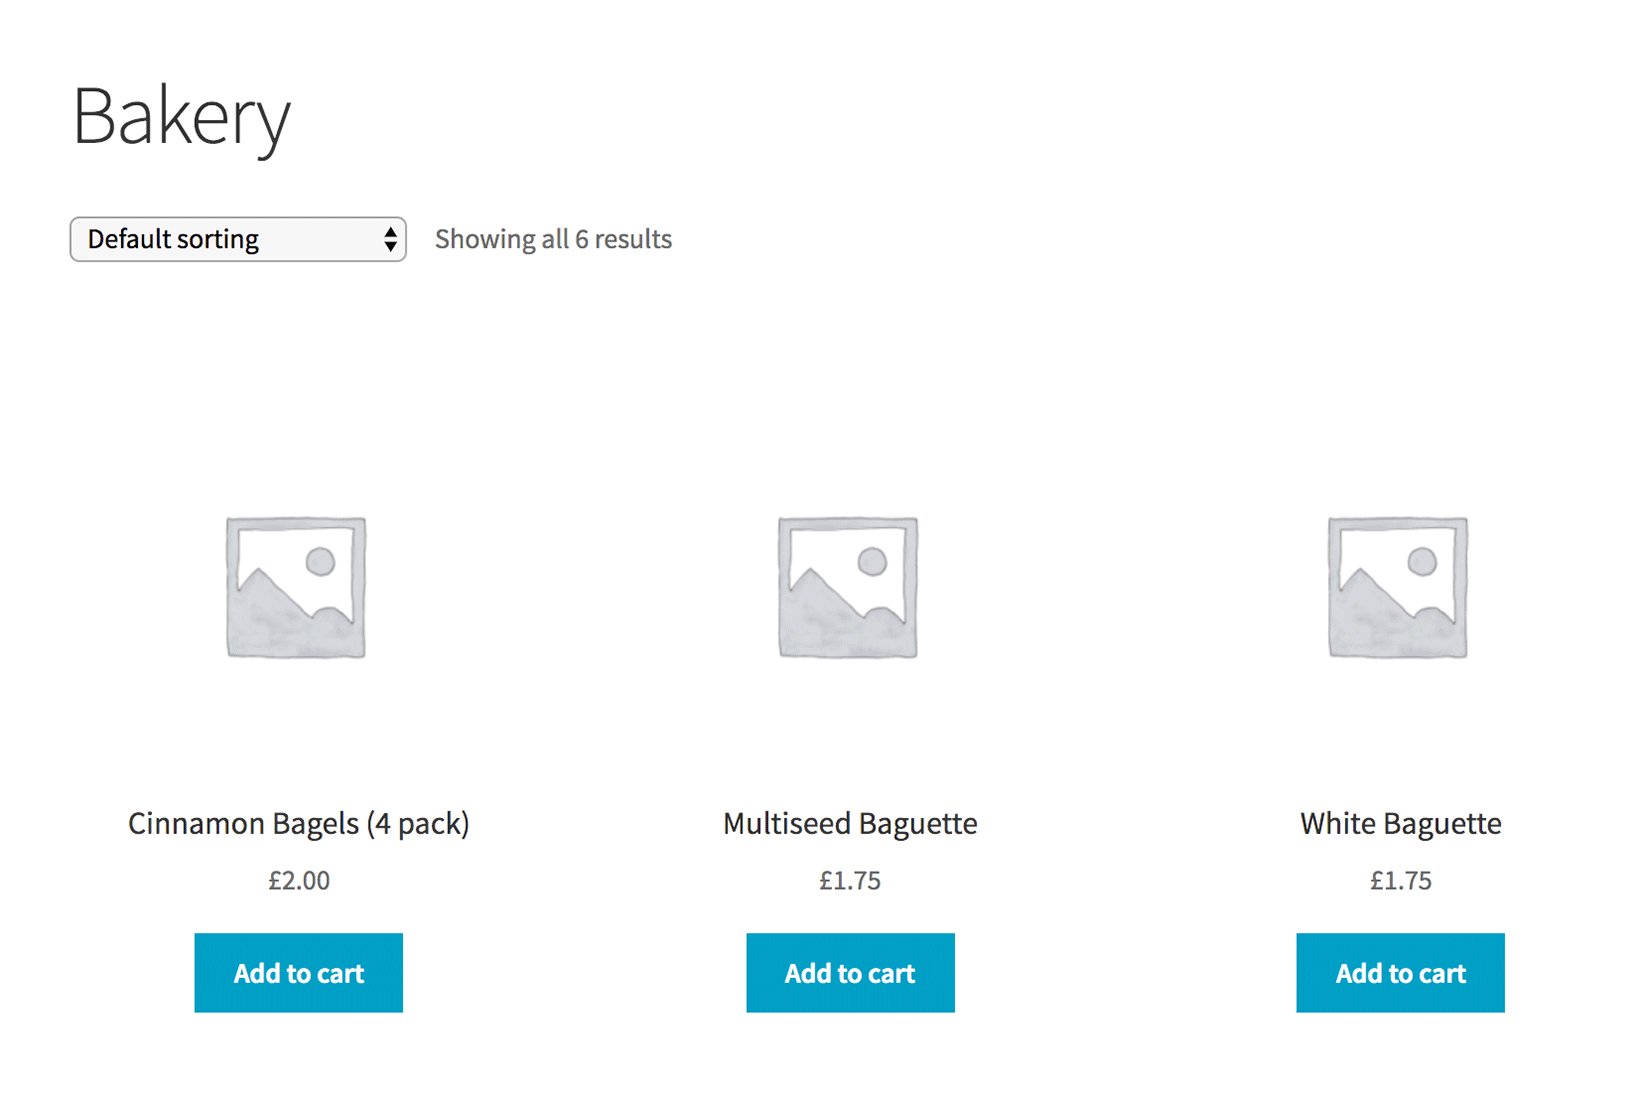
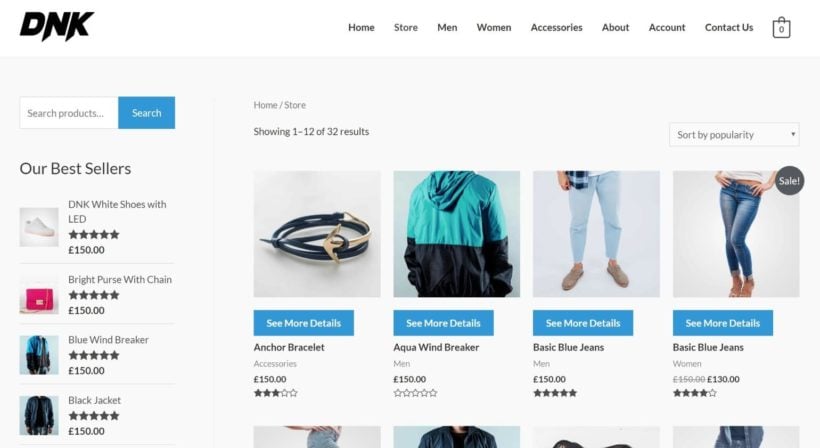
If you just follow steps 1 and 2 (above), then your products will be listed in a grid layout. This layout is mostly designed for selling products with big images, where customers will spend their time browsing - for example, online clothes stores. If you're setting up a quick online store during the coronavirus crisis, that's not what you want.

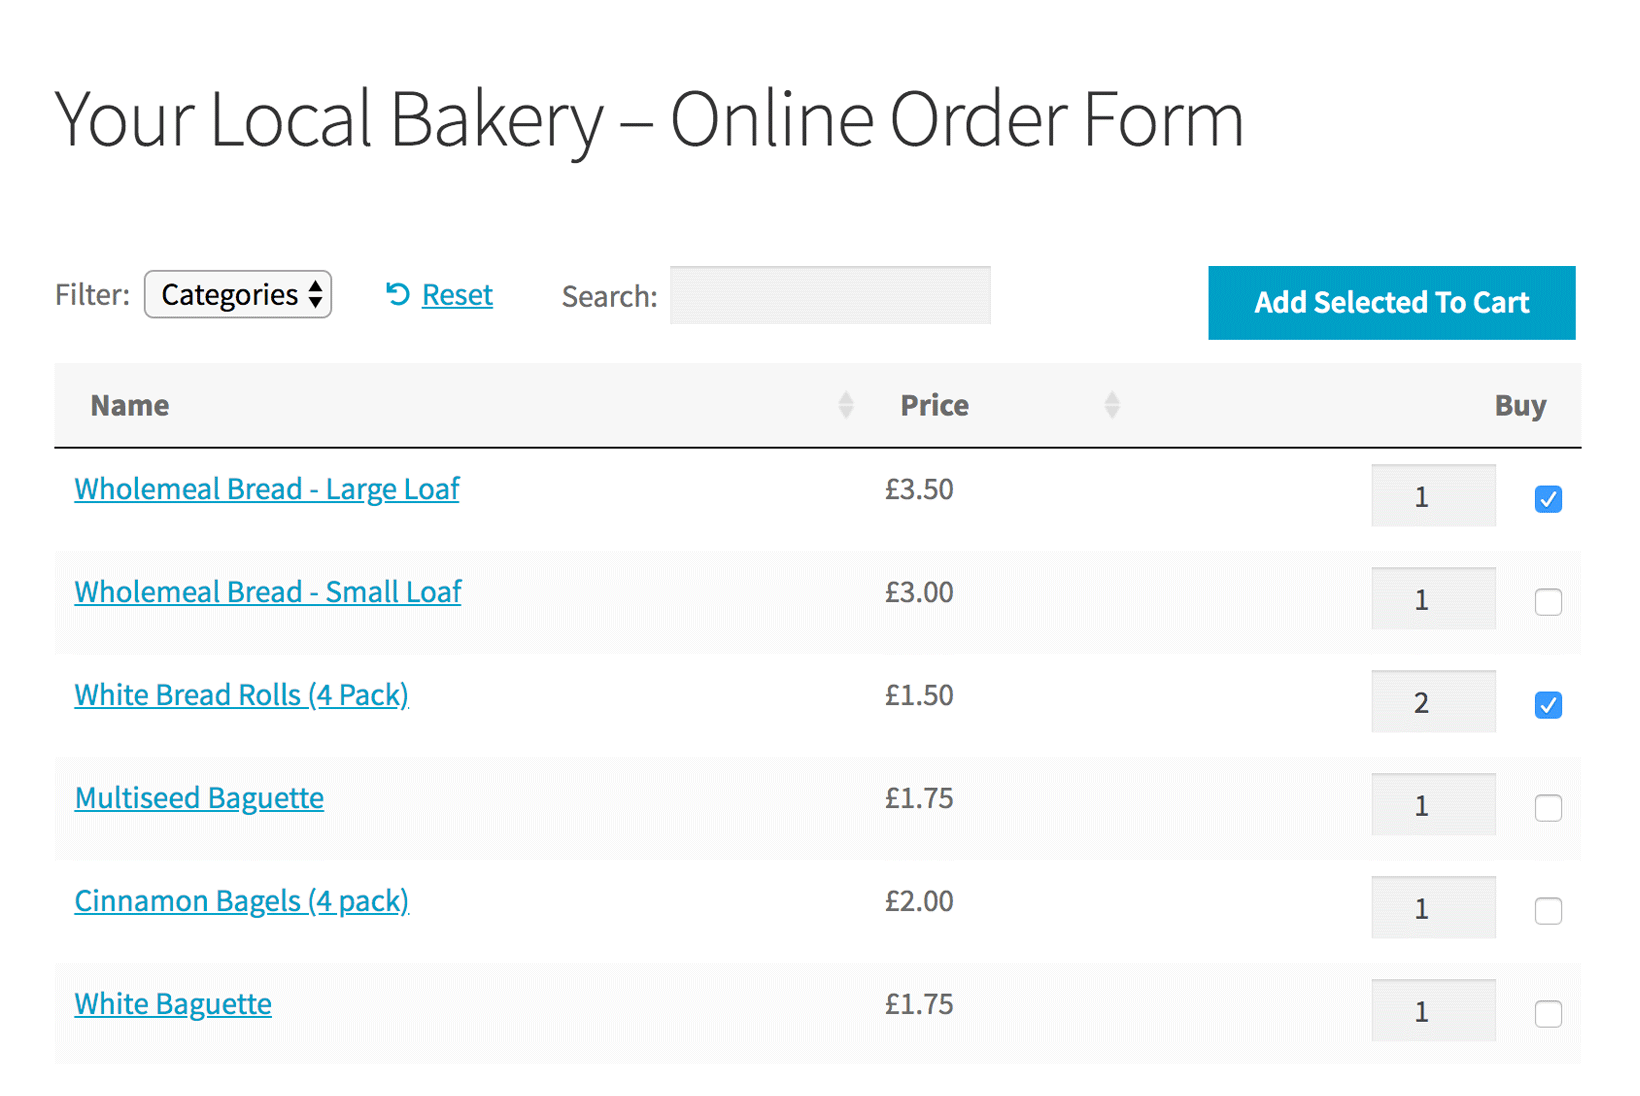
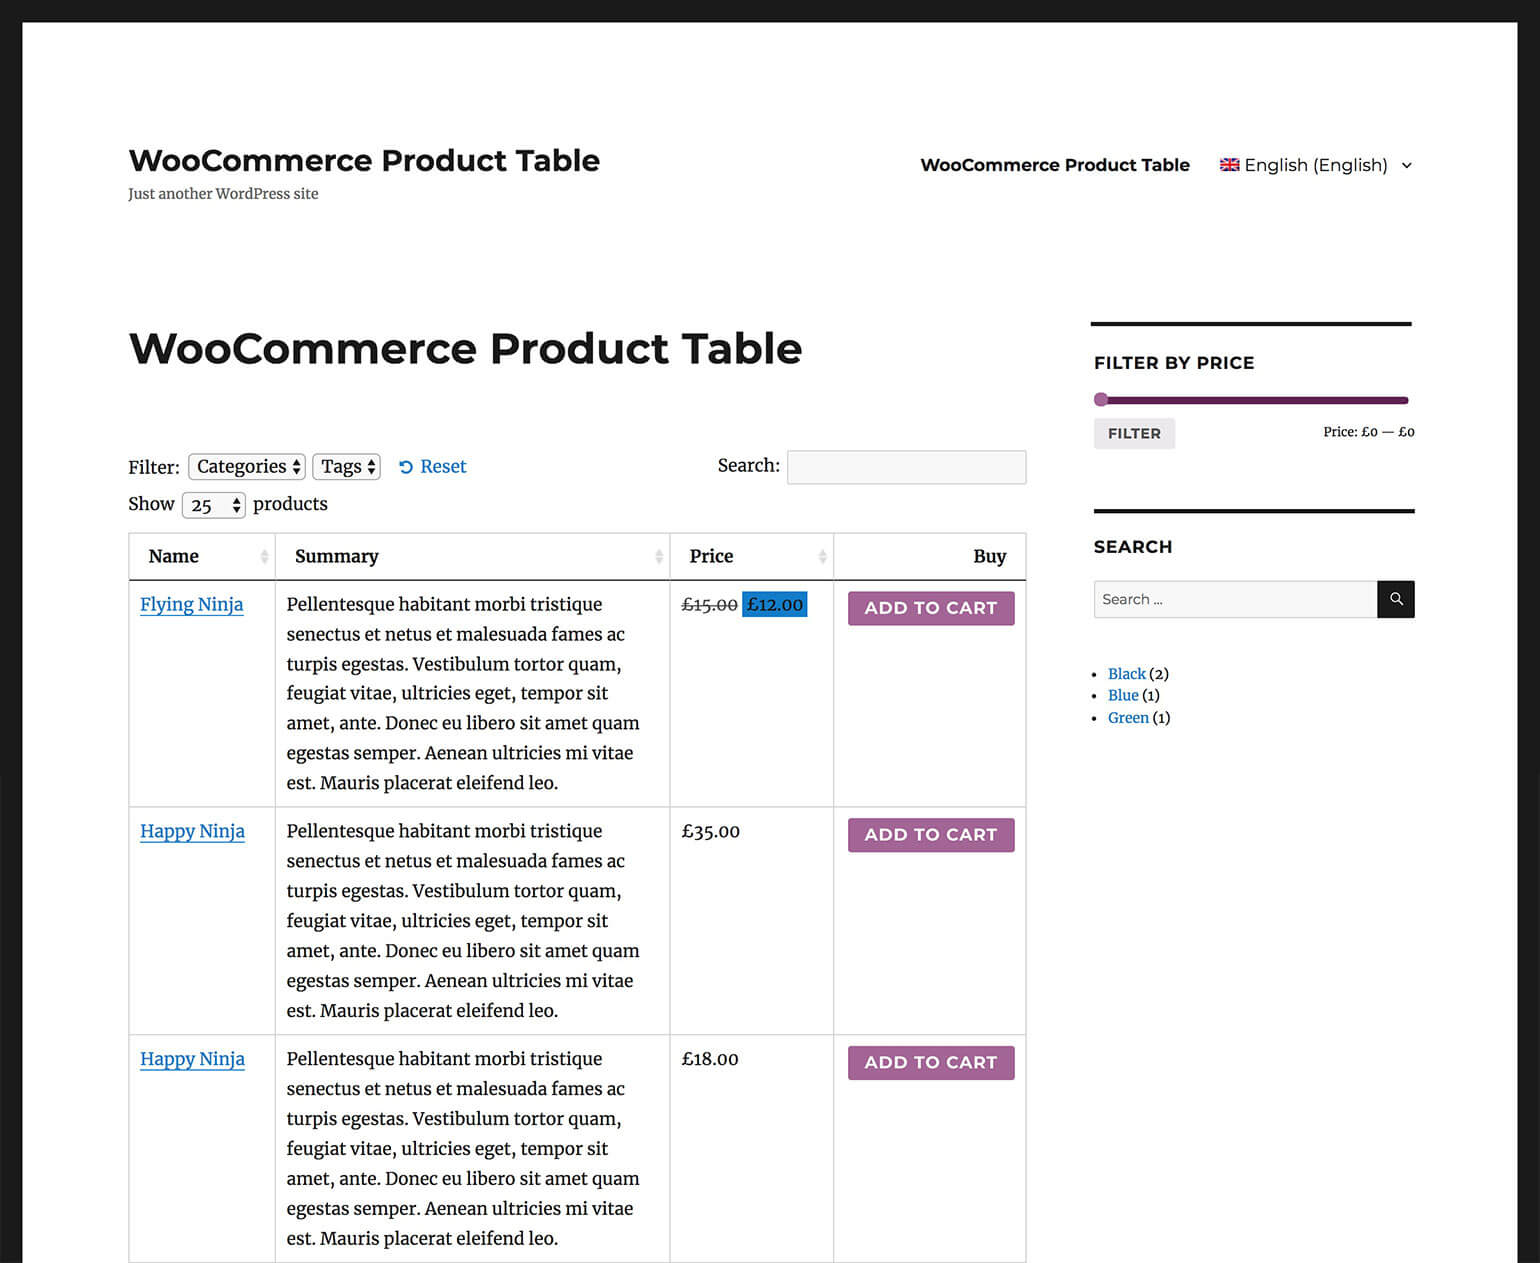
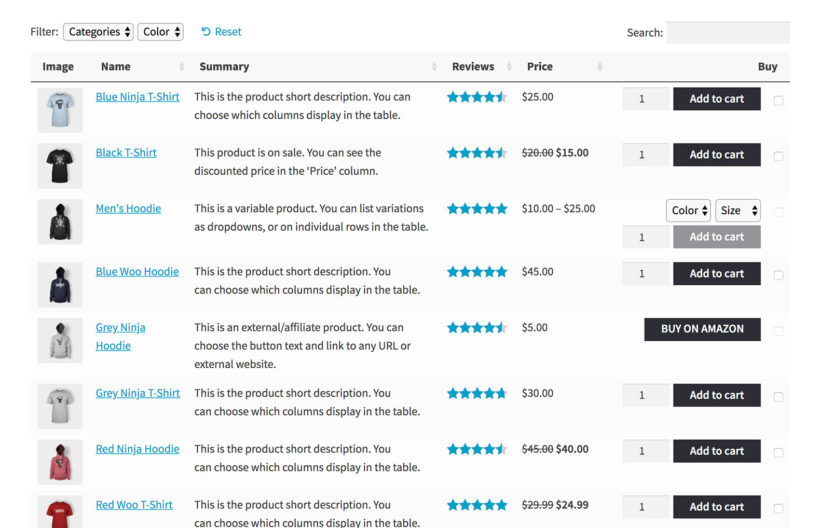
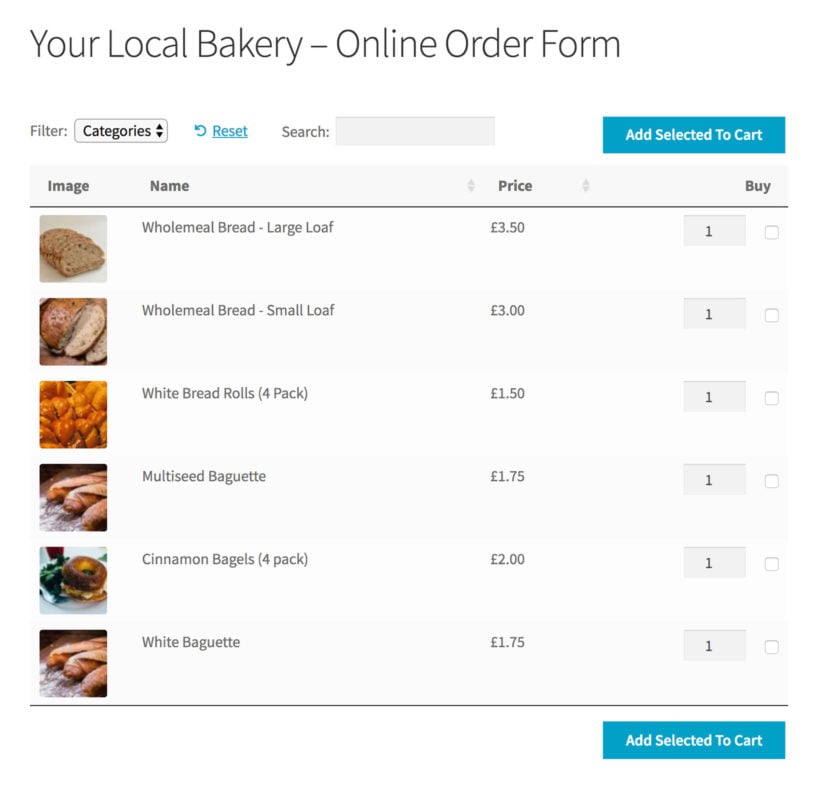
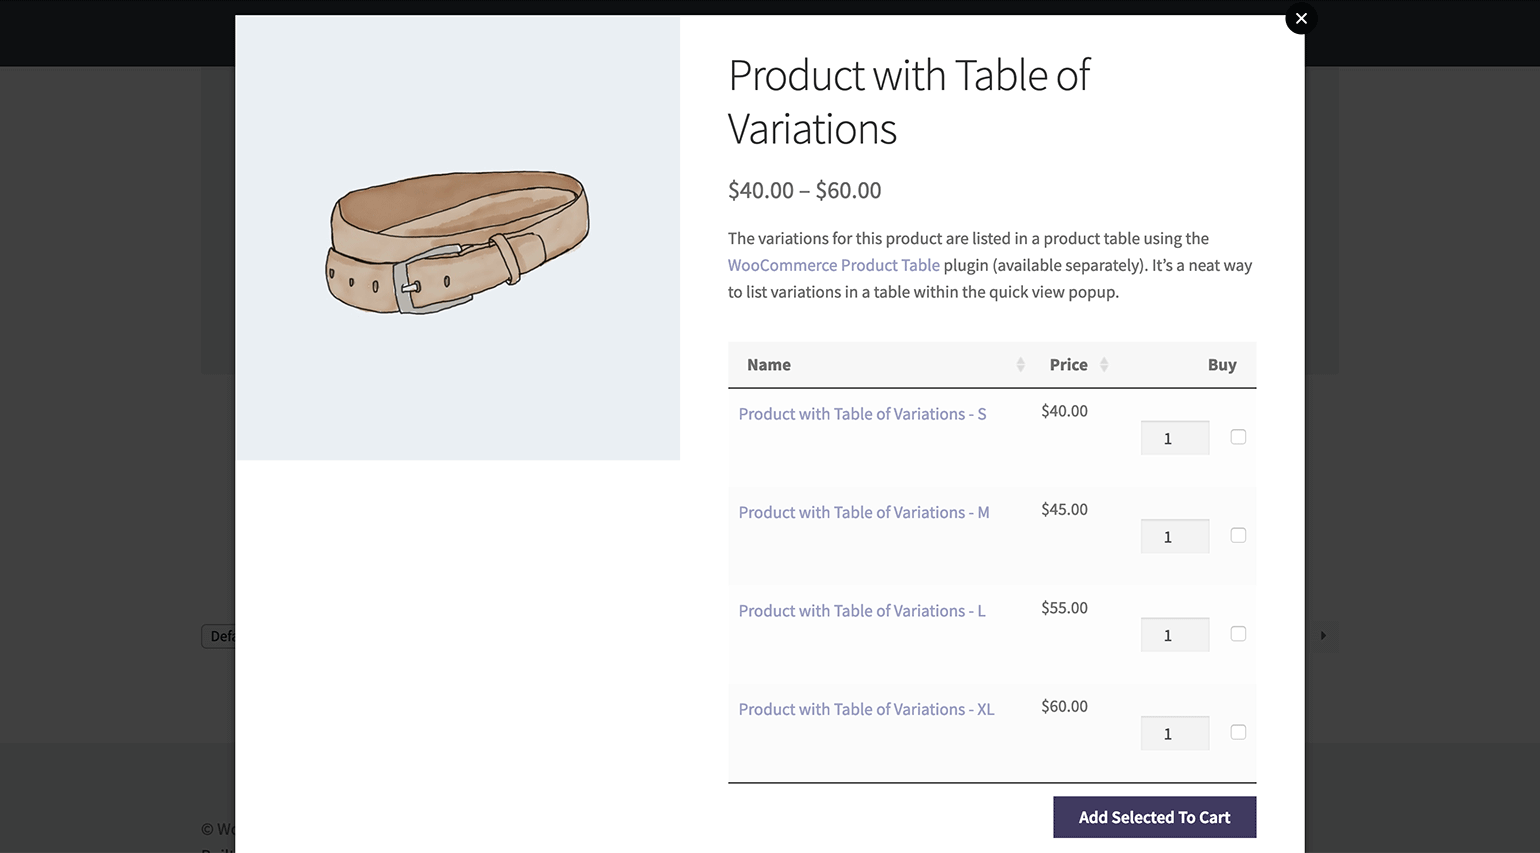
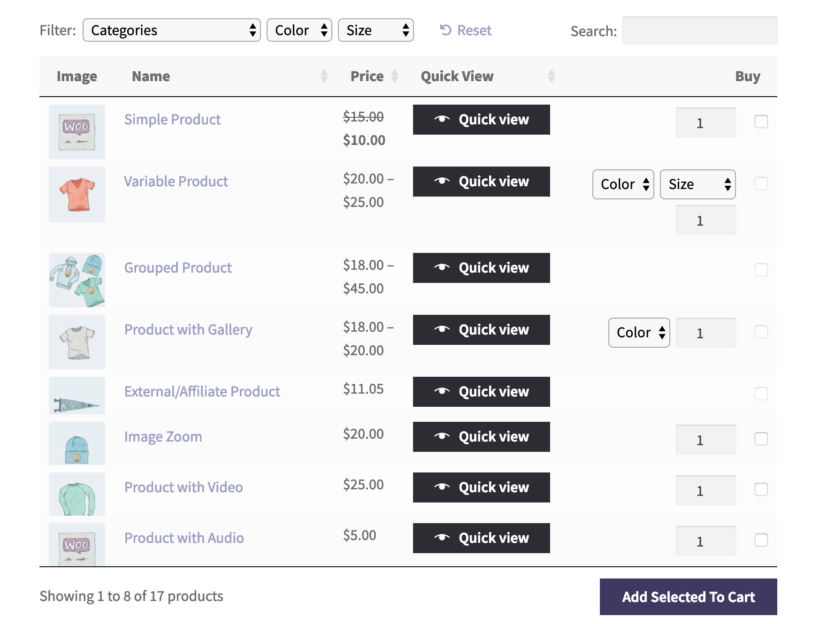
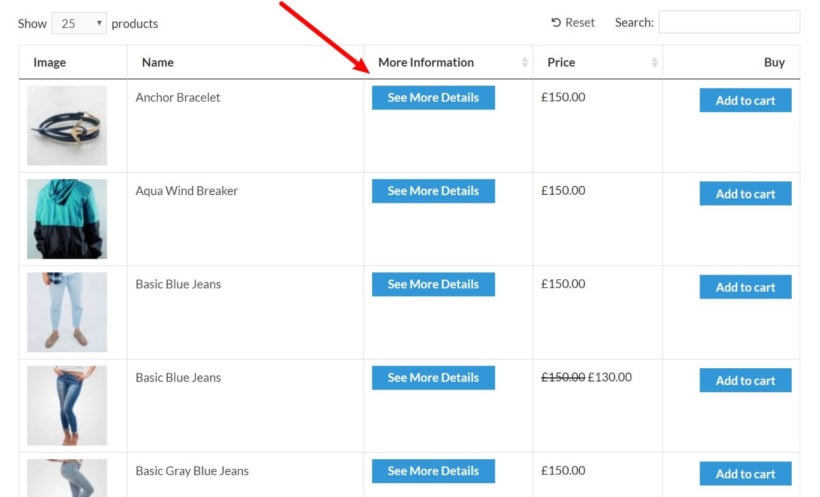
Instead, you need to list products in a quick one-page order form. Customers can instantly view all your products, tick the ones they require, and add them all to the cart. You can do this by installing the WooCommerce Product Table plugin.

If you like, you can add extra columns of information and images to the product table. However, if you need to start selling online quickly, then I suggest keeping it to a minimum.

If your business is selling products or service that are actively helping people to cope with the coronavirus outbreak, please contact us below for a free copy.

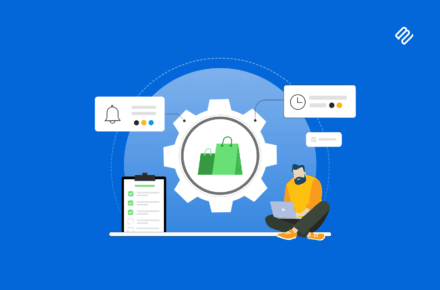
How to set up WooCommerce Product Table

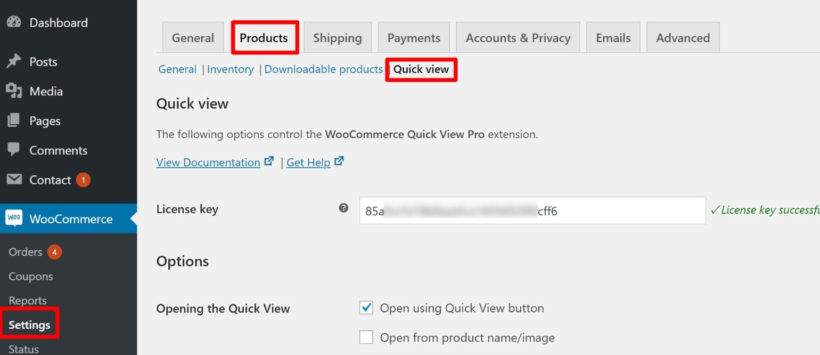
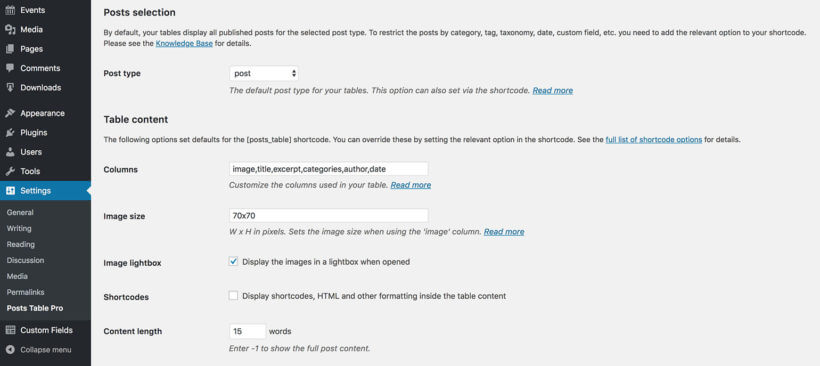
  • Install the plugin and activate it using the license key from your Getting Started email. You can do this on WooCommerce → Settings → Products → Product tables.
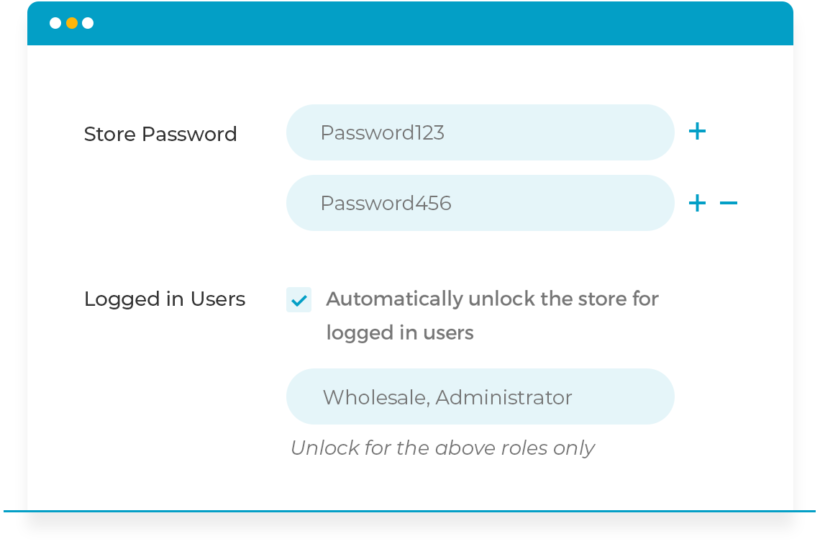
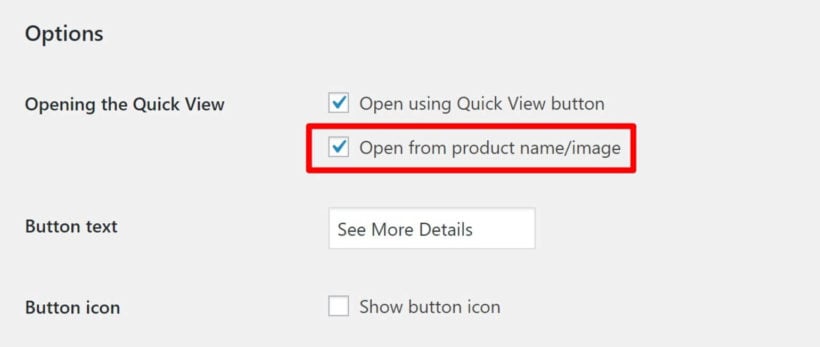
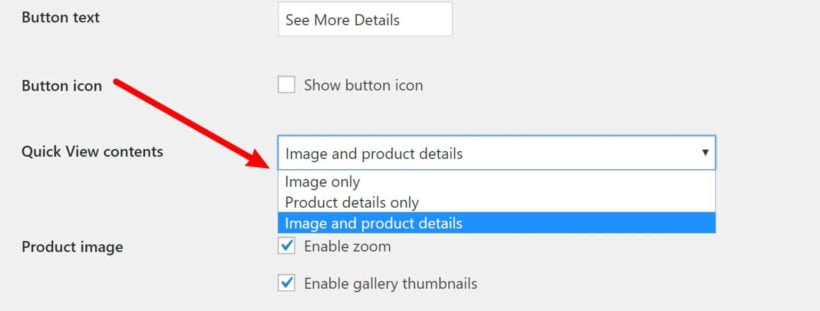
  • Go through the settings and choose how you want your order form to operate. I recommend the following:
    • Table display - tick box of these boxes to enable the product table layout throughout your online store.
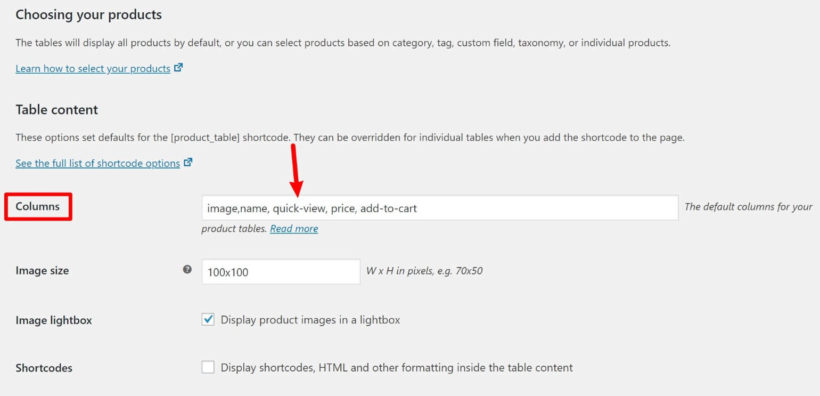
    • Columns - paste the following into this box: name,price,add-to-cart
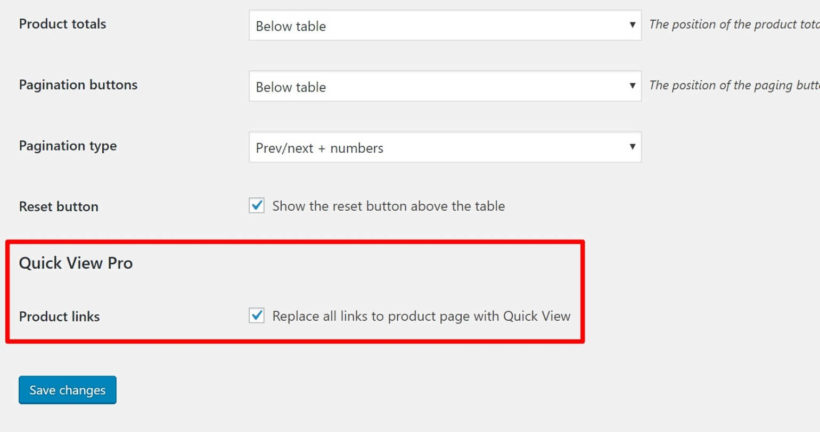
    • Product links - type none here. This keeps your store simple, as you don't need to worry about having a separate page for each product.
    • Add to cart button - select either 'Checkbox' or 'Button and checkbox'. The checkboxes are important to allow your customers to tick multiple products at once, and quickly add them all to the cart.
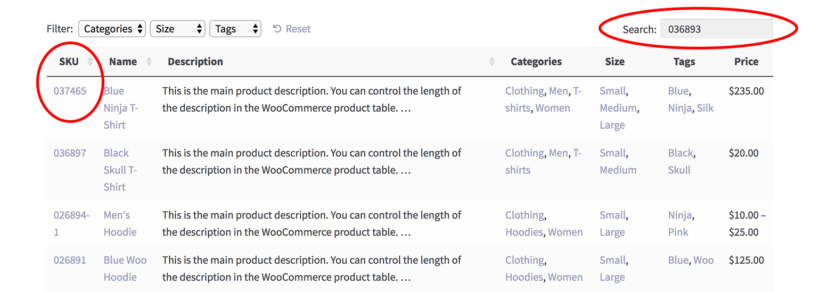
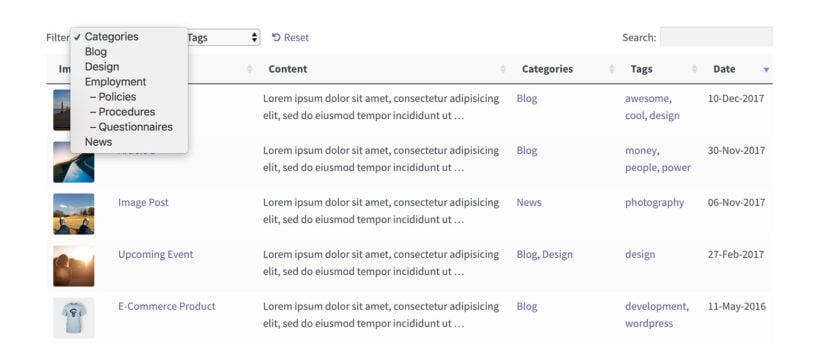
    • Product filters - type categories into this box. This will add a filter dropdown of your product categories, so that customers can quickly view products from a specific category only (e.g. bread).

Of course, WooCommerce Product Table has many more options than this - but our aim today is to help you start selling quickly and easily. If you want to make your store more sophisticated, feel free to browse the full list of 50+ options.
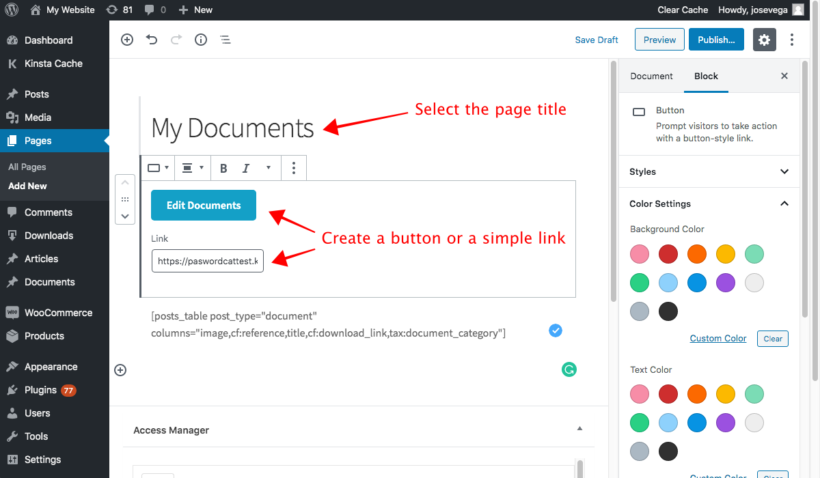
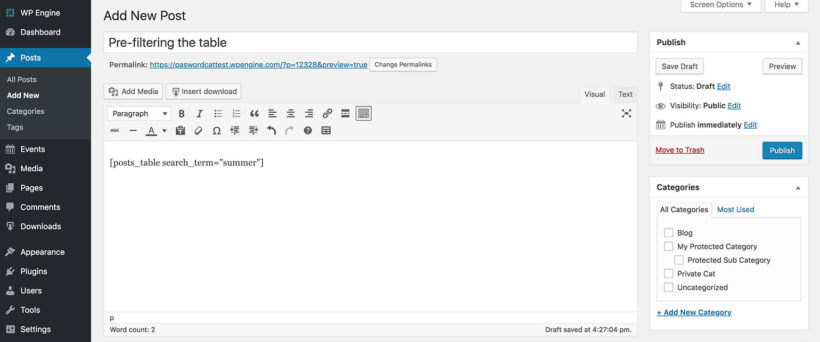
Finally, it's time to publish your website and direct people to your shop page!

  1. Go to the list of 'Pages' section of the WordPress admin and find the page with 'Shop' after its name. This is your main shop page - remember this for the next step!
  2. Now go to Appearance → Menus. Find the shop page in the list of pages on the left, click on it and click 'Add to menu'. This will add it to the menu on the right, so save the menu.

Now, the main menu on your site will include a link to the shop page which lists all your products.

If you like, then you can create more complex navigation structure by adding links to your category pages etc. But to get your business online as quickly as possible, the only essential page is the shop page.

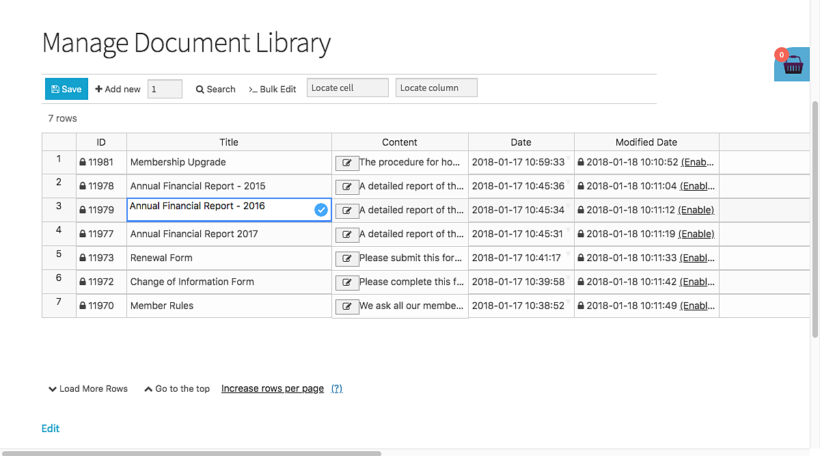
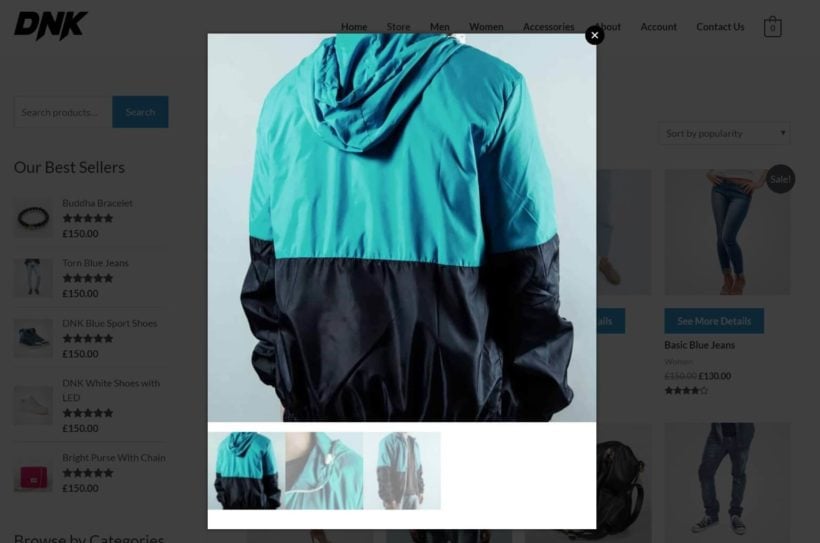
Customers can visit this page, filter by category, select the products they want to buy, add them to the cart and complete their purchase using the WooCommerce checkout. You will receive an email notifying you of their order, so that you can take care of delivery.

Next steps

We understand the problems that the Coronavirus crisis has caused for businesses all over the world. Hopefully this article will help in some small way and keep the wheels turning. If you're helping with the coronavirus effort, please get in touch if you need any further advice or help with anything in this article or to request a free copy of one of our plugins.

WooCommerce Private Store unlock user role

How to use the new feature

  1. Update to version 1.6 of WooCommerce Private Store.
  2. Go to the plugin settings page at WooCommerce > Settings > Private Store.
  3. Enable the 'Logged In Users' option and select one or more rows in the new option that appears underneath.

We recommend doing this if your WordPress site allows user registration for purposes other than the private store. For example, if people can create a 'Subscriber' account in order to comment on your blog, then you can exclude Subscribers from the private store and just make it available to Customers. If you have custom user roles such as 'Wholesale' then you can also select these.

Whichever roles you select, we also recommend selecting 'Administrator' and 'Store Manager' so that you can easily access the store while you're working on it.

Where to get the plugin

If you're already using WooCommerce Private Store, then you can update to version 1.6 from the WordPress Dashboard.

If you don't already have it, get WooCommerce Private Store today. You can download the latest version of the plugin from the order confirmation page, and you'll also receive it by email. That way, you can get it set up straight away.

WordPress frontend editor table plugin

Our Posts Table Pro and Document Library Pro plugins display any type of information from a WordPress website in a searchable table. Our colleagues at WP Sheet Editor have integrated with our plugins to provide a user-friendly way to edit the contents of the table from the front end of your website. Keep reading to learn how to add a frontend editor to your tables.

Posts Table Pro is popular for creating a blog post index, member directory, and more. Document Library Pro is popular for listing documents, publications, or other resources such as audio and video. Both plugins work by taking your posts (or any custom post type) and displaying them in an interactive table on the front end of your website. You can either add the content from the WordPress admin, or you can use it with a forms plugin to allow your users to submit information themselves.

However, until now, there was no way for your colleagues or users to edit the contents of the table directly. Thanks to the developer behind the Universal Frontend Editor plugin, this is now possible by adding a user-friendly front-end editor to your tables. 

Whether you're using our table plugins to list posts, pages, products, documents, articles, courses or something else, keep reading to learn how to let your staff or users edit the contents of the table - all without using the WordPress back end.

1. Create a table using Posts Table Pro or Document Library Pro

Before adding the WordPress frontend editor, you must set up Posts Table Pro or Document Library Pro and use it to start listing information. Get whichever plugin best meets your needs and set it up using the instructions in the 'Getting Started' email. Add some posts/documents and list them in a table on your website.

Once you have done this, you need to follow these simple steps to add a front-end editor to the table(s). This means that your colleagues and/or users can edit information from the WP front end, without having to log into the WordPress admin. I'll tell you how to do that next.

2. Install WP Sheet Editor's Frontend Editor plugin

WP Sheet Editor is a collection of plugins that provide an easy-to-use table editor for any type of WordPress information. It comes with more than 11 plugins for editing posts, pages, custom post types, documents, WooCommerce products, WooCommerce coupons, posts, taxonomies, and more.

In this tutorial, we will use one plugin from WP Sheet Editor: The Frontend Editor plugin. Buy and install the plugin on your WordPress site, and then continue with this tutorial:

Get Universal Frontend Editor

3. Create the frontend editor

Next, it's time to create a new frontend editor. Go to Frontend Sheet → All Spreadsheets.

WordPress table front end editor create spreadsheet

After that, click Add new to create a new spreadsheet:

WordPress spreadsheet editor add new

Now you need to add the spreadsheet name. This is private and used for identifying the frontend editors in the WordPress backend. You can use any name. In this example, we'll call it Manage Document Library:

WordPress front end editor table plugin name

Next, you need to select which post type you'll edit using this new frontend editor. Go to the What information do you want to edit on the frontend? section.

Note: If you haven’t created your custom post type yet, then you can easily do so with the free Easy Post Types and Fields plugin. Check out this step-by-step custom post types tutorial

Here you'll see a list of all the post types on your WordPress site. In this case, we need to select Documents and then click on Save changes. You should select whichever post type you're listing in the table. If not, then you can just select posts or pages and use those instead.)

Select WordPress post type for front end editor

After that, a shortcode will appear below. Copy this to your clipboard - you need this for the next step:

WordPress front end editor plugin shortcode

Add the front end editor to a page

Next, you need to create the page where the editor will be displayed. Users will be taken to this page when they click the 'Edit' button above your Posts Table Pro or Document Library Pro table.

Go to Pages → Add New. Once there, add a page title and enter the shortcode in the content. Make sure the page uses a full-width template - this allows plenty of space for the editable table in the frontend.

Create WordPress front end editor page for table editing

Next, finish off this page as follows:

  1. Copy the URL of the page - you'll need to link to it in Step 5, later.
  2. Add a link or button back to the page where you've added the Posts Table Pro or Document Library Pro table. That way, users can easily return to the public-facing version of the table after editing the information within it.
  3. You might also want to mark this page as 'noindex' so that people won't access it directly from search results. You can do this using any WordPress SEO plugin such as Yoast.

4. Configure the frontend editor

Once you've created the page with the frontend editor, you can configure the visibility options. This controls who can access it and edit the contents of the table.

a) Select the toolbar tools

Decide which tools to include in the frontend editor. This will depend on how you plan to use it. For example:

  • You can use it for clients to manage information from the WordPress front end editor. In this scenario, they need advanced options for searching and bulk editing.
  • You can use it for employees or normal users to submit information (e.g. document, events or posts) from the front end. In this case, you need simpler options.

In the settings for your spreadsheet, select which tools to show on the Primary toolbar and the Secondary toolbar of the editor:

WP frontend editor options

For the Secondary toolbar, you can display the Help options with links to tutorials on how to use the editor.

For the Primary toolbar, you'll be able to show or hide these options:

  • Add new - Users can add new items using the spreadsheet.
  • Search - Users can filter the items by keyword, status, category, tag, modified date, comment count, etc.
  • Bulk Edit - Edit thousands of items in seconds. You deactivate it if you want users to edit items using the cells only.
  • Locate cell - Locate the cell containing a value.
  • Locate column - Locate columns quickly. Useful when you have many columns to avoid scrolling too much. Enter a name and the plugin will find the column.

For a simple editing experience, you can activate the "Search" and "Add new" options and deactivate the rest.

b) Select the columns you want to see on the editor

Use the Columns visibility and Custom Fields section to enable or disable the columns and sort them.

If this frontend editor is for high-level users like clients or employees managing full products or documents, you can let them edit all the fields.

If the frontend editor is for normal users or guests then you can limit the columns. You can just show the document name, content, and link columns.

Generally, you'll probably want to show the same columns that you selected when you set up your WordPress table in Posts Table Pro/Document Library Pro. That will be more intuitive for your users because they will view the main table first, and then click to access the inline spreadsheet editing view. They will therefore expect to see the same columns in both views.

The Columns manager will automatically detect all the fields from the post type (e.g. documents) that you're using for the front-end editor. You can view them in the list and enable, disable, sort, and rename them easily:

Select columns for WordPress front end editor table

For example, if you're adding front end editing to a WordPress document library, then you might rename the Title column 'Document'. To do this, just click on the Edit button in each column, and you'll see the popup that will allow you to change the column name:

WordPress spreadsheet editor rename columns

If there are any columns that you don't want users to be able to edit, simply don't include these in the frontend editor spreadsheet.

5. Integrate the WordPress frontend editor with the public document library

You can easily integrate the frontend editor with the table that you created using Posts Table Pro or Document Library Pro in Step 1.

Simply add an 'Edit' link above or below the table. This should link to the front end editor page that you created in Step 3.

In this case, we've used the Gutenberg editor to create a button linking to the frontend editor page which we created in Step 3:

Add WordPress front end editor to Posts Table Pro

Bonus tip - Hide the 'Edit' link from public users

You might want everyone to be able to see the 'Edit' link, as it provides a handy way for guests to log into their account before editing the contents of the table. However, you might want to hide this so that only certain people see it.

There are several ways to do this:

  • Of course, you don't have to include an 'Edit' link on the same page as your Posts Table Pro table. Instead, you can send your editors a direct link to the page where you added the front end inline spreadsheet editor. Alternatively, you can add the link to a more subtle location such as the footer.
  • You can also install the Advanced Access Manager plugin and use its shortcodes to only show the button to logged in users with a specific role. That way, you can still have an 'Edit' button on the same page as your Posts Table Pro table, but only certain people will see it.

6. Use the frontend editor

When people view the table that you created using Posts Table Pro or Document Library Pro, they will see the button to edit the contents:

Add edit button to WordPress table

When they click on the Edit Documents button, they will be asked to log in in order to see and use the frontend editor (unless they're already logged into their account):

Login to access WordPress front end editor plugin

After they log in, they will see the frontend editor with the tools and columns that you selected. They can quickly edit the information using the spreadsheet interface right on the frontend. No need to access the WordPress backend!

Edit spreadsheet with WP frontend editor

7. Who can use the frontend editor?

The WordPress front end editor is available only for logged in users. Guests will see a login form when they click the 'Edit' button.

The Universal Frontend Editor plugin uses the standard user roles that come with WordPress. When you create accounts for your users, you should choose an appropriate role depending on how much you want them to edit:

  • Subscriber and guest - Not allowed to use the editor.
  • Contributor - Can view and edit their own posts only, but they can't upload images.
  • Author - Can view and edit their own posts only, they can upload images.
  • Editor - Can view and edit all posts and pages.
  • Administrator - Can view and edit everything.

For example, a user with an 'Author' role can use the frontend editor and only edit the posts that they created. This is a good way to allow each user to manage their own information.

Where to get the plugins

You'll need 2 plugins to list information in a table with frontend editing capabilities:

  1. Either Posts Table Pro or Document Library Pro - creates the searchable table that your public visitors will see.
  2. Universal Frontend Editor - creates a spreadsheet-style editor so that logged in users with the correct role can edit the contents of the table.

Get the plugins today, and follow the steps in this tutorial to set it all up!

Looking for quick view popups or product lightboxes? Learn everything you need to know about WooCommerce quick view plugins, how to use them, and how to choose the best one for your store.

Most major e-commerce stores outside of the WordPress space have some sort of quick view functionality on their shop pages. Yet it's surprising that WooCommerce itself doesn't have anything like this built-in. Instead, shoppers have to visit a separate page to learn about and buy each product.

The solution is to use the best WooCommerce quick view plugins to add something like this to your store:

WooCommerce Quick View Example

In this article, I'll start by looking at the benefits of a WooCommerce quick view plugin and how it can help different types of e-commerce store.

Then, I'll show you how to use the WooCommerce Quick View Pro plugin to add quick view buttons and lightboxes to your shop pages.

Let's get started!

What are WooCommerce quick view plugins?

A WooCommerce product quick view plugin does exactly what the name suggests: It gives shoppers a "quick view" of a specific product without requiring them to navigate to the product page.

Overall, product quick views are a popular tactic used by 48% of the top 50 US eCommerce sites, according to the Baymard Institute.

A custom quick view WooCommerce plugin usually displays information like:

  • Full product gallery
  • Short product description
  • Product variations and attributes
  • Quantity picker and add to cart button
  • Extra product information such as reviews, price, categories, tags, and SKU

Typically, customers trigger the quick view by either:

  • Hovering their mouse over the item (no click required)
  • Clicking on a button or the product information (requires clicking)

ForeSee found that the latter implementation was more effective in getting customers to use quick view, but you'll still see both approaches.

Some examples

You can see a combination of the hover and button approach in action at the Fossil store - users hover over a product and click the Quick Look button to open a more detailed product quick view popup WooCommerce without leaving the page:

Example of product quick view at Fossil

And for an actual WooCommerce quick view plugin demo, you can check out this demo page.

Next, I'll share some use cases for when WooCommerce quick view plugins are a good idea. After that, we'll show you how to add quick view to your store.

What types of store can benefit from WooCommerce quick view plugins?

WooCommerce quick view plugins are the perfect way to present additional information without taking up more space or sending users to a separate product page. Because the information is hidden until a customer actually needs it (i.e. they click a button or link to open the quick view), it doesn't clutter up your product lists.

Here are some great examples of stores that will benefit from a WooCommerce quick view WordPress plugin…

Show a WooCommerce product gallery lightbox without forcing people to leave the page

Most WooCommerce product list views show a single image for each product. The best WooCommerce quick view plugins let you create a product gallery lightbox. Shoppers can browse all your product images. They can view the full gallery and enjoy extra features like image zoom, without loading a new page.

Additionally, customers can quickly switch between the gallery lightboxes for different products. This helps them make a decision.

This approach works whether you're using the regular WooCommerce shop and category pages, or a WooCommerce list view plugin.

Include product reviews right away

Reviews add important social proof to your products. Unfortunately, you normally have to get a shopper to go to the individual product page before you can show them the average star rating for each product.

However, with a product quick view WooCommerce plugin, you can display reviews right away. This puts your social proof front and center.

Display food add-ons for a WooCommerce restaurant ordering system

WooCommerce restaurant quick view plugin

If you're using WooCommerce as a restaurant ordering system, you probably know the struggle of trying to balance presenting a clean, easy-to-read menu with giving your customers the ability to customize their food orders.

For example, if you have a pizza delivery shop, you might have 10+ different toppings that customers can choose from, which can get cluttered on a standard WooCommerce list view menu. You can add toppings and other options like this by using the WooCommerce Product Options plugin.

With the WooCommerce quick view plugin, you can present a clean, easy-to-navigate menu and then let customers customize their order using the product quick view.

You'll still get that nice one-page ordering that restaurants need, but you won't have to compromise on usability.

Related tutorial: Create a WooCommerce restaurant ordering system

Create a detailed "build your own product" configurator

WooCommerce build your own hamper

If you let customers build their own products with WooCommerce, you might have too many configuration options to display in your product list. Like the restaurant example above, a WooCommerce quick view plugin lets you offer all those options while still keeping your product list organized.

Related tutorial: Sell 'Build your own' products in WooCommerce

Display information from third-party plugins like deposits, subscriptions, etc.

WooCommerce quick view plugin with Deposits

Many WooCommerce quick view plugins add their own information to the add to cart section of a product page. Common examples are Deposits, Attribute Swatches, and Subscriptions.

These extras won't display on the default WooCommerce shop or category pages. They're normally only available on the WooCommerce single product page popup. However, the WooCommerce Quick View Pro plugin supports a long list of third party plugins, including all of the ones mentioned above. The extra product options appear in the WooCommerce quick view product popup. As a result, your main shop page remains clean while still letting visitors access the important information from the same page.

Move add-ons, attributes, and variations into the WooCommerce quick view

A WooCommerce quick view plugin is a great option for displaying product add-ons, attributes, and variations. If you want to display product options as a WooCommerce preview items popup window, then this is the best quick view plugin for you.

The custom quick view WooCommerce lightbox lets you display more information about each product as well as extra buying options - all without having to visit the individual product page.

You can even display product variations as a table in the quick view lightbox. To do this, use the WooCommerce Quick View Pro and WooCommerce Product Table plugins together. That way, you can display variations as a table in the quick view window.

Display audio or video playlists in the popup

WooCommerce Quick View audio plugin

If you use audio or video playlists at your store (either as actual products or as supplemental product information), you can display an individual media player or a full playlist in the WooCommerce quick view plugin lightbox.

All you need to do is add a media player to the WooCommerce preview items popup product short description.

You can also display audio or video media players directly in your product list if desired. We have some dedicated posts for audio and video, as well as a tutorial on how to create a WooCommerce audio store.

Show bundled or composite products in the popup

WooCommerce quick view bundled products

By default, your shop page or product list displays each individual product, even if it's part of a product bundle or group.

With the WooCommerce Quick View Pro plugin, though, you can display grouped products via the native WooCommerce functionality. This WP plugin also supports product groupings that you've created with the Bundled Products or Composite Products plugins.

You can get pretty creative with these configurations, as explained in this article about creating composite products.

Introducing the WooCommerce Quick View Pro plugin

Quick View Pro is one of the best WordPress quick view plugins. It makes it easy to add quick view features to any Woo store. We spent many months working to develop the best WooCommerce quick view plugin on the market. It has everything you need to speed up shopping and allow customers to learn more and buy directly in the quick view lightbox.

Within minutes, you'll be able to let shoppers open a customizable quick view box with the click of their mouse:

Add quick view buttons anywhere

You can use WooCommerce Quick View Pro with the regular WooCommerce shop and category pages. Either enable it globally or for specific categories only.

You can also use it with the WooCommerce Product Table plugin to create quick one-page order forms complete with quick view buttons:

WooCommerce Product Table with quick view buttons

Flexible quick view lightboxes

You can choose what information to display in the WooCommerce quick view - like opting to only include images, product details, or both.

This means that you can use it:

  • As a WooCommerce add to cart popup plugin, letting customers choose variations and product options from the custom quick view WooCommerce.
  • You can use it as a way to bypass the WooCommerce single product page popup.
  • Furthermore, you can even use it as a standalone WooCommerce gallery lightbox plugin. This showcases the full product image gallery in a product quick view popup WooCommerce with zoom features.

And you can also control how shoppers open the product quick view, like adding a quick view button or opening the quick view when a shopper clicks on the product title or image.

More WooCommerce quick view plugin features

Beyond letting you customize how shoppers open the product quick view box, WooCommerce Quick View Pro also:

  • Lets you customize what information displays in the quick view. For example, you can choose to only display images or to only display certain product details - or both. You have full control over the specific product data that displays in the quickview lightbox.
  • Is responsive and mobile friendly. The quick view popup works on all devices and shoppers can open the quick view with any touch screen.
  • Works with all WooCommerce product types. Simple products, variable products, external/affiliate products, grouped products... your customers can buy any of these from the quick view modal window.
  • Integrates with other popular WooCommerce plugins, including WooCommerce Product Options, WooCommerce Product Bundles, WooCommerce Deposits, WooCommerce Subscriptions, WooCommerce Wishlist Plugin, and more.

When a shopper adds a product to their cart from the quick view, the plugin automatically closes the quick view box and shows a success message. This encourages people to keep browsing and purchasing additional products. Alternatively, you can use the native WooCommerce "Redirect to the cart page after successful addition" feature to send shoppers straight to their carts.

Tutorial: How to set up the best WooCommerce quick view plugin

Next, we get to the practical part of this article: the WooCommerce Quick View Pro setup tutorial.

Below, you'll learn how to use WooCommerce Quick View Pro with:

  • The regular WooCommerce shop and archive pages.
  • Order forms or product list views that you've created with the WooCommerce Product Table plugin.

Either watch the video, or follow the written instructions underneath.

Step 1: Install and activate WooCommerce Quick View Pro

As soon as you install and activate the WooCommerce Quick View plugin on your WooCommerce store, it automatically adds product quick view features right away.

By default, it adds a new Quick View button to the main shop page and category archives. (If you like, then you can disable it for specific categories as needed.)

You can see an example of the default button below:

Product quick view button

When users click that button, the quick view lightbox opens and displays the:

  • Short description
  • Add to cart button
  • Image gallery
  • Extra metadata such as the category, tags, and SKU code
  • Price
  • Reviews
  • Plus various additional product data, as required
Product quick view box

Those are the defaults - now, here's how to customize how the WooCommerce quick view plugin works.

Step 2: Choose how shoppers open quick view

To access WooCommerce Quick View Pro's settings, use the plugin setup wizard or go to WooCommerce → Settings → Products → Quick view.

Access quick view settings

The first setting that you'll want to configure is how shoppers actually open the quick view popup.

First, you can choose whether or not to use the dedicated quick view button. If you do want to use the button, you can also:

  • Change the button text
  • Turn the button icon on or off
Configure quick view button

For example, if you turn the icon off and change the text, here's how your shop page might look:

Beyond that, you can also choose whether or not to open the quick view when a shopper clicks on the product's title or image.

By default, clicking on the product image or title takes shoppers to the individual product page. But if you check the box for Open from product name/image, the quick view will open instead:

Open from product title

Step 3: Choose what information displays in the product quick view box

You can do much more than choose how shoppers open the WooCommerce product quick view box. Beyond this, you can also control what product information displays inside the quick view box. And even further, you can choose how shoppers can interact with that information.

First, you can use the dropdown to control whether to display:

  • Only product images
  • Only product details
  • Both images and product details (the default)
Choose what information to include

For example, if you set the Quick View contents drop-down to Image only, the quick view box would only display the product gallery:

Only product gallery

Further down, you can also control more about how the image and product details function. For example, you can choose which product details to include.

Using WooCommerce Quick View Pro with WooCommerce Product Table

Next, let's cover how to use the WooCommerce quick view plugin with our WooCommerce Product Table WordPress plugin. This is a super-popular combination because customers love creating quick product order forms complete with quick view buttons.

WooCommerce Product Table lets you display some or all of your products in a flexible list view. A few popular use cases are:

  • Restaurant order forms
  • Wholesale stores
  • Audio or video stores
  • Etc.

WooCommerce Quick View Pro is built to integrate with WooCommerce Product Table.

When both WooCommerce quick view plugins are active, you'll see a new Quick View Pro option in the WooCommerce Product Table settings. You can access these settings by going to WooCommerce → Settings → Products → Product tables:

WooCommerce product table quick view

When you check this box, all of the product page links in your table will open the quick view box instead of linking to the individual product page. That means shoppers can:

  • Click on the name of the product to open more information
  • Use the add to cart button if they want to add the product straight to their carts

It replaces all links to the single product page with quick view. As a result, customers can't get from the table to the WooCommerce single product page popup. It's perfect if you want to disable the individual product page completely.

An example
Quick view table

Beyond that setting, you also get a new quick-view column option that you can add to your table:

Add quick view column

Learn more about column options in WooCommerce Product Table

If you include the quick-view column, it will add a persistent quick view button for each product:

Product quick view column

If you want to change the button text, you can use regular WooCommerce Quick View Pro button settings. You can also use those settings to customize what information is included in the product quick view box.

Get the best WooCommerce quick view plugin today

eCommerce quick views are a great way to let shoppers view more information without forcing them to visit the individual product page.

Almost half of the top 50 ecommerce stores use quick view functionality. About 45% of shoppers are likely to make use of quick view functionality.

It doesn't matter whether you're using the regular WooCommerce shop pages or you've created product list views with our WooCommerce Product Table plugin. Either way, WooCommerce Quick View Pro adds a flexible product quick view box in just a few minutes. We've designed it to be one of the best WooCommerce quick view plugins available today, and we hope you like it.

Do you have any questions about how to use WooCommerce quick view plugins at your store? Let us know in the comments!

WooCommerce sort search by SKU

Our WooCommerce Product Table plugin comes with a lazy load option for loading product tables with large numbers of products. In response to popular demand, we've just released a new version which lets you search and sort your lazy loaded tables by SKU.

For those of you who don't know, an SKU stands for 'Stock Keeping Unit'. The SKU field is built into WooCommerce, providing a way to store a unique identifier code for each product. An SKU is a bit like the ISBN number for a book, but you can use it to store any type of code (text or numeric) for your products, in any format. While the SKU field is optional, WooCommerce.com have published a convincing article about the benefits of using SKU's in your Woo store.

What is lazy load?

Because of the structured tabular layout, lots of store owners use WooCommerce Product Table to list hundreds or even thousands of products. For example, it's a popular way to sell technical or wholesale products that require lots of extra data and don't need big images. You can use it to create a one-page WooCommerce order form, with all the purchasing options such as add to cart buttons or checkboxes, quantity pickers and variation dropdowns directly in the product table view.

Most WooCommerce stores only display 9 or maybe 12 products per page, without variations. The product table layout means that you’re likely to be loading many times more data than this. Inevitably, this can cause performance problems and slow page load times. And that's where lazy load comes in...

Lazy load is an alternative method of loading the product table, which you can activate by ticking a box on the plugin settings page. Instead of loading all the products with the initial page load, it just loads 1 page of the table at a time.

For example, let's say you have a table with 1,000 products in total, set to list 25 products per page. Without lazy load, you'd be loading all 1,000 products at once - ouch! That's a lot of data and most servers won't cope with this. Instead, you can enable lazy load and just load 25 products at once. Much better!

The problem with lazy load

As you can see, lazy load is a fantastic way of creating product tables such large numbers of products. However, it's never been perfect.

The problem is that with lazy load, WooCommerce Product Table only knows about the products on the current page. It simply hasn't loaded the others yet! This means that the searching and sorting is limited. You can search and sort by product name or description because WordPress indexes these fields in a way that the plugin can access without having loaded the entire table. However, until now it wasn't possible to sort or search by SKU and other data.

Because WooCommerce Product Table is popular for selling technical or wholesale products, people often want to use it to find products based on their SKU. This means that not being able to sort/search by SKU was a big limitation. As a result, this has become one of the most in-demand items on our feature request list.

We're always looking for ways to improve our WP plugins based on customer feedback. After some head scratching, we found a solution.

New feature: search & sort lazy loaded tables by SKU

Version 2.2 of WooCommerce Product Table is now available. While it looks the same as previous versions, there are lots of improvements and code changes under the hood.

When you create a Woo table with lazy load and an SKU column, a sort arrow will now appear at the top of this column. Users can click on this to sort by SKU in either direction. You can also sort the product table by SKU when the table first loads.

In addition, the AJAX-powered keyword search box above the table will now search by SKU field as well as the product name and description.

Example use case

Here's a common use case to help you to visualise the new features:

A WooCommerce wholesale store uses WooCommerce Product Table to create a one-page wholesale order form for their WordPress site. They have a large number of products, so they activate the lazy load option to boost performance.

The B2B wholesale buyers already know what products they want to buy, and have a list of SKU's for their regular products. They simply type a product code into the search box to search by SKU. They then add the product to the cart, and repeat the process to quickly create their order.

This is far more user-friendly than other ways of ordering your regular products. The customer doesn't have to scroll through multiple pages. Instead, they just type the product code and order much more quickly. Perfect!

Where to get the plugin

If you're already using WooCommerce Product Table, just upgrade to the new version from the WordPress Dashboard. If you haven't got it yet, buy it today and start adding searchable, sortable product tables to your store.

WordPress table plugin version 2

We've been working hard adding exciting new features to Posts Table Pro, and I'm pleased to tell you that version 2.0 is now available for you to install.

The new version contains a huge number of changes, new features and improvements. We've made it easier to use than ever before, with a full settings page for people who aren't confident working with shortcodes. There's an image lightbox which opens a bigger version of the featured image in a popup or modal window. You can pre-filter for a specific search term, and add nested hierarchical filters above the table.

Here's more information about the new features and improvements.

Get Posts Table Pro

New! Full settings page

Posts Table Pro WordPress plugin settings page

Quite a few of our customers have asked for an easier way to configure your tables, instead of having to do everything in the shortcode. As a result, we've added a full settings to the plugin where you can select default options that will affect all the tables on your site. You can find this at Post Tables → Settings.

As before, you can continue configuring your tables directly in the Posts Table Pro shortcode if desired. This allows you to override the default settings for individual tables - for example if you want to add multiple tables to your site, each one listing different information.

New! Image lightbox

WordPress table plugin image lightbox

Another popular feature request - version 2.0 includes an image lightbox for all your post images, courtesy of the Photoswipe library. You can enable this from the plugin settings page:

WordPress table plugin image lightbox option

This applies to all featured images within the 'image' column. Once enabled, the image will open in a lightbox when clicked or tapped.

Check out the demo to see the new image lightbox in action.

New! Hierarchical nested category filters

WordPress table plugin hierarchical category filters

One of the most popular items on our feature request list relates to the category or custom taxonomy filter dropdown above the table. Previously, all categories and sub-categories were listed alphabetically in a single list, regardless of their level. Lots of you have asked for this list to be hierarchical, so we have reworked the filter to achieve this.

The new categories/taxonomies filter is also better at only showing categories that relate to the products in the current table when you're not using the lazy load option.

Further reading: How to create custom taxonomies to sort your WordPress content in new ways using Posts Table Pro.

New search term option

Posts Table Pro pre filter table

Lots of you have also asked for an option to filter the products in the table when it first loads. To do this, add the search_term option to your shortcode. For example, the following shortcode will pre-filter the table for posts containing the word 'summer'.

[posts_table search_term="summer"]

New toolbar button

Insert Posts Table Pro shortcode toolbar button

Previously, you created a table by adding the shortcode [posts_table]. We've added an 'Insert posts table' toolbar button to make this easier for you.

Use this button to add a table containing all the options you chose on the settings page.

Caching added for faster load times

We've added a new caching option to improve performance. By default, the cache will clear itself every 6 hours. You can enable this on the plugin settings page.

And there's more!

We've also made various other tweaks, bug fixes and improvements. You can see the full changelog here.

How to get the new improved table plugin

If you're already using Posts Table Pro then you can update to the latest version via Dashboard → Updates in the WordPress admin. If you get any errors, please see our knowledge base article on problems updating the plugin.

If you haven't got the plugin yet, get it now and start creating instant tables of your posts, pages, custom post types and more!

Get Posts Table Pro

We've just released version 2.1 of WooCommerce Product Table. This contains some exciting new features that lots of our customers have asked for. There are various other changes and behind-the-scenes improvements (see Changelog). Here are the main headlines:

GET THE PLUGIN

Open product images in a lightbox

WooCommerce image lightbox plugin

An image lightbox has been the most in-demand item on our feature request list for a while. Now, when you click on an image in the product table, the image will open up in a lightbox.

The lightbox uses the in-built Photoswipe JavaScript library built into WooCommerce to display the enlarged product images. This is a great way for customers to see a bigger version of the image without having to click through to the single product page. It's especially important since a lot of our customers use WooCommerce Product Table as a one-page order form, disabling any links to the product detail pages.

New support for variation descriptions when using separate variations

We added support for separate variations back in version 1.7 (June 2017). This is where each product variation option is listed on its own row in the table.

If you're listing each product variation on a separate row in the table, the description for each individual variation will now appear in the 'description' column. (Previously, the main product description would appear here and it was not possible to display variation descriptions.)

If there is no variation description then the main product description will appear in this column, as before.

New language translations

The WooCommerce Product Table plugin now contains complete translations for English, French, Finnish, German and Polish. Please see our article about using WooCommerce Product Table in different languages for usage instructions.

We're currently awaiting full translations for Italian, Spanish, Dutch, Norwegian, Swedish, Danish, Hebrew, Greek and Romanian, and hope to add these shortly. (In the meantime, there are already partial translations for most of these.)

We're always interested to hear from anyone who is interested in translating the plugin into other languages.

How to update

Existing users of WooCommerce Product Table can update to the new version via Dashboard > Updates in the WordPress admin. If you get any errors, please see our knowledge base article on problems updating the plugin.

If you're not using the plugin yet, get it today and start taking advantage of the new features.

GET THE PLUGIN

What's next?

Next on the agenda are further improvements for using WooCommerce Product Table as a one-page order form. Watch this space for more new features...

WooCommerce Product Table WPML CompatibleWe're delighted to announce that WPML, the market leading WordPress multilingual system, have formally tested our WooCommerce Product Table plugin and confirmed that it is fully WPML compatible.

WOOCOMMERCE PRODUCT TABLE WPML

We have always tested our WordPress and WooCommerce plugins with WPML. However, this is the first time that we have submitted a plugin to them for formal testing and review. They were happy that WooCommerce Product Table works perfectly with WPML and have issued a certificate of compliance.

Note: Since publishing this article, WPML have discontinued their compatibility program. However, you can still use it with WooCommerce Quick View Pro.

WPML have also published a demo site where you can test WooCommerce Product Table on a multilingual WPML site. To see it in action, visit the demo site and click the languages dropdown in the top right corner.

Demo: Test drive WooCommerce Product Table with WPML.

What about Barn2 Media's other plugins?

Next, we plan to submit our other WordPress plugins to WPML for formal testing and certification.

In the meantime, we have already tested all our plugins with WPML so you can safely use them together for your multilingual websites.

GET WOOCOMMERCE PRODUCT TABLE GET WPML

WooCommerce custom add to cart button plugin

Discover the best free and premium WooCommerce custom add to cart button plugins, and how to choose the right one for your store.

One of the most important features of any e-commerce store is the "add to cart" button, which allows customers to easily add items to their shopping cart and continue shopping. While WooCommerce offers a default add to cart button, many businesses may want to customize this button to appeal to their customers more effectively. In this article, I will explore the best free and pro plugins available for customizing the WooCommerce add to cart button. I'll also help you choose the one that's right for your business.

To give you plenty of options, I'll focus on three plugins which take different approaches to customizing the add to cart button:

  1. WooCommerce Custom Add to Cart Button (free plugin) - Change the 'Add to Cart' button text, replace the add to cart text with an icon, or add an icon alongside the button text.
  2. Express Shop Page (premium plugins) - Extend the add to cart button on the shop page by adding quantity and variation pickers.
  3. WooCommerce Product Table (premium plugin) - Make it quicker and easier to add products to the cart by listing them in a fast one-page order form. It comes complete with multiple add to cart buttons, quantity fields and variation pickers for true one-page shopping. Use it alone or with the free WooCommerce Custom Add to Cart Button plugin.

Keep reading to learn more about these options, and choose which one(s) to install on your store for the best results.

Why customize the WooCommerce add to cart button?

There are lots of reasons why store owners might want an option in WooCommerce to upgrade the add to cart button.

For example:

  • Do you feel that the 'add to cart' text wording doesn't quite fit with your brand? For example, a lot of WooCommerce store in the UK change the button text to 'add to basket'. Think about what custom add to cart text would work better for you.
  • Are you using another plugin to change the function of the WooCommerce add to cart button? This could be through a course bookings plugin, events plugin, add to quote plugin, etc. If so, you might want to reword the Add to Cart text with something more relevant, such as 'Buy Now', 'Enrol Now', 'Book a Place', 'Add to Quote' or 'Make an Enquiry'.
    WooCommerce Custom Add to Cart Button plugin
  • Are your customers frustrated by the basic add to cart buttons on the Shop page, which don't let you change quantities or choose variations? If so, then you might want to extend these using a plugin like WooCommerce Express Shop Page. This brings all the usual product options onto the shop page, instead of having standalone add to cart buttons.
  • If you've used our Product Table plugin to create a WooCommerce order form, then you might want to remove the Add to Cart text and replace it with a simple cart icon for each product.
    Icon only add to cart buttons
    A website using the free Custom Add to Cart Button plugin with WooCommerce Product Table
  • Or maybe you just want to change the capitalization of the add to cart text, for example from lowercase to uppercase or vice versa.

Whatever your reason for wanting to change the add to cart link in WooCommerce, you can do it with the free WooCommerce Custom Add to Cart Button plugin.

Option 1: Change the add to cart text and add an icon

WooCommerce Custom Add to Cart Button is a 100% free WordPress plugin for customizing the add to cart button. It comes with all the essential features for customizing the WooCommerce add to cart button text and adding a cart icon:

  • Change the wording of the WooCommerce add to cart button text.
  • Add a high definition (retina) WooCommerce cart icon alongside the text.
  • Hide the add to cart text and just have an icon.

It's super-simple and lightweight, so it won't weigh down your site.

Here are some examples of the plugin in action:

How to create WooCommerce custom add to cart buttons

  1. Log into the WordPress Dashboard and go to Plugins → Add New.
  2. Search for 'WooCommerce Custom Add to Cart Button'.
  3. Install and activate the plugin of this name by Barn2 Media.
  4. Go to Appearance → Customizer → WooCommerce → Add to Cart. Here, choose the options for your custom WooCommerce add to cart buttons.

As you can see, the plugin is incredibly simple to use. There are full usage instructions on the official WooCommerce Custom Add to Cart Button plugin page on wordpress.org, but that's basically it!

Option 2: Add quantity and variation pickers to the Shop page add to cart button

WooCommerce Express Shop Page plugin

WooCommerce puts add to cart buttons on your main product listing pages, such as the main Shop page and your category pages. However, these are pretty useless as they come! That's because clicking the add to cart button only adds 1 of each product to the cart - there's no way to choose a quantity. It's even worse for variable products, which show a 'Select options' button linking to the single product page.

It's much better to allow customers to choose quantities and variations directly on your Shop and category pages.

Fortunately, you can easily do this with the WooCommerce Express Shop Page plugin. It adds variation dropdowns and quantity pickers to the shop page like this:

Add quantity and variations to WooCommerce shop page plugin

As you can see, customizing the basic add to cart button in this way makes it much easier to add products to the cart.

For best results, use Express Shop Page with the free WooCommerce Custom Add to Cart Button plugin to change the button text and add an icon.

Option 3: Create one-page order forms with custom add to cart buttons

Gutenberg for WooCommerce Product Table block

So far, we've discovered two plugins for customizing the WooCommerce add to cart button. These create a custom button without changing the overall layout of your products.

The WooCommerce Product Table plugin takes things to the next level. It takes your products and displays them in a quick one-page order form for faster shopping.

Use it alone, or with WooCommerce Custom Add to Cart Button to create a WooCommerce order form with cart icons.

WooCommerce Product Table is a powerful solution for taking your custom add to cart buttons to the next level. This plugin offers a unique approach to product displays by creating a table format. This allows customers to purchase products directly from the main shop page. As a result, there's no need to click through to individual product pages.

Why should I use custom add to cart buttons in a product table?

Product tables are a good addition to your store because:

  • There are a variety of purchasing options. These include the ability to select product variation and choose quantities. As a result, customers can quickly add products to the cart directly from the order form. This enhances the customer experience by streamlining the purchasing process. It also helps to increase conversions by reducing the number of clicks required to make a purchase.
  • You can also add WooCommerce custom fields to the product table, such as SKU, weight, and dimensions. Add multiple columns to provide customers with additional information.
  • It is highly customizable, with a range of options to control the appearance and functionality of the product table. You can choose which columns to display in the table, enable filters and sorting, and even add product search functionality.

As you can see, this gives you a lot of conversion-boosting flexibility compared the default WooCommerce shop page. Bringing the full range of add to cart options to the main shop page can help to increase conversions. The end result: driving more sales for your business.

Which WooCommerce add to cart plugin should I use?

In conclusion, customizing the WooCommerce add to cart button is a crucial step in improving the shopping experience for your customers. By using the free WooCommerce Custom Add to Cart Button plugin, you can easily change the button text and add an icon, helping to improve the design and functionality of your website.

Additionally, the WooCommerce Product Table plugin takes things one step further by bringing the full range of add to cart options directly onto the shop page. This allows customers to purchase products without having to navigate to individual product pages.

While each of these plugins offers its own unique set of features, they work best when used together. Combine them to create a highly customized and streamlined shopping experience for your customers. This will help to conversions and drive more sales for your business.

So why wait? Try them out today and see the difference they can make for your WooCommerce store!