How to list WordPress Media Library files in a table
The Posts Table Pro plugin can list any WordPress post type in a table. Not everyone knows that media library files are saved as a post type called 'attachment', so you can display them in the front end too.
This article explains how to use Posts Table Pro to list files from the Media Library in a searchable table on the front end. This method is particularly useful if you want to display images, audio files etc. in a front end media library because you can do it automatically. If you want to list other file types, for example to display PDF's from the Media Library, then you might prefer our Document Library Pro plugin which can also be used as a front end media library.
Displaying Media Library files
- Create a table using your chosen method.
- If you are creating the table using the table wizard (Post Tables → Add New), select Media in the first step where it says "What type of content do you want to display?".
- If you are using the
[posts_table]shortcode, add the following option to your shortcode:post_type="attachment".
- Add any or all of the following columns to the Columns option. Only the following columns are relevant to displaying Media Library files:
id- displays the database ID of the Media Library file.image- displays the image (image file types only) - not recommended if you are showing non-image file types and you should use the 'content' column instead.title- displays the filename, with or without a link to download the file.content- displays the image if you are displaying image files, and non-image files will just show the file name.excerpt- shows the caption that you added in the Media Library. You can use this to show a description or summary of each file.author- the username of the WordPress user who added the file to the Media Library.date- the date the file was added to the Media Library.date_modified- the date the file was last modified.- Any additional custom fields or categories/taxonomies that you have added to the 'attachment' post type. You can use these to store information such as the file size, file type, add any extra text, or add extra links, images, icons, or download buttons.
- If you are displaying images in your front end media library, then you must set the Content length option to -1. This is essential because if you tell Posts Table Pro to restrict the content length then it can prevent your images from displaying in the table.
- Finally, insert the table onto your site.
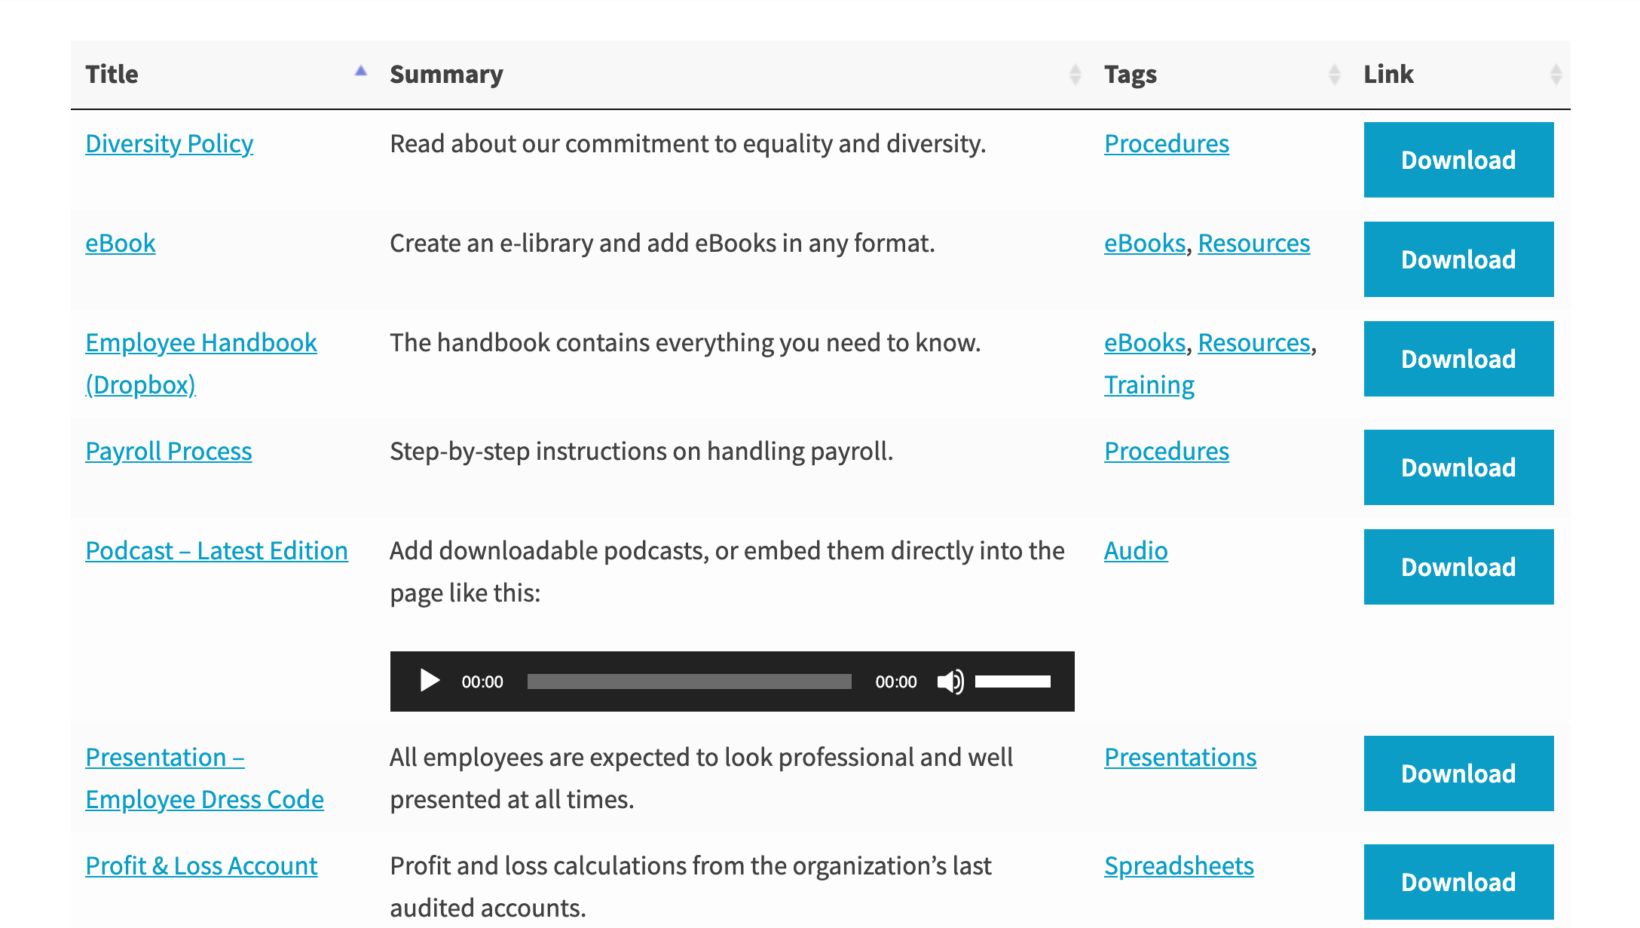
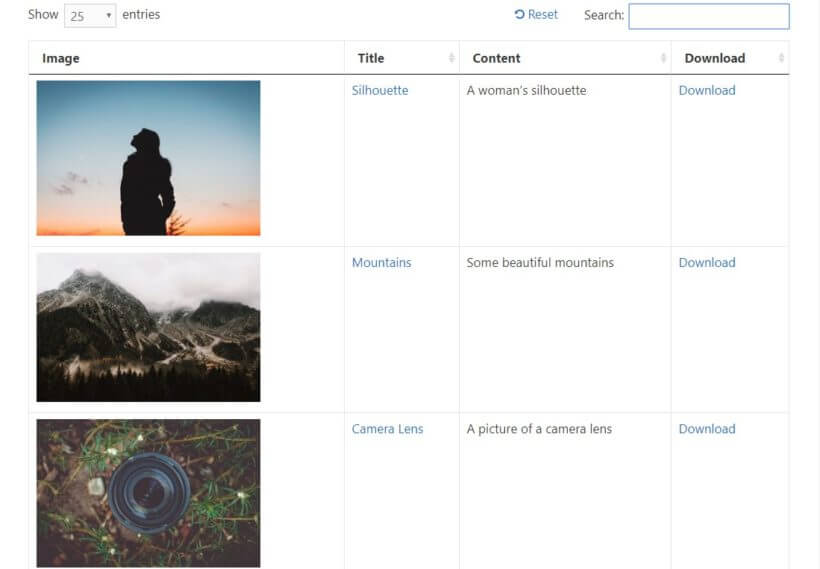
View the page and you'll see a front end WordPress media library that looks like this:
The files in the screenshot above are image files (e.g. jpeg or png). Iff your media library contains non-image files (e.g. pdf, xls, docx, etc) then it will look more like this:

Showing specific file types in the table
By default, Posts Table Pro will display all Media Library files. You can use MIME types to display specific file types only, such as images or audio files.
To use MIME types, you need to add the post_type parameter directly to the [posts_table] shortcode. For example:
- To show only images:
[posts_table post_type="attachment:image"] - To show only PNG images:
[posts_table post_type="attachment:image/png"] - To show only PDFs:
[posts_table post_type="attachment:application/pdf"]
Adding categories to the front end media library
WordPress doesn't come with any options to categorize the media library in the back end, or structure it into folders. Fortunately, you can easily do this by installing the free Easy Post Types and Fields plugin.
- After installing Easy Post Types and Fields, go to Post Types → Other Post Types.
- Find the Media post type in the list and click the button Taxonomies button in the Actions column.
- Add a new taxonomy called something like Media Categories. Set the taxonomy slug to
category - Now go to Media → Media Categories

- Create as many categories as needed. For example, you might have categories called PDF, XLS and DOCX if you want to be able to filter the table by file type.
- Next, edit each file in the Media Library and assign it to the appropriate category.
Now you have added categories to the WordPress Media Library, you can add them as a column in the table, or as a filter dropdown to filter the table by category.
In the screenshot below you can see a table where we have added "Media Categories" as an extra column to the table, and added a filter to search by media category. You can do one or both of these.
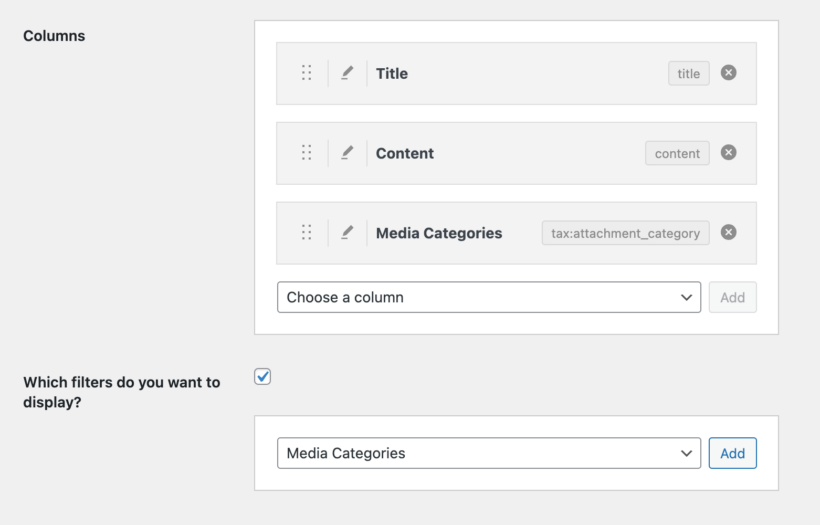
If you are using the [posts_table] shortcode, remember that the category is a custom taxonomy, so you will need to use the tax: prefix when adding it to the columns or filters shortcode option.
E.g. [posts_table post_type="attachment" filters="tax:attachment_category"]
Adding extra fields
You can also add extra fields to display in the WordPress media library. There are two types of field available:
- Custom fields Use these to list unique information about each file. For example, if you wanted to add an extra summary or descriptive text about each file, or to store the file size or a document reference number, then you'd need a custom field.
- Custom taxonomies Use these for information that you want to be able to filter by and use to group your files. For example, if you wanted to store the year or file type for each document and add a Year or File Type filter dropdown above the front end media library, then you'd need a taxonomy for this.
The free Easy Post Types and Fields plugin is perfect for adding custom fields and taxonomies to the 'Media' post type in WordPress. Once you've done this, you'll be able to store extra information about each file in the media library.
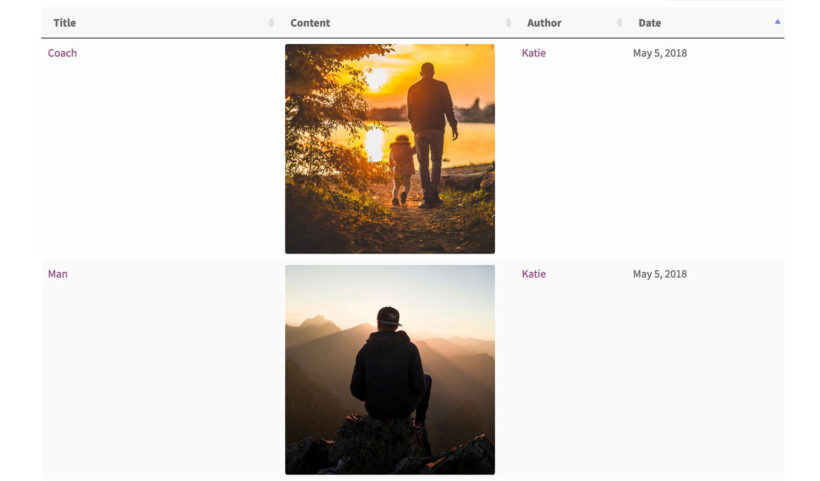
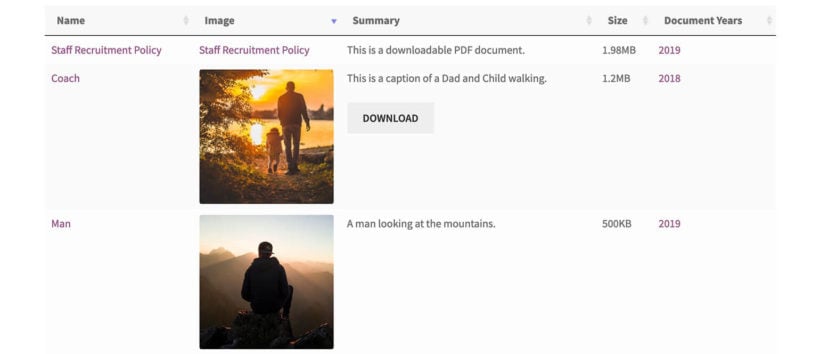
For example, this screenshot has a title column (which we renamed to 'Name'), the content column (which we renamed to 'Image' and shows the image for image files, and the filename for non-image files), excerpt (which is the caption from the media library), plus a custom field called 'size' and a custom taxonomy called 'Document Year':
Filtering the front end media library
Posts Table Pro adds a keyword search box above the media library. This allows users to search the contents of the table, but it will only search within the text shown in the table itself - it will not search the contents of documents such as PDFs. To do this you will need to use a specialised search plugin such as SearchWP together with Posts Table Pro - see our tutorial.
To filter the table using dropdown menus you can add custom taxonomies as described above in Adding categories to the front end media library.
Once you have created your taxonomies, you can add them to your table using the Filters option, like this:
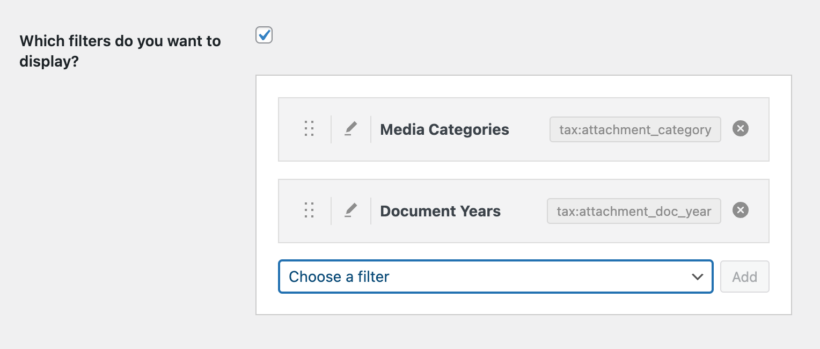
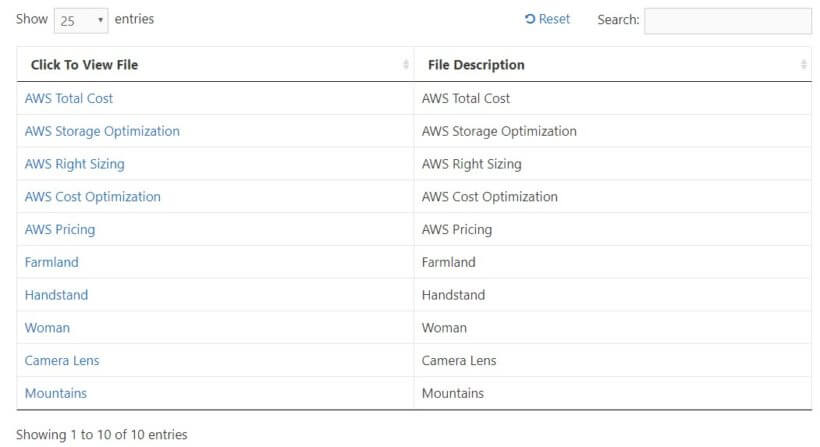
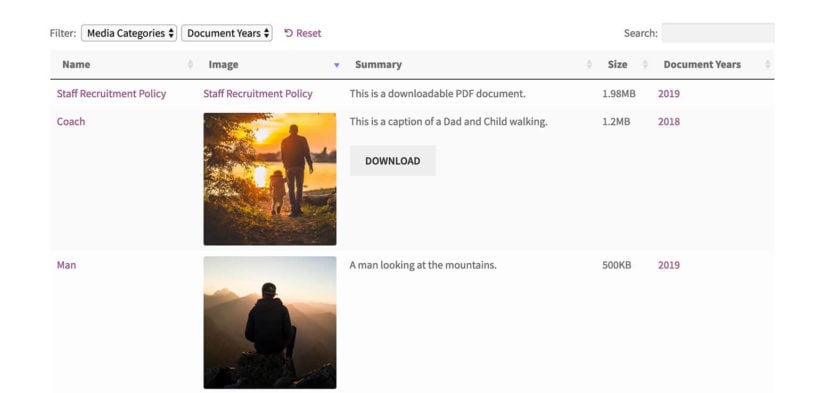
Your filterable media library will look something like this example:
Adding download links
By default, if you click on the file name in the front end media library, then you will be taken to the attachment page. This will contain a link where users can download the file.
This isn't ideal in most situations and creates an extra 'click' for your visitors. If you want users to download the file directly from the front end media library, then you can do this in the Yoast SEO settings. Yoast have provided a useful tutorial about how to set it up. (If you're using a different SEO plugin, then you would need to check whether it has an equivalent setting):
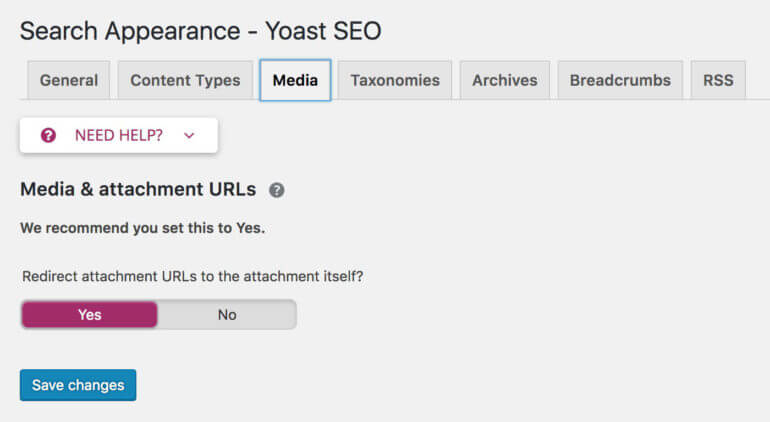
This disables the attachment post and directs people straight to download the file. You can also follow the instructions in this article to add download buttons and other types of link.
Alternatively, if you want to add download buttons then you may be better off with our Document Library Pro plugin instead of Posts Table Pro. This lets you convert files from the Media Library into 'documents' and then display them in a searchable resource library complete with download buttons, preview buttons, customizable button text and icons, and more.