How to filter WooCommerce products by brand
The WooCommerce Product Filters plugin makes it easy to filter WooCommerce products by brand. This article explains the different ways that you can add a brand filter to your store.
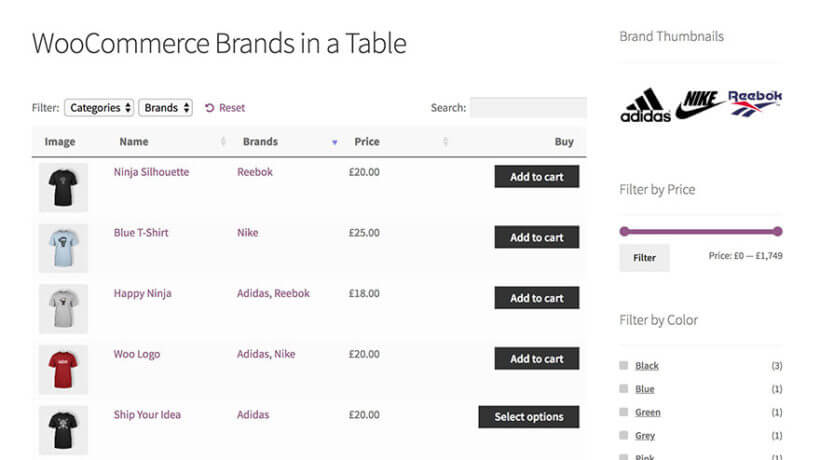
Related tutorial: How to list WooCommerce brands in a filterable product table
Types of filter by brand
WooCommerce Product Filters comes with several styles of filter which are perfect for filtering by brand. These include:
- Brand checkbox filters - customers filter by brand by ticking all the brands they are interested in.
- Brand logo filters - customers click on an image or logo of each brand.
- Brand filter dropdowns and radio buttons - these are less popular ways to filter WooCommerce products by brand, but you can use them if you like.
All of these filter styles work with both methods for creating a brand filter described below.
How to create a WooCommerce products brand filter
1. Add your brands
To filter by brand, you need to add the brands to your products. WooCommerce comes with a built-in 'Brands' taxonomy for this:
- Go to Products → Brands and add all your brands.
- Click to edit the terms and add all the brands that you will be using. Adding brands is very similar to creating product categories. If you will be using image filters to display the brand logo then you should also upload this as the image for each brand.
2. Select the brand of each product
Next, edit each product, and add the brand to the 'Brands' section on the right hand side of the 'Edit Product' screen.
3. Create WooCommerce brand filters
Finally, follow the instructions for creating filters. Create a custom taxonomy filter that uses the brand taxonomy.