How to add a map of your restaurant location
When you use the WooCommerce Restaurant Ordering plugin, you will probably want to include a map somewhere on your website. This helps to communicate your location to customers so that they know where to collect their order from, or which areas you deliver to.
This article explains how to embed a Google Map into your restaurant website.
Step 1. Generate a Google Map
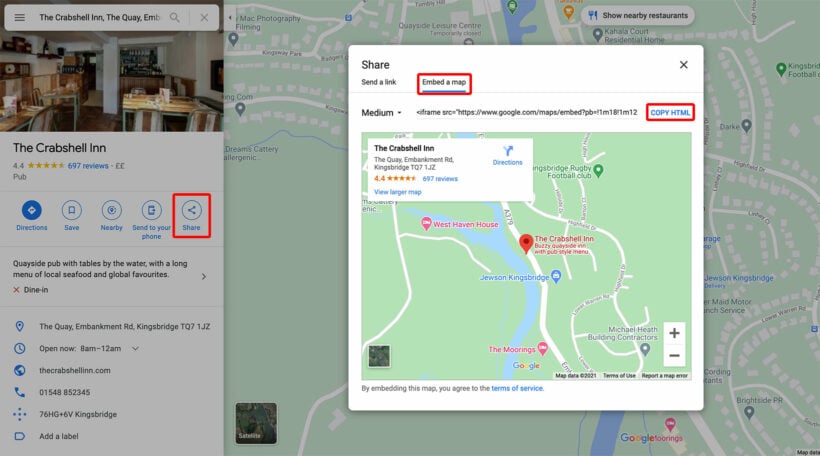
Option A. Create a map of your restaurant location
- Go to https://www.google.com/maps.
- Use the search box to enter the location that you want to show on the map. Make sure the marker is showing the exact location of the restaurant. If the restaurant isn't in the center of its postcode/zip code area then you may wish to enter a more accurate location.
- Click the 'Share' option on the left.
- Go to the 'Embed a map' tab in the window that opens.
- Click 'COPY HTML'. This will copy an iframe embed code to your clipboard.
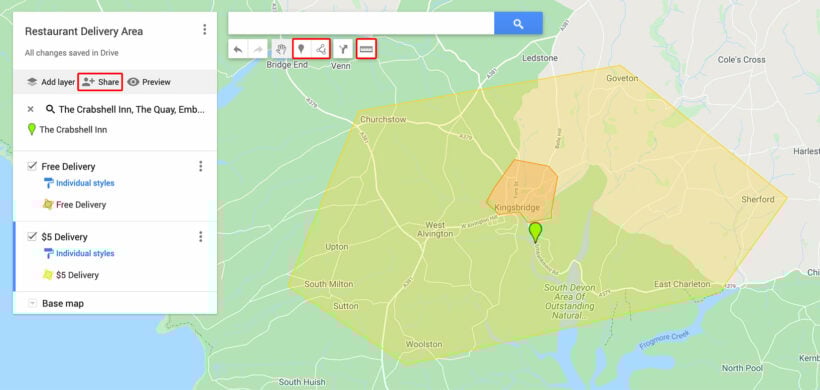
Option B. Create a custom Google map of your delivery area
If you're creating a restaurant delivery website then you probably only deliver to certain areas. To avoid disappointment, your food ordering website needs to clearly communicate which areas you will deliver to. A custom Google map of your delivery area is the perfect way to do this.
- Go to https://www.google.com/maps/about/mymaps and click 'Create a New Map'.
- Add a title to the map, for example 'Restaurant Delivery Area'.
- Use the search box to find your restaurant and zoom out enough so that you can see the entire delivery area.
- If you're creating a map showing multiple restaurant locations then you can use the 'Add marker' toolbar option to add each location.
- On the left, you will see a layer called 'Untitled'. Give this a proper name, such as 'Delivery Area' or 'Free Delivery Area'.
- Select an option from the toolbar under the search box. Use 'Draw a line' and select 'Draw line or shape' if you already know your delivery area and want to draw it on the map. Alternatively, select 'Measure distances and areas' if you want the deliver area to be a set distance from the restaurant (e.g. 3 miles). Draw the delivery area.
- Create a new layer and repeat Step 6 for each area that you want to draw on the map. For example, you might create one line indicating the outside of your free delivery area, and another line showing your paid delivery areas.
- Now click the 3 dots in the top left corner, to the right of the map title. Select 'Embed on my site' from the dropdown and copy the iframe code.
Step 2. Embed the map
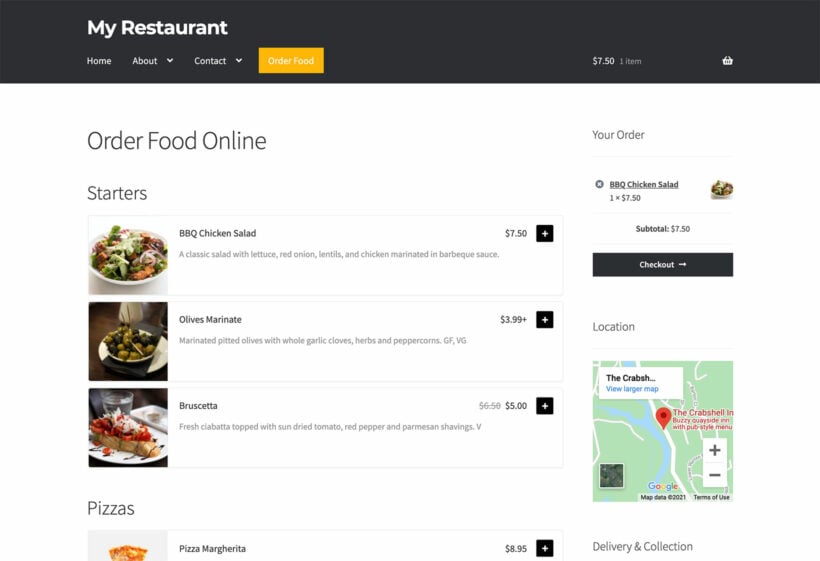
Once you have copied the iframe embed code for your Google map, it's time to paste it onto your restaurant website. You can insert the map to any location on your site that supports HTML code. For example:
- Page or post:
- If you're using the Gutenberg editor or any page builder plugin - Paste the code into a code or HTML block.
- If you're using the classic WordPress editor - Paste the code into the 'Text' view of a page or post.
- Sidebar or footer widget: Paste the code into a 'Custom HTML' widget.
Finally, check how the map looks on your website and make any changes to the 'width' and 'height' attributes in the iframe embed code. For example, the Google Map in the following screenshot is set to width="232" height="232".
Note: Google will set the zoom level for your map and how much detail to show depending on the user's device and screen size. It's not possible for you to change this.