How to change the position of the lead time on the product page
By default WooCommerce Lead Time displays the lead time text in two ways depending on whether you are managing stock for the product:
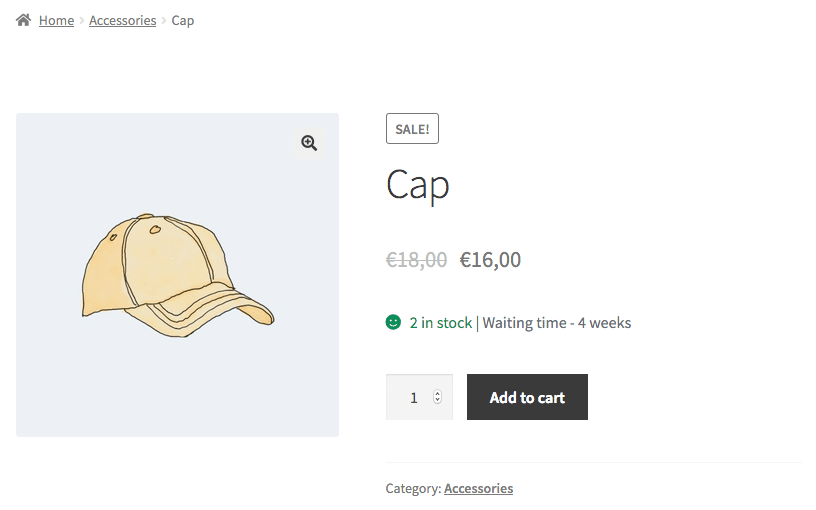
- If you are managing stock then the availability text will appear before the lead time.
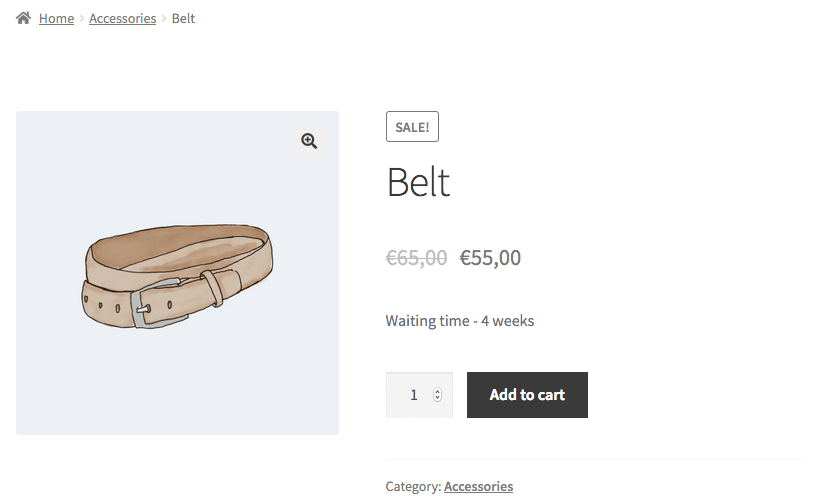
- If you are not managing stock then the lead time will appear on its own, in the position where the availability text would normally appear.
-

- With stock status
-

- Without stock status
The exact position of the lead time text will depend on your theme. It will always appear wherever your theme displays the stock availability text.
The following instructions will allow developers to change the position of the lead time text on the single product page.
Please note that this code is aimed at developers. If you feel comfortable using them, our article on how to use code snippets can serve as a guide. If you don't know how to use it, then you can use our plugin customization service.
Alternatively, we have provided separate instructions on how to display the product lead time on other pages on your site.
How the lead time is displayed
If the product has availability text, then it is displayed with the availability text separated by a | .
If it there is no availability text then it is displayed on a separate line attached to the woocommerce_get_stock_html filter.
How to stop the lead time from displaying in the default position
You can use the wclt_disable_default_output filter to disabled the default output of the lead time. The code snippet below will allow you to achieve this:
add_filter( 'wclt_disable_default_output', '__return_true' );
How to display the lead time elsewhere
Once you have disabled the default output of the lead time text, you can use the wclt_get_lead_time template function to output the lead time in the position of your choice.
As an example, below we hook into woocommerce_single_product_summary to output the lead time there.
add_action( 'woocommerce_single_product_summary', 'yourprefix_custom_lead_time_display' );
function yourprefix_custom_lead_time_display() {
    $product = wc_get_product( get_the_ID() );
    $lead_time = wclt_get_lead_time( $product );
    printf( '<p class="my-custom-lead-time">%s</p>', $lead_time );
}