IARC document libraries using Post Table Pro

A document library plugin is a perfect solution for WordPress website owners that need an easy way to share documents with others. It lets you organize document libraries in a logical way and make them available to people all around the world.

With a document library plugin, you can simplify document library management and also create an easy-to-use resource hub or publications database for your organization or institute.

Here’s a gallery of different document libraries created using Barn2’s Document Library Pro plugin on the International Arctic Research Center website:

The University of Alaska Fairbanks’ International Arctic Research Center (IARC) was founded back in 1999 to support Arctic research.

The purpose of the website is to act as a community hub for just about anyone who’s interested in the Arctic climate, including researchers and students. It also provides easily accessible information (including peer-reviewed publications, print publications, and in-house reports) to those interested.

Let’s take a look at the problem IARC faced initially and how Document Library Pro was the right solution for them.

The problem

In the beginning, IARC created a simple list of publications to publish on their WordPress website. However, as their number of publications continued to grow, IARC quickly realized they needed a better way to display documents. This, of course, was challenging considering they needed the list of documents to be dynamic, filterable, and sortable.

Carolyn Rosner, designer and web developer at IARC, says:

“We needed a way to display a list of documents that would be filterable, and sortable, and not just a static list because we knew that list would grow.”

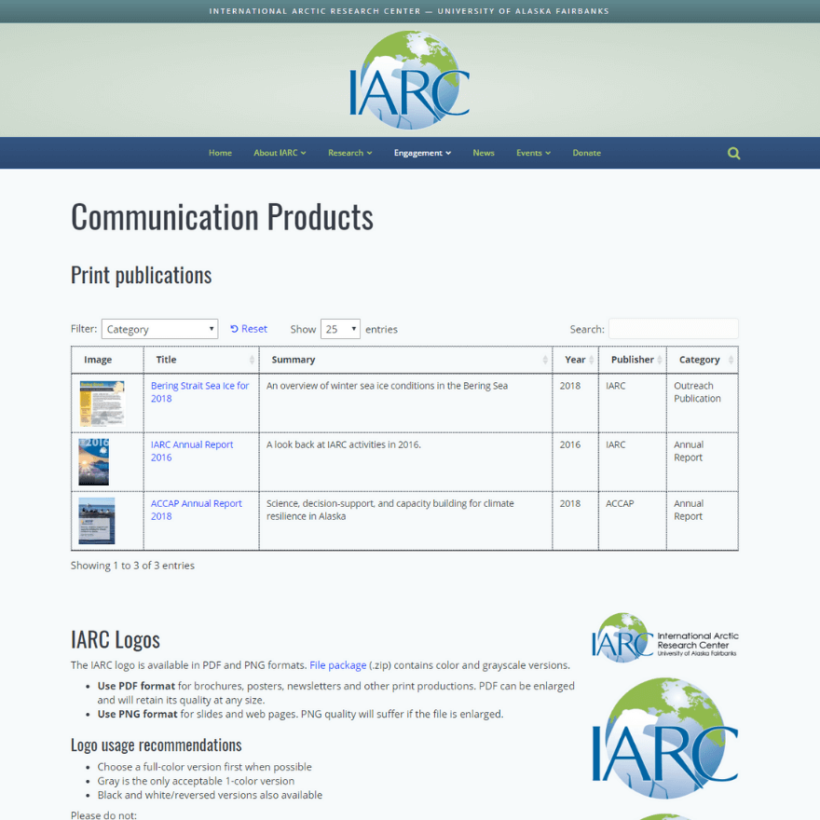
Above all, IARC was looking for a way to create searchable, sortable, and filterable document libraries on their WordPress website. This would help their team, external researchers, and students easily find the document or publication they’re looking for.

Essentially, it would make it easy to search for a specific document, sort them by title, year of publication, or publisher, or filter by category. In addition to this, they could display dozens of documents in a table layout instead of creating a long list of publications using static lists.

The solution

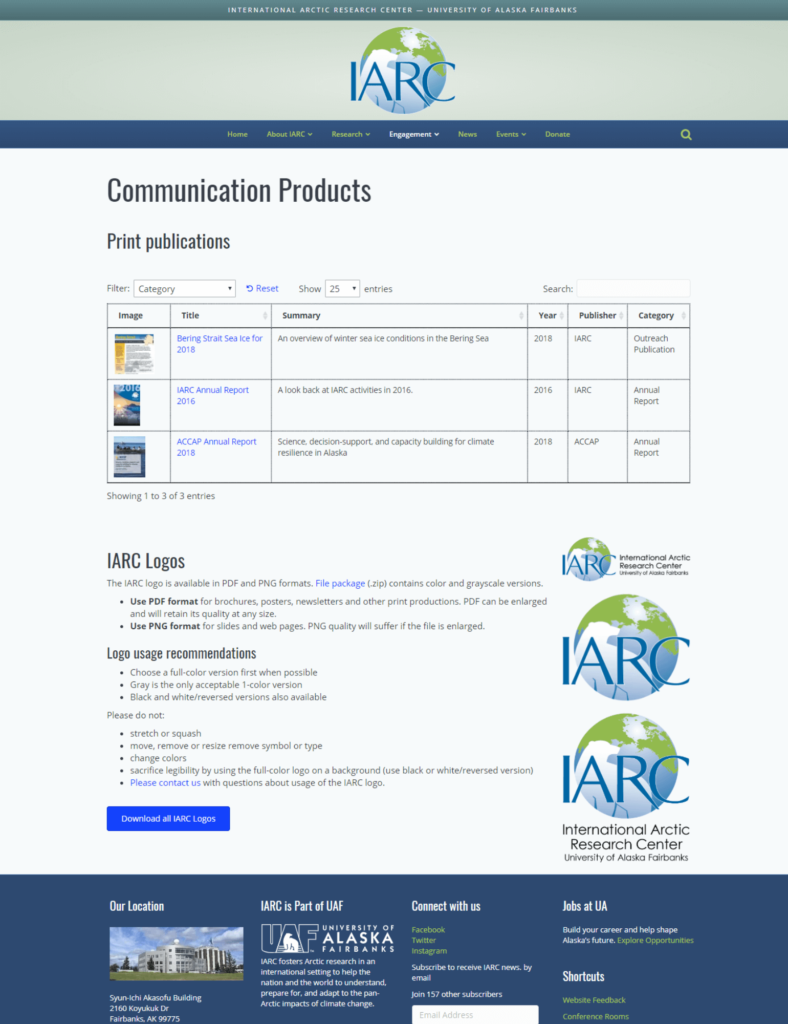
Using Barn2’s Document Library Pro plugin, IARC was able to store their communications, including annual reports and published articles, in a searchable, sortable, and filterable table layout.

According to Rosner, IARC uses Document Library Pro for:

“... tables of documents, peer-reviewed publications, research projects (with metadata such as personnel, contact information, etc.) as well as tables of other resource types such as case studies.”

More specifically, IARC uses the Document Library Pro plugin to create the following document libraries:

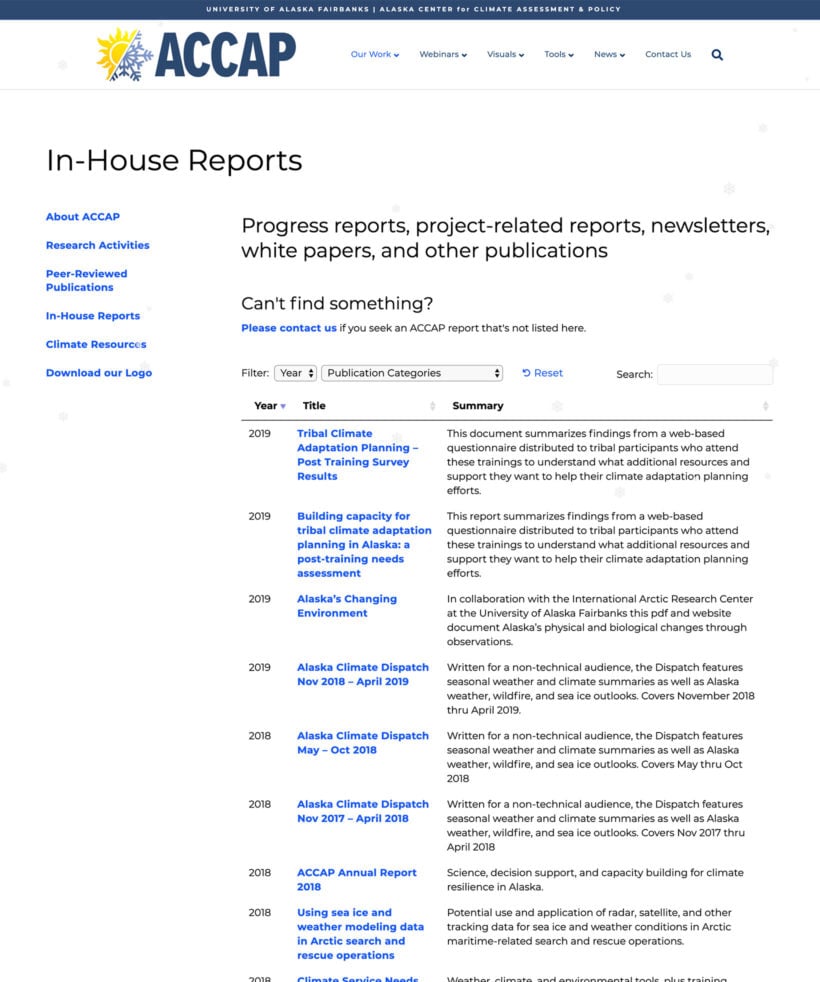
  • A publications database that lists communication products.
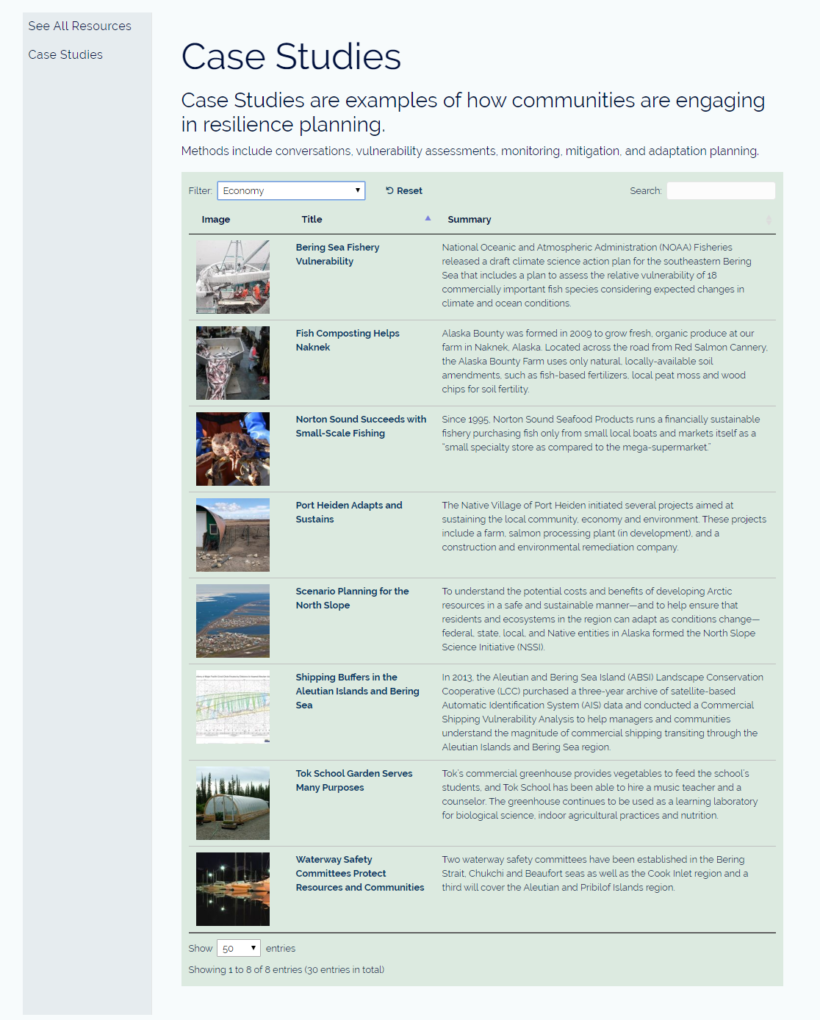
  • Listing in-house reports and case studies.
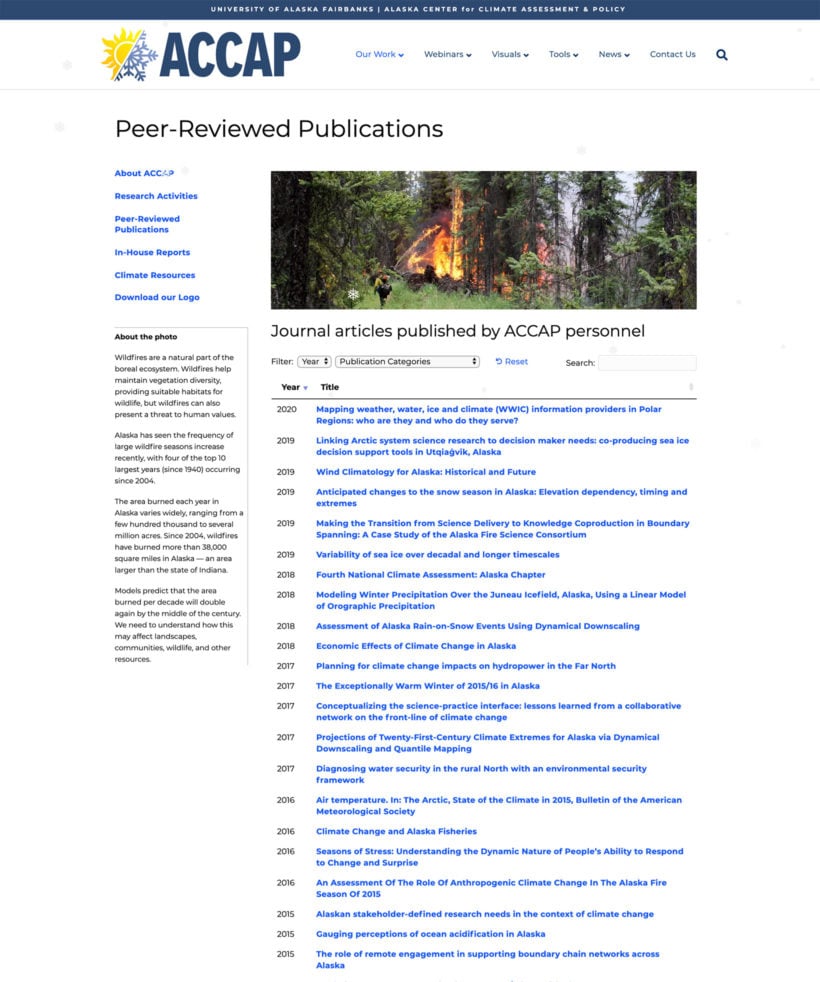
  • A searchable list of peer-reviewed academic publications.
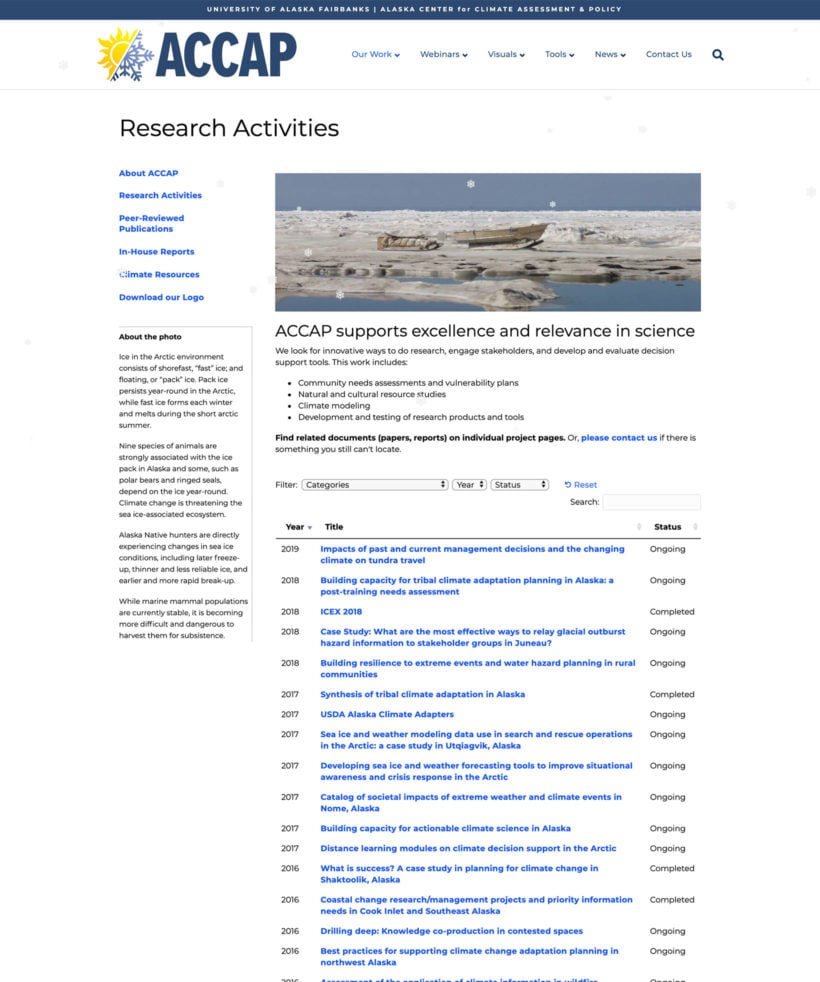
  • A document library outlining research activities along with a status.

Since the Document Library Pro plugin is incredibly flexible, IARC can use it to create document libraries with different metadata.

For example, the peer-reviewed document library contains the publishing year and title of each publication. The case studies document library, on the other hand, contains an image, title, and summary of each document. This gives IARC the flexibility to include the document information they want to showcase in each document library, instead of following a template.

How IARC created document libraries using Document Library Pro

The specific implementation IARC uses to create their document libraries is pretty standard.

In the case of in-house publications, they link to a downloadable PDF document. Similarly, a slightly different implementation involves listing case studies in a table layout. IARC also links to documents published on their sub-groups’ websites.

IARC case studies document libraries

They also use the Document Library Pro plugin to display other types of information too. For example, they display related materials directly in the document library. These include links to other websites and additional documents.

Finally, to create different-looking document libraries on the same website, IARC used the document library plugin’s shortcodes to specify parameters for columns.

As Rosner puts it:

“[Implementing the plugin] was quite easy. And [the Barn2 Plugins] website is excellent in terms of organization, clear instructions, and links to related materials. I refer to it a lot.”

“We can display long lists of items that can be searched or filtered by category. This is not possible with static lists.”

Using the document library plugin, IARC could easily display lists of sortable and filterable publications in a table layout. It also adds a search bar to the document libraries. Hence, this allowed them to tackle the challenge of displaying an ever-growing list of documents in a sortable way head-on.

IARC’s implementation of different types of document libraries on their WordPress website has made it significantly easier (and intuitive) for researchers and students to quickly find the exact document or publication they’re looking for. In this way, it improves the user experience their website delivers.

Create your own document libraries!

To recap, IARC solved the main challenge they faced to display a list of documents in a sortable and filterable way using Barn2’s Document Library Pro plugin. This makes it easy to create document libraries on your WordPress website with search, sort, and filter columns. It’s also great for listing all sorts of documents including publications, case studies, and reports.

Here’s what you need to do to organize your own documents using Document Library Pro:
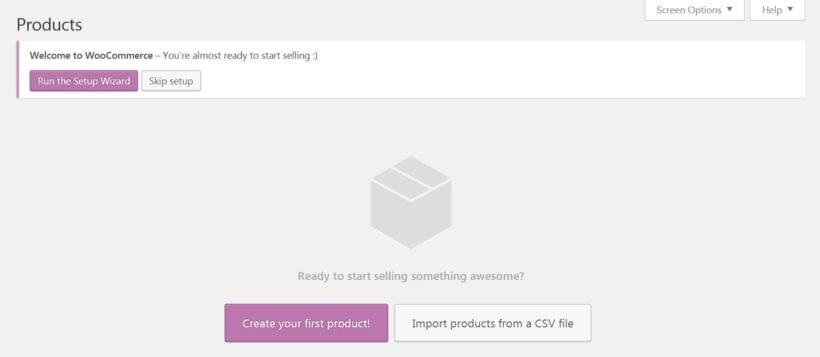
  1. Install the plugin.
  2. Add or import your documents to WordPress.
  3. Use the plugin options to customize how your document libraries are displayed.

So, are you ready to create your own document libraries? Get Document Library Pro today!

Add WooCommerce to WordPress

Adding a WooCommerce storefront to your existing WordPress website can be a very profitable move. An e-commerce area lets you sell products or services directly to visitors, and when set up properly it can practically run itself. However, you’ll need to think carefully about exactly how you add WooCommerce to WordPress without affecting your live site.

For best results, you’ll want to develop your new store privately, and only make it available to customers once it’s completely ready to go.

Most people do this by creating a separate staging site, adding WooCommerce, and then overwriting the main site when it's ready to launch. This causes various problems, such as version control issues and potential loss of data when you need to make changes to the live site. Fortunately, there's an easier way.

In this quick tutorial, we’ll explain how to add WooCommerce to WordPress seamlessly. You'll use the WooCommerce Private Store plugin to create a hidden development area. It's like adding a 'coming soon' page to WooCommerce or putting your store in maintenance mode, while the rest of your website remains public.

When your site goes live, you'll deactivate the private store plugin and your WooCommerce store will instantly become available on your existing website. You won't have to worry about version control or staging sites, and it just takes a few minutes to set up.

Let’s get to work!

Why you should use a hidden development area to add WooCommerce to WordPress

Many people start up a blog or a small business site, only to later decide to add in a storefront. Selling products and services through your website does take a little work, but the benefits are more than worth it.

WordPress doesn’t offer a lot of e-commerce specific functionality, so you’ll need a dedicated tool for setting up your new shop. We highly recommend WooCommerce:

An example of a WooCommerce store.

The free WooCommerce plugin adds a fully-featured store to your website, without disrupting any of your existing pages or content. No matter how established your site is, setting up an integrated WooCommerce shop is quick and painless.

However, you will want to spend a little time working on your store before making it live – creating key pages, uploading products, and so on. You'll want to add menu links to your store pages, and icons linking to the cart and checkout. What’s more, you won’t want this work-in-progress to be publicly available. Instead, you’ll want visitors to continue seeing the original website until the new store is designed and ready.

The easy way to add WooCommerce to WordPress

There are a few ways you can handle this. For instance, you can set up a separate staging site that’s a carbon copy of your live website, add WooCommerce to WordPress, and then merge your changes. Unfortunately, this is a time-consuming, complex process that’s fraught with the potential for errors.

Clearly, you need a better solution. That’s where WooCommerce Private Store comes into the picture:

This plugin has a number of useful applications. Its primary use is enabling you to set up a private storefront, where users have to log in before they can view its contents. For example, some people use it to create a private members-only club. However, it also lets you temporarily hide your new WooCommerce store while it’s being developed. Then, you can easily make the shop publicly available when you’re done setting it up.

Check out the WooCommerce Private Store demo!

This is a much simpler and more temporary solution than creating a full staging site and then copying it over your live site. To illustrate, let’s take a look at how the process works from start to finish.

How to add WooCommerce to WordPress using a hidden development area (in 4 steps)

The following steps will show you how to set up a hidden WooCommerce store on your live site. You'll also learn how to make it visible only when you’re ready to do so. All you’ll need to get started is a WordPress site, and the WooCommerce Private Store plugin.

Step 1: Add WooCommerce to WordPress

The first thing you’ll need to do is add WooCommerce to WordPress. You won’t actually be setting up your store yet – after all, you’ll want to be sure it’s hidden first. However, WooCommerce will need to be installed before you configure your hidden development area.

Fortunately, WooCommerce is a free plugin that’s simple to set up. Log into your WordPress dashboard, and navigate to Plugins > Add New. Use the search bar to find 'WooCommerce', and click on the button labeled Install Now:

Installing the WooCommerce plugin.

After a few moments, another button will appear, this one labeled Activate:

Activating the WooCommerce plugin.

Select that one as well, and WooCommerce will be ready to go on your site. At this point, you’ll be able to start setting up your shop and adding products. Before you do that, however, it’s important to make sure your fledgling store is safely locked away.

Step 2: Set up your hidden development area

If you haven't done so yet, go ahead and purchase the WooCommerce Private Store plugin. You’ll be provided with a zipped file containing everything the plugin needs to work, which you’ll need to install on your site.

After that, navigate to WooCommerce > Settings in your dashboard. Select the Private Store tab:

Setting up the WooCommerce hidden development area plugin

Enter the license key you were given when you bought the plugin. Then, save your changes. This will fully activate WooCommerce Private Store, making it ready to use.

The best part is that this is all you need to do. Once the plugin has been activated using a valid license key, it will automatically hide WooCommerce from public view. This means that all pages, features, and products associated with WooCommerce won’t be available on the front end. If anyone does try to view those areas, all they’ll see is a login form:

A WooCommerce store login form.

You can customize the login form on the plugin settings page. However, it's not very important because it's unlikely that anyone will see it anyway. All the WooCommerce-related pages are hidden from public view, so the only way someone would ever see the login form is if they guessed the URL of one of these pages.

Show the WooCommerce hidden development area to logged in users or specific roles

Of course, you want logged in administrators to be able to access the hidden development area. That's how you'll develop and test your WooCommerce store, while keeping it hidden from other users.

There are two ways to do this. Use the first option if your website isn't set up to allow normal visitors to create accounts. That's how most non-WooCommerce websites work. However, if you let people create accounts for other purposes - such as blog commenting or membership plugins - then use option 2 instead.

  • Option 1 - Tick the 'Logged In Users' box on the plugin settings page, then select the 'administrator' from the user roles option that appears underneath. This will automatically unlock the store for all logged in administrators, while leaving it hidden from guests and other user roles.
  • Option 2 - Leave the 'Logged In Users' box unticked on the plugin settings page, and enter 1 password which will unlock the store.

Once administrators have unlocked the store using either of these methods, they will be able to see the full WooCommerce store. This includes viewing menu links to the store pages in the front end, and viewing those pages. They can also add products to the cart and test the checkout process. This lets you and your development team work on the new WooCommerce area while it remains hidden from everyone else.

Step 3: Create your WooCommerce store

Now that you’ve made WooCommerce inaccessible to visitors, it’s time to set up your store:

Setting up your WooCommerce store.

We won’t go through that entire process here, since there’s plenty of information elsewhere that can help you out. Still, let’s summarize the basic steps involved in getting your WooCommerce store ready to go:

  1. Go through the WooCommerce setup wizard. In just a few screens, you’ll be able to set up your store’s basic features and enter crucial information about pricing, shipping, and more.
  2. Configure your store’s settings. While the WooCommerce wizard covers the most crucial options, there are a lot of other settings you may want to customize to better suit your needs.
  3. Add each of your products or services to the store. This can be done in the Products tab, which offers lots of options to fully customize your offerings.

We recommend taking your time with this process. Check out each product and store page on the front end, and walk through the buying and checkout stages as though you were a customer. You’ll want to ensure that your store looks and acts exactly the way you want it to before you make it live.

Step 4: Make your WooCommerce store visible to the public

When you’re confident that your store is ready to launch, you’ll need to make it visible to the public. Fortunately, this is the easiest part of the entire process.

All you need to do is deactivate the WooCommerce Private Store plugin. To do that, go to the main 'Plugins' list in the WordPress admin, and click to Deactivate WooCommerce Private Store.

This will automatically unhide your hidden development area and make your store available for all to see. At this point, you can uninstall the plugin if you like. Alternately, you can keep it deactivated on your site, in case you need it in the future. (For example, you might want to temporarily hide your WooCommerce store while making changes or updates.)

Conclusion

If you want to build a positive reputation online, your website should always look professional and fully-functional. This means that if you need to make large-scale changes, you’ll want to keep your development work hidden from public view. That includes keeping your in-progress store private while you add WooCommerce to WordPress.

As we’ve demonstrated, the process of doing this is remarkably simple when you use WooCommerce Private Store. It's much quicker than installing WooCommerce on a separate site and merging with the live site, and avoids all the problems.

To recap, here are the four steps you’ll want to follow:

  1. Add WooCommerce to WordPress.
  2. Set up your hidden development area.
  3. Create your WooCommerce store.
  4. Make your WooCommerce store visible to the public.

Do you have any questions about how to add WooCommerce to WordPress? Ask us anything in the comments section below!

Image credit: pxhere.

Advanced Custom Fields is obviously a great plugin, but there are one or two things with it's API that could be made easier.

For example, in vanilla ACF there's no easy way to get the field object from the field name, despite what the documentation says. The get_field_object only returns partial information if queried by name - to return the full object you need to use the field key. (Side note: in ACF Pro it's a little easier as you can use the acf_get_field function which does return the full field object.)

If you're developing on a single, known site where you've created the fields yourself, that's fine. But if you're developing a theme or plugin which uses ACF, you don't know the keys and the only way to find them is quite convoluted.

Another problem is selecting posts based on the custom field values.

Single-value fields

Selecting posts based on simple, single-value fields such as "Number" or "Text" is straightforward enough. You just use the standard WP_Meta_Query fields. I won't recap these here, but you can read the documentation for details.

Example query

Say we're selecting posts based on two custom fields - email and num_articles. We want to select all posts with the email joe@bloggs.com whose number of articles is greater than 1:

$args = array(
  'post_type' => 'post',
  'meta_query' => array(
    'relation' => 'AND',
    array(
      'key' => 'email',
      'value' => 'joe@bloggs.com',
      'compare' => '='
    ),
    array(
      'key' => 'num_articles',
      'value' => 1,
      'type' => 'NUMERIC',
      'compare' => '>'
    )
  )
);

$posts = get_posts( $args );
// etc...

That's all straightforward enough, and no different to querying by custom field without ACF.

Array-based fields

However, when using array-based fields such as Checkbox or fields which allow multi-selection, it gets more complicated.

The documentation says you should use the LIKE operator for these fields, which at first glance makes sense.

Consider a checkbox field (field name: checkbox_field). Posts with this field will have a row in wp_post_meta which looks something like:

meta_id post_id meta_key meta_value
1 123 checkbox_field a:2:{i:0;s:3:"one";i:1;s:5:"three";}

The meta_value column is the bit we're interested in. As this is an array-based field, the value is a serialized array. So in this case we have an array of length 2, which contains two values: one and three.

Example query

Using the LIKE operator to select posts based on this field might look something like this:

$args = array(
  'post_type' => 'post',
  'meta_query' => array(
    array(
      'key' => 'checkbox_field',
      'value' => 'three',
      'compare' => 'LIKE'
    )
  )
);

$posts = get_posts( $args );
// etc...

In this case, it all works fine.

Another example

However, consider a User field which allows multi-section:

Posts with this field will have a user_field value in wp_post_meta which looks something like:

meta_id post_id meta_key meta_value
2 123 user_field a:1:{i:0;s:1:"2";}
3 125 user_field a:2:{i:0;s:1:"3";i:1;s:2:"11"}
4 127 user_field a:1:{i:0;s:1:"4";}

So in this case, the values are stored as arrays containing user IDs.

Unexpected results

A query using this field might look like this:

$args = array(
  'post_type' => 'post',
  'meta_query' => array(
    array(
      'key' => 'user_field',
      'value' => '2',
      'compare' => 'LIKE'
    )
  )
);

$posts = get_posts( $args );
// etc...

However, this would give unexpected results. As the values are serialized arrays, the above query would match 2 posts - 123 and 125 - as both contain the string "2". The first (post_id = 123) is correct as the "2" refers to the user ID we're looking for. But the second result is picking up the serialized string reference "s:2", which we definitely don't want in the results.

Improving the query

An improved way of selecting posts based on array values needs to take this into account. The documentation for WP_Meta_Query mentions that (since 3.7) it supports SQL operators such as 'REGEXP' and 'NOT REGEXP'. This can be used to improve our field selection in the above example, to produce something like this:

$args = array(
  'post_type' => 'post',
  'meta_query' => array(
    array(
      'key' => 'user_field',
      'value' => '^2$|s:1:"2";',
      'compare' => 'REGEXP'
    )
  )
);

$posts = get_posts( $args );
// etc...

This will now return the correct number of posts as it takes the serialization format into account. We also have an alternate option in case the field is stored as a single value (e.g. if you switch the field from mutli to single selection).

To produce this query automatically from a variable field value, you could the following code:

$search_value = 'xyz'; // whatever
$field_value = sprintf( '^%1$s$|s:%2$u:"%1$s";', $search_value, strlen( $search_value ) );

$args = array(
  'post_type' => 'post',
  'meta_query' => array(
    array(
      'key' => 'user_field',
      'value' => $field_value,
      'compare' => 'REGEXP'
    )
  )
);
// etc...

You could obviously combine this with other meta queries to select posts based on multiple fields using the AND or OR operators.

Conclusion

At the moment, this is the best method I'm aware of to search in array based fields. There's no native way in WP or in ACF, but if you know a better way please share them in the comments below. And if you have any other comments or improvements on this, let me know.

Recently, while making updates to our WooCommerce Private Store plugin, I needed to find a way to create a WordPress page in code which doesn't exist in the database.

All WordPress posts (and pages) live in the database in the wp_posts table, with additional meta info in the wp_postmeta table. This works fine for all standard WordPress loops, but what if you need to create a fake or dummy post that doesn't actually exist in the database?

Turns out it is possible, you just need to hack the main $wp_query and do a bit of extra jiggery-pokery. Read on...

Step 1 - Creating the fake post

First of all, you'll need to create a dummy WP_Post object. Looking at the constructor for WP_Post, we'll see it expects to receive an object:

// WP_Post constructor
public function __construct( $post ) {
  foreach ( get_object_vars( $post ) as $key => $value )
    $this->$key = $value;
}

So you need to create one! The following code creates a basic object (using stdClass) and then sets the required properties on the object:

$post_id = -99; // negative ID, to avoid clash with a valid post
$post = new stdClass();
$post->ID = $post_id;
$post->post_author = 1;
$post->post_date = current_time( 'mysql' );
$post->post_date_gmt = current_time( 'mysql', 1 );
$post->post_title = 'Some title or other';
$post->post_content = 'Whatever you want here. Maybe some cat pictures....';
$post->post_status = 'publish';
$post->comment_status = 'closed';
$post->ping_status = 'closed';
$post->post_name = 'fake-page-' . rand( 1, 99999 ); // append random number to avoid clash
$post->post_type = 'page';
$post->filter = 'raw'; // important!

A few things to note here:

  1. We're using a negative post ID. This is to avoid clashes with any existing posts in the database. Although our post won't be saved to the database, it's possible it will form part of a loop with other posts which are, so we want to avoid a clash. In the testing I've done I haven't found any problems with this approach.
  2. We're creating an instance of stdClass (a generic 'empty' class in PHP) rather than using the WP_Post constructor. This is because WP_Post requires an object passed to it, which it then uses to set all of its properties. So we create a basic object here to pass to the constructor later.
  3. We're creating a page ($post->post_type = 'page') in this example, but you could just as easily create a 'post' or any post type you want.
  4. The filter="raw" step is important. Other examples I found for creating fake post objects didn't include this step. I encountered numerous problems without this. The reason being the core get_post() function. This function is used everywhere in WordPress. If you look at this you'll notice in the following code:
    } elseif ( 'raw' == $post->filter ) {
      $_post = new WP_Post( $post );
    } else {
      $_post = WP_Post::get_instance( $post->ID );
    }

    Because we set filter to raw, when this function is called it will fall into this block and create a new WP_Post object. If you don't set this, you instead go into the get_instance() block, which results in a call to the database (or the cache) for a post with ID -99. That obviously isn't going to work, so we need to ensure the constructor method is used.

Next, we need to create the WP_Post object. This is to ensure any instanceof checks return return true for WP_Post. (See note 3 above).

// Convert to WP_Post object
$wp_post = new WP_Post( $post );

Finally we need to add our post object to the cache. This ensures that any calls to the cache for our post ID will return a valid object and thus prevent any (error producing) calls to the database. This happens, for example, when calling get_post() with an ID rather than an object:

 // Add the fake post to the cache
 wp_cache_add( $post_id, $wp_post, 'posts' );

Step 2 - Overriding the WordPress query

Now we have our WP_Post, we can start injecting that into $wp_query. In this use case, I'm assuming you want to override the main WordPress query, but you may have different requirements. In any case, the steps below should help you get an understanding of what you need to do.

global $wp, $wp_query;

// Update the main query
$wp_query->post = $wp_post;
$wp_query->posts = array( $wp_post );
$wp_query->queried_object = $wp_post;
$wp_query->queried_object_id = $post_id;
$wp_query->found_posts = 1;
$wp_query->post_count = 1;
$wp_query->max_num_pages = 1; 
$wp_query->is_page = true;
$wp_query->is_singular = true; 
$wp_query->is_single = false; 
$wp_query->is_attachment = false;
$wp_query->is_archive = false; 
$wp_query->is_category = false;
$wp_query->is_tag = false; 
$wp_query->is_tax = false;
$wp_query->is_author = false;
$wp_query->is_date = false;
$wp_query->is_year = false;
$wp_query->is_month = false;
$wp_query->is_day = false;
$wp_query->is_time = false;
$wp_query->is_search = false;
$wp_query->is_feed = false;
$wp_query->is_comment_feed = false;
$wp_query->is_trackback = false;
$wp_query->is_home = false;
$wp_query->is_embed = false;
$wp_query->is_404 = false; 
$wp_query->is_paged = false;
$wp_query->is_admin = false; 
$wp_query->is_preview = false; 
$wp_query->is_robots = false; 
$wp_query->is_posts_page = false;
$wp_query->is_post_type_archive = false;

There's a lot of setting to false here, but that's just to ensure that everything in $wp_query is correct for the fake query we're now dealing with.

Lastly, we need to update some global variables. During my testing, I found it was safest to explicitly set the wp_query global to the $GLOBALS array. In addition, you want to call WordPress's register_globals() function to set various other globals including the global $post:

// Update globals
$GLOBALS['wp_query'] = $wp_query;
$wp->register_globals();

Step 3 - Putting it all together

Putting it all together, you should now how a fully functioning query which completely replaces the main query that would have been used to display the current page. A good place to put this code is on the template_redirect action, before WordPress decides which template to load to display the current page:

add_action( 'template_redirect', 'spoof_main_query' );
function spoof_main_query() {
  global $wp, $wp_query;

  // Create our fake post
  $post_id = -99;

  // rest of code from above...
  // ...
  
  $GLOBALS['wp_query'] = $wp_query;
  $wp->register_globals();
}

That's it! Let me know in the comments how you get on, or if you have any improvements on this solution....

Whilst making some small improvements to our website recently, I came across a small problem displaying a random post in WordPress.

Background

Our website has a custom post type called "Testimonials". We use to this to record our client testimonials which are then displayed in various places throughout our site. In addition to this, we wanted to display a random testimonial on the sidebar, so that each time a page loads a different testimonial is shown. Sounds simple, right?

First Steps - creating a shortcode

The first step was to write a new shortcode which I could drop into a standard text widget in our main sidebar. I called my shortcode [random_testimonial]. I won't go into the details of creating a WordPress shortcode - this has been covered a lot elsewhere and the Shortcode API is a good resource if you need more information.

The next step was to implement the shortcode to retrieve and display our random testimonial. This shortcode would run when each time the sidebar is displayed. If you were looking to display other types of content in your sidebar or footer, you could easily modify this example to get display a random post or page, for example.

Attempt 1

This was the code I tried first. I'd already assumed this would be the way to do it, and I saw similar variants mentioned in other articles and forums:

if ( post_type_exists( 'testimonial' ) ) { 
 
   $testimonial_query = new WP_Query( array(
       'post_type' => 'testimonial',
       'orderby' => 'rand',
       'posts_per_page' => 1
   ) );
 
   if ( $testimonial_query->have_posts() ) {
      $testimonial_query->the_post();     
 
      // do something with post - e.g. the_excerpt(), the_content(), etc.
   }
   // Restore original post data
   wp_reset_postdata();
}

However, this didn't work as expected. One first load, it seemed to select a testimonial at random, but on second, third and subsequent loads, the same testimonial was displayed each time.

After a couple of minutes head scratching, I realised the problem might be to do with the object and database caching on our server. Our site is hosted with WP Engine and the query above is exactly the sort of thing that would be cached by their highly efficient caching infrastructure.

So I needed to try another approach.

Attempt 2

global $post;

if ( post_type_exists( 'testimonial' ) ) { 
 
   $testimonial_query = new WP_Query( array(
       'post_type' => 'testimonial',
       'orderby' => 'rand',
       'posts_per_page' => -1
   ) );
 
   if ( $testimonial_query->have_posts() ) {
      $random_int = rand( 0, $testimonial_query->post_count - 1 );
      $post = $testimonial_query->posts[$random_int];     
      setup_postdata( $post );
      
      // do something with post - e.g. the_excerpt(), the_content(), etc.
   }
   // Restore original post data
   wp_reset_postdata();
}

And this time it worked as expected, loading a different testimonial on each page load.

The key here is returning all posts from the database ('posts_per_page' => -1) and then randomly selecting from the list of returned posts (i.e. testimonials). In this case, we only have 15 or so testimonials so it's not a big database hit, and the query will be cached. But if you're querying 1000's of blog posts, you might want to limit your query to say 50 or 100, or perhaps limit on a certain category.

Once we have our list, we create a random number between 0 and the maximum length of the list (subtracting 1 as the array is zero-indexed). We then select the random testimonial from the posts list on the WP_Query object ($post = $testimonial_query->posts[$random]) and then call setup_postdata() on that post. Once we've done this, we can then call our usual loop functions such as the_title(), the_content(), etc., remembering to call wp_reset_postdata() afterwards to restore the original query's post data.

Important note: Did you notice the global $post; line at the top of this code snippet? Well spotted. That's because we have to pass the global $post object to setup_postdata() for this to work. So the variable we assign our random testimonial to must also be called $post!

Wrapping up

Hopefully this tip was useful to you. Let me know if you have any questions in the comments.