Installation & basic setup
WooCommerce Protected Categories provides an easy way to password protect your product categories or restrict them to specific user levels or roles. This is how to set up it.
1. Install the plugin
Once you have purchased WooCommerce Protected Categories, you should receive a confirmation email which contains your license key and a download link to the plugin. If you don’t receive this email, please check your spam folder. If it’s not there, please send us a support request.
Your confirmation email also contains a link to download your purchase invoice as a PDF.
Once you have downloaded the plugin, go to your WordPress admin, then go to Plugins → Add New → Upload Plugin. Click Choose File and select the woocommerce-protected-categories.zip file you just downloaded. Once uploaded, click Activate.
Note: WooCommerce Protected Categories requires the free WooCommerce plugin to work. If you can't see the plugin settings page, make sure you have WooCommerce installed.
2. Enter your license key
You can find your license key in the email confirmation that was sent to you after purchase. The plugin will not work until you activate your license key.
There are two ways to enter your license key:
- In the setup wizard - Once activated, the setup wizard will open. This walks you through each step of the setup process, including entering your license key.
- On the settings page - Alternatively, you can go to WooCommerce → Settings → Products → Protected Categories and enter your license key.
If you get an error saving your license key, please try a second time. If the error persists, please view the article on license key problems.
3. Configure the plugin settings
The setup wizard will guide you through configuring the main plugin settings. You can also access these at any time on the settings page at WooCommerce → Settings → Products → Protected Categories.
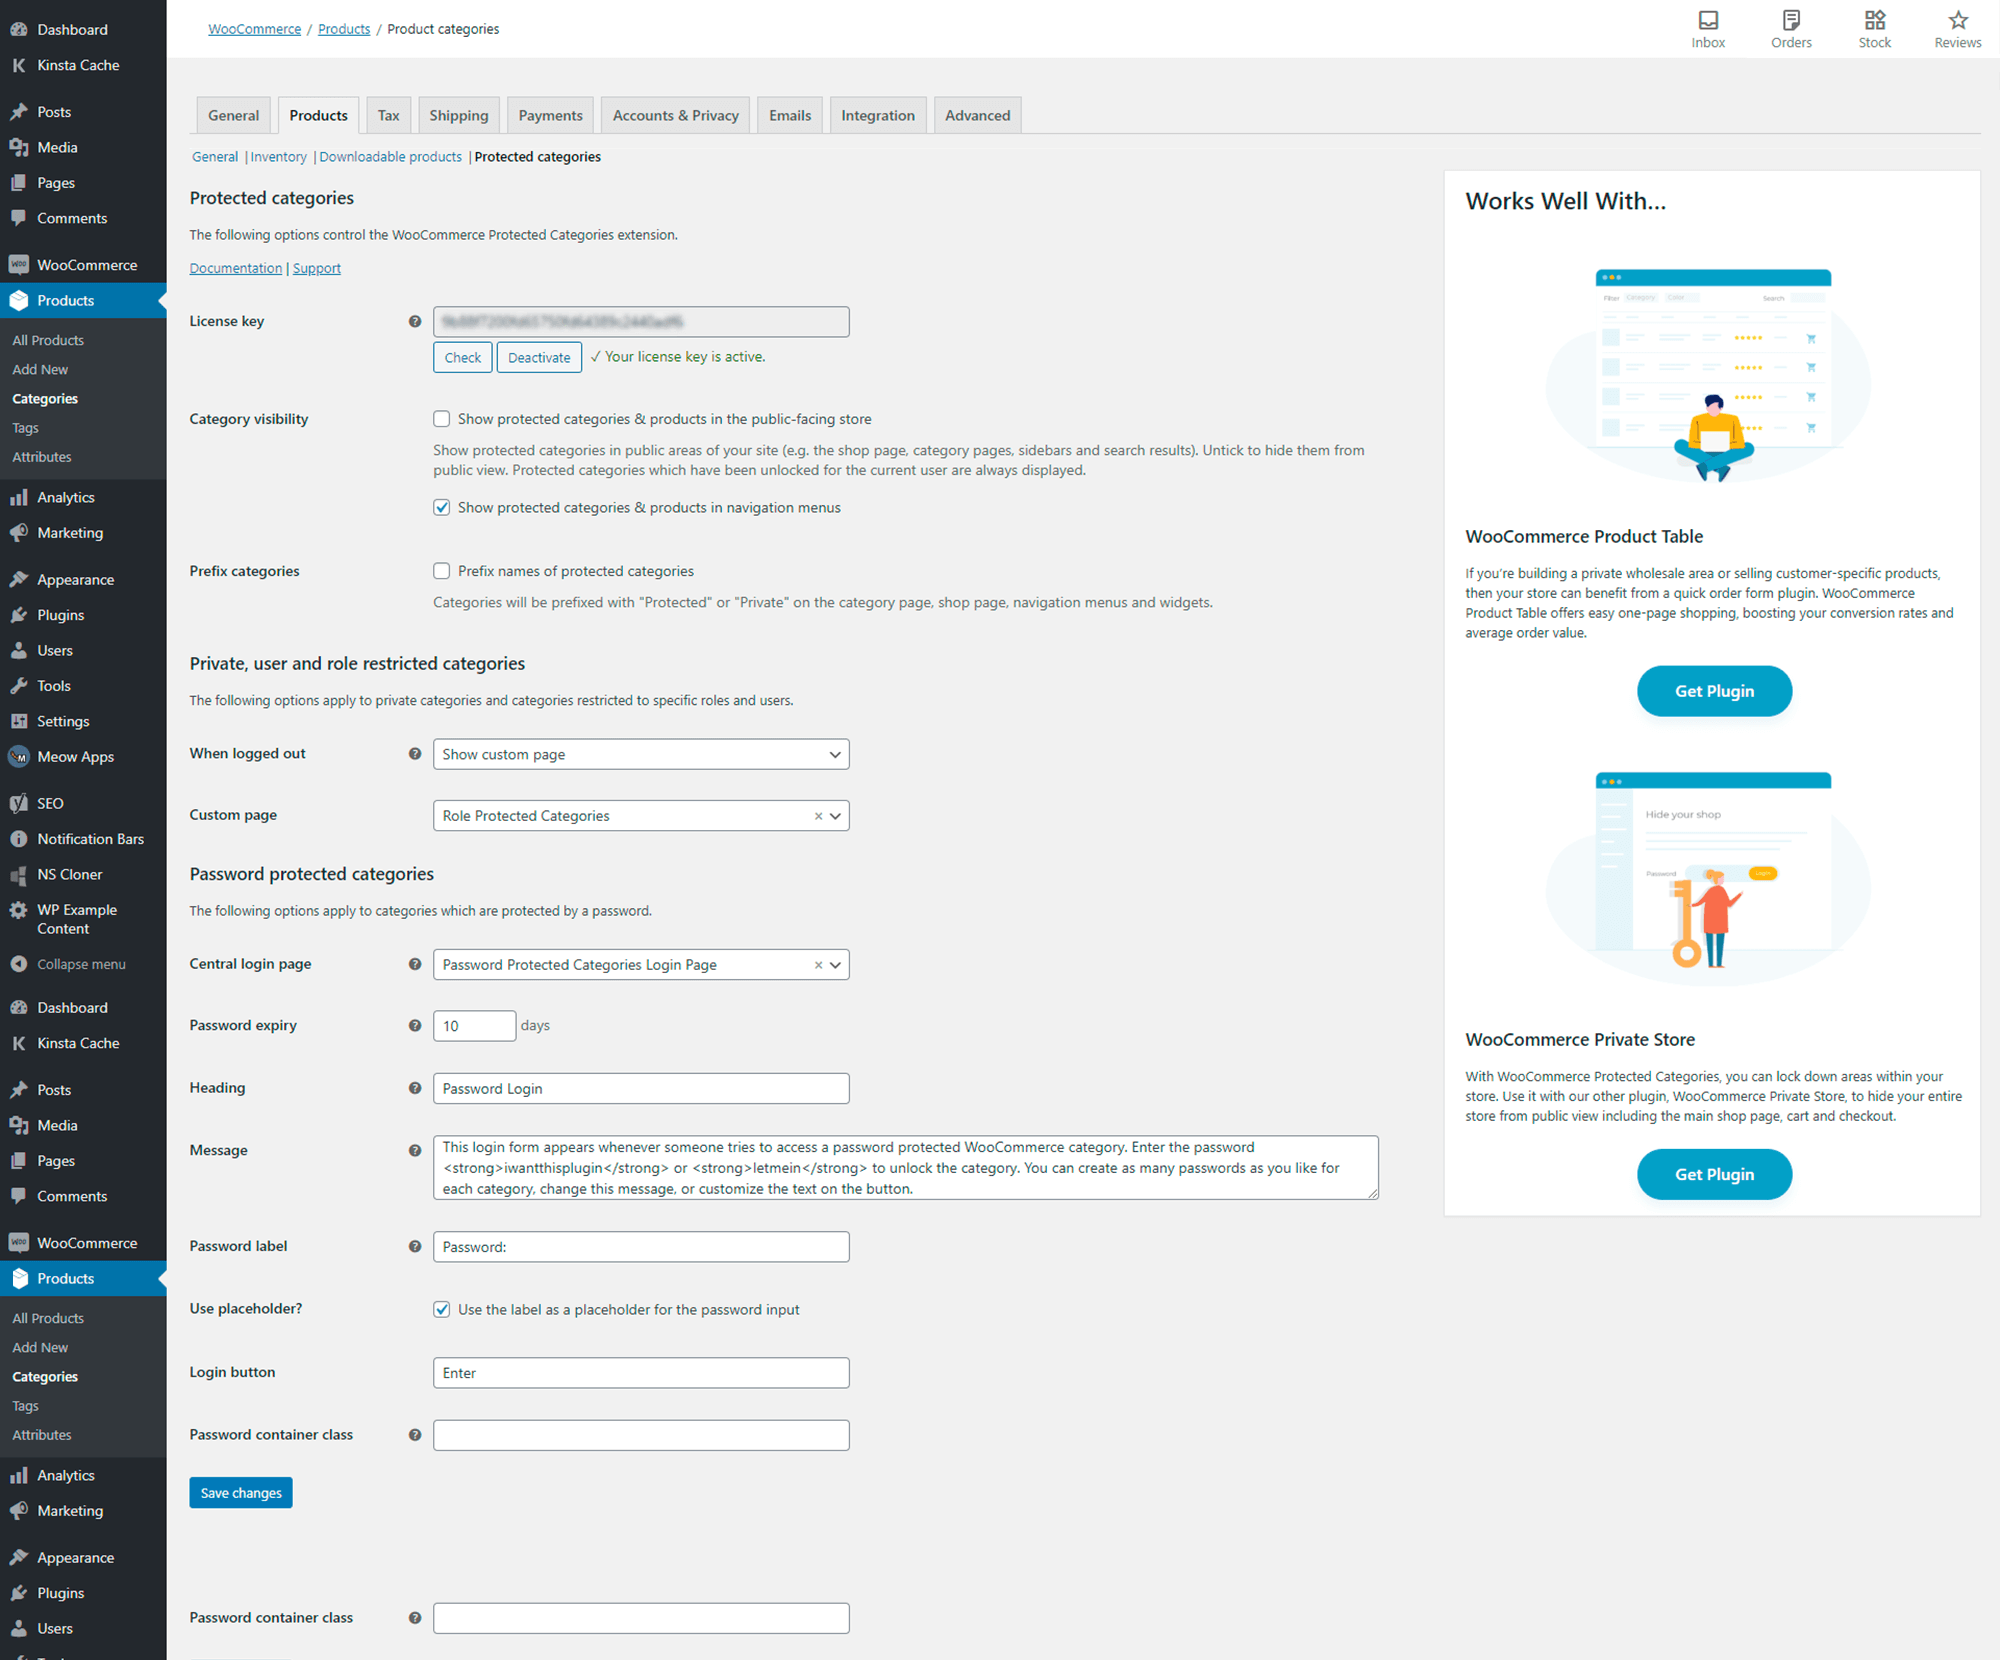
Category Visibility
Show protected categories & products in public-facing store
Tick this box if you would like your protected product categories to be visible in your public-facing WooCommerce store. This will show protected products on your main shop page, on category pages, archives and in search results. It will also show protected categories in the product categories widget. Untick this option to hide protected categories and products.
Show protected categories & products in navigation menus
Tick this box if you would like protected categories and their products to display in navigation menus. This works for products and categories that you have added to the menu via the ‘Products’ and ‘Protect Categories’ section in Appearance → Menus – it does not work if you have added them as ‘Custom Links’.
Please note that unticking these boxes only affects the visibility of protected categories for users who have not yet unlicked the category. Once someone has entered the correct password, the category will be ‘unlocked’ to them and will display on the main store page and in the menu for that user, regardless of whether these boxes are ticked.
Prefix categories
Ticking this box will automatically add ‘Protected:’ before the name of the category and its products, wherever it appears on the website. For example, if you have a password protected product category called ‘Shop’ then it will display as ‘Protected: Shop’.
The prefix will appear on the category page, shop front, menus and widgets.
Password protected categories
The following options apply to WooCommerce password protected categories.
Central login page
Set a page which your customers or clients can login to a password protected category from a central login page. The page will display a password entry form. If the user enters a correct password for any category, they will be taken to the page for that category with the products unlocked and displayed.
The plugin will look for a category that matches the password entered, and if it finds a match, it will redirect to the first category found. For this reason, it makes sense to use different passwords for each category.
Setting this option will add the [category_login] shortcode to the page. You can also add this shortcode directly to any other location on your site, such as additional pages or sidebar widgets.
Password expiry
Enter a whole number of days, after which the password will expire. This works by adding a cookie in the user's browser. The minimum cookie expiry period is 1 day and the maximum is 9999. On entering a correct password, users will be able to access the category for the set number of days without having to re-enter a password.
Heading
Use this option to customise the heading that appears at the top of the password login form, above the message and password entry box.
Message
You can enter some text here to customise the wording that appears on the password login form, above the password entry box. Anything that you enter here will replace the default text.
You can format the text using HTML code to add lists, images etc. as required.
Password label
The text that appears next to the password entry box.
Use placeholder?
Tick the box if you would like to use the ‘Password Label’ (see above) as a placeholder for the password entry box.
Login button
You can change the text that appears on the ‘Submit’ button for the password entry form.
Password container class
If you enter a CSS class here, it will be used in the container element that surrounds the password entry form. This might be useful if your relies on full-width page templates and you want to ensure the password form has a contained width.
User and role restricted categories
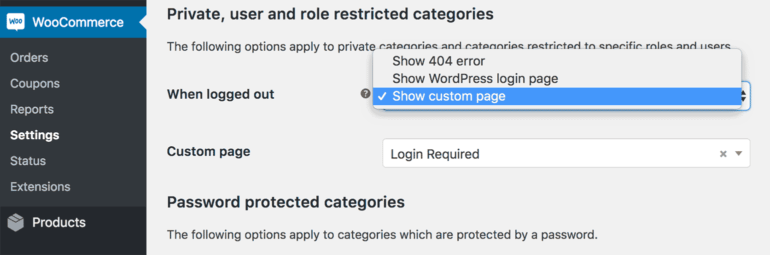
The following options apply to WooCommerce product categories that are restricted to specific roles or users.
When logged out
Choose what happens when someone without the correct privileges tries to access a role or user protected category:
- Show 404 error - Display a 404 error, so it appears as a broken link. This is a good way to hide the fact that the hidden category and its products even exist.
- Show WordPress login page - Redirect people to the default WordPress login page (/wp-login.php) so that they can log into their account.
- Show custom page - Alternatively, select any page on your website for people to be redirected to.
Note: If a category is password protected as well as restricted to specific roles or users, then this option will be ignored and the password login form will be shown instead.
Custom page
This option appears if you select 'Custom page' in the 'When logged out' dropdown. It lists all the pages on your WordPress website.
Choose which page you'd like people to be redirected to when they try to access a role or user protected category. For example, you can select a front end login page if you have one (if not, then we recommend the free Theme My Login plugin for this). Alternatively, if you're creating members-only categories then you could redirect people to a page that explains that the content is for members-only with details on how to join.
4. Start protecting your product categories!
Once you have installed the plugin and activated your license key, you can start creating protected WooCommerce categories!
Plugin installation & setup service
If you don't want to set up the plugin yourself, then you can use our plugin setup service.