How to bulk protect categories in WordPress
Password Protected Categories works with standard post categories, tags, and any custom taxonomy registered on your WordPress site. You can restrict each category individually by editing it in the WordPress admin. To set up protection across many categories at the same time, use the third-party app Setary, which loads your taxonomies into a spreadsheet for fast bulk editing.
This guide walks you through the process.
Step 1: Choose which taxonomies to manage in Setary
From your WordPress admin, head to Settings → Setary. Tick the box next to each taxonomy you want to bulk edit - for example 'Categories', 'Tags', or any custom taxonomy added by your other plugins. Save your changes.
Step 2: Open the taxonomy tab you want to edit
Sign in to the Setary app. Along the bottom of the spreadsheet you'll see a tab for each taxonomy you enabled. Click the one you want to work with.

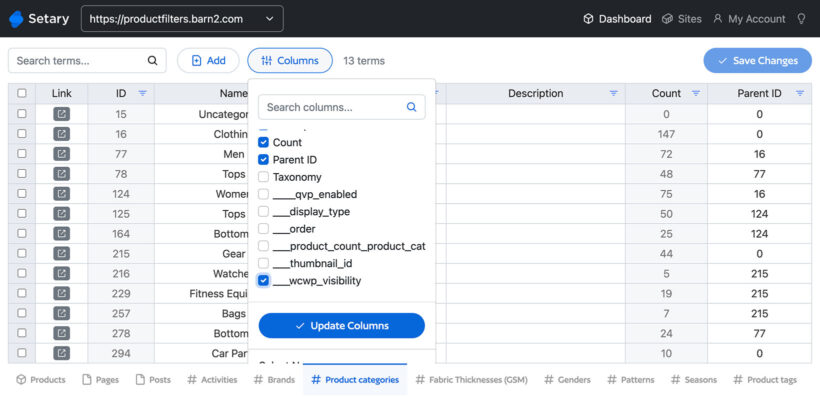
Step 3: Display the protection columns
- Before the protection fields appear in Setary, you need to save protection on at least one category manually. Open any category in the WordPress admin, set its visibility to "Protected", add a password, and pick at least one user or user role. Save the category.
- Switch back to Setary and open the relevant taxonomy tab.
- Press the 'Columns' button at the top right and enable these four fields:
- Visibility
- Password
- User roles
- Users
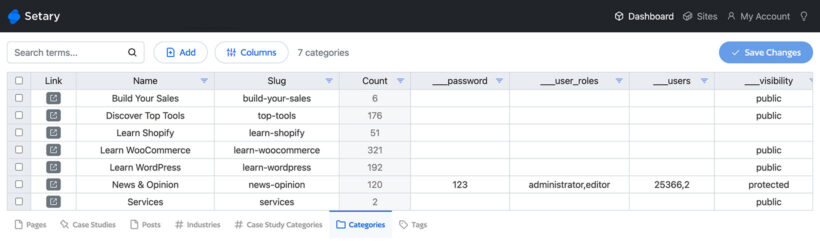
Step 4: Apply protection to your categories
Fill in the cells in each row depending on how you want to restrict access:
- Visibility - type
publicorprotectedin lowercase. The other three columns only take effect when this is set toprotected. - Password - add the password that visitors will enter to unlock the category.
- User roles - list the roles that should have access, separated by commas and written in lowercase. For example:
administrator,editor,subscriber. - Users - list the IDs of the individual users who can access the category, separated by commas. For example:
25366,2. To find a user's ID, open their profile in the WordPress admin and check the URL.
A single category can use any mix of password, user roles, and named users at the same time.
Step 5: Check your changes and save
Setary marks every edited cell with a small blue dot. Use these to review your edits, then hit 'Save changes' to push all the protection settings to your WordPress site in one go.
The restrictions will take effect on your live site straight away.