Show WPForms form entries in a searchable table

This is the complete guide to using the WPForms WordPress forms plugin to collect user-submitted information, and displaying it in a searchable table on your website. If you've ever wondered how to display WPForms data on the front end, then you've come to the right place!
WPForms is one of the most popular form plugins out there. You can use it to create a wide range of forms for many different purposes.
You can use WPForms to build directories, document libraries, e-commerce marketplaces, job and event listings, and collect testimonials, among other things.
This article will show you how to use WPForms to build any of the above in just a few steps. The best part is, you’ll not just learn how to collect information from users, but also how to automatically display it in a searchable table on the front end of your website.
Read on, or watch this video to get started.
What to expect
In this guide, you will learn to:
- Let users submit data on your site using WPForms.
- Store the data as a regular post or page or a separate custom post type.
- Display user-submitted data in a searchable, filterable table using Posts Table Pro, Document Library Pro or WooCommerce Product Table (depending on what you're displaying).
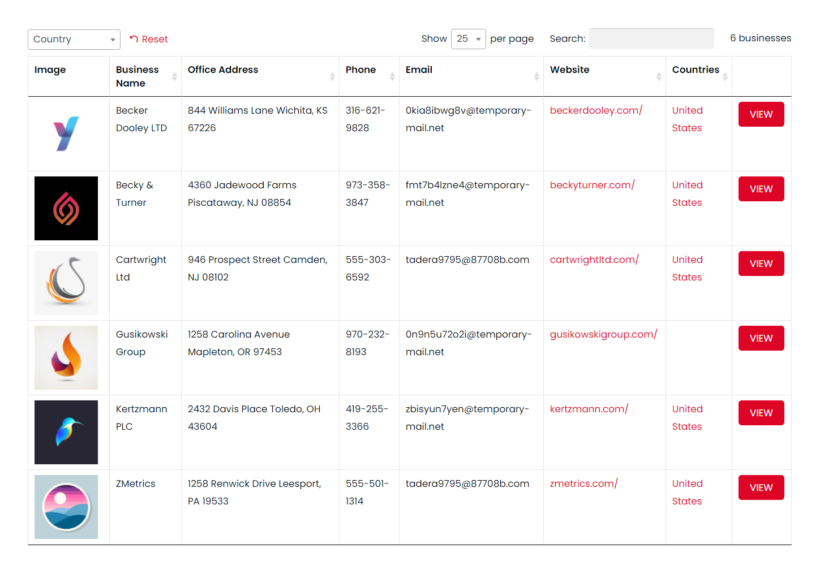
At the end of the article, you will end up with something like this:
Quick side note: If you want to display user-submitted content from a different WordPress form plugin then you can use these tutorials instead:
Now let’s begin...
1. Create a WPForms form to collect user data
Step 1: Install and activate WPForms on your WordPress website. You should see a WPForms menu in your dashboard.
Step 2: Before building the form, take a minute to plan which fields you want to enable on the form.
On my demo website, I'm going to create a business directory and a simple business directory will require the following fields:
- Business Name
- Office Address
- Phone Number
- Website
- CAPTCHA
Step 3: Now let’s build the form. You can either build a new form from scratch or use the Blog Post Submission Form template. This guide will help you install and use the template.
But if you choose to build a new form, navigate to WPForms → Add New. Select Blank Form and the form builder will open.
Step 4: Navigate to the Settings and name the form. I named my form Add a Business.
Step 5: Next, go to Fields and you will notice that there are many pre-build fields available. Start adding the fields you had chosen back in Step 2. Simply drag and drop the fields into the form.
Tip: Enable CAPTCHA protection to prevent bots from submitting spam information.
Step 6: When the form is ready, hit Save.
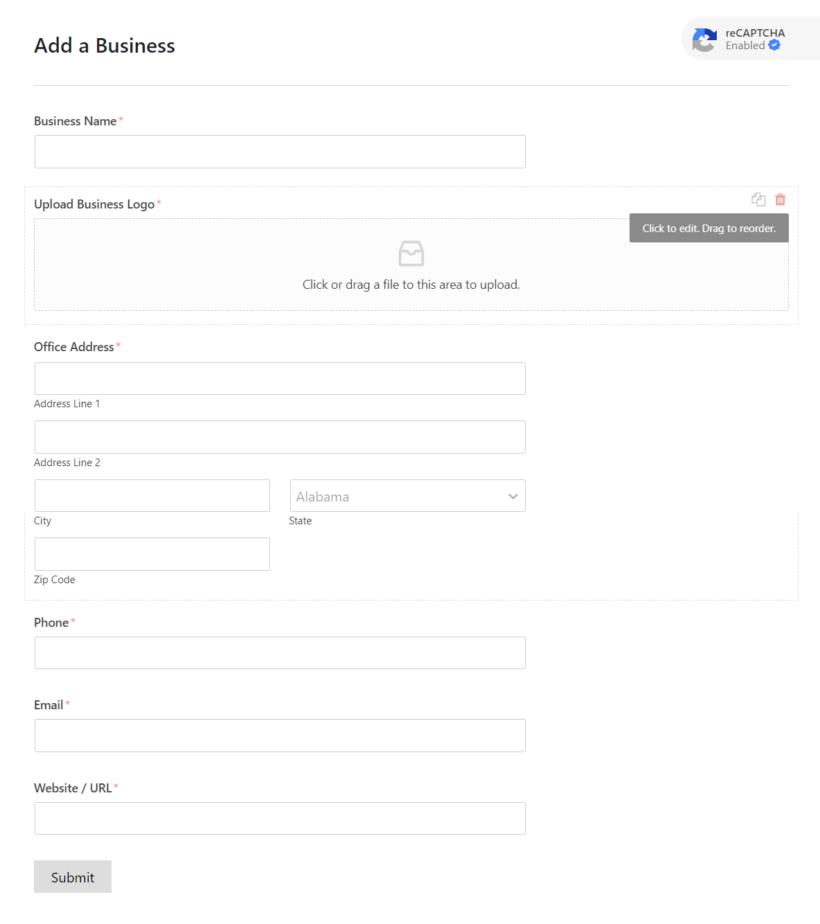
Here’s a form that I built:
Display the WPForm form on your website
Now that your form is ready, you need to publish it on your WordPress website. There are two ways of doing this:
- Add the form to a new page, or
- Add it to an existing page
Here’s how:
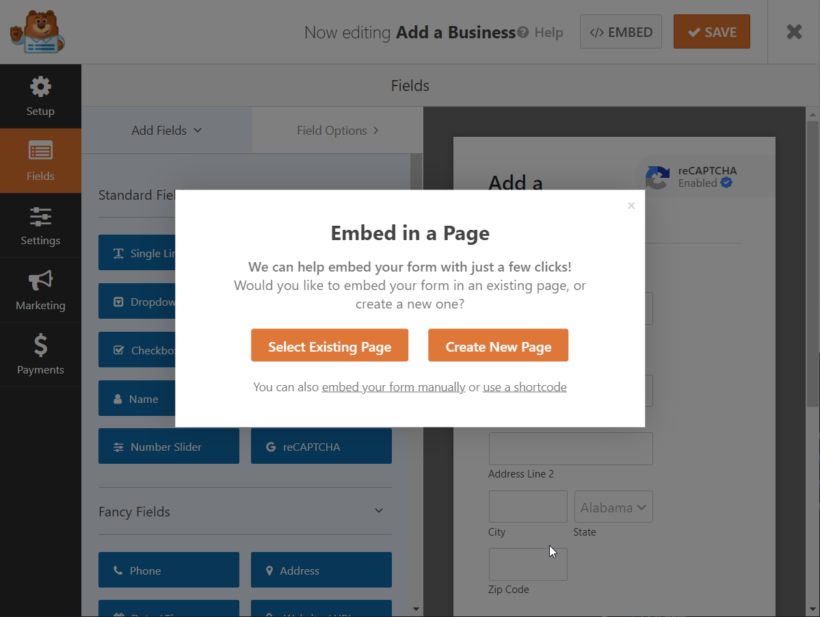
- On your WPForms builder page, select the option Embed. Hint: Look at the top right corner of your screen.
- It will ask you to choose whether you want to embed the form on an existing page or create a new page. Select what suits you and keep following the instructions.
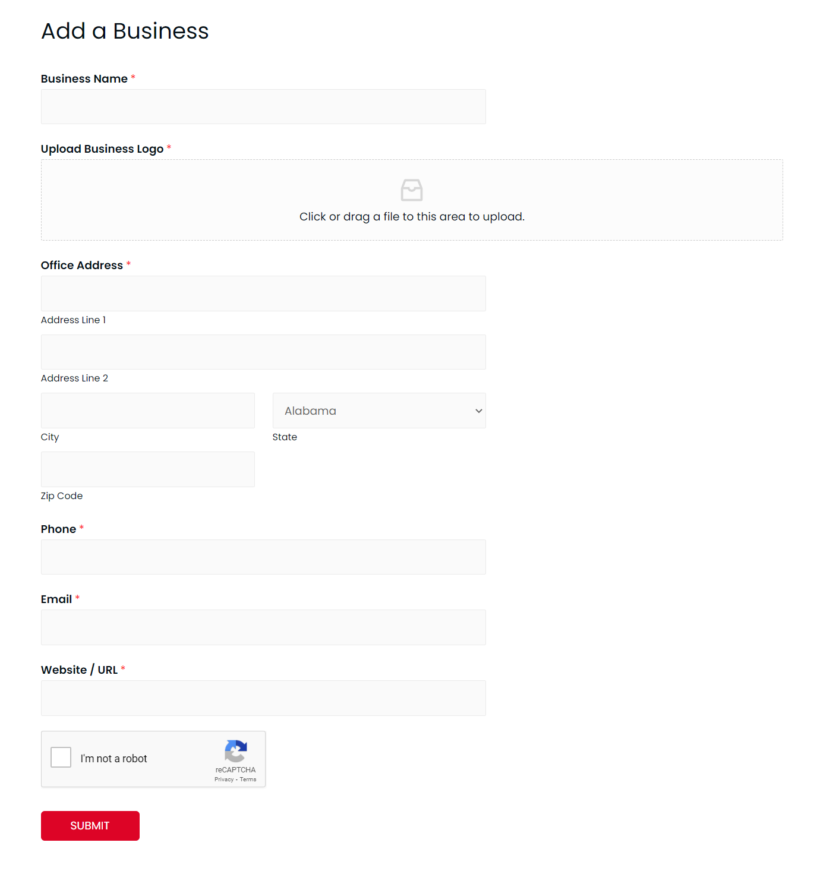
On our demo site, I decided to go for a new page. And here’s how our form looks on the front-end:
I strongly recommend that you test the form before promoting it.
- Simply open the URL in incognito, add fake data, and submit the form.
- Then come back to your WordPress dashboard and check for new entries by going to WPForms → Entries. You should be able to see the data you just entered.
- If you don’t see any data, then contact support.
Creating hidden forms
If you’ve built the form to share it with only a handful of people, consider password protecting it to prevent unauthorized access. You can enable WordPress’s very own password protection feature or you can utilize WPForms' Locker add-on. Here's a guide that will help you with both the options: How to Make a Password Protected Form in WordPress.
You can also consider no-indexing the page to discourage search engines from displaying it on SERP.
Right, now onto the next steps...
2. Choose where to store WPForms entries in the WordPress database
It’s time to consider where you want to store the user-submitted data. There are a few options to choose from, depending on what you are collecting from users:
- Documents or any other type of resource - Install the Document Library Pro plugin. This will create a 'Documents' post type, which you can map to the WPForm.
- E-commerce products - Install the free WooCommerce plugin. This will create a 'Products' post type.
- Any other type of content - You can store the data as a post or pages or create a separate custom post type. If you want to accept articles from your visitors then it’s best to store the data as a post or even a page. But if you are collecting testimonials, or building a business directory, or jobs and events listing, then creating a separate custom post type makes more sense. Trust us, you don’t want to store all your data as posts and pages. It will clutter up your website.
Follow the instructions in the next section if you need to create a custom post type. If not, skip ahead.
Creating a custom post type
To create a custom post type, all you need to do is follow the steps below:
- Download and Install the free Pods plugin on your website.
- You should see an option called Pods Admin in the WordPress admin. Go to Pods Admin → Add New → Create New.
- Next, choose Custom Post Type (like Posts or Pages) from the Content Type dropdown.
- After that, add Singular and Plural Labels. All your user-submitted data is going to be stored under the Plural label. I named my Singular Label as ‘Business’ and the Plural one as ‘Businesses.’
- Head over to Advanced Options. Scroll down to the Support and Built-in Taxonomies section. Select the fields that you need for your custom post type and then click on Save Pods. The post type needs a field for each piece of information that you will be collecting on the WPForms form. If the standard fields aren't enough then you can add custom fields and taxonomies. We have a dedicated guide that will help you do just that.
- Click on Next Step. At this point, you should see the custom post type on the left of the WordPress admin.
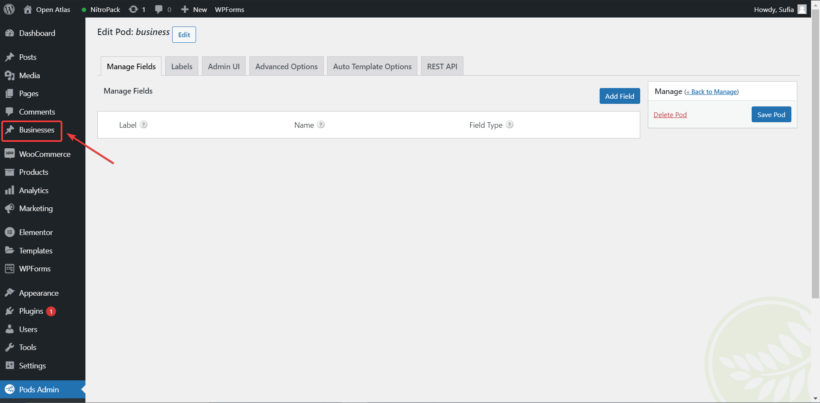
Select your post type from the WPForm
The next step is to link the WPForm that you created in Section 1 with the post type that you're using to store the form entries:
- Next, you will learn how to map your form fields to the post type. To do this, download and install WPForms' Post Submission Add-on.
- Then go to WPForms → All Forms. Select the form you created earlier.
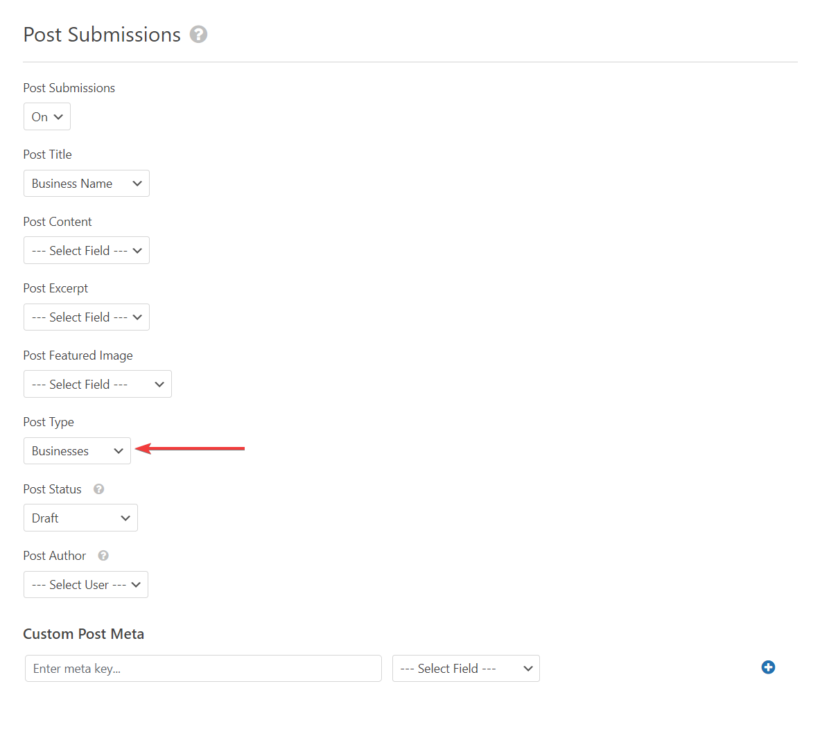
- On the form builder page, navigate to Settings → Post Submissions.
- You should be able to see an option called Post Submission which is set to Off. Toggle it On.
- Scroll down to Post Types. From the dropdown, select the post type you're using to store the user-submitted data. For this demo tutorial, I selected my custom post type: Businesses.
- Scroll down further and set the Post Status as Draft or Pending Review.
- Hit Save.
That’s it. Your Post Submission page should look something like this:
3. Display WPForms entries in a searchable table
At Barn2, we have a choice of 3 plugins that can display WPForms entries on the front end. They all display the form entries in a searchable table, and you should choose the plugin that matches the type of content that the user is submitting:
- Post Table Pro: For displaying posts, pages, and custom post types.
- Document Library Pro: For displaying document libraries and resource hubs.
- WooCommerce Product Table: For displaying WooCommerce products.
The below instructions focus on Posts Table Pro. However, the method is very similar for the other two plugins.
How to display entries using Posts Table Pro
- Install and activate the Post Table Pro plugin on your website.
- On your WordPress dashboard, navigate to Post Tables → Settings and activate the license of the plugin.
- Scroll down on the same page and you will see many options. Take some time to view the options and modify them if necessary. For example, you should add a column for each piece of data that you are collecting in the WPForms form. Remember to hit Save before you go to the next step.
- Now, navigate to Pages → Add New. A new page will be created. This is where you will display the table. I named my page Business Directory.
- Next add this shortcode to your page:
[posts_table] - Now view the page. You should be able to see a table with the settings you chose in step 3. You can override some of the settings by using shortcodes.
Here’s a video tutorial about how to add a table:
This is the business directory I created on my demo site. The WPForms entries are displayed in a searchable table with a 'Country' filter and sortable columns.
FAQ
Q. How to find user-submitted data?
A. On your WordPress dashboard, go to WPForms → Entries → select a form and the user-submitted entries will appear. You can also find it by going to the Pages or Posts section of the WordPress admin or clicking on the name of your custom post type (depending on where you’ve chosen to save the data).
Q. Can users change the data they have submitted?
A. Yes, they can. There are two ways to enable users to modify their data.
- Download and install Universal Frontend Editor. It will add an Edit button near the table. Users will need an account and will have to be logged in to click through the button to access the frontend editor.
- Alternatively, you can use another frontend editor plugin called Editus. It will take users straight to the document page where they can edit their information.
Need more help? Check out this guide: Create WordPress Tables With User Specific Content.
Q. Why display WordPress form entries on the frontend?
A. There are lots of reasons to display WPForms entries on your front-facing WordPress site. It all depends on what sort of data you're using WPForms to collect. If it's data that you then wish to show to other people - either publicly or to team members or colleagues - then you can do this by displaying it on the front end.
For example, you might use Posts Table Pro to display WPForms entries containing data for a business directory, resource directory, competition entries, or something else.
Q. How does WPForms store entries in the database?
A. WPForms creates its own database tables which automatically store the form entries. These are the WPForms database fields:
wp_wpforms_entries- Data from the submitted form entries.wp_wpforms_entry_meta- Meta data info about WPForms entries such as IDs and dates.wp_wpforms_entry_fields- Encoded entry information from your form fields.wp_wpforms_tasks_meta- Data about tasks which WPForms processes behind the scenes.wp_wpforms_payments- Data about payments submitted with form entries.wp_wpforms_payment_meta- Additional payment information such as user IP addresses and other data which WPForms uses internally.
When you display WPForms entries using Posts Table Pro, you need to use the above instructions store the necessary data to a custom post type. That's because WPForms searchable database tables are different from WordPress posts and custom posts.
Q. Can I display WPForms entries without a plugin?
A. No, you need a plugin like Posts Table Pro to display WPForms entries on the WordPress front end.
Q. What are the alternative methods for displaying WPForms entries?
A. Using Posts Table Pro is by far the most user-friendly way to display WPForms entries in a searchable table. However, developers wishing to do some extra work can write custom code to achieve a similar (but simpler) result.
WPForms have provided developer documentation to help you get started with this.
Q. The table is not appearing, only the shortcodes are!
A. If you can see the shortcodes on the page and not the table, then it's most likely a license issue. Go over to Post Tables → Settings and check if your license key is activated.
Facing a problem not listed here? Take a look at our troubleshooting resources. You are also welcome to reach out to our support team.
Getting started
That’s pretty much it for this one. You can get the plugins from here:
- WPForms to collect the user-submitted data.
- WPForms Post Submissions to store the data as a post, page, custom post type, document or product.
- Posts Table Pro, Document Library Pro or WooCommerce Product Table to display the WPForms entries in the front end.
I hope that this article helped you display information submitted via WPForms. You can use this method to build any type of business directory.
If you have any questions, feel free to drop them in the comments section below.
4 Comments
Just ran down your steps and I think I have found my road map for what I want to accomplish. But in theory, if I uses WPForms + Post Table Pro, to collect and store “customer information” via webpage. Does an auto response email plug in, need to connect with PTP? Or with WPForms?
Again, great thread!
Hi James, thank you for the comment and for the kind words. Posts Table Pro is designed and built to display posts, pages, or custom posts in table format. Your email autoresponder plugin will need to connect to the form plugin which is in this case, WPForms. If you have further questions, you can also reach us via our Support Center. Thank you.
Hi, with "Post table pro", is it possible to have a conditional display ?
I mean, I will display the results on a page where there is another form. I need Post table pro to diplay results (filter) depending on the answers to the second form within this page. For example, if in the second form i select one given country, only results for this given country are displayed ?
Thank you
Philippe
Hi, Philippe. Thanks for asking. You can achieve this without the need to use a form. I suggest you instead add/create a "country" custom taxonomy, which you can then display/show/use as a filter dropdown list above the table to filter the listed post types and only show the ones with the selected term/country.
Please let me know if you have any more questions. You can also enquire in more detail via our dedicated Support Center. Cheers!