


If you're a graphic designer, learning how to sell fonts online is a great way to generate some passive income from your skills.
There are plenty of font designer marketplaces that will happily sell your fonts for you like MyFonts, Fonts.com, etc...but those resellers will typically take half your sales as a commission and might require that you exclusively sell through them.
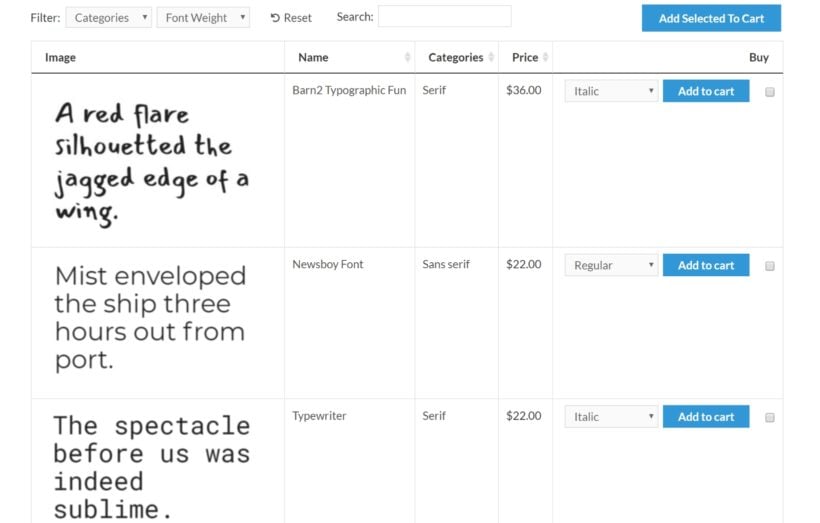
WordPress and WooCommerce provide a better way to sell fonts online that cuts out the commission and gives you full control. With the right WooCommerce plugins, you can create a store that's optimized specifically for fonts. You'll get a convenient table layout, complete with font previews and Ajax category filters to help your shoppers find the right font:
In this tutorial, I'll show you how to use WooCommerce Product Table and WooCommerce Quick View Pro to sell print or web fonts online with WooCommerce.
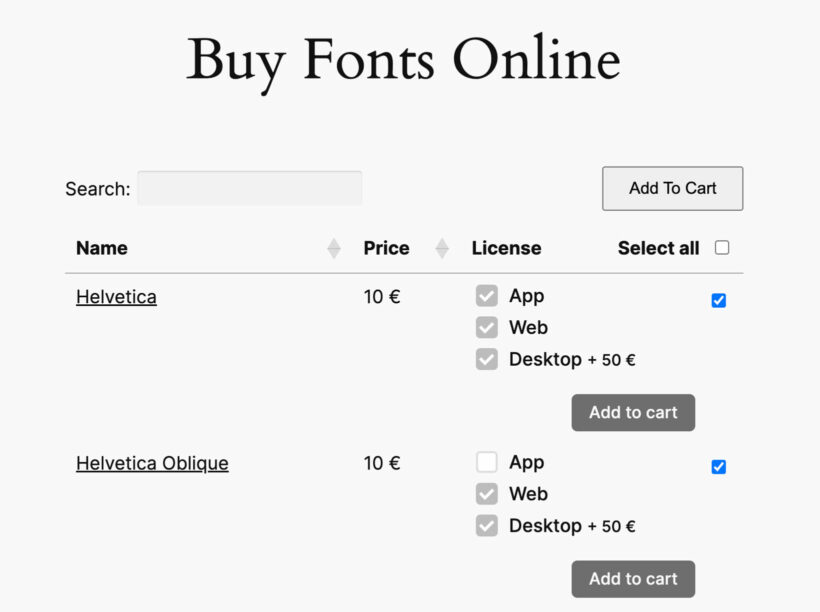
At the end, I'll also show you how to add the WooCommerce Product Options plugin to display the font license options as checkboxes like this:
Why WooCommerce Product Table is the best way to sell fonts online
WooCommerce is the world's most popular way to create an ecommerce store and is fully capable of selling both physical and digital products. It makes a great option for a solo font designer, font shop, or type foundry.
However, the default styling of most WooCommerce themes displays products in a more "traditional" ecommerce layout that looks something like this:
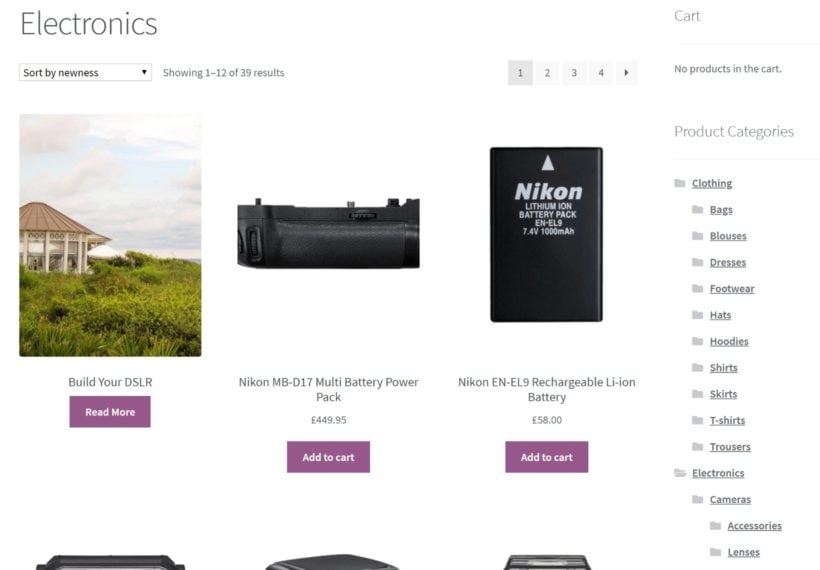
Now, that might work great if you're selling physical products. But if you're selling your own fonts, that kind of shop layout...
- Doesn't display the important information about a font, like how it looks, its different font weights, etc.
- Wastes space and makes it hard for shoppers to browse all your available fonts.
WooCommerce Product Table is a flexible plugin that fixes those issues by letting you display your fonts in a table layout like you saw above:
This gives you a compact way to help people shop your fonts. Visitors can:
- See a graphic preview of the font to see kerning, glyphs, ligatures, calligraphy, etc.
- Choose different weights for each font family from a drop-down.
- Use checkboxes to add multiple fonts to their carts.
- Use filters to find specific types of fonts. For example, serif font vs sans serif font, or OpenType fonts.
- View license options.
- Plus whatever else fits your business - the plugin gives you full control over what information you display.
Integrate your table layout with product quick view
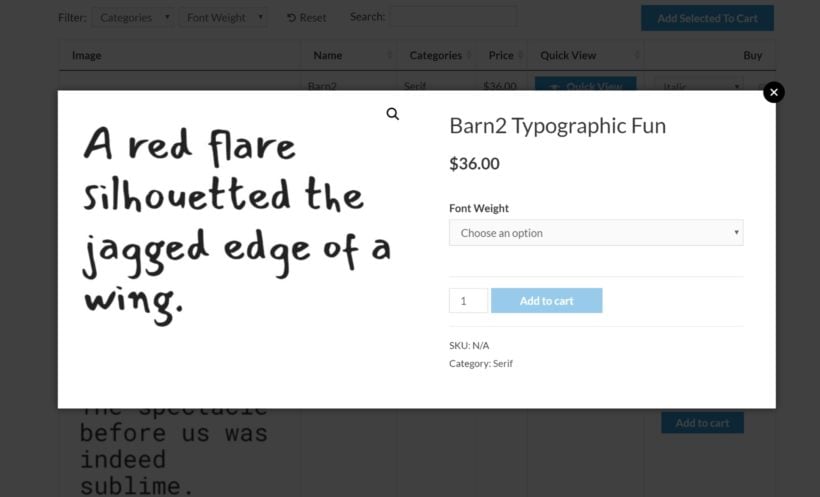
If you want to display more information about each typeface than the table layout allows, you can add a product quick view button to the table that lets shoppers browse more information in a lightbox.
For example, you could use this product quick view to show:
- A description of the typeface and its inspiration.
- More detailed licensing information.
- More images of your typography in action (or different font weights in action).
- Font bundles or upsells.
How to sell fonts online with WooCommerce: Step-by-step
Below, we'll take you step-by-step through how to sell fonts online with WooCommerce and WooCommerce Product Table.
To begin, we'll assume that you already have a fresh WordPress/WooCommerce install. If not, you'll first want to install WooCommerce and complete the setup wizard.
1. Add new fonts as WooCommerce products
To manage your fonts, you'll use the regular WooCommerce product system. The simplest approach is to create one unique WooCommerce product for each new font family that you want to offer. You can then add different font weights or licensing options as product variations within that product.
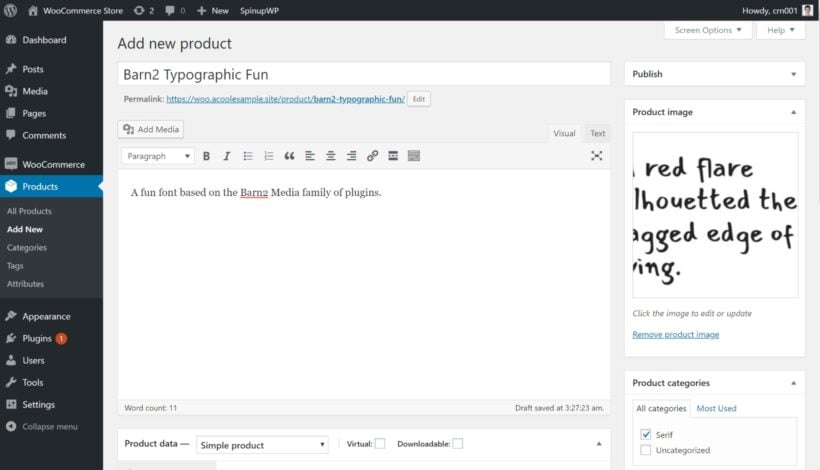
To do that, go to Products → Add New.
First, enter basic details like the font family name and description. You can also use product categories and tags to add other pertinent information, like whether the font family is serif or sans serif.
You can also add an image to preview how the font looks - the way that Google Fonts handles things is a good starting point:
Next up:
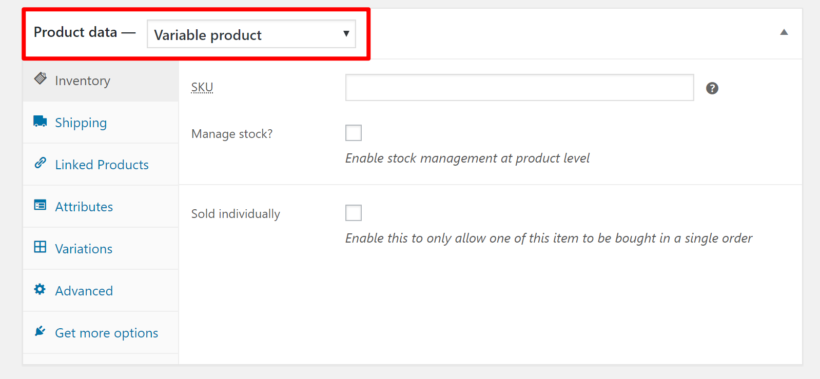
- Scroll down to the 'Product data' box
- Choose 'Variable product' from the drop-down (unless you're only selling a single font weight - then you can use simple product)
From there:
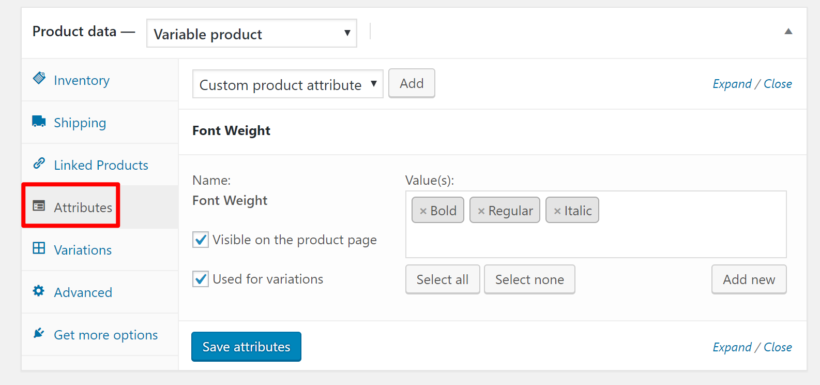
- Go to the 'Attributes tab' and select your attributes (you can set these up by going to Products → Attributes).
- Select the 'Used for variations' box.
- Click 'Save Attributes'.
To finish setting up the variable product:
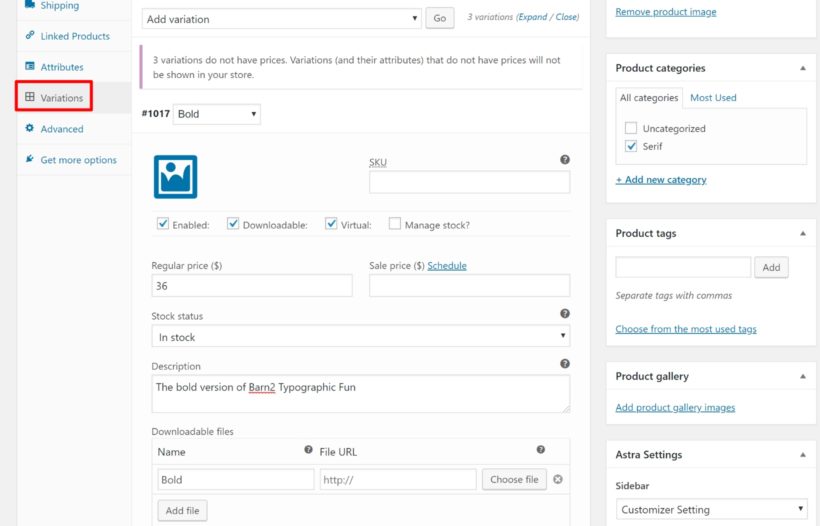
- Go to the 'Variations' tab.
- Select 'Create variations from all attributes' from the drop-down and click 'Go'.
- Check the 'Downloadable' and 'Virtual' boxes for each variation.
- Enter the price. If you want to offer free fonts or other freebies, you can mark it as zero.
- Upload the font file in whatever format you want to offer.
Once you've configured all of your variations, publish your product. Then, repeat the same process for all the different font families that you want to offer.
2. Configure WooCommerce Product Table
Once you've added all your font families as WooCommerce products, you're ready to create the front-end interface that you'll use to sell fonts online.
Install and activate the WooCommerce Product Table plugin. Then, go to Products → Product Tables to create a list of the fonts you're selling.
The easiest way is to enable the 'Display on a shop page' option. This will replace the standard layout on all your main shop pages (which is terrible for selling fonts!) with a font-friendly product table view:

You can explore all of the plugin's settings, but here are the specific settings you'll definitely want to configure.
First, use the 'Columns' page to configure what information you want to display for each font. You can include basic columns like this:

And you can also include other product data, like custom fields or taxonomies. View all the column options.
Next, go to the 'Add to Cart' page:
- Choose Button and checkbox from the 'Add to cart method' dropdown. This will allow shoppers to select multiple fonts to add to their cart. That's important if you sell whole font families a la carte.
- Choose how to handle variations. You can either display each font weight as a separate row in your table. Or, you can display a drop-down next to each font family that lists all of the weights.

Displaying variations as separate rows makes it easier for shoppers to purchase multiple font weights, while using the drop-down lets you display more font families in less space.
Finally, add some product filters. You can use these to let shoppers filter by font category/tag (e.g. serif vs sans serif) and/or attribute (e.g. font weight):

Pro tip: For even more advanced filtering, use WooCommerce Product Table alongside its sister plugin WooCommerce Product Filters.
3. View your font shop page
Once you've finished creating the table, visit your store's main shop page or a category page. You should see the table that will help you sell fonts online:
4. Add product quick view buttons (optional)
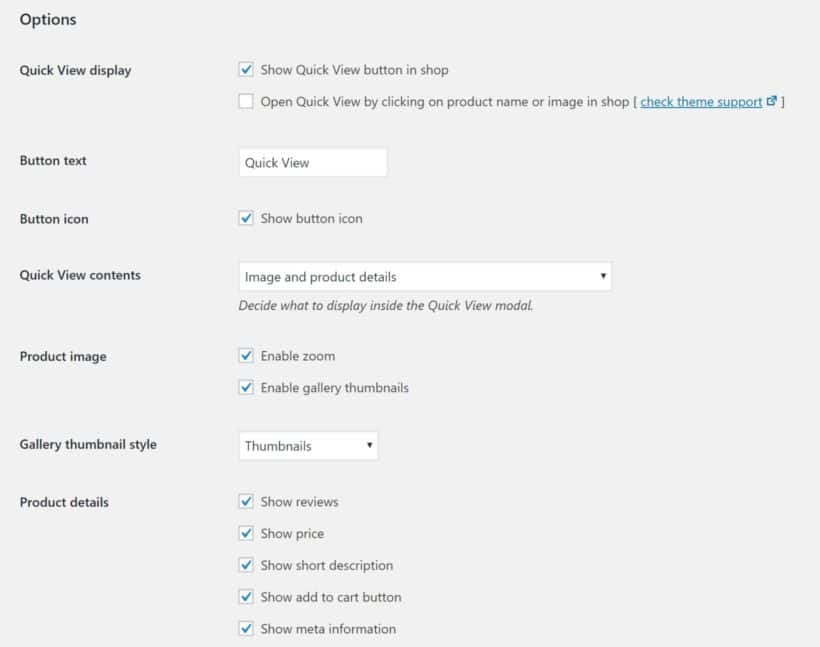
If you want to display more information about each font, you can add a product quick view column to your table using the WooCommerce Quick View Pro plugin.
Once you've installed and activated the plugin, you can then go to WooCommerce → Settings → Products → Quick view to configure how the quick view box works:
Then, you can add a Quick View your product table to achieve this effect:
Tips for selling fonts more effectively
Once you've set up your basic online font store, you'll want to consider implementing some more advanced sales tactics to boost your revenue and sell fonts online more effectively.
Display font license options as checkboxes
Above, I showed you how to list each font license option as a separate row of the table. But what if you want to list each font on a row, with options to select a license?
Product variations as useful for letting customers select a license option. However, you can only select one variation at a time. That's not much use because customers often buy multiple font licenses at once (e.g. web and desktop).
The solution is to use the WooCommerce Product Options plugin to display the font license options as checkboxes, like this:
Simply install WooCommerce Product Options, go to Products → Product Options and create a 'License' option group with the checkboxes.
Choose which products the license options will appear on. These will then appear in the 'Buy' column of the product table.
Sell font bundles
People who purchase fonts online love bundles - there are even entire sites dedicated just to selling font bundles. For example, you could bundle different font weights together or fonts that pair well together.
The WooCommerce Product Bundles plugin lets you bundle together as many fonts as you want. You can then display your bundle options in the product quick view box in your fonts table. The bundles will not display in the table itself - but they will appear in the quick view box if you use WooCommerce Quick View Pro.
Create upsells
Another good option is font upsells, which let you recommend a similar font/bundle in place of the font a shopper is looking at.
You can create font upsells using the built-in Linked Products feature in WooCommerce and display them in your product quick view box.
Launch your WooCommerce font store today
By creating your own WooCommerce store to sell fonts online, you eliminate the middleman and ensure you don't have to give up 50% of your sales as a commission to a third-party font marketplace.
However, if you want to use WooCommerce to sell fonts online, you'll also want to use some extensions to create a more optimized font shopping experience.
WooCommerce Product Table lets you create an optimized, table-based shop layout page to display your fonts. You'll be able to share previews, list pertinent details like font weight and type, and allow shoppers to purchase multiple fonts at the same time.
Get started today and create your own WooCommerce store to sell fonts online!
Do you have any questions about how to sell fonts online with WooCommerce and WooCommerce Product Table? Ask away in the comments!