How to create layered image previews
WooCommerce Product Options and the Live Preview add-on can show your customer the product they are building, assembled from the images you supply. Give every option choice its own image, and the product photo redraws with each choice they make.
For example, a jeweler sells a bracelet in three band finishes with four gemstones. A customer picks a rose gold band and a sapphire, and the product image shows a rose gold bracelet with a sapphire set into it. You upload seven images.
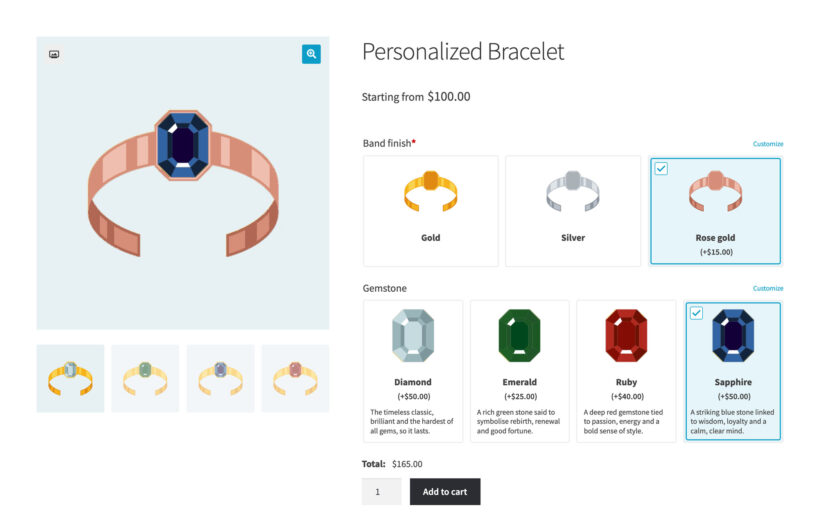
You can try this on our demo site.
Step 1. Prepare the images for each choice
A bracelet with three band finishes and four gemstones needs seven images, plus the photograph underneath. You don't need to photograph all 12 combinations - just add an image of each option and Live Preview will auto-generate a layered image based on the customer's selections.
- Use PNG files with a transparent background - Everything except the part itself has to be transparent, so the layers underneath show through.
- Crop each image tightly to the part - Export the gemstone on its own, not the whole bracelet.
- Keep every choice in one option the same size and crop - A diamond and an emerald exported at the same dimensions appear in exactly the same place on the product.
- Upload one image per choice - The same file becomes the button your customer clicks and the layer drawn on the product. Upload a separate square version only where a tight crop makes a poor button.
Step 2. Create the product
- Go to Products → Add New and create the product as usual.
- Choose the photograph your customer will build on, and set it as the product image.
- Set the price to the cost of the base product. The options add their own prices on top.
Step 3. Add one option for each part of the product
Our bracelet has two parts the customer chooses. It needs two options: Band finish and Gemstone.
- Go to Products → Product Options and click Add option group.
- In the Visibility section, select the product you created in Step 2.
- Click Add option and choose the Image buttons option type. Radio buttons, checkboxes and dropdowns work the same way, so use one of those if you'd rather show the choices as text.
- Name the option after the part, for example 'Band finish'.
- Add a choice for each image, and upload that image against the choice. Set a price against any choice that costs more, for example rose gold.
- Tick Enable live preview.
- Set the maximum number of choices to 1, so your customer picks one band finish rather than three.
- Tick Required if the product can't be made without this part.
- Repeat for the next part, then save the option group.
If you want the choices to appear in the preview without showing the buttons on the product page, untick Display choice images. The layer still appears.
Step 4. Set a printable area for each option
A printable area tells the plugin where on the photograph each layer goes. The band finish covers most of the bracelet. The gemstone covers only the bezel in the middle.
- Go to Media and switch the library to grid view.
- Click the product photograph and click Set printable areas.
- Draw a rectangular area over the part the first option controls.
- In the Area Details panel, set Linked Option to that option.
- Draw a second area over the part the next option controls, and link it to that option.
- Tick Allow only one image per area on each area.
- Click Apply.
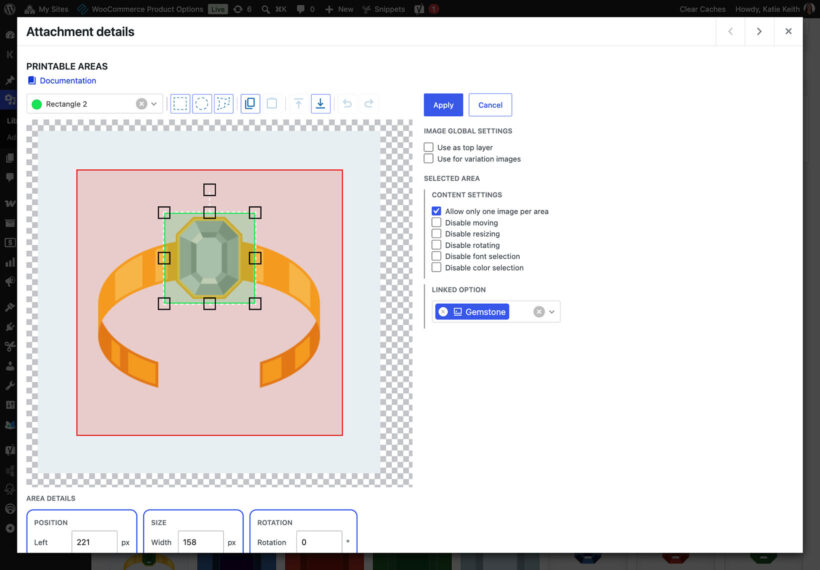
Link each option to exactly one area. If two printable areas are linked to the same option, that option's choice images don't appear on the product page at all, and your customer sees no error message. Use one area per option.
Step 5. Let customers recolor a layer
A color swatch option can recolor a layer the customer has already picked. For example, someone chooses a logo from your designs and then chooses the thread color it's embroidered in.
- Add a Color swatches option and add a choice for each color.
- Under Use the chosen color to, select Change the color of a linked option.
- Under Linked option, select the option whose image you want to recolor.
- Under Blending method, choose Recolor for logos, line art and anything with a single flat fill. Choose Tint for photographs, because it keeps the shadows and highlights.
The other setting, Fill a printable area, paints the area itself rather than a layer. Use that one for a panel or a stripe with no artwork on it.
Step 6. Let customers add their own artwork and text
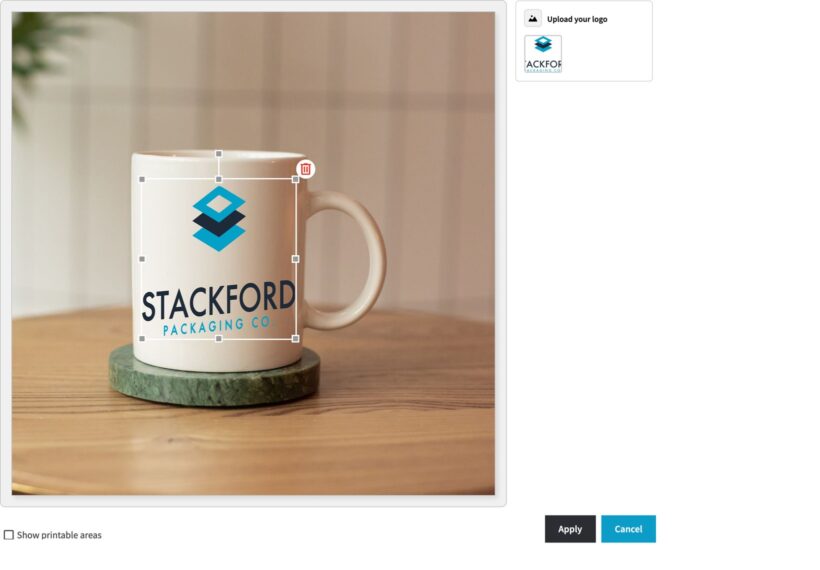
Your designs and your customer's own files can appear on the same product. Add a file upload option for artwork and a text option for a name or a date, tick Enable live preview on each, and give each one its own printable area.
Customers can drag and resize anything they upload. If you'd rather they didn't, tick Disable moving and Disable resizing on that printable area.
Step 7. Check the cart and the order
The finished preview image appears next to the product in the classic cart and checkout. It also reaches you with the order. If your customer goes back from the cart to change a choice, the preview follows them and updates.
The WooCommerce cart and checkout blocks can't display preview images yet, although the images still appear in the order emails.
Other ways to build a configurator
Layered images suit a product whose parts you can photograph. Plenty of configurable products don't work that way, and WooCommerce Product Options handles those without any preview at all:
- A build-your-own product with no visual result - For example, a computer built from a processor, memory and a drive. Use a series of options in a step-by-step layout.
- A product priced by size - For example, a glass shelf cut to order. Use number fields and a price formula.
- A product where one choice changes the next - Use conditional logic to show and hide options as the customer works through them.