Warping uploaded images to fit an angled printable area
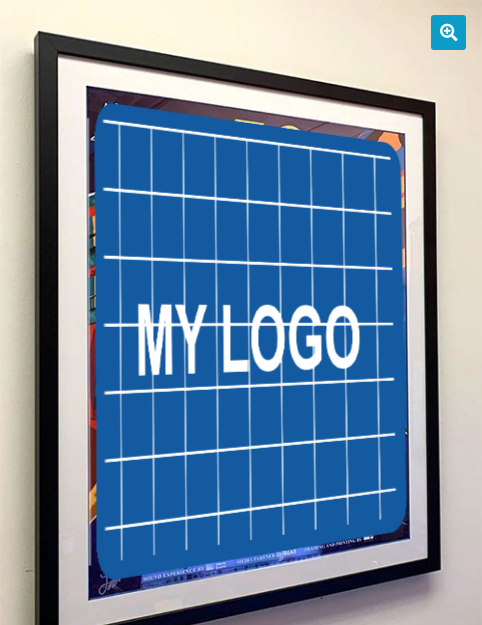
The Live Preview for WooCommerce Product Options add-on can bend the image a customer uploads so that it follows the perspective of the product photo. This is called warping. It's ideal for products photographed at an angle, such as a framed poster hanging on a wall, a sign seen from the side, a box or a book cover, where a flat rectangular preview would look out of place.
This article explains how warping works and how to set up a printable area that uses it.
How warping works
Warping uses a freeform printable area with exactly four corners. When a customer uploads an image, each corner of their image is pinned to one corner of the area:
- the top-left corner of the image goes to the top-left corner of the area;
- the top-right corner of the image goes to the top-right corner of the area;
- and so on for the bottom corners.
The image is then stretched between the four corners, so it narrows towards the side of the product that is further away, just like the product itself in the photo.
The warped image appears everywhere the customer sees their personalization: in the preview on the product page, in the preview window, and in the preview image in the cart, checkout and order. The file that the customer uploaded is stored unchanged with the order, so you always receive the original artwork for production.
Setting up a warped printable area
- Go to Media and open the product image you want to use. You can also open it from the product's image gallery.
- Click Edit printable areas.
- Click the freeform button in the toolbar to add a freeform printable area.
- Click on the four corners of the surface where the customer's image should appear, for example the four corners of the poster inside the frame. Then click on the first point again to close the shape. You can click the corners in any order: the live preview works out which one is top-left, top-right, bottom-right and bottom-left.
- With the new area selected, tick Warp image in the Content Settings. This option only appears when the selected area is a freeform area with exactly four corners.
- We recommend also ticking Disable moving, Disable resizing and Disable rotating. A warped image is designed to fill the area from corner to corner, so these settings stop customers from accidentally pulling it out of alignment.
- Optionally, tick Allow only one image per area so that a new upload replaces the previous one instead of being added on top of it.
- If the product has several upload options, select the one that should use this area under Linked Option.
- Click Apply to save the printable areas.
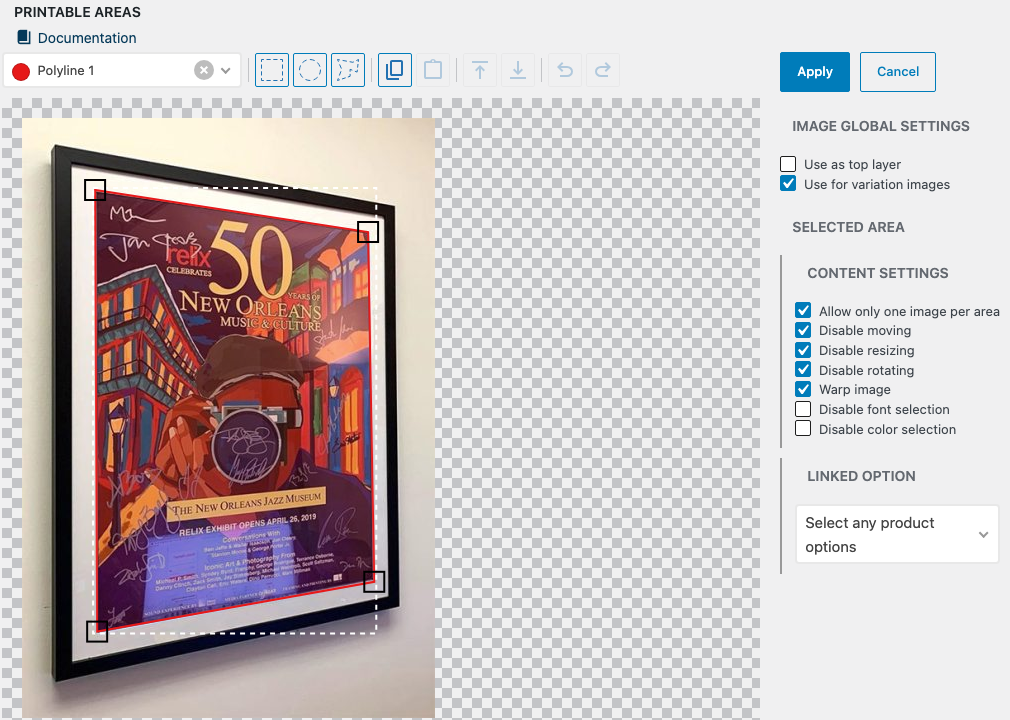
To adjust the area later, select it and drag its corner handles. You can zoom in with the lens that appears while you drag, to place each corner precisely.
What customers see
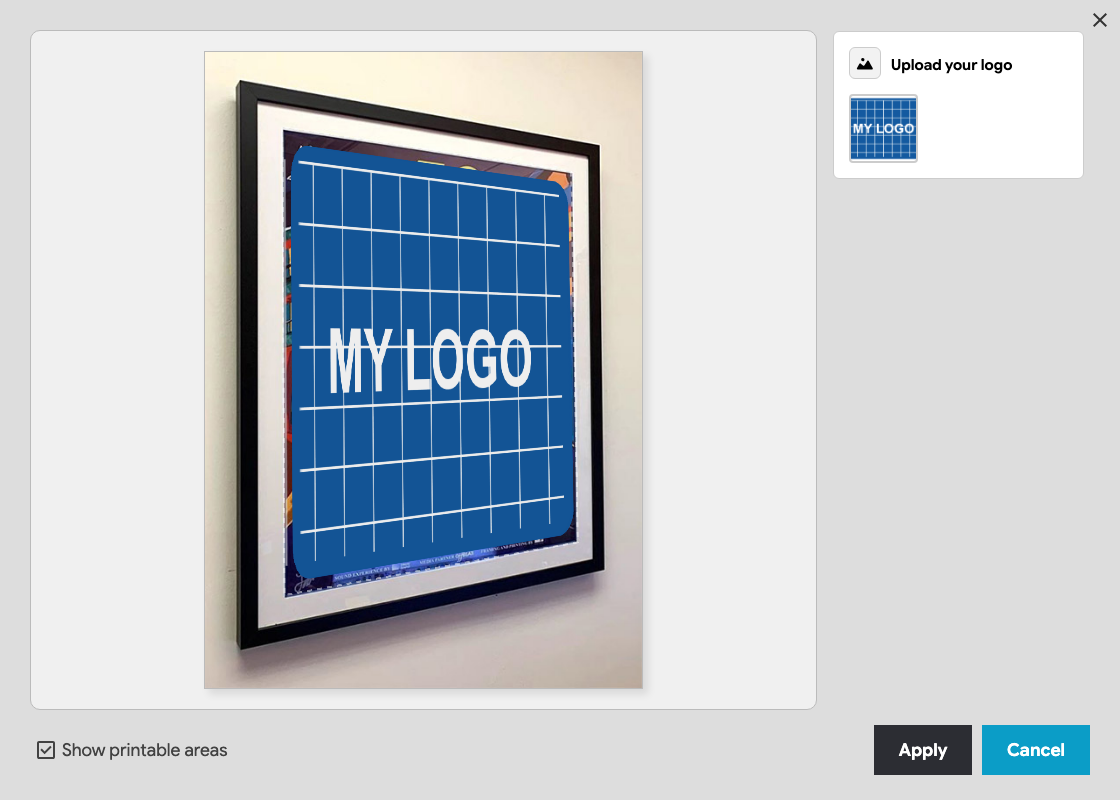
When a customer uploads an image using a File upload option linked to the area, the image is warped straight away in the preview on the product page. If they open the preview window, they see the same warped image there, and it is used for the preview image added to the cart.
Tips for good results
- Pick photos with flat surfaces. Warping follows four straight edges, so it gives the most convincing result on flat surfaces seen at an angle: posters, canvases, signs, boxes, book covers, phone cases, and similar products.
- Place the corners carefully. Put each corner exactly where the edge of the printed surface is in the photo. Small differences become visible once the image is stretched across the area.
- Match the proportions. Because the image is pinned to all four corners, an image with different proportions from the surface is stretched to fit. Tell customers which proportions to use for their artwork, for example in the option's description.
- Keep the area roughly upright. The corners are identified by where they sit around the centre of the area. If an area is tilted by about 45 degrees or more, the image may appear turned sideways.
- Use a transparent product image for frames and covers. If part of the product should appear in front of the customer's image, such as a frame, use a PNG product image with a transparent printed surface and enable Use as top layer. The product image is then shown on top, and the customer's image shows through the transparent part only.
Limitations
- Warping only applies to images uploaded by the customer with a File upload option. Text and the images of choice options (radio buttons, checkboxes, dropdowns and image buttons) are not warped.
- Warping is only available for freeform areas with exactly four corners. Rectangular and circular areas, and freeform areas with three or more than four corners, don't show the Warp image setting.
- Warping follows straight edges. Curved surfaces, such as mugs, bottles or caps, can't be followed exactly. For these products, a rectangular area placed on the front of the product usually gives a more natural result.
FAQ
The Warp image setting doesn't appear in the editor. Why?
The setting only appears when the selected area is a freeform area with exactly four corners. Check that you have selected the right area in the area selector dropdown, and that the area doesn't have an extra point. If it does, delete the area and draw it again with four clicks plus the closing click on the first point.
The customer's image appears turned sideways. What should I do?
The live preview identifies the top-left, top-right, bottom-right and bottom-left corners by their position around the centre of the area. When an area is tilted by about 45 degrees or more, a different corner can be picked as the top-left one, and the image is turned by a quarter. Choose a product photo where the printed surface is closer to upright, or rotate the photo before uploading it.
Can customers still move or resize a warped image?
Yes, unless you disable it. As the warped image is already fitted to the corners of the area, we recommend enabling Disable moving, Disable resizing and Disable rotating for warped areas.
Do I receive the warped image with the order?
The order contains the original file uploaded by the customer, which is what you need for production. The warped version is used for the preview images that you and the customer see in the cart, checkout and order.
Related articles
- Using the WooCommerce Live Preview add-on
- Setting printable areas
- Using Live Preview with variation image galleries