Add your document library to Google Sites
You can add your hosted document library to any Google Sites page using the Embed tool. This guide walks through every step.
Before you begin: Google Sites gives every embed a fixed size, so you will resize the embed box to fit your library (Step 5). Your library shows in Preview and on your published site.
Step 1: Copy your embed code
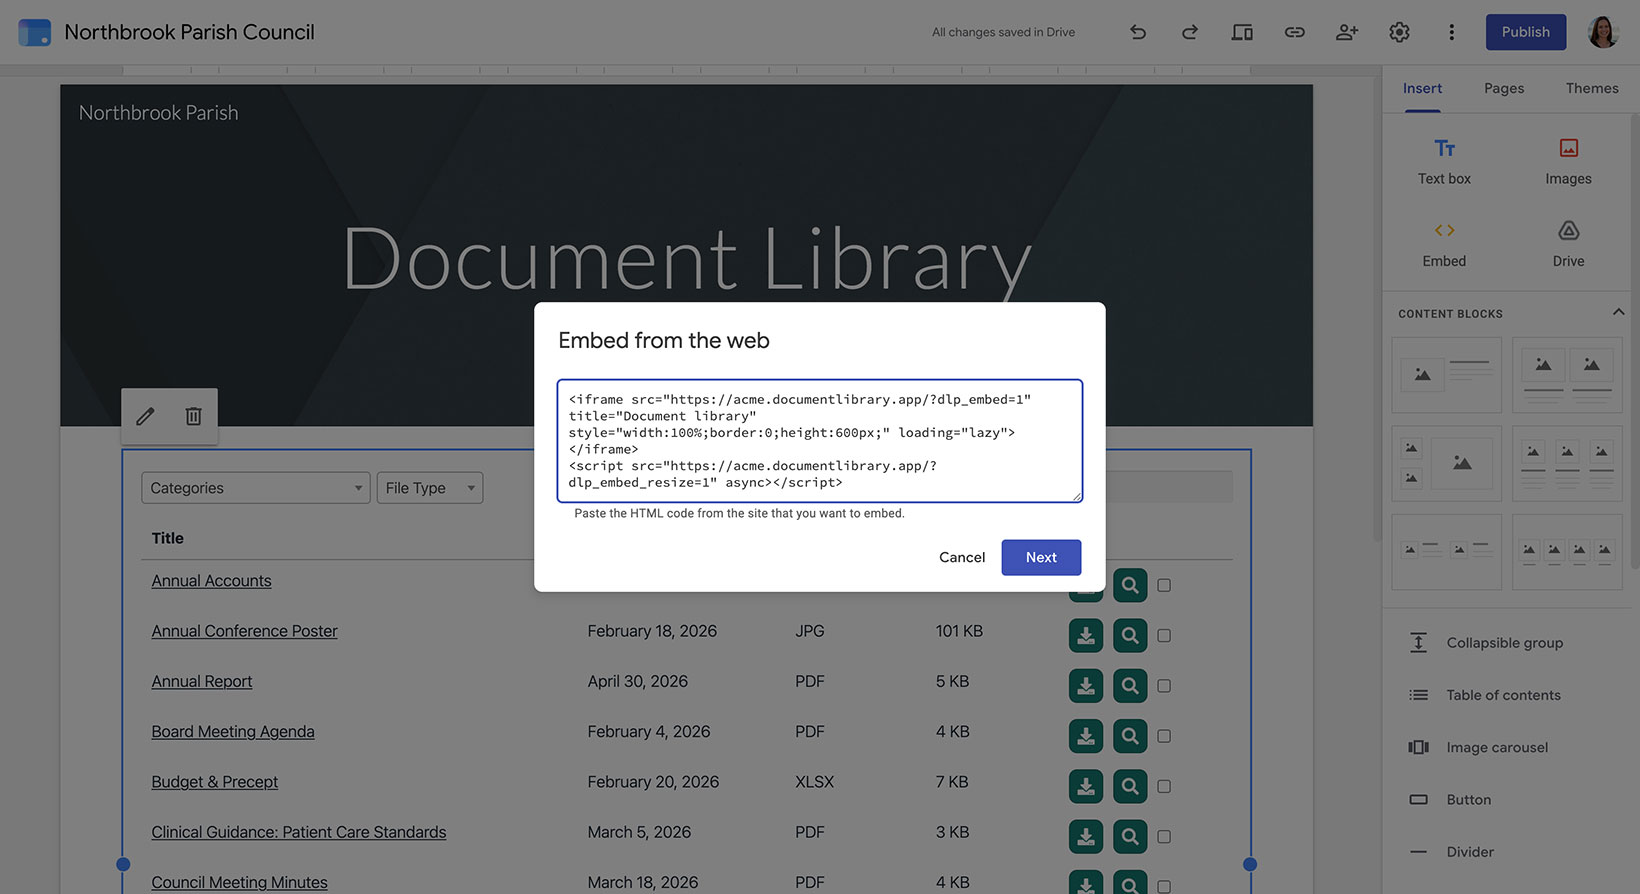
In your hosted dashboard, open the Libraries screen and click Copy code next to the library you want to display. Your embed code looks like this (always use the exact code from your own dashboard, not this example):
<iframe src="https://your-library.documentlibrary.app/?dlp_embed=1" title="Document library" style="width:100%;border:0;height:600px;" loading="lazy"></iframe>
<script src="https://your-library.documentlibrary.app/?dlp_embed_resize=1" async></script>
Step 2: Create a page for your library
In the Google Sites editor, open the Pages tab and add a new page (or use an existing one). Give it a name such as Document Library. Google Sites adds it to your navigation menu automatically.
Step 3: Open the Embed tool
On your page, open the Insert panel and click Embed. In the dialog that appears, choose the Embed code tab.
Step 4: Paste your embed code
Paste the embed code you copied in Step 1 into the box, then click Next and Insert.
Step 5: Resize the embed to fit your library
This step is important. Google Sites gives the embed a fixed size, so drag the embed's handles to make it both wider and taller than your library. This makes sure the whole table fits without being cut off, and gives it a little room to spare. Make sure you are in Desktop view so the library has space to show all of its columns.
Step 6: Publish and view your library
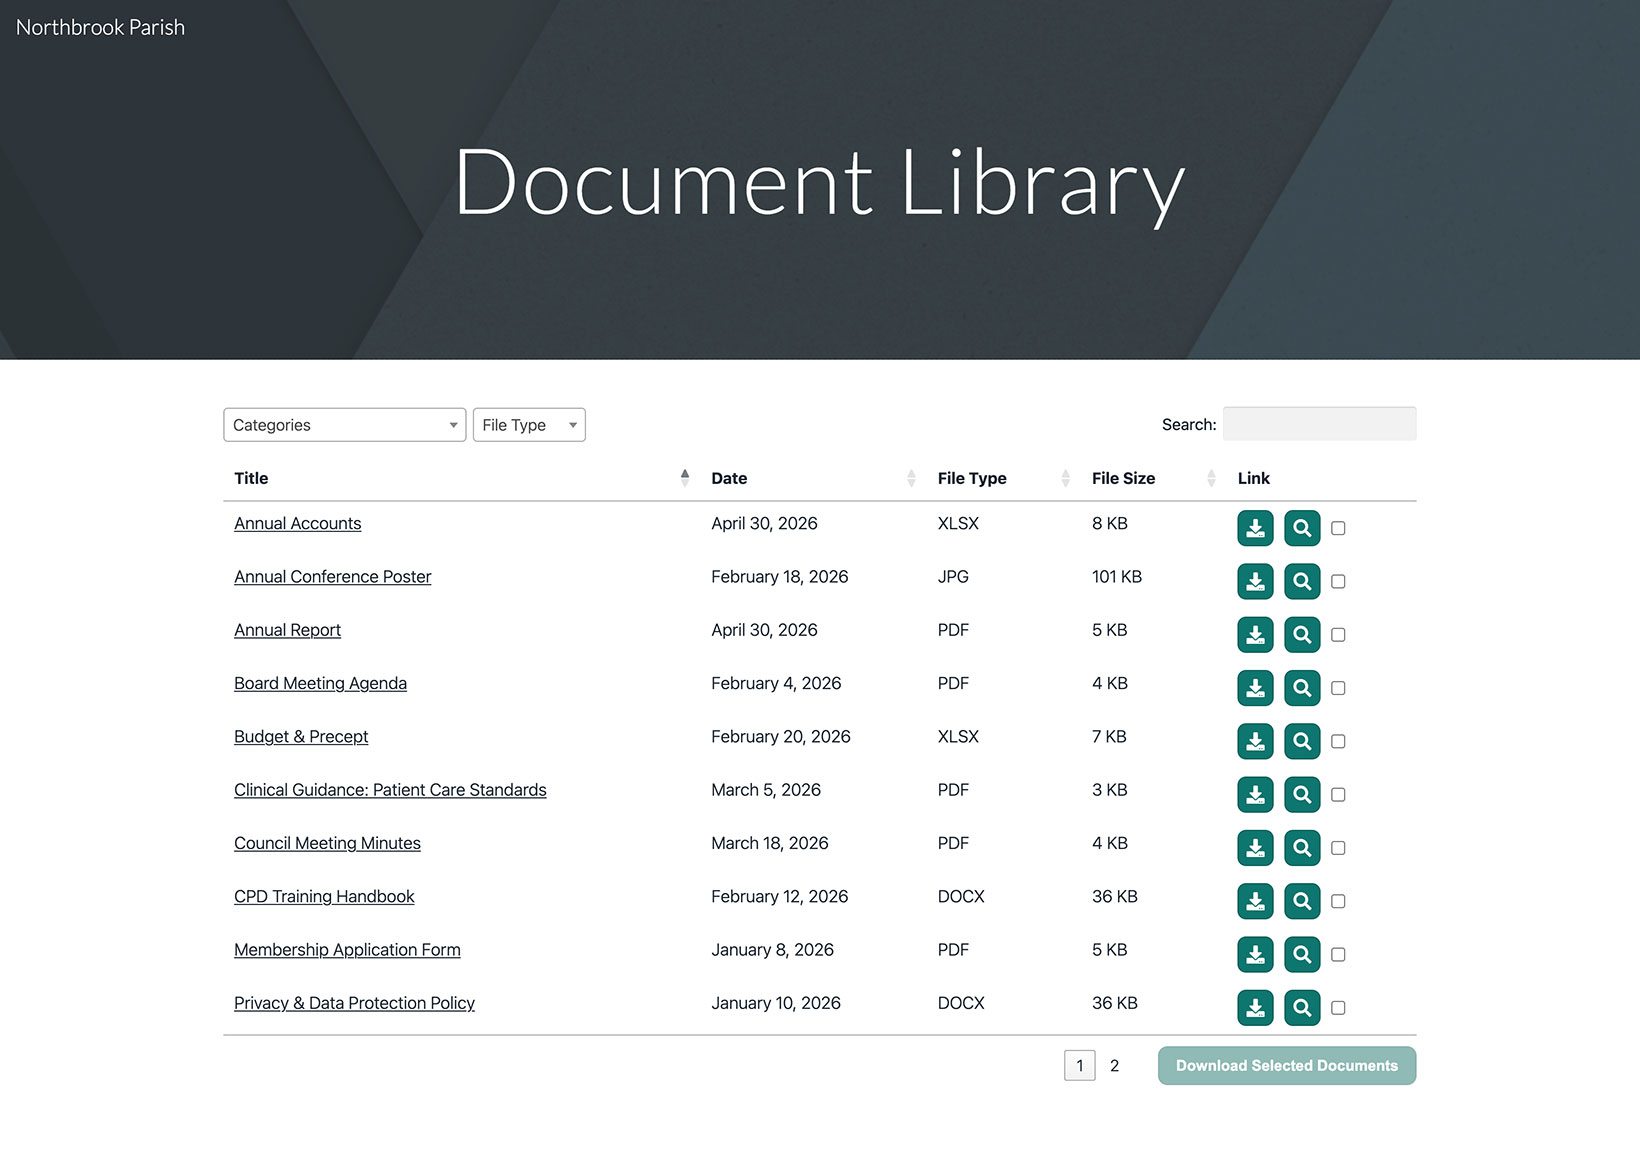
Click Publish in the top right, or use Preview to check it first. Once published, visit the page to see your document library, where visitors can search, filter by category, and download or preview each document.