Implementing a horizontal product filter in WooCommerce

Horizontal product filters provide a superior user experience (UX) compared to their vertical counterparts. In this detailed tutorial, I'll show you how to add a WooCommerce horizontal product filter to your site in ten minutes or less.
If you're looking for a quick and easy way to add a horizontal product filter to your WooCommerce store, this guide has your back. Here's what we'll cover:
- An overview of WooCommerce horizontal product filters.
- How horizontal product filters enhance the WooCommerce user experience (UX).
- A step-by-step guide to setting up horizontal product filters in WooCommerce using the powerful WooCommerce Product Filters plugin.
Ready? Let's begin with a quick run-through of how horizontal filters work and how they elevate your site's user experience.
An overview of WooCommerce horizontal product filters
In WooCommerce, horizontal product filters are displayed in a row (horizontally) at the top of your product listings. Like sidebar filters, they can include various options like price range, categories, attributes (such as size, color, brand), and more.
WooCommerce's default product filter widgets aren't robust enough and appear in the page sidebar, not horizontally. As a result, you'll need to create horizontal filters using a plugin like WooCommerce Product Filters.
How horizontal product filters improve user experience
Traditional ecommerce stores usually place product filters in a page sidebar. This takes up space and isn’t ideal for mobile users who may not see the sidebar. Horizontal product filters avoid these problems by placing filters above the list of products where everyone can see them.
James KempProduct Lead at Woo
Horizontal filters are positioned above product listings. They are placed 'above the fold', a term web designers use to refer to the area of a webpage that is visible without scrolling when the page first loads. (This phrase actually comes from newspaper design, where important stories were placed on the upper half of the front page. On a website, 'above the fold' is the part that users see immediately when they visit the site.)
Here's why this concept is important for your WooCommerce store: Because the content above the fold is usually one of the first things visitors see when they land on a webpage, it greatly impacts their first impression and can determine whether they decide to check out the rest of your site or simply bounce off. That's why you need to place important elements above the fold.
There's a lot of data to back this up. The Baymard Institute, a top Independent Web UX Research Institute found that 57% of websites' product listing and filtering interface is mediocre or worse. And these sites with mediocre product list product listing and filtering interfaces have 67-90% abandonment rates. Yikes!
Luckily, fixing these issues — such as, by adding horizontal product filters — can significantly boost a store's bottom line. For instance, sites that made slight changes to optimize their product lists and filters saw only 17-33% abandonments for people trying to find the exact same types of products.
Filter bar (horizontal filter): Yay or Nay? 🤔
👉 Horizontal navigation usually works well for #ecommerce websites that have fewer product filters, as this way users are likely to have an overview of all filters.#uiux #uiuxdesign #productfilter pic.twitter.com/CJ2kq1dEFo
— Boost Commerce (@_BoostCommerce_) June 3, 2021
Here's how placing horizontal product filters improves your site's user experience:
- It makes them easy to access: Placing filters horizontally at the top of product listings makes them immediately visible and accessible to customers. This encourages users to start searching for the products they want as soon as they land on the product page.
- They look better than vertical filters: Horizontal filters look cleaner and more organized on the front end. Unlike sidebar filters, which can take up valuable screen space, horizontal filters keep the focus on the products while still providing essential filtering options.
- They are more mobile-friendly: Horizontal filters are particularly beneficial for mobile users because fit well on smaller screens without requiring excessive scrolling.
- They improve customer satisfaction: Showing filters immediately after a customer lands on a page invites them to engage with your site right away. Plus, customers don’t have to scroll down to find filtering options, which simplifies the shopping process overall.
This isn't to say that the traditional vertical sidebar product filters are bad. However, for most stores, horizontal filters are proven to be superior, and can greatly improve product discoverability, visitor engagement, and revenue.
A run-through of the best WooCommerce horizontal product filter plugin
WooCommerce Product Filters is the best choice for adding horizontal product filters together with advanced search and sorting options to your WooCommerce store.
Kinsta recently recognized it in their round-up of the Best WooCommerce Product Filter Plugins as “a powerful and flexible tool for improving the product filtering capabilities of any WooCommerce-powered store”.
With WooCommerce Product Filters, you can filter via various kinds of product data, including attributes (like colors, sizes, product models, etc.), categories, tags, custom taxonomies, and much more.
Plus, there's a choice of two handy layouts to display horizontal product filters on the front end:
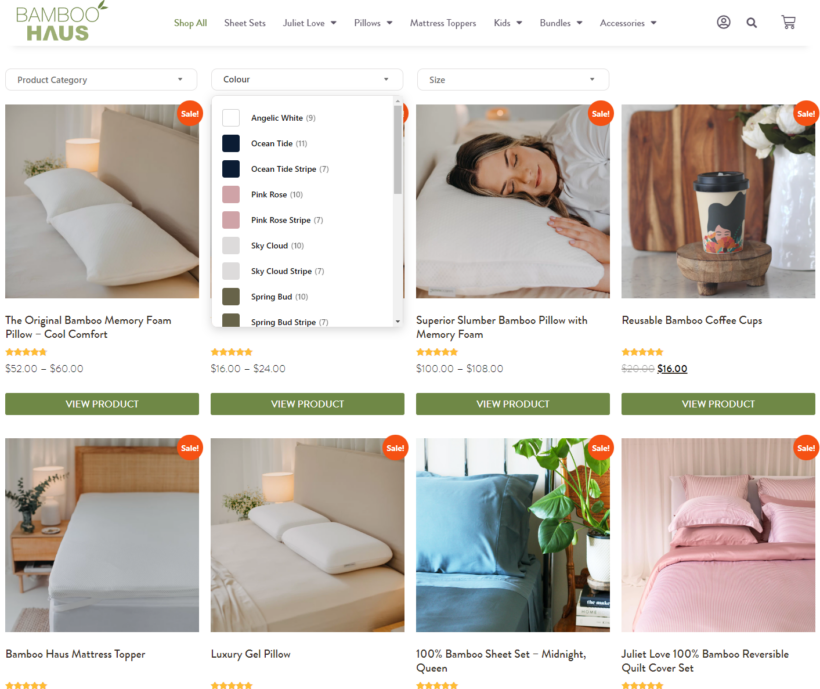
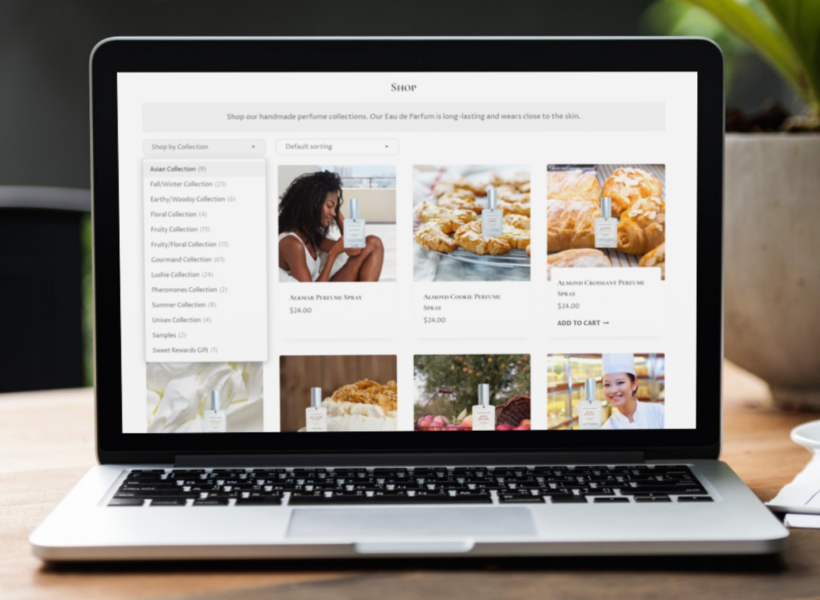
Option 1: In dropdown menus above product listings
Customers can open up each dropdown to view the filters in a range of styles, such as checkboxes, radio buttons, clickable images, color swatches, and so on. Here's a preview of how it looks:
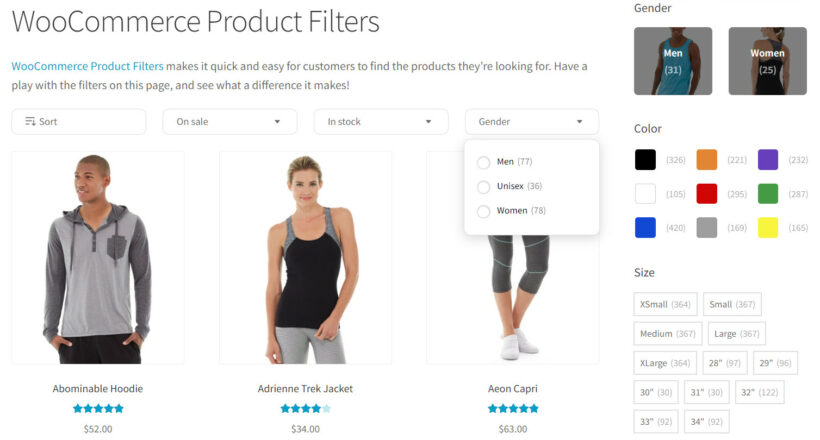
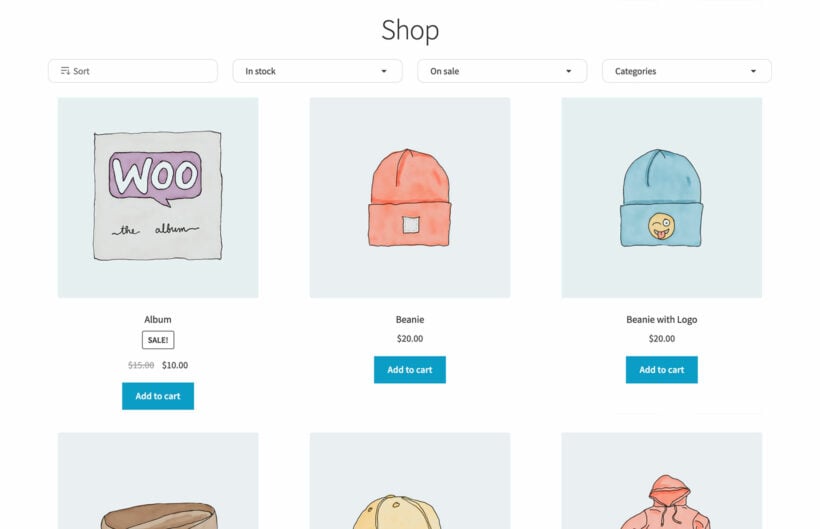
Option 2: In full view on top of the product listings
Here, you display the full filters in your chosen style above the list of products, instead of hiding them within dropdowns. For example, this store used visible horizontal filters to create a product recommendation quiz, like this:

Although this consumes more space on the screen, it draws attention to the product filters. So it can be a good option for stores where filtering is a critical part of the buyers' journey.
WooCommerce Product Filters' key features
- It lets customers filter by virtually any criteria, such as categories, attributes (like colors, sizes, release year, product materials, etc.), stock status, custom taxonomies, etc.
- There are multiple filter styling options to choose from, including checkboxes, image pickers, tag/label clouds, color swatches, etc. This ensures the filters look good and are super user-friendly.
- The filters work quickly and present the relevant products in a few seconds, even if you have hundreds or thousands of items in your product catalog.
- You can customize how the product filters are displayed based on the users' devices, whether mobile screens or tablets and desktops. This customizes the shopping experience further.
- It creates unique URLs for each filter, making it easier for search engines like Google and Bing to index them.
Step-by-step guide to setting up horizontal product filters in WooCommerce
Setting up WooCommerce Product Filters to add horizontal filters is pretty straightforward. Follow these steps.
Option 1: Add product filters as dropdown menus above product listings
1. Configure general product filter settings
- Add WooCommerce Product Filters to your website.
- You'll need to configure the general settings in the plugin's setup wizard. The first step is to enter the license key and activate it.

- Important: Choose 'default' from the list of options on the 'Shop filters' page. This is what will be shown as the horizontal product filter group on the product listings page. (WooCommerce Product Filter automatically adds the default product filter group when you install it. Don't worry, you'll get to customize it in a later step).
- The 'Filter visibility' option controls how the group of filters shows up on desktops and tablets. You can choose to always display the entire group of filters or hide them by default and let customers click a button to reveal them.
- 'On mobile' controls how the filter group shows up on mobile screens. You can choose to always display the entire group of filters or hide them by default and let customers click a button to reveal them.
- Enable the 'Toggle filters' option to allow customers to toggle filters open or closed.
- Decide the default toggle state for the filter group.
- The 'Filter mode' lets you automatically apply the filters when customers select their desired filters, or let customers click a separate button to apply them. I recommend the latter to make sure customers select all the filters they want before applying the filters.
- Recommended: Enable the product count to show the number of products for each attribute next to each filter option. This gives customers an idea of how long they'd expect to wade through the results to find the items they want.
- Finally, click 'Manage filters' at the end of the setup wizard.
2. Customize the WooCommerce horizontal product filters
The default filter group WooCommerce Product Filters adds to your site consists of several commonly used filters, including categories, product attributes, price, stock status, and sort by options. You can add, remove, and edit filter types and tailor the group however you like. You can also create new filter groups in addition to the default group added by the plugin.
- In your WordPress dashboard, navigate to Product → Filters.
- Select the 'Default' filter group and click on 'Edit'.
- Rename it however you prefer.
- Customize each filter within the group as you like. Here are some examples of what you can do. Note: Check this guide for the complete list of customization options:
- Rename the filter.
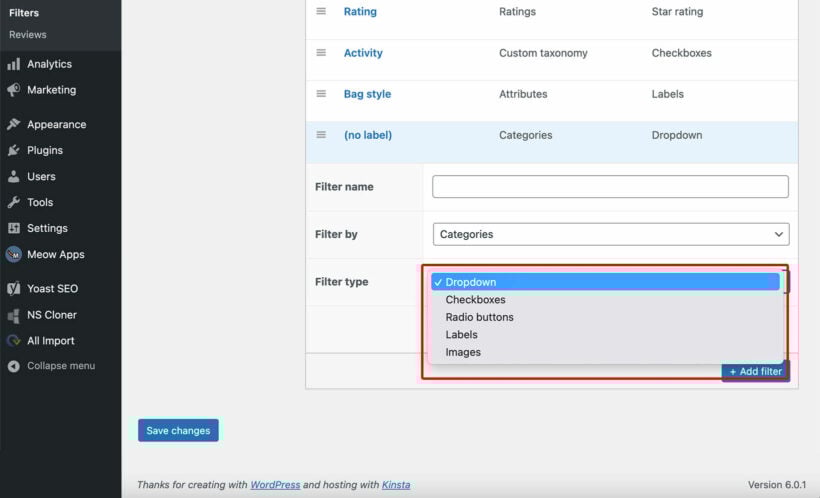
- Change the filter type.
- Change the filter criteria.
- Change the filter style - dropdowns, radio buttons, checkboxes, range sliders, labels, or images.
- Navigate to Product → Filters → Settings.
- Locate the 'Filter text' and 'Design' sections. Here, you can customize the text shown on the ‘Show filters’ button, Slide-out panel heading, ‘Apply filters’ button, and ‘Clear filters’ link. You can also customize the design of the filter, namely the primary and secondary colors and filter title text.
- Hit 'Save changes' once done.
3. View the horizontal filters in your WooCommerce store
That's it. You selected the filter group in the 'Shop filters' page of the plugin setup wizard, so they'll be immediately visible on the front end. Feel free to test them out as customers would, and make sure they work to your liking.
Option 2: Add product filters in full view above product listings
Follow these steps if you wish to make the filters always visible instead of hidden within dropdowns, like this:
You'd need to follow the instructions in option 1, but do these two things differently:
- Don't select a filter group to appear on all your shop pages as described in the '1. Configure the general product filter settings' section above. Select 'None' to leave this blank. Follow the remaining instructions to add and customize the product filters.
- In your WordPress dashboard, go to Pages → All Pages → Shop and add the following shortcode
[wpf-filters id="1" layout="vertical"]to the page content. This will add the horizontal product filters above the list of products, which WooCommerce adds automatically.
Note: This method also works if you designed your shop pages using a page builder like Elementor.
That's it. Feel free to test the product filters out as customers would, and make sure they work to your liking.
Optimizing horizontal product filters for mobile users
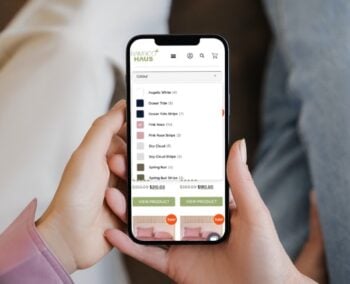
Mobile commerce keeps exploding in popularity. 80% of people browse ecommerce sites from mobile devices. Over 70% of orders are made from a mobile phone. That makes it crucial to optimize product filters for all screen sizes.
WooCommerce Product Filters lets you choose to always show filters on mobile screens or enable shoppers to press a button to reveal filters in a slide-out panel.
This makes sure that the filters don't consume too much space on the page, and shoppers can easily navigate your site when shopping on mobile devices.
In this #WinningTest, we added the customer’s selected filters to the top of the product menu, which brought in a 905K revenue increase for our client — all because it was easier for customers to search for the products they really need.
Here's why 👇 pic.twitter.com/2HoN0hlemK
— Jon MacDonald (@jonmacdonald) September 22, 2023
Upgrade to a WooCommerce horizontal product filter today
Horizontal product filters are much easier for visitors to find compared to sidebar filters. This makes them more effective at helping shoppers quickly and easily find the products they are looking for in a WooCommerce store.
WooCommerce Product Filters is the best plugin to add horizontal filters and search and sort options to WooCommerce stores. It lets customers filter by various criteria — categories, tags, attributes (such as sizes, colors, release year, product materials, etc.), price, custom taxonomies, and more.
There are various filter styles to pick from, such as radio buttons, checkboxes, color swatches, tag/label clouds, etc. Plus, it uses AJAX to speed up the filtering process and show product results in seconds, even if you have a huge number of products.
Get started with WooCommerce Product Filters and add a horizontal product filter to your store in minutes!