How to customize add to cart button in WooCommerce

The add to cart button in WooCommerce is one of the most important elements of your online store. Customers click it to add products to their cart. Without the WooCommerce add to cart button, you would get no sales!
Here’s the deal: it’s important to customize the add to cart button in WooCommerce to best fit the products you sell. For example:
- Some store owners might want to change the text in the button or add an icon.
- Others might want to replace add to cart buttons with checkboxes.
- You might want to display add to cart buttons in other parts of your store.
- Perhaps you want to add extra options alongside the add to cart button on the shop page, such as variation dropdowns and quantity boxes.
These are just some of the available options. There's a lot more you can play around with. It all depends on the type of products you sell and the customer journeys you want to create.
By customizing the add to cart button in WooCommerce, you can deliver better user experiences and optimize user flows on your online store. The result? A spike in conversion rates!
With this in mind, keep reading or watch our video to learn how you can customize the WooCommerce add to cart button in a variety of different ways.
How to add an add to cart button in WooCommerce
Don't have your add to cart button set up at all yet? Not to worry, let us begin by explaining how to add add to cart button in WooCommerce.
- Install WooCommerce: Firstly, make sure you have installed and activated the WooCommerce plugin. This can be done from the "Plugins" section in the WordPress dashboard.
- Create a product: To add an add to cart button, you need to create a product. Go to "Products" > "Add New" in the WordPress dashboard. Enter the name, description, price, and any other relevant information for your product.
- Set up product data: In the product data section, select "Simple product" from the dropdown menu. Here, you can set up product data such as SKU, stock, and shipping information.
- Add a price: The add to cart button will only appear for products that have a price added.
- Save the product: Once you have set up the product data, click "Publish" to make the product live on your website. As soon as your product is purchasable, WooCommerce will display the add to cart button.
Replace the WooCommerce add to cart button with a checkbox
If you sell dozens of products in WooCommerce, you might want to make it easier for customers to buy multiple products at once. This is especially true for wholesale stores and stores that sell grocery items.

One way to replace the WooCommerce add to cart button with a checkbox is by using our WooCommerce Product Table plugin.
WooCommerce Product Table lets you list products in a flexible table with a ‘Buy’ column. There are options that let you have a separate add to cart button for each product, replace the add to cart buttons with a multiple-select checkbox, or both! You can add product tables to your main WooCommerce shop and category pages, or create separate pages listing products with WooCommerce add to cart checkboxes.
The checkbox adds an ‘Add selected to cart’ button above and/or below the table. This way, customers can quickly tick all the products they want to purchase and add them to their shopping cart at once.
Add variation dropdowns and quantity fields to the add to cart button
Normally, WooCommerce displays add to cart buttons on the main shop page and category pages. However, it doesn’t display variation dropdowns or quantity pickers. This causes several problems:
- For simple products, clicking the add to cart button will only add a quantity of 1 to the customer’s shopping cart. This can hurt your average order value by adding friction and discouraging customers from buying larger quantities. Think of it this way: if customers want to purchase a dozen units of a product from you, they have to click the add to cart button 12 times!
- On the flip side, for variable products, the add to cart button changes to a ‘Select options’ button. This button links to the single product page for the variable product. In other words, customers have to click through to a separate page to choose their variations for each product. This slows down the buying process and can increase your bounce rates.
The solution is to use the WooCommerce Product Table plugin to replace the standard product grid on the main shop page and category pages with a table. The table has variation dropdowns, quantity pickers, and add to cart buttons (and/or checkboxes):

Show WooCommerce add to cart buttons in a quick view lightbox
You can also make your WooCommerce add to cart buttons more accessible by showing them in a quick view lightbox. As with the Product Table plugin that we discussed in the previous section, quick view lets customers choose quantities and options from the main Shop page. You can easily add it by installing our WooCommerce Quick View Pro plugin.

The plugin adds quick view buttons wherever you list products in your store. When a customer clicks on the quick view button, it displays product information, quantity pickers, variation dropdowns, and an add to cart button in a lightbox.

This makes it much faster for customers to add products to the cart than visiting the single WooCommerce product page. And, when a customer closes the lightbox, they remain on the page they were on before they clicked the button. So, it’s easier for them to add more products to the cart instead of checking out straight away, increasing your chances of making more sales.
Customize the WooCommerce add to cart button text
Our free WooCommerce Custom Add to Cart Button plugin lets you:
- Change the add to cart button wording to anything you'd like.
- Add an icon to the left of the text in the button, or instead of the text.
- Change the WooCommerce add to cart button color and font color.

For example, you might use a more persuasive call to action like ‘Buy Now’, easily creating a buy now button without writing custom code. Or, if you sell registrations for online courses, you could change it to something that makes more sense considering the context such as ‘Book Course’.
Depending on your target customers, you might want to re-word the add to cart button to something else. For example, stores in the UK often reword the add to cart button to ‘Add to Basket’.

Here’s what you need to do:
- Install the WooCommerce Custom Add to Cart Button plugin on your WordPress site.
- Go to Appearance → Customizer → WooCommerce → Add to Cart from the admin panel.
- Enter the custom text in the Add to cart text field. Also change the button colors as required.
- Click the Publish button to continue.
Once you change the add to cart button wording or add an icon, the changes will reflect across all of the add to cart buttons in your online store. This includes any add to cart buttons you are listing using shortcodes or other plugins such as WooCommerce Product Table or WooCommerce Quick View Pro.
The importance of this microcopy might seem insignificant, but it can truly transform the user experience on your website by making your brand voice apparent, standing out from the crowd and guiding users to take the desired action. So, don't underestimate the power of effective UX microcopy!
Replace the WooCommerce add to cart button text with an icon
As mentioned above, you can use the free WooCommerce Custom Add to Cart Button plugin to remove the add to cart text from the button and replace it with a cart icon.
This is particularly useful for quick, one-page order forms where you have an add to cart button for every product and want to save space. So, instead of a button that says ‘Add to Cart’ you can display a cart icon.
Here’s what you need to do:
- Install the WooCommerce Custom Add to Cart Button plugin on your WordPress site.
- Go to Appearance → Customizer → WooCommerce → Add to Cart from the admin panel.
- Tick the Show add to cart icon option.
- Tick the Hide the add to cart text option.
- Click the Publish button to continue.
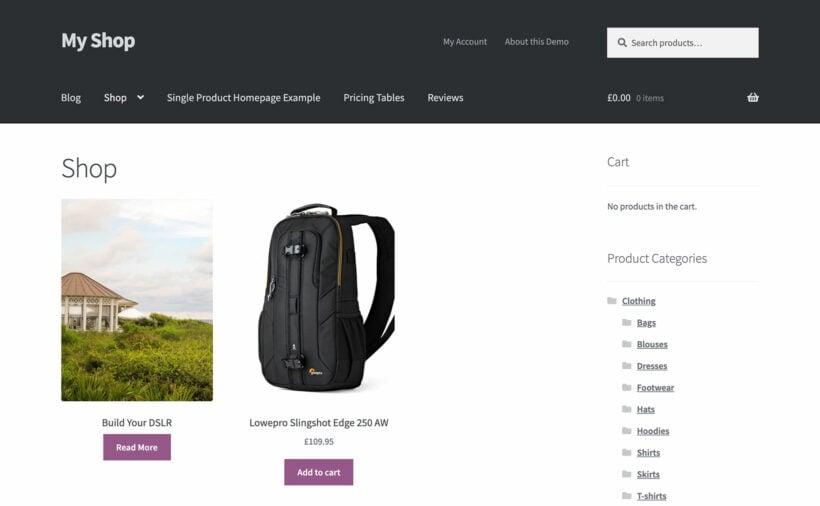
Display add to cart buttons anywhere on your website
With WooCommerce, you can insert add to cart buttons anywhere on your website. This way, you don’t have to rely on the standard WooCommerce pages alone. For example, you can insert add to cart buttons into blog posts or other pages. How? By using WooCommerce shortcodes to embed the button wherever you want:
- Edit the page or post where you want to add the button.
- If you're using the WordPress block editor then click on the "Add Block" button and search for "Shortcode". If you're using another page builder then insert a Shortcode block.
- Select the "Shortcode" block and enter the shortcode for the add to cart button. The shortcode for the add to cart button in WooCommerce is
[add_to_cart id=PRODUCT_ID]. ReplacePRODUCT_IDwith the ID of the product you want to add to the cart. - Preview your page or post to make sure the button is displayed correctly.
- Once you're satisfied with your changes, click "Publish" to make the changes live on the website.
Change the style and color of the add to cart button in WooCommerce
When creating your online store, you want it to look cohesive and recognizable. That means that all elements need to fit into your color scheme and look good together. Of course, that includes your add to cart button!
By default, your add to cart button will be shown as a plain link. But if you want it to stand out and fit into the design of your website, then customization is in order.
But how can you change the style of the add to cart button?
By using CSS! In simple terms, you need to add a custom CSS code in your child theme or the WooCommerce Customizer. This is what that looks like in more detailed terms:
- Start by locating the CSS class of your add to cart button. Simply open your website and inspect the button with the browser's development tools. You should be able to right-click on the button and select ''Inspect''/''Inspect Element''. By doing so, you will find the button's HTML code. Look for the class attribute (for example: .single_add_to_cart_button).
- Once you have the class name, it's time to add your custom CSS code. Go to the WordPress Dashboard → Appearance → Customize. Scroll to the bottom of the page until you see the Additional CSS section.
- Open the Custom CSS box and paste your custom CSS code there.
- After you have inserted your custom code, click ''Publish'' and see the changes on your website.
Here's an example of a CSS code that changes the background color of the add to cart button:
.single_add_to_cart_button {
background-color: #2ecc71; /* Replace with your desired color */
color: #fff; /* Replace with your desired font color */
border: none; /* Remove border */
border-radius: 4px; /* Add border radius */
padding: 12px 24px; /* Adjust padding */
}
Note that when using custom CSS code to style your add to cart button, you may need to use additional CSS code to ensure your design is responsive and works well across different devices and screen sizes.
That's all there is to it! It's a quick and effective way to change the style and color of the add to cart button in WooCommerce, which will make a big difference. In case you're apprehensive about making changes to the code due to a lack of experience and knowledge in that area, you can always consult someone who knows their way around CSS.
Another solution you might want to check out is using a plugin that allows complete customization of the add to cart button, including the color.
Make the add to cart button open an instant cart & checkout
Creating a website is all about catering to your customers' needs and making their journey to the checkout page as smooth as possible. One way of doing so is by customizing your add to cart button so that it opens a direct checkout.
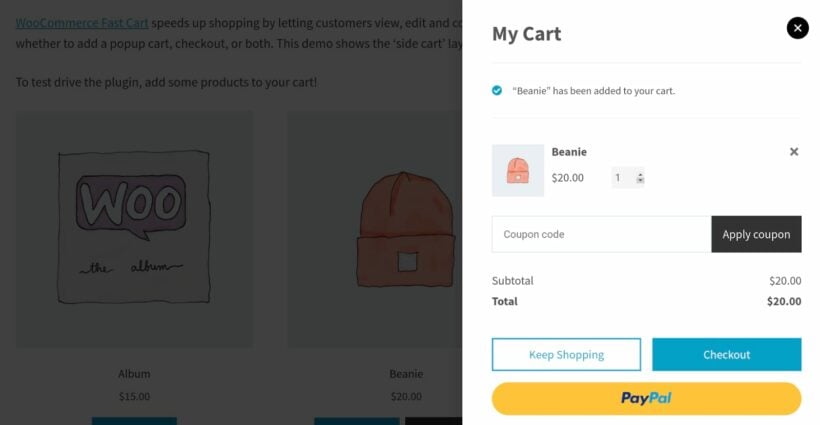
By introducing the fast cart feature to your WooCommerce store, you're streamlining the WooCommerce checkout flow. Once they click the add to cart button, your customers can complete the purchase in the popup checkout window without having to go through the multiple steps of the classic order process. Sounds good, right?
You can customize your add to cart button and add the fast cart feature in a few easy steps! By using the WooCommerce Fast Cart Plugin, you'll be on your way to a more customer-friendly store.
Instant cart functionality improves the user experience on ecommerce stores, as it makes it easier and faster for customers to add items to their cart and complete their purchase. It can also reduce cart abandonment rates, as customers are less likely to abandon their cart if they can quickly add items without having to navigate to a different page.
Benefits of a WooCommerce custom add to cart button
You may be wondering if all these code changes and plugins are worthwhile. I'm here to let you know that they are. These are just some of the benefits you can reap by customizing the add to cart button in your ecommerce store.
- Branding: A custom add to cart button in WooCommerce reinforces your brand identity and makes your store stand out.
- User experience: Making the add to cart button more visible and attractive can improve the user experience and encourage customers to add products to their cart. You can use language and design elements that speak to your target audience and make the order process more intuitive.
- Call to action: The add to cart button is a key CTA in any ecommerce store. By customizing it, you can make it more prominent and increase the likelihood of conversions.
- Differentiation: Make your mark in the world and differentiate your store from competitors. By creating a unique design that reflects your brand and values, you can create a more memorable and engaging shopping experience for customers.
Customize add to cart buttons today
It's essential to customize the WooCommerce add to cart buttons to fit the type of products you sell. There are lots of easy ways to do this:
- Replace the add to cart button with a checkbox. (Requires WooCommerce Product Table.)
- Add quantity and variation pickers next to all your add to cart buttons. (Requires WooCommerce Product Table.)
- Show add to cart buttons and other purchase options in a lightbox. (Requires WooCommerce Quick View Pro.)
- Customize the WooCommerce add to cart button text or add an icon. (Requires WooCommerce Custom Add to Cart Button.)
- Display add to cart buttons anywhere on your website. (Requires shortcodes.)
And for the best possible results, you can use all these options together!
By upgrading the standard call to action with something that’s more suited towards the products you sell, you can make it easier for customers to buy from your store. The end result: Happier customers and more sales for you!
Now you know how to customize the add to cart buttons in WooCommerce in a variety of different ways. Hopefully, now you’re in a good position now to take the next steps. Are there any other ways you'd like to customize the buy buttons? Please leave a comment below.