Complete guide: How to make your WordPress blog private
Do you want to collaborate on private projects within a workplace team? Perhaps you want to restrict content to paid subscribers, or give specific access to site subscribers/bloggers with password protection? Or you might want to share photos and updates among family and friends. You may even need to distribute online training to bloggers, for example.
You can do all this and more with a WordPress private blog plugin.
With the right tools, it's surprisingly simple to create a WordPress private blog. In this guide, I'll show you how to protect your blog content in just a few minutes by changing its visibility.
We'll first start with the "why", and show you some example use cases of private blogs, and then get into the "how" of doing this on your own blog – including advanced features such as a convenient user login page. By the end of this blog, you'll be totally prepared to create private posts yourself.
You'll learn to create password protected and private blog posts using the popular plugin, Password Protected Categories.
You can get a head start by getting the plugin right away, or continue reading for the "why" and then the "how". Let's make a start.
Why create a WordPress private blog?
A WordPress private blog allows you to protect some or all of your posts. You can also choose how users access this protected content: either using a password, or by logging into their WordPress user account..
It's a good idea to take some time to consider whether, for your particular blog, you want to protect some of your private pages or all of them, and how you want users to access your content.
Popular uses of a private WordPress blog plugin
With that in mind, let's look at some of the most popular uses of a WordPress private blog plugin:
- Subscription blogs If you offer paid or tiered content, a WordPress private blog plugin is ideal. You might even choose to keep some of your posts public while protecting others in order to entice new subscribers.
- Community building A completely hidden blog is a great place to share news and updates exclusively within your community.
- Membership levels Do you run an organization or club with different membership levels? With a private blog, you can choose which posts are visible to which members.
- Client areas You can share content with specific types of clients, or even create special areas within your private blog for individual clients.
- Workplace communicationCommunicate important, private news and updates to your staff members. Or create a space to collaborate on private projects within a workplace team.
- Personal blog Create a private blog that's hidden from search engines and share it with only the people you choose.
- Training Offer online training either within a workplace or to subscribers – you can even include videos. If it's for paid subscribers, you could also offer teaser training videos to encourage signups.
Whichever usage you want, the process is identical. You might even choose a use case we haven't thought of! That's absolutely fine: the process is exactly the same, whatever you want to use your private blog for.
In the next section, I'll show you how to do this in practice: protect some of your blog posts, while keeping others public. Alternatively, if you're interested in protecting your entire WordPress site, you can skip ahead. For both, we'll show you how to setup convenient login pages for your visitors, clients, and/or customers to smoothly access your content.
How to protect some (but not all) of your blog posts
If you want to keep some of your blog posts public while keeping others visible, you can change the visibility of selected blog categories. This lets you create a private site area within your blog, which only specific users will be able to view. For example, you might want to keep paid content hidden while offering teaser blog posts, or have some areas of your blog only viewable by certain clients.
Changing blog category visibility isn't possible using the core WordPress software, so you'll need the plugin Password Protected Categories.
Password Protected Categories adds a visibility option to blog categories. This makes it easy to change the visibility of categories between Public, User role protected, and restricted to individual user accounts , just as you can with individual posts. It's better than protecting individual posts because it actually hides them from your main blog page. Users can enter a single password to unlock the whole private WordPress blog instead of having to enter a password for each post.
Get Password Protected Categories
Using this plugin you can:
- Either password protect blog categories so only people with the correct password will be able to view posts in protected categories. You can create as many passwords as you need without having to add lots of users who could potentially make unwanted changes to your website.
- Or restrict blog categories to specific logged in users or roles so that only certain people can see them.
Firstly, buy the Password Protected Categories plugin. To upload the plugin file, go to Plugins → Add New and click Upload Plugin. Choose the plugin file from your computer and click Open. Click Install Now then Activate Plugin.
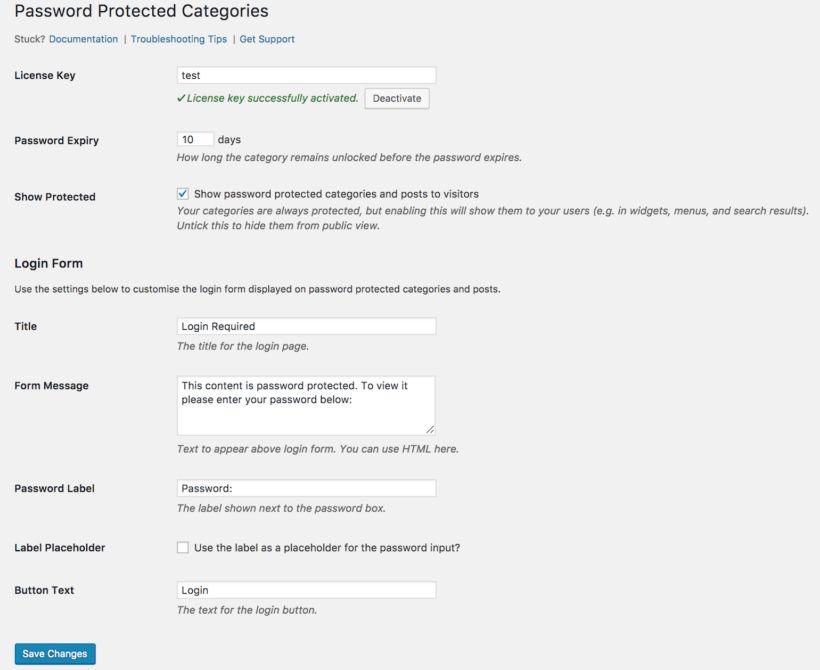
Once activated, head to Settings → Protected Categories and enter your license key:
Let readers register for private blog access
You can let your readers self-register for private blog access by using the Profile Builder or Theme My Login plugin. Both plugins create an attractive front end registration form (plus login page). Install the plugin, and activate.
The plugin automatically generates a set of login pages, which you can find under Pages in the WordPress dashboard. You're now able to send readers to the Register page, where they can self-register for access to your private blog. Use the TML icon on the bottom left of the WordPress Dashboard, and then click Enable user moderation to ensure you have full control over who can register for your site.
You can use this capability in conjunction with with Password Protected Categories' user role protection. The registration form will give users access to the role that has access to the protected categories. This gives you a full suite of private blog capabilities.
Read on for more details on how to edit blog category visibility. You have two options: set blog categories to be password protected (below), or restrict blog categories based on user or role (click to skip to this).
Option 1: Set blog categories to password protected
A password protected blog is a great choice if you have more than a couple of people who'll be reading your private blog posts. It's also good if you don't want each person to have an individual user account on your website, as all they need is the password.
To password protect blog categories, you can create new blog categories and set their visibility to Password protected or you can edit the visibility of existing blog categories.
To create a new blog category, in your WordPress Dashboard, go to Posts → Categories. Write the category name and slug. Scroll down to the Visibility section, select Password Protected. Type your password and click Add New Category:
Password protect the blog category
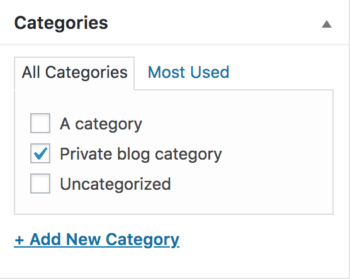
To categorize a blog post as password protected, go to the Edit Post screen and check the box next to the password protected category:
To edit the visibility of existing categories go to Posts → Categories and hover over the category you want to change. Click Edit, scroll down to the Visibility section and select Password Protected. Type your password and click Update.
When enabled, a single password protects and unlocks an entire category. You can protect as many categories as you need and create as many passwords as you like for each. For example, you might like to create a password for each of your users. That way, if you no longer want a user to access the content, you can just delete the password to revoke access. To view password protected content, users need to enter a password to view all content in that particular category:
To alter the login form message, or how long a category remains unlocked before a password needs to be reentered, head to Settings → Protected Categories.
Option 2: Create user or role restricted blog categories
This option is perfect if you have blog content that you only want certain users to access when logged into the WordPress Admin.
To user or role restrict a blog category, you can either create new blog categories or edit the visibility of existing blog categories.
To create a new blog category: in your WordPress Dashboard, go to Posts → Categories. Write the new category name and slug. Scroll down to the Visibility section, select Protected, select the users and/or roles who require access, and click Add New Category.
To edit the visibility of existing categories, go to Posts → Categories and hover over the category you want to change. Again, change the blog category visibility settings as required.
Only those users with the correct user account or role access will be able to view the private blog categories, and only when they're logged in.
How to make an entire WordPress blog private
Rather than making select blog categories private, you might like to create a standalone WordPress private blog that's only visible to specific users. This is useful for workplace communication, or personal blogs for example. Again, it's easy to do using the plugin, Password Protected Categories. The first step is creating private parent and sub-categories for your blog. The second step is to create a login page so users can login to gain access to your blog.
Step 1. Create private blog parent and sub categories
To recap how to install the plugin: buy the Password Protected Categories plugin and upload the plugin file, by going to Plugins → Add New and click Upload Plugin. Choose the plugin file from your computer and click Open. Click Install Now then Activate Plugin
Once activated, head to Settings → Protected Categories and enter your license key.
There are two ways you could create an entirely private blog. One way would be to set the visibility of all your blog categories to either Private or Password protected. A much slicker way is to create a parent blog category with sub categories. In this case, users will be able to unlock the entire WordPress private blog, including all the sub categories, with one password. This means you have an entirely private blog, which is as easy to navigate as a public blog.
First, you'll need to create the parent blog category. In your WordPress Dashboard, go to Posts → Categories. Write the category name and slug. Scroll down to the Visibility section, select Password Protected. Type your password and click Add New Category:
Next, you'll create a sub category. Write the category name and slug. Then under the section Parent, click the dropdown and select the parent category you just created. Scroll down and click Add New Category:
Note, you don't need to change the visibility of the sub category as, thanks to the plugin, it will already be password protected and only visible to users who have entered the parent category password.
You can create as many additional sub categories as you like - think of these like the categories of a public blog.
Step 2. Set up blog login
Head to Settings → Protected Categories. You'll see the option Show Protected. This doesn't affect the visibility of post content on your site. However it does affect whether your post categories and any blog titles within those categories are public.
Whether you check this box or not, dictates how users can login to your blog. If you keep blog categories and titles public, users are prompted to login when they try to view any protected content. If you uncheck this box, you'll need to provide a centralized login page so users can login and be directed to the your blog. Read on to find out how these two options work:
Option 1: Keep blog categories and titles public
If you want people to be prompted to login when they try to access a post or category in your WordPress private blog, head to Settings → Protected Categories and ensure the Show Protected box is checked. Remember, they won't be able to view the content of the posts unless logged in – only the information such as post titles and categories.
When you select this option, your protected content will, however, be visible to RSS readers. If you don't want entire posts to show in an RSS feed, head to Settings → Reading. Next to the option For each article in a feed, show, select Summary. This ensures only a summary or excerpt appears in RSS feeds.
Further reading: Discover 5 ways to make parts of WordPress private, or create a 100% private WordPress site.
Option 2 (recommended): Create a centralized category login page
To make it even easier for users to login and view your blog, create a centralized login page for your WordPress private blog.
First, uncheck the box next to Show Protected. Your blog is now completely inaccessible on your website.
Next, you need to create a login page. Head to Pages → Add New. Call the page something like 'Login To My Blog' and in the content area add the shortcode [category_login]
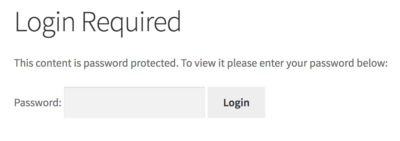
If you preview the page, you'll see your centralized category login page. Here users can login to view your blog.
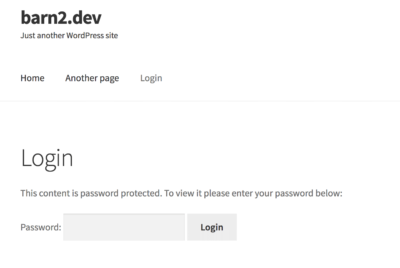
To change the message that appears above the login box, head to Settings → Protected Categories. Here you can edit the Form message. Alternatively, you can override the message by adding message="a different message" to the shortcode.
For example:
[category_login message="Log in to read the blog!"]
You may wish to also add a link to the registration page we created earlier.
Hit Publish. You'll most likely want to add this login page to your menu so it's easy for users to access. To do this, head to Appearance → Menus, select the page and click Add to Menu then Save Menu.
Users get automatically redirected to the correct category page when they enter the correct password on the login page.
You're now set up with a private blog, complete with convenient login page for your users.
Easily make a WordPress private blog
Whether you're building a subscription blog, community or membership site, need to communicate with your team or clients, or have any of the other WordPress private blog plugin use cases we outlined earlier, this WordPress tutorial has shown you all you need to know to create a private space for your content.
We've looked at why you might want to create a private blog, and then how to do it. We've shown you how to use Password Protected Categories to make any part of your blog private, to achieve any of the use cases outlined above. You can get the plugin in order to put this into practice.
Interested in making other parts of your blog password protected? Read our Password Protect WordPress guide to learn how to make the rest of your site, or even your WooCommerce store, private.
And, of course, let us know in the comments below if you have any questions about making your particular blog a private one. Thanks for reading!
3 Comments
Sounds like a very useful and quick way to make part or all of your WordPress site private. Certainly looks a lot more simple than some other solutions.
Hi, Shane. Thanks for your comment and interest in what our Password Protected Categories plugin allows you to do on your site. Should you have any questions, please let me know. You can also enquire in more detail via our dedicated Support Center. Cheers!
Thanks for all the info, especially for the password protection of directories