Top tips on using WooCommerce Product Filtering for more sales
There are lots of ways to add WooCommerce product filtering to your store. You can do it very effectively, or very badly! Discover our top tips on the best way to provide filtering options for your customers.
While designing our WooCommerce Product Filters plugin, we did a lot of research and analysis into what makes effective product filtering. Today I'm going to share my top tips on how to use WooCommerce product filtering in a way that will delight your customers and maximize your sales.
We'll cover various areas of filtering products, including subtle but important details that people normally overlook.
Tip 1: Choose WooCommerce product filtering styles that suit your product data
If you look at the basic filter widgets that come with WooCommerce yourself, you'll see that they're very limited. Compare them with the world's top e-commerce stores (many of which don't use WordPress) and you'll see a huge difference. The best stores have a much more creative approach to WooCommerce product filtering, with a huge range of filter styles.
But don't go crazy! Think carefully about the types of product data that your customers will be filtering by. Choose a filter style that suits each type of data and will create a logical experience for customers.
Filtering types and style options
The WooCommerce Product Filters plugin comes with a big choice of filter styles. This includes checkboxes, dropdown lists, radio buttons, text labels, images (with or without text), and color filters. Which one you choose for each type of product data can make a big difference to your customers' experience.
Here's a summary of the different filtering styles that you can choose from:
Dropdown filters
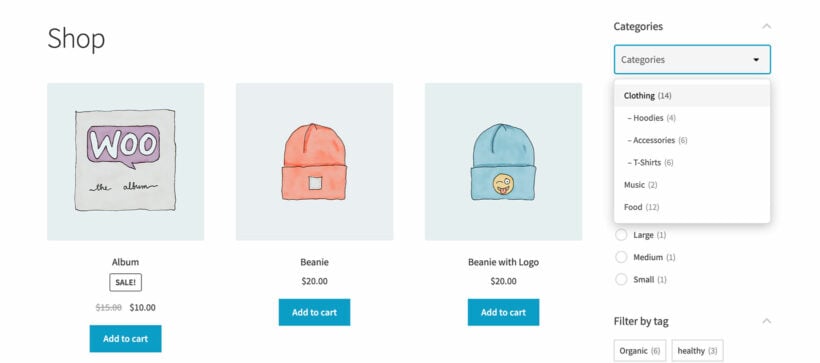
- What is a dropdown filter?: A dropdown list, which customers click to open the list of options.
- Hierarchical?: Yes - sub-categories are indented under their parent categories.
- Selection method: Single choice.
- Recommended for: Product filtering where there is lots of options. That's because a dropdown doesn't take up much space on the page. Only use dropdowns where the customer only needs to choose one option at a time.
Checkbox filters

- What is a checkbox filter?: A list of tick boxes.
- Hierarchical?: Yes - sub-categories are indented under their parent categories.
- Selection method: Multiple choice.
- Recommended for: Non-visual types of product data where customers need to select more than one WooCommerce product filtering option at a time.
Radio buttons
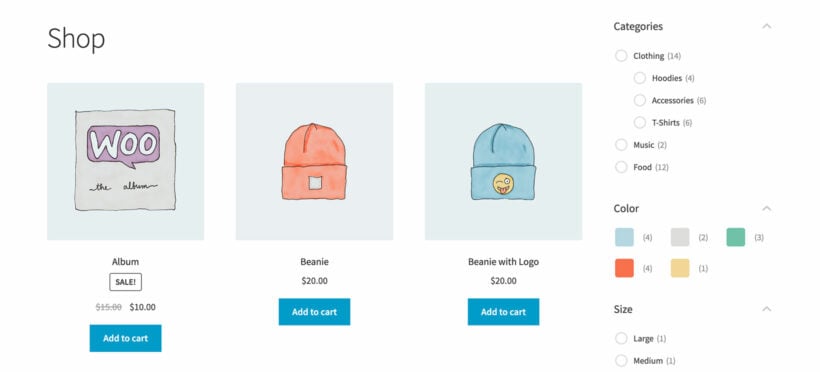
- What is a radio button filter?: A list of options, each with a circle that customers can click on.
- Hierarchical?: Yes - sub-categories are indented under their parent categories.
- Selection method: Single choice.
- Recommended for: Filters where customers must make an either-or choice to select one option at a time.
Text labels
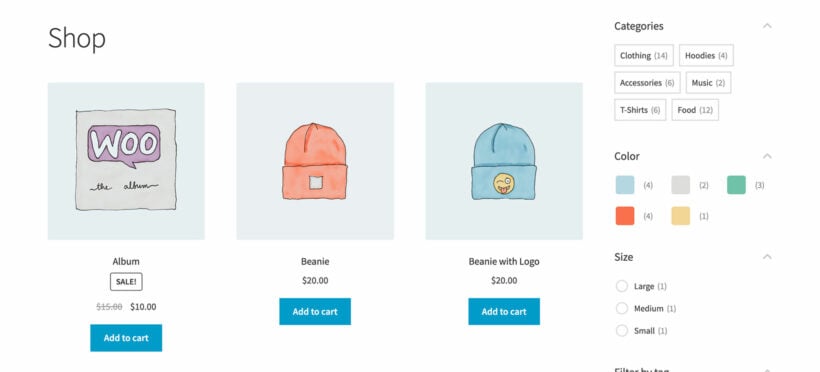
- What are label filters?: A cluster of small boxes, each containing the name of the option - similar to a tag cloud.
- Hierarchical?: No - only top level options are included (e.g. parent categories).
- Selection method: Multiple choice.
- Recommended for: Types of product data which don't have images, but where customers will benefit from a more visual way to display the options. For example, size options (e.g. Small, Medium and Large) look good displayed as text labels. This is a particular good way to display WooCommerce tag filters.
Images
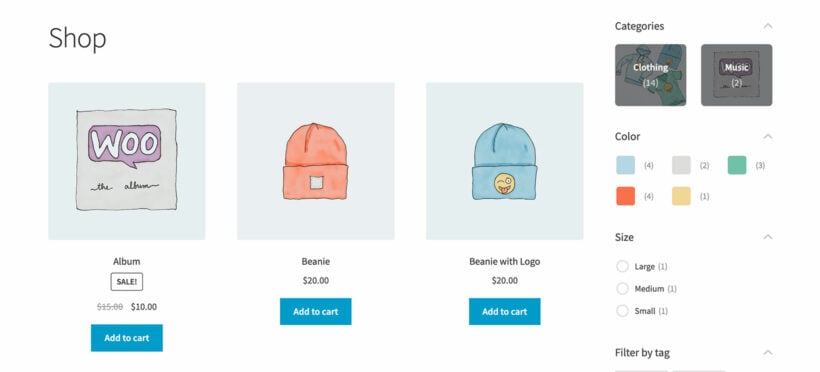
- What are image filters?: A grid of images, each representing one of the filter options (e.g. a category or an attribute). You can choose whether to show the image on its own, or to add a dark overlay with the option name over the image.
- Hierarchical?: No - only top level options are included (e.g. parent categories).
- Selection method: Multiple choice.
- Recommended for: Visual types of product data where customers will appreciate being able to click on an image of what they are looking for, instead of having to read through a list of text options. For example, categories often work well when displayed as image filters.
Color swatches

- What are color swatch filters?: A grid of coloured squares, each representing a color attribute option. Customers click on a color to filter for products of that color. You can display the colors on their own, or with the name of each color alongside.
- Hierarchical?: N/A
- Selection method: Multiple choice.
- Recommended for: Color attributes.
Choosing the right product filtering styles
Think about whether you're using the most appropriate style for each filter on your site. If not, then head over to Products → Filters and change it - it only takes a second!
Tip 2: Show WooCommerce product filtering in the right parts of your store
Did you know that there are 3 different ways that you can add filters to different parts of your store?
Method 1: Above your shop
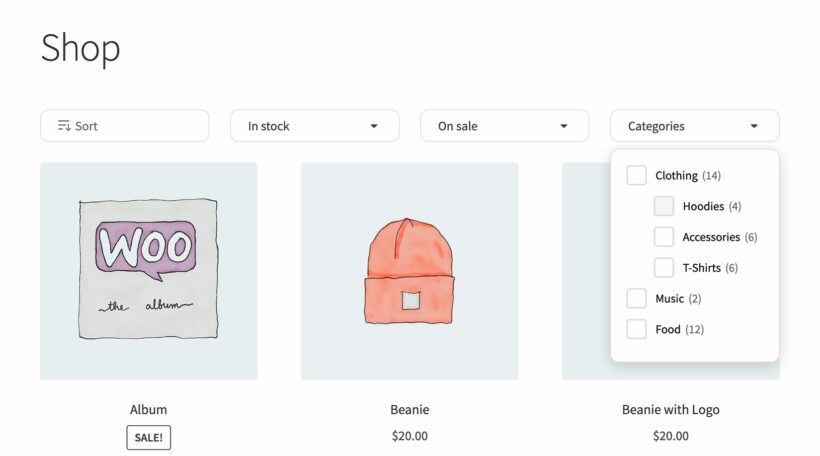
The most obvious way to show filters on your site is by displaying a filter group above your shop. You can enable this in the setup wizard, or on the plugin settings page at Products → Filters → Settings.
This method displays the filters as dropdowns above your default store pages (shop, category pages, etc.). But what if you want to add filters to the sidebar, or to pages other than your default store pages? That's when you need Methods 2 and 3.
Method 2: As sidebar widgets
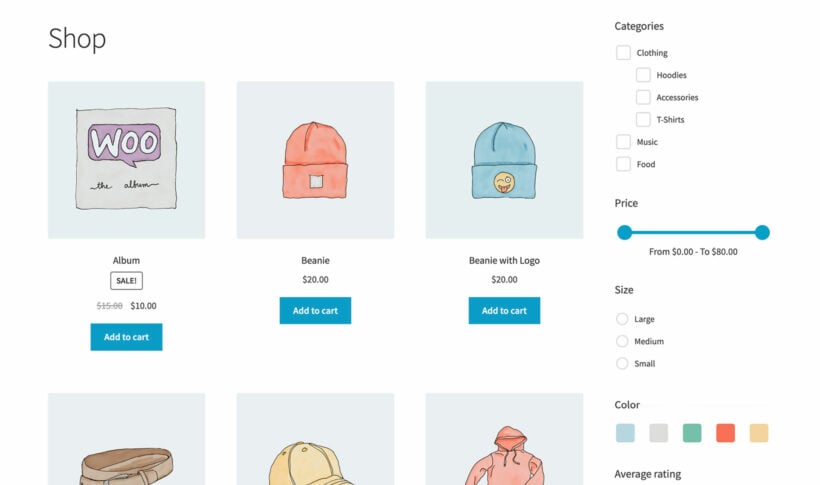
Lots of e-commerce stores display filters in the left or right sidebar of their shop pages. That's a great option because the customer can see all the options at once.
To add a filter group to the sidebar, go to Appearance → Widgets and use the 'Product Filters' widget. To show the widget on some pages but others, you can use a free plugin like Widget Options.
Method 3: As a shortcode
The final way to insert filters is a bit more technical than the others, but also the most flexible. You'll need this if you're creating custom pages to list products and want to display filters above - for example, if you're using a page builder plugin or our WooCommerce Product Table plugin.
To find the shortcode, go to Products → Filters and copy the shortcode for the relevant group. Paste it wherever you want the filters to appear - for example, above a product table shortcode, in a Gutenberg text or shortcode block, in an Elementor or Divi block, or anywhere else.
You can either use the shortcode as it comes, or configure it using the shortcode options.
Choose the right location for your WooCommerce product filtering
Armed with this information, think about whether you have added filters to all the locations where they would be helpful to your customers.
Tip 3: Choose between horizontal, vertical and hidden filters
Amazingly, the WooCommerce Product Filters plugin provides three layout options for your filters.
That's right - you can choose between:
- Horizontal layout - This normally appears horizontally above the list of products, with each filter hidden within a dropdown.
- Vertical layout - This is normally use for sidebar widget filters.
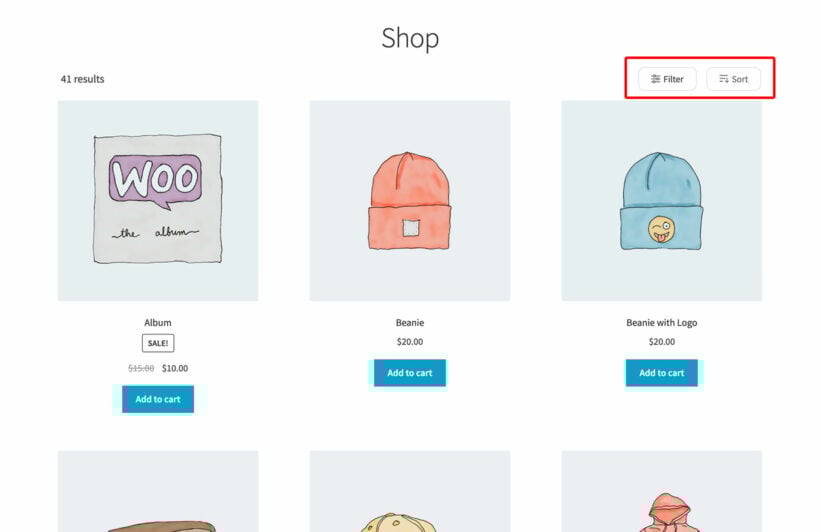
- Hidden filters - You can also display a 'Show filters' button above the list of products, which opens the filters in a slide-out panel.
So, how can you choose which layout(s) to use in your store? Here are my top tips to help you decide:
- Do your shop pages have a sidebar? If not, then you should definitely use the horizontal or hidden layout!
- Do you want customers to be able to see all the filter options all the time? If so, then the vertical layout is best.
- Do you have large numbers of filters? Consider using a combination of both layouts, as in the above screenshot.
- Are you worried about cluttering up the page? Hide the filters so that customers must click a button to view them.
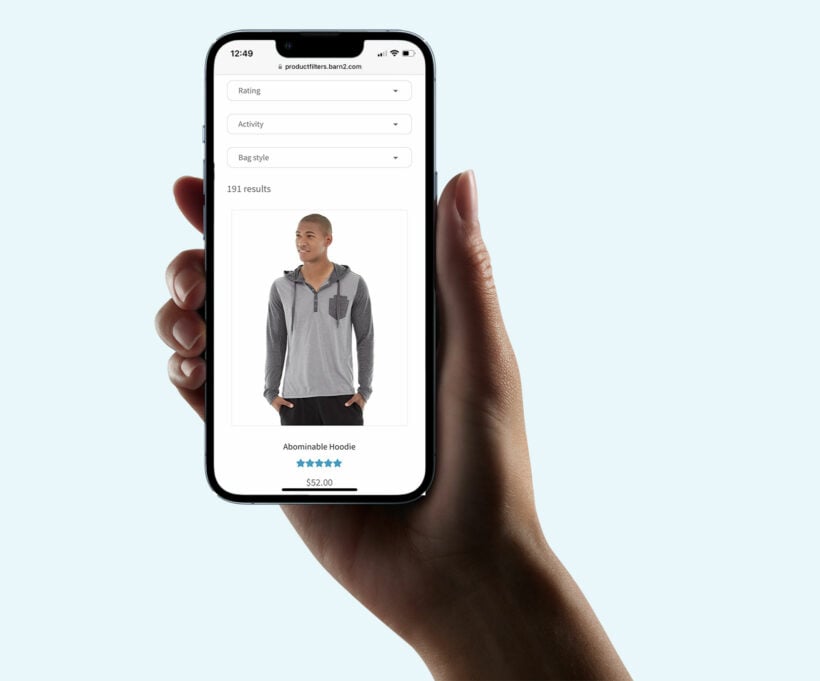
What about mobile?
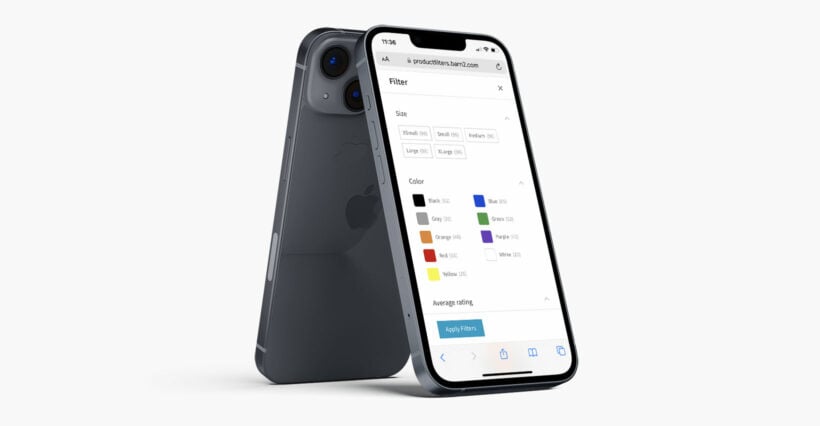
So far, we've only considered desktop users. Most mobile sites don't have a sidebar so even if you add filter widgets on desktop, WooCommerce Product Filters will automatically hide these and display a 'Show filters' button on mobile instead.
This means that for mobile users, your only choices are to either show the 'Show filters' button, or to show the horizontal filters above the list of products. I recommend using the 'Show filters' button if you have lots of filters, and making them visible above the list of products if you just have a few.
Use these options to plan the best possible locations for the filters in your store - whatever devices your customers are using.
Tip 4: List products in a structured order form with filtering
If you use product filters on your e-commerce site, chances are that you have lots of products. After all, that's why you need filters!
And when you have lots of products, the default store layout often isn't good enough. Each product takes up a lot of space, and even after using the filters, it's still difficult for customers to compare products and make quick buying decisions. It's also a pain for customers to have to visit a separate page for each product in order to choose quantities and variations, and add to the cart.
You can solve all these problems by using WooCommerce Product Filters with our other plugin, WooCommerce Product Table:
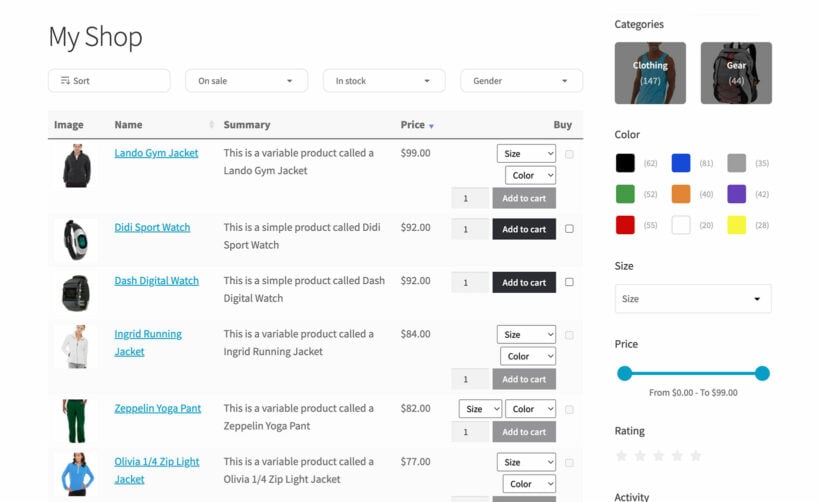
WooCommerce Product Table lists your products in a conversion-optimized one-page order form. Customers can view more products per page, and choose quantities and variations without leaving the page.
It's a much faster way to buy. And as everyone knows, faster shopping means more sales for you!
Tip 5: Decide whether to hide the product filtering
Next, let's look at whether your store will be better if you show or hide your product filters.
Most WooCommerce stores show the filters all the time. However, if you look at some of the world's leading e-commerce sites outside of WordPress - particularly clothes stores - then you'll see that this isn't always the best option. Depending on the layout of your store and the type of products, it's often better to hide the filters so that customers can choose whether to see them.
The WooCommerce Product Filters plugin provides several ways to do this:
Slide-out panel
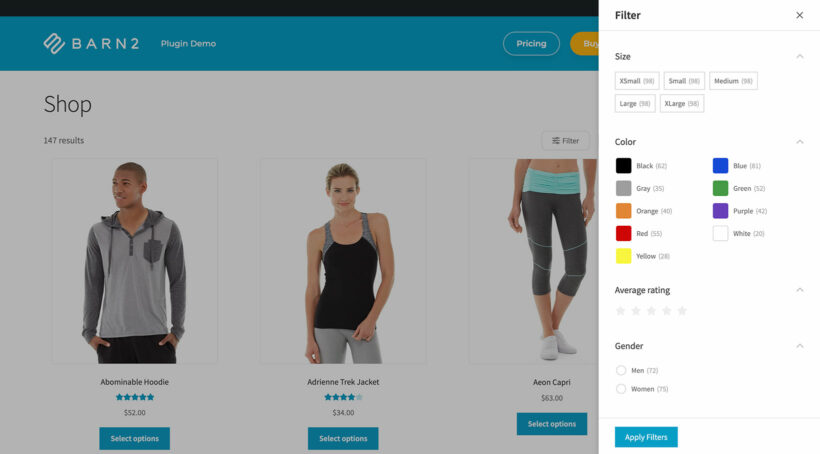
You can hide filters from the page on mobile and/or desktop. When you do this, customers can click a button to view the filters in a user-friendly slide-out panel. That way, customers can still filter your products - but you keep the page clean and clutter-free.
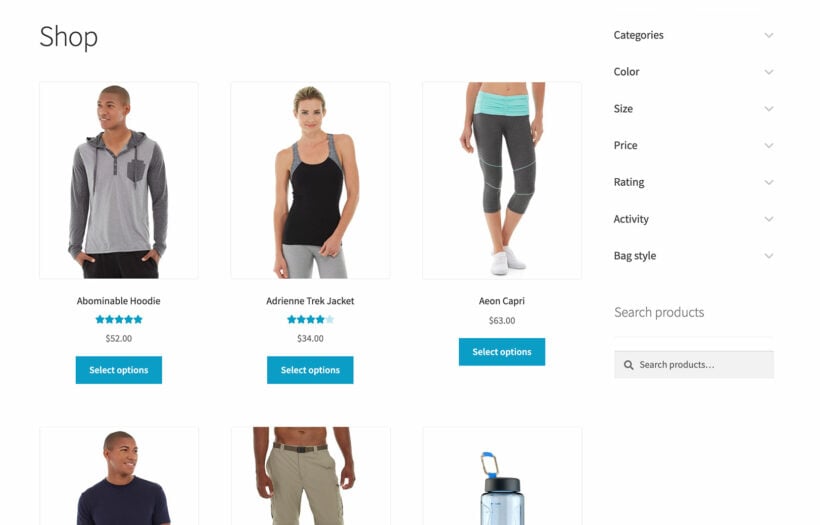
Add open/close toggles
Maybe you don't want to hide the filters all the time, but you want them to take up less space on the page.
You can achieve this by enabling the Toggle option in WooCommerce Product Filters. Either show the toggles as open or closed by default, and customers can click on a filter heading to show and hide the options within:
Take a look at your store and think about whether you're using the visibility options in the best possible way for your customers. It can make a big difference!
Tip 6: Should you use AJAX filtering?
When people first install the WooCommerce Product Filters plugin, they tend to select the "Instant" filtering option without really thinking about it. But is it definitely best option for your store?
Now I'm going to tell you a bit about the "Button click" option and help you think about which filter mode you should be using.
WooCommerce Product Filters comes with a choice of 2 filter modes:
- Instant - This uses AJAX to filter the list of products as soon as the customer clicks on an option.
- Button click - Customers can select as many options as they like from the filters, and then click an 'Apply' button to view the results.
Most of the world's top e-commerce stores use AJAX filtering. That's because it reduces the number of clicks for the customer, and shows results without reloading the page.
However, AJAX filtering can sometimes create a worse user experience. This can happen when you sell the sort of products where customers want to make all their choices in one go, and only view the results at the end of the process. ]
Some examples
To illustrate this, let's look at two possible use cases:
- Clothes websiteI'd generally recommend AJAX filtering for this because the customer wants to see some products after selecting some initial filters, and then might select additional options to fine-tune the results. When they start shopping, they don't know the exact combination they're looking for. They'll keep selecting filters one at a time until they find items they like.
- Car parts websiteWith this type of product, customers know exactly what they need. They want to select all the criteria from faceted search filters and then view the results all at once. As a result, I'd recommend the button click method for this type of store.
Based on the above, which filter mode do you think is best for your store? It's easy to change - just head to Products → Filters → Settings.
Tip 7: Check the order of your filtering options
And finally - another thing to check is the order of your filters. There are two things to check here:
Are your filters in the right order?
When you created your WooCommerce product filtering options you might have added them to the end of the group without considering the order. Edit the filter group and drag and drop the sort icons to put them in the best possible order.
I recommend putting the most high level filters first to create a logical journey for your customers. For example, it would make sense to put the category filter first. Next, you can have the most important attribute filters, and then general data such as price filter and average rating.
Are the options within each filter ordered correctly?
It's also worth checking the order of the options within each individual filter. For example, if you have created a filter using the 'Size' attribute then you may want to order the attributes in size order instead of alphabetically.
Category, Attribute, Color and Taxonomy filters are ordered via the term_order option that is built into WordPress. While WordPress doesn't have a built-in way to re-order taxonomy terms, you can change the order using free plugins such as Category Order and Taxonomy Terms Order.
Once your filters are up to date and ordered logically, it will be easier then ever for customers to find what they're looking for.
Where to get the plugin
We built the Product Filters plugin to allow any store owner to add professional-quality product filtering to WooCommerce.
There's no one-size-fits-all approach, and different stores work best with different types and configurations of filtering.
As a result, use the above tips when adding WooCommerce product filtering to your store. Think about the types of products you sell, and what will create the best possible experience for your customers. Create logical filtering options that suit your products and guide customers to the products they're looking for. As a result, they're much more likely to find what they're looking for - resulting in more sales for you!