How to add checkboxes for product variations in WooCommerce

Want to display variants as checkboxes in your online store? Keep reading to discover the easy way to add WooCommerce checkbox variations. It will transform the way that customers interact with your products.
Checkboxes are a great way to offer extra product options and upgrades. Unfortunately, WooCommerce doesn't provide any way to create checkbox variations. Instead, product variations can only ever appear as dropdown lists, which are pretty limited.
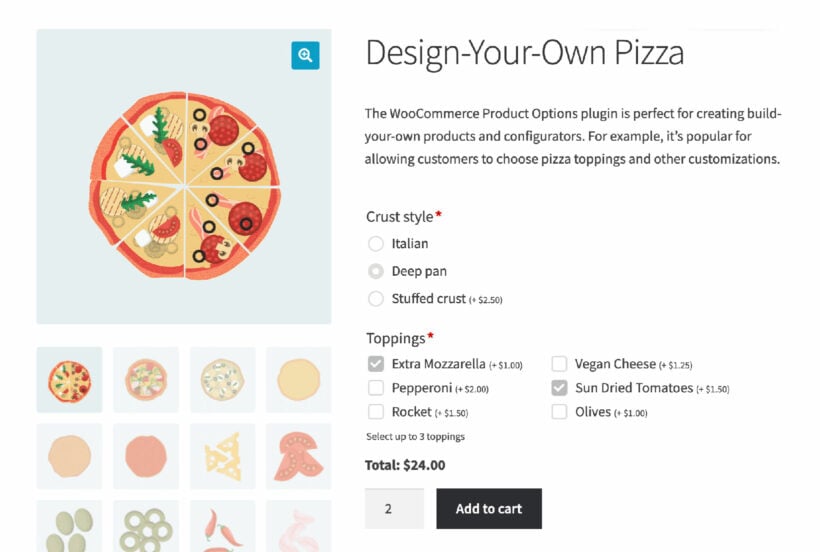
Luckily, the WooCommerce Product Options plugin offers tons of ways to add extra types of option to your products. And you guessed it - this includes WooCommerce checkbox variations like this:
This tutorial will explain how to add a single checkbox or multiple checkboxes to any or all of your products. I'll provide advice on how to decide whether checkboxes are the best way to display product options, and what the alternatives are. You'll also learn how to add advanced functionality to your product page checkboxes, including:
- Changing the product price when the customer ticks the checkboxes.
- Conditionally showing and hiding other product options based on the checkboxes ticked.
- Selecting certain checkboxes by default when the product page first loads.
- Making checkboxes required fields.
- Setting minimum and maximum quantities to control the number of checkboxes that the customer can select.
- How to add WooCommerce checkbox variations which appear both on and outside of the product page, such as on the main Shop page or in a quick view lightbox.
What exactly are WooCommerce checkbox variations?
A WooCommerce checkbox variation is a tick box which customers can choose whether to select before adding a product to the cart. There are two types of variation checkboxes: single checkboxes and multi-checkboxes:
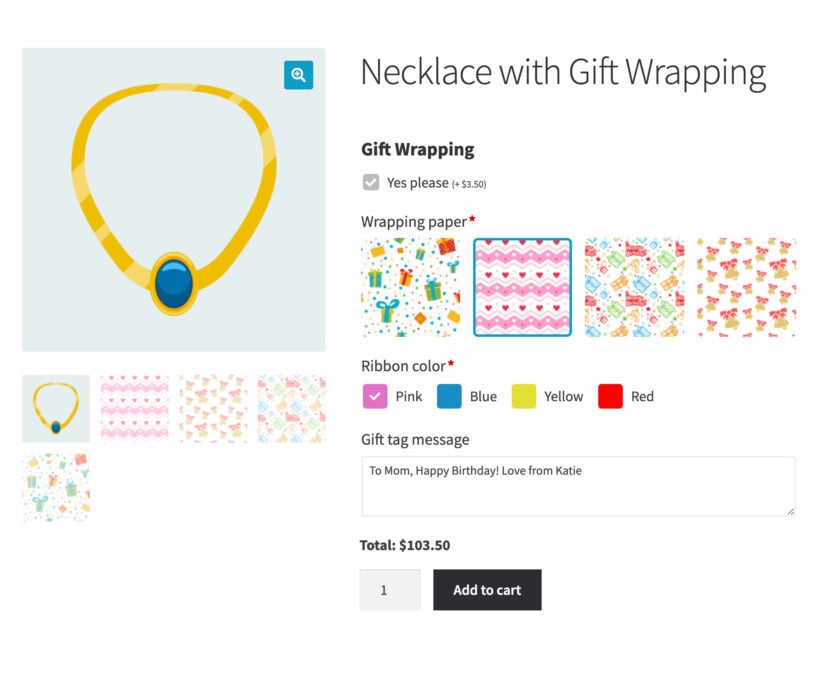
- Single checkboxes can be used for yes/no options, and to prompt conditional logic choices (e.g. showing additional options when the customer ticks a box).
- Multi-checkboxes (checkbox groups) are best for allowing users to choose multiple custom options from a list.
Unlike normal product variations, checkboxes give customers the flexibility to add as many options as you allow per product. As a result, WooCommerce checkbox variations are a powerful tool for customizing your products.
Why add checkboxes to WooCommerce products?
As we have seen, WooCommerce checkbox variations give flexibility in how you offer products , gifts, or add-ons.
Let's look at a few ways you can add checkboxes to WooCommerce products:
- Product customization: Give customers the option to add customize their purchases with engravings or monograms.
- Extended warranty: When customers add specific products to their cart, you can allow them to select an extended warranty. By using multi-checkboxes, customers can add a warranty to individual items.
- Age Verification: Do you offer products that require age verification such as alcohol? Adding an "I am over 18" checkbox is a great way to verify the customer's age.
- Opt-in communication: Allow customers to opt-in to exclusive offers, email notifications, or product alerts with checkbox selections.
- Product specifications: For products that require specifications such as size or color, checkboxes can help streamline the selection process.
- Sell gift wrapping: Use checkboxes to offer gift wrapping for an extra fee. When the customer ticks to have a product gift wrapped, extra options such as a gift message text field can appear underneath. This lets you add gift wrap options without cluttering up the product page for people who aren't buying gifts.
- Free gifts: If you're offering promotional deals such as a free gift, then checkboxes can allow customers to effortlessly opt-in and choose their gift from a list.
When should I use checkboxes for product options?
As we saw above, WooCommerce checkbox variations offer significant flexibility when it comes to customizable products. However, It's important to know when checkboxes are the best option and when another customization tool might be a better fit.
The WooCommerce Product Options is the most advanced product add ons plugin on the market. As well as checkboxes, it lets you add dropdown selections, image buttons, text fields, and more. This gives you free rein to choose the type of options which best suit your products.
When to use checkboxes
Checkboxes allow customers to select a single or multiple items from a fixed number of alternatives. They are perfect for:
- Product personalization with multiple options (i.e. engravings, free gift selections).
- Opt-ins (i.e. newsletter sign up, profile set up specifications).
- Age verification.
Image and color swatches - a visual alternative to WooCommerce checkbox variations
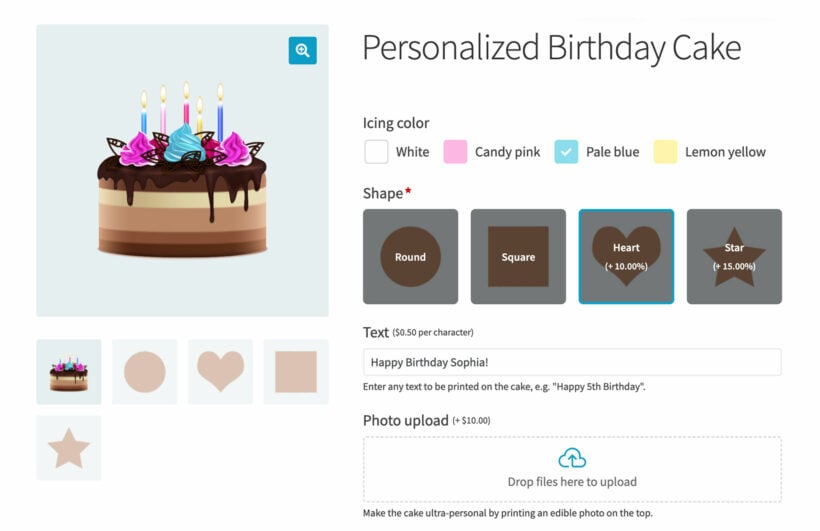
Image buttons provide customers with selectable visual options. They work similarly to checkboxes and are great for laying out options that are better explained with pictures rather than text, such as:
- Color selections.
- Choosing a shape.
- Choosing anything else which is inherently visual.
Watch this video to learn more about image buttons and other product options:
Text labels - a less visual alternative to image buttons
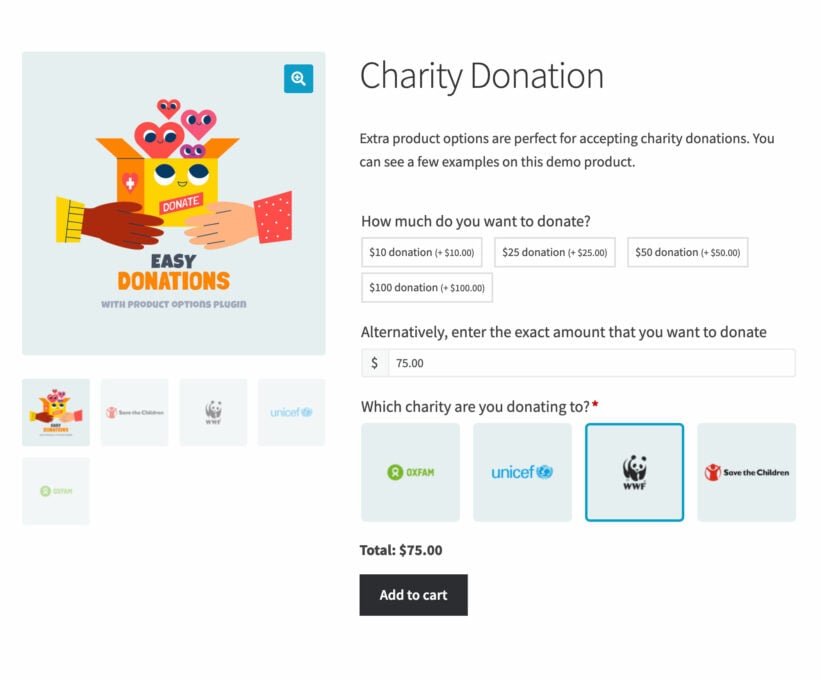
Text Labels look like tag clouds, with each option displayed as text within a button. They are just like image buttons (described in the previous section), but use text rather than images.
The WooCommerce Product Options plugin comes with other types of option too. These include file upload fields, and text fields where the customer can enter their own text. However, the option types featured above are the best alternatives to checkboxes.
You can have it all 😀
If you like more than one of the options described above, then don't worry! WooCommerce Product Options lets you display labels next to checkboxes and text labels. That way, you can combine the benefits of multiple styles like this:
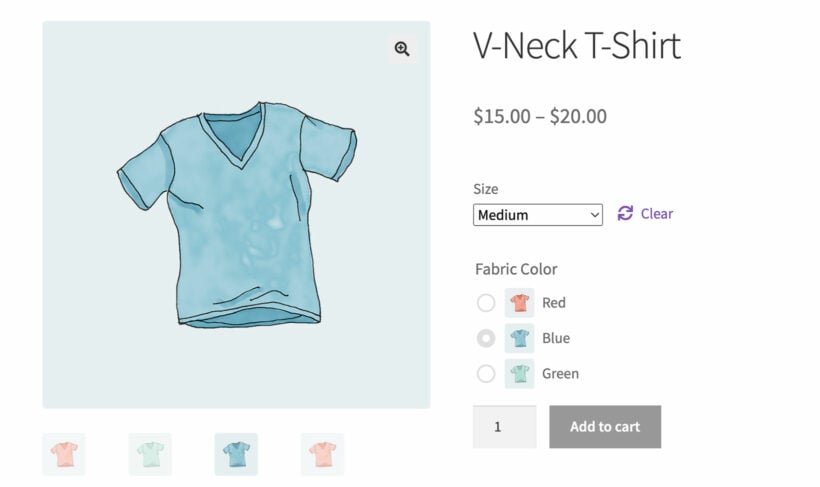
How to add WooCommerce checkbox variations
Now that you know when and when not to use checkboxes, let's talk about how to add WooCommerce checkbox variations to your products.
Install the checkbox plugin
To begin, you'll need to purchase and install WooCommerce Product Options plugin. This is the best way to add checkboxes to WooCommerce products.
Add WooCommerce variation checkbox options to your products
- First, get the plugin and install it on your WordPress site.
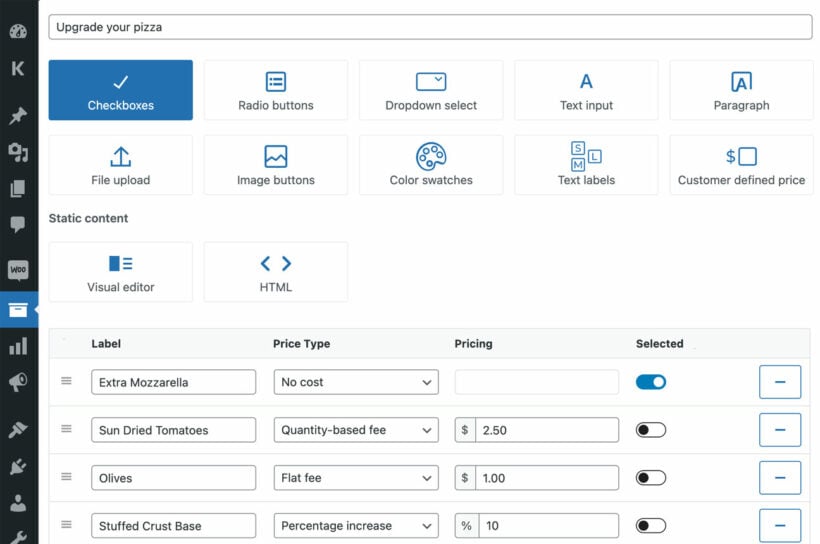
WooCommerce Product Options lets you create any type of product option, including checkboxes, and more. - To add the WooCommerce checkbox variations, go to Products → Product Options in the WordPress admin.
- Add a new product options group, enter a name for it, and choose which products you'd like the WooCommerce variation checkboxes to appear on.
- Next choose an option type. This will probably be 'Checkboxes', but you might prefer images, color swatches or text labels for something more visual.
- In the 'Choice type' option, decide whether you want to display existing variations as checkboxes, or create the checkbox options directly in the WooCommerce Product Options interface. I recommend using existing variations if you've already created them, and if you're happy for customers to only be able to select one option from each checkbox attribute group. (This is due to a limitation in WooCommerce itself.) If you want customers to select multiple checkboxes from the same group, then create the checkboxes directly in the plugin instead.
- Next, create all the checkboxes and assign prices to each one if required. (The choices will be pre-populated if you're displaying existing variations as checkboxes.)
- To display an image next to each checkbox, click the blue cog icon to the top right of the list of choices and enable the 'Image' column. You can then upload images and choose how they are displayed on the front end:
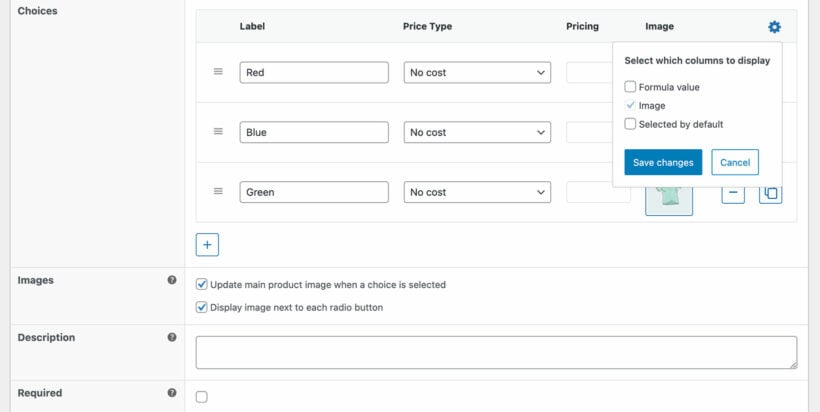
Pre-tick a checkbox by default
If you'd like one of the WooCommerce checkbox variations to be ticked as soon as the product page loads, then use the blue cog icon to show the 'Selected by default' column. This then displays columns which you can use to pre-select one or more checkboxes.
This saves the customer having to select it manually, although they can always de-select if they like.
Make checkboxes a required field
To make a checkbox a required field, scroll down to the Required tab beneath the description and click the checkbox. For example, if you make the 'Pizza toppings' checkbox group a required field then customers must select at least one before they can add the product to the cart.
Note: This field is hidden if you're displaying product variations as checkboxes because WooCommerce itself requires customers to select one option from each group of attributes
Add minimum and maximum quantities for multiple checkbox groups
Making a checkbox group 'Required' forces customers to tick at least one box. For even more control, toggle the Advanced Settings option and set the minimum and maximum quantities of boxes to be checked. For example, you might set a maximum of 3 pizza toppings that customers can select.
Note: Again, this option is hidden when displaying product variation checkboxes because WooCommerce requires that only one of each attribute can be selected.
Use conditional logic to show or hide additional fields when a checkbox is selected
Lastly, the WooCommerce checkbox variations let you add conditional logic in order to show and hide other product options. Scroll down to Conditional Logic section in the Advanced options and set up your conditional variations as needed.
Displaying checkboxes in your store
Your WooCommerce checkbox variations will automatically appear on product pages above the add to cart button.
In addition, it's a good idea to display checkbox options wherever products are listed in the store and not just on the individual product page. This will let customers make customizations from the main shop page - or in a quick view lightbox - without having to visit a separate page.
You can easily achieve this by installing either the WooCommerce Product Table or Quick View Pro plugin (or both).
WooCommerce Product Table replaces your standard shop layout with a quick order form view like this:
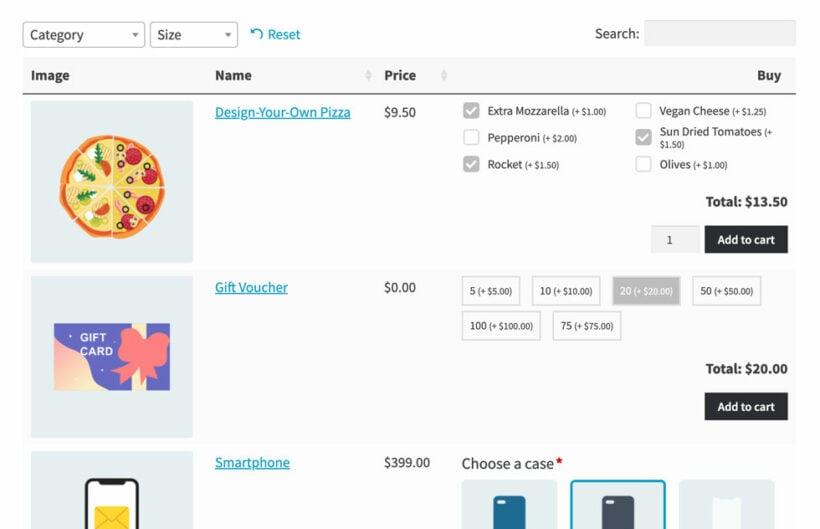
As you can see, the product options appear in the 'Buy' column of the table. Customers can tick the checkboxes and select other options without having to visit the individual product page.
Quick View Pro achieves the same result, but in a different way. Instead of changing your shop layout, it adds 'Quick View' buttons to your shop pages. Customers can click these to open a quick view lightbox popup, from which they can tick the checkboxes and add to the cart.
Use these two plugins alone or together to speed up the customer journey by allowing them to view and select product options away from the single product page. By simplifying the customization process, you will create a seamless shopping experience. This will lead to faster sales, higher rates of order completion, and increased likelihood of return customers.
Related: Discover how to replace add to cart buttons with checkboxes on the shop page for an even more streamlined ordering process.
Next steps
A WooCommerce checkbox variation plugin is a great way to personalize customer experience and increase your average order value. The WooCommerce Product Options plugin is perfect because it lets you add checkboxes and a wide range of other add-on types.
And even better, the plugin is easy to set up, and comes with a 30-day money back guarantee.
Download the plugin today and see how WooCommerce checkbox variations can revolutionize how you do business!

4 Comments
Hello, thank you for this article. I want to cross out the normal price when adding prices with a checkbox and write the discounted price next to it. Is there such a feature?
Hi, Yilmaz. Thanks for your interest in WooCommerce Product Options. Yes, you can use a "Products" option type to display the products and/or variations on your website as checkbox options with their normal/regular price. If they have a sale/discounted prices, these will be displayed after the regular price crossed out (e.g. screenshot: https://share.zight.com/OAuvgoGB).

Let me know if you have any more questions. You can also get in touch via our Support Center. You can try WooCommerce Product Options on your website completely risk-free, thanks to our full 30-day money back guarantee.
Hello,
I have a question. I need the possibility to show checkbox of products on a sidebar. Is there any possibility to show products attributes as a checkbox as additional options (products or services) not under the product, but as a widget on the shop page? To be able to select one or more options. Thank you in advance!
Hi Yedige, thanks for your comment. Instead of showing checkbox of products on a sidebar, I recommend using WooCommerce Product Options' 'Product' option type, which lets you display other products as options for the customer to select. You can read more about it at this link. If you have further questions, feel free to reach us at our Support Center. Cheers!