MarketKing WordPress plugin: An in-depth review of the multi-vendor solution

MarketKing is a powerful multi-vendor plugin that enables you to create a WooCommerce marketplace. This plugin makes it easy for users, also known as vendors, to create unique stores on your WordPress website and sell products and services. We've been testing it to see if it's worth the hype - keep reading for our in-depth review.
If you’re interested in turning your store into a WooCommerce multivendor marketplace, MarketKing may be your best bet. You can use this plugin to build a massive store that supports multiple vendors and earns you commissions and subscription fees.
What’s more, MarketKing supports all types of products, including physical items like toys, fashion, food, and electronics. You can also use it to sell digital products like music, ebooks, and digital software.
So, what does MarketKing look like? What features does it have, and what can you do with them?
Let’s explore that below.
MarketKing use cases
First, let's look at the main types of websites that would benefit from the MarketKing plugin.
Add a WooCommerce multivendor marketplace to your existing website
If you already have an existing store and want to turn it into a WooCommerce multivendor marketplace, MarketKing may be the best place to go. MarketKing easily turns your website into a marketplace where other sellers can onboard and sell their physical products.
The plugin creates a separate section for sellers to list their products on your website. All this happens, and you still maintain control over the look and feel of your site. Think of it like setting up your own little Amazon marketplace for sellers.
That can be a great way to monetize your website and offer additional value to your audience, especially if you have access to massive online traffic.
Building a crowdfunding marketplace
Another excellent use case for the MarketKing plugin is crowdfunding. Entrepreneurs, creators, and other groups can use your platform to raise project funds.
MarketKing has features enabling you to set up a WooCommerce multivendor crowdfunding system, create campaigns, set funding goals, and offer rewards to backers. You can also use it to create an audience, build a community of supporters around your platform, and help creators bring their ideas to life.
Building a job board
What if your primary product is job postings? MarketKing can be just as useful. Different businesses and organizations can set up accounts on your job website, post listings, and accept applications from prospective employees.
MarketKing can help you manage the application process, including accepting uploaded documents and managing communications between you and applicants on a WooCommerce multivendor platform.
These aren’t the only viable use cases. There’s more, including niche product stores, tours and travel-based businesses, and membership marketplaces.
MarketKing features
Next, let's explore the features which are available once you purchase a MarketKing license. Since this is a multivendor plugin, it gives you access to administrator and vendor dashboards. I'll talk you through all the main features, and then show you how to set up the plugin.
Administrator dashboard
Once you install the MarketKing plugin on your WordPress website, you instantly unlock a trove of powerful features. With this plugin, you can access an extensive set of tools that transform a basic store into a budding WooCommerce multivendor store with unlimited product options.
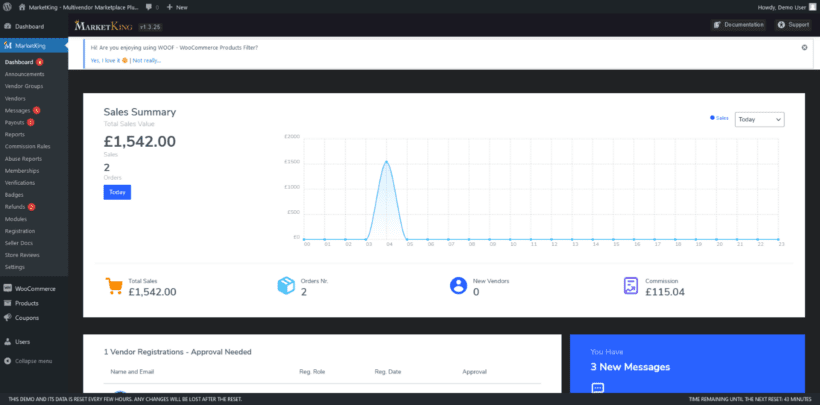
From the MarketKing admin dashboard, you can view everything about your WooCommerce marketplace from one screen. For instance, you can view the number of sales made by all your vendors on any given day. Also, you can view pending orders, new vendors, and any commissions and fees your vendors owe.
But the dashboard has other useful features. Let’s explore some other key examples:
WooCommerce multivendor marketplace functionality
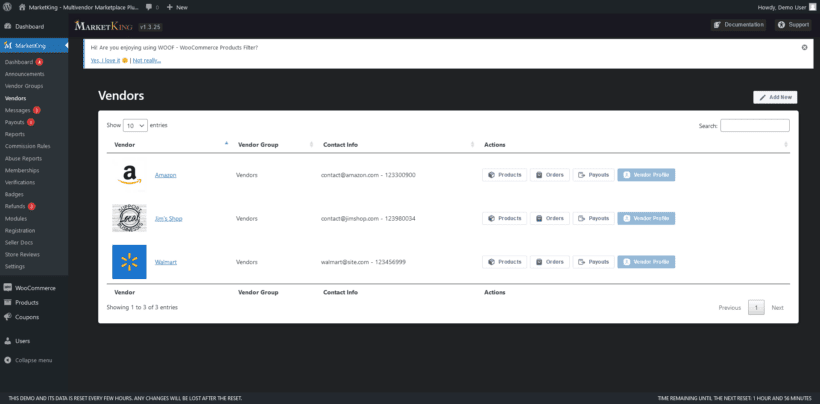
You can onboard new vendors and manage existing seller profiles from one place. Once a vendor applies to join your WooCommerce multivendor marketplace, you can accept or reject the application directly from here.
You can also see information like vendor groups, their contact information, and further actions you can take on their account.
Take, for example, Jim’s Shop. By selecting this vendor profile, you can access and use more control options.
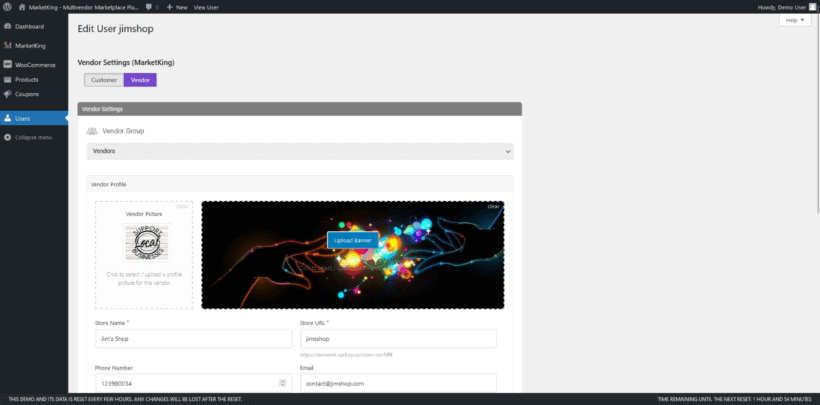
You can change vendor-specific settings by selecting or unselecting whether:
- A vendor can publish products directly.
- A vendor can change the status of an order.
- You can enable the base site URL for that specific store.
- To deactivate or unapprove a vendor.
Commission management
Under this option, you can set up different commission rules for different stores, products, vendors, and groups. Once you create new rules, you can also edit or change them. You can also apply commission management rules on only one vendor.
Vendor dashboard
As a vendor, what will your experience be with MarketKing? You get a complete vendor suite with all the tools and features needed to manage an online store.

This dashboard has a home page showing key metrics, including earnings, orders, and other store statistics. You can monitor new sales, customers and orders, and even the average order value per customer.
Besides that, the vendor dashboard also features other vital tools, including:
- Messages for communication with your customers
- Coupons you can generate to boost your sales
- Product settings that allow you to upload and manage items on sale
- My team section for various team members with unique store roles
- Earnings which measures your total sales
- Payouts to monitor how much you’ve received from a WooCommerce marketplace store owner.
- Reviews from your customers
- Refund section
- Seller documents
- Membership tools
- Vendor settings
By configuring your vendor dashboard, you and your vendor can get products to market fast.
Payout management
With the payout settings, you can pay your vendors from your business account. Once a vendor has passed a sales threshold, you can pay their earnings into their preferred account directly from this section.
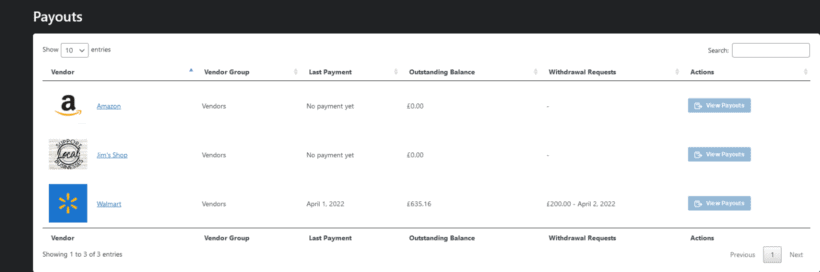
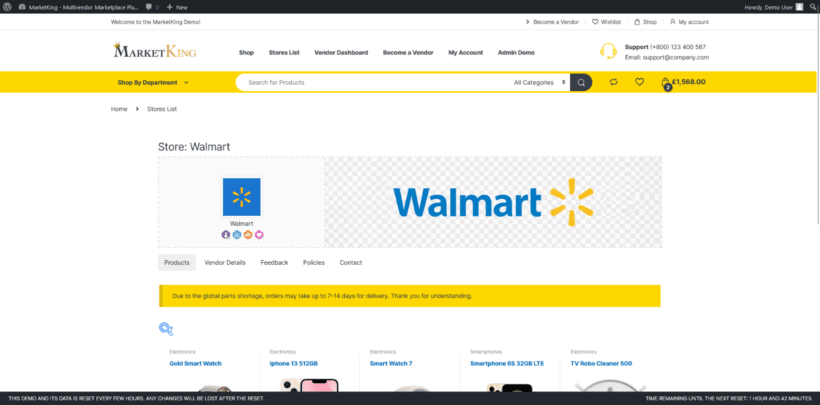
Take the example of the demo Walmart profile below. You can pay this vendor in part or full straight to their business account. You can also view and download all payout history data for the demo Walmart and make necessary payment adjustments.
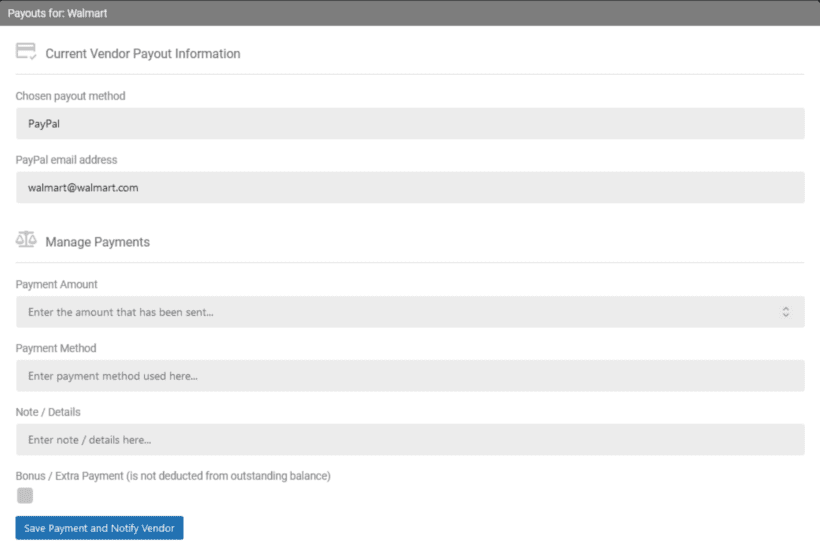
Payment gateway integration
MarketKing already supports multiple common payment gateways, including PayPal and Stripe. From the get-go, you can receive payments from different sources, including credit and debit cards.
Memberships
Under these settings, you can create membership tiers for prospective vendors. From the example below, you can see three seller tiers: Starter, Professional, and VIP. Each membership tier has its vendor group, package image, and price.
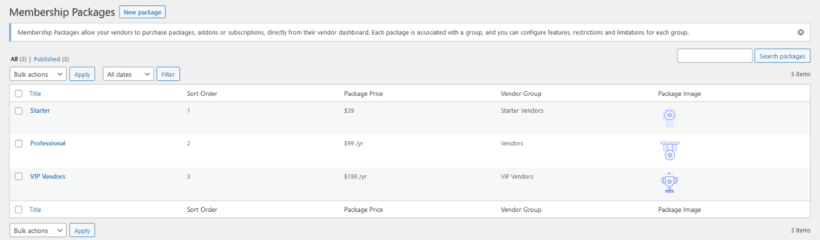
Once you go a level further, you can set up the package price and image, give a package price description, its associated products, and the groups to which this package is visible.
Verifications
Under this section, you can view the documentation vendors submit to verify their legal statuses as businesses. From here, you can view the verification file and approve or reject it based on your business requirements.
Refunds
Under this section, you can view refunds requested by customers from various onboarded vendors. Here, you can view customer details, order actions, order notes, and other information necessary to take action.

If you agree with the customer in a dispute, you can offer a full or partial refund. If you agree with your vendor, you may reject the refund application.
Installation and setup
Before starting out, remember that MarketKing is a premium plugin. You must purchase a valid license from its official website to activate and use it on your WordPress website.
Once you've bought it, it's pretty easy to set up and configure. To begin:
- Complete your purchase on the MarketKing website and download the plugin .zip file.
- Go to Plugins → Add plugin → Upload plugin.

- From your download file, select the plugin file and click install now.

- Once installed, the plugin will require activation to access its core functionality. Click the Activate button and use the license key.

Once installed and activated, the plugin configures itself to your unique setup. MarketKing works with most WordPress and WooCommerce themes, so you should be ready to go.
Vendor onboarding
You can onboard new vendors using the dashboard login page or manually. The login page is pre-built; anyone can join as a new vendor by clicking the Become a vendor button.
You can also add a vendor manually from the administrator dashboard. To do that:
- Go to Users → Add New.
- Choose Customer under the WordPress role. What you choose here doesn’t matter since MarketKing will form its groups independent of all WordPress roles

- Under Vendor settings, select Vendor

- Give the new store a unique URL and store name. You may also add the vendor's contact details

User experience
From the onset, MarketKing looks like a plugin packed with plenty of features. When I first started reading about it, I wondered if the number of features would make it difficult to navigate. However, it wasn't like that at all when I actually started using it. It turns out that MarketKing uses a neat and well-designed modern interface for its WooCommerce multivendor marketplace, making it easy and intuitive to use.
Its design elements use warm and vibrant colors, making it appealing to look at. Moreover, its menu bar is set to the left of the dashboard, with each settings option clearly labeled. You can also collapse the menu bar whenever you like, giving you plenty of space to view page contents.
Its intuitive design allows you to navigate across features seamlessly. It has an easy learning curve, even for beginners.
Pricing and support
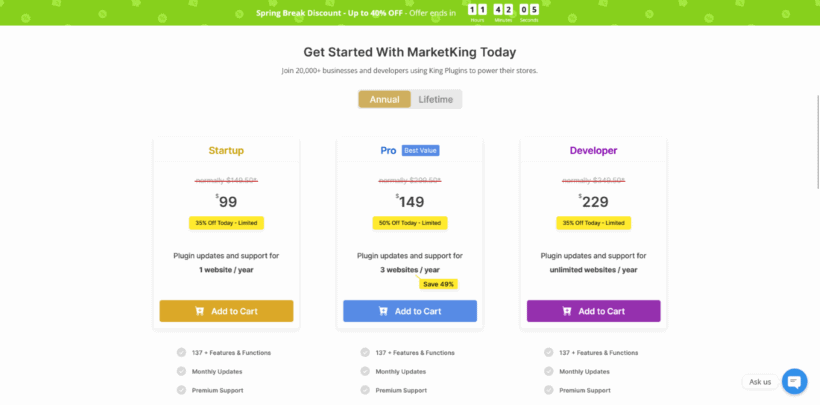
Pricing for the MarketKing plugin starts at $99 for a single-user license for a full year. This license gives you full access to all MarketKing features for a single website. You'll pay $149 for two more license uses per year if you need it for more than one website. For an unlimited license, you'll part with $229 per year.
Considering all the features you can access, a single license at that price is a steal.
Should you encounter any challenges, you can access MarketKing’s knowledge base or file a ticket from its official website. To file the ticket, you’ll need your KingsPlugins or CodeCanyon purchase codes to proceed.
Once you submit a ticket, you’ll receive a response from their team as soon as possible.
Future developments
MarketKing is constantly updated to keep it secure and valuable to all users. Since its initial development, this plugin has received multiple updates, each time resolving bugs and delivering fresh features and functionality.
This makes me more confident in expecting them to continue releasing consistent updates in the future as well.
Final thoughts
Turning your online store into a successful WooCommerce multivendor store is as simple as integrating the MarketKing plugin. It extends your store's ability to sell products by enabling users to become vendors.
Moreover, this plugin helps you generate extra income from your vendors by charging them commissions and seller fees. Despite having about 137 unique features, MarketKing keeps everything on its administrator and vendor dashboard intuitive and accessible.
Regardless of your skill level, onboarding onto MarketKing is seamless, and you'll have your store running in record time. I recommend it if you consider turning your website into a multivendor store.
Test out its features with the MarketKing demo link and find out how it can work for your store.