How to add a searchable library of course materials to LearnDash
Do you need to provide LearnDash course materials to your students? Discover the easy way to add a searchable resource library to any LearnDash course or lesson. (And it works with other WordPress LMS plugins too!)
If you use LearnDash to create online courses in WordPress, then you'll know how important it is to provide learning materials to students. These reinforce their learning by providing further reading and giving students something to refer back to.
For example, you can enhance your LearnDash LMS courses by providing:
- A downloadable course handbook.
- Links to relevant third party websites.
- Audio and video content.
- Printable worksheets.
- Links to community resources, such as the course forum.
The problem is that while LearnDash provides a 'Materials' tab for each course, it doesn't provide any special ways of displaying your resources. That's fine if your course just has a few materials, which you can list using bullet points or similar. But what if you have more course materials to display, or if you want to add resources within individual lessons?
Luckily, there's an easy solution. Install the Document Library Pro plugin on your WordPress site, and use it to add searchable libraries or course materials within your LearnDash courses or lessons.
And even better, everything in this tutorial works just as well with any other WordPress LMS plugin. That means that you can also follow the instructions to list course materials in LifterLMS, Tutor LMS, and others.
What sort of resource library can I create with Document Library Pro?
The Document Library Pro plugin makes it easy to add course materials to WordPress and display them in a LearnDash course or lesson. It's easy to add resources one at a time or in bulk. Once you've done that, there are lots of flexible ways to display the materials in your courses:
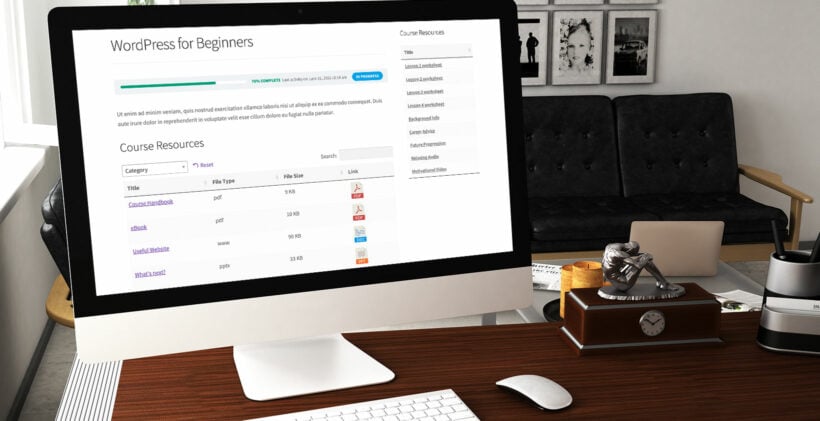
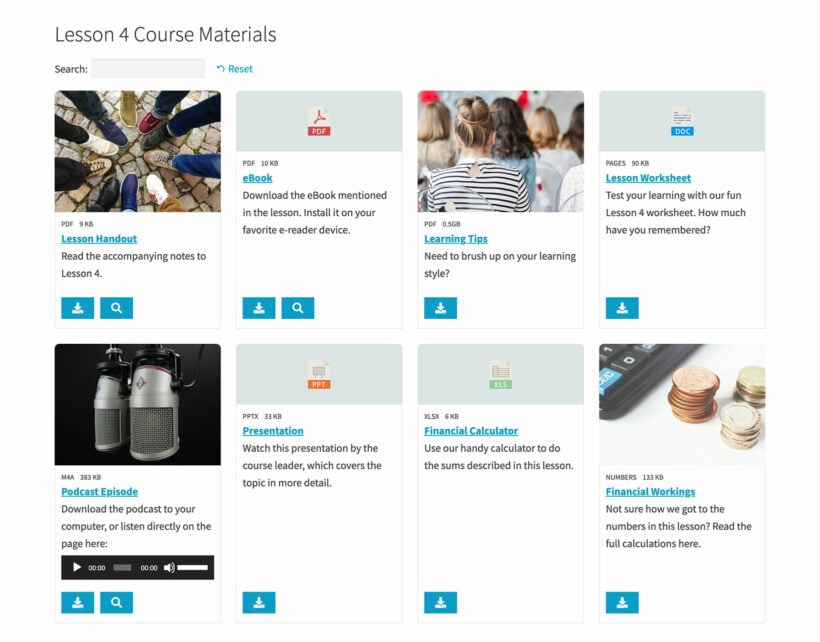
- 2 layout optionsChoose between an interactive table layout (recommended for listing large numbers of resources), or a stylish tiled/grid view (recommended for smaller numbers of materials).
- List course materials anywhere in LearnDashUse a simple shortcode to list resources on the main course page, the 'Materials' tab, the course sidebar, or even within individual lessons.
- Find resources more easilyBoth the table and grid view come with an optional search box, which students can use to find specific materials. The table view also has filter dropdowns so that students can filter by category, tag, and more.
- Downloadable files and website linksDisplay any file type in the course resource library. As well as downloadable files, you can include links third party website links.
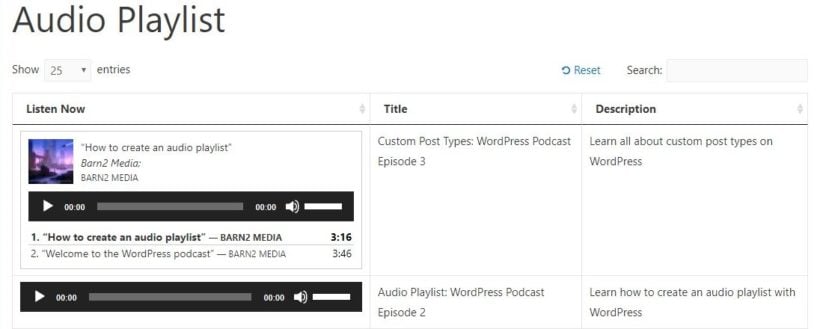
- Embedded audio and videoDisplay embedded audio and video players directly in the list of course materials so that students can watch them on the page.
- Multi-file downloadWith the table view, students can tick multiple documents and download them as a zip file in a single click.
Step 1: Add your course materials
Now we've reached the practical part of this tutorial. First, I will show you how to install the Document Library Pro plugin and start adding course materials. Next, I'll show you how to display the learning resources in different locations within your LearnDash courses and lessons.
Setting up Document Library Pro
- Get the plugin and install it on your site.
- Once you activate the plugin, the setup wizard will open. Paste the license key from your confirmation email, and choose the default settings for your course materials. (Don't worry, you can override these options when you list them in LearnDash later - for example, if you want each list of resources to be different.) In particular, pay attention to the following settings:
- The content/columns option - This controls what information to display about each resource.
- Searching and filtering - If you will only list a few course materials in each location on your site, then disable these. If students need to be able to search for a resource, then enable these.
- Next, you're ready to start adding course materials to WordPress. There are several easy ways to do this, depending on how many materials you're adding:
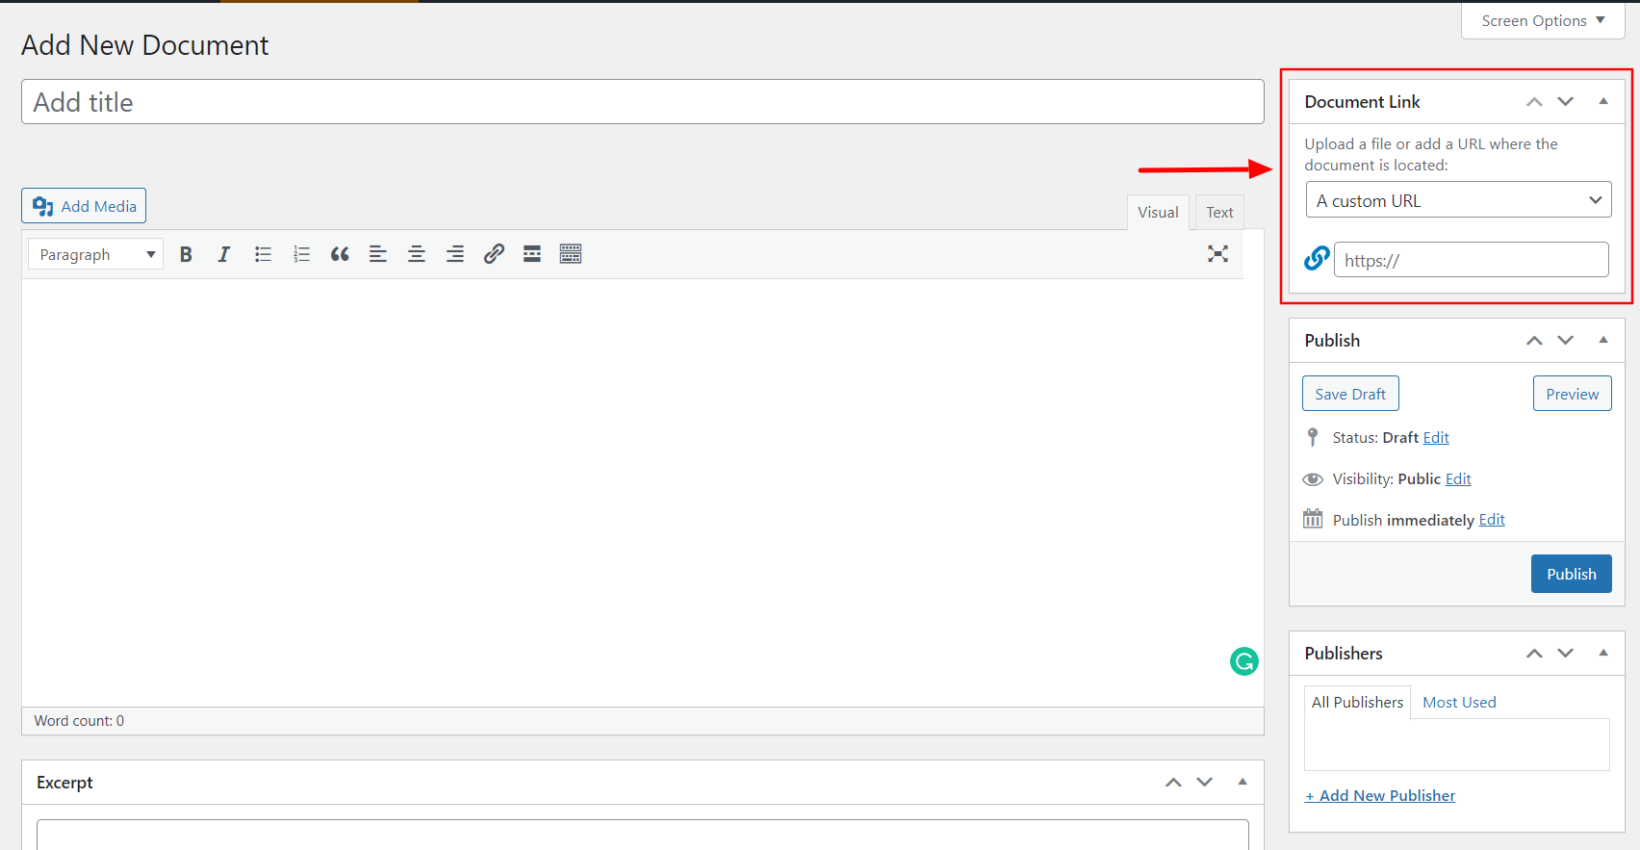
- Add them one-at-a-time via Documents → Add New. This is just like adding a WordPress post. In the 'Document Link' section, either upload a downloadable file, add a link to a third party website, or select 'None' if you will be pasting the resource directly into the page.
- Go to Documents → Import and either create documents automatically by dragging and dropping files, or prepare a CSV file for bulk upload.

Add each resource as a Document and either upload a file or add a link URL.
- If you're planning to list different materials in different courses or lessons, then I recommend labelling each one using document categories and tags. That way, you can easily choose which resources to display in different locations. For example, you might have a different category for each course, and a tag to indicate which lesson each resource relates to.
After you have added some course materials (i.e. "Documents"), it's time to display them in your LearnDash courses.
Step 2: Get a shortcode to list the course materials
The Document Library Pro plugin makes it super-easy to list course materials anywhere in LearnDash. All you need to do is add a simple shortcode wherever you want the resources to appear.
The basic document library shortcode is [doc_library]. This will list all your resources using the default options that you chose in the setup wizard. You can use the 50+ shortcode options to choose which course materials to include, and what they should look like. However, for now, I will just focus on the most important option - how to list documents by category or tag.
Most LearnDash sites need to list different materials in different places. To do this, simply add the slug or the document category or tag that you want to display. For example:
[doc_library doc_category="course1"][doc_library doc_tag="lesson1,lesson2"](to list the resources for more than one category or tag, add a comma between them like I have done here)
Step 3: Add a searchable library of course materials anywhere in LearnDash
Armed with your shortcode, you are now ready to add it to any location within a LearnDash course or lesson. This bit is super-flexible, so think about where students will find it most helpful to be able to access course materials.
Here are some suggestions:
Main LearnDash course page
Some LMS site owners like to display resources directly on the main homepage for each course.
- Go to LearnDash LMS → Courses in the WordPress admin.
- Click on the course that you want to list materials in. This opens the LearnDash 'Edit Course' screen.
- Paste the shortcode to the main description, wherever you want to list the course materials. I would normally recommend adding it underneath the main introduction/overview to the course.
The LearnDash Materials tab
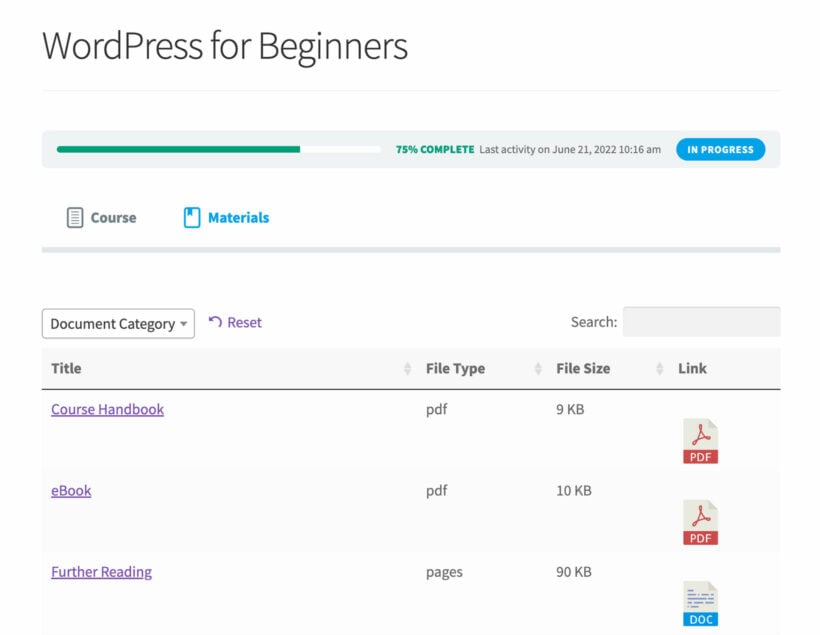
LearnDash provides a 'Course Materials' tab which is the perfect place to display materials which apply to the entire course.
- Navigate to LearnDash LMS → Courses.
- Click on a course.
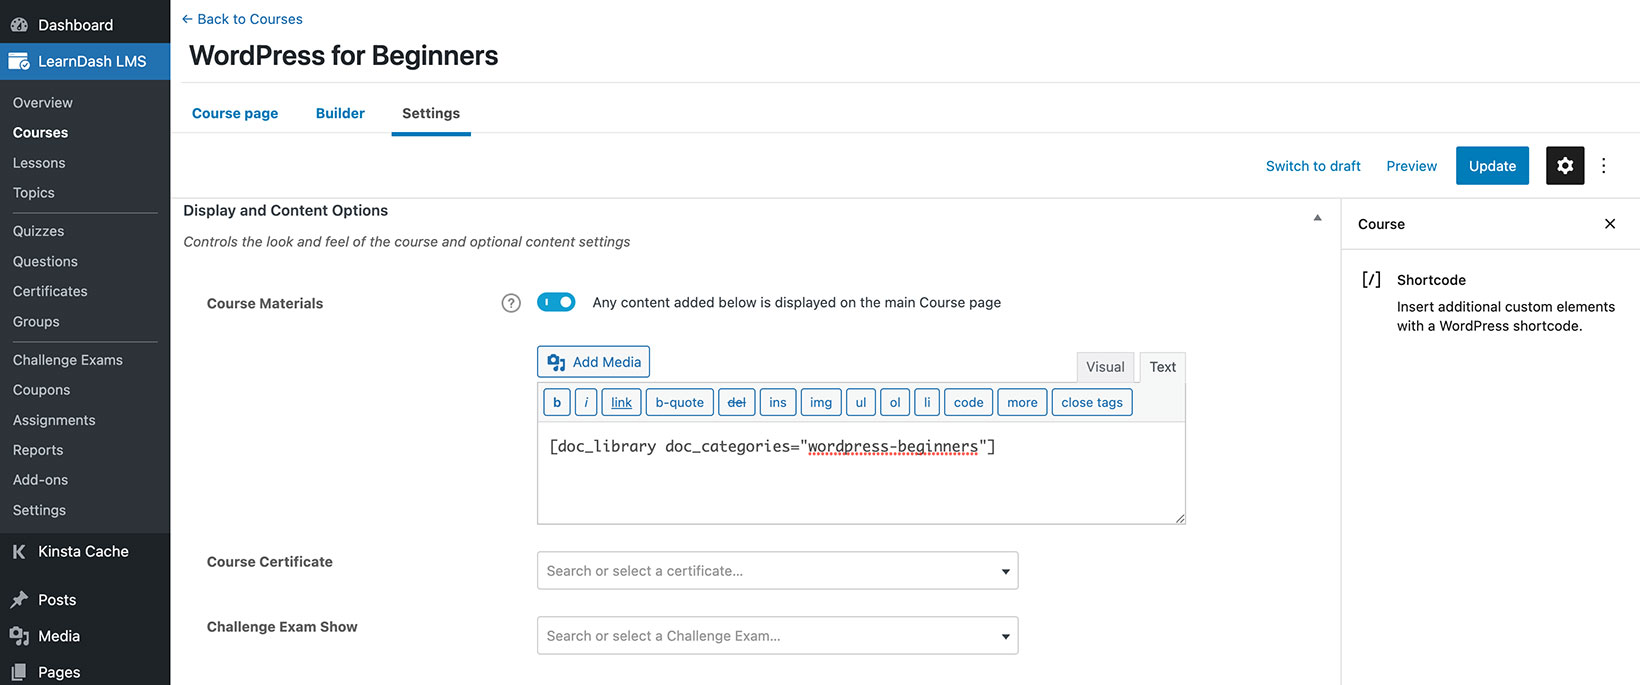
- Go to the 'Settings' tab at the top of the page.
- Find the section called 'Display & Content Options'.
- Enable the 'Course Materials' tab and add the document library shortcode to it.
LMS course sidebar
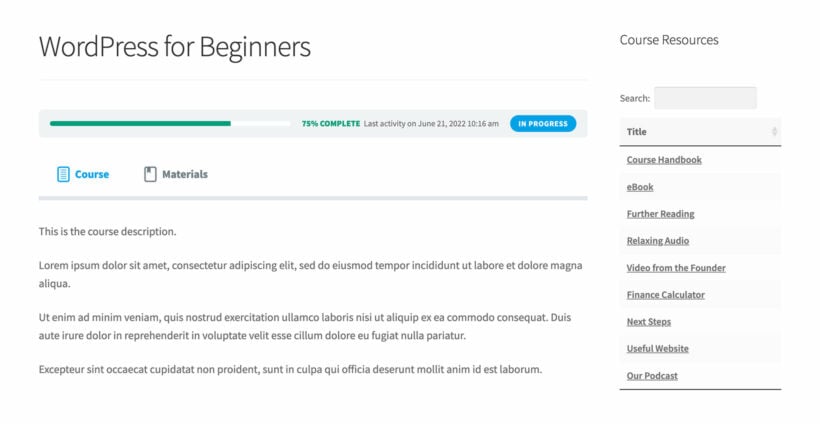
Perhaps you want students to have easy access to the learning materials wherever they are in the course. The best way to do this is to list the resources in a sidebar widget. That's because the sidebar visible on the main course and all the lesson pages.
To do this, simply paste the shortcode into a Text, HTML or Shortcode widget (or block if you're using the Gutenberg widget editor). For more fine-grained control, you can use a free plugin like Widget Options to choose which courses and lessons to display the widget on. That's important if each course has different learning materials, as you'll need a different widget and shortcode for each course.
Individual LearnDash lessons
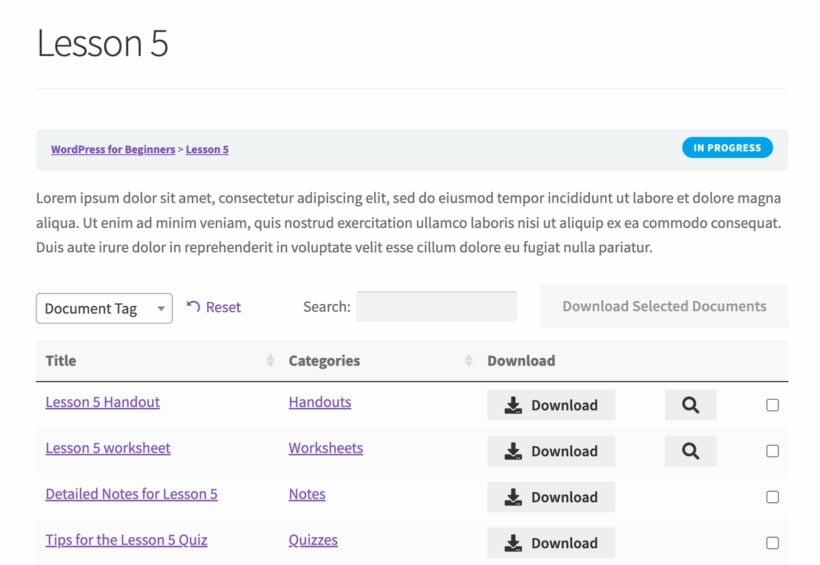
Finally, you might need to provide different course materials in different LearnDash lessons. For example, you might want to do this if:
- Each lesson has different resources, such as accompanying audio tracks or lesson notes. It wouldn't make sense to add all these centrally for the entire course, as they would be muddled up!
- You want to provide a dedicated 'Further resources' lesson at the end of the course. This avoids cluttering up the main course page.
Whatever your reason for listing course resources in individual LearnDash lessons, simply paste a shortcode wherever you want the materials to appear.
Bonus: List courses and lessons in a searchable table
Document Library Pro is fantastic for listing resources within a LearnDash course. But did you know that it has a sister plugin?
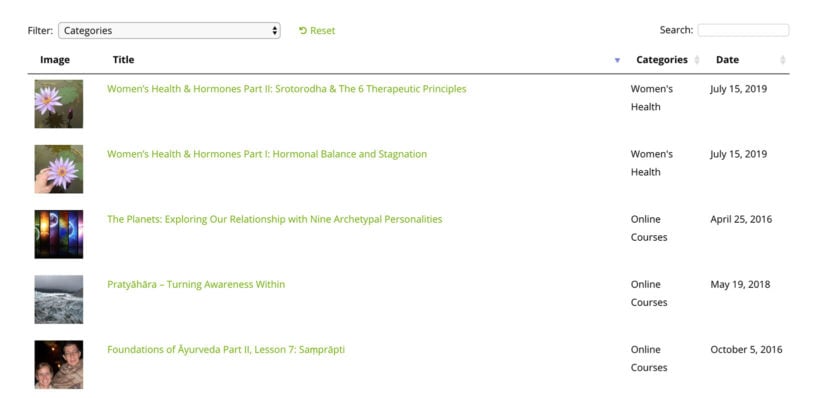
Posts Table Pro looks similar to the table view in Document Library Pro, but has an entirely different purpose. Instead of listing resources, it creates searchable tables of content from your WordPress site. And you've guessed it - that can include your LearnDash courses or lessons!
Normally, LearnDash lists courses and lessons in a professional-looking way that looks good but isn't very searchable. That's fine if you just have a few courses, but you may want to supercharge your course lists if you have a large number of courses. For big LMS sites, students like to be able to search and filter courses to quickly find something they're interested in. Posts Table Pro is perfect for this.
For full details, check out our separate tutorial on how to list LearnDash courses and lessons in a searchable table.
Add resources to your LearnDash courses today!
As you can see, Document Library Pro is the perfect way to add a searchable library of materials to any LearnDash course or lesson. You can:
- List course resources in any course or lesson (or even as a LearnDash course sidebar widget).
- Choose between a structured table view, or an attractive tiled layout.
- Add a search box and filter dropdowns to help students find the materials they need.
- Display downloadable resources, on-page resources, or third party links.
The plugin comes with a full 30-day money back guarantee. That way, you can try it with your LearnDash courses for up to a month and get a refund if you're not happy.
2 Comments
A great option that gives me ideas for adding content to my courses.
Thanks for the kind words, Michaël! Please let me know if you have any questions about Document Library Pro. You can also contact us and enquire in detail via our dedicated Support Center. For quick reference, you can also browse our detailed and extensive plugin Knowledge Base articles and tutorials.