Unlock SEO potential with the 7 best WordPress glossary plugins

On the hunt for the best WordPress glossary plugin for your website? I've rounded up the top options for you to consider. I'll also show you how to use our favorite - Posts Table Pro - to create functional and professional-looking glossaries in 15 minutes or less.
Even though you can create a regular post or page and add terms along with their definitions, using a WordPress glossary plugin comes with a host of benefits to your site's organic rankings and user experience (UX).
Not to mention, the right glossary plugin makes creating and managing your glossary as straightforward as possible.
In this article, I'll show you:
- How using a WordPress glossary plugin boosts SEO.
- 7 top-tier plugins to add glossaries or dictionaries to your WordPress site.
- The steps to create a robust searchable, sortable, and filterable WordPress glossary with the powerful Posts Table Pro plugin.
- Best practices for creating effective glossary entries that maximize SEO impact.
Ready? Let's kick off with a brief overview of the SEO benefits of using WordPress glossary plugins.
How WordPress glossary plugins can boost your SEO
Using a dedicated WordPress glossary plugin can yield massive benefits for your site's SEO. Here, we'll discuss 5 of their key advantages:
It makes your content more accessible and user-friendly
A well-executed glossary — like this one by Moz — ensures that visitors find answers quickly without leaving your site.
The result? Longer on-site sessions coupled with reduced bounce rates. These metrics signal to search engines like Google that your site offers relevant, high-quality content.
It builds topical authority
Search engines are known to reward sites that cover a topic in-depth and provide comprehensive answers to users' queries. Building a glossary of terms is a great way to demonstrate your expertise on a subject. It boosts your site's overall domain authority and organic ranking potential.
For example, if you run a site focused on digital marketing, creating a glossary of industry terms like “conversion rate optimization” or “programmatic advertising” signals to search engines that your site is a trusted authority in that niche. Bonus points if you create standalone content covering the terms and link each of them to the glossary page (more on this in a bit).
"WordPress glossary plugins are a powerful tool for enhancing SEO by providing clear definitions and explanations of terms directly within your content. This not only improves user experience but also helps in retaining visitors on your site longer, which can positively impact your search engine rankings." Jessica MalnikContent Strategist
It improves your internal linking architecture
Your internal linking structure signals to search engines the importance of certain pages and enhances SEO in various ways, including:
- Helping search engines better understand the context of your content.
- Improving link equity by distributing authority across pages.
- Enhancing user navigation and keeping site visitors engaged by directing them to related and hopefully, helpful content.
It enhances content richness
The best WordPress glossary plugins aren’t just for adding text definitions. They allow you to add multimedia elements such as images, infographics, and even videos to your glossary entries.
Adding various types of content enhances the richness of your content which can improve engagement metrics such as time on page, scroll depth, and repeat visits.
It can help nab featured snippets and voice search-optimized answers
Search engines, especially Google, favor concise, accurate definitions for featured snippets. Glossary plugins format your content in a way that increases the chances of being selected for a snippet. If you rank in position zero for key terms, you’re not just gaining visibility—you’re establishing authority.
Not to mention, in the era of voice search, clear definitions also improve the chances of your content being used in voice responses, since voice assistants often rely on short, factual information.
Top 7 WordPress glossary plugins
Here are the 7 best WordPress glossary plugins. Read on for a more detailed review of their key features.
- Posts Table Pro
- CM Tooltip Glossary
- Glossary for WordPress
- WordPress Tooltips
- WP Glossary
- Name Directory
- Heroic Glossary
1. Posts Table Pro
Barn2's Posts Table Pro is a robust WordPress plugin that lets you create highly functional, easy-to-navigate, SEO-optimized glossaries. It includes a ton of powerful customization options and makes organizing and displaying your glossary terms both efficient and user-friendly. For example:
- It comes with powerful search, sort, and filter options to help users find glossary terms quickly.
- It lets you tailor the fields that display whichever fields of information you like about each glossary word or phrase.
- You can choose to let users click through to a separate page with extra information about each word in the glossary, such as a longer definition. (Or you can disable this and just have the table-based glossary).
- And much more.
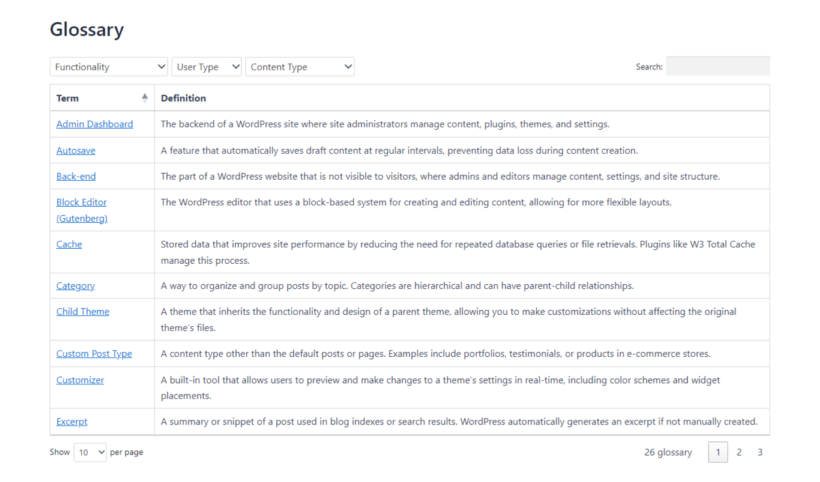
Here's a preview of how the glossary looks on the front end:
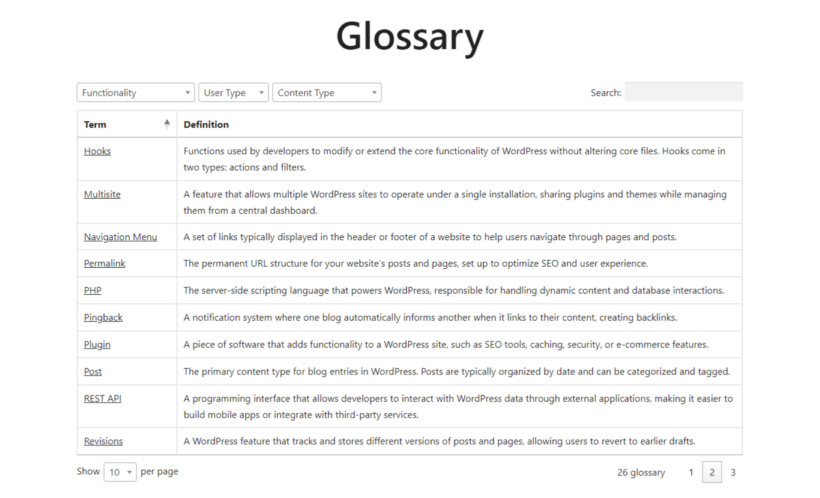
Whether you’re running a large e-commerce site, an educational platform, or a niche blog, Posts Table Pro provides everything you need to build responsive and dynamic glossaries, dictionaries, A to Z lists, and the like.
Let's take a closer look at some of its top features.
Posts Table Pro's key features
Extensive customization options
This WordPress glossary plugin offers over 50 customization settings which enable you to fine-tune every aspect of how your glossary is displayed. For instance, you can adjust pagination, add search boxes, modify column widths, control content lengths, and more.
Easy setup
Even with its extensive features, Posts Table Pro is super easy to set up. It comes with step-by-step builder instructions that guide you through every stage. There's zero coding required and you can have your professional-looking glossary up and running in a couple of minutes.
Sorting capabilities
Glossaries often contain hundreds or thousands of terms. With Posts Table Pro, you can enable site visitors to sort displayed content based on different criteria in order to find information quickly. Website visitors can sort terms alphabetically, by date, or by other custom fields.
AJAX instant search
AJAX-powered instant search enables users to filter results in real-time without needing to reload the page. This enhances the user experience, especially for large glossaries (such as those with hundreds or thousands of terms) where visitors need quick access to specific definitions.
Multimedia support
You can easily add media (images, audio, video, etc.) alongside text to enrich the information presented in your glossary. For example, if you run a site that sells hardware and equipment, you can add video tutorials or audio explanations alongside each glossary term to provide a more interactive, engaging experience for your website visitors.
Translation ready
Out of the box, Posts Table Pro supports multiple languages. It's also compatible with popular multilingual plugins like WPML, WeGlot, TranslatePress, etc. This is super handy for websites that cater to global audiences and might need to define terms in multiple languages.
Mobile responsiveness
The mobile-friendly features let you create fully responsive glossaries with seamless user experience (UX) across all devices. So whether visitors are accessing your glossary on a desktop, tablet, or smartphone, the glossary table will adapt to fit their screen size.
Built-in styling options
Posts Table Pro inherits your site's theme and style by default. It also includes built-in styling options which you can use to adjust the glossary's colors, fonts, and spacing as you like.
2. CM Tooltip Glossary
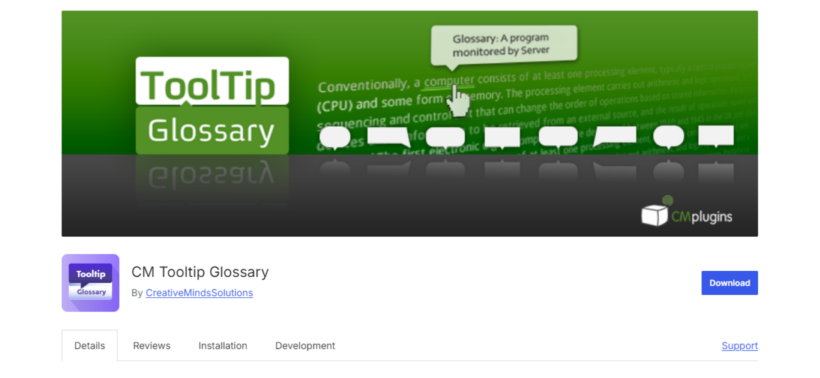
CM Tooltip Glossary is a popular freemium plugin that lets you create comprehensive glossaries with dynamic tooltips on your WordPress site. It intelligently identifies terms on your site's posts or pages and adds them to a standalone glossary page, complete with in-depth definitions for each term.
Plus, you can add tooltips that appear when site visitors hover on specific terms.
Upgrading to its premium version lets you access more robust features, including, audio and video tooltips, support for abbreviations and variations, integrations with external platforms like Merriam-Webster, Google Translate, Wikipedia, ChatGPT, etc., and more.
3. Glossary for WordPress

Another solid freemium plugin, Glossary for WordPress is a great choice for creating user-friendly, visually appealing glossaries.
With its free version, you can automatically link each and every instance of a term to a preset list of definitions. Then you can add glossaries to custom post types, archive and taxonomy pages, and anywhere else on your site.
Users who choose to upgrade to Glossary for WordPress's premium version get additional features, like advanced customization and style options for tooltips, the ability to automatically generate glossary terms footnotes, total control of how tooltips behave on mobile devices, and more.
Glossary for WordPress plays nice with Elementor, Yoast SEO, Polylang, WPML, and several other popular plugins.
4. WordPress Tooltips
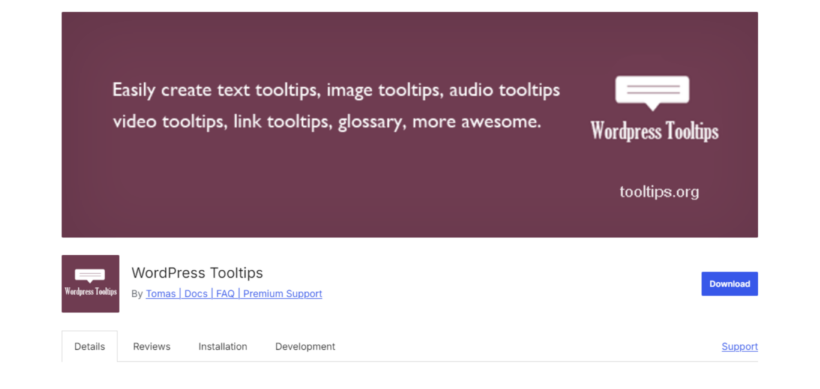
WordPress Tooltips is a simple freemium plugin whose primary use case is to add the tooltip effect to various elements on each site page. Its tooltips are responsive, meaning that they adapt to fit each user's screen size.
However, this plugin can also be used to add SEO-friendly glossaries to your site. It is shortcode-focused and lets you use specific shortcodes to customize how the glossary looks on the front end.
When you install the WordPress Tooltips plugin, it automatically creates a glossary index page that creates links for every single tooltip term to boost your site's SEO rankings. Plus, it supports multiple languages for your glossary in addition to English, including French, Spanish, German, Swedish, Finnish, etc., making it a good choice for websites with international audiences.
5. WP Glossary
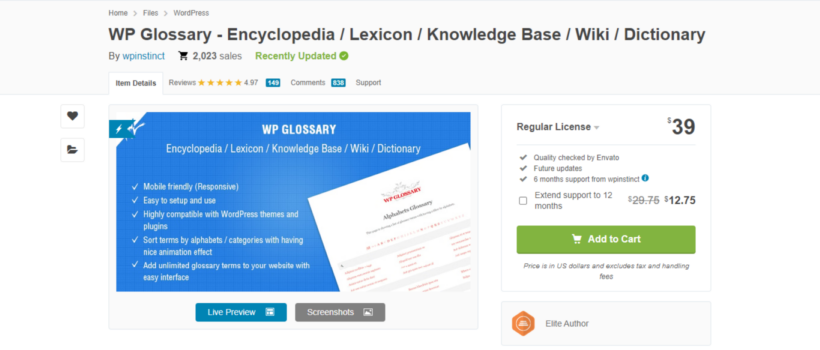
WP Glossary is a well-known premium plugin that can be used to create glossaries, encyclopedias, dictionaries, lexicons, wikis, knowledge bases, and the like.
Upon installation, it automatically creates a standalone indexable glossary page to which you can add an unlimited number of terms. Alternatively, you can use an existing post type or create a new glossary index page.
WP Glossary offers several features that can significantly improve your site's user experience (UX) and organic search rankings, such as:
- Its "linkify" option which automatically hyperlinks glossary terms and phrases in each post and page.
- Tooltips that display additional information when site visitors hover over the terms.
- Cool animation effects that make content more engaging.
- An instant search feature that shows users results while they're typing.
6. Name Directory

Available since 2013, Name Directory was born out of a simple "feature request" to enable visitors to a bird enthusiast website to suggest names for little birds. Since then, it's grown to a more robust glossary plugin.
This WordPress gallery plugin is pretty straightforward to use. In line with its origin, it lets you add suggestion forms to the front end that allow site visitors to share ideas for glossary terms. Of course, site admins can still add term definitions from within the WordPress admin.
Name Directory enables you to create multiple glossaries/indexes and embed them on the front end using shortcodes. Plus, you can showcase the newest entries can help keep the glossary fresh and engaging.
It's free to use Name Directory's core features, however, you can reach out to the plugin's developer if you'd like to adapt it to your site. The plugin is compatible with popular plugins like Members (to add use role permissions) and Relevanssi (to enhance its search capabilities).
7. Heroic Glossary

Heroic Glossary works a bit differently than other WordPress glossary plugins. It provides a Gutenberg Block with ready-made templates and an intuitive user workflow that you can use to create robust glossaries on your website.
It includes the option to arrange terms alphabetically for easier navigation. Plus, you can enable instant search to help site visitors find specific information quickly.
Heroic Glossary is 100% free and lets you re-use glossary blocks across multiple pages of your site, so you won't have to create new glossaries from scratch.
How to create a WordPress glossary with Posts Table Pro
Next, I'll walk you through brief step-by-step instructions to create a robust searchable, sortable, and filterable WordPress glossary with the powerful Posts Table Pro plugin.
For this tutorial, I'll create a simple glossary index page that lists WordPress-related terms and their definitions.
Let's get started.
1. Create a glossary post type
First, you need to add a "glossary" post type to your website. This adds a "Glossary" section to the left hand side of the WordPress admin, which you'll use to add all the glossary terms. We'll use a free WordPress custom post type plugin for this. You can then display the terms in a searchable glossary using the Posts Table Pro plugin.
Follow these steps:
1a. Set up a custom post type
- In your WordPress admin dashboard, go to Plugins → Add New.
- Search for the free Easy Post Types and Fields plugin and install it.
- After activation, you’ll see a new Post Types tab on the left of the dashboard. Click Manage → Add New to create your Glossary custom post type.
- Enter the singular and plural names for the new post type. Here, I entered "Glossary" and "Glossaries".

- Select the relevant fields that you'll use to store information about the glossary terms, then click Create.

- A new "Glossary" section will now appear on the left of the WordPress admin.

1b. Add custom fields and taxonomies to the glossary (optional)
In the previous section, we enabled standard WordPress fields for your glossary items. For example, you could store the name of the glossary term as the name of the glossary post, and add the definition to the main content area. If that's all you needm then skip to the next section.
Alternatively, follow the instructions below to create custom fields and taxonomies for storing extra data about each glossary term. For example, you might want custom fields to store extra data which is unique to each term; and taxonomies to add terms which you'll use to group and filter the glossary.
Adding custom fields
- Navigate to Post Types → Manage in your admin dashboard.
- Find the glossary post type and click on Custom Fields.

- Click Add New to create a new custom field, then fill in the necessary details:
- Provide the name and slug for the field.
- Select the field type, such as text or visual editor.
- Click Add Custom Field to save it. Repeat the process if you need to add more fields.
Adding custom taxonomies
- To add a custom taxonomy, go to Post Types → Manage and click Taxonomies for the glossary post type.

- Click Add New, then enter the singular name, plural name, and slug for the taxonomy. For this tutorial, I want to add three custom taxonomy terms to my WordPress glossary: "Content Type", "Functionality", and "User Type".

- Indicate if the taxonomy should be hierarchical.
- Click Add Taxonomy to save. Repeat as needed for additional taxonomies.

Your custom fields and taxonomies will appear on the Add/Edit Glossary item page. I'll show you how to add terms to your WordPress glossary next.
2: Add glossary terms, definitions, and other details
The next step is to add the actual terms, definitions, and other details to be presented on the glossary index page. Follow these steps:
- Navigate to Glossary → Add new glossary in the WordPress admin.
- Enter the term in the "title" field and its definition in the "content" area.

- Go to the menu on the right side of the screen and enter the appropriate filter criteria in the respective fields. Here, I'll update the specific terms for the three custom taxonomy terms I created earlier: "Content Type", "Functionality", and "User Type".
- Update any other details as necessary.
- Click on "Publish" from the top right corner.
3: List glossary terms in a searchable, sortable, and filterable table
Now, we'll display the terms in a searchable WordPress glossary on the front end of your website:
- Purchase and install the Posts Table Pro plugin on your WordPress site.
- Create a new table to list the glossary terms, definitions, and content by going to Posts Table → Add New in your admin dashboard.
- Give the glossary table a name (this is for internal use only).

- Choose the "Glossary" post type (or whatever name you set up).
- On the "Select your posts" screen, choose All post types if you want to display all terms within that glossary in this glossary table. If you want to showcase only specific terms, select the relevant parameters.

- Next, select the columns of information that you want to display about each glossary term, and rename them if needed.

- If you created custom taxonomies so that people can filter the glossary, then add the filters on the 'Filters' page.

- Configure the sorting options to display the WordPress glossary in a logical order. For example, I would normally sort a glossary alphabetically by title.

4: Add the glossary table to the front end
Finally, we'll add the glossary table to a post or page on the front end.
- Copy the shortcode provided on the final page of the table builder. (If you're using the WordPress block editor, skip this step.)

- Go to Pages in your WordPress dashboard and either create a new page or edit an existing one to serve as the glossary index page. You can either insert the 'Posts Table Pro' block or paste the shortcode you copied earlier.

- Once done, click Publish or Update. Your site's visitors will now see the glossary page displaying the terms, definitions, and details in the beautiful, functional table layout.
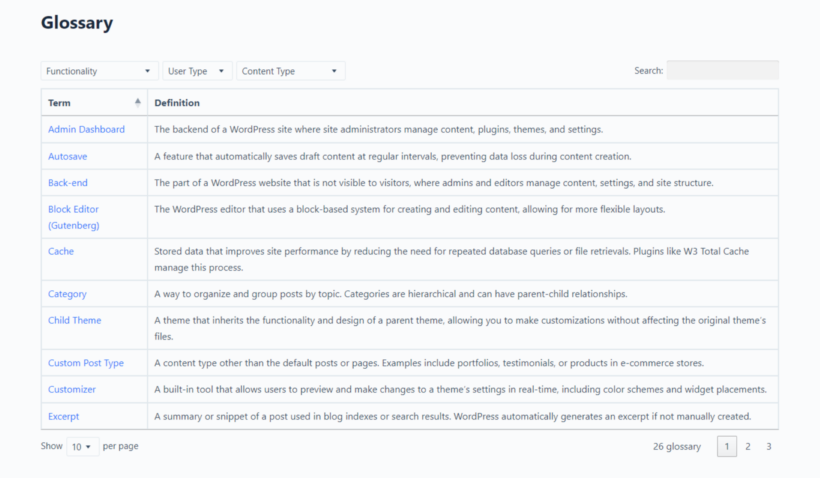
Optional: If you'd like to further customize the glossary table's design, navigate to Settings → Posts Table Pro → Design and choose 'Custom'. You’ll find lots of options to adjust borders, header background color, text, body background color, and others.
Best practices for creating effective glossary entries to maximize SEO impact
Finally, I'll share some techniques to help you build rich glossary index pages that are well-optimized for search. These will help to give your site a boost, and also provide an intuitive experience to visitors.
Add clear and concise definitions
The whole reason for creating a glossary is to clarify concepts. So there's no point in adding jargon or complex explanations. Use straightforward, easily digestible definitions for every glossary entry to make them easier for users to understand and ensure search engines can accurately index your content.
Incorporate relevant keyphrases and their synonyms
It's important to weave relevant keywords and their synonyms naturally into each glossary entry to maximize SEO. This helps you rank for a wider variety of search queries. Take care that you don't stuff keywords as that could hurt your site's organic rankings.
Enrich the glossary with contextual information
Adding examples and multimedia like images, audio, videos, or links to related terms adds extra value to your glossary entries. This makes your content more engaging and keeps users on your site longer, which sends positive signals to search engines.
Link to related content to strengthen internal linking
Add links to related content such as blog posts, tutorials, product pages, etc., on your site to each term. Building your internal link profile has two key benefits: (1) it improves user navigation, and (2) it boosts SEO by signaling content hierarchy and relevance to search engines.
Optimize meta titles, descriptions, and header tags
A basic rule of thumb is to ensure that your H1 tag reflects the primary term, while subheadings (H2, H3) break down other sections like examples or related terms. This improves the content structure and helps search engines better understand the focus of the page.
Enable schema markup
Schema enables search engines to showcase your content in rich snippets that stand out on SERPs and leads to improved click-through rates and organic visibility. Use WordPress SEO plugins like Rank Math, Yoast, etc., to add schema to your glossary entries.
Ready to boost your site's SEO with a WordPress glossary plugin?
Adding a glossary to your WordPress site is a great way to boost its organic rankings, engage site visitors, and enhance users' experience.
In this post, I've shared 7 solid options to help you create stellar glossary index pages. I've also shown you how to use Posts Table Pro, the best WordPress glossary plugin to create robust glossaries with instant search, sorting, and filter options.
Posts Table Pro lets you create highly functional, easy-to-navigate, SEO-optimized glossaries. It offers 50+ customization options to modify pagination, column widths, content lengths, etc.
With it, you can easily add media (images, audio, video, etc.) alongside text to enrich the information presented in your glossary. Plus, it's super easy to set up, even for folks who are not tech-savvy.
Get with Posts Table Pro and create your glossary in fifteen minutes or less!