Use WooCommerce wishlist plugins in your product tables & quick view
Lots of customers have asked us how to add wishlists to their WooCommerce product tables and quick view lightboxes. We've tested our WooCommerce Product Table and WooCommerce Quick View Pro plugins with the best premium and free WooCommerce wishlist plugins.
This tutorial will help you to choose the right wishlist plugin to use with your product tables and quick views, with setup instructions on how to use them together. All of the WooCommerce wishlist plugins have a Pro version with extra features.
MC Wishlist
When working with WooCommerce Product Table and WooCommerce Quick View Pro, you expect automation and integrity from your wishlist plugin. Lucky for you, the MC Wishlist plugin has complete integration and works harmoniously with these plugins.
MC wishlist offers a free widget for Elementor and has shortcodes for all wishlist buttons, pages, and counters that you can use everywhere you want. These features - along with the wishlist counter, pop-ups, and marketing toolkit - may be reasons to give this plugin a shot.
How it works with WooCommerce Product Table
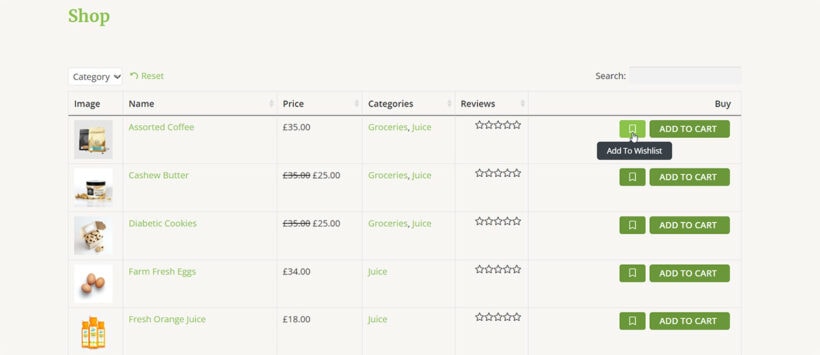
Due to its high flexibility, the MC WooCommerce Wishlist plugin works well with the table in both standard and lazy loading modes. All the settings related to the wishlist button, such as button text, icon, color, position, etc., can be edited through the settings of this plugin, and it works in harmony with the table.
Also, when you click on the add to wishlist button, the plugin offers different modes, including pop-ups, which you can choose according to your needs.
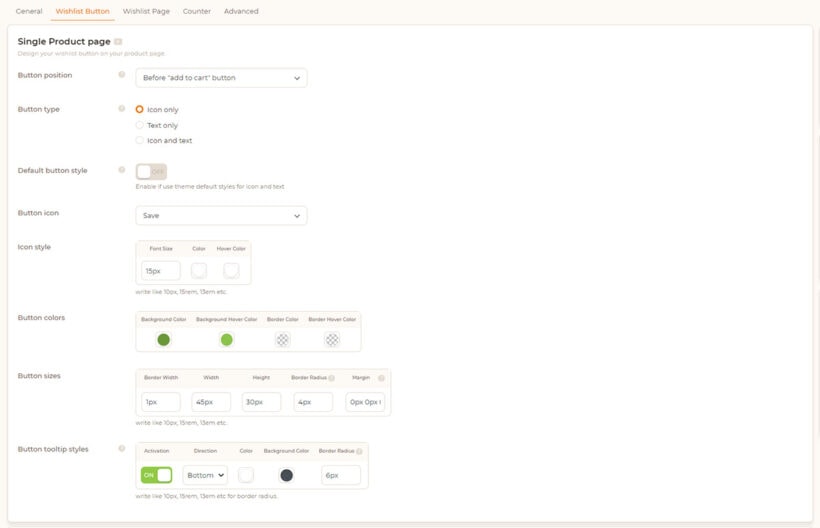
How to set it up
- Install and activate the MC WooCommerce Wishlist and WooCommerce Product Table plugins, as per the documentation.
- After activating the MC wishlist plugin, you will enter the setup wizard. Here you can change the location (top, bottom, left, and right of the Add to cart button) and the text of the add to wishlist button. These choices can be changed from the wishlist settings.
- (If needed, you can use the
[wlfmc_add_to_wishlist]shortcode to put the wishlist button in your desired location. Note that you should use the single product page settings for this purpose.)
From the WooCommerce Product Table settings, add the table you want to a desired page (for example, the shop page). - Now go to the page where you added the table and see the result.
How it works with WooCommerce Quick View Pro
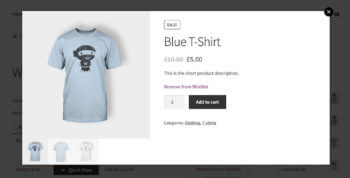
MC Wishlist is well coordinated with WooCommerce Quick View Pro. When a customer opens the quick view lightbox, the add to wishlist button is included too. The wishlist button's appearance is styled based on whichever option you have chosen in the wishlist settings.
You can choose what happens after clicking on the wishlist button. For instance, you can choose to add to the wishlist only or show a customizable popup. It changes to a 'Remove from Wishlist' link after adding to the wishlist.
How to set it up
- Install and activate the MC WooCommerce Wishlist and Quick View plugins, as per the documentation.
- After activating the MC wishlist plugin, you will enter the setup wizard. Here you can change the location (top, bottom, left, and right of the Add to cart button) and the text of the add to wishlist button. These choices can be changed from the wishlist settings.
- (If needed, you can use the [wlfmc_add_to_wishlist] shortcode to put the wishlist button in your desired location. Note that you should use the single product page settings for this purpose.)
- Now, by going to your product listing page, you can see the quick view button by hovering over the images. After clicking on quick the view button, you can see the wishlist button in the opened window.
YITH WooCommerce Wishlist Plugin
YITH's wishlist plugin is one of the most popular ways of adding wish lists to WooCommerce. You can use it with WooCommerce Product Table or WooCommerce Quick View Pro by adding the wishlist shortcode to the appropriate place. I'll provide instructions for both plugins below.
How it works with WooCommerce Product Table
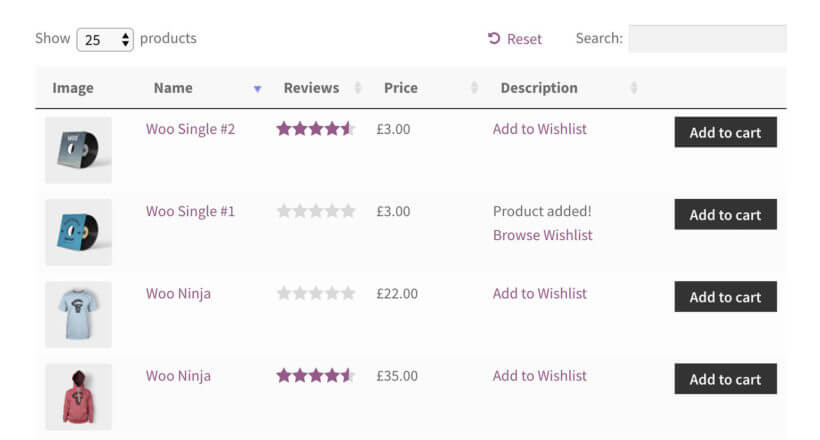
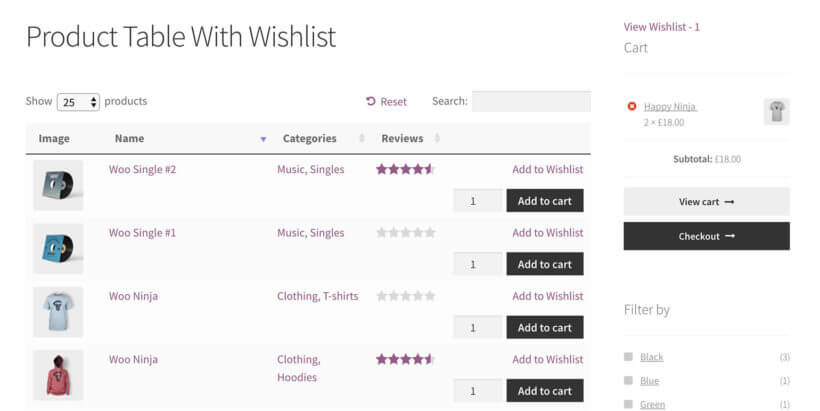
You can use the YITH WooCommerce wishlist plugin to add 'Add to Wishlist' text links in your product table. When you add a product to the wishlist, the text will change to "Product added! Browse Wishlist" (you can change this if you like), with a link to the wishlist page.
The plugin works fine with WooCommerce Product Table. However, you can't add the wishlist link within the add to cart column. You can add it to any other text-based column in the table. Or if you're a developer, then you can use the developer documentation to add a custom column containing the wishlist shortcode.
How to set it up
- Install the WooCommerce Wishlist and Product Table plugins, as per the documentation. Add product tables to your site as required.
- On the YITH plugin settings page (YITH Plugins → Wishlist), select 'Shortcode' from the 'Position' dropdown list. (If you select any of the other options then the 'Add to Wishlist' link will appear on the single product page, but not in the product table.)

- The next step is to paste the wishlist shortcode
[yith_wcwl_add_to_wishlist]into one of the fields that you're displaying as column in the product table. You need to do this for every product. You can either add the shortcode to the short description for each product, the main product description for each product, or a custom field (e.g. created using the Advanced Custom Fields plugin). - On the WooCommerce Product Table plugin settings page (WooCommerce → Settings → Products → Product tables), enable the 'Shortcodes' option. You should also use the columns option to ensure that whichever field you've added the wishlist shortcode to is present as a column in the table (for example, if you have added it to the short description then your table must contain a
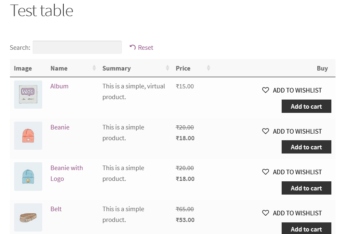
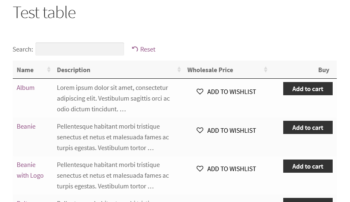
summarycolumn). - Now view the page where you added a product table in Step 1, and you will see the 'Add to Wishlist' buttons in the correct column:
How it works with WooCommerce Quick View Pro
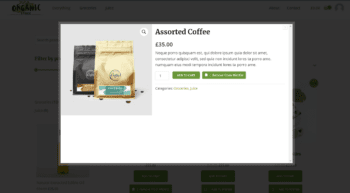
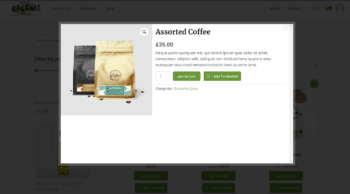
You can use YITH WooCommerce Wishlist with WooCommerce Quick View Pro by adding a wishlist shortcode to the short description field. When your customers open up the quick view lightbox for a product, they'll see a wishlist link. This appears at the end of the short description:
How to set it up
To use YITH's wishlist plugin with WooCommerce Quick View Pro, you must add a wishlist shortcode to the short description for each product.
- Install the WooCommerce Wishlist and Quick View plugins using the documentation for each plugin.
- On the Quick View settings page (WooCommerce → Settings → Products → Quick view), make sure you enable the short description field. This is where the wishlist links will appear.
- On the YITH plugin settings page (YITH Plugins > Wishlist), select 'Shortcode' from the 'Position' dropdown list. (The other options will add the wishlist link to the single product page. But it won't appear in the product table.)

- Next, edit each product and add the following shortcode to the short description (this normally appears at the very bottom of the Edit Product screen) -
[yith_wcwl_add_to_wishlist].
WooCommerce Wishlist Plugin by Acowebs
Acowebs have kindly integrated their WooCommerce wishlist plugin with WooCommerce Product Table and and WooCommerce Quick View Pro. This is how to use the plugins together.
Using Aco Wishlist with WooCommerce Product Table
- Install the free Wishlist for WooCommerce plugin by Acowebs or its pro version, WooCommerce Wishlist.
- Also install Barn2’s WooCommerce Product Table plugin and add a product table to any page on your site.
- When you activate the Aco wishlist plugin, you can choose the position for the 'Add to Wishlist' button above or below the add to cart button from product page setting, and both will appear correctly in the product table.

- Alternatively, if your product table doesn't have an add to cart column, then you can use the shortcode
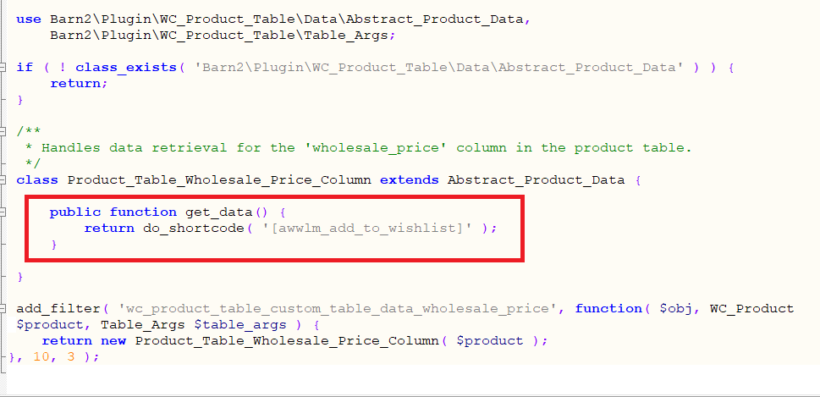
[awwlm_add_to_wishlist]in any other column that appears in the table. To do this, use the documentation on adding a custom column to the product table. Specifically, when following the documentation, you should add the following code:
- Check the page with your product table, and you will see the Add to Wishlist links in the table:
Using Aco Wishlist with WooCommerce Quick View Pro
- Install the free version of the WooCommerce Wishlist Plugin by Acowebs or its pro version WooCommerce Wishlist.
- Also install Barn2’s WooCommerce Quick View plugin as per the documentation.
- When you activate the Aco wishlist plugin, you can choose the position for the 'Add to Wishlist' button. Use the settings page to select either above or below the add to cart button. Whichever you choose, the wishlist button will appear correctly in the quick view popup.
TI WooCommerce Wishlist Plugin
With over 3,000 active installs, TemplateInvaders' WooCommerce wishlist plugin is a popular choice for many stores. It automatically works with WooCommerce Product Table and WooCommerce Quick View Pro.
The wishlist plugin comes with a widget which shows the number of items in the wishlist. It has a handy link to the main wishlist page.
How it works with WooCommerce Product Table
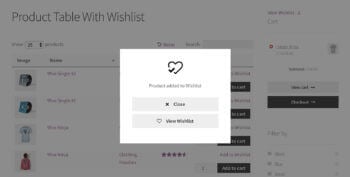
When you click on the 'Add to Wishlist' link for any product, a lightbox will appear confirming that the product has been added. You can either close the popup or click through to the wishlist page, where you can view the items, share them on social media, or buy using WooCommerce.
How to set it up
- Install the WooCommerce Wishlist and WooCommerce Product Table plugins, as per the documentation.
- Add a product table to any page on your site.
- When you activate the WooCommerce wishlist plugin, you'll be taken through a handy setup wizard where you can choose how your wishlist will work. You can choose to position the 'Add to Wishlist' button above or below the add to cart button, and both will appear correctly in the product table. Or if your product table doesn't have an add to cart column, then choose the 'Custom position with code' option and add the shortcode
[ti_wishlists_addtowishlist]to any other product field that appears in the table. For example, if you add this shortcode to the short description, long description or a custom field for each of your products, then it will appear in the table. - View the page with your product table, and you will see the Add to Wishlist links!
Tip: If you're using the 'Custom position with code' option, then you must add shortcodes="true" to your product table. You can either do this in the plugin settings page, or directly in the product table shortcode.
How it works with WooCommerce Quick View Pro
The TI WooCommerce Wishlist plugin works beautifully with WooCommerce Quick View Pro, automatically adding wishlist links to the quick view lightbox. You can choose to position the links before or after the add to cart button.
How to set it up
- Install the WooCommerce Wishlist and Quick View plugins using the documentation for each plugin.
- When you activate the WooCommerce wishlist plugin, you'll be taken through a handy setup wizard where you can choose how your wishlist will work. You can choose to position the 'Add to Wishlist' button above or below the add to cart button, and both will appear correctly in the quick view lightbox. Or if you don't need add to cart buttons in the quick view, then you can show the wishlist links by adding the shortcode
[ti_wishlists_addtowishlist]to the short description for each product and including this in the quick view instead. - Test the quick view lightbox for any product, and you will see the Add to Wishlist links!
Please note: The TI WooCommerce Wishlist plugin has a 'Show successful notice in popup' option on the settings page. DO NOT enable this option because quick view is a popup, and you can't have two popups at a time. (If you do enable this option, then nothing terrible will happen - but you won't see a success message saying that the product has been added to your wishlist.)
Which is the best WooCommerce wishlist plugin?
If you want to use wishlists with WooCommerce Product Table or WooCommerce Quick View Pro, then I'd recommend MC Wishlist or TemplateInvaders' WooCommerce Wishlist plugin. These are easier to set up because the wishlist buttons automatically appear in your product tables and quick view popups.
YITH's WooCommerce wishlist plugin is good too. However, you need to manually add the wishlist shortcode. If you're happy to do that, then this is a valid option too.
Other WooCommerce wishlist plugins
If you're using WooCommerce Product Table or WooCommerce Quick View Pro with any other wishlist plugins, please let us know. We'd love to test them and publish the details of any more that are compatible. We might even be able to feature your website as a case study!



4 Comments
Hi, I am using the wishlist option included in the theme xstore (by 8themes). It it so far the smoothest and best wishlist I have come across. Do you support this one?
Hi, Martin. We've not tested using the wishlist option of the XStore theme by 8theme that you're using, albeit you can do so on your site completely risk-free, thanks to our full 30-day money back guarantee. This lets you buy our plugins and try them for up to a month, and get a full refund if you're unhappy with them or if they don't suit your needs. Should you have any questions or difficulty, just get in touch with our friendly support team and we'll either help you out until you get the results you need or give you a swift refund.
Do you provide or allow affiliation of products with different websites like AMAZON, ABABy etc?
Hi, Sabahat. Yes, you can use WooCommerce Product Table to display/list your Affiliate Product types and then display a button per product's Amazon affiliate link. Please see: Linking to third party or affiliate websites. Thanks.