Managing sale prices in WooCommerce: A comprehensive guide

Struggling to manage sale prices in WooCommerce? Keep reading to discover an easier way to create, schedule and display discounts. We'll do it using the best WooCommerce sale price plugin.
A mind-boggling 97% of customers look for discounts when they shop. It's not surprising, as everyone wants to get a good deal and pay less. This applies equally to online WooCommerce stores as well as traditional brick and mortar shops.
Whether you're running a storewide sale at a time like Black Friday, or reducing prices to promote single products, WooCommerce sale prices can give your revenue a huge boost 📈. However, it's frustratingly difficult to set sale prices in WooCommerce. You literally have to edit each individual product or variation and fill in the 'Sale price' field, and later delete it to return the product to full price 😩.
Fortunately, there's an easier way - use one of the best WooCommerce sale price plugins to do all the work for you. In this article, I'll show you how to use the WooCommerce Discount Manager plugin to:
- Bulk-set sale prices for your entire store, or specific products and categories.
- Schedule sales to automatically start and end at set times.
- Create different types of sale pricing, ranging from simple percentage or monetary discounts to complex price incentives based on factors like the total cart value, quantity, or type of user.
- Display discounted prices in prominent locations on your WooCommerce store to attract customers.
As a bonus, you'll also learn how to use the Setary app to set sale prices from a bulk editing spreadsheet.
Understanding the importance of sales management in WooCommerce
Having an effective way to manage sale prices puts your Woo store at a huge advantage. The jump in sales during Black Friday is a great example of how ecommerce stores can profit from sale prices and discounts.
As well as the financial benefits, sales can have practical benefits such as helping to turn over inventory more quickly, clearing excess stock, and getting rid of discontinued products. By offering attractive deals, you can also increase customer loyalty, attract new buyers, and boost brand awareness. For example, you can use sales to reward loyal customers with exclusive discounts, or entice new customers with free shipping or gift vouchers.
Obviously, manually editing the built-in WooCommerce sale price field is not a sustainable way to run a sale. Imagine running a Black Friday sale and having to do this for every product at the start AND end of the sale - disaster! Not to mention the risk of human errors, inconsistency, and inefficiency. You would waste a lot of time and energy that could be better spent on other aspects of your business, such as marketing or product development.
With the right WooCommerce sale price plugin, your business can be more flexible and competitive. For instance, it’s important to be able to quickly adjust prices in response to factors like seasonality, stock clearance, consumer trends, or promotional events. You can also create different types of discounts, such as percentage off, fixed amount off, buy one get one free, etc. These can help to differentiate your products from competitors, increase your average order value, and encourage repeat purchases.
In the next section, I’ll tell you how to use the best WooCommerce sale price plugin. You’ll learn how to easily set up and manage discounted prices, create dynamic pricing, schedule sales, and more. Stay tuned!
The best WooCommerce sale price plugin
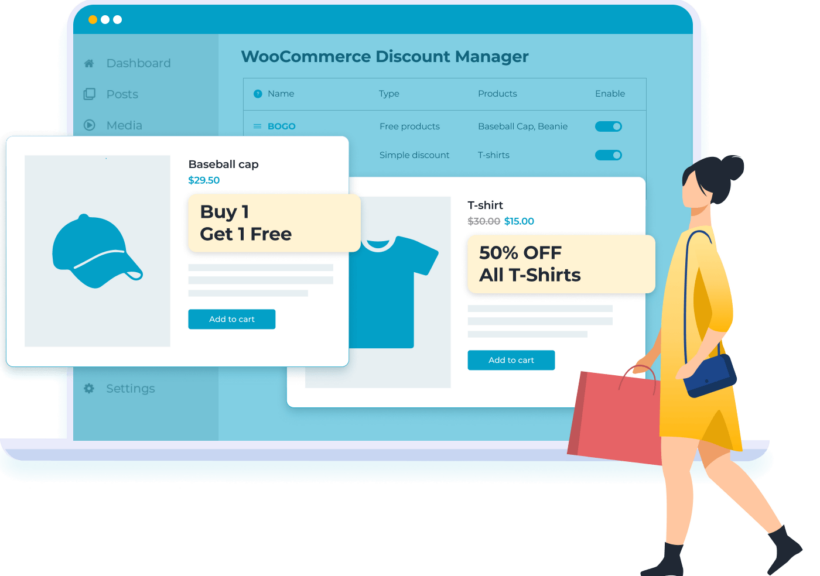
The WooCommerce Discount Manager plugin simplifies the process of managing sale prices and applying discounts on a larger scale, reducing the manual workload.
It has a comprehensive suite of features for complete and effective product price management, including:
- Selecting from various discount types, such as:
- Simple discounts, either giving a % or $ value off.
- Other types of promotional offer, such as the option to buy X products for a fixed price.
- Creating discounts based on total spend as an incentive for customers to spend more.
- Bulk sale pricing, including whether to apply a discount to certain items or an entire cart.
- Creating storewide sales or controlling which products and categories the discount applies to.
- Setting which users/user roles the discount applies to (such as running sales for new customers - i.e. "guest" users - only, or setting customer-specific pricing).
- Availability - Schedule start and end dates to the discount. For example, creating a scheduled Black Friday discount saves you the hassle of repeating the pricing changes at the start and end of the sale every year.
Tutorial: How to add sale prices to WooCommerce
Now we'll answer the question "How do I add sale prices to my store"? Use these step-by-step instructions:
- Get WooCommerce Discount Manager and upload it to your WordPress site (Plugins → Add New).
- Activate your license key in the setup wizard.
- Next, go to Marketing → Discounts in the WordPress dashboard.
- Select 'Add New' to create a new discount.
- Choose a discount type.
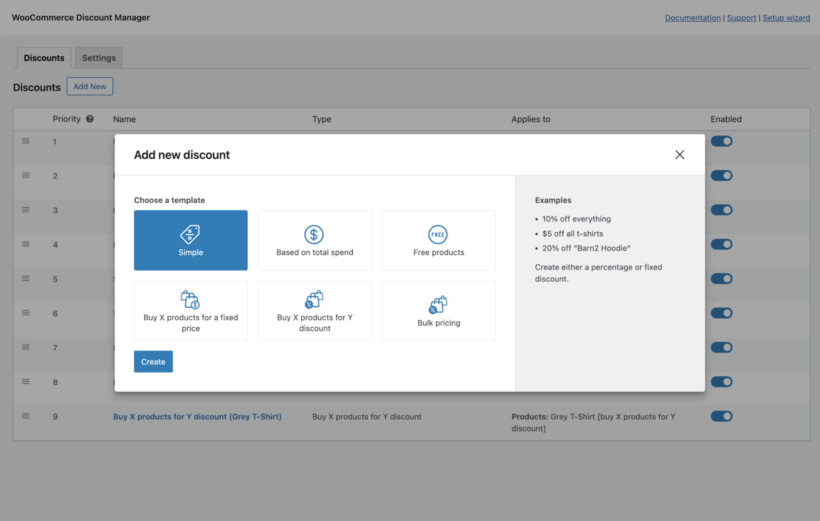
- Next, type in a name for the type of sale price you're creating. This is just for internal use.
- Fill in the details of how you want the discounted price to work. The exact options depend on the discount type. For example, if you selected a simple discount then you can add the percentage or fixed price discount amount.
- Set a start and end date for when the sale price will be active.
- Optionally use the dropdown to choose which users and/or roles will receive the special pricing.
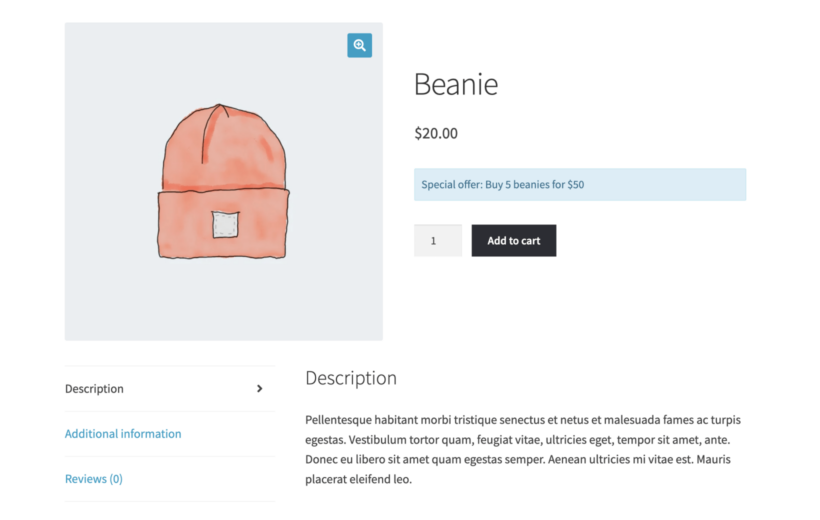
- Add content which will appear on the product page to tell customers about the sale price promotion. If you're creating bulk discounts then you can also display a tiered pricing table.
- Also add some text which will appear in the WooCommerce cart when the deal is active. For example, you might enter "Congratulations! You have saved money with our Black Friday sale prices."
Finally, save the discount and test it out. The sale prices will be applied automatically - no coupons or discount codes needed.
When you need to update sale prices, simply edit the discount. This will bulk edit the discounted pricing on all the products that it applies to.
As you can see, this method is much easier than going to every 'Edit Product' screen and making changes individually 😀. There's no need to edit code snippets, PHP or CSS code, or edit the functions.php template file. Simply create a discount and it will be seamlessly added to your site.
Tips on advanced sales pricing strategies
By now, you know the basis of how to set WooCommerce sale prices. Next, I'll share some actionable tips on how to make the most of your sales and promotions. These will help you to get maximum benefit from the flexible features in WooCommerce Discount Manager and create your own custom pricing.
Optimize sales through effective pricing strategies
Knowing how to set sale prices in WooCommerce is only the first step to running successful sales. Your sale prices should be underpinned with a robust pricing strategy. Here are some tips to help store owners to started with this:
- Understand your market - This includes understanding customer behavior, competitor pricing strategies, and market trends. This knowledge shapes pricing strategies and allows business owners to set prices that appeal to their target audience. Analysis of competitor behavior, customer behavior, and supply and demand is crucial.
- Dynamic pricing - This is a strategy where prices are flexible and change based on various factors. These factors could include time, season, inventory levels, or even user behavior. WooCommerce seasonal pricing can help stimulate sales during low seasons, and can be automated for more accurate and timely changes.
- Monitoring and testing - It is important to monitor and test your sales methods. Measure and evaluate what does and doesn't work after each sale. Use this to make constant improvements, so that each sale becomes more and more successful.
As you can see, your sale strategy should be based on a thorough understanding of market trends, product value, competition, and the goals of your business. Effective dynamic pricing strategies require rigorous research and lots of trial and error to get right - but the results are worth it!
Don't let sale prices become the norm!
The success of sales and promotions relies on a feeling of scarcity. Customers need to believe that it's unusual for them to be able to buy your products for such amazing sale prices.
Perpetual discounts achieve the opposite effect - and are even illegal in certain countries because they mislead the customer. Implemented incorrectly, discounts and promotions can therefore create a negative image of your brand. Running sales so often can make people lose confidence in the value or quality of your products.
Think carefully about how to achieve the right balance. For example, I would recommend that you only use WooCommerce sale prices in the following situations:
- Seasonal sales such as Black Friday, Cyber Monday, Halloween, and so on.
- Adding sale prices to individual products for specific purposes. This might include discounting end-of-line products to clear unwanted stock, or one-time discounts to promote newly released products.
Each time you add a discounted price to a WooCommerce product, there should be a reason for it. Don't just run sales for the sake of it.
Follow this principle to ensure that sale prices are a special treat for your customers, and not the norm.
Optimize sales through effective display strategies
It's not enough to just have sale price. The reduced price of a product needs to be effectively displayed to capture customers' attention and be successful.
With simple products, the Discount Manager WooCommerce plugin displays the regular price crossed out with the sale price alongside. WooCommerce also displays a sale badge:
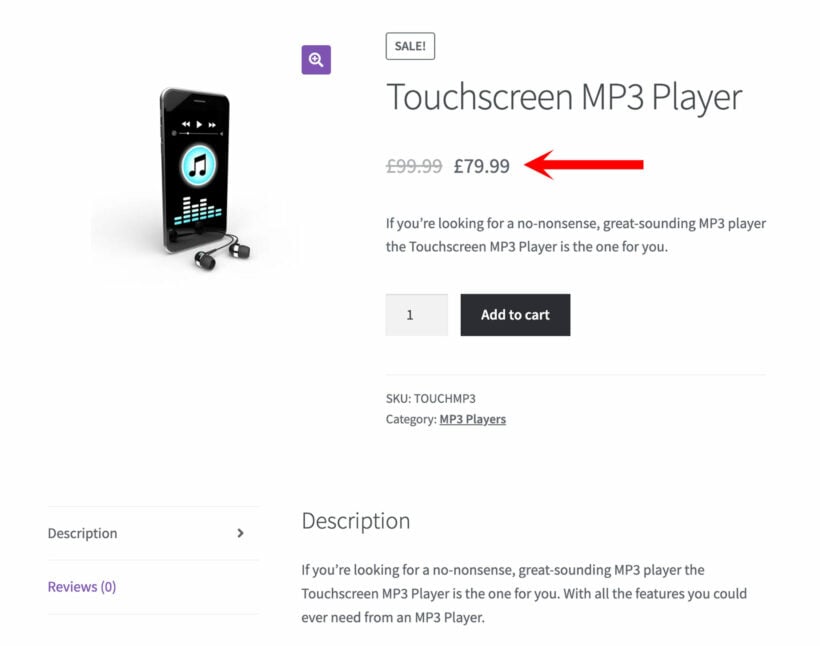
This is a good start, but only works for simple discounts. It's not possible with more advanced discounts such as quantity-based pricing.
Either way, I strongly recommend displaying a prominent notice about the available discount on the product page.
As we saw in the tutorial section above, the WooCommerce Discount Manager plugin has a content field which you can use to display information about the sale on the product page. This is a huge opportunity for you to grab customers' attention and convince them to make a purchase without delay.
Be creative and make the content as eye-catching as possible. You can add the same sort of content as you can anywhere else in WordPress (e.g. to pages or posts), such as shortcodes from your theme, buttons, and so on. You can also use the formatting toolbar to change the text color and format it to make it more prominent. Consider adding emojis to add a personal touch 🎁. Choose which part of the page to display the message and how it fits alongside your other product data.
In addition, each discount has an option to add a text message which will appear in a box at the top of the cart page whenever the customer has taken advantage of a sale price. This reassures them that they're getting a good deal, helping to reduce abandoned carts.
Display sale prices with a sense of urgency
For best results, regularly change the text about your promotions to add a sense of scarcity and urgency. This strategy can make the product seem more valuable and drive quicker purchasing decisions. Time-limited sales, exclusive sales for subscribers, displaying low stock and similar techniques can create a greater sense of value for customers.
Here are some tips on how to build urgency towards the end of the sale period:
- Display text containing action words like "Last chance" and "Ending soon". This indicates that customers should take advantages of the sale prices now or never.
- Embed an HTML countdown timer like Countdown Mail in the content field for your discount. This will appear on the product page, helping to close the sale.
Display sale prices for variable WooCommerce products
While we're talking about displaying sale prices on the front end, it's worth giving a special mention to variable products. That's because WooCommerce itself isn't designed to show the usual crossed-out prices for variable products. Instead, it just shows a price range at the top of the page.
Obviously, you can use the WooCommerce Discount Manager plugin to add an eye-catching notice which appears on your variable product pages. If you'd also like to display the actual sale price for each variation or add-on, then you can do this by installing the WooCommerce Variation Prices plugin. This lets you change the format of how variation prices are displayed. For example, you can list the price of each variation separately, including any discounted prices:

Inventivize customers to spend more
When you decided to add WooCommerce sale prices, you probably expected to add a simple fixed or percentage discount for all products. However, keeping things this simple isn't necessarily the best option.
Customers are looking for the best possible deal. You can often convince them to spend more by offering better sale prices when they place larger orders.
There are several easy ways to set dynamic pricing in WooCommerce Discount Manager:
- Use the 'Based on total spend' discount type to create a sale price which only becomes active above a minimum cart value. Display a prominent message such as "Spend $250 and get 20% off" on the product page to encourage customers to add more to their cart.
- For more fine-grained quantity discounts, use the 'Bulk pricing' sale price type to add different discount amounts for different quantities. For example, you might give 5% discount for quantities of 2-5, 10% when customers buy 6-10, and so on. As well as displaying text about the discount, there's an option to display a tiered pricing table on the product page. This tells customers exactly what they can save by buying higher amounts.
Run sales for new customers only
WooCommerce Discount Manager has a handy feature where you can restrict each discount or sale price to specific user roles. This creates an opportunity to run sales for new customers only. Use this to provide them with an extra incentive to buy from you for the first time.
When you use the tutorial above to create sales prices, find the 'Applies to' option and select the 'Guest' user role. This means that only customers without an account will see the sales prices. Existing customers who are logged into their account will see your regular prices.
Bonus: Set sale prices from a WooCommerce bulk edit spreadsheet
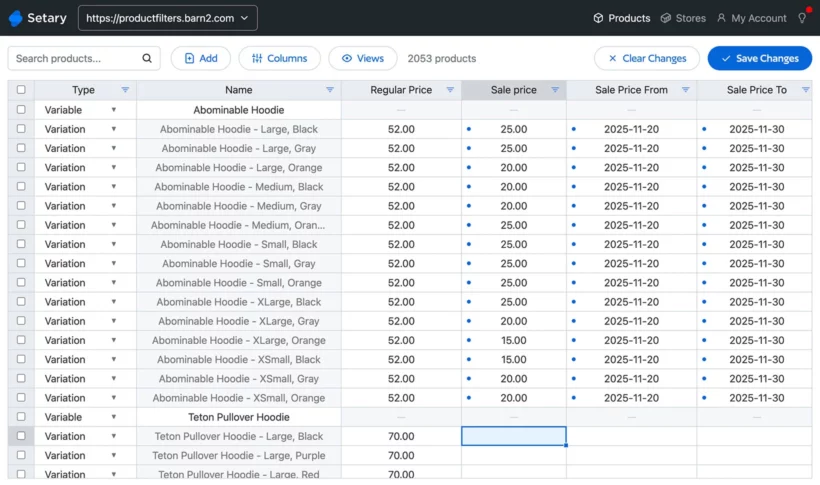
Before we finish, I'm going to share another way to set sale WooCommerce prices for any or all of your products.
The WooCommerce Discount Manager plugin is an excellent way to set sale prices because it gives you extra flexibility, beyond what you can do with the default sale price field. But what if you're happy with the built-in sale prices, but just need a faster way to put products on sale? This is where the Setary app comes in.
Setary is a bulk spreadsheet editor for WooCommerce. It connects to your store via the REST API and displays all your products and variations in a secure spreadsheet interface outside of the WordPress admin. This avoids weighing down your store, and provides an incredibly fast way to edit product data. And you've guessed it, you can also use it to set and schedule WooCommerce sale prices in bulk!
It works like this:
- Sign up for a Setary free trial and follow the onscreen instructions to connect your store.
- You'll see all your products and variations displayed in a spreadsheet editor, complete with columns for the price, sale price, and sale dates.
- To put specific products on sale, click in the relevant cell and add the sale price and dates directly to the spreadsheet.
- To apply sale prices to multiple products or your whole store, use the filters to select products and then click the 'Bulk Actions' button. This opens a form which you can use to set and schedule WooCommerce sale prices in bulk.
Next steps for managing sales prices in WooCommerce
You’ve just learned how to create and display a range of flexible sale prices in WooCommerce using the Discount Manager plugin. This plugin lets you run any type of sale on your online store, from percentage discounts to fixed amounts, and from bulk discounts to tiered pricing. You can also schedule your sales in advance, target specific products or product categories, and offer exclusive discounts to certain users or roles.
By following the steps in this tutorial, you can easily set up sales prices on your site in minutes. To put it in to practice, get the WooCommerce Discount Manager plugin and install it on your site. Follow the steps in this tutorial to add sales prices to your store in minutes.
The Discount Manager plugin has everything you need to manage WooCommerce sale prices:
- A choice of flexible discount types suitable for running any type of sale.
- Sales scheduling, so you can automatically start and end the sale at pre-defined times.
- The ability to run sitewide sales or add different sale prices for specific products, categories, users and roles.
- Comes with in-depth documentation and expert support from the Barn2 team.
- No-risk 30-day money back guarantee, so you can try it on your site risk-free!
Don’t miss this opportunity to boost your sales and revenue with WooCommerce. Get the Discount Manager plugin today and start creating amazing sale prices for your WooCommerce store: