With online shopping the most convenient it's ever been, a WooCommerce store should be as organized and user-friendly as possible. Keep reading to learn how to make it easy for your customers to find what they want and increase your revenue. All you need is WooCommerce plus the best product filter plugin to allow customers to filter by attribute and other criteria.
If you sell multiple types of products, you'll know that it's ideal to let shoppers search for what they want - it should be fast and easy for them to find things to buy.
However, there are plenty of products a customer might like, but they might not know how to find it or won't even know it exists yet. This is where product filters and attributes come in!
What is an attribute filter and why do customers love them?
A product filter (also known as faceted search) is a tool on a shop page to help customers discover new products by searching by any criteria. This means that if a customer is looking for a blue T-shirt, they can apply "T-shirt" and "Blue" on a product filter to find every blue T-shirt in the store.
Most WooCommerce stores use attributes to store data about their products. This might be size, color, brand, and so on. As a result, WooCommerce product attribute filters are an excellent opportunity to help customers to find products using this important data.
Product attribute filters benefit stores in a variety of ways:
Increase time spent in the shop.
Add to discoverability of all products (it's easier for any product to be seen by a customer).
Increase conversion rate.
A user-friendly store creates more customer loyalty.
Adding attribute filters to your shop page allows customers to find items that match their personal preferences faster. This is how they can find all kinds of great new products.
However, unfortunately the attribute filters that come with WooCommerce aren't very good! This causes problems if you have a huge catalog of product variations.
If you use the default WooCommerce product filter to offer filtering by attribute, here’s what would happen: When a customer tries to filter based on an attribute, it will show all variable products having that attribute. This is a terrible customer experience!
The solution - the best WooCommerce attribute filter plugin
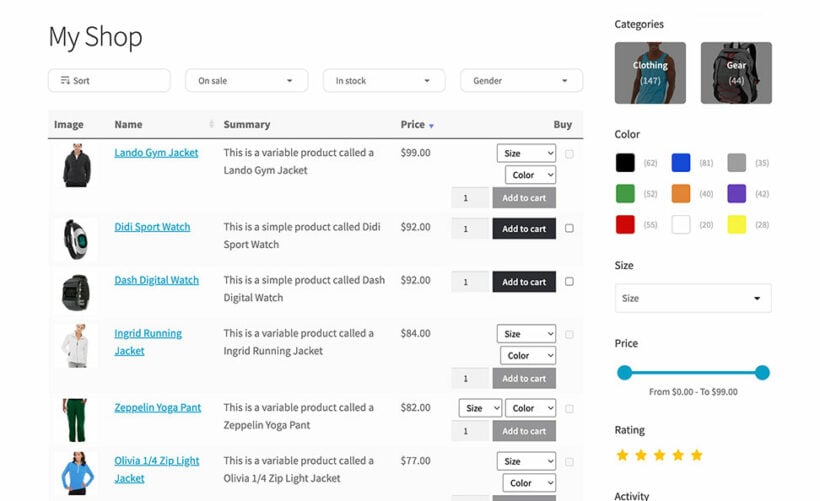
A WooCommerce store with attribute filters for gender, color, size, and activity
Fortunately, there's a beginner-friendly WordPress plugin that lets you add professional-level WooCommerce attribute filters to any shop page. The best all-in-one product filter plugin on WordPress is WooCommerce Product Filters. It's the perfect mix of full customization power, plus an easy-to-manage back end with drag-and-drop options and straightforward settings.
If you want to add attribute filters to WooCommerce, then there are 6 professional-looking filter styles to choose from:
Dropdown - The product attributes are listed in a dropdown/select list. Customers can select one at a time.
Checkboxes - Attributes are listed as a series of tick boxes. Customers can select as many attributes as they like, e.g. red, green and blue.
Radio buttons - The product attributes are listed as radio buttons, where the customer can select one at a time.
Labels - Attributes are displayed as text labels, similar to a tag cloud. This is a nice visual way to display a small number of attributes, for example 3-5 size options.
Images - For an even more visual way to add attribute filters to WooCommerce, you can display them as images. Select an image on the edit page for each attribute term, and they will appear in the filter. Customers click on an attribute image to filter by that. They can filter by as many attributes as they like. You can choose whether to show the image on its own, or with the name of the attribute term as an overlay.
Color swatches - Finally, you can display color attributes as square blocks of color - either with or without labels. Customers filter by all the color attributes that they wish to see results for.
The filters are also 100% mobile friendly, so customers can easily filter by attribute from any device!
And there's more!
As well as having a choice of styles for your WooCommerce product attribute filters, you have full control over how the filters behave:
Choose whether to use AJAX to load results instantly, or select multiple filters and then apply them together.
Add filters anywhere on your site, including as a widget or shortcode.
Filter by product attributes like size, color, brand, and more - in a better way!
Add additional filters such as price, rating, On Sale, In Stock, custom taxonomy, and much more.
Visually engaging and intuitive design.
Works with Elementor, Divi Builder, mobile, and any WordPress themes.
No technical experience needed!
Custom product attribute filters can be easy to set up and manage even without any technical experience. We'll show you how to set up product filters for any WooCommerce store in just 5 minutes, and how to filter by product attributes in a cleaner, user-friendly manner.
As you can see, using WooCommerce Product Filters is a powerful plugin that would take you a long time to code from scratch. That's why you can save a lot of time and money compared to coding a WooCommerce product filter programmatically.
How to add your own WooCommerce product attribute filters
Now we get to the tutorial part of our article. First, I'll give you the super-fast way to add WooCommerce attribute filters plus a video where you can copy us setting it up. Below, I'll provide a more in-depth step-by-step tutorial.
Go to Products → Filters and add a new filter group.
Add one or more attribute filters to the group.
Go to Appearance → Widgets and add the 'Product Filters' widget to your sidebar.
Start with your basic WooCommerce store
Before we add filters, you'll need to have a WooCommerce store. Simply install the WooCommerce plugin on any WordPress website, then add some products to start.
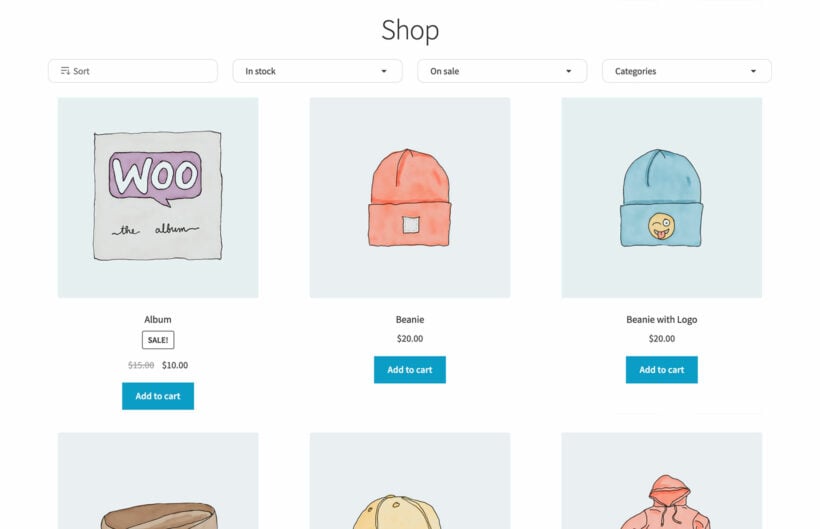
At this point your customers will see all the items you have available in the WooCommerce default product layout, without filters. You'll have a main shop homepage, plus a separate page for each category.
However, displaying WooCommerce products by category is only the very beginning. As we saw earlier, you need attribute filters to help customers to find products more easily.
Next, let’s take a look at how you can enable this plugin and apply custom filters in your website in minutes with or without any experience. We will:
1. Install the best WooCommerce product filter plugin
First, buy the WooCommerce Product Filters plugin. Download the plugin from your Order Confirmation page or confirmation email, then install and activate it on WordPress.
The setup wizard will open, asking you to enter your license key and choose the main settings for your product filters. Here's a summary of some of the most important settings for your attribute filters:
Filter mode
Button - You can choose to let users manually apply their filter options by clicking a button with your custom text. When "Button" under Filter Mode is selected, a text box will appear where you can input your own button text.
Instant / AJAX - To add an automatic product filter to WooCommerce, select "Instant" under Filter Mode.
What is an AJAX product filter? - An AJAX product filter is a filter that will apply each selection immediately — no other clicking required.
Should you use an instant filter or button? - A WooCommerce AJAX product filter can be beneficial to your store because it decreases the amount of clicks for a customer as well as the time it takes to see the products they want. When a selection is made, items will be filtered automatically with no extra refresh time, making this option generally more user-friendly.
However, in some cases, it's best to have the manual button available — for example, when there are a lot of filters on one page, and it could take a while for a shopper to select all the product attributes and filters they want to apply before they are ready to browse products.
Filter visibility
Display on shop pages or archive - All of your filter groups are automatically available in this dropdown. Simply pick one to display above the product area on your shop pages, or leave this blank if you'd rather manually place filters in other places in your shop.
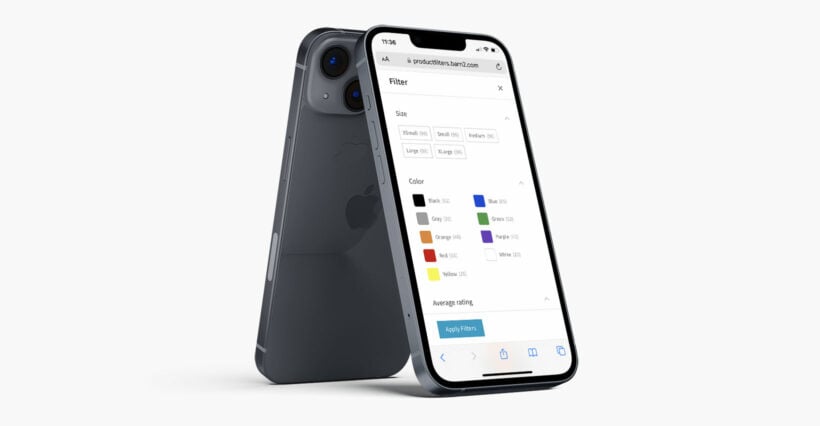
Hide filters by default - As a 100% mobile-friendly product filter, WooCommerce Product Filters offers this option that allows filters to be minimized right when the page loads. This means that a customer will need to click on a button to view them. By default, this will be enabled on mobile and disabled on desktop, but you can choose whether to hide your filters on both or neither.
Here's a great example of what hidden filters can look like on mobile:
Play around with these options until you're happy, and then click 'Save changes.'
Other options
Product count - Display the number of products within each filter option. Knowing how many items are in each option can be helpful for the customer. Or you can hide the product count by un-checking the box.
Button text - There are several options for changing the button text that appears in your filters. Change it to whatever you like, in your language.
Toggle filters - If this option is enabled, customers can click to manually open or close each option in your filters. A plus (+) icon will appear on the right side of each filter option.
Default status - You'll see this option if Toggle filters are enabled. 'Open' will show all filter options when a page first loads. When 'Closed' is selected, customers will need to click on filter headings to see what options are available.
Play around with these options until you're happy, and then click 'Save changes.'
Once you've done that, you're just a few minutes away from having live product attribute filters on your store!
2. Create WooCommerce attribute filters
Now that the WooCommerce product filter plugin is set up, it's time to make your first attribute filter! You can easily create a few simple filters or tons of totally unique filters. Whatever the needs of your store - it can be done right here.
Start at Products → Filters.
Click on the default filter group or create a new one.
Use the 'Add new filter' form on the left side of the page to enter your filter's information:
Filter name - Add any name for customers to identify this filter. For example: "Drinks" or "Filter by color".
Filter by - Let shoppers filter your products by one or more of the following filter options:
Categories
Product Attributes (you'll want to choose this if you're creating a WooCommerce attribute filter)
Colors
Tags
Custom taxonomy
Price
Ratings
In stock
On sale
Sort by
Filter type - You'll see this field if you've selected to filter by categories, attributes, taxonomies, or tags. These types of filters can be displayed as:
Dropdown
Checkboxes
Radio buttons
Labels
Images (available for categories, attributes, or custom taxonomies)
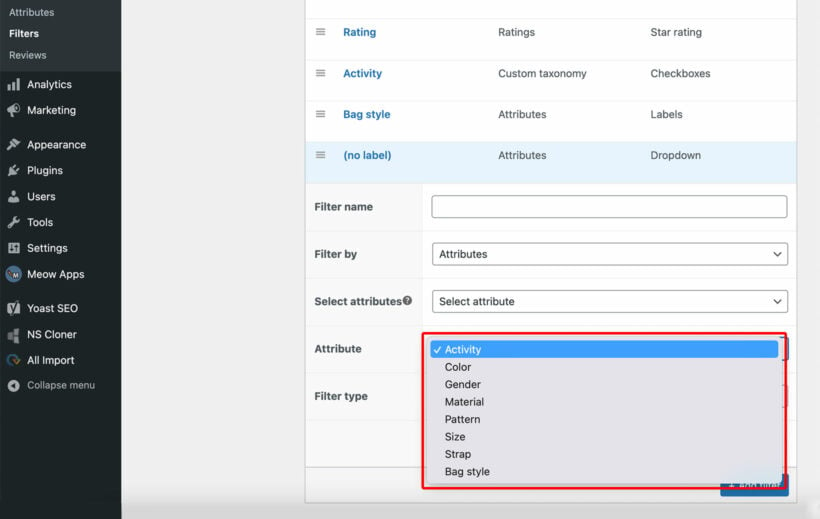
When you create WooCommerce attribute filters, some additional options will appear. These let you choose whether to automatically display filters based on the attributes of the current page, or whether to select a specific attribute (e.g. color or size). If different products have different attributes then I recommend the automatic option.
Finally, click the 'Add new filter' button.
Repeat step 3 to make as many filters as you want!
3. Place product filters anywhere on your site
Every store layout has different places where a product filter will look and perform best. Of course, you should be able to put your filters anywhere you want to, and you absolutely can!
Once you have your groups and individual filters, easily put them anywhere on your site. The options are to automatically display a filter group on all your store pages, or to add filters using a sidebar widget or shortcode.
On your shop pages
To display horizontal filter dropdowns above all your shop pages, select a filter group on the plugin settings page (Products → Filters) or in the setup wizard.
Attribute filter widgets
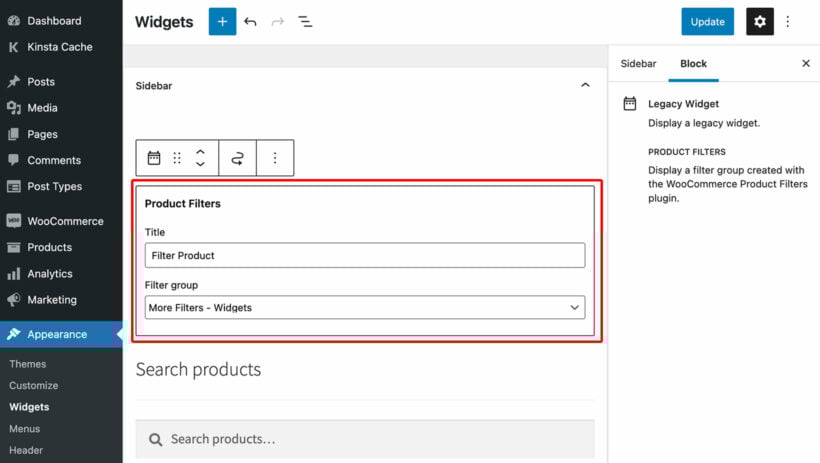
You can add the Product Filters widget to a page sidebar. Similar to other widgets, find it in Appearance → Widgets in WordPress and drag the Product Filters widget to where you want it.
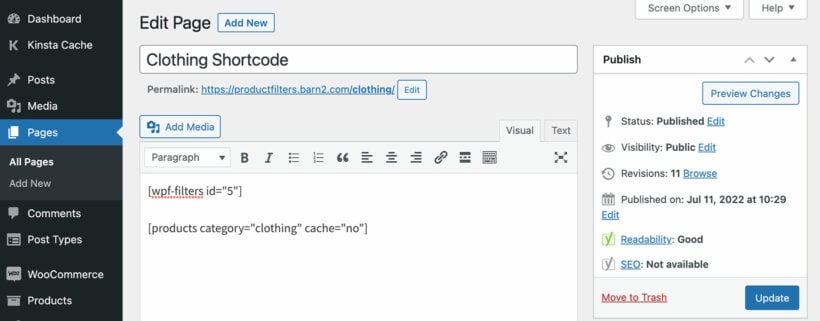
Shortcode placement — anywhere!
Display your default filter group anywhere using this shortcode:
[wpf-filters id=1]
Display the filter group of your choice by following these steps:
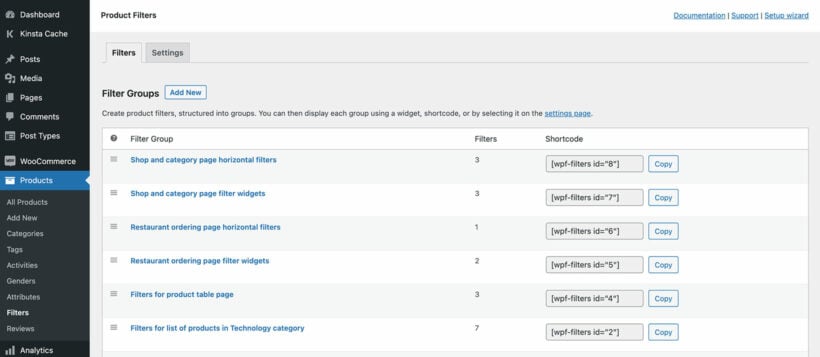
Go to Products → Filters, then the 'Filter Groups' tab.
Find the group you want on the right side of the page. Click the 'Copy' option next to that group.
Finally, paste its shortcode anywhere you want your group to show up!
It's time to test your attribute filters!
Now that the WooCommerce attribute filters are set up, it's important to test them out on your WordPress site. Click around your shop to make sure that:
The filters are in the perfect locations.
Types of filters and filter behaviors are to your liking. For example, if you’ve created an attribute filter, make sure all your product attributes are correctly named and added and are being displayed accurately.
Your products are organized by the correct filters.
WooCommerce product filters that work with Elementor and Divi Builder
Page builders like Elementor and Divi Builder make it possible to construct a website completely visually, with or without any coding experience. Tools like these create an accessible space for pros and total beginners alike to design the websites of their dreams. While Elementor and Divid are the most popular WordPress page builders, there's a surprising number of WooCommerce plugins that are not compatible with them.
With the option to display any filter group as a shortcode, WooCommerce Product Filters is the best and most flexible WooCommerce product filter for Elementor and Divi. Use it with either to create a space where you can fully design a WooCommerce store with custom product attribute filters by using mostly visual and drag-and-drop methods.
Bonus: Display product attributes in a table for faster orders - perfect for wholesale and more
In some cases, it's more convenient for certain customers to see a list-style catalog instead of viewing each product individually. Showing filtered results in a table streamlines the purchasing process even further, saving time for buyers. The efficient WooCommerce Product Table is ideal for situations like wholesale transactions, order forms, and restaurant ordering.
WooCommerce Product Table used together with the WooCommerce Product Filters plugin
How it works
Choose to show users any product data you want including product attributes, custom fields, taxonomies, SKU, videos, and more. Showing the same information on both the product attribute filter and product table brings a feeling of consistency to your whole shop.
This product table also allows shoppers to make multiple selections at once, eliminating wasted time for them while also automating the ordering process for you. It's a win-win!
You can choose to display product attributes as product details or as product variations - depending on your business and audience. Use our comprehensive guide to understand the top 2 ways to display product attributes in table format.
Here's what one happy WooCommerce Product Table user has to say:
I needed a simple table to display thousands of products in table form and this plugin did the trick. Plus, it is super simple for the customer to select many items at one time. Before I installed I was lucky to get orders with three items, now I AVERAGE ten products per order. Support is also really good too. I highly recommend this plugin.
Set up your custom product filters to filter by attribute for WooCommerce in just 5 minutes
WooCommerce is a truly flexible e-commerce platform with a wide variety of custom options and plugins for any store. Overall, WooCommerce Product Filters is the best plug-and-play answer for store owners with a variety of products to show off. Enjoy increased revenue and loyalty from customers who know how to navigate your shop every time.
It's fast, easy, and totally customizable for beginners and pros alike. Your WooCommerce store is now more user-friendly than ever!
Next steps
In this article, we explored the most important aspects of custom attribute filters:
How to add a WooCommerce AJAX product filter on top, on the side, or anywhere on your site as a widget or shortcode.
Allow filtering by product attributes, price, product category, color, tags, custom taxonomies, stock, sales, ratings, sorting, and more.
Choosing the right look for your filters: dropdowns, checkboxes, radio buttons, labels, color swatches, or images.
Adding a clickable button or using instant filtering.
Creating filter groups and how to change any setting in seconds.
If you’re looking for a WooCommerce product filter with 100% custom options, that allows you to add filtering by attributes and more anywhere on your website, with collapsible product filters for mobile friendliness - WooCommerce Product Filters is perfect for you!
Your customers will love it as much as you do. Get your store the best WooCommerce store filters available →