Quick & easy WooCommerce export orders alternative you should try

If you want to export orders (including detailed order information) from your online store, this step-by-step WooCommerce export orders guide is for you. We'll show you two easy methods to manually and automatically export order details in various formats, including XML and CSV.
But first - do you need to export orders from WooCommerce?
Order management - including order exports - is essential to running an online store. There are plenty of reasons why you may need to extract order information from WooCommerce, such as:
- To share relevant details with 3rd-party business partners. For example, warehouse providers, delivery persons, accountants, etc.
- If you're migrating from one WooCommerce store to another or to a different ecommerce platform such as Shopify or BigCommerce.
- Integrating WooCommerce with marketing apps and platforms for personalized and better-targeted campaigns across email, social media, and other channels.
- Creating reports with essential analytics and insights around customer order behavior to help make data-driven business decisions.
- Storing backups of order details for future access if you periodically delete order data from WooCommerce.
WooCommerce is excellent at collecting and storing detailed order information. However, if you've tried to export order-related details using the default option, you'll quickly realize that it's pretty limited - especially if your online store has a large number of orders.
In this guide, we'll cover everything you need to know about the default WooCommerce order export feature. We'll also show you two better alternatives to manually and automatically extract orders with detailed order information from WooCommerce.
Let's jump straight into it.
Can you export WooCommerce orders?
Yes. There are several ways to export orders and order information from WooCommerce. However, not all methods allow you to extract detailed order information. Plus, some methods are more complex than others and require development experience.
Here are the key ways to export orders from WooCommerce:
- Via the default WordPress export tool: Although there are some restrictions to using this, the built-in WordPress export feature is an excellent option for when you need high-level order details. We've covered how to use this in detail below.
- By using plugins: Plugins are your best bet if you need detailed order information and automated order reports. We've also covered how to use these in detail below. I'll show you how to use the WooCommerce Customer / Order / Coupon Export plugin to export order data; and the Posts Table Pro plugin to display orders on a hidden front end page on your site.
- WordPress database export: This method involves adding a custom script to your WordPress site's database to export WooCommerce data. You need to hire a WooCommerce developer or have coding knowledge to use this option.
How to export WooCommerce orders without using a plugin
This method involves using the default export tool in your WordPress admin area. So, if you're wondering: how do I export WooCommerce orders for free? This option is for you.
WooCommerce functions on top of WordPress' CMS - and that's where order information for your ecommerce site is stored. From here, you can also generate basic reports for products, refunds, coupons, etc.
Keep in mind: While this can help you extract basic order details, if you need detailed order information or want to automate the order export process, you'll need to use a different method. We've covered the restrictions in more detail below.
Steps to export WooCommerce orders without using a plugin
- Go to your WordPress dashboard. Click on "Tools" → "Export".

- Select the "Orders" option. Then scroll down and click the "Download Export File" button.

Note: This method downloads an XML file with order details. There's no option to export the order details directly as a CSV file.
How to export products from WooCommerce.Related tutorial:
Limitations of the default WooCommerce export orders feature
The default WooCommerce export orders feature works fine to help you get basic order information. However, it's not suitable for more advanced reports. Let's consider its limitations:
The complexity of the process
Using the order reports downloaded with the built-in WordPress feature is not a straightforward process. As mentioned in the previous section, WordPress can only export order data in XML format by default. If you're not familiar with XML, here's a short snippet of an XML file:
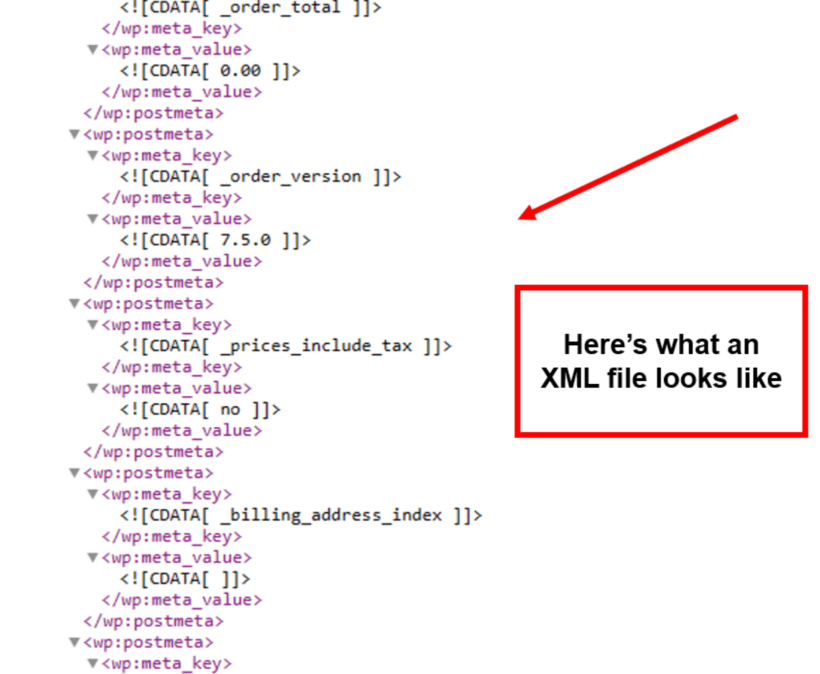
You'll notice that XML isn't an easily accessible format for humans to read. In addition, you can't import XML files into other 3rd-party apps or platforms directly. So, unless you intend to import the orders into another WooCommerce site, you'll first need to convert the file to the CSV file format using an online tool. And finally, you'll have to sort through the data and clean up the file.
Lack of customization options
There's a lot of manual, time-consuming work needed to customize the reports based on your business needs. This is because the built-in WooCommerce export orders feature doesn't allow you to customize the order data fields before downloading the information. This means that you may need to amend the reports after downloading them.
To create order reports with custom fields, you'll first need to download the XML file and convert it to CSV file format. Then, amend and customize the report fields as you prefer.
Inability to export specific order data
The built-in WooCommerce export order option is limited to pretty high-level store data and does not export complete order-related information. For instance, it doesn't show details like the number of orders made from a specific state over a certain period.
In addition, it doesn't have filtering options and can't export specific order details or export orders in batches. Whenever you need to export a report, WordPress will literally export all orders without skipping - even the ones you've previously downloaded.
Not really useful for managing your real-life orders
For most businesses, exporting orders is an essential yet routine task that's better automated. By default, WordPress doesn't let you schedule order exports to automate the process of exporting orders from WooCommerce. So, this option isn't ideal if you need to share periodical reports, e.g., hourly, daily, or weekly.
Overall, the default WooCommerce order export feature is great if you want to get basic, high-level order data and are okay with manually configuring the report every time you need order information. However, if you require detailed order information, you'll need to use a plugin or get a developer to add code to your website.
Alternative 1: Using a WooCommerce order export plugin
WooCommerce Customer / Order / Coupon Export is the best plugin to help you manually and automatically export detailed order information from WooCommerce in CSV and XML file formats.
Although it has lots of useful features, here are the top reasons to use this plugin:
- It handles complex WooCommerce store data exports quickly and easily.
- It's super easy to use - even for beginners and non-techy people.
- In addition to orders, it also lets you export customer and coupon details. So you won't need to get an additional plugin in order to export the additional information.
Top features of the WooCommerce Customer Order Coupon export plugin
- Download reports with detailed order information: The plugin allows you to generate advanced order reports with order items and other detailed metadata.
- Create order reports with custom fields: It comes with several pre-built templates. Also, you can configure the plugin to create reports and templates with custom fields, rearrange or add new fields, and include custom metadata or static values.
- Generate reports manually or automatically: You can set up the plugin to create and send automated order reports on a recurring schedule.
- Export order data in XML and CSV file formats: This feature is helpful because you can directly transfer the order data to another platform.
- Processes reports in the background: The plugin runs asynchronously in the background of your site. So you can continue working on other website areas while it completes your order exports.
How to use the WooCommerce Customer Order Coupon export plugin (Step-by-step guide)
- Get the WooCommerce / Customer / Order / Coupon export plugin.
- Download the plugin ZIP files from your WooCommerce dashboard to your desktop.
- From your WordPress admin dashboard, head to Plugins → Add New → Upload. Then, select the plugin's ZIP files.
- Click on "Install Now" and "Activate".
How to manually export orders from WooCommerce
Follow these steps to generate reports on demand:
Step 1: Head to your WordPress admin dashboard. Select WooCommerce → Export → Manual Export.
Step 2: Choose the appropriate general settings based on your preferences. The options are:
- Output type: This option exports your orders in XML or Excel CSV formats.
- Export type: Select "Orders".
- Format: Choose one of the default formats or create your custom format.
- Filename: Type in the name to save the file.
- Mark as exported: Selecting this option excludes the exported WooCommerce data from future exports.
- Batch processing: Select this option if your site doesn't support asynchronous background processing.
Step 3: Next, choose the appropriate export options for specific orders if needed. The options are:
- Order statuses: Leave this field blank to export all orders - in progress, completed, etc.
- Refunds: Choose whether to export orders that were refunded.
- Product categories: Enter product categories to be excluded from the export report (if any).
- Products: Enter products to be excluded from the export report (if any).
- Start date: Select the start date of orders to be included in the exported file in the YYYY-MM-DD format.
- End date: Select the end date of orders to be included in the exported file in the YYYY-MM-DD format.
- Add order notes: Tick the checkbox to add a note to the exported orders.
Step 4: Click on "Export".
That's it! Your orders will be exported into a CSV or XML file, depending on your chosen option.
How to automatically export orders from WooCommerce
Follow these steps to generate scheduled, recurring reports, e.g., every 5 minutes, hour, or week.
Step 1: Head to your WordPress admin dashboard. Select WooCommerce → Export → Automated Exports.
Step 2: Click on the "Add New" button.
Step 3: Choose the appropriate general settings based on your preferences. The options are:
- Enabled: This option turns the automated export on or off.
- Export name: Type in an internal name for the export to help you identify the report. This name differs from the file name, so feel free to keep it as descriptive as possible.
- Output: This option is to export your file in CSV or XML format.
- Export type: Select "Orders".
- Filename: Type in a name for the files generated for this export.
- Format: Select one of the default formats or create your custom format.
Step 4: Next, choose the appropriate scheduling options for your report. The options are:
- Trigger automated export: Choose whether to run order exports as orders are paid or on set intervals or to only run customer exports on set intervals.
- Start time: Enter the time for the order export to start. (Export reports are scheduled according to your WordPress website's timezone settings in the Settings > General tab).
- Export interval (in minutes): Type in the frequency for the reports.
- Method: Select a file transfer method, whether email, FTP, HTTP Post, or local.
Note: From now, the available options will change based on your selected method.
Step 5: Now, choose the appropriate export options for your report. The options are:
- Order statuses: Leave this field blank to export all orders - in progress, completed, etc.
- Product categories: Enter product categories to be excluded from the export report (if any).
- Products: Type in the name of products to be excluded from the export report (if any).
- Add order notes: Tick this option to add a note to the exported orders.
Step 6: Finally, click on "Save".
That's it! Head to the "Automated Exports" tab to view or update your automated order report.
Default WooCommerce Export Orders feature vs. the WooCommerce Customer / Order / Coupon export plugin
How does the WooCommerce Export Orders feature compare to the WooCommerce Customer / Order / Coupon Export plugin? Let's take a look:
- The Customer / Order / Coupon Export plugin lets you export detailed order information. In contrast, the built-in WooCommerce export feature is limited to high-level order export reports.
- There's no option to select the fields to include in the report if you're using the default WooCommerce export feature. Whereas, with the Customer / Order / Coupon Export plugin, you can customize the fields before exporting the report to ensure your reports are formatted just as you prefer.
- You can create manual reports as well as scheduled automated order export reports with the Customer / Order / Coupon export plugin. In comparison, the default WooCommerce Export feature doesn't let you set up automatic order reports.
- Unlike the default WooCommerce order export feature, the Customer / Order / Coupon Export plugin directly exports order data in XML and CSV Excel formats, so you won't have to spend time manually converting the file format after exporting the report.
Alternative 2: Listing WooCommerce orders on the front end
The second alternative to exporting WooCommerce orders is quite nifty. It involves displaying orders on a private page on your website's front end using Barn2's Posts Table Pro plugin instead of exporting orders from your ecommerce store.
Posts Table Pro is a popular WordPress table plugin we created at Barn2. It allows you to automatically create tables listing various types of WordPress content, such as pages, posts, custom post types, and of course WooCommerce orders, in a structured HTML table.
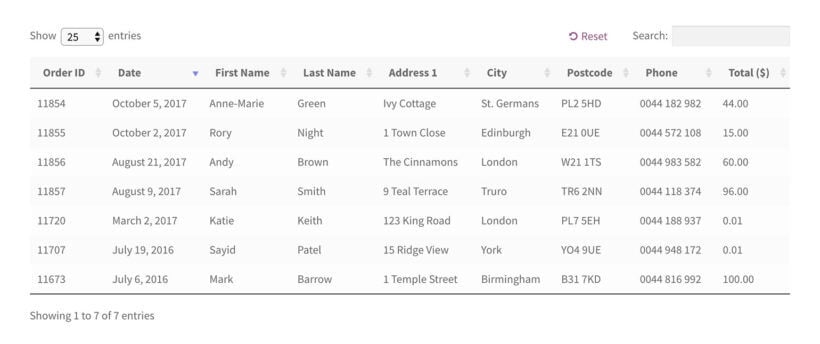
Using the plugin to list order data allows you to select custom fields to include in the table (for example, the order ID, date, name, shipping address, phone number, etc.), customize how the table is filtered and sorted, enable keyword searches, and more.
The key benefit of using this plugin is that it allows you to share order information with 3rd-party business partners without giving them admin access to your website.
Here's how the table of WooCommerce orders using Posts Table Pro can display orders on the front end of your website:
By default, WooCommerce doesn't allow displaying customers' orders on a site's front end, as this information is usually confidential. However, for some store owners, this may be a better option to sharing order information. For example:
- If you run a business that sells physical products (or even a restaurant), you can create a hidden page to share order details with the delivery drivers.
- Suppose its tax season, and you need to share order details with your admin or finance staff.
- If you run a multi-vendor site, you can create a private page to show each vendor their order reports.
Note: Order details usually include personal or sensitive information. Remember to follow the appropriate steps to keep your customers' details safe, such as using an SSL certificate. In addition, add the table of orders to a private, password-protected page on your website to ensure that only the right people access it.
How to display WooCommerce orders in an instant table on your website's front end
You can follow these steps to create a table that instantly displays WooCommerce orders on the front end:
- Buy the Posts Table Pro plugin and download the plugin ZIP files to your desktop.
- Navigate to your WordPress dashboard. Head to Plugins → Add New → Upload and select the plugin's ZIP files.
- Click on "Install Now" and "Activate".
- Activate your license key with the instructions you received in your confirmation email.
- Check out this detailed guide for step-by-step instructions to set up the plugin.
Where to get the plugins
WooCommerce captures a great deal of order-related information. However, there are several limitations to using its built-in export feature. Use the default WooCommerce export orders feature if you're only looking for basic order information and are okay with manually exporting reports whenever needed.
If you're looking for a quick and easy way to get detailed order information or automated order reports, try out these advanced WooCommerce plugins:
- WooCommerce Customer Order Coupon export plugin: To manually and automatically export detailed orders, customers, and coupon details from WooCommerce in various formats such as XML, CSV, and more.
- Posts Table Pro plugin: To display detailed order information on a private, password-secured page on the front end of your website.
Do you have any more questions about how to export orders from WooCommerce? Tell us in the comments!