How to easily add custom fields to the WooCommerce checkout

Want to add custom fields to your WooCommerce checkout and display them in a high-converting popup? This article shows you exactly how to do both.
The default WooCommerce checkout has two big problems. It only collects a fixed set of fields, and it forces customers through a separate page to complete their order. Both of these hurt conversions, especially if you sell products that need extra information from the customer.
This article walks you through the complete fix in two stages:
- First, I'll show you how to add custom WooCommerce checkout fields using YITH's WooCommerce Checkout Manager. This lets you collect any information you need, from personalization details to appointment times to B2B company data.
- Then I'll show you how to display the entire customized checkout in an on-page popup using WooCommerce Fast Cart popup cart and checkout. Fast Cart is fully compatible with the extra fields added by YITH, so your custom fields appear inside the popup checkout instead of forcing customers onto a separate page.
The result is a checkout that collects exactly the data you need and converts better at the same time. Let's start with the custom fields.
Why you should add extra fields to WooCommerce checkout
Many businesses use WooCommerce custom checkout fields to collect additional information for various purposes. Here are a few examples.
- E-commerce businesses selling custom-made or personalized productsOnline stores use custom fields for engraving instructions, monogramming, specific measurements, or any special request that affects how the product is made. You can also use WooCommerce custom fields to collect information that needs to be attached to the order itself.
- Service-based businesses collecting additional information for appointments or reservationsSalons, rental companies, and other service businesses use custom checkout fields for appointment times, booking dates, or specific service requests. These details get captured at the point of purchase, which saves a follow-up email later.
- B2B businesses collecting information about company size or industryB2B stores use custom fields to capture company size, industry, VAT numbers, or PO references. This data feeds into marketing segmentation and helps the sales team prioritize follow-up.
Benefits of custom WooCommerce checkout fields for ecommerce businesses
There are several benefits to adding extra fields to the checkout of your WooCommerce store. Let's look at the main ones.
- Better customization and personalization of the checkout processAdding custom fields lets you collect exactly the information that's relevant to your products. This makes the checkout feel tailored to the customer rather than generic. In turn, you get higher satisfaction and fewer abandoned carts caused by missing information.
- Ability to collect additional customer informationCustom fields give you direct insight into customer preferences, needs, and demographics. You can use this to improve your products, refine your marketing, and spot trends in who's actually buying from you.
- Improved data collection for business insightsThe data captured at checkout is some of the most reliable you'll get, because customers are already committed to buying. As a result, you can use it to optimize operations, segment future campaigns, and make better stock decisions.
Add WooCommerce custom checkout fields with YITH's WooCommerce Checkout Manager
YITH's WooCommerce Checkout Manager lets you add, edit, or remove fields in the checkout process of a WooCommerce store. With this plugin, you can customize the checkout to suit your business needs. It also gives you a wide range of customization options.
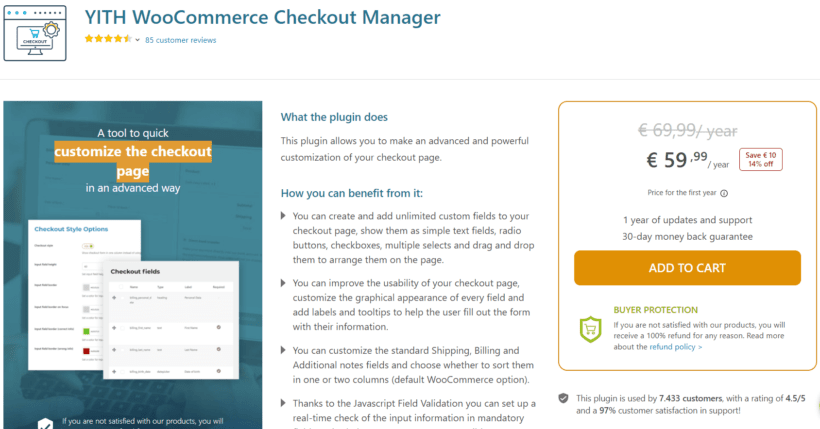
You can also display WooCommerce checkout fields based on specific conditions. I find this is especially useful when different products need different information from the customer.
Features
- Add and remove fields from the checkout page Add fields for personalization options, appointment details, or B2B information. The interface makes it easy to customize the checkout without touching any code.
- Customize the layout of the fields Adjust the position of fields, change font size and color, and set field widths. This helps you create a checkout that looks consistent with the rest of your store.
- Set required fields Mark any field as required so customers can't complete the checkout without filling it in. This stops orders coming through with critical information missing.
- Enable or disable fields based on product or category Show specific fields only when relevant products or categories are in the cart. The result is a cleaner checkout that only asks for what's actually needed.
- Conditional logic for fields Show or hide fields based on answers to other fields. For example, if a customer selects a personalized product, an engraving field can appear automatically.
- Translation ready The plugin works with translation tools so you can serve customers in multiple languages.
How WooCommerce checkout fields work in Checkout Manager
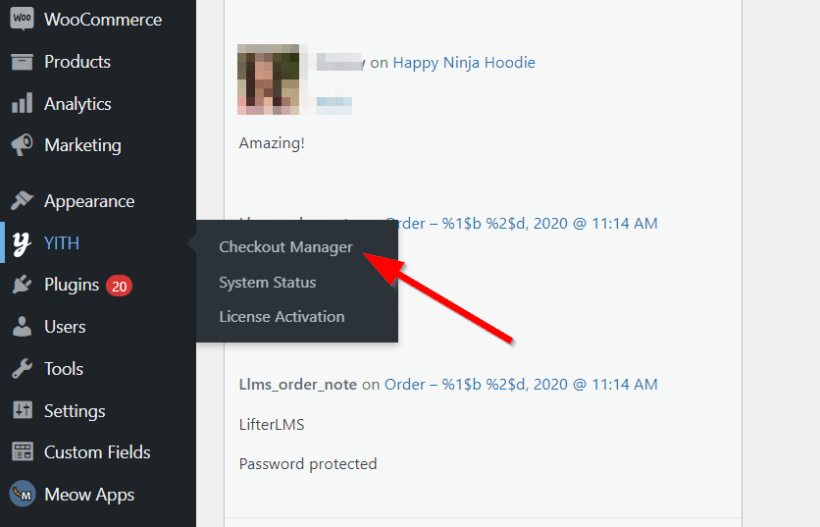
So how do you actually edit the checkout fields in WooCommerce? Go to YITH → Checkout Manager → Checkout fields.
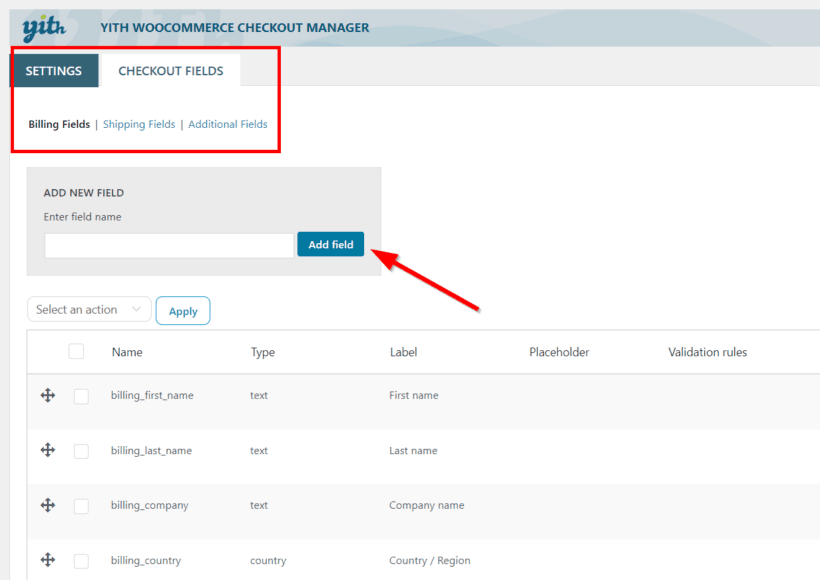
The checkout fields are grouped into Billing Fields, Shipping Fields, and Additional Fields. You'll also see the field names, field types, and other important information.
Edit any field by clicking it and making your changes. Add new fields by clicking the Add Field button. Save your changes when you're done.
A quick note before we go further. You can't delete the default fields in WooCommerce checkout. You can only edit, enable, or disable them.
WooCommerce checkout fields options
Click Edit next to any field to open the Edit Field panel. From there, you can configure the following settings:
- Label - Choose the title shown for the field.
- Placeholder - Choose the text customers see inside the empty field.
- Tooltip - Choose the text shown in the field tooltip. You'll need to enable tooltips on the Settings page first.
- Position - Set the field position. Choose 'First' for the left, 'Last' for the right, or 'Wide' to take up the full row.
- Class - Add CSS classes to style the field.
- Label Class - Add CSS classes to style the label.
- Validation - Choose the validation type for fields like phone, VAT, country, email, or zip code.
Repeat the process for any other fields you want to change and save your changes.
Some advanced modifications may need custom code. If you're not comfortable with that, hire a WooCommerce developer rather than trying to bend the plugin into something it isn't.
Tutorial: How to add custom fields to checkout in WooCommerce
Let me walk you through the actual process of adding custom checkout fields with YITH WooCommerce Checkout Manager.
Step 1: Install and activate the plugin
Start by getting your copy of the plugin. You'll receive a ZIP file and an activation key by email.
Next, install and activate it on your WooCommerce site. Go to Plugins → Add New → Upload Plugin, upload the ZIP file, and click Install.
Once installed, enter your license key to activate the plugin. This unlocks automatic updates and gives you access to support.
Step 2: Add and customize fields on the checkout page
Open the plugin settings at YITH → Checkout Manager, then click the Checkout fields tab.
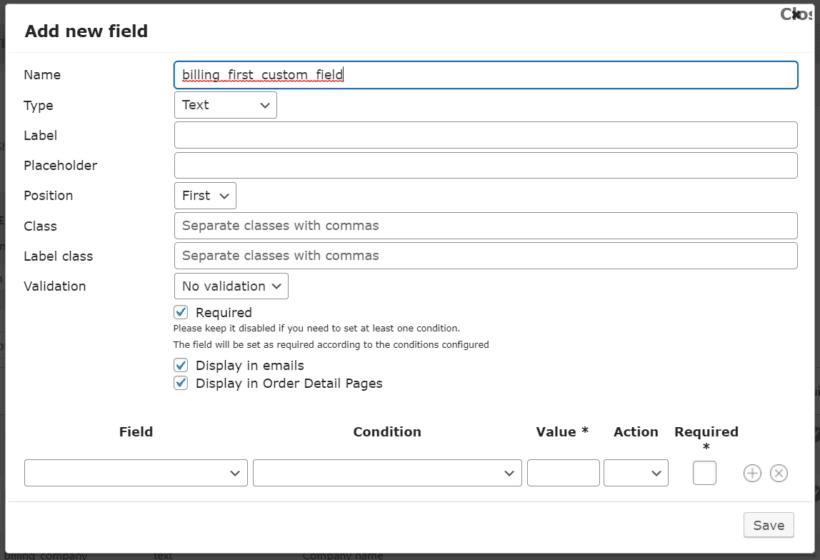
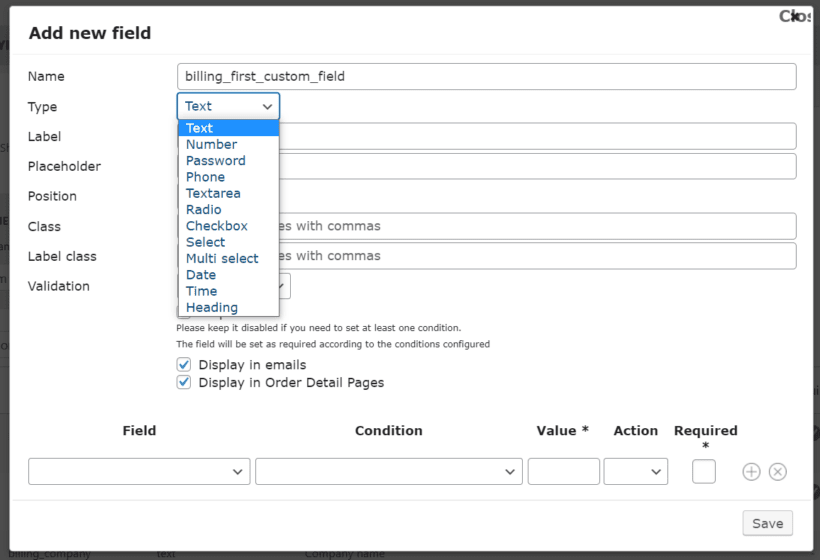
From here, you can add new fields and customize them as needed. You can adjust the position, change the field type, and set placeholder text. The settings for new fields are similar to the editing form, with a few extras:
- Type - Choose the field type. Options include text, number, password, phone, text area, radio button, checkbox, select dropdown, multi-select, date picker, time, and heading.
- Display in emails - Choose whether the field appears in order emails.
- Display in Order detail pages - Choose whether the field appears on the order summary.
The first thing to do is select the type of WooCommerce checkout field you want.
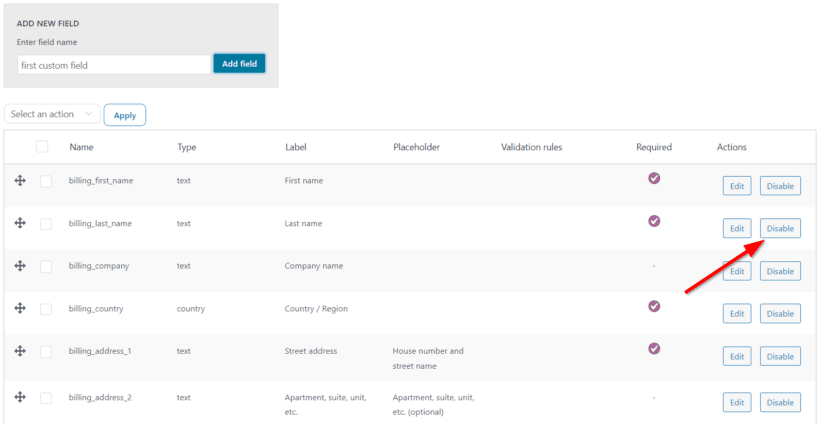
Step 3: Set required fields and enable or disable fields
Once you've added your fields, decide which ones are required. You can also enable or disable fields based on specific products or categories.
The standard fields on a typical WooCommerce checkout are:
- Name fields.
- Address fields like shipping address and billing address.
- Postcode.
- Date fields.
To disable an existing field, click Disable next to it on the Checkout Fields page.
Step 4: Use conditional logic for fields
You can also set up conditional logic so that fields only appear based on what the customer has selected. For example, if someone chooses a personalized product, an engraving field can appear automatically.
Configure each condition with these settings:
- Field - Select the field that triggers the condition.
- Condition - Select the condition type.
- Value - Enter the value that triggers the logic.
- Action - Choose to show or hide the current field when the condition is met.
- Required - Mark the field as required only when the condition is met.
You can add multiple conditions to the same field. Click the + sign to add another condition or x to remove one.
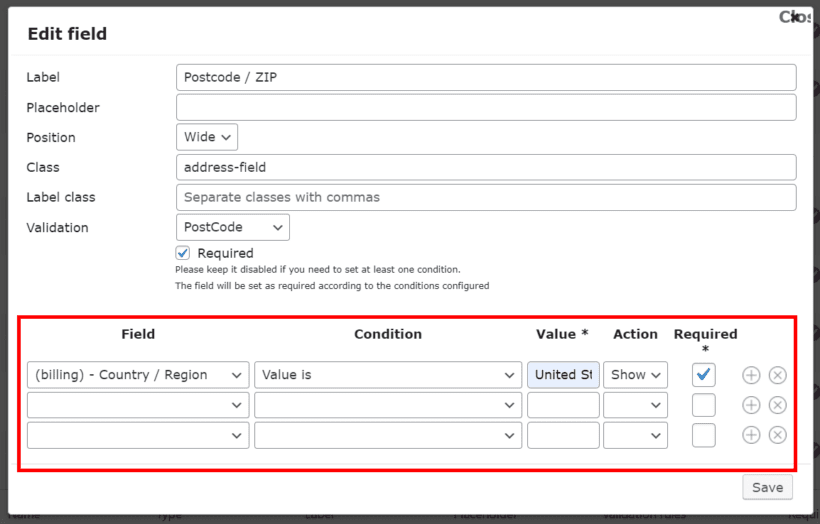
Click Save when you're done. You've just created your first custom WooCommerce checkout field.
Display your customized checkout in an on-page popup with WooCommerce Fast Cart
At this point, your checkout collects exactly the data you need. But it still works the old-fashioned way - customers have to load a separate cart page, then a separate checkout page, before they can pay. Every extra page is another chance for them to drop off.
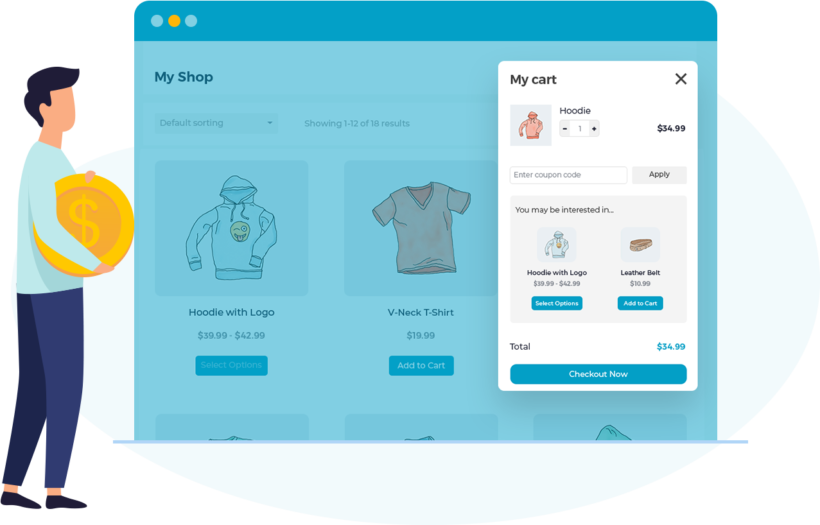
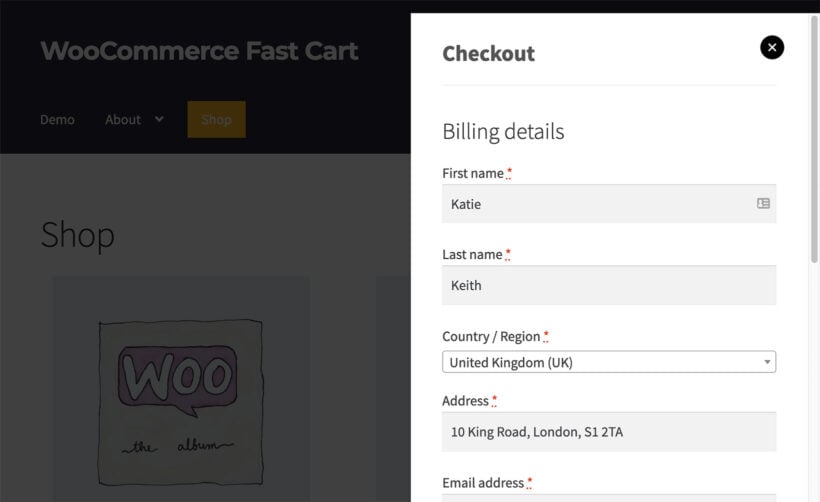
This is where WooCommerce Fast Cart comes in. Fast Cart replaces the multi-page checkout flow with a single on-page popup. Customers add to cart, view their cart, fill in the checkout fields, and pay - all without leaving the page they're on.
How to set up Fast Cart with your custom fields
Setup is quick. Here's the short version - I'll add screenshots to each step.
- Install and activate WooCommerce Fast Cart on your store.
- Run the Setup Wizard when it launches.
- When you reach the checkout step, enable the 'Fast Checkout' option. This tells Fast Cart to display the full checkout inside the popup instead of redirecting customers to the standard checkout page.
- Finish the wizard and save your settings.
That's it. Your customized checkout fields will now appear inside the on-page popup whenever a customer goes to check out. The conditional logic still works, the required fields still validate, and customers complete the entire purchase without ever loading a separate page.
Pro tip - If you've set up fields that only appear for certain products or categories, test the popup with each scenario before launching. The behaviour should match your standard checkout exactly, but it's worth confirming with a real test order.
Start adding custom WooCommerce checkout fields
You now have everything you need to build a checkout that collects the right data and converts well. Use YITH WooCommerce Checkout Manager to add and customize the fields, then use WooCommerce Fast Cart to display the whole thing in an on-page popup.
For more ideas on optimizing your checkout, take a look at our checkout page examples and our guide to WooCommerce checkout page customization.
Ready to get started? Grab YITH WooCommerce Checkout Manager for the fields and WooCommerce Fast Cart for the popup checkout.
2 Comments
Thanks for the info. Is there a way with this plugin to have a "confirm e-mail" field, which validates comparing its value to the main e-mail field and only lets the user order when the two addresses match? Thanks.
Hi, Andres. Thanks for asking. For the best advice about the YITH WooCommerce Checkout Manager plugin, I suggest that you please get in touch with YITH Support. I hope this helps point you in the right direction. Cheers.