How to bulk delete Shopify products (safely)


When you have products you need to clear out of Shopify, the bulk action checkbox makes deletion look like a quick admin task. However, deletion is the one bulk change you cannot undo, so you need to know exactly what will disappear before you confirm it.
Most bulk product editing gives you room to change your mind, but deleting does not. You can put a price back, but you cannot put a deleted product back. Shopify's documentation is blunt: "Product deletion is irreversible. After a product is deleted, it can't be recovered."
There is no undo button, and Shopify gives you no deleted-products area. Shopify support can't roll your store back for you.
I'll cover when deleting products is risky, when it makes sense, and the safer alternatives to try first. I'll also cover the tools that make large deletions easier to control:
- Archive instead of deleting, unless you are certain.
- Export a CSV backup first.
- Delete products in the Shopify admin.
- Delete variants when you only need to remove one option.
- Use a CSV to build the list.
- Delete products and variants in Setary.
- Handle URLs after deletion.
Archive instead of deleting, unless you are certain
If you're searching for bulk delete because you want to remove products from your storefront, you probably want Archive first. Deleting should be the last choice when you're certain you'll never want to sell those products again.
Shopify gives you a few options before you delete a product.
- The product status selector includes Active, Draft and Unlisted.
- Unlisted means the product is reachable only by direct link.
- Archive is a separate action in the product's More actions menu, next to Delete product.
Shopify's archive confirmation says: "Archiving this product will hide it from your sales channels and Shopify admin. You'll find it using the status filter in your product list." Underneath, archived is still a product status in Shopify's data, which is why some tools show it as one.
| If you want to | Use |
|---|---|
| Hide it from shoppers but still sell it to people with the link | Unlisted |
| Take it off the store but keep it and be able to bring it back | Archive |
| Stop selling it while you work on it | Draft |
| Remove it for good | Delete |
Archiving is reversible, but deleting is not. If you feel even slightly unsure, archive first and review the list again later.
Export a CSV backup first
Before you delete anything, create a product export. Our guide to exporting products is useful if you haven't done this before, but the basic path is simple: Go to Products → Export, choose 'Plain CSV file', and click 'Export products'.
The export carries titles, descriptions, prices, SKUs, barcodes, variants and image URLs. However, it does not carry the image files themselves, metafields or inventory history.
As a result, a CSV backup lets you re-create products, but it does not restore them. That distinction matters because a re-created product won't be the same product record Shopify deleted.
However, the export still gives you a way back when the alternative is nothing. If a filter catches the wrong products, the CSV is the file you'll be glad you made.
Delete products in the Shopify admin
Shopify's own admin is the right place to start if the list is small or the filters are obvious. Filter the product list first by status, collection, tag, vendor, product type or stock.
- From your Shopify admin, go to Products.
- Apply the filters until the list shows only the products you mean to delete.
- Tick the header checkbox at the top of the product list.
- Click 'Select all 50+ items' if Shopify shows that link.
- Choose the delete action and confirm the count.
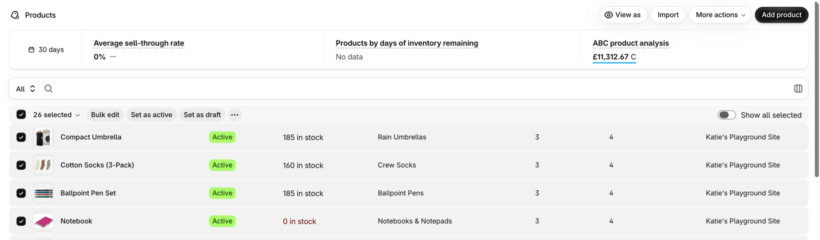
That 'Select all 50+ items' link is the step people miss. Without it, the admin looks like it caps the action at the first page of 50 products.
Shopify's help center says: "You can select up to 25 items at a time on a mobile device." For this kind of work, use a desktop browser. Mobile selection is too limited for a careful bulk delete.
The Shopify admin starts to feel risky when the delete list gets large. You confirm a count, not a visible product-by-product preview. If a very large delete stalls part way through, you'll also have to work out which products were removed and which ones stayed.
Delete variants when you only need to remove one option
Sometimes you do not want to delete a whole product. You want rid of one option, not the product itself. Bulk editing variants is the right place for that, whether you are discontinuing one color or dropping a size that never sells. Some readers arrive needing exactly this and nothing else, especially after a bad import creates variants that should never have existed.
People often struggle to find the delete option because it lives on the product, not on the main Products page.
- Open the product, not the Products list.
- Scroll to the Variants section.
- Tick the checkbox on each variant you want to remove.
- Check the toolbar above the list, which shows how many variants are selected.
- Click the '...' button on that toolbar.
- Choose 'Delete variant'.
Deleting a variant removes its SKU, barcode, price, weight and variant image. A product must keep at least one variant. If you delete every variant, Shopify deletes the product too.
There is no bin for variants either. A spreadsheet suits variant cleanup because variants are rows. You can look at one option across the whole catalog at once, instead of opening product pages one by one.
Use a CSV to build the list, not to do the deleting
Shopify's product CSV import is useful, but it has one limit many tutorials gloss over. A product CSV cannot delete products in Shopify.
That doesn't make CSV work pointless. It is very good for exporting, filtering and sorting until you have the exact products you mean. Then you can use the sheet while you set the same filters in the Shopify admin.
- From your Shopify admin, go to Products, click 'Export', choose 'Plain CSV file', and export the products.
- Open the CSV in a spreadsheet.
- Sort or filter the sheet until only the products you mean are left.
- Note the shared property in those rows, for example a vendor, tag or product type.
- Apply that same filter in the Shopify admin so the admin list matches your sheet.
For example, you might sort by vendor, tag, product type or a naming convention. After that, use the filtered sheet as your checklist when selecting products in Shopify.
If you're changing product data rather than deleting products, a CSV import can still be the right route. However, deletion needs an admin action, an app action or the Shopify API.
Delete products and variants in Setary
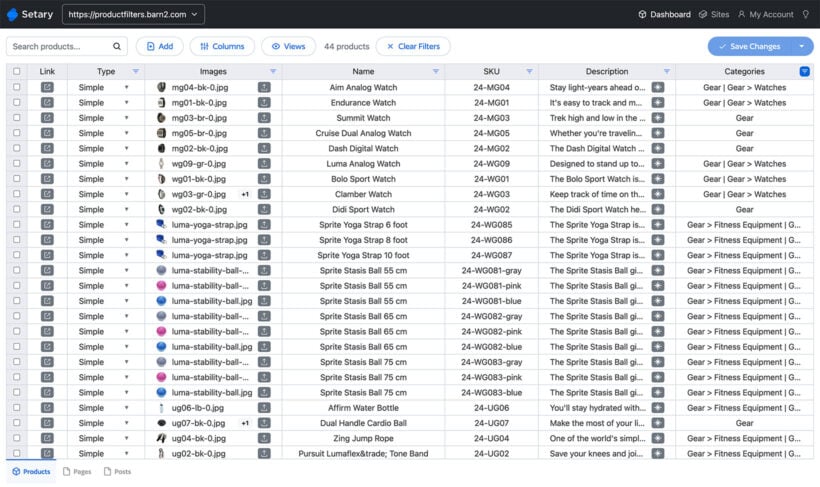
Setary is a bulk editor that loads your Shopify products and variants into a live spreadsheet in your browser. Products and variants sit in the same sheet, which means you can work on both at once.
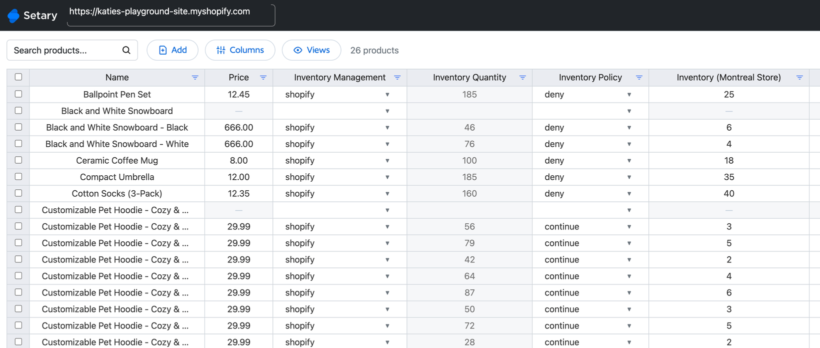
Barn2 co-owns Setary, so we know how much time it saves when a delete list is too big for Shopify's normal admin. However, if you only need to delete a few products, don't install anything because the Shopify admin is enough for that.
Setary is useful for larger deletes because it gives you control before you update Shopify. In the sheet, you can:
- Filter and sort until the sheet holds exactly what you mean, then run one bulk action instead of clicking hundreds of rows.
- Remove one size across the whole catalog with one filter, instead of opening product pages one at a time.
- Use the Status column dropdown to choose active, draft and archived.
- Archive a whole filtered group in bulk, while the Shopify admin makes you archive product by product.
When you run the bulk action in Setary, the rows leave the spreadsheet immediately while your store is still untouched. It is alarming the first time, but that is the point because you are looking at the result before you commit to it.
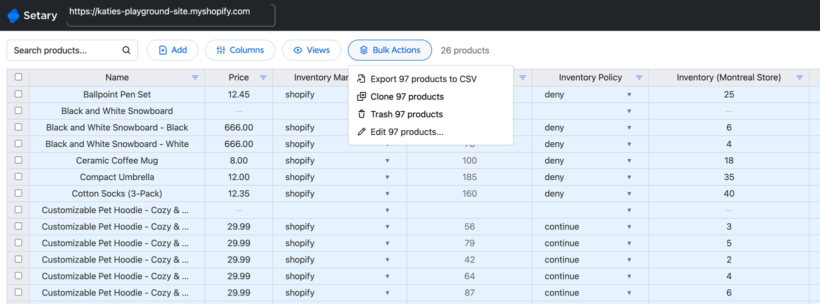
Nothing reaches Shopify until you click 'Update'. Setary lets you preview and undo changes before you make them live, but there is no rollback after you sync your edits with your live store.
Setary doesn't store your product data because it reads your products live through the Shopify API and pushes your changes back once you've approved them. As a result, there is no copy of your catalog sitting on someone else's server.
However, Shopify itself does not keep deleted products or variants in a trash area, whether you delete them in the admin or through the API. Apps that offer a recycle bin have to save your product data before deletion, because Shopify cannot read it back afterward.
Setary costs $9.99 a month and includes a 7-day free trial, with no limit on the number of products. Use it when the list is long or the filtering is fiddly.
Handling URLs after deletion
A deleted product URL returns a 404. If the product had traffic, backlinks or internal links pointing to it, create a Shopify URL redirect after you delete it.
For one or two products, you can add redirects manually in Shopify. If the count is large, use Shopify's bulk redirect CSV. Point each old product URL to the closest live product or collection.
This is also a good moment to check the rest of your Shopify SEO basics. Deleted products can leave holes in menus, collection descriptions, blog posts and search results. Fixing the redirects is much easier while the deleted list is still in front of you.
Frequently asked questions
Can you undo a bulk delete in Shopify?
No. Shopify says product deletion is irreversible, and deleted products can't be recovered. If you bulk delete the wrong products, your practical fallback is the CSV export you made before deleting.
Is there a trash can for deleted Shopify products or variants?
No, Shopify doesn't provide a bin for deleted products or variants. This is true whether you delete in the admin or through the API. Apps that offer a recycle bin work by recording your data before the deletion, not by reading it back out of Shopify.
Does deleting a product change past orders?
No. Past order line items stay on the order. However, the deleted product record is no longer available as a normal product in your catalog.
Can you delete every product at once?
Yes, you can use the header checkbox and the 'Select all 50+ items' option to select a full filtered product list. You should export a CSV first. If your filter is wrong, that export is your only practical way to rebuild the deleted products.
Does deleting products free up anything on your Shopify plan?
No. Shopify does not charge by product count, so deleting products saves nothing on your bill. Delete products because they should be gone, not because you expect a billing benefit.
Even if the product list looks obvious, export anyway. If your delete list is long, Setary shows the full list of products and variants you are about to remove before anything reaches your store. It takes a minute, and it is the only thing standing between a bad filter and a permanent loss.