List LearnDash courses & lessons in a WordPress table

LearnDash is the world's leading WordPress LMS (Learning Management System) plugin. Keep reading to discover the easy way to list your LearnDash LMS courses and lessons in a searchable, filterable table.
LearnDash is a fantastic WordPress LMS. It makes it easy to create online courses with sophisticated features. And with the LearnDash WooCommerce add-on, you can even sell your courses online!
LearnDash comes with some neat layouts and shortcodes that you can use to display your courses and lessons - either in a grid or as a basic list. However, if you have lots of courses then you might find these slightly limiting. That's where the Posts Table Pro plugin comes in.
Keep reading to learn how to list any type of WordPress content in a table:
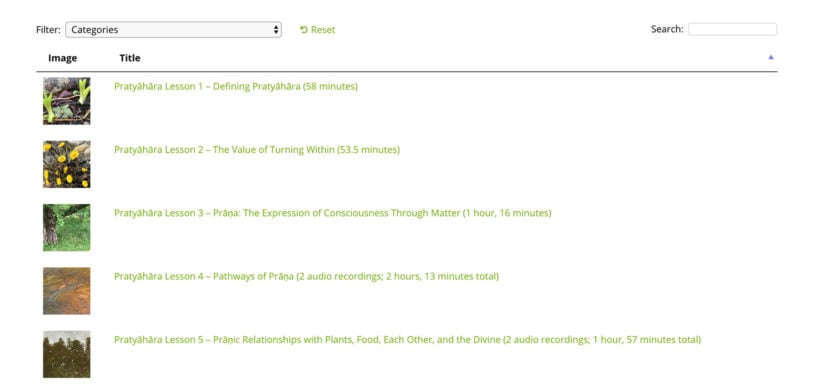
You can choose what information to display about your courses and lessons, and which courses you want to include. It's even possible to add filter dropdowns to help students to find particular LearnDash content more easily!
Before you start
We'll need the Posts Table Pro WordPress plugin in order to list courses and lessons from the LearnDash CMS in a table.
- Download the plugin from the link provided in your order confirmation email. This will save a zip file to your computer.
- Go to your WordPress admin panel, then navigate to Plugins → Add New → Upload Plugin.
- Click "Choose File" and select the posts-table-pro.zip file you just downloaded.
- After uploading, click "Activate"
- The Posts Table Pro setup wizard will automatically open. Follow the prompts to create your license key.
If you are not familiar with building courses on LearnDash, you can check out Learndash Dashboard. It comes with an intuitive frontend builder to help you create dashboards for instructors, students, and group leaders to monitor and manage anything related to their LearnDash account.
List LearnDash courses in a table
First, let's learn each stage of the process for creating a table or how to list your LearnDash courses in a table. You can add the table to any page on your site, or even to other locations such as sidebar widgets.
- The setup wizard will open automatically when you install the plugin. Alternatively, go to Post Tables → Add New to create new tables.
- Give your table a name and select the post type you wish to display. If you don't have a content type yet, you can create one using the Easy Post Types and Fields plugin for free.
- Select the posts or pages you want to include in the table. The available options will vary depending on the post type you selected in the previous step. If you chose a post with custom taxonomy, the relevant taxonomies will be listed for you to select.
- Customize your table according to your preferences. You can choose which columns to display and in what order. To add a new column, choose the column type from the dropdown menu and click "Add". You can also reorder columns by dragging and dropping the sort icon or column heading. Check out the full list of available columns. You can add lots of additional columns including custom fields, taxonomies, and more!
- You can improve user experience by adding filters to your table in the Post Table Pro plugin. Filters appear as dropdowns above the table and can be customized according to your preferences. You can add as many filters as you want.
- Enable lazy loading to improve the table's performance, even when containing hundreds or thousands of items.
- Choose how to sort the table. You can set the default sorting option and the sort direction.
- Finally, the wizard will confirm that you have finished creating your table and provide instructions for inserting it onto your site.
Choosing which courses to display
If you don't want to list all the courses from your LearnDash LMS, that's fine too. Use these options to control which courses to list in the table. You can list LearnDash courses by category, ID, date, author, custom field or custom taxonomy values, and more.
Once you've created a table using the Post Table Pro plugin, the next step is to display it on your WordPress site. There are two ways to do this, and both options provide you with flexibility in terms of where the table appears on your site.
There are two ways to display the table created with the Post Table Pro plugin on your WordPress site.
- The first method involves using the 'Post Table' block in the Gutenberg editor to insert the table directly from the block settings.
- The second method is to copy the shortcode from the table builder of the main Tables page in the Post Tables section of the WordPress admin and paste it anywhere on your site. This method allows you to place the table on any page, regardless of its content, providing you with the flexibility to showcase the table where it's most relevant.
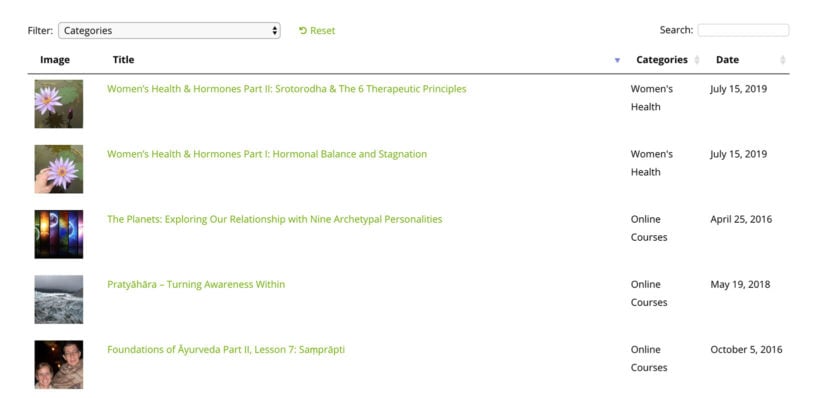
An example list of LearnDash courses
List LearnDash topics in a table
LearnDash has a feature that lets you add topics to your lessons and courses. This is an excellent way to group your course content thematically.
Posts Table Pro is excellent for allowing students to search by topic, as they simply type a topic name into the search box above the table.
If you want to create a table that includes a list of topics, simply specify the 'topic title', 'topic tag', and 'topic category' in their respective columns when using the table builder.
It's not possible to include the lesson name in the table because LearnDash stores the lesson as a separate post type, and not as a field on the topic post. If you want to list the topics for each lesson individually, then it's best to create a separate table for each lesson.
You can easily do this by using topic categories to record which lesson each topic is used on. You can then add the lesson name as a subheading on the page, and add a table listing the topics for that lesson underneath.
Sell LearnDash courses with WooCommerce and WooCommerce Product Table
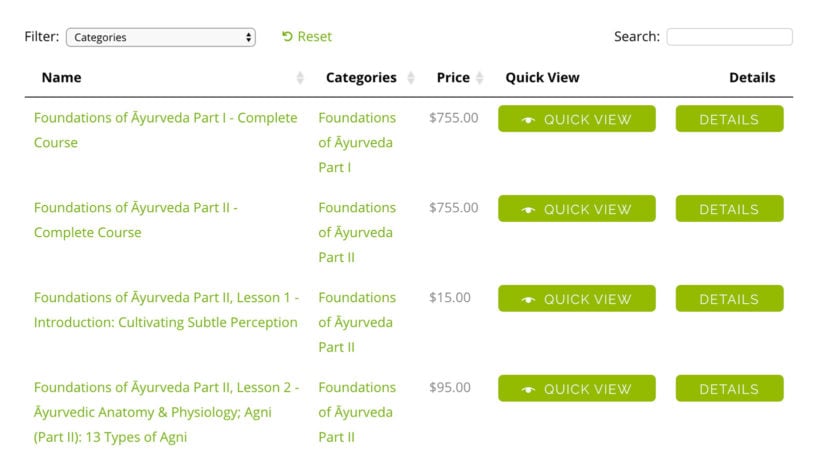
Lots of LearnDash LMS websites like to take payment for courses. The student pays for a course online and then receives instant access to the course and all its lessons, quizzes, etc.
The LearnDash WooCommerce plugin provides an excellent way to do this. You install WooCommerce to provide the e-commerce and payment features, create a new product, select the 'Course' product type, and choose which course the student will be enrolled in when they buy the product.
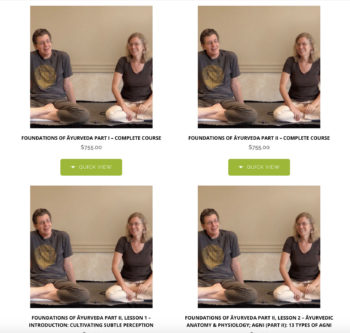
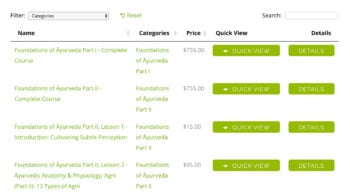
The problem with this plugin is that your course products are listed in a standard store layout, which isn't really designed for selling courses! Each course product is displayed with a large image and very little information about the course. It's difficult to compare courses alongside one another, and students have to scroll down a long way to see the different courses. Compare the two screenshots below:
As you can see, the table layout on the right is a much better way to display courses. If you want to display course images then you can add small thumbnails to the table, but there's no need for such huge images. It's better to show more products within a smaller amount of space, along with extra information about each course. You can also add quick filters and a search box to help people to find courses more easily, for example by category.
You can achieve all this by using the LearnDash WooCommerce plugin with the WooCommerce Product Table plugin. And if you like the quick view buttons in the screenshot above, then you'll need the WooCommerce Quick View Pro plugin too. I'll tell you how to set all this up next.
Listing LearnDash products with WooCommerce Product Table
- Set up LearnDash, add some courses, and then use the WooCommerce Integration add-on to create some course products.
- If you'll be using WooCommerce Product Table to sell other types of products as well as courses, create a category for your course products.
- Install WooCommerce Product Table.
- Go to WooCommerce → Settings → Products → Product Tables and choose the settings for your tables. In particular, choose which columns you want to include, and add filters to help people to buy specific courses more easily.
- Create a new page, which you'll use to list your LearnDash course products.
- Add the shortcode:
[product_table category="courses"]. Replace 'courses' with the slug of the product category you want to display, or if you're not using categories then just use[product_table]).
This will create a searchable table listing the LearnDash courses that you have added as WooCommerce products. It's perfect if you want to create a one-page order form for signing up to your courses. Students can select the courses they want to sign up to (either using the add to cart buttons or quick-select checkboxes) and pay for them all using the WooCommerce checkout.
Add quick view buttons
Normally, students have to click on the product title to learn more about the course and read the full description. You can speed up the process by installing WooCommerce Quick View Pro.
This handy plugin lets you add 'quick view' buttons to the product table. Potential students can use these to learn more about each course from a quick view lightbox popup. That's much faster than having to visit a separate page for each product. It also keeps them on the list of courses, which encourages them to sign up for multiple courses at once.
Once you've installed WooCommerce Quick View Pro, simply add quick_view to your list of columns on the WooCommerce Product Table settings page. For example, your list of columns might now be: image,name,quick_view,buy
List WordPress forums
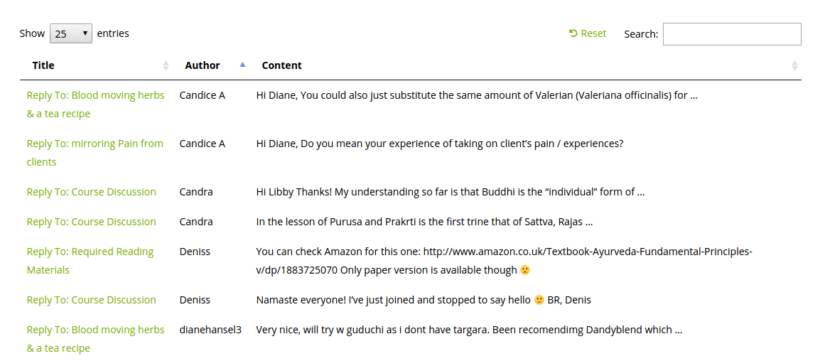
LearnDash integrates with the bbPress forum plugin, which is ideal if you want to provide discussion forums for your LMS courses.
If you'd like to list these in a table, instead of using the standard bbPress forum layouts, then check out our other tutorial. This provides full instructions on how to use Posts Table Pro to list your LearnDash forums and discussion topics in a table.
Learn how to list LearnDash forums in a searchable table view.
Display LearnDash quizzes in a table
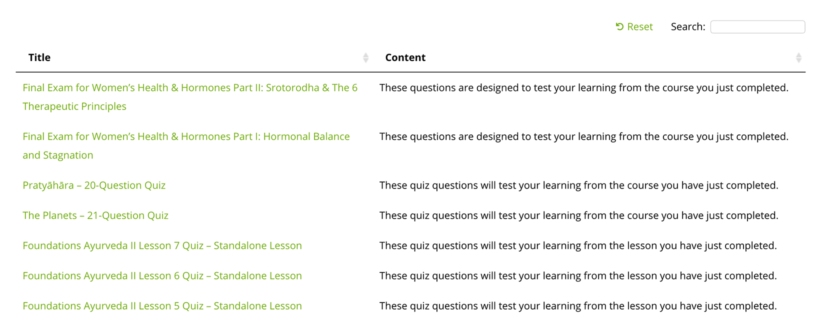
It's also possible to list LearnDash quizzes in a table. To do this, install LearnDash and Posts Table Pro (as described above) and either use the Gutenberg editor to insert your list of quizzes block or copy the shortcode from the final page of the WordPress table builder. You can then paste it anywhere on your site.
Use the include option to choose which quizzes to show. For example, if you wanted to list quizzes for a specific course only (e.g. on the course homepage), then you would select all the quizzes for that course.
Displaying other LearnDash data in a table
So far, we've looked at how to display LearnDash courses, lessons, forums, quizzes, and WooCommerce course products in a searchable table view. LearnDash also comes with other post types such as groups (groups) and assignments (sfwd-assignment) which you can list in a table.
To list other LearnDash post types, just select the post type on the first page of the Posts Table Pro table builder.
Adding a searchable directory of course materials to your LearnDash courses
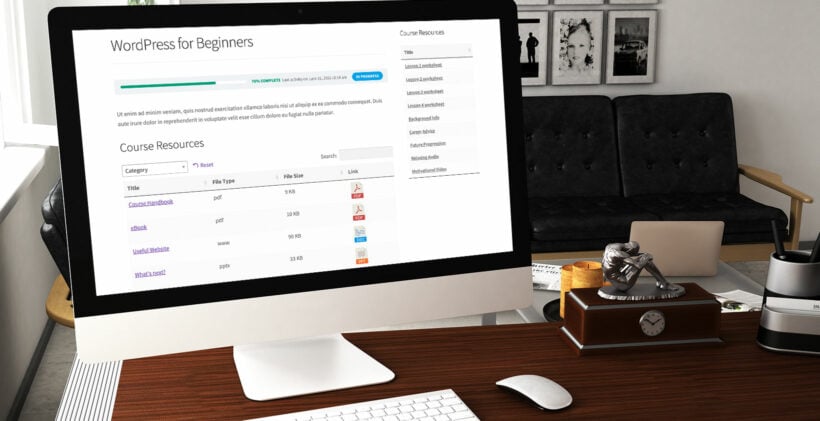
Finally, there's one more way that you can improve your LearnDash courses. As well as listing the courses and course information in a searchable format, it's important to consider how to present your course materials.
Most LMS courses need to provide extra resources to their students. For example, this might include course handbooks, lesson notes, worksheets, links to useful websites, and so on. The best way to do this is with Posts Table Pro's sister plugin - Document Library Pro.
Document Library Pro makes it easy to:
- Add any type of resource, link or download to LearnDash.
- Display them in any location within your courses and lesson pages.
- Add easy search boxes and filter dropdowns so that students can find the resources they need.
For full details, check out our tutorial on how to add searchable course materials to LearnDash.
Where to get the plugins
As you can see, Posts Table Pro offers the perfect way to list LearnDash courses, lessons, forums and quizzes in a more searchable, interactive format. It's an excellent way to engage potential students and encourage them to take more courses.
Or if you want to list WooCommerce course products, then you can do this with WooCommerce Product Table and WooCommerce Quick View Pro.
Together, these plugins provide the perfect solution to listing any type of LearnDash data in a table. Get them today, and start listing your LearnDash content in new and better ways!
